Qt 实现实时波形绘制 和QSerialPort
在你的Qt窗体或窗口中,创建一个QCustomPlot的实例。你可以在Qt Designer中拖放一个QWidget小部件并将其促进为QCustomPlot,或者在代码中动态创建一个实例。你可以从QCustomPlot的官方网站下载最新版本,并将其添加到你的Qt项目中。这就是一个简单的实时波形绘制的例子。在Qt中使用QCustomPlot类实现实时波形绘制是一种常见的做法,特别是在科学和工程应用中
代码
Qt 使用QCustomPlot类 实现实时波形绘制
在Qt中使用QCustomPlot类实现实时波形绘制是一种常见的做法,特别是在科学和工程应用中。以下是一个简单的步骤指南,帮助你开始实时波形绘制:
-
准备Qt项目:
首先,确保你已经设置好了Qt项目,并且已经在项目中包含了QCustomPlot库。你可以从QCustomPlot的官方网站下载最新版本,并将其添加到你的Qt项目中。 -
创建QCustomPlot实例:
在你的Qt窗体或窗口中,创建一个QCustomPlot的实例。你可以在Qt Designer中拖放一个QWidget小部件并将其促进为QCustomPlot,或者在代码中动态创建一个实例。
#include <QCustomPlot>

// 创建QCustomPlot实例
QCustomPlot *customPlot = new QCustomPlot(this);
- 初始化波形图:
在你的初始化代码中,设置波形图的各种属性,例如坐标轴范围、标签等。
// 设置波形图坐标轴范围
customPlot->xAxis->setRange(0, 10);
customPlot->yAxis->setRange(-1, 1);

// 设置波形图坐标轴标签
customPlot->xAxis->setLabel("Time");
customPlot->yAxis->setLabel("Amplitude");

// 添加波形图标题
customPlot->plotLayout()->insertRow(0);
customPlot->plotLayout()->addElement(0, 0, new QCPTextElement(customPlot, "Real-time Plot", QFont("sans", 12, QFont::Bold)));
- 实时更新数据:
使用定时器或其他机制,以一定的频率更新波形图的数据。这可能涉及到从传感器、文件或其他来源获取数据,并将其添加到QCustomPlot中。
// 更新波形图数据的槽函数
void updatePlotData()
{
    // 获取新的数据
    double time = getTime(); // 例如,获取当前时间
    double amplitude = getAmplitude(); // 例如,从传感器获取振幅数据

    // 添加新的数据点到波形图
    customPlot->graph(0)->addData(time, amplitude);

    // 保持波形图的数据点数量不超过一定的阈值,以防止图形过于拥挤
    customPlot->graph(0)->removeDataBefore(time - maxTimeSpan);

    // 更新波形图
    customPlot->replot();
}

// 设置定时器,以一定的频率调用更新波形图数据的槽函数
QTimer *timer = new QTimer(this);
connect(timer, &QTimer::timeout, this, &MainWindow::updatePlotData);
timer->start(updateInterval);
这就是一个简单的实时波形绘制的例子。你可以根据自己的需求和应用场景来进一步扩展和定制。记得处理好内存释放以及异常情况的处理,尤其是在长时间运行的应用中。
Qt 自带绘图绘制
如果你没有使用QCustomPlot库,你仍然可以在Qt中实现实时波形绘制。以下是一种使用Qt自带的绘图功能来实现的方法:
-
创建Qt项目:
确保你已经设置好了Qt项目。 -
创建绘图区域:
在你的Qt窗体或窗口中,你可以使用QWidget或QFrame来创建一个绘图区域。
// 创建一个绘图区域
QWidget *plotWidget = new QWidget(this);
plotWidget->setFixedSize(800, 600); // 设置绘图区域大小
- 重写绘图事件:
在绘图区域的类中重写绘图事件(paintEvent),以便实现自定义的绘图逻辑。
// 在绘图区域类中重写绘图事件
void PlotWidget::paintEvent(QPaintEvent *event)
{
    Q_UNUSED(event);

    QPainter painter(this);
    painter.setRenderHint(QPainter::Antialiasing);

    // 绘制坐标轴
    painter.drawLine(50, 50, 50, height() - 50); // y轴
    painter.drawLine(50, height() - 50, width() - 50, height() - 50); // x轴

    // 绘制波形
    painter.setPen(Qt::blue); // 设置画笔颜色为蓝色
    for (int i = 0; i < data.size() - 1; ++i) {
        int x1 = 50 + i;
        int y1 = height() - 50 - data[i];
        int x2 = 50 + i + 1;
        int y2 = height() - 50 - data[i + 1];
        painter.drawLine(x1, y1, x2, y2);
    }
}
- 实时更新数据:
使用定时器或其他机制,以一定的频率更新绘图区域的数据,并触发重绘事件。
// 更新数据的槽函数
void PlotWidget::updateData()
{
    // 获取新的数据
    int newData = generateData(); // 例如,生成一个新的随机数据点

    // 将新的数据添加到数据列表中
    data.append(newData);

    // 如果数据列表超过一定数量,移除最旧的数据
    if (data.size() > maxDataPoints) {
        data.removeFirst();
    }

    // 重绘绘图区域
    update();
}

// 设置定时器,以一定的频率调用更新数据的槽函数
QTimer *timer = new QTimer(this);
connect(timer, &QTimer::timeout, this, &PlotWidget::updateData);
timer->start(updateInterval);
这是一个基本的实时波形绘制的示例,你可以根据需要进行定制和扩展。记得在处理数据时考虑到线程安全性,并在长时间运行的应用中处理好内存释放和异常情况。
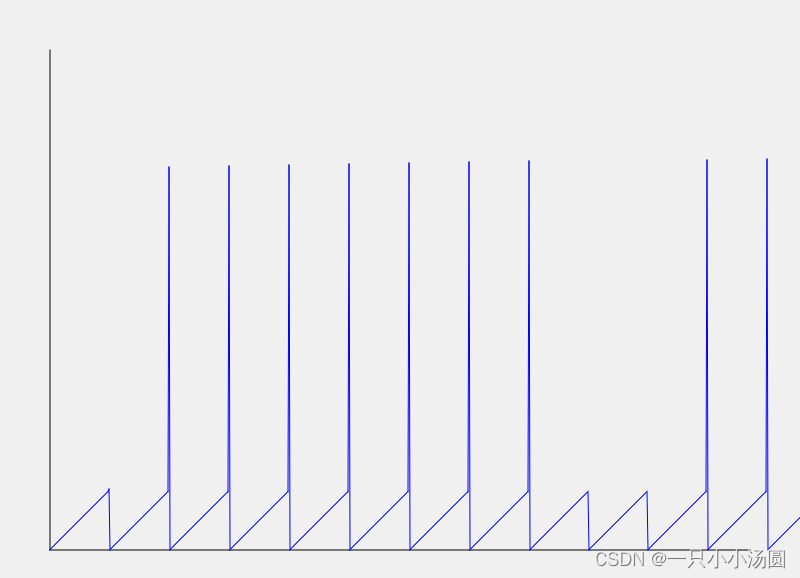
效果图:

使用Qt的QSerialPort类可以轻松地实现串口通信。下面是一个简单的示例,演示如何使用QSerialPort类在Qt5中进行串口通信:
#include <QCoreApplication>
#include <QSerialPort>
#include <QSerialPortInfo>
#include <QDebug>

int main(int argc, char *argv[])
{
    QCoreApplication a(argc, argv);

    // 获取可用串口列表
    QList<QSerialPortInfo> serialPorts = QSerialPortInfo::availablePorts();

    qDebug() << "Available serial ports:";
    for (const QSerialPortInfo &info : serialPorts) {
        qDebug() << "Port:" << info.portName();
        qDebug() << "Description:" << info.description();
        qDebug() << "Manufacturer:" << info.manufacturer();
        qDebug() << "Serial number:" << info.serialNumber();
        qDebug() << "System location:" << info.systemLocation();
        qDebug() << "Vendor ID:" << info.vendorIdentifier();
        qDebug() << "Product ID:" << info.productIdentifier();
        qDebug() << "--------------------------------";
    }

    // 打开串口
    QSerialPort serialPort;
    serialPort.setPortName("COM1"); // 设置串口名称
    serialPort.setBaudRate(QSerialPort::Baud9600); // 设置波特率
    serialPort.setDataBits(QSerialPort::Data8); // 设置数据位
    serialPort.setParity(QSerialPort::NoParity); // 设置校验位
    serialPort.setStopBits(QSerialPort::OneStop); // 设置停止位

    if (serialPort.open(QIODevice::ReadWrite)) {
        qDebug() << "Serial port opened successfully.";

        // 向串口写数据
        QByteArray data = "Hello, Serial!";
        serialPort.write(data);

        // 从串口读数据
        QByteArray receivedData = serialPort.readAll();
        qDebug() << "Received data:" << receivedData;

        serialPort.close(); // 关闭串口
    } else {
        qDebug() << "Failed to open serial port.";
    }

    return a.exec();
}
这个示例首先列出了所有可用的串口,然后尝试打开一个串口进行通信。你需要将串口的名称设置为实际可用的串口名称(例如"COM1"或"/dev/ttyUSB0"),并根据需要设置波特率、数据位、校验位和停止位。然后,它向串口写入一条消息并尝试读取来自串口的响应数据。
记得在使用串口通信时考虑到错误处理和异常情况,并确保在长时间运行的应用中处理好资源释放。
更多推荐
 已为社区贡献3条内容


所有评论(0)