毕业设计——基于PyQT+FaceNet卷积神经网络实现的学生人脸识别考勤系统
毕业设计——基于PyQT+FaceNet卷积神经网络实现的学生人脸识别考勤系统
基于卷积神经网络的学生人脸识别考勤系统
测试环境:
1.Windows 10 Ubuntu 20.04
2.TensorFlow1.15 GPU版本(没有GPU也可以,CPU版本会慢一些)
3.PyQt5
4.Sqlite3
使用的模型:
MTCNN->人脸检测
FaceNet->人脸识别
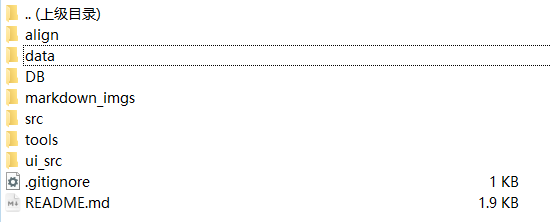
程序目录如下:
data下为FaceNet数据 这个数据太大无法上传,请到百度云下载
链接:https://
pan.baidu.
com/s/1nMwbahnZ0ZgeIOO6UrATdw(请去掉空格)
**提取码:w3it **
align文件夹下为MTCNN模型数据
src文件夹下为所有主程序文件 SetUpMainWindow.py为启动文件
DB文件夹下为sqlite3数据库(文件夹里面是空的,运行主程序会自动创建,也可以手动创建,但是名字必须和DB_File里面写的一样)
ui_src文件夹下为ui设计文件和转码py文件
emb_img和src_img文件夹在程序运行时会自动创建(或者可以直接手动创建,两个都是空文件夹)
目录结构
DB目录讲解
StudentCheckWorkDB.db 为学生考勤数据表
StudentFaceDB.db 为学生人脸数据
操作步骤
0、SetUpMainWindow.py是主界面启动文件
1、在数据库管理中添加用户,主要不要修改主键内容,修改主键内容会导致更新错误
2、在主界面点击刷新,更新数据表
3、选择学号ID
4、打开摄像头->录入人脸
5、点击生成模型(人脸模型生成过程线程会被阻塞,但是训练完成就没事了)
5、开始检测
数据库:
StudentFaceDB.db:人脸数据库
StudentCheckWorkDB.db:考勤数据库
界面展示: 部分源码展示:
import tensorflow as tf
import numpy as np
import os
from scipy import misc
from skimage import transform
import copy
import facenet
import align.detect_face
import argparse
import sys
# import sqlite3_op
from tools.sqlite_func import Sqlite_Func
import cv2
import imageio


# MTCNN人脸检测
def align_data(image_path, imgae_size, gpu_memory_faction):
    minsize = 20
    threshhold = [0.6, 0.7, 0.7]
    factor = 0.709

    with tf.Graph().as_default():
        # per_process_gpu_memory_fraction指定了每个GPU进程中使用显存的上限,但它只能均匀地作用于所有GPU,无法对不同GPU设置不同的上限。
        gpu_options = tf.GPUOptions(per_process_gpu_memory_fraction=gpu_memory_faction, allow_growth=True)
        sess = tf.Session(config=tf.ConfigProto(gpu_options=gpu_options, log_device_placement=False))
        # 加载mtcnn
        with sess.as_default():
            pnet, onet, rnet = align.detect_face.create_mtcnn(sess, None)

    temp_image_path = copy.copy(image_path)  # 浅拷贝文件目录
    image_list = []  # 图片列表
    for path in temp_image_path:

        print('读取:', path)
        # os.path.expanduser:展开目录
        img = imageio.imread(os.path.expanduser(path))  # 这样读出来的图片格式为numpy类型,后面就不需要再转换了
        # img_size = np.asarray(img.shape)[0:2]  # 获取数据尺寸类型为ndarray

        bounding_boxes, _ = align.detect_face.detect_face(img, minsize, pnet, onet, rnet, threshhold, factor)
        if len(bounding_boxes) < 1:
            image_path.remove(path)
            print("无法检测到脸部,删除", path)
            continue

        det = np.squeeze(bounding_boxes[0, 0:4])  # 从数组的形状中删除单维度条目,即把shape中为1的维度去掉,数据降维

        # 切片操作需要整数类型
        bb = np.zeros(4, dtype=np.int32)
        bb[0] = det[0]
        bb[1] = det[1]
        bb[2] = det[2]
        bb[3] = det[3]
        cropped = img[bb[1]:bb[3], bb[0]:bb[2], :]  # 对角坐标
        cropped = cv2.resize(cropped, (imgae_size, imgae_size), interpolation=cv2.INTER_AREA)  # 默认双三线性插值

        prewhitened = facenet.prewhiten(cropped)  # 白化,取出冗余数据
        image_list.append(prewhitened)

    images = np.stack(image_list)

    return images


# 文件夹人脸检测
def detection():
    src_img = '../src_img/'  # 原图片
    emb_img = '../emb_img'  # 人脸目录

    # 如果不存在这个目录就新建一个
    if os.path.exists(emb_img) is False:
        os.mkdir(emb_img)
    if os.path.exists(src_img) is False:
        os.mkdir(src_img)

    img_path_set = []
    # 查看src_img下所有文件
    for f in os.listdir(src_img):
        # 拼接图片目录
        one_img = os.path.join(src_img, f)
        img_path_set.append(one_img)

    print(img_path_set)
    if len(img_path_set) != 0:
        # 提取人脸
        images_align = align_data(img_path_set, 160, 1.0)

    # 保存切割好的图片
    count = 0
    for f in os.listdir(src_img):
        # param:path,img
        imageio.imwrite(os.path.join(emb_img, f), images_align[count])
        count = count + 1

        # 删除已经被剪裁的图片
        os.remove(os.path.join(src_img, f))

    # 计算特征值
    computing_emb()
    return True


# Facenet计算embadding并存入数据库
def computing_emb():
    with tf.Graph().as_default():
        with tf.Session() as sess:

            # opsql = sqlite3_op.Operate_Sql()
            sqlite = Sqlite_Func()

            model = '../20170512-110547/'
            emb_img = '../emb_img'
            # 加载facenet模型
            facenet.load_model(model)
            images_placeholder = tf.get_default_graph().get_tensor_by_name("input:0")
            embeddings = tf.get_default_graph().get_tensor_by_name("embeddings:0")
            phase_train_placeholder = tf.get_default_graph().get_tensor_by_name("phase_train:0")
            image = []
            nrof_images = 0
            global compare_emb, compare_num, all_obj_name

            all_obj_name = []
            for i in os.listdir(emb_img):
                all_obj_name.append(i)
                img = imageio.imread(os.path.join(emb_img, i))
                prewhitened = facenet.prewhiten(img)  # 预白化去除冗余信息
                image.append(prewhitened)
                nrof_images = nrof_images + 1

            images = np.stack(image)  # 沿着新轴连接数组的序列。
            # 计算对比图片embadding,embdadding是一个128维的张量
            compare_emb = sess.run(embeddings, feed_dict={images_placeholder: images, phase_train_placeholder: False})
            compare_num = len(compare_emb)
            print('compare_emb len:', len(compare_emb[0]))
            print("pre_embadding计算完成")

            for i in os.listdir(emb_img):
                #拆分表名和id号
                index = 0
                info = i.split("#")
                print("info:{}".format(info))
                table_name=info[0]
                id = info[1].split(".")
                ID=id[0]

                # opsql.insert_emb(info[0], id[0], compare_emb[index])
                sqlite.update_face_emb(sqlite.DB_STUDENTFACE_PATH, table_name, ID, compare_emb[index])
                index += 1

            # 移除已经计算过的image
            for f in os.listdir(emb_img):
                pass
                os.remove(os.path.join(emb_img, f))


def parse_arguments(argv):
    parser = argparse.ArgumentParser()
    parser.add_argument('--img_size', type=int, default=160)
    return parser.parse_args(argv)


def main(args):
    detection()


if __name__ == "__main__":
    # main(parse_arguments(sys.argv[1:]))
    detection()

腾讯云面向开发者汇聚海量精品云计算使用和开发经验,营造开放的云计算技术生态圈。
更多推荐


 0
0 0
0- 0


 已为社区贡献6条内容

所有评论(0)