LangcChain4J - Java必备技能
LangChain4j 的目标是简化将大型语言模型集成到 Java 应用中官网地址文档地址@AiService官网地址低阶api有最多的选择,可以使用所有底层组件,比如ChatModel等。这些是基于LLM的应用中的“primitives”。可以完全控制组合它们,但需要写更多的代码。Embedding高阶api在程序员自己定义接口,通过AiServices类里面的方法实现,优点是Api封装度较高,
目录
1、介绍
LangChain4j 的目标是简化将大型语言模型集成到 Java 应用中
官网地址 https://docs.langchain4j.dev/
 文档地址https://docs.langchain4j.dev/get-started
2、入门案例
(1)LangcChain4J支持的语言模型
支持的模型地址https://docs.langchain4j.dev/category/language-models案例中使用阿里的通义千问和deepseek模型
(2)获取百炼平台信息
1)获取Key
地址https://bailian.console.aliyun.com/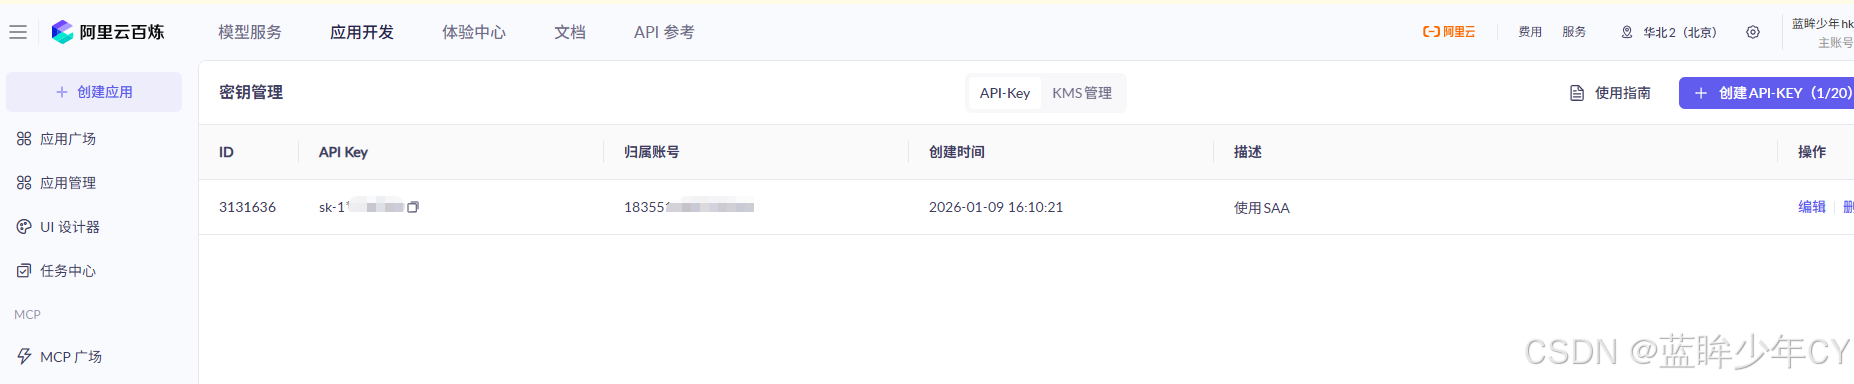
2)获取模型名称
qwen-plus
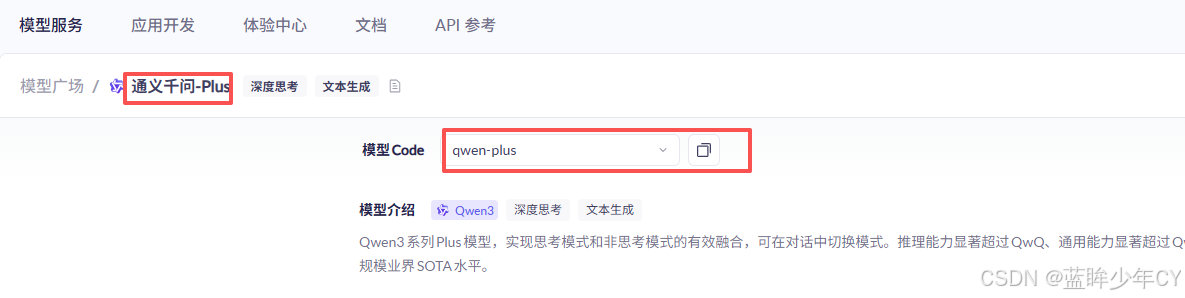
3)获取baseUrl
https://dashscope.aliyuncs.com/compatible-mode/v1
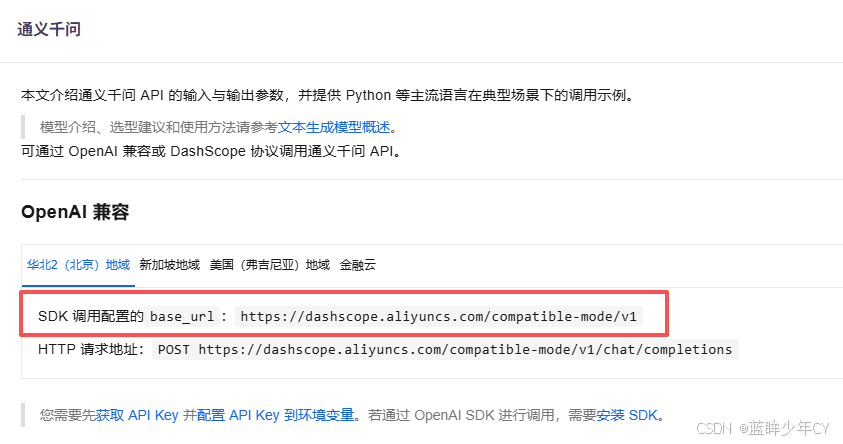
(3)创建父工程
1)创建工程
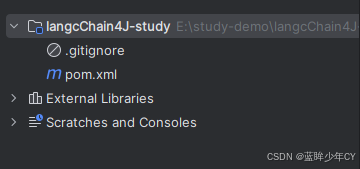
2)修改pom文件
<?xml version="1.0" encoding="UTF-8"?>
<project xmlns="http://maven.apache.org/POM/4.0.0"
         xmlns:xsi="http://www.w3.org/2001/XMLSchema-instance"
         xsi:schemaLocation="http://maven.apache.org/POM/4.0.0 http://maven.apache.org/xsd/maven-4.0.0.xsd">
    <modelVersion>4.0.0</modelVersion>

    <groupId>com.hk</groupId>
    <artifactId>langcChain4J-study</artifactId>
    <version>1.0-SNAPSHOT</version>

    <packaging>pom</packaging>
    <name>langchain4j-study父工程</name>

    <properties>
        <project.build.sourceEncoding>UTF-8</project.build.sourceEncoding>
        <project.reporting.outputEncoding>UTF-8</project.reporting.outputEncoding>
        <java.version>17</java.version>
        <maven.compiler.source>21</maven.compiler.source>
        <maven.compiler.target>21</maven.compiler.target>
        <!-- Spring Boot -->
        <spring-boot.version>3.5.0</spring-boot.version>
        <!-- Spring AI -->
        <spring-ai.version>1.0.0</spring-ai.version>
        <!-- Spring AI Alibaba -->
        <spring-ai-alibaba.version>1.0.0-M6.1</spring-ai-alibaba.version>
        <!-- langchain4j -->
        <langchain4j.version>1.0.1</langchain4j.version>
        <!--langchain4j-community 引入阿里云百炼平台依赖管理清单-->
        <langchain4j-community.version>1.0.1-beta6</langchain4j-community.version>
        <!-- maven plugin -->
        <maven-deploy-plugin.version>3.1.1</maven-deploy-plugin.version>
        <flatten-maven-plugin.version>1.3.0</flatten-maven-plugin.version>
        <maven-compiler-plugin.version>3.8.1</maven-compiler-plugin.version>
    </properties>

    <dependencyManagement>
        <dependencies>
            <!-- Spring Boot -->
            <dependency>
                <groupId>org.springframework.boot</groupId>
                <artifactId>spring-boot-dependencies</artifactId>
                <version>${spring-boot.version}</version>
                <type>pom</type>
                <scope>import</scope>
            </dependency>
            <!-- Spring AI -->
            <dependency>
                <groupId>org.springframework.ai</groupId>
                <artifactId>spring-ai-bom</artifactId>
                <version>${spring-ai.version}</version>
                <type>pom</type>
                <scope>import</scope>
            </dependency>
            <!-- Spring AI Alibaba -->
            <dependency>
                <groupId>com.alibaba.cloud.ai</groupId>
                <artifactId>spring-ai-alibaba-starter</artifactId>
                <version>${spring-ai-alibaba.version}</version>
            </dependency>
            <!--langchain4j的依赖清单,加载BOM后所有langchain4j版本号可以被统一管理起来
            https://docs.langchain4j.dev/get-started
            -->
            <dependency>
                <groupId>dev.langchain4j</groupId>
                <artifactId>langchain4j-bom</artifactId>
                <version>${langchain4j.version}</version>
                <type>pom</type>
                <scope>import</scope>
            </dependency>
            <!--引入阿里云百炼平台依赖管理清单
           https://docs.langchain4j.dev/integrations/language-models/dashscope
           -->
            <dependency>
                <groupId>dev.langchain4j</groupId>
                <artifactId>langchain4j-community-bom</artifactId>
                <version>${langchain4j-community.version}</version>
                <type>pom</type>
                <scope>import</scope>
            </dependency>
        </dependencies>
    </dependencyManagement>

    <build>
        <plugins>
            <plugin>
                <groupId>org.springframework.boot</groupId>
                <artifactId>spring-boot-maven-plugin</artifactId>
                <version>${spring-boot.version}</version>
            </plugin>
            <plugin>
                <groupId>org.apache.maven.plugins</groupId>
                <artifactId>maven-deploy-plugin</artifactId>
                <version>${maven-deploy-plugin.version}</version>
                <configuration>
                    <skip>true</skip>
                </configuration>
            </plugin>
            <plugin>
                <groupId>org.apache.maven.plugins</groupId>
                <artifactId>maven-compiler-plugin</artifactId>
                <version>${maven-compiler-plugin.version}</version>
                <configuration>
                    <release>${java.version}</release>
                    <compilerArgs>
                        <compilerArg>-parameters</compilerArg>
                    </compilerArgs>
                </configuration>
            </plugin>
            <plugin>
                <groupId>org.codehaus.mojo</groupId>
                <artifactId>flatten-maven-plugin</artifactId>
                <version>${flatten-maven-plugin.version}</version>
                <inherited>true</inherited>
                <executions>
                    <execution>
                        <id>flatten</id>
                        <phase>process-resources</phase>
                        <goals>
                            <goal>flatten</goal>
                        </goals>
                        <configuration>
                            <updatePomFile>true</updatePomFile>
                            <flattenMode>ossrh</flattenMode>
                            <pomElements>
                                <distributionManagement>remove</distributionManagement>
                                <dependencyManagement>remove</dependencyManagement>
                                <repositories>remove</repositories>
                                <scm>keep</scm>
                                <url>keep</url>
                                <organization>resolve</organization>
                            </pomElements>
                        </configuration>
                    </execution>
                    <execution>
                        <id>flatten.clean</id>
                        <phase>clean</phase>
                        <goals>
                            <goal>clean</goal>
                        </goals>
                    </execution>
                </executions>
            </plugin>
        </plugins>
    </build>

    <repositories>
        <repository>
            <id>spring-milestones</id>
            <name>Spring Milestones</name>
            <url>https://repo.spring.io/milestone</url>
            <snapshots>
                <enabled>false</enabled>
            </snapshots>
        </repository>
        <repository>
            <id>spring-snapshots</id>
            <name>Spring Snapshots</name>
            <url>https://repo.spring.io/snapshot</url>
            <releases>
                <enabled>false</enabled>
            </releases>
        </repository>
        <repository>
            <id>aliyunmaven</id>
            <name>aliyun</name>
            <url>https://maven.aliyun.com/repository/public</url>
        </repository>
    </repositories>

    <pluginRepositories>
        <pluginRepository>
            <id>public</id>
            <name>aliyun nexus</name>
            <url>https://maven.aliyun.com/repository/public</url>
            <releases>
                <enabled>true</enabled>
            </releases>
            <snapshots>
                <enabled>false</enabled>
            </snapshots>
        </pluginRepository>
    </pluginRepositories>
</project>
(4)建立第一个案例模块
1)新建模块
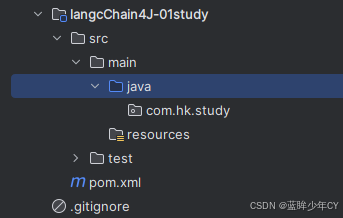
2)修改pom文件
文档出处https://docs.langchain4j.dev/get-started
<?xml version="1.0" encoding="UTF-8"?>
<project xmlns="http://maven.apache.org/POM/4.0.0"
         xmlns:xsi="http://www.w3.org/2001/XMLSchema-instance"
         xsi:schemaLocation="http://maven.apache.org/POM/4.0.0 http://maven.apache.org/xsd/maven-4.0.0.xsd">
    <modelVersion>4.0.0</modelVersion>
    <parent>
        <groupId>com.hk</groupId>
        <artifactId>langcChain4J-study</artifactId>
        <version>1.0-SNAPSHOT</version>
    </parent>

    <artifactId>langcChain4J-01study</artifactId>

    <properties>
        <maven.compiler.source>21</maven.compiler.source>
        <maven.compiler.target>21</maven.compiler.target>
        <project.build.sourceEncoding>UTF-8</project.build.sourceEncoding>
    </properties>
    <dependencies>
        <dependency>
            <groupId>org.springframework.boot</groupId>
            <artifactId>spring-boot-starter-web</artifactId>
        </dependency>
        <!--所有调用均基于 OpenAI 协议标准,实现一致的接口设计与规范LangChain4j 提供与许多 LLM 提供商的集成
        从最简单的开始方式是从 OpenAI 集成开始https://docs.langchain4j.dev/get-started    -->
        <dependency>
            <groupId>dev.langchain4j</groupId>
            <artifactId>langchain4j-open-ai</artifactId>
        </dependency>
        <!--langchain4j 高阶-->
        <dependency>
            <groupId>dev.langchain4j</groupId>
            <artifactId>langchain4j</artifactId>
        </dependency>
        <!--lombok-->
        <dependency>
            <groupId>org.projectlombok</groupId>
            <artifactId>lombok</artifactId>
            <optional>true</optional>
        </dependency>
        <!--test-->
        <dependency>
            <groupId>org.springframework.boot</groupId>
            <artifactId>spring-boot-starter-test</artifactId>
            <scope>test</scope>
        </dependency>
    </dependencies>

    <build>
        <plugins>
            <plugin>
                <groupId>org.springframework.boot</groupId>
                <artifactId>spring-boot-maven-plugin</artifactId>
            </plugin>
        </plugins>
    </build>
</project>
3)添加配置文件
server.port=8001
spring.application.name=langchain4j-01study
4)添加配置类
@Configuration
public class LLMConfig {

    @Bean
    public ChatModel chatModel() {
        return OpenAiChatModel.builder()
                .apiKey(System.getenv("aliQwen-api"))
                .baseUrl("https://dashscope.aliyuncs.com/compatible-mode/v1")
                .modelName("qwen-plus")
                .build();
    }
}
5)编写业务类
@RestController
public class Study01Controller {

    @Resource
    private ChatModel chatModel;

    @GetMapping("/chat")
    public String chat(@RequestParam(name = "msg", defaultValue = "你是谁") String msg) {
        return chatModel.chat(msg);
    }
}
6)测试
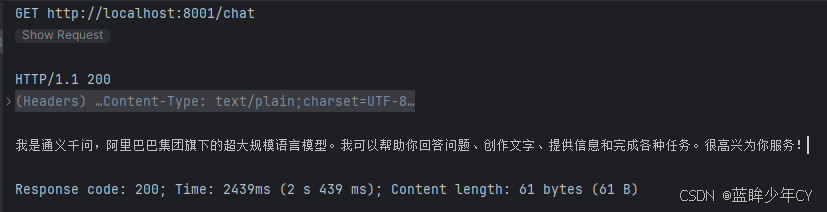
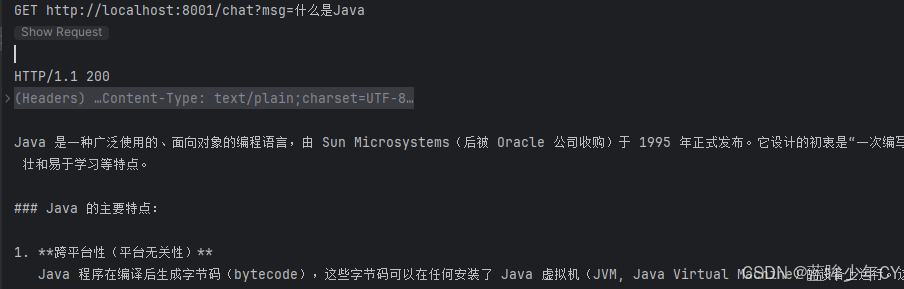
(5)多模型共存(deepseek)
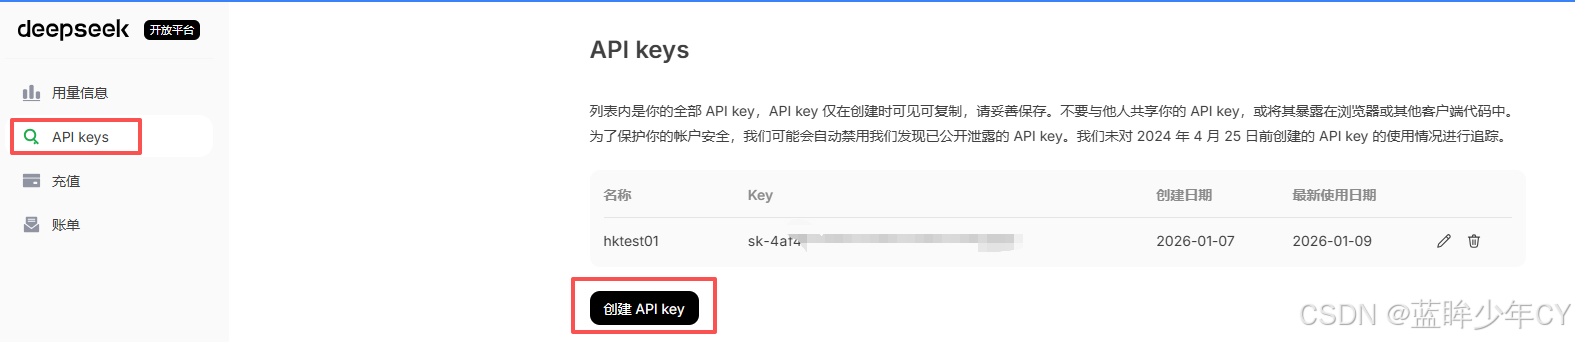
官网地址https://platform.deepseek.com/usage
1)获取Key
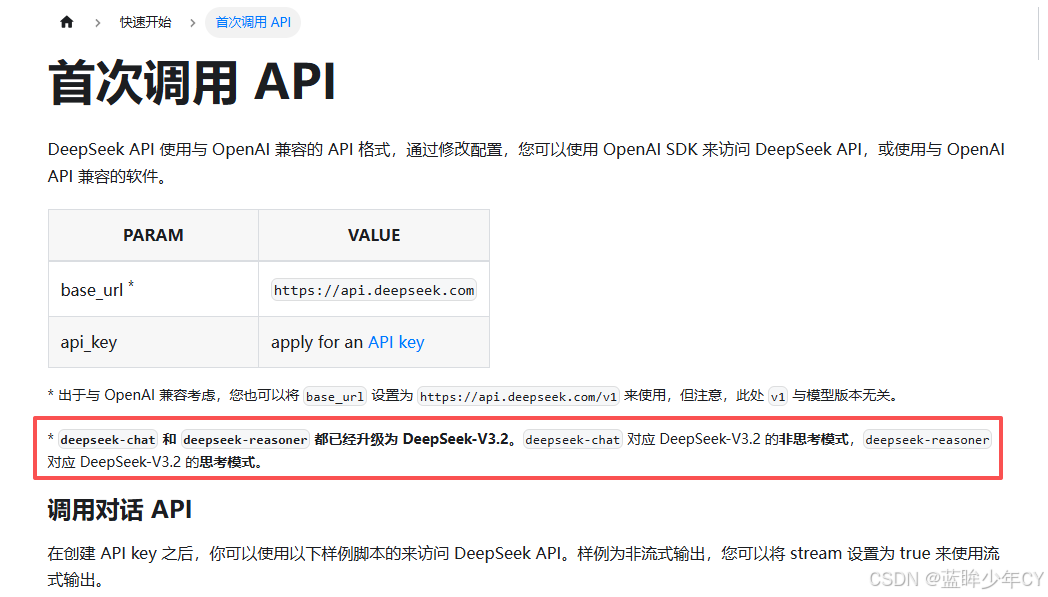
2)获取模型名称
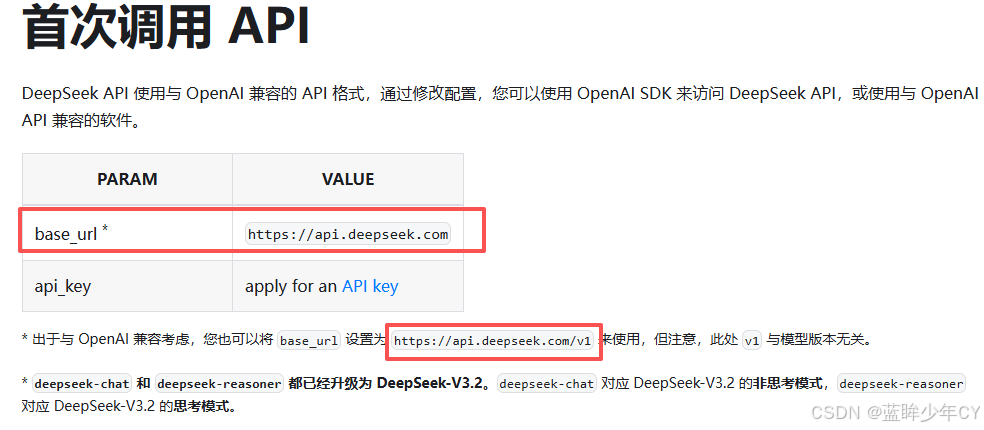
3)获取baseUrl
(6)修改工程
1)修改配置类
@Configuration
public class LLMConfig {

    @Bean("qwen")
    public ChatModel qwenChatModel() {
        return OpenAiChatModel.builder()
                .apiKey(System.getenv("aliQwen-api"))
                .baseUrl("https://dashscope.aliyuncs.com/compatible-mode/v1")
                .modelName("qwen-plus")
                .build();
    }

    @Bean("deepseek")
    public ChatModel deepseekChatModel() {
        return OpenAiChatModel.builder()
                .apiKey("sk-4af********")
                .baseUrl("https://api.deepseek.com/v1")
                .modelName("deepseek-chat")
                .build();
    }
}
2)修改业务类
@RestController
public class Study01Controller {

    @Resource(name = "qwen")
    private ChatModel qwenChatModel;

    @Resource(name = "deepseek")
    private ChatModel deepseekChatModel;

    @GetMapping("/chat/v1")
    public String chatV1(@RequestParam(name = "msg", defaultValue = "你是谁") String msg) {
        return qwenChatModel.chat(msg);
    }

    @GetMapping("/chat/v2")
    public String chatV2(@RequestParam(name = "msg", defaultValue = "你是谁") String msg) {
        return deepseekChatModel.chat(msg);
    }
}
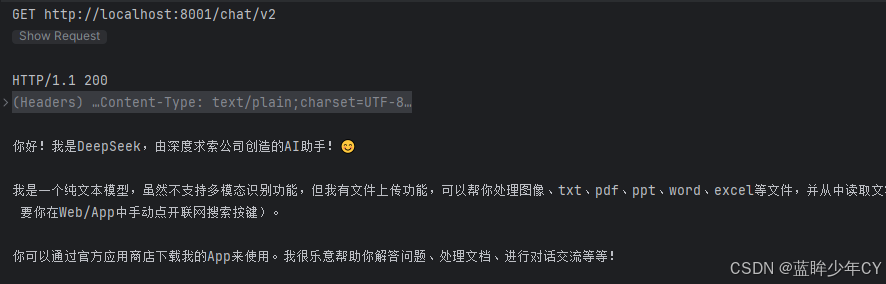
3)测试

3、与springBoot整合
(1)了解
官网地址https://docs.langchain4j.dev/tutorials/spring-boot-integration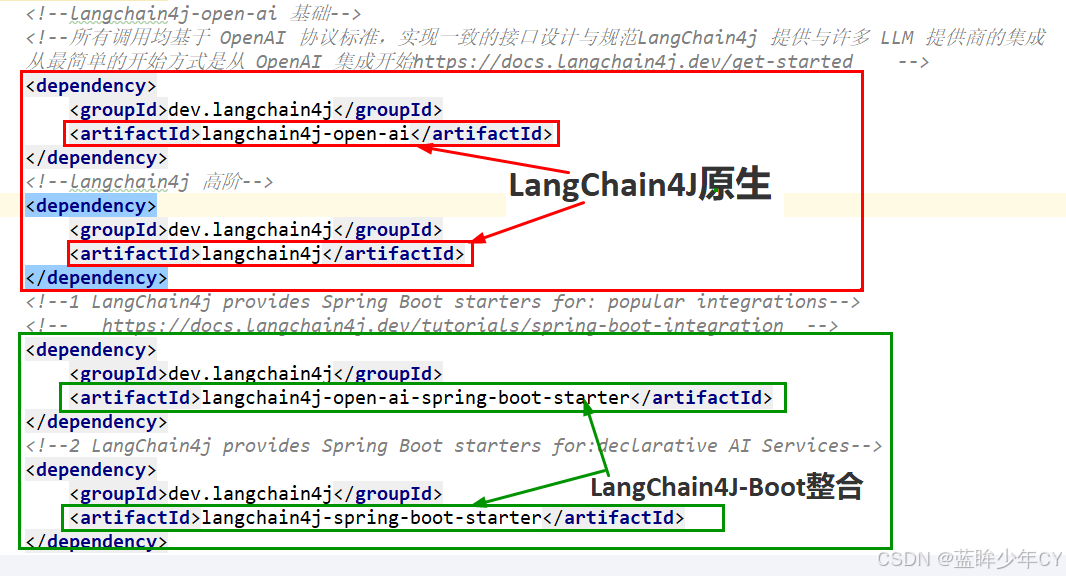
(2)案例实现
1)新建模块
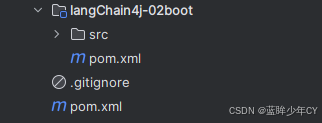
2)修改pom文件
<?xml version="1.0" encoding="UTF-8"?>
<project xmlns="http://maven.apache.org/POM/4.0.0"
         xmlns:xsi="http://www.w3.org/2001/XMLSchema-instance"
         xsi:schemaLocation="http://maven.apache.org/POM/4.0.0 http://maven.apache.org/xsd/maven-4.0.0.xsd">
    <modelVersion>4.0.0</modelVersion>
    <parent>
        <groupId>com.hk</groupId>
        <artifactId>langcChain4J-study</artifactId>
        <version>1.0-SNAPSHOT</version>
    </parent>

    <artifactId>langChain4j-02boot</artifactId>

    <properties>
        <maven.compiler.source>21</maven.compiler.source>
        <maven.compiler.target>21</maven.compiler.target>
        <project.build.sourceEncoding>UTF-8</project.build.sourceEncoding>
    </properties>

    <dependencies>
        <dependency>
            <groupId>org.springframework.boot</groupId>
            <artifactId>spring-boot-starter-web</artifactId>
        </dependency>
        <!--langchain4j原生 基础-->
        <dependency>
            <groupId>dev.langchain4j</groupId>
            <artifactId>langchain4j-open-ai</artifactId>
        </dependency>
        <!--langchain4j原生 高阶-->
        <dependency>
            <groupId>dev.langchain4j</groupId>
            <artifactId>langchain4j</artifactId>
        </dependency>
        <!--1 LangChain4j 整合boot底层支持-->
        <!--   https://docs.langchain4j.dev/tutorials/spring-boot-integration  -->
        <dependency>
            <groupId>dev.langchain4j</groupId>
            <artifactId>langchain4j-open-ai-spring-boot-starter</artifactId>
        </dependency>
        <!--2 LangChain4j 整合boot高阶支持-->
        <dependency>
            <groupId>dev.langchain4j</groupId>
            <artifactId>langchain4j-spring-boot-starter</artifactId>
        </dependency>
        <!--lombok-->
        <dependency>
            <groupId>org.projectlombok</groupId>
            <artifactId>lombok</artifactId>
            <optional>true</optional>
        </dependency>
        <!--test-->
        <dependency>
            <groupId>org.springframework.boot</groupId>
            <artifactId>spring-boot-starter-test</artifactId>
            <scope>test</scope>
        </dependency>
    </dependencies>

    <build>
        <plugins>
            <plugin>
                <groupId>org.springframework.boot</groupId>
                <artifactId>spring-boot-maven-plugin</artifactId>
            </plugin>
        </plugins>
    </build>
</project>
3)添加配置文件
server.port=8002

spring.application.name=langchain4j-02boot

# https://docs.langchain4j.dev/tutorials/spring-boot-integration
langchain4j.open-ai.chat-model.api-key=${aliQwen-api}
langchain4j.open-ai.chat-model.model-name=qwen-plus
langchain4j.open-ai.chat-model.base-url=https://dashscope.aliyuncs.com/compatible-mode/v1
4)低阶Api业务类
@RestController
public class PopularIntegrationsController {

    @Resource
    private ChatModel chatModel;

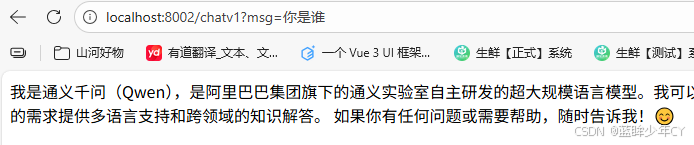
    @GetMapping("/chatv1")
    public String chat(String msg) {
        return chatModel.chat(msg);
    }
}
5)自定义接口类
@AiService
public interface ChatAssistant {

    String chat(String prompt);
}
6)高阶Api业务类
@RestController
public class DeclarativeAIServiceController {

    @Resource
    private ChatAssistant chatAssistant;

    @GetMapping("/chatv2")
    public String chat(String msg) {
        return chatAssistant.chat(msg);
    }
}
7)测试

4、低阶Api和高阶Api
(1)介绍
官网地址https://docs.langchain4j.dev/intro/#2-levels-of-abstraction
低阶api 有最多的选择,可以使用所有底层组件,比如ChatModel等。 这些是基于LLM的应用中的“primitives”。 可以完全控制组合它们,但需要写更多的代码。UserMessage AiMessage
EmbeddingStore Embedding
高阶api 在程序员自己定义接口,通过AiServices类里面的方法实现,优点是Api封装度较高,减少代码的复杂度,但是仍可以进行微调
(2)案例实现
1)新建模块
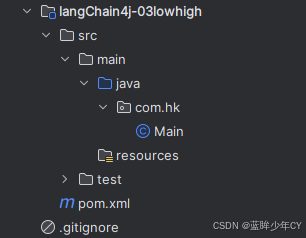
2)修改pom文件
<?xml version="1.0" encoding="UTF-8"?>
<project xmlns="http://maven.apache.org/POM/4.0.0"
         xmlns:xsi="http://www.w3.org/2001/XMLSchema-instance"
         xsi:schemaLocation="http://maven.apache.org/POM/4.0.0 http://maven.apache.org/xsd/maven-4.0.0.xsd">
    <modelVersion>4.0.0</modelVersion>
    <parent>
        <groupId>com.hk</groupId>
        <artifactId>langcChain4J-study</artifactId>
        <version>1.0-SNAPSHOT</version>
    </parent>

    <artifactId>langChain4j-03lowhigh</artifactId>

    <properties>
        <maven.compiler.source>21</maven.compiler.source>
        <maven.compiler.target>21</maven.compiler.target>
        <project.build.sourceEncoding>UTF-8</project.build.sourceEncoding>
    </properties>

    <dependencies>
        <dependency>
            <groupId>org.springframework.boot</groupId>
            <artifactId>spring-boot-starter-web</artifactId>
        </dependency>
        <!--langchain4j-open-ai 基础-->
        <!--所有调用均基于 OpenAI 协议标准,实现一致的接口设计与规范LangChain4j 提供与许多 LLM 提供商的集成
        从最简单的开始方式是从 OpenAI 集成开始https://docs.langchain4j.dev/get-started    -->
        <dependency>
            <groupId>dev.langchain4j</groupId>
            <artifactId>langchain4j-open-ai</artifactId>
        </dependency>
        <!--langchain4j 高阶-->
        <dependency>
            <groupId>dev.langchain4j</groupId>
            <artifactId>langchain4j</artifactId>
        </dependency>
        <!--lombok-->
        <dependency>
            <groupId>org.projectlombok</groupId>
            <artifactId>lombok</artifactId>
            <optional>true</optional>
        </dependency>
        <!--test-->
        <dependency>
            <groupId>org.springframework.boot</groupId>
            <artifactId>spring-boot-starter-test</artifactId>
            <scope>test</scope>
        </dependency>
    </dependencies>

    <build>
        <plugins>
            <plugin>
                <groupId>org.springframework.boot</groupId>
                <artifactId>spring-boot-maven-plugin</artifactId>
            </plugin>
        </plugins>
    </build>
</project>
3)添加配置文件
server.port=8003
spring.application.name=langChain4j-03lowhigh
4)添加配置类
@Configuration
public class LLMConfig {

    @Bean
    public ChatModel chatModel() {
        return OpenAiChatModel.builder()
                .apiKey(System.getenv("aliQwen-api"))
                .modelName("qwen-plus")
                .baseUrl("https://dashscope.aliyuncs.com/compatible-mode/v1")
                .build();
    }
}
5)低阶api调用业务类
@RestController
public class LowApiController {

    @Resource
    private ChatModel chatModel;

    @GetMapping("/chat1")
    public String chat1(@RequestParam(name = "msg", defaultValue = "你是谁") String msg) {
        return chatModel.chat(msg);
    }
}
6)测试低阶api调用

7)修改业务类获取Token调用
@RestController
public class LowApiController {

    @Resource
    private ChatModel chatModel;

    @GetMapping("/chat1")
    public String chat1(@RequestParam(name = "msg", defaultValue = "你是谁") String msg) {
        return chatModel.chat(msg);
    }

    @GetMapping("/chat2")
    public String chat2(@RequestParam(name = "msg", defaultValue = "你是谁") String msg) {
        ChatResponse chatResponse = chatModel.chat(UserMessage.from(msg));
        String text = chatResponse.aiMessage().text();
        TokenUsage tokenUsage = chatResponse.tokenUsage();
        System.out.println("本次token消耗:" + tokenUsage);
        return text;
    }
}
8)高阶api调用
官网地址https://docs.langchain4j.dev/tutorials/ai-services#simplest-ai-service
1、定义AiServices接口
public interface ChatAssistant {
    String chat(String prompt);
}
2、修改配置类
AiService接口实现
package com.hk.study.config;

import com.hk.study.service.ChatAssistant;
import dev.langchain4j.model.chat.ChatModel;
import dev.langchain4j.model.openai.OpenAiChatModel;
import dev.langchain4j.service.AiServices;
import org.springframework.context.annotation.Bean;
import org.springframework.context.annotation.Configuration;

@Configuration
public class LLMConfig {

    @Bean
    public ChatModel chatModel() {
        return OpenAiChatModel.builder()
                .apiKey(System.getenv("aliQwen-api"))
                .modelName("qwen-plus")
                .baseUrl("https://dashscope.aliyuncs.com/compatible-mode/v1")
                .build();
    }

    @Bean
    public ChatAssistant chatAssistant(ChatModel chatModel) {
        return AiServices.create(ChatAssistant.class, chatModel);
    }
}
3、业务类
@RestController
public class HighApiController {

    @Resource
    private ChatAssistant chatAssistant;

    @GetMapping("chatv2")
    public String chatv2 (String msg) {
        return chatAssistant.chat(msg);
    }
}
9)测试高阶api
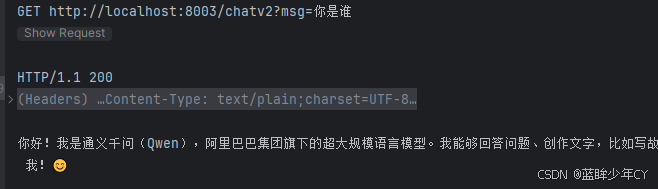
5、模型的参数配置
在03模块的基础上配置
官网地址https://docs.langchain4j.dev/tutorials/model-parameters
(1)日志配置
官网地址https://docs.langchain4j.dev/tutorials/logging
1)修改配置类
    @Bean
    public ChatModel chatModel() {
        return OpenAiChatModel.builder()
                .apiKey(System.getenv("aliQwen-api"))
                .modelName("qwen-plus")
                .baseUrl("https://dashscope.aliyuncs.com/compatible-mode/v1")
                // 开启日志, 日志级别设置为DEBUG才会打印日志
                .logRequests(true)
                .logResponses(true)
                .build();
    }
2)修改配置文件
server.port=8003
spring.application.name=langChain4j-03lowhigh

# 开启langchain4j的日志, 日志级别设置为DEBUG才会打印日志
logging.level.dev.langchain4j=DEBUG
3)测试
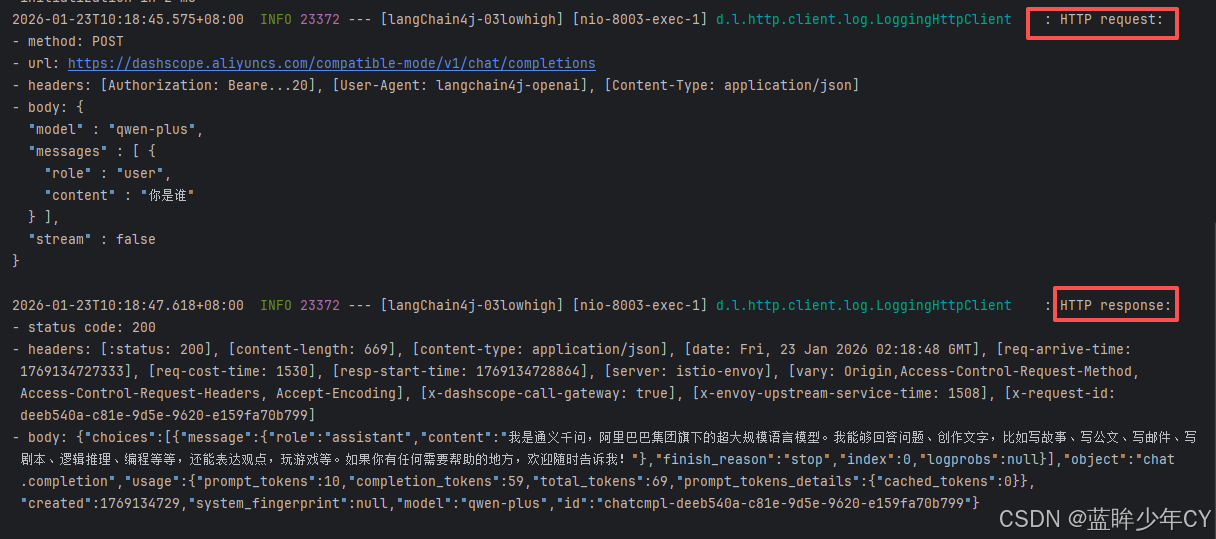
(2)监控配置
官网地址https://docs.langchain4j.dev/tutorials/observability
1)编写监听类
public class TestChatModelListener implements ChatModelListener {

    @Override
    public void onRequest(ChatModelRequestContext requestContext) {
        // onRequest配置的k:v键值对,在onResponse阶段可以获得,上下文传递参数好用
        String uuidValue = IdUtil.simpleUUID();
        requestContext.attributes().put("TraceID",uuidValue);
        System.out.println("配置请求参数:TraceID == "+ uuidValue);
    }

    @Override
    public void onResponse(ChatModelResponseContext responseContext) {
        Object object = responseContext.attributes().get("TraceID");

        System.out.println("获取请求参数:TraceID == "+ object);
    }

    @Override
    public void onError(ChatModelErrorContext errorContext) {
        System.out.println("出错了...");
    }
}
2)修改配置类
    @Bean
    public ChatModel chatModel() {
        return OpenAiChatModel.builder()
                .apiKey(System.getenv("aliQwen-api"))
                .modelName("qwen-plus")
                .baseUrl("https://dashscope.aliyuncs.com/compatible-mode/v1")
                .listeners(List.of(new TestChatModelListener()))
                .build();
    }
3)测试

(3)重试机制
1)修改配置类
    @Bean
    public ChatModel chatModel() {
        return OpenAiChatModel.builder()
                .apiKey(System.getenv("aliQwen-api"))
                .modelName("qwen-plus")
                .baseUrl("https://dashscope.aliyuncs.com/compatible-mode/v1")
                .logRequests(true)
                .logResponses(true)
                .maxRetries(2)
                .build();
    }
2)测试
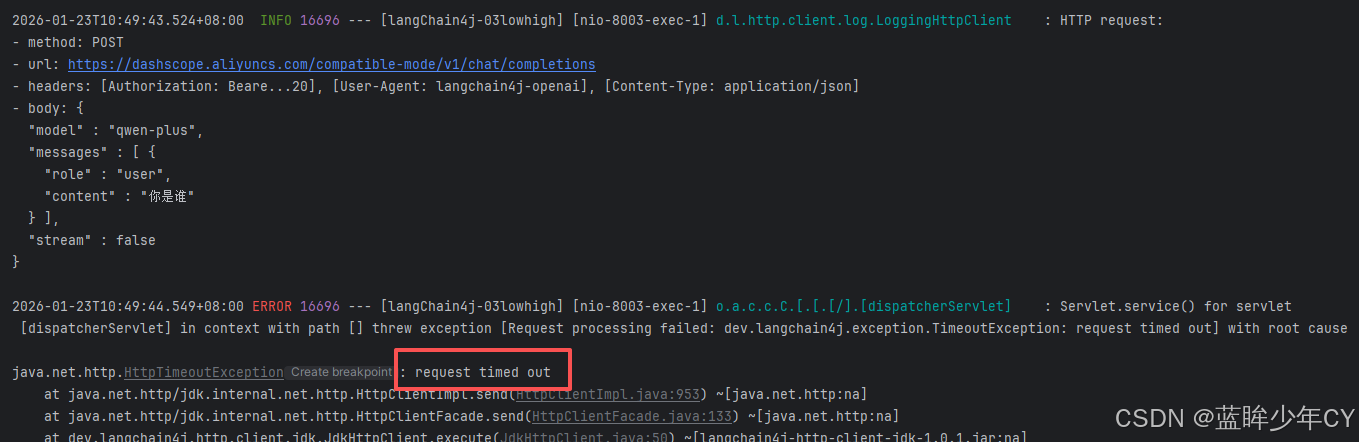
断开网络,再次访问
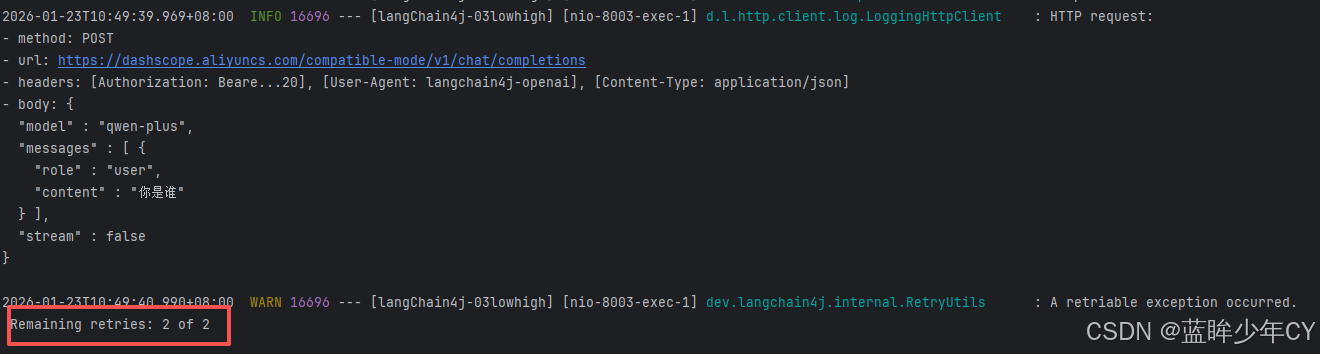
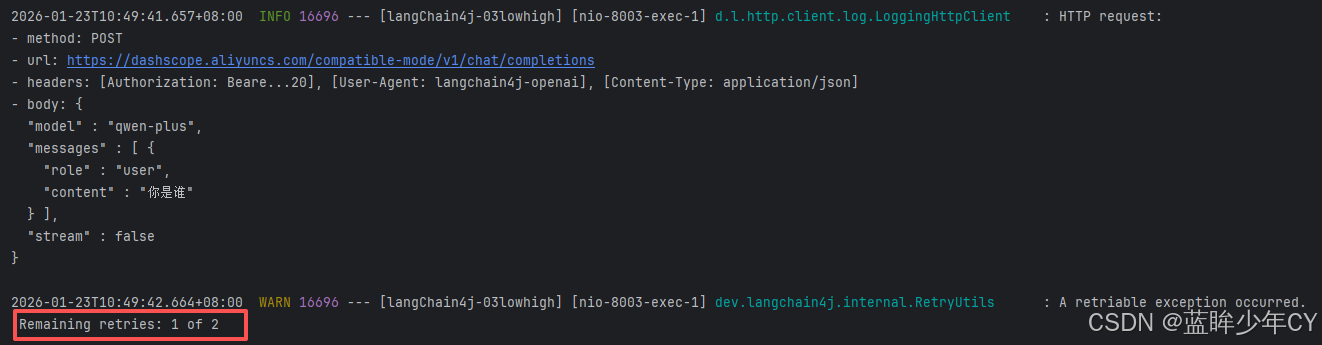
(4)超时机制
1)修改配置类
    @Bean
    public ChatModel chatModel() {
        return OpenAiChatModel.builder()
                .apiKey(System.getenv("aliQwen-api"))
                .modelName("qwen-plus")
                .baseUrl("https://dashscope.aliyuncs.com/compatible-mode/v1")
                .logRequests(true)
                .maxRetries(2)
                .timeout(Duration.ofSeconds(1))
                .build();
    }
2)测试
6、多模态视觉
(1)出处
官网地址https://docs.langchain4j.dev/tutorials/chat-and-language-models#multimodalityUserMessage不仅可以包含文本,还可以包含其他类型的内容。 包含一个 。 是一个接口,具有以下实现方式:UserMessageList<Content> contentsContent
TextContentImageContentAudioContentVideoContentPdfFileContent
本次选择的模型:qwen-vl-max
阿里地址https://help.aliyun.com/zh/model-studio/models#850732b1aabs0
(2)图形理解案例实现
1)创建模块
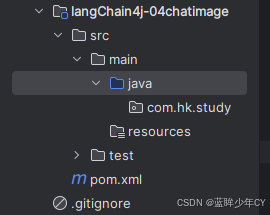
2)修改pom
<?xml version="1.0" encoding="UTF-8"?>
<project xmlns="http://maven.apache.org/POM/4.0.0"
         xmlns:xsi="http://www.w3.org/2001/XMLSchema-instance"
         xsi:schemaLocation="http://maven.apache.org/POM/4.0.0 http://maven.apache.org/xsd/maven-4.0.0.xsd">
    <modelVersion>4.0.0</modelVersion>
    <parent>
        <groupId>com.hk</groupId>
        <artifactId>langcChain4J-study</artifactId>
        <version>1.0-SNAPSHOT</version>
    </parent>

    <artifactId>langChain4j-04chatimage</artifactId>

    <properties>
        <maven.compiler.source>21</maven.compiler.source>
        <maven.compiler.target>21</maven.compiler.target>
        <project.build.sourceEncoding>UTF-8</project.build.sourceEncoding>
    </properties>

    <dependencies>
        <dependency>
            <groupId>org.springframework.boot</groupId>
            <artifactId>spring-boot-starter-web</artifactId>
        </dependency>
        <!--langchain4j-open-ai 基础-->
        <!--所有调用均基于 OpenAI 协议标准,实现一致的接口设计与规范LangChain4j 提供与许多 LLM 提供商的集成
        从最简单的开始方式是从 OpenAI 集成开始https://docs.langchain4j.dev/get-started    -->
        <dependency>
            <groupId>dev.langchain4j</groupId>
            <artifactId>langchain4j-open-ai</artifactId>
        </dependency>
        <!--langchain4j 高阶-->
        <dependency>
            <groupId>dev.langchain4j</groupId>
            <artifactId>langchain4j</artifactId>
        </dependency>
        <!--lombok-->
        <dependency>
            <groupId>org.projectlombok</groupId>
            <artifactId>lombok</artifactId>
            <optional>true</optional>
        </dependency>
        <!--hutool-->
        <dependency>
            <groupId>cn.hutool</groupId>
            <artifactId>hutool-all</artifactId>
            <version>5.8.22</version>
        </dependency>
        <!--test-->
        <dependency>
            <groupId>org.springframework.boot</groupId>
            <artifactId>spring-boot-starter-test</artifactId>
            <scope>test</scope>
        </dependency>
    </dependencies>

    <build>
        <plugins>
            <plugin>
                <groupId>org.springframework.boot</groupId>
                <artifactId>spring-boot-maven-plugin</artifactId>
            </plugin>
        </plugins>
    </build>
</project>
3)添加配置文件
server.port=8004
spring.application.name=langchain4j-04chatimage
4)添加配置类
@Configuration
public class LLMConfig {

    @Bean
    public ChatModel chatModel() {
        return OpenAiChatModel.builder()
                .apiKey(System.getenv("aliQwen-api"))
                .modelName("qwen-vl-max")
                .baseUrl("https://dashscope.aliyuncs.com/compatible-mode/v1")
                .build();
    }
}
5)编写业务类
@RestController
public class ImageModelController {

    @Resource
    private ChatModel chatModel;

    @Value("classpath:mi.jpg")
    private org.springframework.core.io.Resource imageResource;

    @GetMapping("/image")
    public String image() throws IOException {
        // 1、将图片通过Base64编码转为字符串
        byte[] imageBytes = imageResource.getContentAsByteArray();
        String encodeToString = Base64.getEncoder().encodeToString(imageBytes);
        // 2、构建提示词userMessage
        UserMessage userMessage = UserMessage.from(
                TextContent.from("从以下图片中获取来源网站名称,股价走势和5月30号股价"),
                ImageContent.from(encodeToString, "image/jpg")
        );
        // 3、调用模型获取回答
        ChatResponse chatResponse = chatModel.chat(userMessage);
        String response = chatResponse.aiMessage().text();
        return response;
    }

}
6)测试
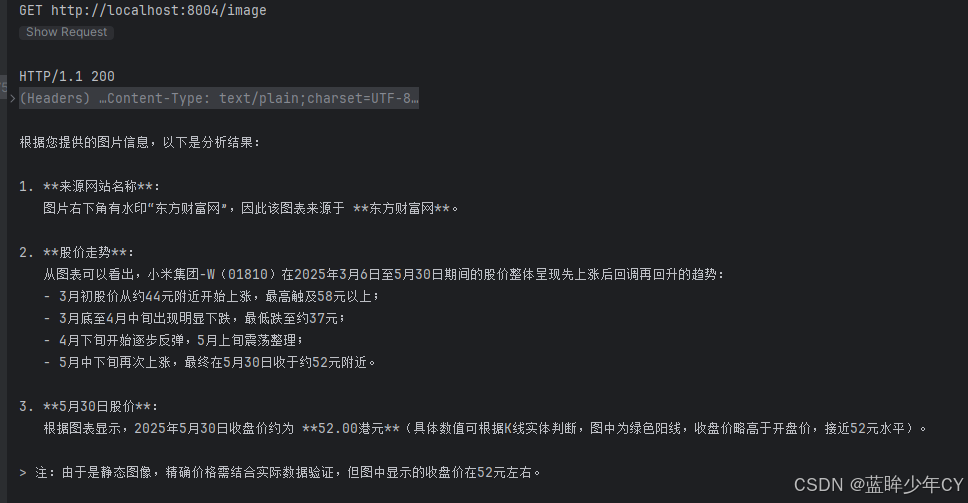
(3)引入第三方案例实现
结合阿里巴巴的通义万象进行图像理解,所有出处均来自官网,模型使用阿里的wanx2.1-t2i-turbo
官网文档地址https://docs.langchain4j.dev/integrations/language-models/dashscope
0)修改父工程pom文件
<properties>
......
<!--langchain4j-community 引入阿里云百炼平台依赖管理清单-->
<langchain4j-community.version>1.0.1-beta6</langchain4j-community.version>........
</properties>
<dependencyManagement>......
<!--引入阿里云百炼平台依赖管理清单
https://docs.langchain4j.dev/integrations/language-models/dashscope
-->
<dependency>
<groupId>dev.langchain4j</groupId>
<artifactId>langchain4j-community-bom</artifactId>
<version>${langchain4j-community.version}</version>
<type>pom</type>
<scope>import</scope>
</dependency>......
</dependencyManagement>
<?xml version="1.0" encoding="UTF-8"?>
<project xmlns="http://maven.apache.org/POM/4.0.0"
         xmlns:xsi="http://www.w3.org/2001/XMLSchema-instance"
         xsi:schemaLocation="http://maven.apache.org/POM/4.0.0 http://maven.apache.org/xsd/maven-4.0.0.xsd">
    <modelVersion>4.0.0</modelVersion>

    <groupId>com.hk</groupId>
    <artifactId>langcChain4J-study</artifactId>
    <version>1.0-SNAPSHOT</version>

    <packaging>pom</packaging>
    <name>langchain4j-study父工程</name>
    <modules>
        <module>langChain4J-01study</module>
        <module>langChain4J-02boot</module>
        <module>langChain4j-03lowhigh</module>
        <module>langChain4j-04chatimage</module>
    </modules>

    <properties>
        <project.build.sourceEncoding>UTF-8</project.build.sourceEncoding>
        <project.reporting.outputEncoding>UTF-8</project.reporting.outputEncoding>
        <java.version>17</java.version>
        <maven.compiler.source>21</maven.compiler.source>
        <maven.compiler.target>21</maven.compiler.target>
        <!-- Spring Boot -->
        <spring-boot.version>3.5.0</spring-boot.version>
        <!-- Spring AI -->
        <spring-ai.version>1.0.0</spring-ai.version>
        <!-- Spring AI Alibaba -->
        <spring-ai-alibaba.version>1.0.0-M6.1</spring-ai-alibaba.version>
        <!-- langchain4j -->
        <langchain4j.version>1.0.1</langchain4j.version>
        <!--langchain4j-community 引入阿里云百炼平台依赖管理清单-->
        <langchain4j-community.version>1.0.1-beta6</langchain4j-community.version>
        <!-- maven plugin -->
        <maven-deploy-plugin.version>3.1.1</maven-deploy-plugin.version>
        <flatten-maven-plugin.version>1.3.0</flatten-maven-plugin.version>
        <maven-compiler-plugin.version>3.8.1</maven-compiler-plugin.version>
    </properties>

    <dependencyManagement>
        <dependencies>
            <!-- Spring Boot -->
            <dependency>
                <groupId>org.springframework.boot</groupId>
                <artifactId>spring-boot-dependencies</artifactId>
                <version>${spring-boot.version}</version>
                <type>pom</type>
                <scope>import</scope>
            </dependency>
            <!-- Spring AI -->
            <dependency>
                <groupId>org.springframework.ai</groupId>
                <artifactId>spring-ai-bom</artifactId>
                <version>${spring-ai.version}</version>
                <type>pom</type>
                <scope>import</scope>
            </dependency>
            <!-- Spring AI Alibaba -->
            <dependency>
                <groupId>com.alibaba.cloud.ai</groupId>
                <artifactId>spring-ai-alibaba-starter</artifactId>
                <version>${spring-ai-alibaba.version}</version>
            </dependency>
            <!--langchain4j的依赖清单,加载BOM后所有langchain4j版本号可以被统一管理起来
            https://docs.langchain4j.dev/get-started
            -->
            <dependency>
                <groupId>dev.langchain4j</groupId>
                <artifactId>langchain4j-bom</artifactId>
                <version>${langchain4j.version}</version>
                <type>pom</type>
                <scope>import</scope>
            </dependency>
            <!--引入阿里云百炼平台依赖管理清单
           https://docs.langchain4j.dev/integrations/language-models/dashscope
           -->
            <dependency>
                <groupId>dev.langchain4j</groupId>
                <artifactId>langchain4j-community-bom</artifactId>
                <version>${langchain4j-community.version}</version>
                <type>pom</type>
                <scope>import</scope>
            </dependency>
        </dependencies>
    </dependencyManagement>

    <build>
        <plugins>
            <plugin>
                <groupId>org.springframework.boot</groupId>
                <artifactId>spring-boot-maven-plugin</artifactId>
                <version>${spring-boot.version}</version>
            </plugin>
            <plugin>
                <groupId>org.apache.maven.plugins</groupId>
                <artifactId>maven-deploy-plugin</artifactId>
                <version>${maven-deploy-plugin.version}</version>
                <configuration>
                    <skip>true</skip>
                </configuration>
            </plugin>
            <plugin>
                <groupId>org.apache.maven.plugins</groupId>
                <artifactId>maven-compiler-plugin</artifactId>
                <version>${maven-compiler-plugin.version}</version>
                <configuration>
                    <release>${java.version}</release>
                    <compilerArgs>
                        <compilerArg>-parameters</compilerArg>
                    </compilerArgs>
                </configuration>
            </plugin>
            <plugin>
                <groupId>org.codehaus.mojo</groupId>
                <artifactId>flatten-maven-plugin</artifactId>
                <version>${flatten-maven-plugin.version}</version>
                <inherited>true</inherited>
                <executions>
                    <execution>
                        <id>flatten</id>
                        <phase>process-resources</phase>
                        <goals>
                            <goal>flatten</goal>
                        </goals>
                        <configuration>
                            <updatePomFile>true</updatePomFile>
                            <flattenMode>ossrh</flattenMode>
                            <pomElements>
                                <distributionManagement>remove</distributionManagement>
                                <dependencyManagement>remove</dependencyManagement>
                                <repositories>remove</repositories>
                                <scm>keep</scm>
                                <url>keep</url>
                                <organization>resolve</organization>
                            </pomElements>
                        </configuration>
                    </execution>
                    <execution>
                        <id>flatten.clean</id>
                        <phase>clean</phase>
                        <goals>
                            <goal>clean</goal>
                        </goals>
                    </execution>
                </executions>
            </plugin>
        </plugins>
    </build>

    <repositories>
        <repository>
            <id>spring-milestones</id>
            <name>Spring Milestones</name>
            <url>https://repo.spring.io/milestone</url>
            <snapshots>
                <enabled>false</enabled>
            </snapshots>
        </repository>
        <repository>
            <id>spring-snapshots</id>
            <name>Spring Snapshots</name>
            <url>https://repo.spring.io/snapshot</url>
            <releases>
                <enabled>false</enabled>
            </releases>
        </repository>
        <repository>
            <id>aliyunmaven</id>
            <name>aliyun</name>
            <url>https://maven.aliyun.com/repository/public</url>
        </repository>
    </repositories>

    <pluginRepositories>
        <pluginRepository>
            <id>public</id>
            <name>aliyun nexus</name>
            <url>https://maven.aliyun.com/repository/public</url>
            <releases>
                <enabled>true</enabled>
            </releases>
            <snapshots>
                <enabled>false</enabled>
            </snapshots>
        </pluginRepository>
    </pluginRepositories>
</project>
1)创建模块
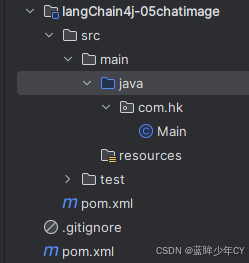
2)修改pom
<?xml version="1.0" encoding="UTF-8"?>
<project xmlns="http://maven.apache.org/POM/4.0.0"
         xmlns:xsi="http://www.w3.org/2001/XMLSchema-instance"
         xsi:schemaLocation="http://maven.apache.org/POM/4.0.0 http://maven.apache.org/xsd/maven-4.0.0.xsd">
    <modelVersion>4.0.0</modelVersion>
    <parent>
        <groupId>com.hk</groupId>
        <artifactId>langcChain4J-study</artifactId>
        <version>1.0-SNAPSHOT</version>
    </parent>

    <artifactId>langChain4j-05chatimage</artifactId>

    <properties>
        <maven.compiler.source>21</maven.compiler.source>
        <maven.compiler.target>21</maven.compiler.target>
        <project.build.sourceEncoding>UTF-8</project.build.sourceEncoding>
    </properties>

    <dependencies>
        <dependency>
            <groupId>org.springframework.boot</groupId>
            <artifactId>spring-boot-starter-web</artifactId>
        </dependency>
        <!--langchain4j-open-ai 基础-->
        <!--所有调用均基于 OpenAI 协议标准,实现一致的接口设计与规范LangChain4j 提供与许多 LLM 提供商的集成
        从最简单的开始方式是从 OpenAI 集成开始https://docs.langchain4j.dev/get-started    -->
        <dependency>
            <groupId>dev.langchain4j</groupId>
            <artifactId>langchain4j-open-ai</artifactId>
        </dependency>
        <!--langchain4j 高阶-->
        <dependency>
            <groupId>dev.langchain4j</groupId>
            <artifactId>langchain4j</artifactId>
        </dependency>
        <!--DashScope (Qwen)接入阿里云百炼平台
            https://docs.langchain4j.dev/integrations/language-models/dashscope
        -->
        <dependency>
            <groupId>dev.langchain4j</groupId>
            <artifactId>langchain4j-community-dashscope-spring-boot-starter</artifactId>
        </dependency>
        <!--lombok-->
        <dependency>
            <groupId>org.projectlombok</groupId>
            <artifactId>lombok</artifactId>
            <optional>true</optional>
        </dependency>
        <!--hutool-->
        <dependency>
            <groupId>cn.hutool</groupId>
            <artifactId>hutool-all</artifactId>
            <version>5.8.22</version>
        </dependency>
        <!--test-->
        <dependency>
            <groupId>org.springframework.boot</groupId>
            <artifactId>spring-boot-starter-test</artifactId>
            <scope>test</scope>
        </dependency>
    </dependencies>

    <build>
        <plugins>
            <plugin>
                <groupId>org.springframework.boot</groupId>
                <artifactId>spring-boot-maven-plugin</artifactId>
            </plugin>
        </plugins>
    </build>
</project>
3)添加配置文件
server.port=8005
spring.application.name=langchain4j-05chatimage
4)添加配置类
@Configuration
public class LLMConfig {

    @Bean
    public WanxImageModel wanxImageModel() {
        return WanxImageModel.builder()
                .apiKey(System.getenv("aliQwen-api"))
                .modelName("wanx2.1-t2i-turbo")
                .build();
    }
}
5)编写业务类
@RestController
public class ImageModelController {

    @Resource
    private WanxImageModel wanxImageModel;

    @GetMapping("/chat/image-1")
    public String image1() {
        Response<Image> generate = wanxImageModel.generate("一张图,描述:一个人在沙滩上");
        return generate.content().url().toString();
    }

    @GetMapping("/chat/image-2")
    public String image2() throws NoApiKeyException {
        String prompt = "近景镜头,18岁的中国女孩,古代服饰,圆脸,正面看着镜头," +
                "民族优雅的服装,商业摄影,室外,电影级光照,半身特写,精致的淡妆,锐利的边缘。";
        ImageSynthesisParam build = ImageSynthesisParam.builder()
                .apiKey(System.getenv("aliQwen-api"))
                .model("wanx2.1-t2i-turbo")
                .prompt(prompt)
                .n(2)
                .size("1024*1024")
                .build();
        ImageSynthesis imageSynthesis = new ImageSynthesis();
        ImageSynthesisResult result = imageSynthesis.call(build);
        return JsonUtils.toJson(result);
    }
}
6)测试


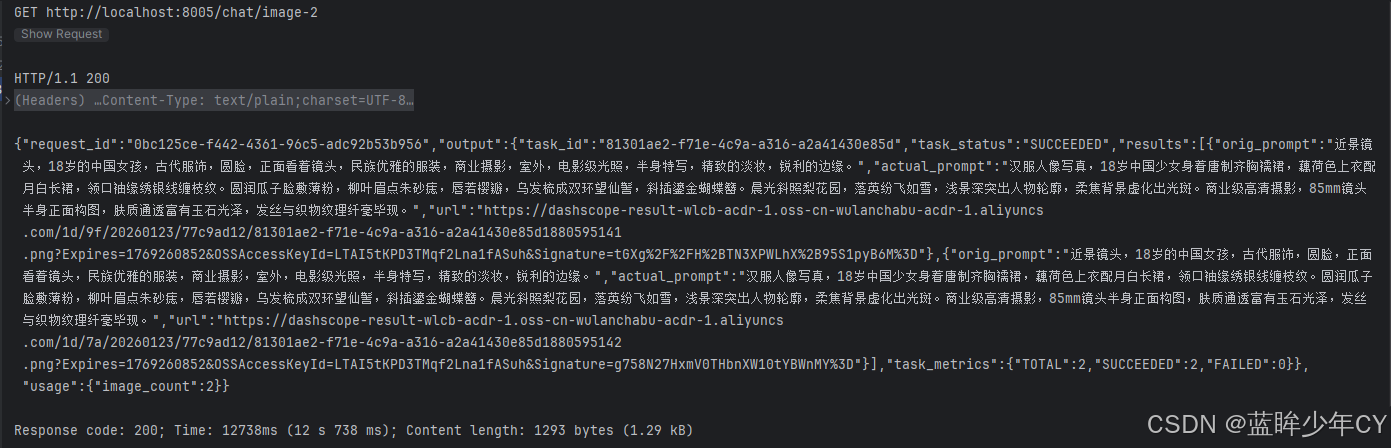

7、流式输出
(1)介绍
流式输出(StreamingOutput)是一种逐步返回大模型生成结果的技术,允许服务器将响应内容分批次实时传输给客户端,而不是等待全部内容生成完毕后再一次性返回。这种机制能显著提升用户体验,尤其适用于大模型响应较慢的场景(如生成长文本或复杂推理结果)。
低阶出处https://docs.langchain4j.dev/tutorials/response-streaming高阶出处https://docs.langchain4j.dev/tutorials/ai-services#flux
(2)案例实现
1)创建模块
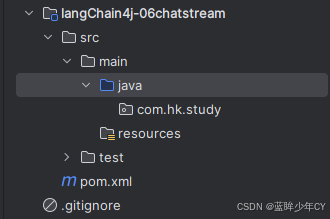
2)修改pom
<?xml version="1.0" encoding="UTF-8"?>
<project xmlns="http://maven.apache.org/POM/4.0.0"
         xmlns:xsi="http://www.w3.org/2001/XMLSchema-instance"
         xsi:schemaLocation="http://maven.apache.org/POM/4.0.0 http://maven.apache.org/xsd/maven-4.0.0.xsd">
    <modelVersion>4.0.0</modelVersion>
    <parent>
        <groupId>com.hk</groupId>
        <artifactId>langcChain4J-study</artifactId>
        <version>1.0-SNAPSHOT</version>
    </parent>

    <artifactId>langChain4j-06chatstream</artifactId>

    <properties>
        <maven.compiler.source>21</maven.compiler.source>
        <maven.compiler.target>21</maven.compiler.target>
        <project.build.sourceEncoding>UTF-8</project.build.sourceEncoding>
    </properties>

    <dependencies>
        <dependency>
            <groupId>org.springframework.boot</groupId>
            <artifactId>spring-boot-starter-web</artifactId>
        </dependency>
        <!--langchain4j-open-ai + langchain4j + langchain4j-reactor-->
        <dependency>
            <groupId>dev.langchain4j</groupId>
            <artifactId>langchain4j-open-ai</artifactId>
        </dependency>
        <dependency>
            <groupId>dev.langchain4j</groupId>
            <artifactId>langchain4j</artifactId>
        </dependency>
        <dependency>
            <groupId>dev.langchain4j</groupId>
            <artifactId>langchain4j-reactor</artifactId>
        </dependency>
        <!--lombok-->
        <dependency>
            <groupId>org.projectlombok</groupId>
            <artifactId>lombok</artifactId>
            <optional>true</optional>
        </dependency>
        <!--hutool-->
        <dependency>
            <groupId>cn.hutool</groupId>
            <artifactId>hutool-all</artifactId>
            <version>5.8.22</version>
        </dependency>
        <dependency>
            <groupId>org.springframework.boot</groupId>
            <artifactId>spring-boot-starter-test</artifactId>
            <scope>test</scope>
        </dependency>
    </dependencies>

    <build>
        <plugins>
            <plugin>
                <groupId>org.springframework.boot</groupId>
                <artifactId>spring-boot-maven-plugin</artifactId>
            </plugin>
        </plugins>
    </build>

</project>
3)添加配置文件
server.port=8006

spring.application.name=langchain4j-06chat-stream

# 设置响应的字符编码,避免流式返回输出乱码
server.servlet.encoding.charset=utf-8
server.servlet.encoding.enabled=true
server.servlet.encoding.force=true
4)自定义接口
public interface ChatAssistant {

    Flux<String> chat(String prompt);
}
5)编写配置类
@Configuration
public class LLMConfig {

    @Bean
    public StreamingChatModel streamingChatModel() {
        return OpenAiStreamingChatModel.builder()
                .apiKey(System.getenv("aliQwen-api"))
                .modelName("qwen-plus")
                .baseUrl("https://dashscope.aliyuncs.com/compatible-mode/v1")
                .build();
    }

    @Bean
    public ChatAssistant chatAssistant(StreamingChatModel streamingChatModel){
        return AiServices.create(ChatAssistant.class, streamingChatModel);
    }
}
6)编写业务类
@RestController
public class StreamingChatModelController {

    @Resource
    private StreamingChatModel streamingChatModel;

    @Resource
    private ChatAssistant chatAssistant;

    // 方式一:使用 Flux.create 手动创建 Flux
    @GetMapping("/chat1")
    public Flux<String> chat1(String msg) {
        return Flux.create(fluxSink -> {
            streamingChatModel.chat(msg, new StreamingChatResponseHandler() {

                @Override
                public void onPartialResponse(String s) {
                    System.out.println(s);
                    fluxSink.next(s);
                }

                @Override
                public void onCompleteResponse(ChatResponse chatResponse) {
                    System.out.println("---response over: "+chatResponse);
                    fluxSink.complete();
                }

                @Override
                public void onError(Throwable throwable) {
                    fluxSink.error(throwable);
                }
            });
        });
    }

    // 方式二
    @GetMapping("/chat2")
    public Flux<String> chat2(String msg) {
        return chatAssistant.chat(msg);
    }
}
7)测试
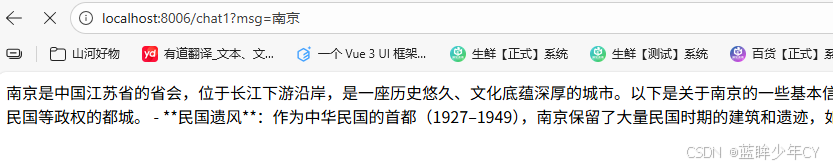
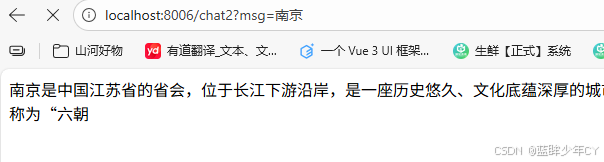
8、记忆存储
(1)介绍
记忆缓存是聊天系统中的一个重要组件,用于存储和管理对话的上下文信息。它的主要作用是让AI助手能够"记住"之前的对话内容,从而提供连贯和个性化的回复
官网地址https://docs.langchain4j.dev/tutorials/chat-memoryLangChain4j 提供两种开箱即用实现:
- 滑动窗口:只保留最新的N条消息 MessageWindowChatMemory
- 限制Token数量:它同样作为滑动窗口,保留最新的令牌TokenWindowChatMemory,需要结合TokenCountEstimator来计算Token的数量
(2)案例实现
1)新建模块
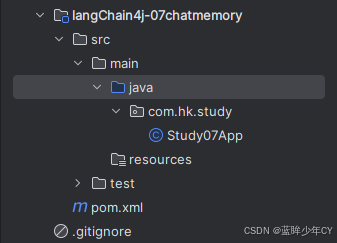
2)修改pom文件
<?xml version="1.0" encoding="UTF-8"?>
<project xmlns="http://maven.apache.org/POM/4.0.0"
         xmlns:xsi="http://www.w3.org/2001/XMLSchema-instance"
         xsi:schemaLocation="http://maven.apache.org/POM/4.0.0 http://maven.apache.org/xsd/maven-4.0.0.xsd">
    <modelVersion>4.0.0</modelVersion>
    <parent>
        <groupId>com.hk</groupId>
        <artifactId>langcChain4J-study</artifactId>
        <version>1.0-SNAPSHOT</version>
    </parent>

    <artifactId>langChain4j-07chatmemory</artifactId>

    <properties>
        <maven.compiler.source>21</maven.compiler.source>
        <maven.compiler.target>21</maven.compiler.target>
        <project.build.sourceEncoding>UTF-8</project.build.sourceEncoding>
    </properties>

    <dependencies>
        <dependency>
            <groupId>org.springframework.boot</groupId>
            <artifactId>spring-boot-starter-web</artifactId>
        </dependency>
        <!--langchain4j-open-ai + langchain4j + langchain4j-reactor-->
        <dependency>
            <groupId>dev.langchain4j</groupId>
            <artifactId>langchain4j-open-ai</artifactId>
        </dependency>
        <dependency>
            <groupId>dev.langchain4j</groupId>
            <artifactId>langchain4j</artifactId>
        </dependency>
        <dependency>
            <groupId>dev.langchain4j</groupId>
            <artifactId>langchain4j-reactor</artifactId>
        </dependency>
        <!--lombok-->
        <dependency>
            <groupId>org.projectlombok</groupId>
            <artifactId>lombok</artifactId>
            <optional>true</optional>
        </dependency>
        <!--hutool-->
        <dependency>
            <groupId>cn.hutool</groupId>
            <artifactId>hutool-all</artifactId>
            <version>5.8.22</version>
        </dependency>
        <dependency>
            <groupId>org.springframework.boot</groupId>
            <artifactId>spring-boot-starter-test</artifactId>
            <scope>test</scope>
        </dependency>
    </dependencies>

    <build>
        <plugins>
            <plugin>
                <groupId>org.springframework.boot</groupId>
                <artifactId>spring-boot-maven-plugin</artifactId>
            </plugin>
        </plugins>
    </build>
</project>
3)添加配置文件
server.port=8007

spring.application.name=langchain4j-07chat-memory

# 设置响应的字符编码
server.servlet.encoding.charset=utf-8
server.servlet.encoding.enabled=true
server.servlet.encoding.force=true
4)自定义接口
public interface ChatMemoryAssistant {
    /**
     * 聊天带记忆缓存功能
     *
     * @param userId  用户 ID
     * @param prompt 消息
     * @return String
     */
    String chatWithChatMemory(@MemoryId Long userId, @UserMessage String prompt);
}
5)编写配置类
@Configuration
public class LLMConfig {

    @Bean
    public ChatModel chatModel() {
        return OpenAiChatModel.builder()
                .apiKey(System.getenv("aliQwen-api"))
                .modelName("qwen-long")
                .baseUrl("https://dashscope.aliyuncs.com/compatible-mode/v1")
                .build();
    }

    @Bean("chatMessageWindowChatMemory")
    public ChatMemoryAssistant chatMessageWindowChatMemory(ChatModel chatModel) {
        return AiServices.builder(ChatMemoryAssistant.class)
                .chatModel(chatModel)
                // 每个memoryId对应创建一个ChatMemory
                .chatMemoryProvider(memoryId -> MessageWindowChatMemory.withMaxMessages(20))
                .build();
    }

    @Bean
    public ChatMemoryAssistant chatTokenWindowChatMemory(ChatModel chatModel) {
        // TokenCountEstimator默认的token分词器,需要结合Tokenizer计算ChatMessage的token数量
        OpenAiTokenCountEstimator openAiTokenCountEstimator = new OpenAiTokenCountEstimator("gpt-4");
        return AiServices.builder(ChatMemoryAssistant.class)
                .chatModel(chatModel)
                // 每个memoryId对应创建一个ChatMemory
                .chatMemoryProvider(memoryId -> TokenWindowChatMemory.withMaxTokens(100, openAiTokenCountEstimator))
                .build();
    }
}
6)编写业务类
@RestController
public class ChatMemoryController {

    @Resource(name = "chatMessageWindowChatMemory")
    private ChatMemoryAssistant chatMessageWindowChatMemory;

    @Resource(name = "chatTokenWindowChatMemory")
    private ChatMemoryAssistant chatTokenWindowChatMemory;

    // MessageWindowChatMemory实现聊天功能
    @GetMapping("/chatv1")
    public void chatv1() {
        chatMessageWindowChatMemory.chatWithChatMemory(1L, "你好!我的名字是Java.");
        String answer01 = chatMessageWindowChatMemory.chatWithChatMemory(1L, "我的名字是什么");
        System.out.println("answer01返回结果:"+answer01);

        chatMessageWindowChatMemory.chatWithChatMemory(3L, "你好!我的名字是C++");
        String answer02 = chatMessageWindowChatMemory.chatWithChatMemory(3L, "我的名字是什么");
        System.out.println("answer02返回结果:"+answer02);
    }

    // TokenWindowChatMemory实现聊天功能
    @GetMapping("/chatv2")
    public void chatv2() {
        chatTokenWindowChatMemory.chatWithChatMemory(1L, "你好!我的名字是Java.");
        String answer01 = chatTokenWindowChatMemory.chatWithChatMemory(1L, "我的名字是什么");
        System.out.println("answer01返回结果:"+answer01);

        chatTokenWindowChatMemory.chatWithChatMemory(3L, "你好!我的名字是C++");
        String answer02 = chatTokenWindowChatMemory.chatWithChatMemory(3L, "我的名字是什么");
        System.out.println("answer02返回结果:"+answer02);
    }
}
7)测试
GET http://localhost:8007/chatv1


9、提示词工程
(1)出处
官网地址https://docs.langchain4j.dev/tutorials/chat-and-language-models
五种类型的聊天的消息:
- SystemMessage:系统消息,通常,作为开发人员,你应该定义这条消息的内容。通常,你会在这里写关于LLM在这次对话中的角色、应该如何表现、以什么风格回答等指令。
- UserMessage:用户消息;这是用户发来的信息。 用户可以是你应用的最终用户(人类)或你的应用本身
- AiMessage:由AI生成的消息;
- ToolExecutionResultMessage:模型结合工具
CustomMessage: 这是一个可以包含任意属性的自定义消息。这种消息类型只能被支持它的实现使用(目前仅支持 Ollama)。
(2)案例实现
1)基础工程搭建
- 创建模块
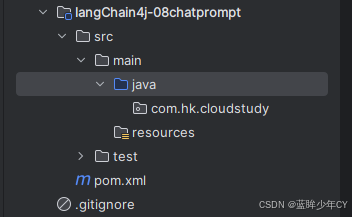
- 修改pom文件
<?xml version="1.0" encoding="UTF-8"?>
<project xmlns="http://maven.apache.org/POM/4.0.0"
         xmlns:xsi="http://www.w3.org/2001/XMLSchema-instance"
         xsi:schemaLocation="http://maven.apache.org/POM/4.0.0 http://maven.apache.org/xsd/maven-4.0.0.xsd">
    <modelVersion>4.0.0</modelVersion>
    <parent>
        <groupId>com.hk</groupId>
        <artifactId>langcChain4J-study</artifactId>
        <version>1.0-SNAPSHOT</version>
    </parent>

    <artifactId>langChain4j-08chatprompt</artifactId>

    <properties>
        <maven.compiler.source>21</maven.compiler.source>
        <maven.compiler.target>21</maven.compiler.target>
        <project.build.sourceEncoding>UTF-8</project.build.sourceEncoding>
    </properties>

    <dependencies>
        <dependency>
            <groupId>org.springframework.boot</groupId>
            <artifactId>spring-boot-starter-web</artifactId>
        </dependency>
        <!--langchain4j-open-ai + langchain4j + langchain4j-reactor-->
        <dependency>
            <groupId>dev.langchain4j</groupId>
            <artifactId>langchain4j-open-ai</artifactId>
        </dependency>
        <dependency>
            <groupId>dev.langchain4j</groupId>
            <artifactId>langchain4j</artifactId>
        </dependency>
        <dependency>
            <groupId>dev.langchain4j</groupId>
            <artifactId>langchain4j-reactor</artifactId>
        </dependency>
        <!--lombok-->
        <dependency>
            <groupId>org.projectlombok</groupId>
            <artifactId>lombok</artifactId>
            <optional>true</optional>
        </dependency>
        <!--hutool-->
        <dependency>
            <groupId>cn.hutool</groupId>
            <artifactId>hutool-all</artifactId>
            <version>5.8.22</version>
        </dependency>
        <dependency>
            <groupId>org.springframework.boot</groupId>
            <artifactId>spring-boot-starter-test</artifactId>
            <scope>test</scope>
        </dependency>
    </dependencies>

    <build>
        <plugins>
            <plugin>
                <groupId>org.springframework.boot</groupId>
                <artifactId>spring-boot-maven-plugin</artifactId>
            </plugin>
        </plugins>
    </build>
</project>- 添加配置文件
server.port=8008

spring.application.name=langchain4j-08chat-prompt

# 设置响应的字符编码
server.servlet.encoding.charset=utf-8
server.servlet.encoding.enabled=true
server.servlet.encoding.force=true
2)方式一
@SystemMessage + @UserMessage + @V
- 编写自定义接口
public interface LawAssistant {

    @SystemMessage("你是一位专业的中国法律顾问,只回答与中国法律相关的问题。" +
            "输出限制:对于其他领域的问题禁止回答,直接返回'抱歉,我只能回答中国法律相关的问题。'")
    @UserMessage("请回答以下法律问题:{{question}},字数控制在{{length}}以内")
    String chat(@V("question") String question, @V("length") int length);
}- 添加配置类
@Configuration
public class LLMConfig {

    @Bean
    public ChatModel chatModel() {
        return OpenAiChatModel.builder()
                .apiKey(System.getenv("aliQwen-api"))
                .modelName("qwen-long")
                .baseUrl("https://dashscope.aliyuncs.com/compatible-mode/v1")
                .build();
    }

    @Bean
    public LawAssistant lawAssistant(ChatModel chatModel) {
        return AiServices.create(LawAssistant.class, chatModel);
    }
}- 编写业务类
@RestController
public class ChatPromptController {

    @Resource
    private LawAssistant lawAssistant;

    @GetMapping(value = "/chatprompt/test1")
    public void test1() {
        String chat = lawAssistant.chat("什么是知识产权?",2000);
        System.out.println(chat);

        System.out.println("========================================================");
        String chat2 = lawAssistant.chat("什么是java?",2000);
        System.out.println(chat2);

        System.out.println("========================================================");
        String chat3 = lawAssistant.chat("介绍下西瓜和芒果",2000);
        System.out.println(chat3);

        System.out.println("========================================================");
        String chat4 = lawAssistant.chat("飞机发动机原理",2000);
        System.out.println(chat4);

    }
}

3)方式二
使用@structuredPrompt业务实体类
- 新建业务实体类
@Data
@StructuredPrompt("根据中国{{legal}}法律,解答以下问题:{{question}}")
public class LawPrompt {
    private String legal;
    private String question;
}
- 修改自定义接口
public interface LawAssistant {

    @SystemMessage("你是一位专业的中国法律顾问,只回答与中国法律相关的问题。" +
            "输出限制:对于其他领域的问题禁止回答,直接返回'抱歉,我只能回答中国法律相关的问题。'")
    @UserMessage("请回答以下法律问题:{{question}},字数控制在{{length}}以内")
    String chat(@V("question") String question, @V("length") int length);

    @SystemMessage("你是一位专业的中国法律顾问,只回答与中国法律相关的问题。" +
            "输出限制:对于其他领域的问题禁止回答,直接返回'抱歉,我只能回答中国法律相关的问题。'")
    String chat(LawPrompt lawPrompt);
}- 修改业务类测试
@RestController
public class ChatPromptController {

    @Resource
    private LawAssistant lawAssistant;

    ......

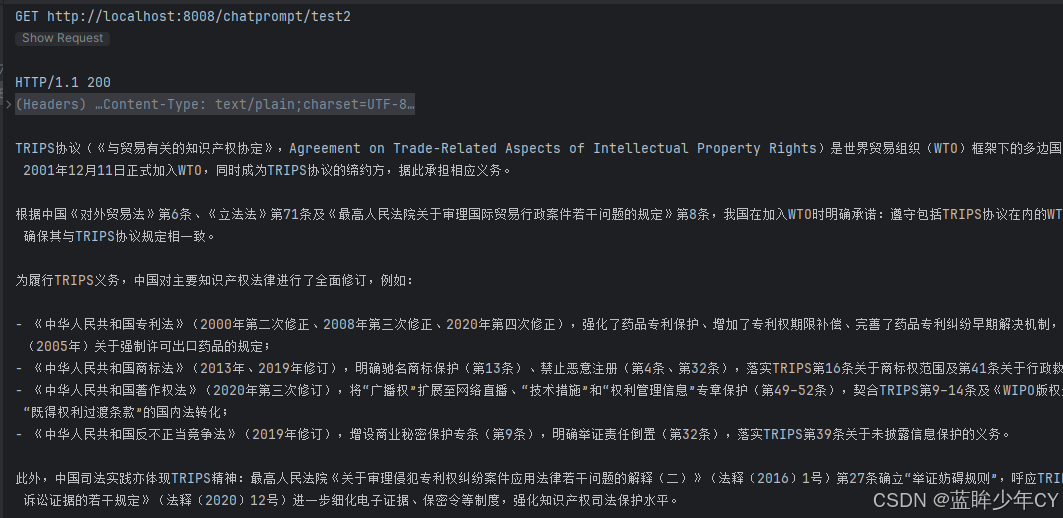
    @GetMapping(value = "/chatprompt/test2")
    public String test2() {
        LawPrompt prompt = new LawPrompt();

        prompt.setLegal("知识产权");
        prompt.setQuestion("TRIPS协议?");

        String chat = lawAssistant.chat(prompt);
        System.out.println(chat);
        return chat;
    }
}
4)方式三
在LangChain4j中有两个对象PromptTemplate以及Prompt用来实现提示词相关功能
单个参数可以使用{it}"占位符或者"{{参数名}",如果为其他字符,系统不能自动识别会报错。
- 修改业务类测试
    @Resource
    private ChatModel chatModel;

    @GetMapping(value = "/chatprompt/test3")
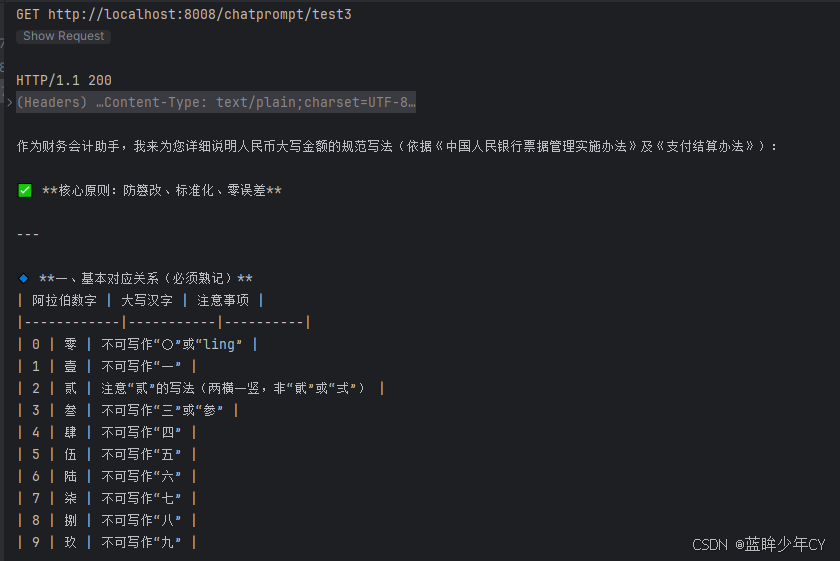
    public String test3(){
        // 默认 PromptTemplate 构造使用 it 属性作为默认占位符
        String role = "财务会计";
        String question = "人民币大写";

        //1 构造PromptTemplate模板
        PromptTemplate template = PromptTemplate.from("你是一个{{it}}助手,{{question}}怎么办");
        //2 由PromptTemplate生成Prompt
        Prompt prompt = template.apply(Map.of("it",role,"question",question));
        //3 Prompt提示词变成UserMessage
        UserMessage userMessage = prompt.toUserMessage();
        //4 调用大模型
        ChatResponse chatResponse = chatModel.chat(userMessage);
        //4.1 后台打印
        System.out.println(chatResponse.aiMessage().text());
        //4.2 前台返回
        return chatResponse.aiMessage().text();
    }
10、持久化
(1)介绍
将用户和大模型的对话进行持久化存储
官网出处https://docs.langchain4j.dev/tutorials/chat-memory#persistence
(2)案例实现
1)创建工程
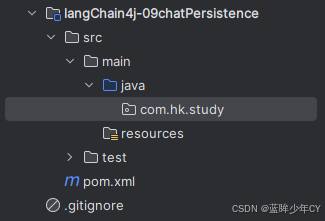
2)修改pom文件
<?xml version="1.0" encoding="UTF-8"?>
<project xmlns="http://maven.apache.org/POM/4.0.0"
         xmlns:xsi="http://www.w3.org/2001/XMLSchema-instance"
         xsi:schemaLocation="http://maven.apache.org/POM/4.0.0 http://maven.apache.org/xsd/maven-4.0.0.xsd">
    <modelVersion>4.0.0</modelVersion>
    <parent>
        <groupId>com.hk</groupId>
        <artifactId>langcChain4J-study</artifactId>
        <version>1.0-SNAPSHOT</version>
    </parent>

    <artifactId>langChain4j-09chatPersistence</artifactId>

    <properties>
        <maven.compiler.source>21</maven.compiler.source>
        <maven.compiler.target>21</maven.compiler.target>
        <project.build.sourceEncoding>UTF-8</project.build.sourceEncoding>
    </properties>

    <dependencies>
        <dependency>
            <groupId>org.springframework.boot</groupId>
            <artifactId>spring-boot-starter-web</artifactId>
        </dependency>
        <!--langchain4j-open-ai + langchain4j + langchain4j-reactor-->
        <dependency>
            <groupId>dev.langchain4j</groupId>
            <artifactId>langchain4j-open-ai</artifactId>
        </dependency>
        <dependency>
            <groupId>dev.langchain4j</groupId>
            <artifactId>langchain4j</artifactId>
        </dependency>
        <dependency>
            <groupId>dev.langchain4j</groupId>
            <artifactId>langchain4j-reactor</artifactId>
        </dependency>
        <!--spring-boot-starter-data-redis
            https://docs.langchain4j.dev/tutorials/chat-memory#persistence
        -->
        <dependency>
            <groupId>org.springframework.boot</groupId>
            <artifactId>spring-boot-starter-data-redis</artifactId>
        </dependency>
        <!--lombok-->
        <dependency>
            <groupId>org.projectlombok</groupId>
            <artifactId>lombok</artifactId>
            <optional>true</optional>
        </dependency>
        <!--hutool-->
        <dependency>
            <groupId>cn.hutool</groupId>
            <artifactId>hutool-all</artifactId>
            <version>5.8.22</version>
        </dependency>
        <dependency>
            <groupId>org.springframework.boot</groupId>
            <artifactId>spring-boot-starter-test</artifactId>
            <scope>test</scope>
        </dependency>
    </dependencies>

    <build>
        <plugins>
            <plugin>
                <groupId>org.springframework.boot</groupId>
                <artifactId>spring-boot-maven-plugin</artifactId>
            </plugin>
        </plugins>
    </build>

</project>
3)添加配置文件
server.port=8009

spring.application.name=langchain4j-09chat-persistence

# 设置响应的字符编码
server.servlet.encoding.charset=utf-8
server.servlet.encoding.enabled=true
server.servlet.encoding.force=true


# ==========config redis===============
spring.data.redis.host=localhost
spring.data.redis.port=6379
spring.data.redis.password=12345
spring.data.redis.database=0
spring.data.redis.connect-timeout=3s
spring.data.redis.timeout=2s
4)自定义接口
public interface ChatPersistenceAssistant {

    String chat(@MemoryId Long userId, @UserMessage String message);
}
5)redis配置类
@Configuration
public class RedisConfig {

    @Bean
    public RedisTemplate<String, Object> redisTemplate(RedisConnectionFactory redisConnectionFactory) {
        RedisTemplate<String, Object> template = new RedisTemplate<>();
        template.setConnectionFactory(redisConnectionFactory);

        //设置key序列化方式string
        template.setKeySerializer(new StringRedisSerializer());
        //设置value序列化方式json
        template.setDefaultSerializer(new GenericJackson2JsonRedisSerializer());

        template.setHashKeySerializer(new StringRedisSerializer());
        template.setHashValueSerializer(new GenericJackson2JsonRedisSerializer());

        template.setEnableTransactionSupport(true);
        template.afterPropertiesSet();
        return template;
    }
}
6)实现ChatMemoryStore
@Component
public class RedisChatMemoryStore implements ChatMemoryStore {

    private static final String CHAT_MEMORY_KEY_PREFIX = "chat_memory:";

    @Resource
    private RedisTemplate<String, String> redisTemplate;

    @Override
    public List<ChatMessage> getMessages(Object memoryId) {
        String messages = redisTemplate.opsForValue().get(CHAT_MEMORY_KEY_PREFIX + memoryId);
        return ChatMessageDeserializer.messagesFromJson(messages);
    }

    @Override
    public void updateMessages(Object memoryId, List<ChatMessage> list) {
        redisTemplate.opsForValue().set(CHAT_MEMORY_KEY_PREFIX + memoryId, ChatMessageSerializer.messagesToJson(list));
    }

    @Override
    public void deleteMessages(Object memoryId) {
        redisTemplate.delete(CHAT_MEMORY_KEY_PREFIX + memoryId);
    }
}
7)模型配置类
@Configuration
public class LLMConfig {

    @Resource
    private RedisChatMemoryStore redisChatMemoryStore;

    @Bean
    public ChatModel chatModel() {
        return OpenAiChatModel.builder()
                .apiKey(System.getenv("aliQwen-api"))
                .modelName("qwen-plus")
                .baseUrl("https://dashscope.aliyuncs.com/compatible-mode/v1")
                .build();
    }

    @Bean
    public ChatPersistenceAssistant chatPersistenceAssistant(ChatModel chatModel) {

        ChatMemoryProvider chatMemoryProvider = memoryId -> MessageWindowChatMemory.builder()
                .id(memoryId)
                .maxMessages(10)
                .chatMemoryStore(redisChatMemoryStore)
                .build();

        return AiServices.builder(ChatPersistenceAssistant.class)
                .chatModel(chatModel)
                .chatMemoryProvider(chatMemoryProvider)
                .build();
    }
}
8)业务类
@RestController
public class ChatPersistenceController {

    @Resource
    private ChatPersistenceAssistant chatPersistenceAssistant;

    @GetMapping("/chat")
    public void chat() {
        chatPersistenceAssistant.chat(1L, "你好!我的名字是redis");
        chatPersistenceAssistant.chat(2L, "你好!我的名字是nacos");

        String chat = chatPersistenceAssistant.chat(1L, "我的名字是什么");
        System.out.println(chat);

        System.out.println("=====================================================");
        chat = chatPersistenceAssistant.chat(2L, "我的名字是什么");
        System.out.println(chat);
    }
}
9)测试
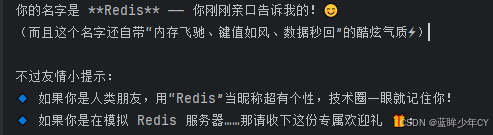
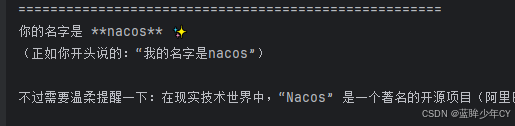
11、Tools工具
(1)说明
大模型对话可回答训练时间之前的问题,对当前时间的问题无法获取,需要给大模型配一个调用其它外部Uti工具类;大语言模型(LLMs)不仅仅是文本生成的能手,它们还能触发并调用第3方函数,比如查询微信/调用支付宝/查看顺丰快递单据号等等..,LLM本身并不执行函数,它只是指示应该调用哪个函数以及如何调用
官网文档https://docs.langchain4j.dev/tutorials/tools
(2)案例实现
1)基础搭建
- 创建工程
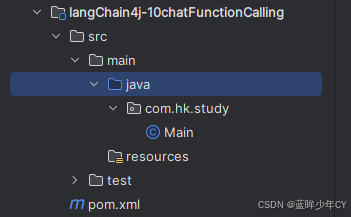
- 修改pom文件‘
<?xml version="1.0" encoding="UTF-8"?>
<project xmlns="http://maven.apache.org/POM/4.0.0"
         xmlns:xsi="http://www.w3.org/2001/XMLSchema-instance"
         xsi:schemaLocation="http://maven.apache.org/POM/4.0.0 http://maven.apache.org/xsd/maven-4.0.0.xsd">
    <modelVersion>4.0.0</modelVersion>
    <parent>
        <groupId>com.hk</groupId>
        <artifactId>langcChain4J-study</artifactId>
        <version>1.0-SNAPSHOT</version>
    </parent>

    <artifactId>langChain4j-10chatFunctionCalling</artifactId>

    <properties>
        <maven.compiler.source>21</maven.compiler.source>
        <maven.compiler.target>21</maven.compiler.target>
        <project.build.sourceEncoding>UTF-8</project.build.sourceEncoding>
    </properties>
    <dependencies>
        <dependency>
            <groupId>org.springframework.boot</groupId>
            <artifactId>spring-boot-starter-web</artifactId>
        </dependency>
        <!--langchain4j-open-ai-->
        <dependency>
            <groupId>dev.langchain4j</groupId>
            <artifactId>langchain4j-open-ai</artifactId>
        </dependency>
        <!--langchain4j-->
        <dependency>
            <groupId>dev.langchain4j</groupId>
            <artifactId>langchain4j</artifactId>
        </dependency>
        <!--langchain4j-reactor-->
        <dependency>
            <groupId>dev.langchain4j</groupId>
            <artifactId>langchain4j-reactor</artifactId>
        </dependency>
        <!--httpclient5-->
        <dependency>
            <groupId>org.apache.httpcomponents.client5</groupId>
            <artifactId>httpclient5</artifactId>
            <version>5.5</version>
        </dependency>
        <!--lombok-->
        <dependency>
            <groupId>org.projectlombok</groupId>
            <artifactId>lombok</artifactId>
            <optional>true</optional>
        </dependency>
        <!--hutool-->
        <dependency>
            <groupId>cn.hutool</groupId>
            <artifactId>hutool-all</artifactId>
            <version>5.8.22</version>
        </dependency>
        <dependency>
            <groupId>org.springframework.boot</groupId>
            <artifactId>spring-boot-starter-test</artifactId>
            <scope>test</scope>
        </dependency>
    </dependencies>

    <build>
        <plugins>
            <plugin>
                <groupId>org.springframework.boot</groupId>
                <artifactId>spring-boot-maven-plugin</artifactId>
            </plugin>
        </plugins>
    </build>
</project>- 添加配置文件
server.port=8010

spring.application.name=langchain4j-10chat-functioncalling
2)低阶Api实现
- 自定义功能接口
public interface FunctionAssistant {
    String chat(String message);
}- 核心配置类
@Configuration
public class LLMConfig {

    @Bean
    public ChatModel chatModel() {
        return OpenAiChatModel.builder()
                .apiKey(System.getenv("aliQwen-api"))
                .modelName("qwen-plus")
                .baseUrl("https://dashscope.aliyuncs.com/compatible-mode/v1")
                .build();
    }

    // 低阶工具Api
    @Bean
    public FunctionAssistant functionAssistant(ChatModel chatModel) {
        ToolSpecification toolSpecification = ToolSpecification.builder()
                .name("开局发票助手")
                .description("根据用户提交的开票信息,开具发票")
                .parameters(JsonObjectSchema.builder()
                        .addStringProperty("companyName", "公司名称")
                        .addStringProperty("dutyNumber", "税号序列")
                        .addStringProperty("amount", "开票金额,保留两位有效数字")
                        .build())
                .build();

        ToolExecutor toolExecutor = (toolExecutionRequest, memoryId) -> {
            System.out.println("toolExecutionRequest=====" + toolExecutionRequest.id());
            System.out.println("toolExecutionRequest=====" + toolExecutionRequest.name());
            String arguments = toolExecutionRequest.arguments();
            System.out.println("toolExecutionRequest=====" + arguments);

            return "发票已开具";
        };

        return AiServices.builder(FunctionAssistant.class)
                .chatModel(chatModel)
                .tools(Map.of(toolSpecification, toolExecutor))
                .build();
    }
}- 业务类
@RestController
public class ChatFunctionCallingController {

    @Resource
    private FunctionAssistant functionAssistant;

    @GetMapping("/chat")
    public void chat() {
        String msg = "开张发票,公司:尚硅谷教育科技有限公司 税号:zfdehtrhrt533 金额:668.12";
        String chat = functionAssistant.chat(msg);
        System.out.println("ok:" + chat);
    }
}- 测试
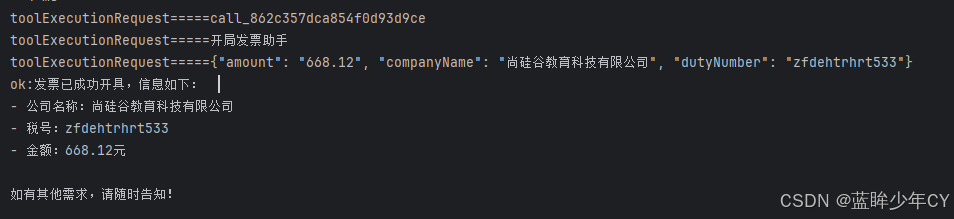
3)获取【和风天气】ApiKey
【和风天气】官网https://dev.qweather.com/
- 注册账号
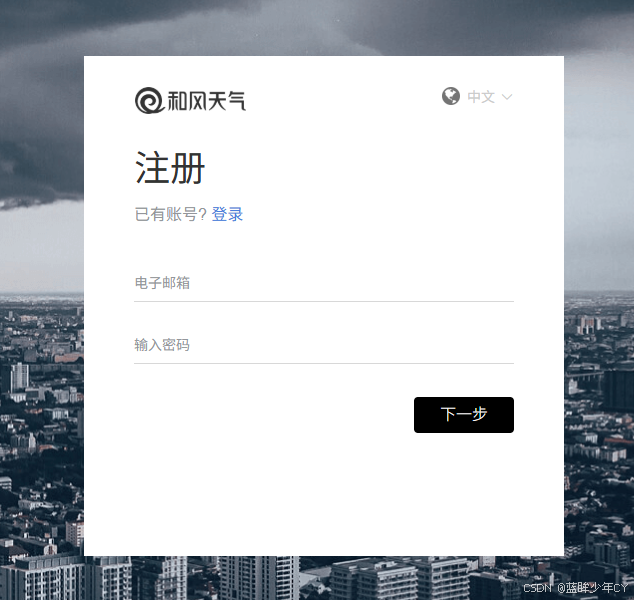
- 创建项目
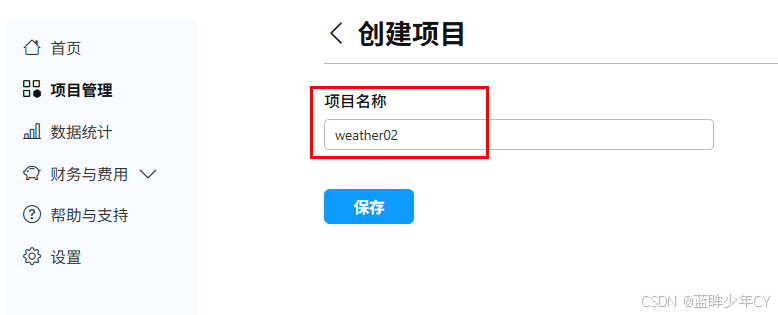
- 创建凭据
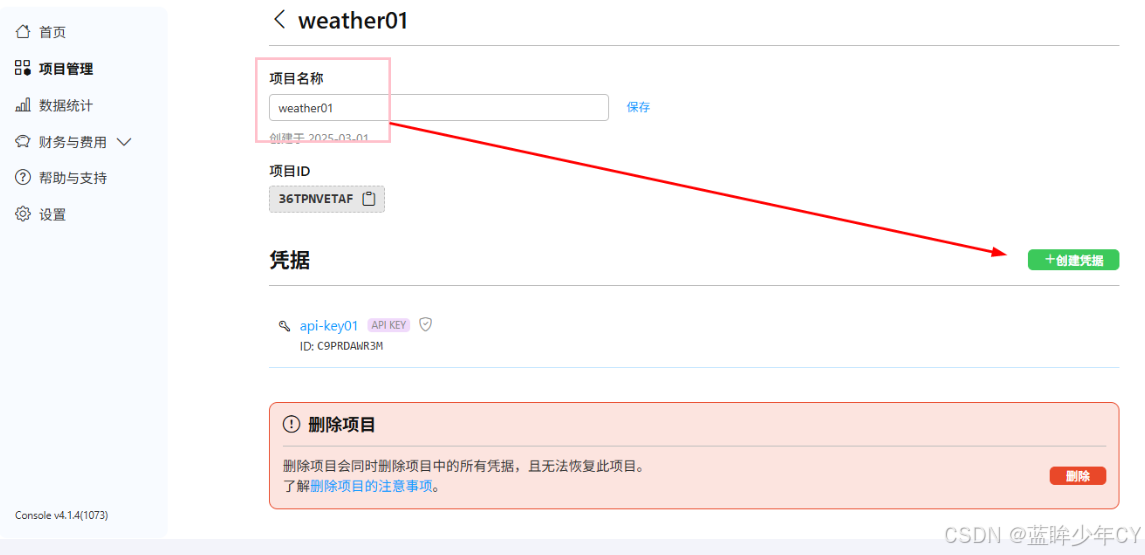
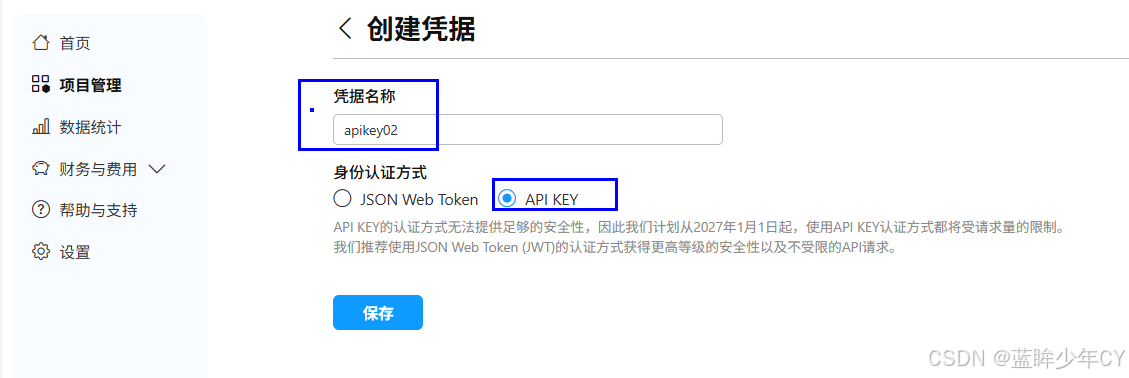
- api地址和参数说明
地址https://dev.qweather.com/docs/configuration/api-config/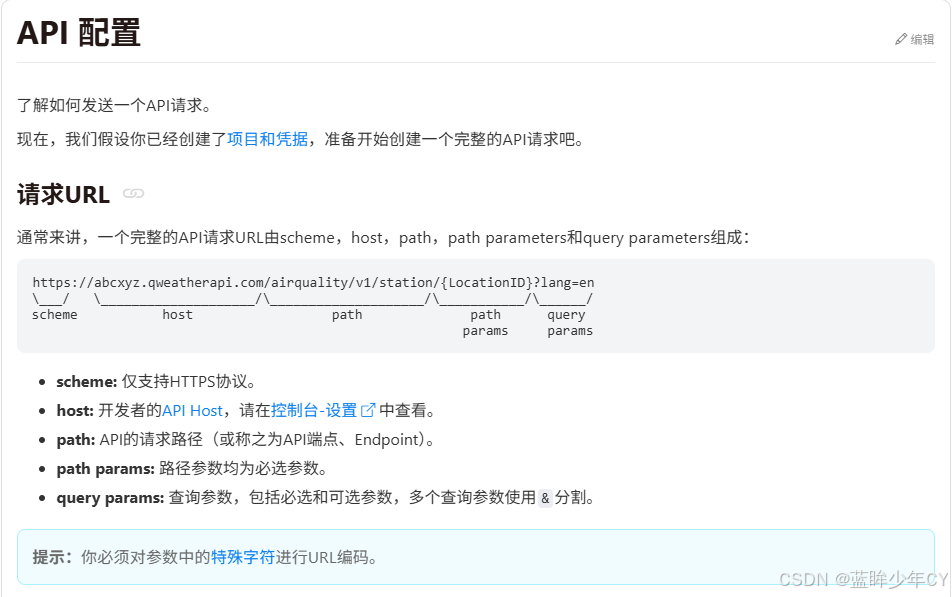
- 返回结果查看
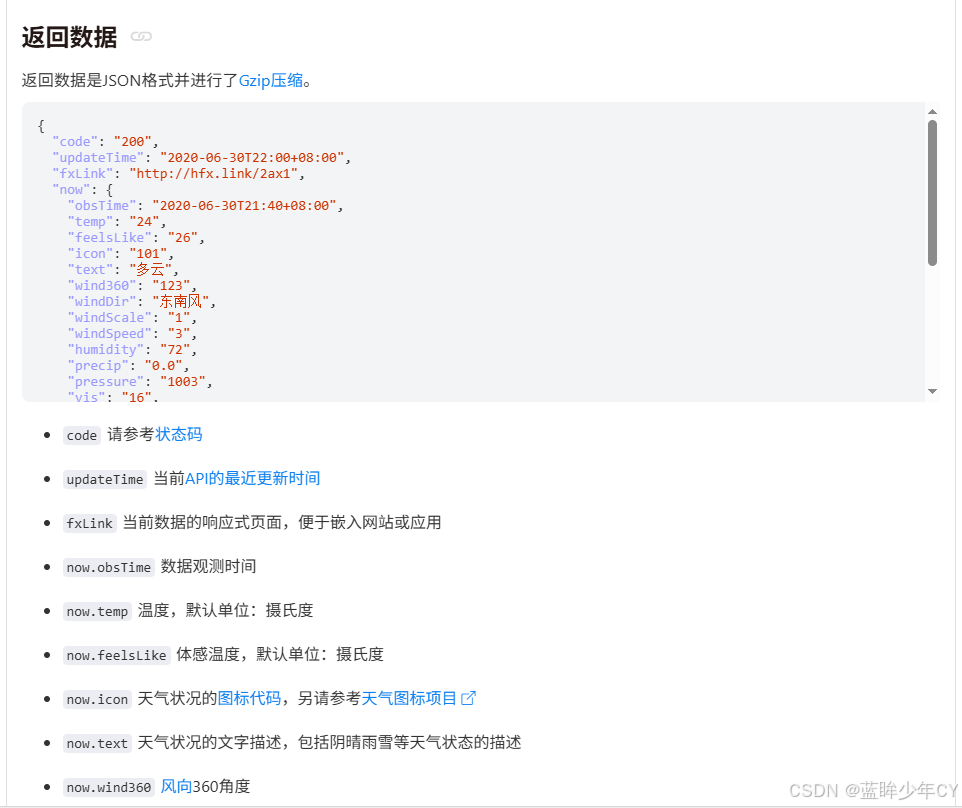
4)高阶Api实现
- 新建天气业务类
@Service
public class WeatherService {

    private static final String WEATHER_API_URL = "https://nXXXX.qweatherapi.com/v7/weather/now?location=%s&key=%s";

    public JsonNode getWeather(String location) throws JsonProcessingException {
        String url = String.format(WEATHER_API_URL, location, "XXXXXX");
        // 发送HTTP请求并解析响应
        CloseableHttpClient httpClient = HttpClients.createDefault();
        // 这里省略具体实现,假设使用RestTemplate发送GET请求并返回JsonNode
        HttpComponentsClientHttpRequestFactory requestFactory = new HttpComponentsClientHttpRequestFactory(httpClient);
        // 配置RestTemplate使用HttpComponentsClientHttpRequestFactory
        RestTemplate restTemplate = new RestTemplate(requestFactory);
        // 发送GET请求并获取响应
        String response = restTemplate.getForObject(url, String.class);
        // 解析响应体为JsonNode
        JsonNode jsonNode = new ObjectMapper().readTree(response);
        return jsonNode;
    }
}- 抽象层次调用
public class InvoiceHandler {

    @Tool("获取天气信息")
    public String handle(@P("天气状况") String text,  @P("风向") String windDir ) throws Exception {
        System.out.println("天气状况:" + text + "  风向: " + windDir);
        //----------------------------------
        // 自己的业务逻辑,调用redis/rabbitmq/kafka/mybatis/顺丰单据/医疗化验报告/支付接口等第3方
        //----------------------------------
        System.out.println(new WeatherService().getWeather("101010100"));
        return "获取成功";
    }
}- 修改配置类
@Configuration
public class LLMConfig {

    @Bean
    public ChatModel chatModel() {
        return OpenAiChatModel.builder()
                .apiKey(System.getenv("aliQwen-api"))
                .modelName("qwen-plus")
                .baseUrl("https://dashscope.aliyuncs.com/compatible-mode/v1")
                .build();
    }

    // 低阶工具Api
    @Bean("lowfunction")
    public FunctionAssistant functionAssistant(ChatModel chatModel) {
        ToolSpecification toolSpecification = ToolSpecification.builder()
                .name("开局发票助手")
                .description("根据用户提交的开票信息,开具发票")
                .parameters(JsonObjectSchema.builder()
                        .addStringProperty("companyName", "公司名称")
                        .addStringProperty("dutyNumber", "税号序列")
                        .addStringProperty("amount", "开票金额,保留两位有效数字")
                        .build())
                .build();

        ToolExecutor toolExecutor = (toolExecutionRequest, memoryId) -> {
            System.out.println("toolExecutionRequest=====" + toolExecutionRequest.id());
            System.out.println("toolExecutionRequest=====" + toolExecutionRequest.name());
            String arguments = toolExecutionRequest.arguments();
            System.out.println("toolExecutionRequest=====" + arguments);

            return "发票已开具";
        };

        return AiServices.builder(FunctionAssistant.class)
                .chatModel(chatModel)
                .tools(Map.of(toolSpecification, toolExecutor))
                .build();
    }

    // 高阶工具Api
    @Bean("highfunction")
    public FunctionAssistant highFunctionAssistant(ChatModel chatModel) {
        return AiServices.builder(FunctionAssistant.class)
                .chatModel(chatModel)
                .tools(new InvoiceHandler())
                .build();
    }
}- 修改业务类
@RestController
public class ChatFunctionCallingController {

//    @Resource(name = "lowfunction")
//    private FunctionAssistant functionAssistant;

    @Resource(name = "highfunction")
    private FunctionAssistant highFunctionAssistant;

//    @GetMapping("/chat")
//    public void chat() {
//        String msg = "开张发票,公司:尚硅谷教育科技有限公司 税号:zfdehtrhrt533 金额:668.12";
//        String chat = functionAssistant.chat(msg);
//        System.out.println("ok:" + chat);
//    }

    @GetMapping("/chat2")
    public void chat2() {
        String chat = highFunctionAssistant.chat("北京今天的天气");
        System.out.println("ok:" + chat);
    }
}- 测试

12、向量数据库
(1)介绍
1)概述
LangChain4J的向量数据库统一抽象为 EmbeddingStore,是 Java 开发 RAG 检索增强知识库、语义搜索的核心组件。所有向量数据库都实现 dev.langchain4j.store.embedding.EmbeddingStore 接口
2)核心用途
-
把文档、问答文本通过 Embedding 模型转为高维浮点向量
-
持久化向量 + 原文片段 + 元数据
-
快速语义相似度检索,匹配最相关知识库片段
-
解决大模型幻觉、私有文档问答、企业本地知识库 RAG
3) 特点
捕捉复杂的词汇关系(如语义相似性、同义词、多义词)
超越传统词袋模型的简单计数方式
动态嵌入模型(如BERT)可根据上下文生成不同的词向量
向量嵌入为现代搜索和检索增强生成(RAG)应用程序提供支持
4)流程
文档 → 分割器 → Embedding模型 → EmbeddingStore向量库
用户问题 → Embedding → Retriever检索 → Prompt模板 → ChatLLM → 回答
-
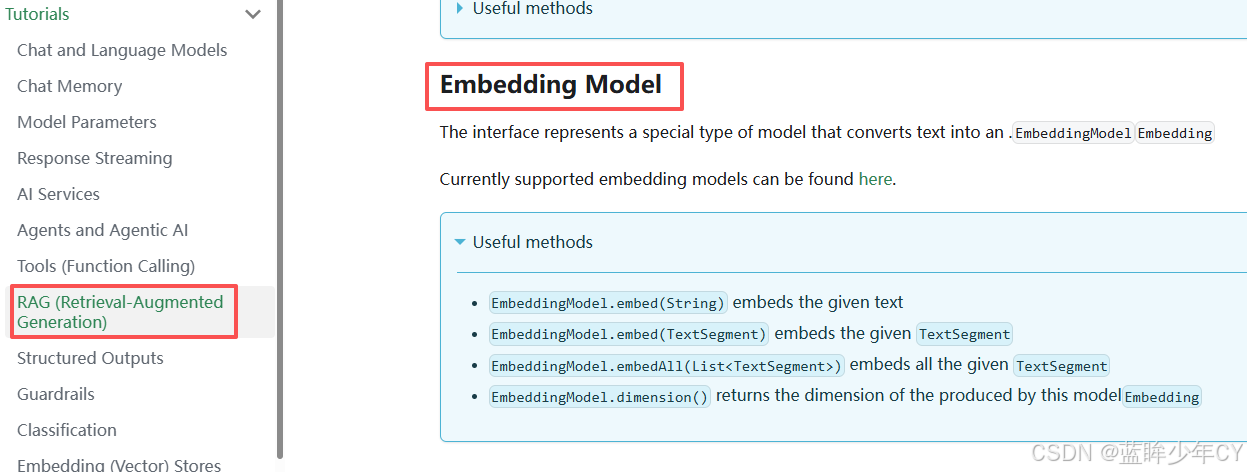
嵌入模型 EmbeddingModel
作用: 文本转向量; 输入文本 → 输出多维浮点向量
-
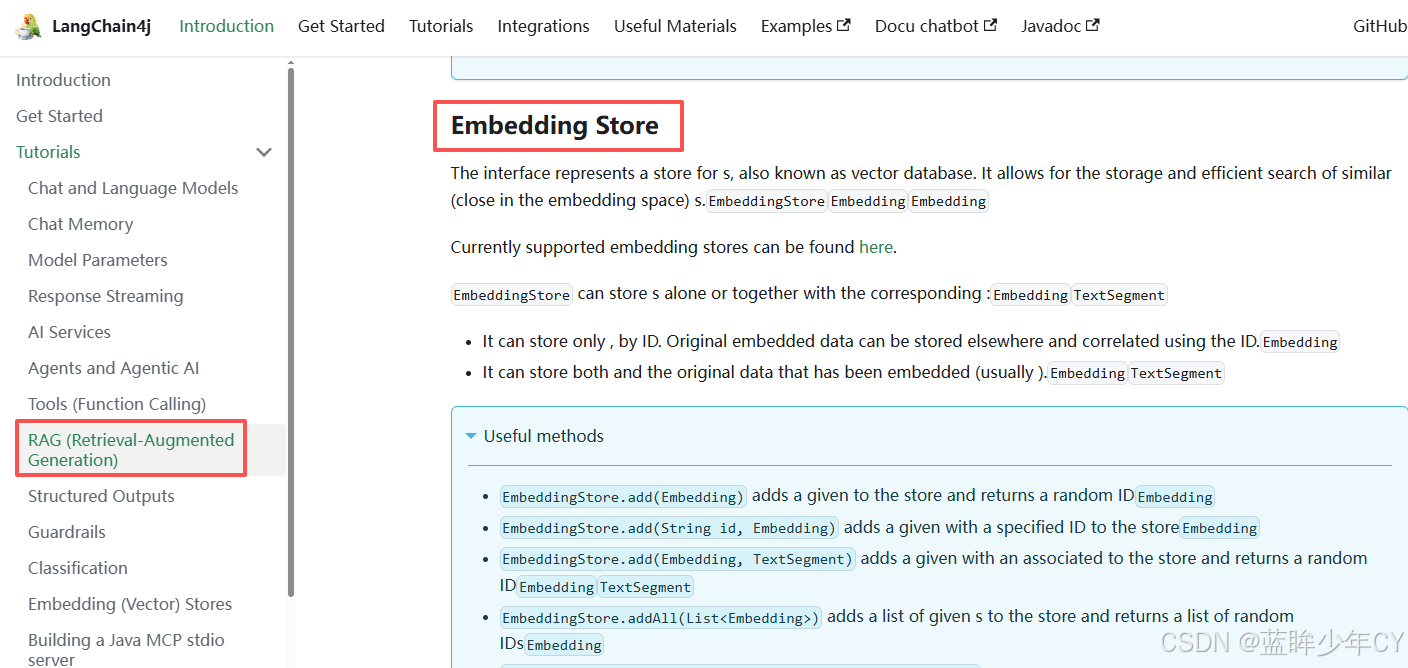
向量存储 EmbeddingStore
作用: 统一抽象接口,所有向量库都实现它; 存储=>向量 + 原文片段 + 元数据; 查询=>相似度语义检索
-
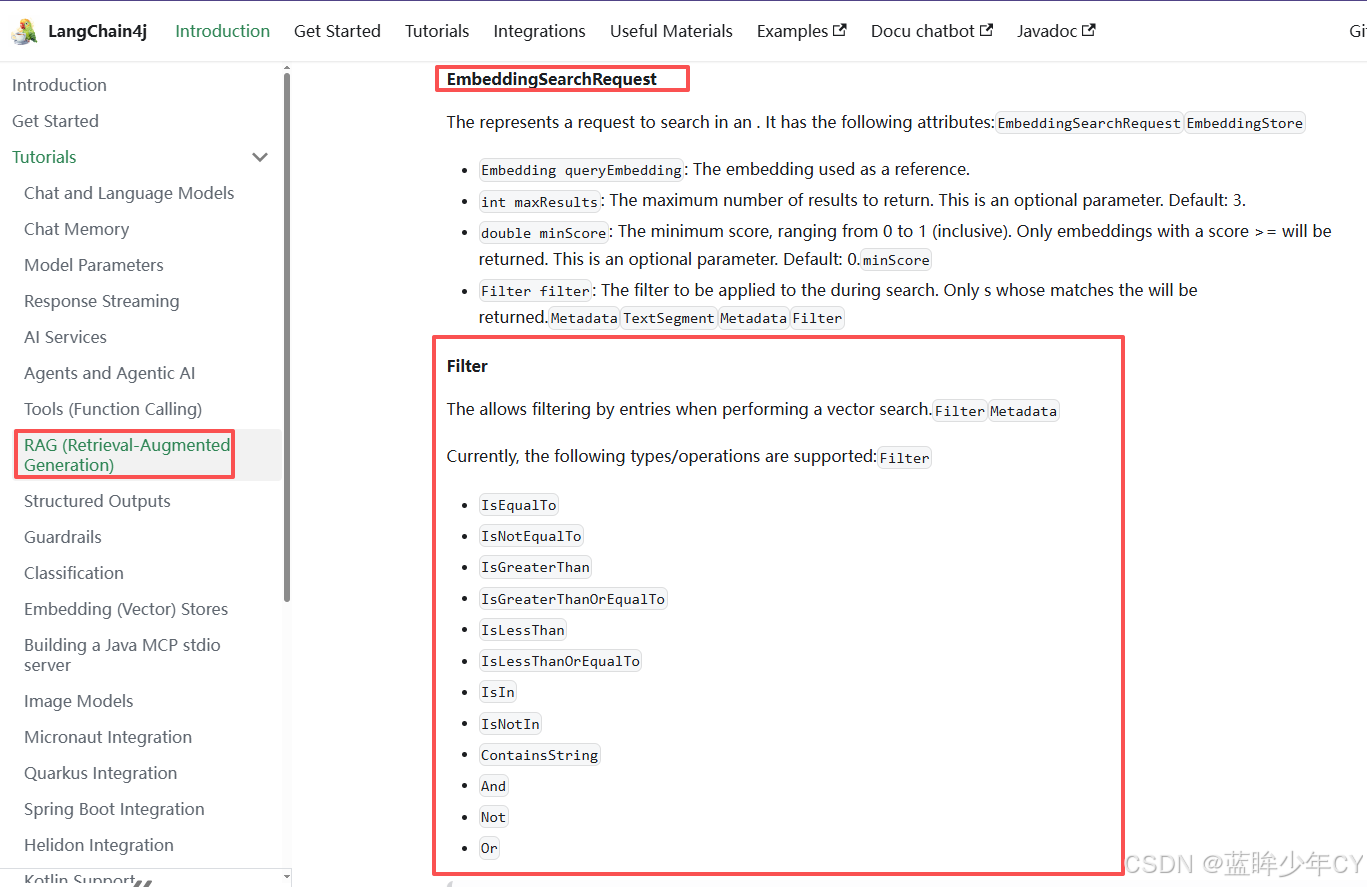
EmbeddingSearchRequest查询
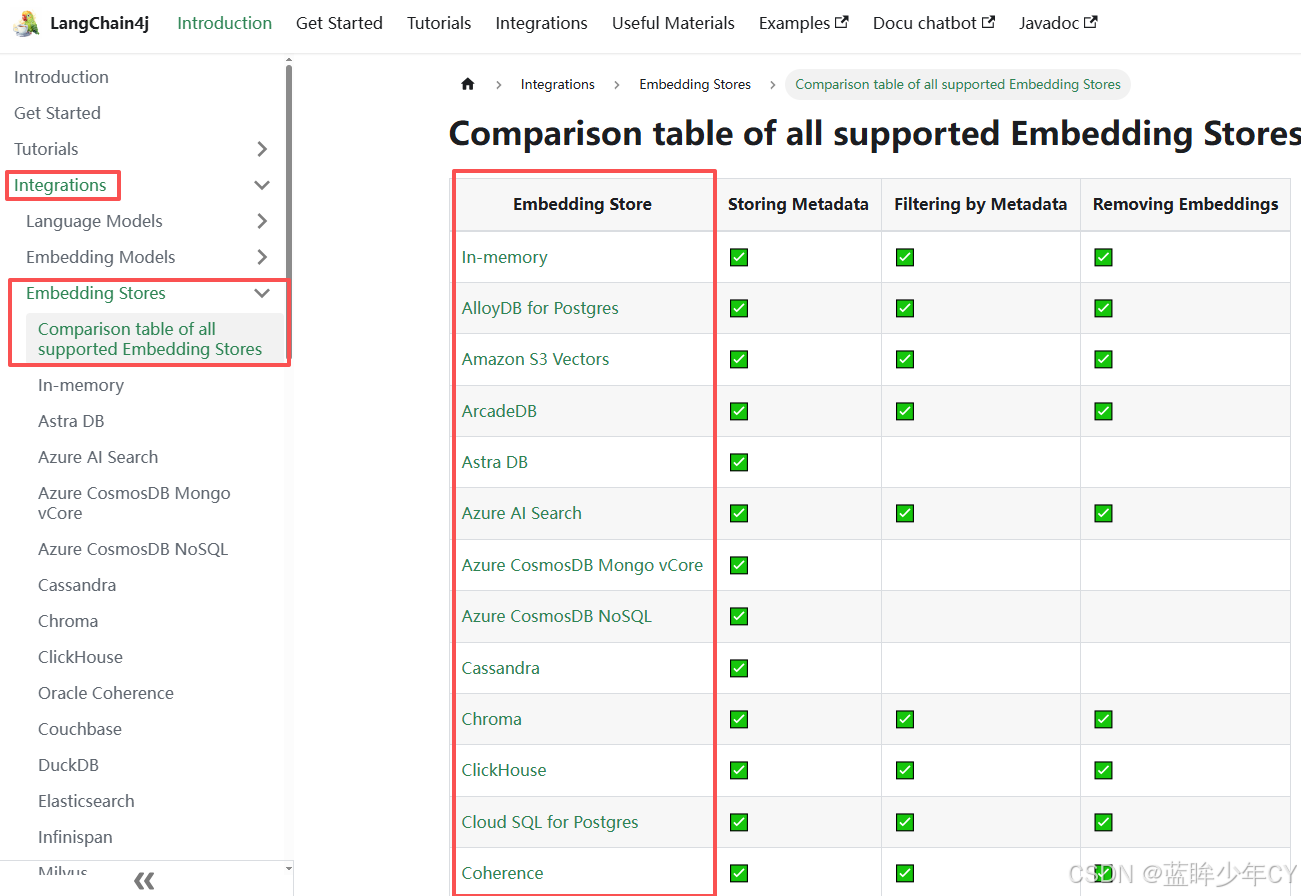
4) 支持的向量数据库
(2)案例实现
1)基础搭建
-
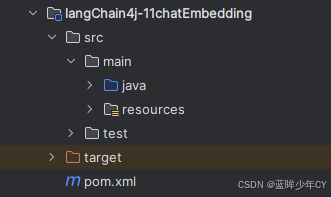
创建工程
-
修改pom文件
......
<dependencies>
<dependency>
<groupId>org.springframework.boot</groupId>
<artifactId>spring-boot-starter-web</artifactId>
</dependency>
<!--langchain4j-open-ai-->
<dependency>
<groupId>dev.langchain4j</groupId>
<artifactId>langchain4j-open-ai</artifactId>
</dependency>
<!--langchain4j-->
<dependency>
<groupId>dev.langchain4j</groupId>
<artifactId>langchain4j</artifactId>
</dependency>
<!--qdrant-->
<dependency>
<groupId>dev.langchain4j</groupId>
<artifactId>langchain4j-qdrant</artifactId>
</dependency>
<!--lombok-->
......
</dependencies>
......
</project>-
添加配置文件
server.port=8010
spring.application.name=langChain4j-11chatEmbedding-
安装qdrant向量数据库
Qdrant是一个高性能的向量数据库,用于存储嵌入并进行快速的向量搜索
1.使用docker安装
docker run -d -p 6333:6333 -p 6334:6334 --name qdrant qdrant/qdrant
6333端口:用于HTTP API和浏览器web界面
6334端口:用于grpc Api
2.访问
192.168.10.40:6333
出现版本号表示安装成功
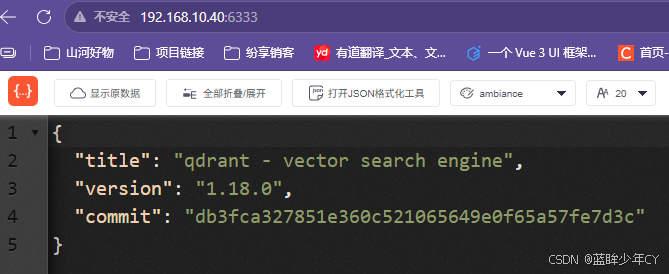
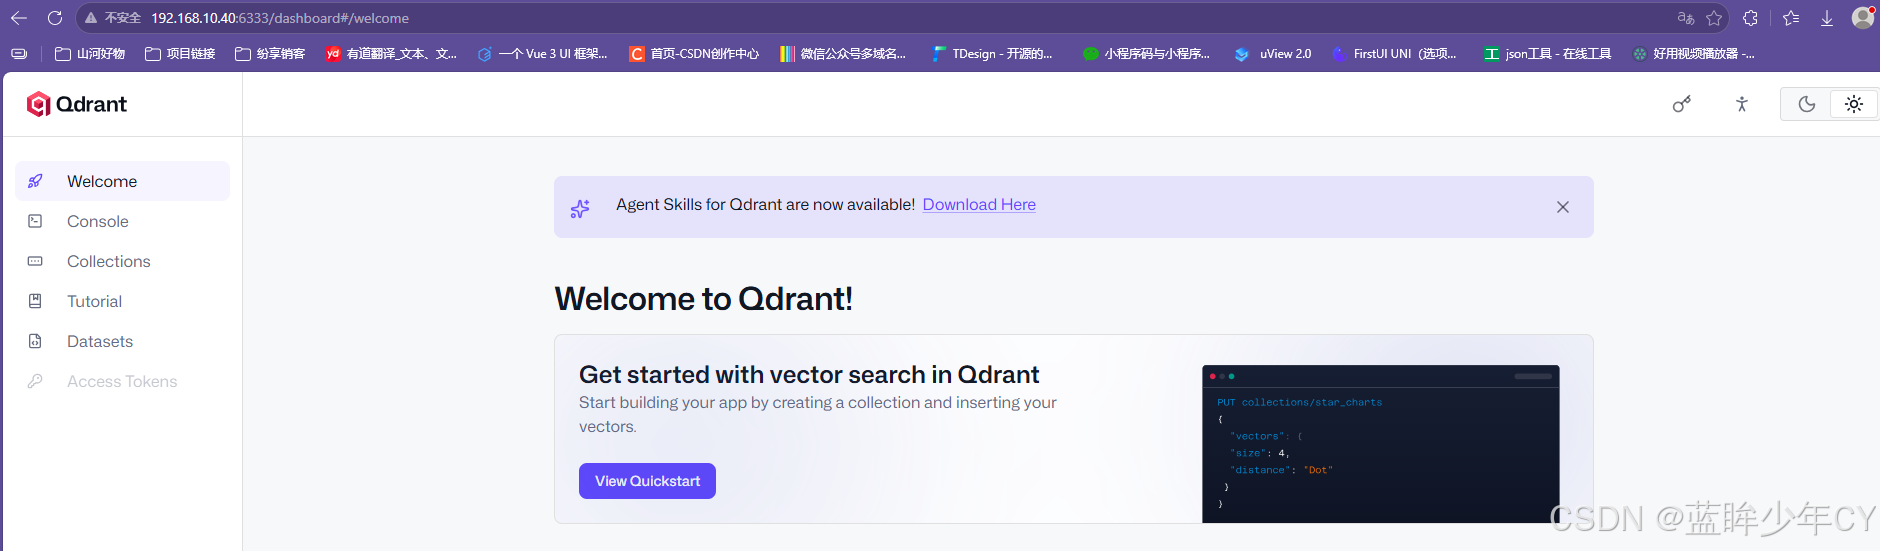
3.控制台访问
192.168.10.40:6333/dashboard
-
模型使用
阿里向量大模型:text-embedding-v3
-
配置类
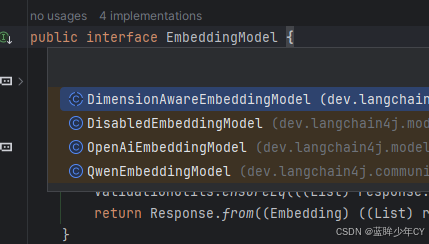
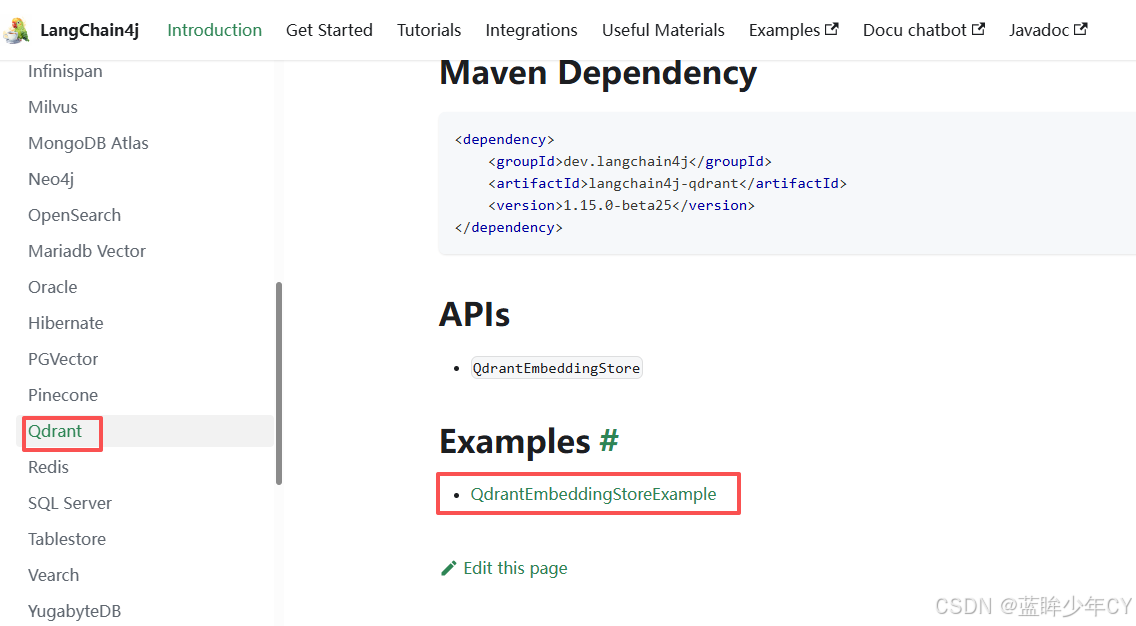
@Configuration
public class LLMConfig {
@Bean
public EmbeddingModel embeddingModel() {
return OpenAiEmbeddingModel.builder()
.apiKey(System.getenv("aliQwen-api"))
.modelName("text-embedding-v3")
.baseUrl("https://dashscope.aliyuncs.com/compatible-mode/v1")
.build();
}
// 创建Qdrant客户端
@Bean
public QdrantClient qdrantClient() {
return new QdrantClient(
QdrantGrpcClient.newBuilder("192.168.10.40", 6334, false)
.build());
}
@Bean
public EmbeddingStore<TextSegment> embeddingStore() {
return QdrantEmbeddingStore.builder()
.host("192.168.10.40")
.port(6334)
.collectionName("test-qdrant")
.build();
}
}-
业务类
-
@RestController public class EmbeddinglController { @Resource private EmbeddingModel embeddingModel; @Resource private QdrantClient qdrantClient; @Resource private EmbeddingStore<TextSegment> embeddingStore; // 将文本生成向量数据 @GetMapping("/embedding/embed") public void embed() { String prompt = """ 春晓 春眠不觉晓, 处处闻啼鸟。 夜来风雨声, 花落知多少。 """; Embedding embedding = embeddingModel.embed(prompt).content(); System.out.println("ok:" + embedding.toString()); } // 新建向量数据库实例和创建索引:test-qdrant @GetMapping("/embedding/createCollection") public void createCollection() { qdrantClient.createCollectionAsync( "test-qdrant", Collections.VectorParams.newBuilder() .setDistance(Collections.Distance.Cosine).setSize(1024).build()); } // 往向量数据库新增文本记录 @GetMapping("/embedding/add") public String add() { String prompt = """ 春晓 春眠不觉晓, 处处闻啼鸟。 夜来风雨声, 花落知多少。 """; TextSegment segment = TextSegment.from(prompt); segment.metadata().put("author", "lisi"); Embedding embedding = embeddingModel.embed(segment).content(); return embeddingStore.add(embedding, segment); } // 条件查询 @GetMapping("/embedding/query1") public String query1() { Embedding queryEmbedding = embeddingModel.embed("春晓说的是什么").content(); EmbeddingSearchRequest embeddingSearchRequest = EmbeddingSearchRequest.builder() .queryEmbedding(queryEmbedding) .maxResults(1) .build(); List<EmbeddingMatch<TextSegment>> matches = embeddingStore.search(embeddingSearchRequest).matches(); EmbeddingMatch<TextSegment> embeddingMatch = matches.get(0); System.out.println(embeddingMatch.score()); return embeddingMatch.embedded().text(); } // 条件查询 @GetMapping("/embedding/query2") public String query2() { Embedding queryEmbedding = embeddingModel.embed("春晓").content(); EmbeddingSearchRequest embeddingSearchRequest = EmbeddingSearchRequest.builder() .queryEmbedding(queryEmbedding) .filter(MetadataFilterBuilder.metadataKey("author").isEqualTo("lisi")) .maxResults(1) .build(); List<EmbeddingMatch<TextSegment>> matches = embeddingStore.search(embeddingSearchRequest).matches(); EmbeddingMatch<TextSegment> embeddingMatch = matches.get(0); System.out.println(embeddingMatch.score()); return embeddingMatch.embedded().text(); } } -
测试
1.查看文本转向量数据 localhost:8010/embedding/embed
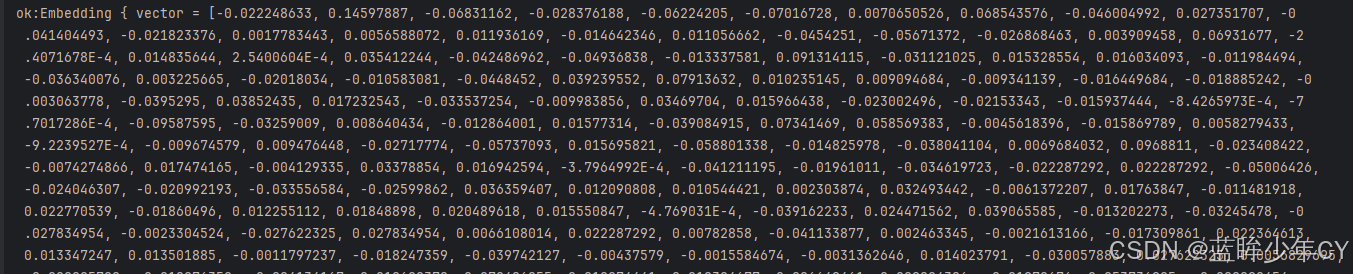
2.创建向量数据库 localhost:8010/embedding/createCollection
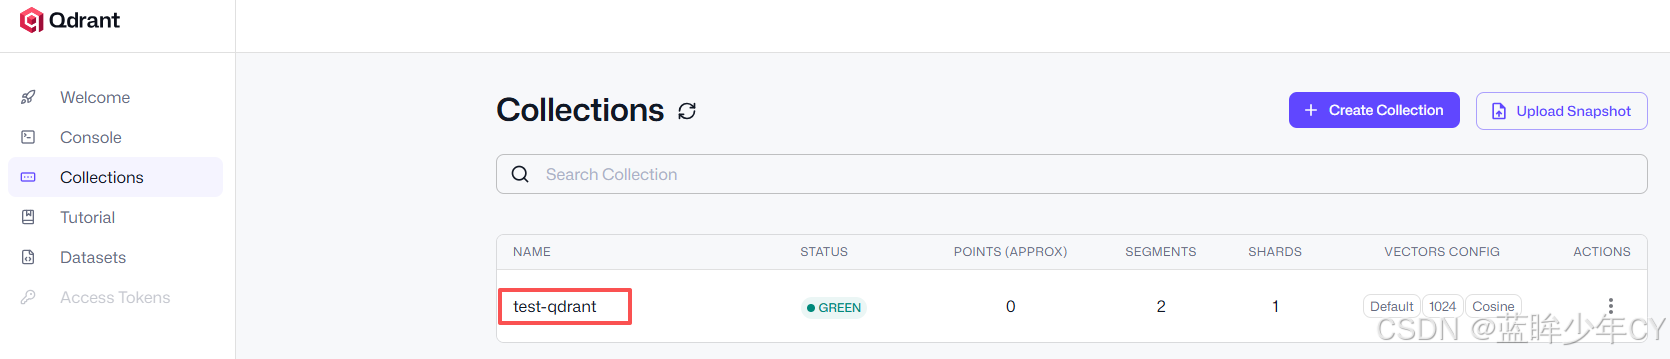
3.向数据库加入数据 localhost:8010/embedding/add
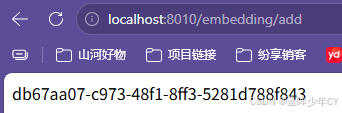
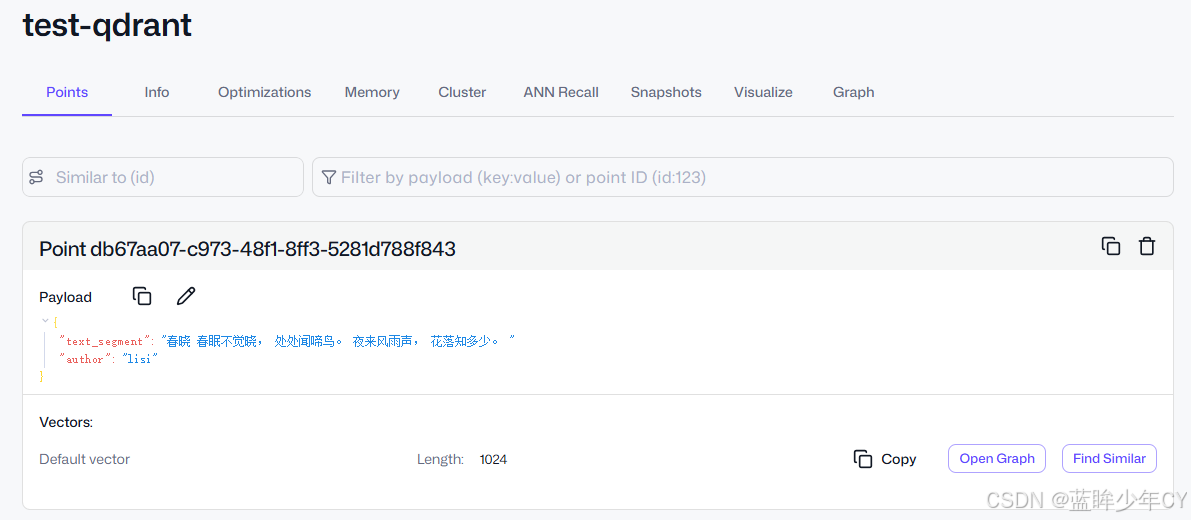
4.查询数据 localhost:8010/embedding/query1
13、RAG检索增强
(1)介绍
是大语言模型 (LLM) 落地最主流架构:先检索外部知识库真实资料,再让大模型结合资料生成答案。通过引入外部知识源来增强LLM的输山能力。传统的LLM通常基于其训练数据生成响应,但这些数据可能过时或不够全面。RAG允许模型在生成答案之前,从特定的知识库中检索相关信息,从而提供更准确和上下文相关的回答
1)原因
模型幻觉:凭空编造不存在事实、数据、文档
知识滞后:模型训练数据截止固定时间,无法知道最新资讯
无法使用私有数据:企业内部文档、手册、数据库、聊天记录等私有知识无法直接使用
2)两个阶段
-
index(索引)
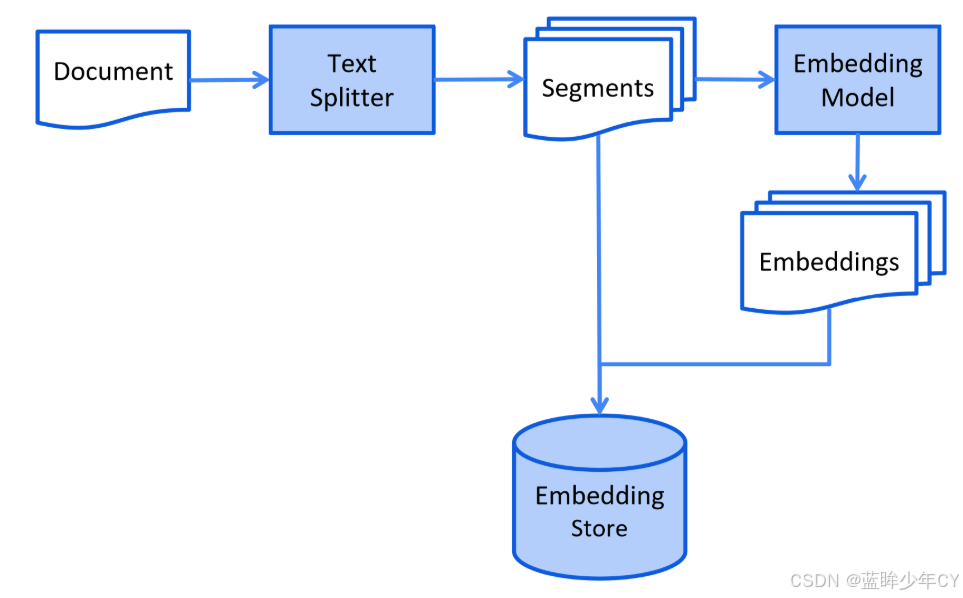
原始数据采集(PDF/Word/MD/ 网页 / Excel / 数据库)
文档解析 & 内容清洗(去空格、乱码、格式)
文本切块(Chunk 分片) 长文本切小段
文本向量化(Embedding)文字转数字向量
向量 + 原文存入向量数据库建立索引
-
Retrieval(检索)
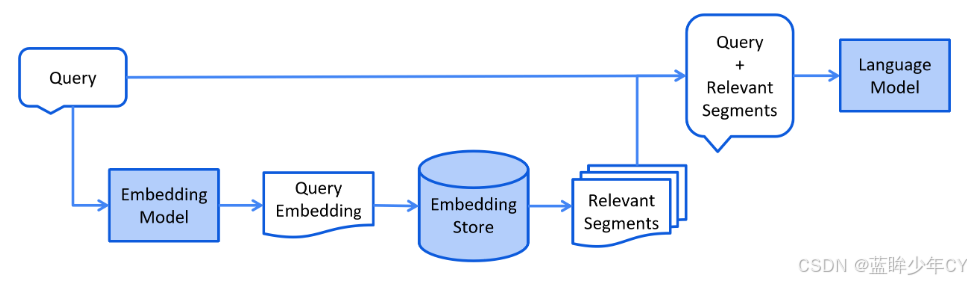
用户输入问题
问题同样转为向量
向量数据库语义相似度检索,召回最相关文本片段
筛选、去重、重排序
把检索到的真实资料 + 用户问题一起塞进提示词
大模型读取资料,合规生成答案
返回答案 + 资料来源
3)标准 RAG 完整流程
数据接入:读取各类非结构化 / 结构化文档
文档解析:提取纯文本,剔除图片、页眉页脚、广告
文本分块:长文档切割成小块(核心关键步骤)
元数据绑定:记录来源、文件名、页码、时间、分类
文本嵌入:调用 Embedding 模型生成稠密向量
向量入库:向量 + 原文 + 元数据存入向量库
用户 Query 向量化:用户问题生成向量
相似度召回:向量库匹配最相似文本块
上下文组装:构造 RAG 专属 Prompt 模板
LLM 推理生成:依据资料输出精准回答
一般流程
1.加载文档:使用适当的DocumentLoader 和 DocumentParser加载文档
2.转换文档:使用DocumentTransformer 清理或增强文档(可选)
3.拆分文档:使用DocumentSplitter 将文档拆分为更小的片段(可选)
4.嵌入文档:使用EmbeddingModel将文档片段转换为嵌入向量
5.存储嵌入:使用 EmbeddingStoreIngestor存储嵌入向量
6.检索相关内容:根据用户查询,从EmbeddingStore检索最相关的文档片段
7.生成响应:将检索到的相关内容与用户查询一起提供给语言模型,生成最终响应
4)主要组件
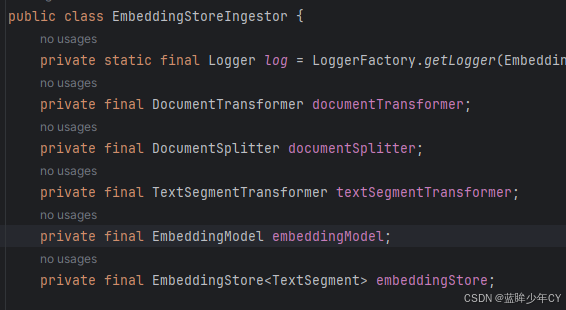
文档处理组件
组件 作用 常用实现 DocumentLoader 加载文档 FileSystemDocumentLoader、WebDocumentLoader、S3DocumentLoaderLangChain4j DocumentParser 解析文档 ApacheTikaDocumentParser、MarkdownDocumentParserLangChain4j DocumentSplitter 拆分文档 RecursiveDocumentSplitter(按标记递归拆分)、FixedSizeDocumentSplitterLangChain4j DocumentTransformer 转换文档 自定义处理器(添加元数据、清洗内容)LangChain4j 嵌入与存储组件
组件 作用 常用实现 EmbeddingModel 生成向量 OpenAiEmbeddingModel、BgeEmbeddingModel、OllamaEmbeddingModelLangChain4j EmbeddingStore 存储向量 InMemoryEmbeddingStore、QdrantEmbeddingStore、MilvusEmbeddingStore、RedisEmbeddingStoreLangChain4j EmbeddingStoreIngestor 索引流水线 整合拆分、嵌入、存储步骤LangChain4j 检索增强组件
组件 作用 常用实现 QueryTransformer 优化查询 CompressingQueryTransformer、ExpandingQueryTransformer、HyDEQueryTransformerLangChain4j QueryRouter 路由查询 LanguageModelQueryRouter(LLM 决定路由)、DefaultQueryRouter(全路由)LangChain4j ContentRetriever 获取内容 EmbeddingStoreContentRetriever、WebSearchContentRetriever、SqlDatabaseContentRetrieverLangChain4j ContentAggregator 聚合结果 DefaultContentAggregator(RRF 算法)、ReRankingContentAggregator(重排序)LangChain4j ContentInjector 注入上下文 DefaultContentInjector(自定义模板)LangChain4j
(2)案例实现
1)基础搭建
-
创建工程
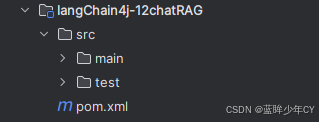
-
修改pom文件
......
<dependencies>
<dependency>
<groupId>org.springframework.boot</groupId>
<artifactId>spring-boot-starter-web</artifactId>
</dependency>
<!--langchain4j-open-ai-->
<dependency>
<groupId>dev.langchain4j</groupId>
<artifactId>langchain4j-open-ai</artifactId>
</dependency>
<!--langchain4j-->
<dependency>
<groupId>dev.langchain4j</groupId>
<artifactId>langchain4j</artifactId>
</dependency>
<dependency>
<groupId>dev.langchain4j</groupId>
<artifactId>langchain4j-qdrant</artifactId>
</dependency>
<!--easy-rag-->
<dependency>
<groupId>dev.langchain4j</groupId>
<artifactId>langchain4j-easy-rag</artifactId>
</dependency>
<!--lombok-->
......
</dependencies>
......
</project>-
添加配置文件
server.port=8010
spring.application.name=langChain4j-12chatRAG-
ChatAssistant 接口
public interface ChatAssistant {
     String chat(String message);
}-
配置类
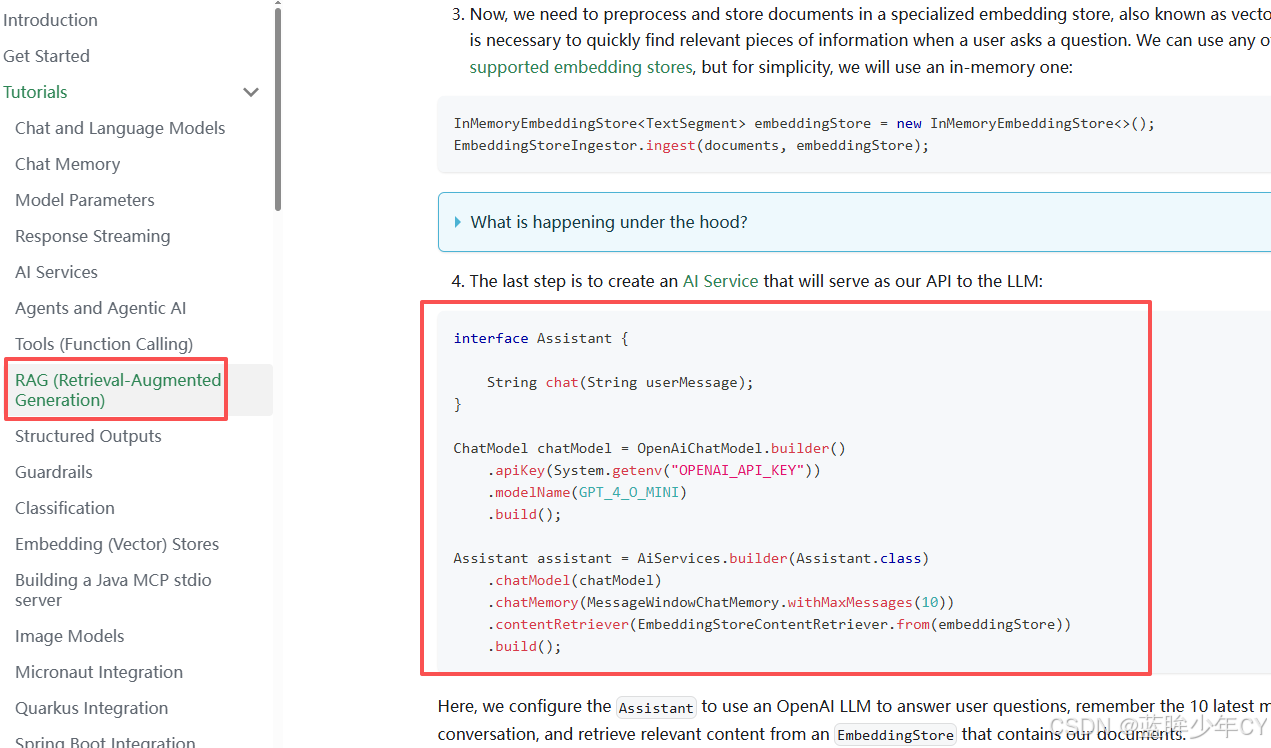
@Configuration
public class LLMConfig {
@Bean
public OpenAiChatModel chatModel() {
return OpenAiChatModel.builder()
.apiKey(System.getenv("aliQwen-api"))
.modelName("qwen-plus")
.baseUrl("https://dashscope.aliyuncs.com/compatible-mode/v1")
.build();
}
// 使用内存中嵌入存储
@Bean
public InMemoryEmbeddingStore<TextSegment> embeddingStore() {
return new InMemoryEmbeddingStore<>();
}
@Bean
public ChatAssistant assistant(ChatModel chatModel, EmbeddingStore<TextSegment> embeddingStore) {
return AiServices.builder(ChatAssistant.class)
.chatModel(chatModel)
.chatMemory(MessageWindowChatMemory.withMaxMessages(50))
.contentRetriever(EmbeddingStoreContentRetriever.from(embeddingStore))
.build();
}
}-
业务类
@RestController
public class RAGController {
@Resource
private InMemoryEmbeddingStore<TextSegment> embeddingStore;
@Resource
private ChatAssistant chatAssistant;
// 将文本生成向量数据
@GetMapping("/embedding/chat")
public String chat() {
Document document = FileSystemDocumentLoader.loadDocument("F:\\study-demo\\alibaba-java.doc");
EmbeddingStoreIngestor.ingest(document, embeddingStore);
return chatAssistant.chat("错误码00000和A0001分别是什么");
}
}-
文档内容
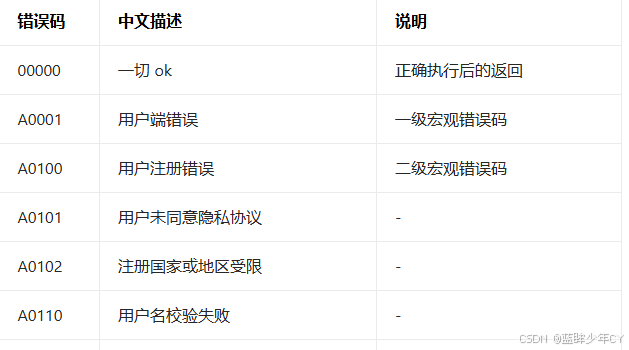
-
测试
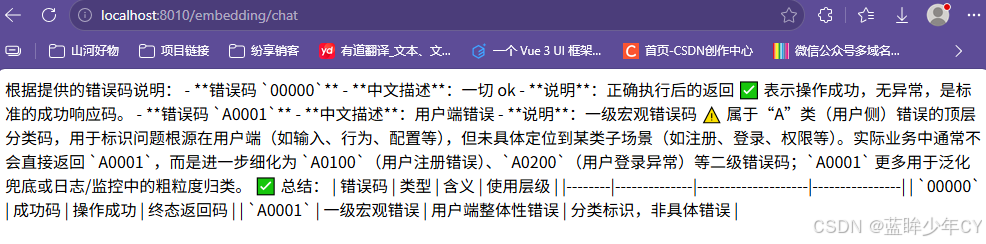
14、MCP模型上下文切换
(1)介绍
1)说明
是由 Anthropic 公司于 2024 年 11 月推出的开放标准协议,被誉为AI 时代的 “USB-C 接口”。它的核心目标是为 AI 模型(尤其是 LLM)提供标准化的外部资源连接接口,让大模型能够以统一、安全、轻量化的方式访问外部工具、数据源和应用程序,而不是把所有信息塞进 PromptModel Context Protocol
2)核心组件
| 核心组件 | 核心职责 |
|---|---|
| MCP主机(MCPHosts) | 发起请求的AI应用程序,比如聊天机器人、AI驱动的IDE等。 |
| MCP客户端(MCPClients) | 拦截模型工具调用、协议转换、路由请求 |
| MCP服务器(MCP Servers) | 为MCP客户端提供上下文、工具和提示信息。 |
| 本地资源(Local Resources) | 本地计算机中可供MCP 服务器安全访问的资源,如文件、数据库。 |
| 远程资源(Remote Resources) | MCP服务器可以连接到的远程资源,如通过API提供的数据 |
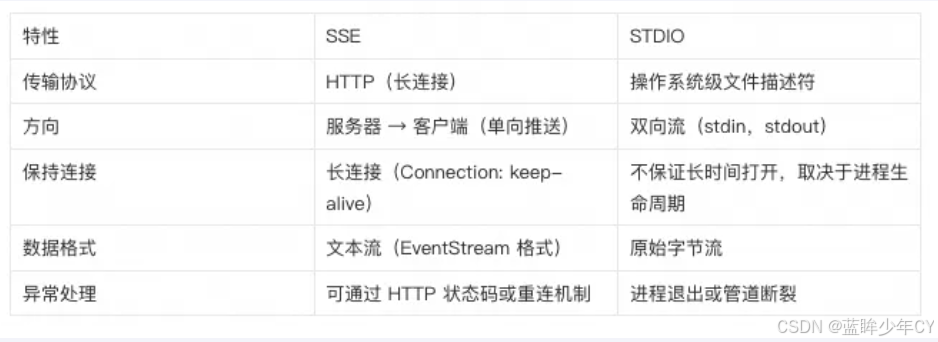
3)通信协议
-
STDI0(标准输入/输出)
支持标准输入和输出流进行通信,主要用于本地集成、命令行工具等场景
-
SSE (Server-Sent Events)
支持使用HTTP POST请求进行服务器到客户端流式处理,以实现客户端到服务器的通信
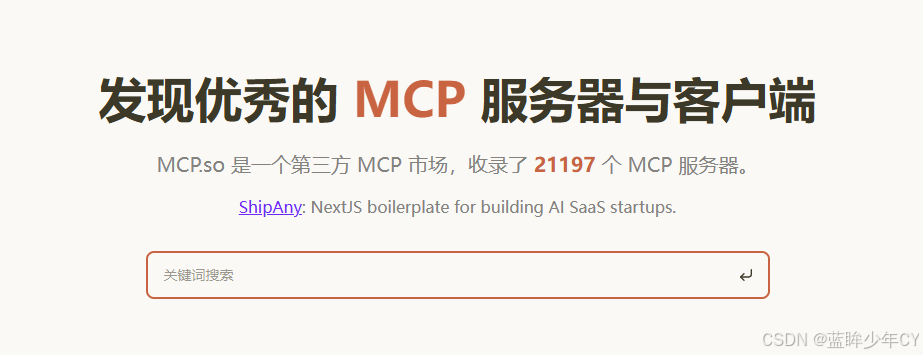
(2)案例实现
接入高德地图
1)基础搭建
-
创建工程
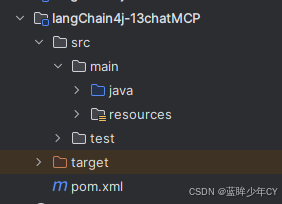
-
修改pom文件
......
<dependencies>
<dependency>
<groupId>org.springframework.boot</groupId>
<artifactId>spring-boot-starter-web</artifactId>
</dependency>
<!--langchain4j-open-ai-->
<dependency>
<groupId>dev.langchain4j</groupId>
<artifactId>langchain4j-open-ai</artifactId>
</dependency>
<!--langchain4j-->
<dependency>
<groupId>dev.langchain4j</groupId>
<artifactId>langchain4j</artifactId>
</dependency>
<!-- langchain4j-reactor实现流式输出 -->
<dependency>
<groupId>dev.langchain4j</groupId>
<artifactId>langchain4j-reactor</artifactId>
</dependency>
<!-- MCP Client 依赖 -->
<dependency>
<groupId>dev.langchain4j</groupId>
<artifactId>langchain4j-mcp</artifactId>
</dependency>
<!--DashScope (Qwen)接入阿里云百炼平台
https://docs.langchain4j.dev/integrations/language-models/dashscope
-->
<dependency>
<groupId>dev.langchain4j</groupId>
<artifactId>langchain4j-community-dashscope-spring-boot-starter</artifactId>
</dependency>
<!--lombok-->
......
</dependencies>
......
</project>-
配置文件
server.port=8010
server.servlet.encoding.charset=UTF-8
server.servlet.encoding.enabled=true
server.servlet.encoding.force=true
spring.application.name=langChain4j-13chatMCP
langchain4j.community.dashscope.streaming-chat-model.api-key=${aliQwen-api}
langchain4j.community.dashscope.streaming-chat-model.model-name=qwen-plus
langchain4j.community.dashscope.chat-model.api-key==${aliQwen-api}
langchain4j.community.dashscope.chat-model.model-name=qwen-plus
logging.level.dev.langchain4j=DEBUG-
接口
public interface McpService {
     Flux<String> chat(String message);
}-
业务类
@RestController
public class MCPController {
@Resource
private StreamingChatModel chatModel;
// 将文本生成向量数据
@GetMapping("/embedding/chat")
public Flux<String> chat() {
/**1.构建McpTransport协议
{
"mcpServers": {
"amap-maps": {
"command": "cmd",
"args": [
"/c",
"npx",
"-y",
""
],
"env": {
"AMAP_MAPS_API_KEY": "***"
}
}
}
}
* 1.1 cmd:启动 Windows 命令行解释器。
* 1.2 /c:告诉 cmd 执行完后面的命令后关闭自身。
* 1.3 npx:npx = npm execute package,Node.js 的一个工具,用于执行 npm 包中的可执行文件。
* 1.4 -y 或 --yes:自动确认操作(类似于默认接受所有提示)。
* 1.5 @baidumap/mcp-server-baidu-map:要通过 npx 执行的 npm 包名
* 1.6 BAIDU_MAP_API_KEY 是访问百度地图开放平台API的AK
*/
McpTransport transport = new StdioMcpTransport.Builder()
.command(List.of("cmd", "/c", "npx", "-y", "@amap/amap-maps-mcp-server"))
.environment(Map.of("AMAP_MAPS_API_KEY", "***"))
.logEvents(true)
.build();
// 2.构建McpClient客户端
McpClient mcpClient = new DefaultMcpClient.Builder()
.transport(transport)
.build();
// 3.创建工具集和原生的FunctionCalling类似
ToolProvider toolProvider = McpToolProvider.builder()
.mcpClients(List.of(mcpClient))
.build();
McpService mcpService = AiServices.builder(McpService.class)
.streamingChatModel(chatModel)
.toolProvider(toolProvider)
.build();
return mcpService.chat("查询南京未来5天的天气");
}
}-
测试



腾讯云面向开发者汇聚海量精品云计算使用和开发经验,营造开放的云计算技术生态圈。
更多推荐
 27
27 0
0- 0


 已为社区贡献2条内容

所有评论(0)