

angular8 node
This might be the most often question among developers on how to create a socket connect with nodeJs and angular, most tutorial explain how to make a socket connection and emit the method only in server.js or app.js, So, today i will be talking about how to integrate socket.io with an Angular app. also you can access socket/emit in all controller in node JS.
这可能是开发人员中最常见的问题,即如何使用nodeJs和angular创建套接字连接,大多数教程解释了如何建立套接字连接并仅在server.js或app.js中发出方法,所以今天我将讨论如何将socket.io与Angular应用集成。 您也可以在节点JS中的所有控制器中访问套接字/发射。
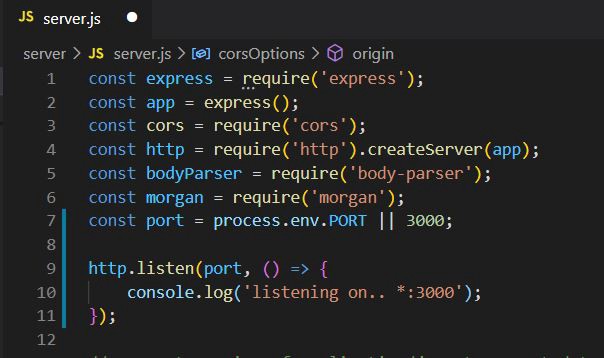
Let’s start by creating a Node project first using express JS.
让我们首先使用Express JS创建一个Node项目。
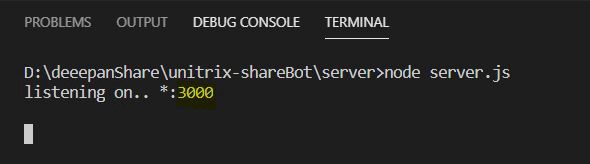
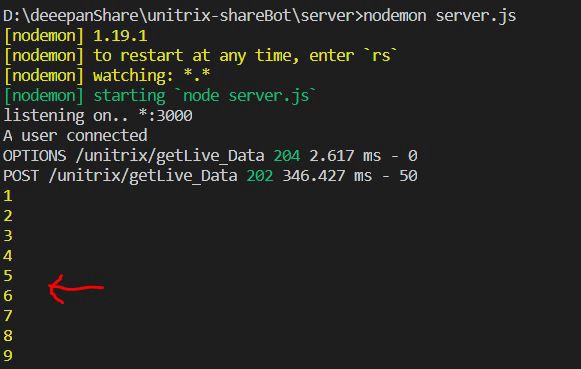
Run project in cmd node server.js you should see the following:
在cmd node server.js运行项目,您应该看到以下内容:
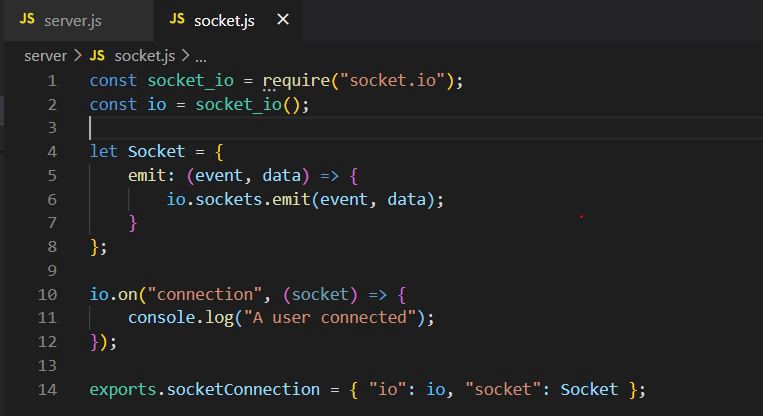
Next we need to create a socket connection in NodeJs, so create a new separate file socket.js and import in your main server.js/app.js file.
接下来,我们需要在NodeJs中创建一个套接字连接,因此创建一个新的单独文件socket.js并导入到您的主server.js / app.js文件中。
Above code is explained in the following steps:
上面的代码在以下步骤中进行了解释:
-
line no 1: download the npm module socket.io and import it.
第1行:下载npm模块socket.io并将其导入。
-
line no 4: Create a common emit function, so now you can call the method from any controllers.
第4行:创建一个公共的emit函数,因此现在您可以从任何控制器调用该方法。
-
line no 14: export the emit function and socket.
第14行:导出emit功能和套接字。
Above code is explained in the following steps:
上面的代码在以下步骤中进行了解释:
-
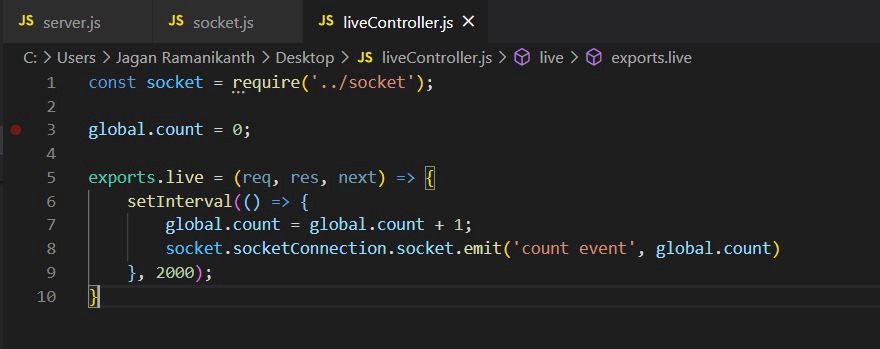
line no 1: Import the socket.js
第1行:导入socket.js
-
line no 3: Create a global variable count and assign the value zero, because we need to check if the data change (means live data). it will emit the value or not.
第3行:创建全局变量计数并将值分配为零,因为我们需要检查数据是否更改(意味着实时数据)。 它将发出或不发出该值。
-
line no 8: call and pass the value to emit function from socket.js.
第8行:调用并传递值以从socket.js发出函数。
-
line no 5: In controller function live, I created a setInterval method. In that function, each 2 second the count value increment but 1 and then pass the value in socket emit function.
第5行:在实时控制器功能中,我 创建了一个setInterval方法。 在该函数中,计数值每隔2秒递增一次,但递增1,然后将其传递给套接字发射函数。
NODE JS做完了,现在我们专注于角度 (NODE JS done, now we focus on angular)
Let’s start by creating an Angular app now. I will be creating a new Angular app from scratch, while most of you would already have one created with you.
让我们从现在创建一个Angular应用开始。 我将从头开始创建一个新的Angular应用,而大多数人已经与您一起创建了一个。
Those who already have a working Angular app can skip the following code:
那些已经使用了Angular应用程序的人可以跳过以下代码:
npm install -g @angular/cling new socketio-angular
npm install -g @ angular / cli ng新的socketio-angular
Now let’s start by creating a service to handle socket.io connection. I would create a root level singleton service named socketio.service.ts and include that in AppModule . You can create the service according to your project structure.You can create the service by running the following command.
现在让我们开始创建一个service来处理socket.io连接。 我将创建一个名为socketio.service.ts的根级singleton服务,并将socketio.service.ts包含在AppModule 。 您可以根据项目结构创建服务。可以通过运行以下命令来创建服务。
ng g s socketio
ng gs socketio
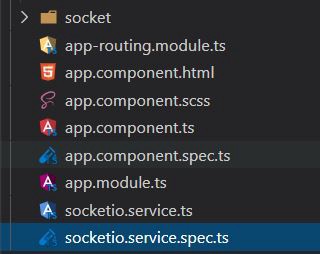
This would create a service named socketio.service.ts . The directory structure would look something like this. This is just a simple one page demo, so i added the service into the base folder like this.
这将创建一个名为socketio.service.ts的服务。 目录结构看起来像这样。 这只是一个简单的一页演示,因此我将服务添加到基本文件夹中,如下所示。
Now, go into the socketio.service.ts file and import the following:
现在,进入socketio.service.ts文件并导入以下内容:
import * as io from ‘socket.io-client’;
从'socket.io-client'导入*作为io;
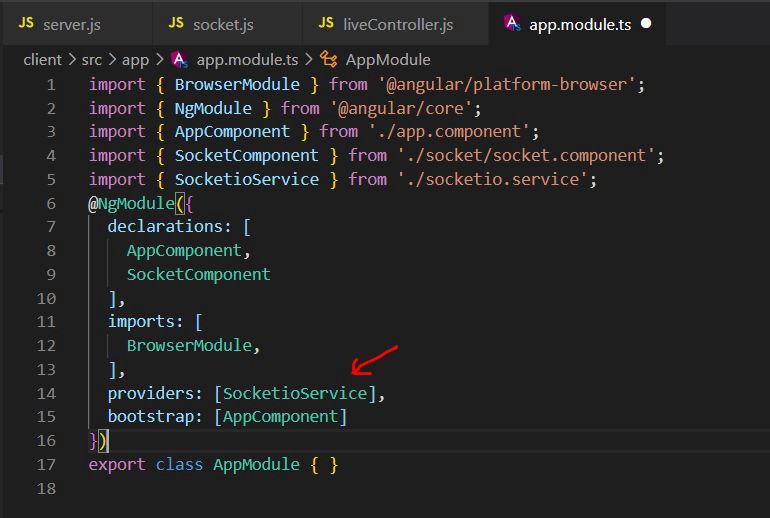
we need to add SocketioService into our AppModule and inject the service into our app.component.ts . Let’s add the service into our providers first. In app.module.ts do this:
我们需要将SocketioService添加到我们的AppModule ,并将服务注入到我们的app.component.ts 。 让我们先将服务添加到我们的提供商中。 在app.module.ts执行以下操作:
And let’s go to socketio.service.ts and write a socket init function.
然后转到socketio.service.ts并编写一个套接字初始化函数。
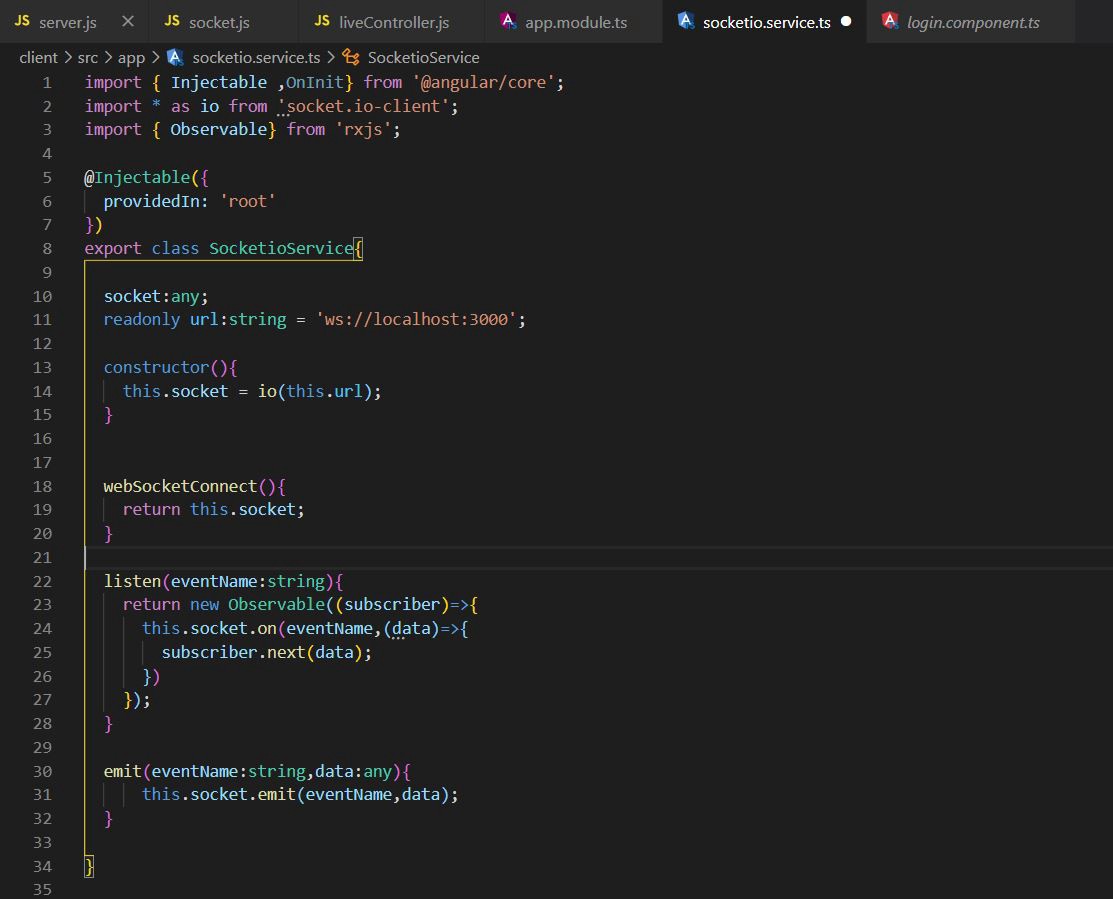
Above code is explained in the following steps:
上面的代码在以下步骤中进行了解释:
-
line no 2: download the npm module socket.io-client and Import it.
第2行:下载npm模块socket.io-client并将其导入。
-
line no 18: we call the webSocketConnect() function from login.component.ts file.
第18行:我们从login.component.ts文件调用webSocketConnect()函数。
-
line no 11: Create a variable “url” and assign the value localhost: 3000 (nodeJS port)
第11行:创建变量“ url ”并分配值localhost:3000 ( nodeJS port )
-
line no 22,30: created a listen and emit function.
第22行,30行 :创建了一个监听和发出函数。
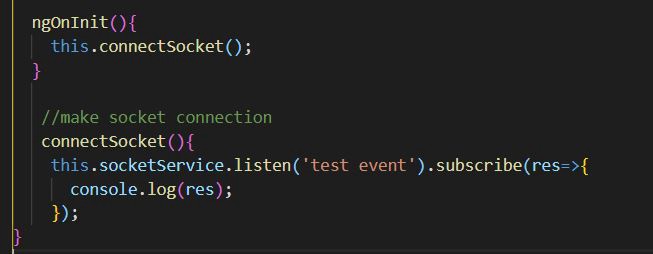
Now, we call the function from XXX.component.ts file and then subscribe the response
现在,我们从XXX.component.ts文件中调用该函数,然后订阅响应
Run Your angular project in cmd ng serve.
在cmd ng服务中运行您的有角项目。
Both frontEnd and backEnd intergration done, Now we need to test the functionality.
前端和后端集成都完成了,现在我们需要测试功能。
Node JS output Terminal
Node JS输出终端
Angular Output Console
角度输出控制台
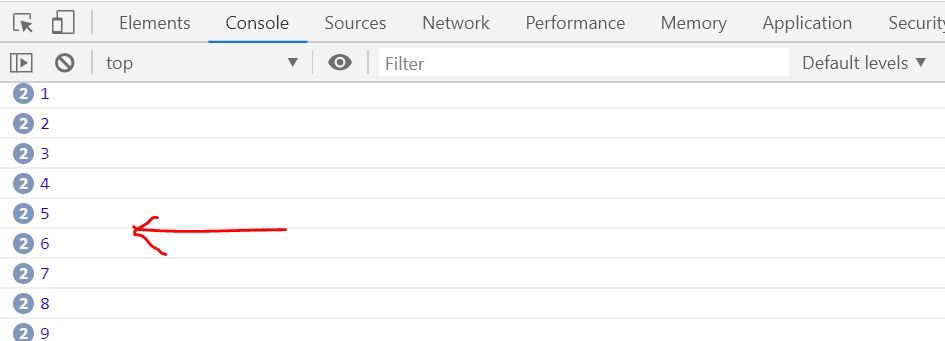
from the OUTPUT , you can see the value passing from server (Nodejs) to client (Angular).
从OUTPUT中,您可以看到从服务器( Nodejs )传递到客户端( Angular )的值。
This concludes my article about creating a Creating a Socket Connect with Node JS (in all controllers) and Angular 8+. There is a lot more information on sockets that can be explored like rooms, video chat, WebRTC, online offline status, sending more data, fetching online users. This information cannot be covered in an single article. Will write on these topics if you liked my work on this blog.
到此我的文章结束,有关创建一个使用Node JS(在所有控制器中)和Angular 8+创建套接字连接的文章。 关于套接字的信息很多,可以进行探索,例如房间,视频聊天,WebRTC,在线离线状态,发送更多数据,获取在线用户。 此信息不能在一篇文章中介绍。 如果您liked my work在此博客上的liked my work ,将会write这些主题。
You can aslo check my “videoChat” application using WebRTC.
您可以 使用WebRTC 检查我的“ videoChat ”应用程序。
video Chat URL here.
视频聊天网址在此处 。
visit my website Unitrix, if you want any project/requirement. Mail ID : jaganunitrix94@gmail.com
如果您需要任何项目/需求,请访问我的网站Unitrix 。 邮件ID :jaganunitrix94@gmail.com
angular8 node


 已为社区贡献11条内容

所有评论(0)