c cuda 指定gpu_五:使用CUDA加速遥感影像处理
·
遥感影像是非常大的,有时候仅使用CPU处理起来很慢,特别是针对批处理的时候,那么我们可以试试CUDA多线程处理影像,使用的是Numba包。首先我先介绍一下GPU的结构吧。
1.GPU结构
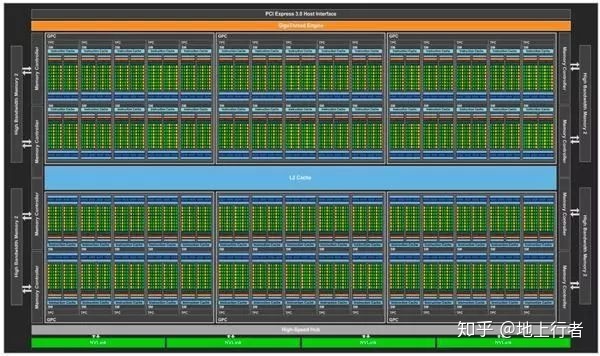
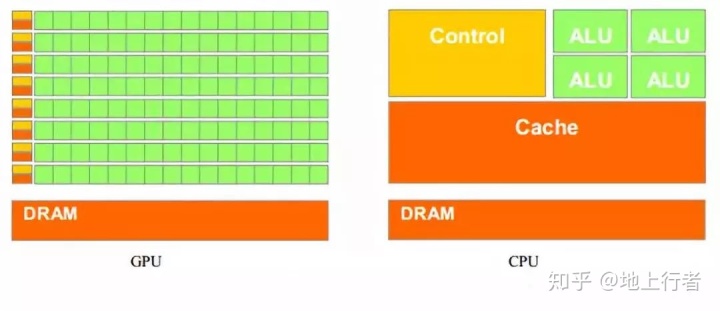
cpu是用作通用计算的,而gpu是异构计算,gpu主要是用作图像的处理(毕竟一般把他叫显卡),而且GPU长的也像矩阵。。。实际上cpu计算核心是非常小的,里面大部分都是缓存。
关于GPU:
GPU结构与通用处理器不同,这儿有几个核心概念:grid、block、thread,一个grid分为多个block,而一个block分为多个thread(计算核心数)。每个block包括共享缓存以及每个线程的独享缓存。
下面就看看如何使用基础的CUDA加速吧~
import cv2
import numpy as np
from numba import cuda
import time
import math
import rasterio


@cuda.jit                             # 申明使用cuda
def process_gpu(img,channels):
    tx = cuda.blockIdx.x*cuda.blockDim.x+cuda.threadIdx.x
    ty = cuda.blockIdx.y*cuda.blockDim.y+cuda.threadIdx.y
    for c in range(channels):
        color = img[tx,ty][c]*2.0+30

def process_cpu(img,dst):
    rows,cols,channels = img.shape
    dst = img*20.0+30

path_2 = r'E:sentinel4_area_2airborngf_dom_xian80_49N_Clip_02m.tif'
img_2_src = rasterio.open(path_2)
imgs = img_2_src.read()

channels,rows,cols = imgs.shape
img = imgs.reshape(channels,rows,cols)
dst_cpu = img.copy()
dst_gpu = img.copy()

start_cpu = time.time()
process_cpu(img,dst_cpu)
end_cpu = time.time()
time_cpu = (end_cpu - start_cpu)
print('cpu process time:'+str(time_cpu))

## GPU
dImg = cuda.to_device(img)
threadsperblock = (16,16)
blockspergrid_x = int(math.ceil(rows/threadsperblock[0]))
blockspergrid_y = int(math.ceil(cols/threadsperblock[1]))
blockspergrid   = (blockspergrid_x, blockspergrid_y)
cuda.synchronize()                # 同步
start_gpu = time.time()
process_gpu[blockspergrid,threadsperblock](dImg,channels)
end_gpu = time.time()
cuda.synchronize()                  #同步

dst_gpu = dImg.copy_to_host()

time_gpu = (end_gpu - start_gpu)
print('gpu process time:'+str(time_gpu))
注:依据NVIDIA官方沙龙学习得到

腾讯云面向开发者汇聚海量精品云计算使用和开发经验,营造开放的云计算技术生态圈。
更多推荐
 0
0 0
0- 0


 已为社区贡献2条内容

所有评论(0)