NowCoder.github.io —— 《仿牛客论坛社区项目实战》——初始SpringBoot 快速开发社区首页 —— SpringBoot+SpringMVC+MyBatis+Thymeleaf
📖 本文目录
📖 NowCoder.github.io
NowCoder 仿牛客论坛项目
📑 初识 SpringBoot 快速开发社区首页
课程介绍
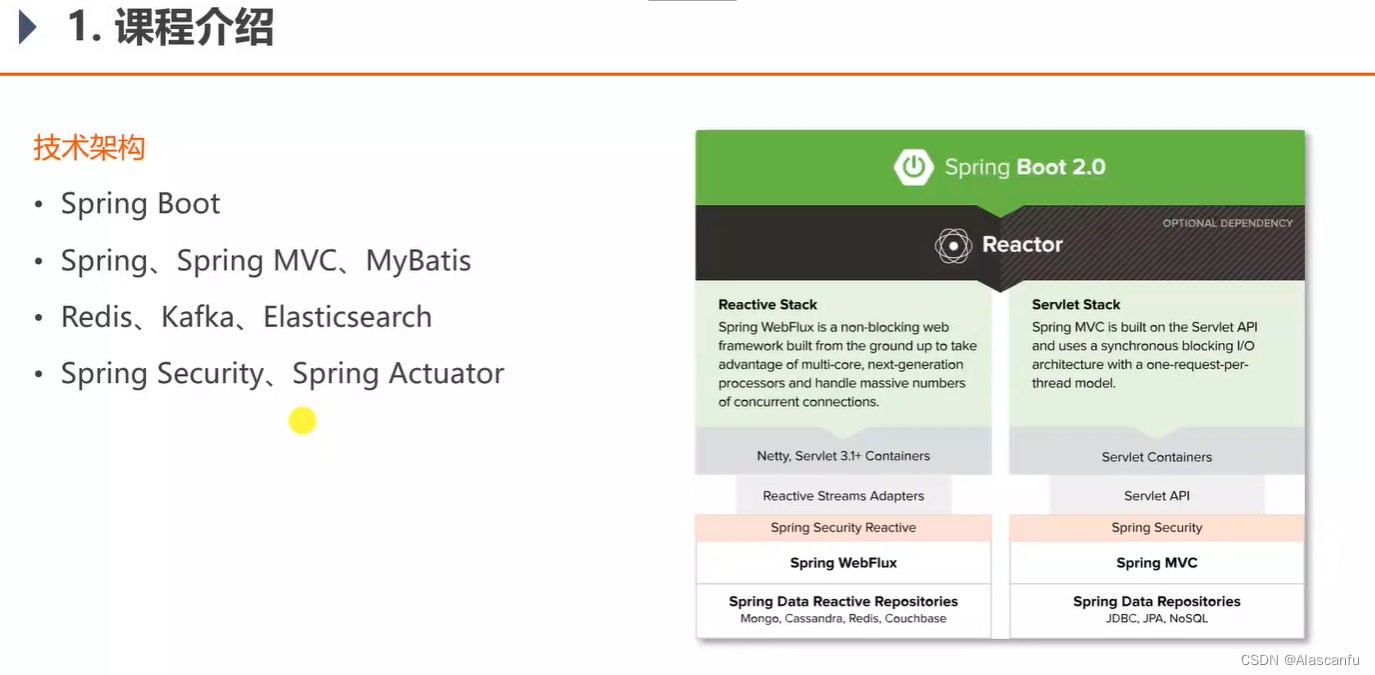
🔖 开发环境
- 构建工具 :Apache Maven
- 集成开发工具: IntelliJ IDEA
- 数据库: MySQL 、Redis
- 应用服务器: Apache Tomcat
- 版本控制工具:Git
🔖 快速搭建开发环境
MAVEN
Maven – Welcome to Apache Maven
MAVEN Repository
Maven Install
Maven – Installing Apache Maven
Quick Start Maven in 5 Minutes
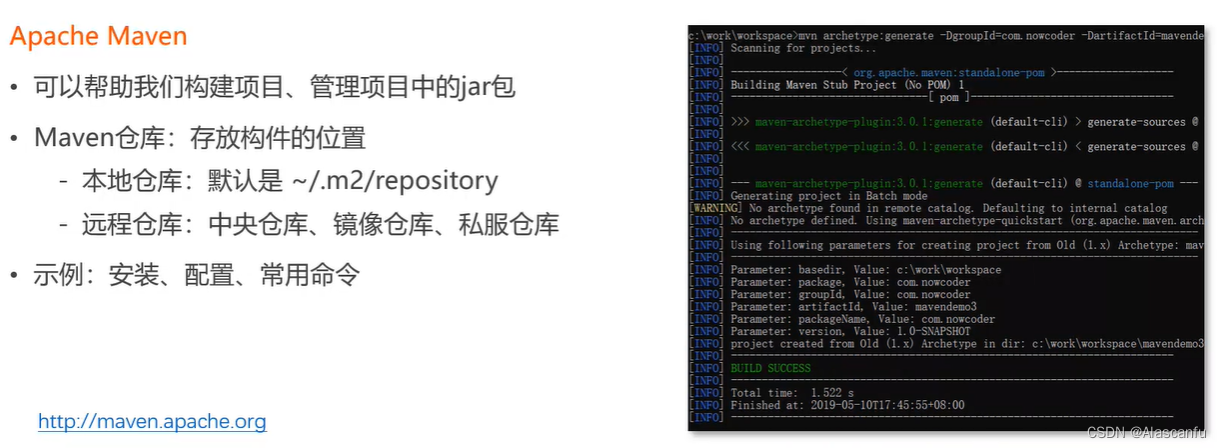
mvn archetype:generate -DgroupId=com.mycompany.app -DartifactId=my-app -DarchetypeArtifactId=maven-archetype-quickstart -DarchetypeVersion=1.4 -DinteractiveMode=false
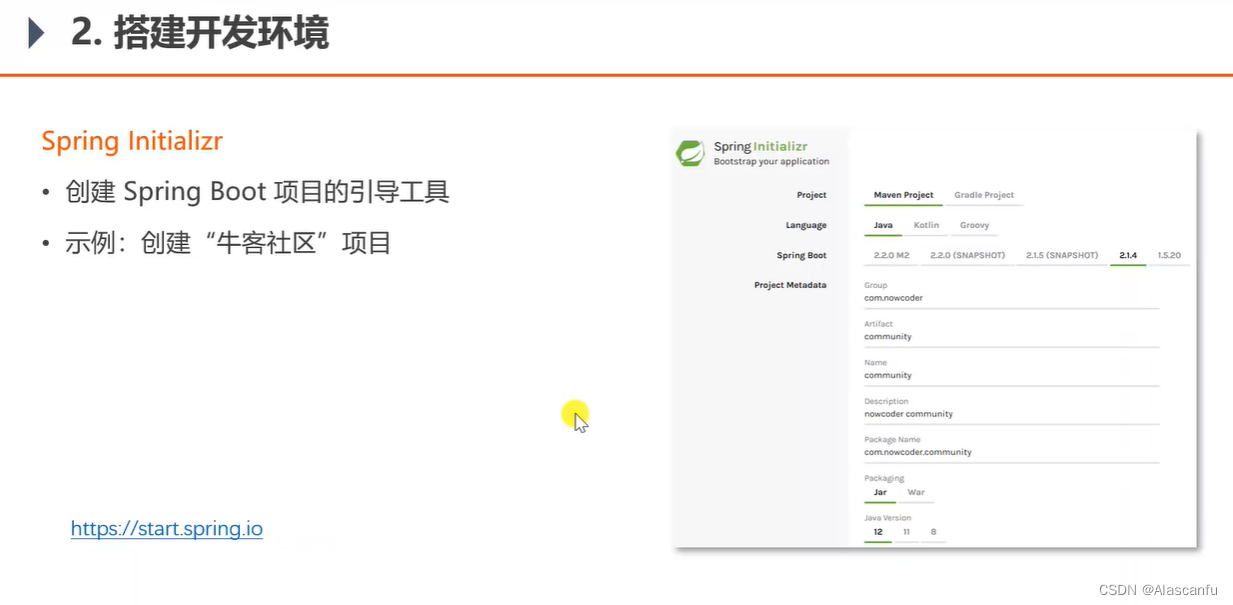
Spring Initializr
创建Spring Boot 项目的引导工具
示例:创建“牛客社区” 项目
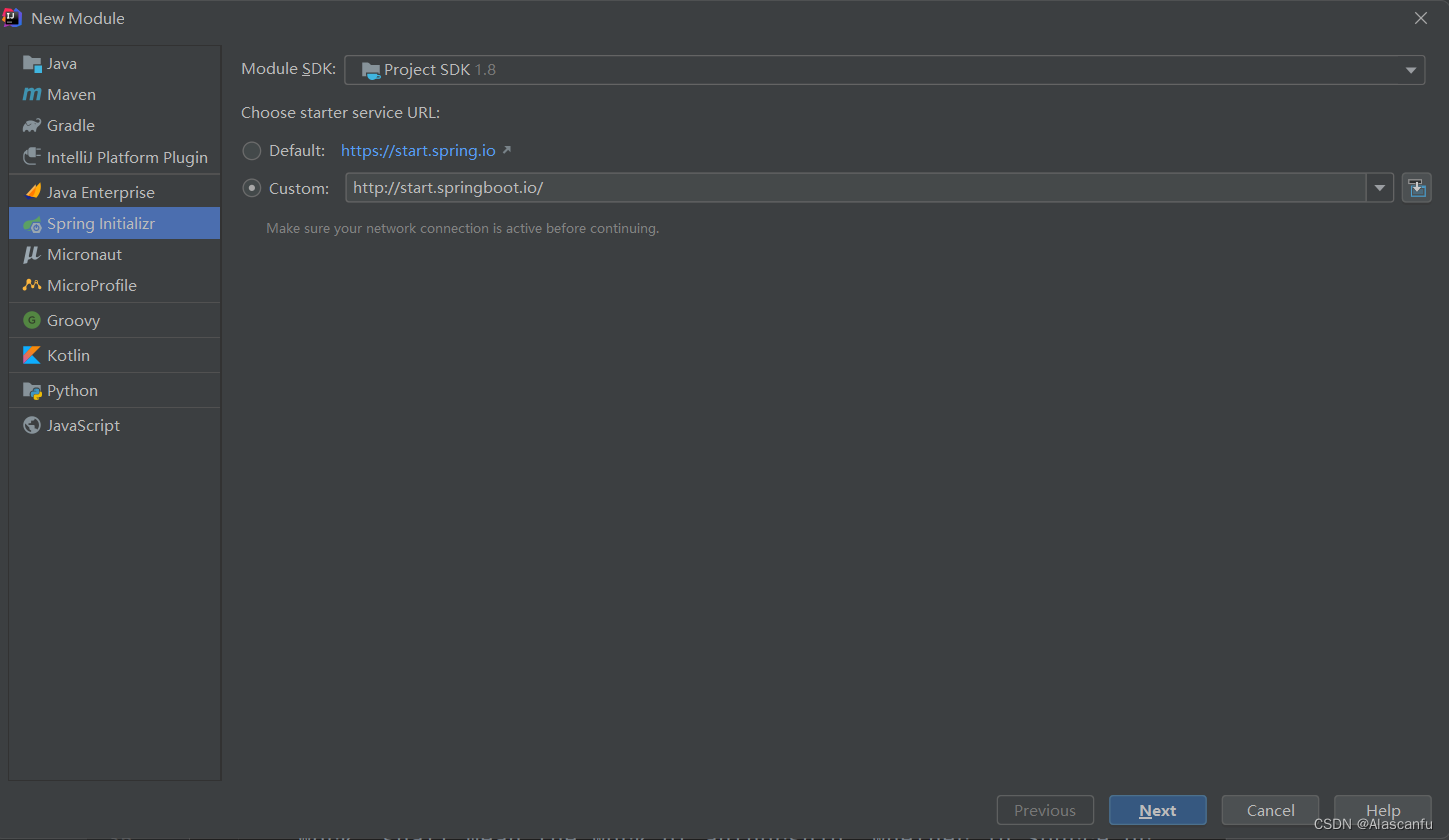
可以直接通过本地进行快速创建一个 SpringBoot 项目
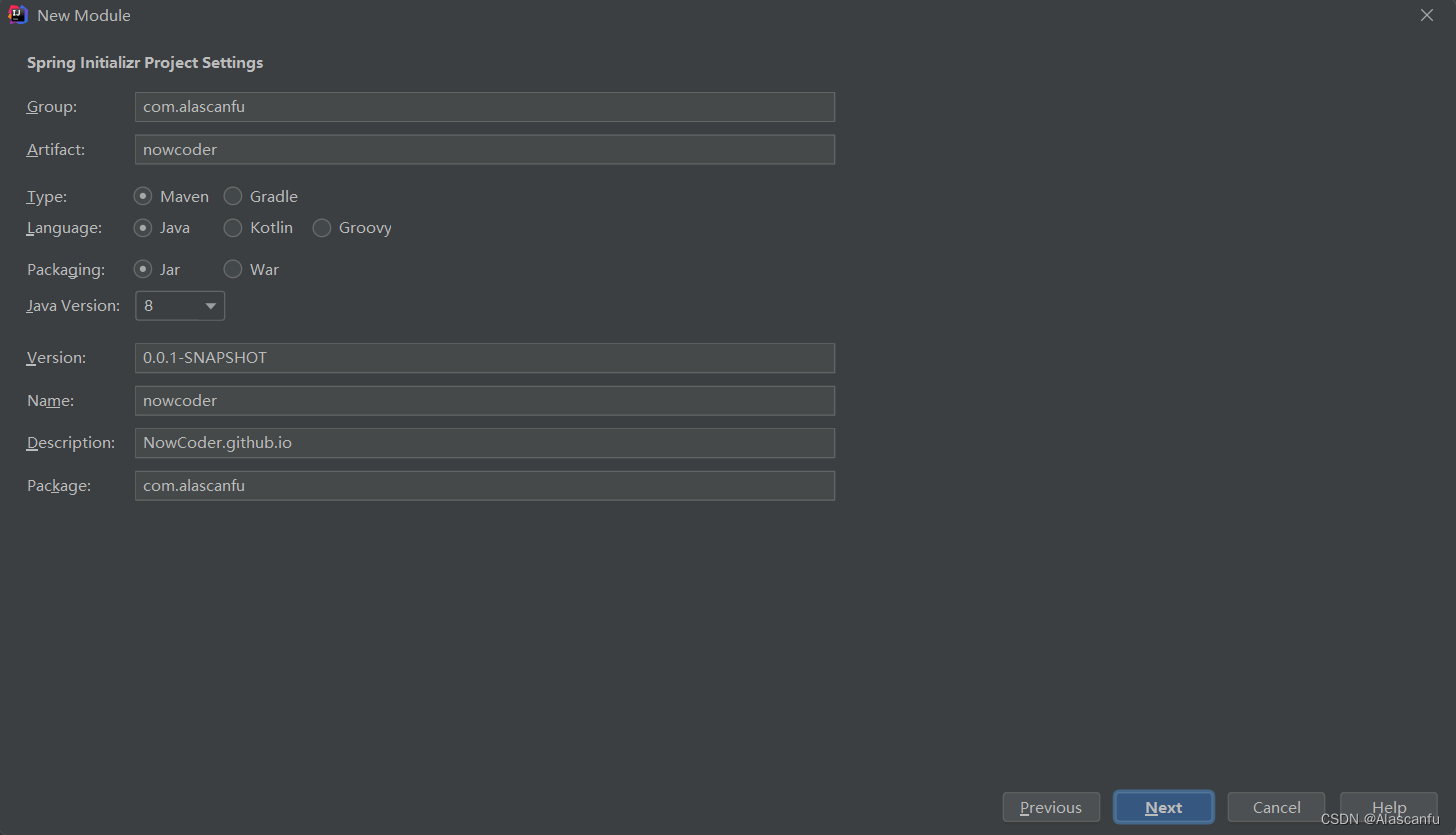
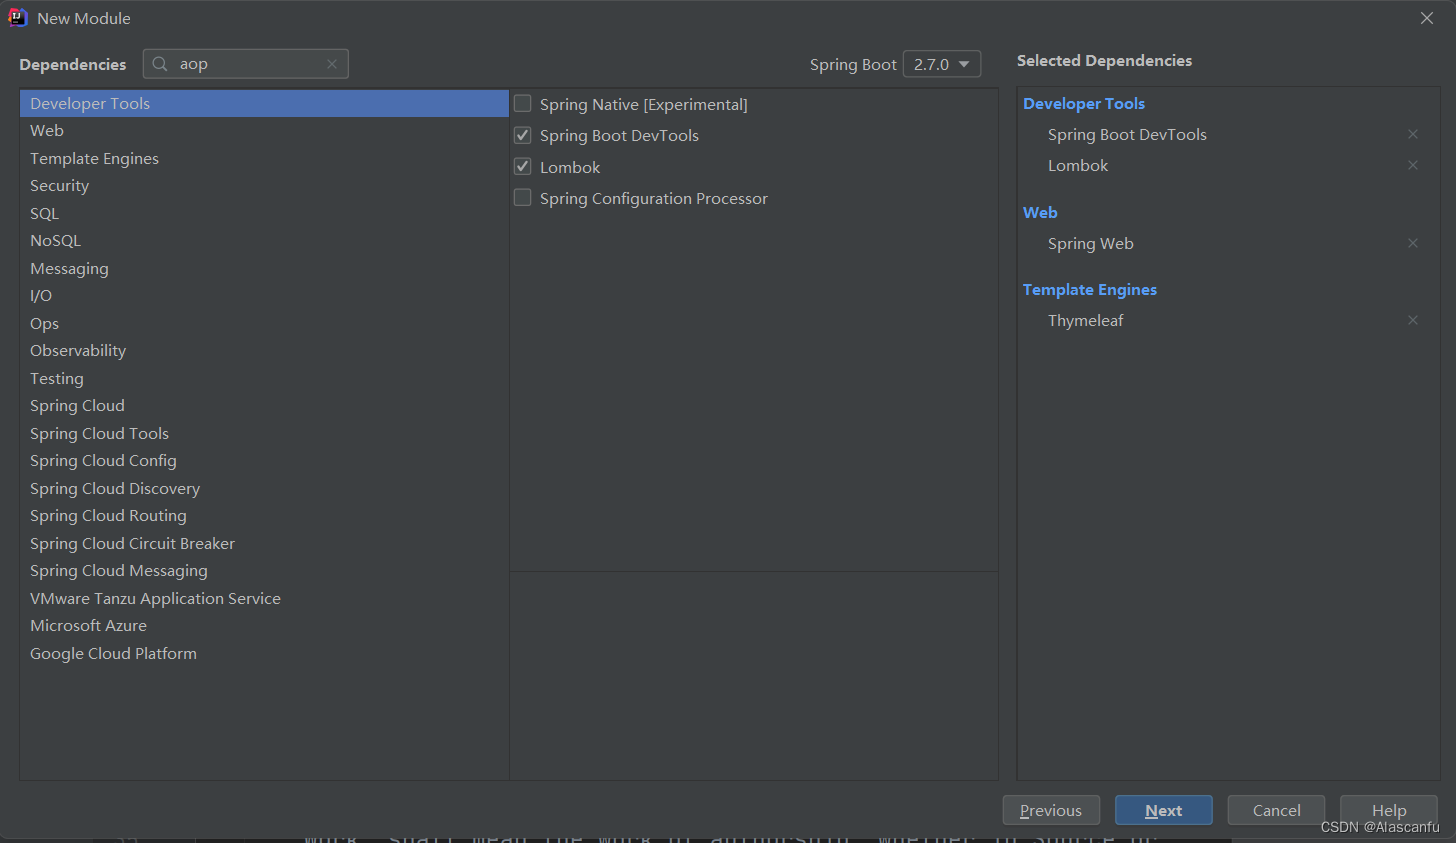
项目结构目录大致如下
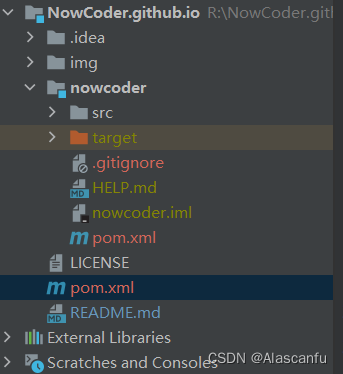
NowCoder.github.io -----> pom.xml
- 将 nowcoder 作为模块导入
<?xml version="1.0" encoding="UTF-8"?>
<project xmlns="http://maven.apache.org/POM/4.0.0" xmlns:xsi="http://www.w3.org/2001/XMLSchema-instance"
	xsi:schemaLocation="http://maven.apache.org/POM/4.0.0 https://maven.apache.org/xsd/maven-4.0.0.xsd">
	<modelVersion>4.0.0</modelVersion>
	<groupId>com.alascanfu</groupId>
	<artifactId>NowCoder.github.io</artifactId>
	<version>0.0.1-SNAPSHOT</version>
	<name>NowCoder.github.io</name>
	<description>NowCoder.github.io </description>
	<packaging>pom</packaging>
	<modules>
		<module>nowcoder</module>
	</modules>
</project>
SpringBoot 入门示例
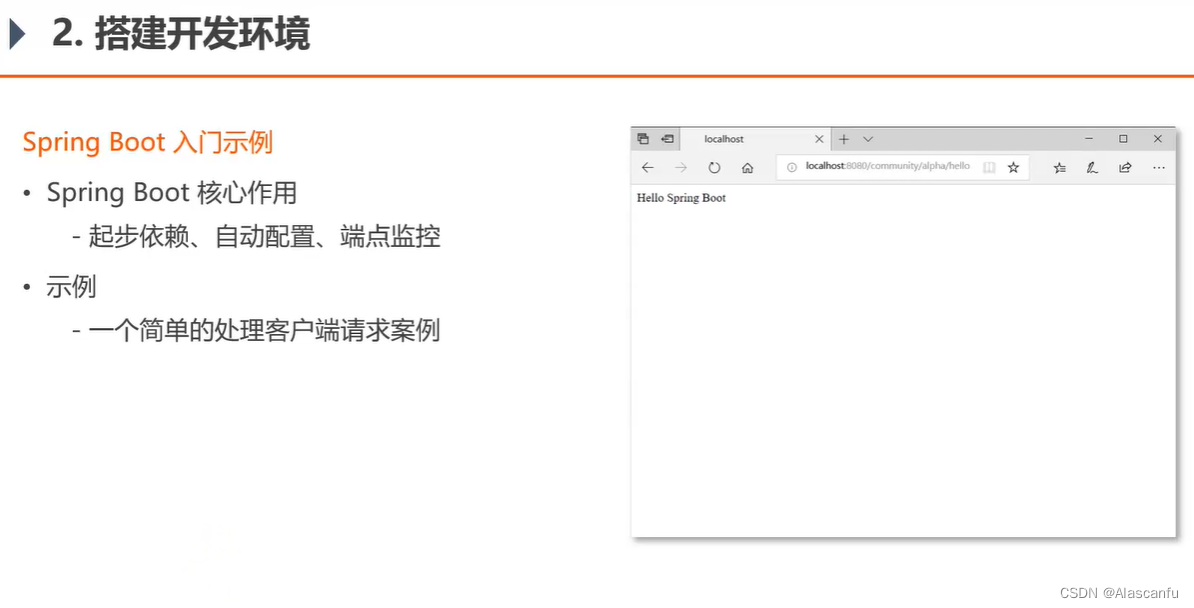
创建一个 TestController 快速处理客户端请求
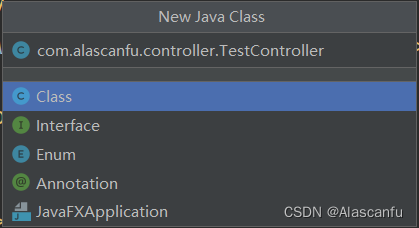
进行测试
com.alascanfu.controller.TestController
/***
 * @author: Alascanfu
 * @date : Created in 2022/6/20 20:20
 * @description: TestController 用于测试的 Controller
 * @modified By: Alascanfu
 **/
@Controller
@RequestMapping("/nowCoder/Test")
public class TestController {
    @RequestMapping("/hello")
    @ResponseBody
    public String hello(){
        return "Hello~ SpringBoot~";
    }
}
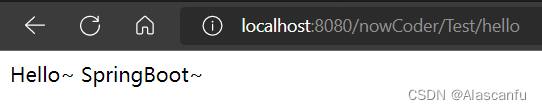
快速测试
http://localhost:8080/nowCoder/Test/hello
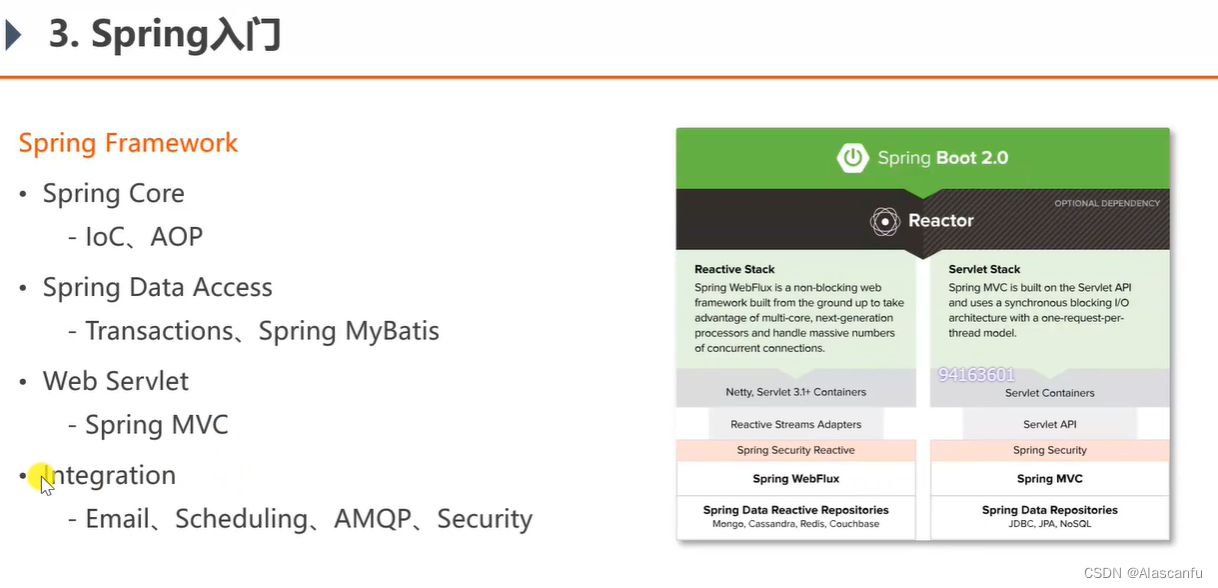
📑 Spring 快速入门
Spring IOC 三大概念理解
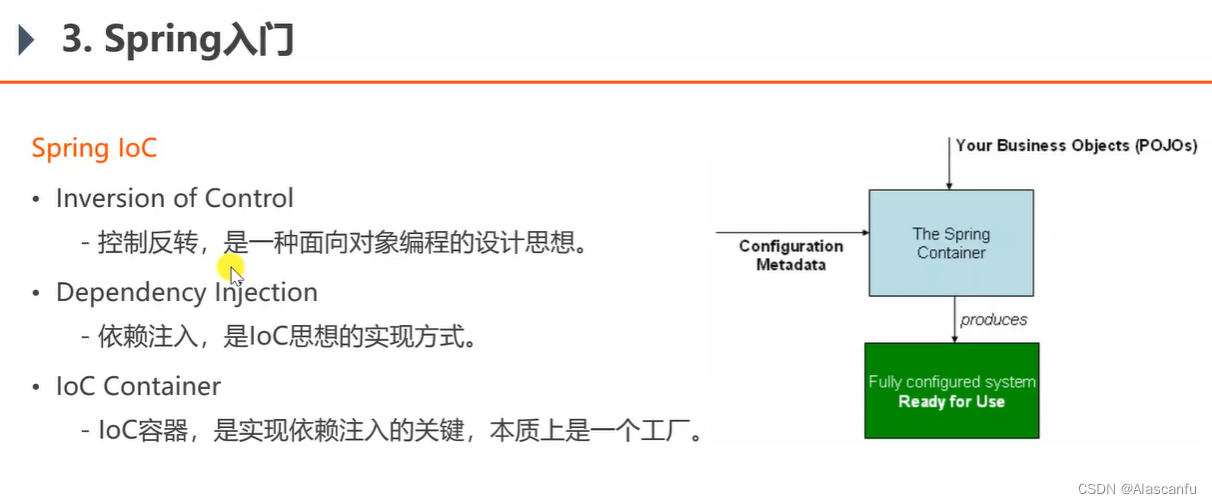
IOC (Inversion of Controller) 控制反转
控制反转,是一种面向对象编程的一种思想, 可以用来降低计算机各个组件之间的耦合度。
DI (Dependency Injection) 依赖注入
依赖注入,是对控制反转IOC思想的具体实现方式。
IOC Container
IOC 容器,是实现依赖注入的关键,本质上是一个工厂。
理解IOC Container 以及 简单使用
-
通过实现 ApplicationContextWare 接口 可以获取得到 ApplicationContext 这个容器对象 底层是BeanFactory。
-
通过 applicationContext 的 getBean() 方法 获取Bean 对象实例。
-
测试
com.alascanfu.dao.Test.dao
/***
 * @author: Alascanfu
 * @date : Created in 2022/6/20 20:42
 * @description: TestDAO 用于测试的 DAO 接口
 * @modified By: Alascanfu
 **/
public interface TestDAO {
    public String selectAll();
}
com.alascanfu.dao.impl.TestImpl
/***
 * @author: Alascanfu
 * @date : Created in 2022/6/20 20:43
 * @description: TestDAO的具体实现类
 * @modified By: Alascanfu
 **/
@Service
public class TestImpl implements TestDAO {
    @Override
    public String selectAll() {
        return "selectAll";
    }
}
NowcoderApplicationTests.java
@SpringBootTest
class NowcoderApplicationTests implements ApplicationContextAware {

	@Test
	void contextLoads() {
		TestDAO testDAO = applicationContext.getBean(TestDAO.class);
		System.out.println(testDAO.selectAll());
	}

	private ApplicationContext applicationContext;

	@Override
	public void setApplicationContext(ApplicationContext applicationContext) throws BeansException {
		this.applicationContext = applicationContext;
	}
}
测试

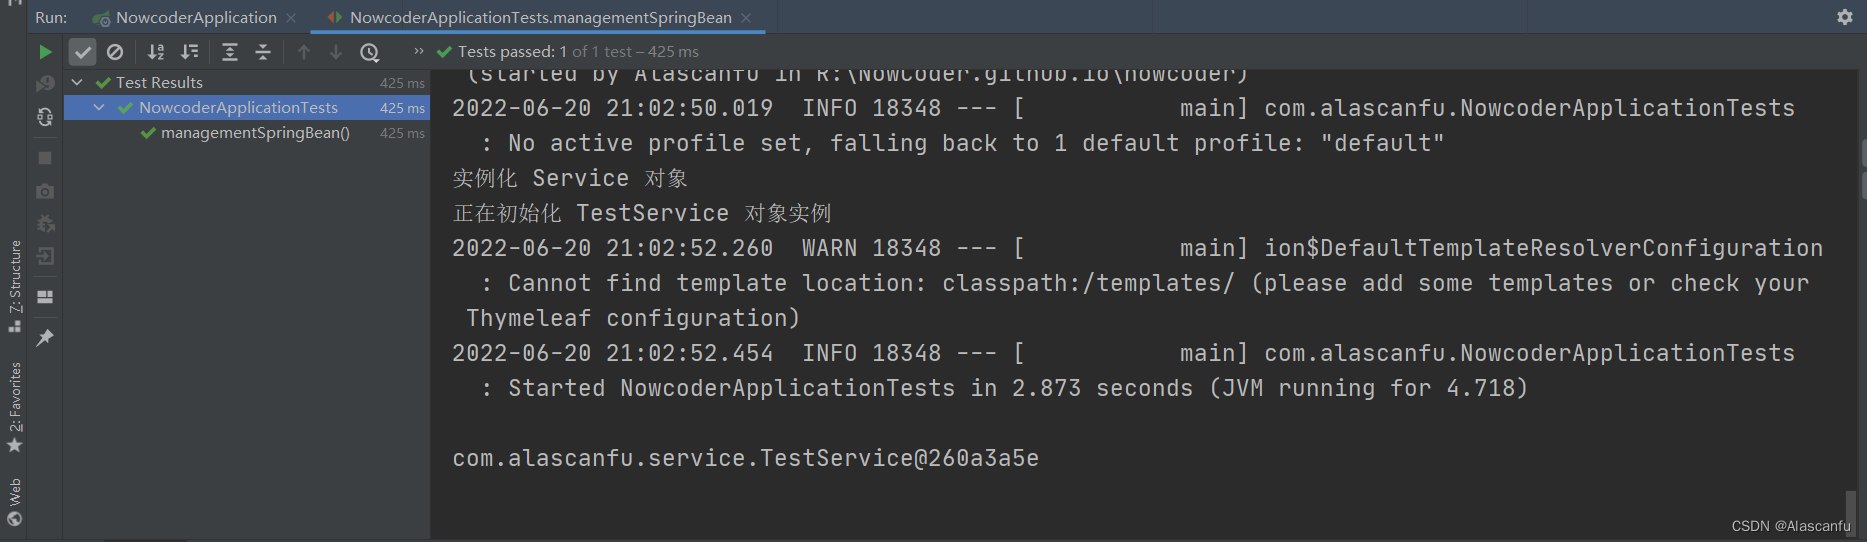
通过Spring getBean()获取TestService实例 查看其不同阶段情况
com.alascanfu.service.TestService
/***
 * @author: Alascanfu
 * @date : Created in 2022/6/20 20:58
 * @description: TestService 用于测试的 TestService
 * @modified By: Alascanfu
 **/
@Service
public class TestService {
    public TestService(){
        System.out.println("实例化 Service 对象");
    }

    @PostConstruct
    public void init(){
        System.out.println("正在初始化 TestService 对象实例");
    }
    @PreDestroy
    public void destroy(){
        System.out.println("正在销毁 TestService 对象实例");
    }
}
进行对应的测试
	@Test
	public void managementSpringBean(){
		TestService testService = applicationContext.getBean(TestService.class);
		System.out.println(testService);
	}
其余的有关于 Spring 的相关知识点建议去查看 官方文档这里只是快速了解一下 Spring ,如果想要快速入门 Spring 可以去查看 小付写好的笔记。
📑 Spring MVC 快速入门
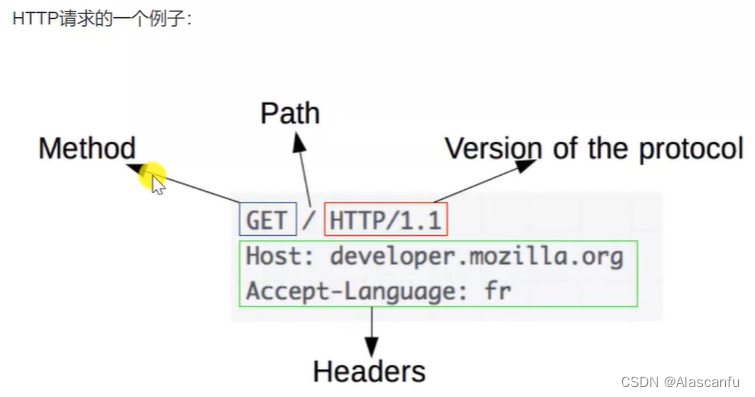
HTTP
SpringMVC
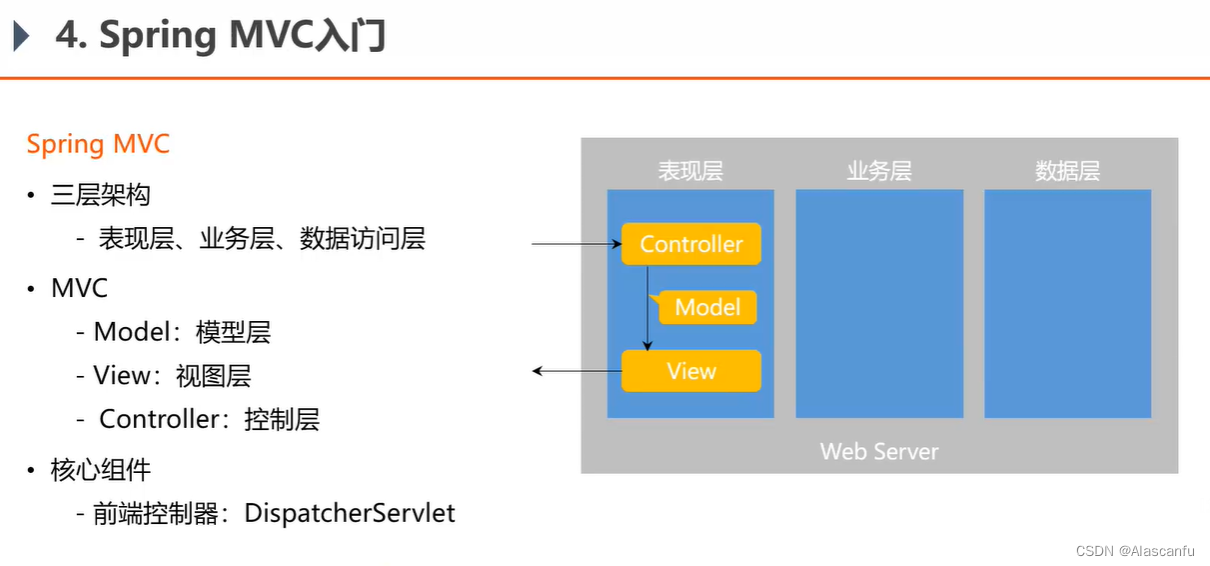
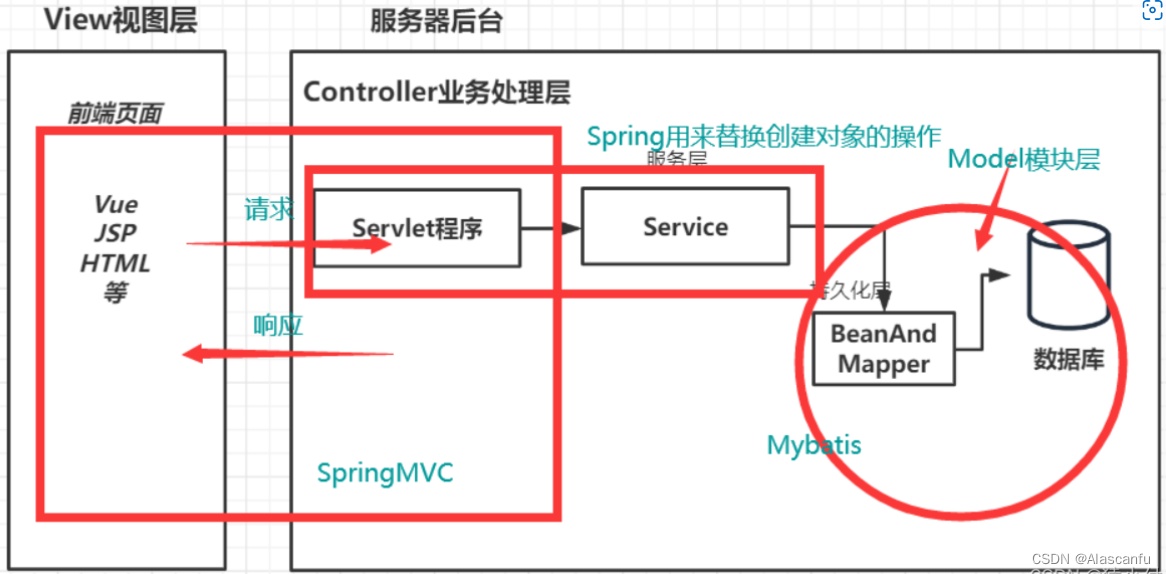
当浏览器发送请求时SpringMVC的执行过程
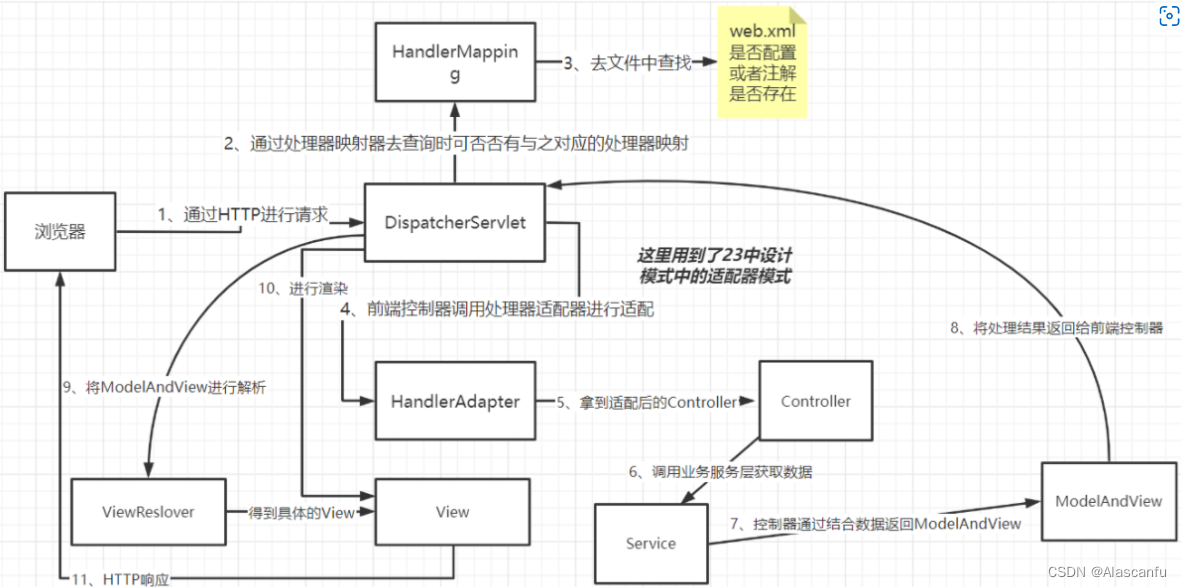
- 用户在浏览器发送请求会先到达DispatcherServlet这个前端控制器。
- DispatcherServlet会通过HandlerMapping去寻找处理器映射器。
- 一般会去web.xml或者通过注解进行查找到具体的处理器、如果生成处理器拦截器一并返回给前端控制器DispacherServlet。
- 当我们前端控制器拿到了这个控制器他会先去通过HandlerAdapter进行适配才能使用得到适配后的Controller。
- 此时的Controller会先去调用Service层的业务服务,拿到所需的数据与Controller结果进行结合返回ModelAndView传给前端控制器。
- 前端控制器获得了ModelAndView这个对象之后还会拿着这个东西去找ViewResolver去解析视图,获得View。
- 最后前端控制器通过拿到的View进行数据显示响应给用户。
📑 MyBatis 快速入门
配置文件配置
application.yaml
spring:
  datasource:
    username: root
    password: fujiawei2013
    url: jdbc:mysql://localhost:3306/community?useUnicode=true&characterEncoding=UTF-8&useSSL=false&severTimeZone=Asia/Shanghai
    driver-class-name: com.mysql.cj.jdbc.Driver
  thymeleaf:
    cache: false
mybatis:
  mapper-locations:  classpath*:mapper/*.xml
  configuration:
    map-underscore-to-camel-case: true
    cache-enabled: true
    use-generated-keys: true
  type-aliases-package: com.alascanfu.entity
📑 开发社区首页
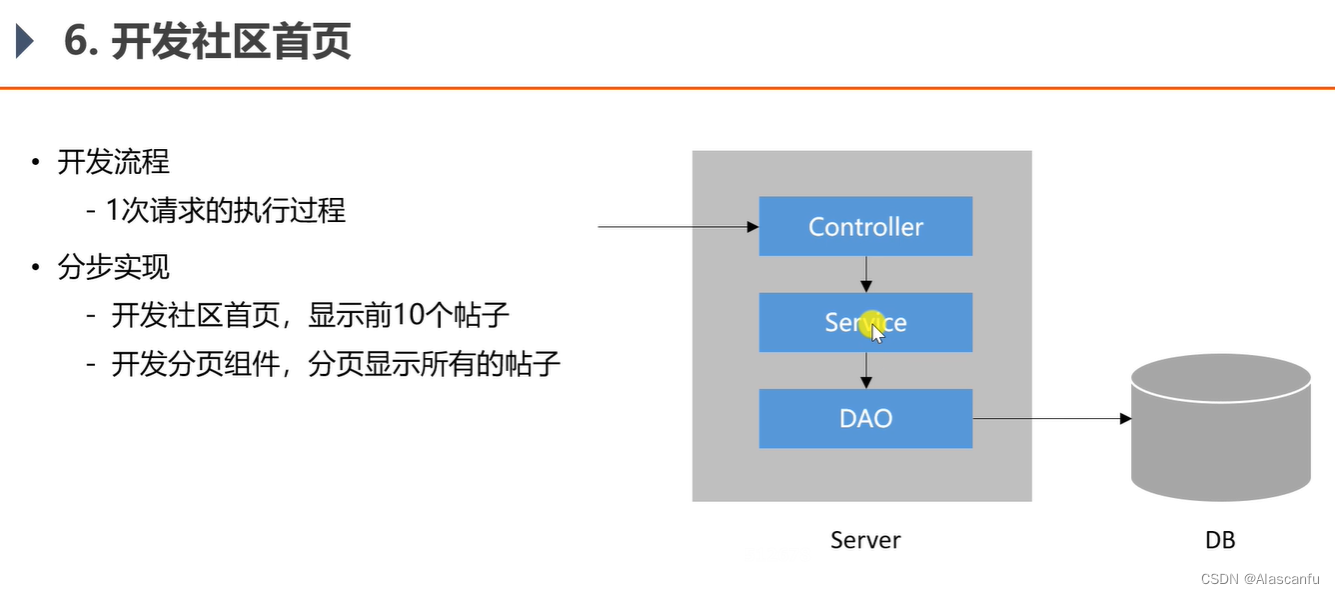
步骤一:创建数据库以及建表
SET NAMES utf8 ;
--
-- Table structure for table `comment`
--
DROP TABLE IF EXISTS `comment`;
 SET character_set_client = utf8mb4 ;
CREATE TABLE `comment` (
  `id` int(11) NOT NULL AUTO_INCREMENT,
  `user_id` int(11) DEFAULT NULL,
  `entity_type` int(11) DEFAULT NULL,
  `entity_id` int(11) DEFAULT NULL,
  `target_id` int(11) DEFAULT NULL,
  `content` text,
  `status` int(11) DEFAULT NULL,
  `create_time` timestamp NULL DEFAULT NULL,
  PRIMARY KEY (`id`),
  KEY `index_user_id` (`user_id`) /*!80000 INVISIBLE */,
  KEY `index_entity_id` (`entity_id`)
) ENGINE=InnoDB DEFAULT CHARSET=utf8;
--
-- Table structure for table `discuss_post`
--
DROP TABLE IF EXISTS `discuss_post`;
 SET character_set_client = utf8mb4 ;
CREATE TABLE `discuss_post` (
  `id` int(11) NOT NULL AUTO_INCREMENT,
  `user_id` varchar(45) DEFAULT NULL,
  `title` varchar(100) DEFAULT NULL,
  `content` text,
  `type` int(11) DEFAULT NULL COMMENT '0-普通; 1-置顶;',
  `status` int(11) DEFAULT NULL COMMENT '0-正常; 1-精华; 2-拉黑;',
  `create_time` timestamp NULL DEFAULT NULL,
  `comment_count` int(11) DEFAULT NULL,
  `score` double DEFAULT NULL,
  PRIMARY KEY (`id`),
  KEY `index_user_id` (`user_id`)
) ENGINE=InnoDB DEFAULT CHARSET=utf8;
--
-- Table structure for table `login_ticket`
--
DROP TABLE IF EXISTS `login_ticket`;
 SET character_set_client = utf8mb4 ;
CREATE TABLE `login_ticket` (
  `id` int(11) NOT NULL AUTO_INCREMENT,
  `user_id` int(11) NOT NULL,
  `ticket` varchar(45) NOT NULL,
  `status` int(11) DEFAULT '0' COMMENT '0-有效; 1-无效;',
  `expired` timestamp NOT NULL,
  PRIMARY KEY (`id`),
  KEY `index_ticket` (`ticket`(20))
) ENGINE=InnoDB DEFAULT CHARSET=utf8;
--
-- Table structure for table `message`
--
DROP TABLE IF EXISTS `message`;
 SET character_set_client = utf8mb4 ;
CREATE TABLE `message` (
  `id` int(11) NOT NULL AUTO_INCREMENT,
  `from_id` int(11) DEFAULT NULL,
  `to_id` int(11) DEFAULT NULL,
  `conversation_id` varchar(45) NOT NULL,
  `content` text,
  `status` int(11) DEFAULT NULL COMMENT '0-未读;1-已读;2-删除;',
  `create_time` timestamp NULL DEFAULT NULL,
  PRIMARY KEY (`id`),
  KEY `index_from_id` (`from_id`),
  KEY `index_to_id` (`to_id`),
  KEY `index_conversation_id` (`conversation_id`)
) ENGINE=InnoDB DEFAULT CHARSET=utf8;
--
-- Table structure for table `user`
--
DROP TABLE IF EXISTS `user`;
 SET character_set_client = utf8mb4 ;
CREATE TABLE `user` (
  `id` int(11) NOT NULL AUTO_INCREMENT,
  `username` varchar(50) DEFAULT NULL,
  `password` varchar(50) DEFAULT NULL,
  `salt` varchar(50) DEFAULT NULL,
  `email` varchar(100) DEFAULT NULL,
  `type` int(11) DEFAULT NULL COMMENT '0-普通用户; 1-超级管理员; 2-版主;',
  `status` int(11) DEFAULT NULL COMMENT '0-未激活; 1-已激活;',
  `activation_code` varchar(100) DEFAULT NULL,
  `header_url` varchar(200) DEFAULT NULL,
  `create_time` timestamp NULL DEFAULT NULL,
  PRIMARY KEY (`id`),
  KEY `index_username` (`username`(20)),
  KEY `index_email` (`email`(20))
) ENGINE=InnoDB AUTO_INCREMENT=101 DEFAULT CHARSET=utf8;
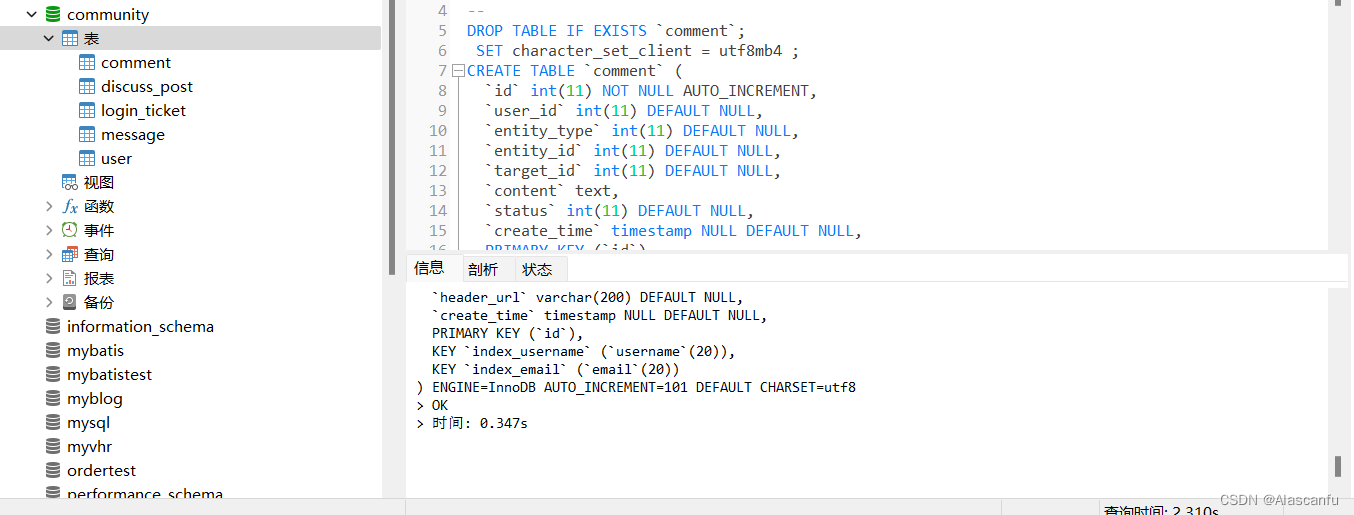
步骤二:编写DiscussPost实体类以及Controller 层
com.alascanfu.entity.DiscussPost
/***
 * @author: Alascanfu
 * @date : Created in 2022/6/21 8:54
 * @description: 对应数据库表中的 discuss_post 的实体类
 * @modified By: Alascanfu
 **/
public class DiscussPost {
    private Integer id ;

    private Integer userId;

    private String title ;

    private String content ;

    private Integer type ;

    private Integer status ;

    private Date createTime;

    private Integer commentCount;

    private Double score ;

    public Integer getId() {
        return id;
    }

    public void setId(Integer id) {
        this.id = id;
    }

    public Integer getUserId() {
        return userId;
    }

    public void setUserId(Integer userId) {
        this.userId = userId;
    }

    public String getTitle() {
        return title;
    }

    public void setTitle(String title) {
        this.title = title;
    }

    public String getContent() {
        return content;
    }

    public void setContent(String content) {
        this.content = content;
    }

    public Integer getType() {
        return type;
    }

    public void setType(Integer type) {
        this.type = type;
    }

    public Integer getStatus() {
        return status;
    }

    public void setStatus(Integer status) {
        this.status = status;
    }

    public Date getCreateTime() {
        return createTime;
    }

    public void setCreateTime(Date createTime) {
        this.createTime = createTime;
    }

    public Integer getCommentCount() {
        return commentCount;
    }

    public void setCommentCount(Integer commentCount) {
        this.commentCount = commentCount;
    }

    public Double getScore() {
        return score;
    }

    public void setScore(Double score) {
        this.score = score;
    }

    @Override
    public String toString() {
        return "DiscussPost{" +
            "id=" + id +
            ", userId=" + userId +
            ", title='" + title + '\'' +
            ", content='" + content + '\'' +
            ", type=" + type +
            ", status=" + status +
            ", createTime=" + createTime +
            ", commentCount=" + commentCount +
            ", score=" + score +
            '}';
    }
}
com.alascanfu.dao.DiscussPostMapper
/***
 * @author: Alascanfu
 * @date : Created in 2022/6/21 8:59
 * @description: DiscussPost 的 Mapper 接口 使用 MyBatis 通过配置xml文件 操作数据库
 * @modified By: Alascanfu
 **/
@Mapper
public interface DiscussPostMapper {
    /** 这是一个动态SQL */
    List<DiscussPost> selectDiscussPosts(int userId , int offset , int limit );

    /** @Param 用于给参数起别名的,如果只有一个参数,并且在 if 中使用拼接就必须拼接 */
    Integer selectDiscussPostRows(@Param("userId") int userId);
}
步骤三:编写对应的Mapper映射文件DiscussPostMapper.xml
<?xml version="1.0" encoding="UTF-8" ?>
<!DOCTYPE mapper
        PUBLIC "-//mybatis.org//DTD Mapper 3.0//EN"
        "http://mybatis.org/dtd/mybatis-3-mapper.dtd">
<mapper namespace="com.alascanfu.dao.DiscussPostMapper">
    <sql id="selectFields">
        id, user_id, title, content, type, status, create_time, comment_count, score
    </sql>

    <select id="selectDiscussPosts" resultType="com.alascanfu.entity.DiscussPost">
        select <include refid="selectFields"></include>
        from discuss_post
        where status != 2
        <if test="userId!=0">
            and user_id = #{userId}
        </if>
        order by type desc , create_time desc
        limit #{offset} , #{limit}
    </select>

    <select id="selectDiscussPostRows" resultType="int">
        select count(id)
        from discuss_post
        where status != 2
        <if test="userId!=0">
            and user_id = #{userId}
        </if>
    </select>
</mapper>
进行数据库的相关数据进行测试
@SpringBootTest
class NowcoderApplicationTests implements ApplicationContextAware {

	@Autowired
	DiscussPostMapper discussPostMapper;
	@Test
	public void testSelectPosts(){
		List<DiscussPost> discussPosts = discussPostMapper.selectDiscussPosts(0, 0, 10);
		for (DiscussPost dsp : discussPosts) {
			System.out.println(dsp);
		}
		int rows = discussPostMapper.selectDiscussPostRows(0);
		System.out.println("总共有" + rows + "条帖子。");
	}
}
步骤四:编写对应的 Service 层信息
/***
 * @author: Alascanfu
 * @date : Created in 2022/6/21 9:52
 * @description: DiscussPostService 的具体业务实现类
 * @modified By: Alascanfu
 **/
@Service
public class DiscussPostService {
    @Autowired
    DiscussPostMapper discussPostMapper ;

    public List<DiscussPost> findDiscussPosts (int userId,int offset , int limit){
        return discussPostMapper.selectDiscussPosts(userId, offset, limit);
    }

    public int findDiscussPostRows(int userId){
        return discussPostMapper.selectDiscussPostRows(userId);
    }
}
步骤五:编写对应User类,UserMapper ,UserService
/***
 * @author: Alascanfu
 * @date : Created in 2022/6/21 10:00
 * @description: 对应数据库表中的 user 的实体类
 * @modified By: Alascanfu
 **/
@Data
@ToString
public class User {
    private Integer id ;

    private String username ;

    private String password ;

    private String salt ;

    private String email ;

    private Integer type ;

    private Integer status ;

    private String activationCode ;

    private String headerUrl ;

    private Date createTime ;
}
com.alascanfu.service.UserService
@Service
public class UserService {

    @Autowired
    private UserMapper userMapper;

    public User findUserById(int id){
        return userMapper.selectById(id);
    }
}
进行单元测试

步骤六:导入模板引擎
步骤七:编写对应 index 页面的 HomeController
/***
 * @author: Alascanfu
 * @date : Created in 2022/6/21 10:39
 * @description:
 * @modified By: Alascanfu
 **/
@Controller
public class HomeController {
    @Autowired
    private DiscussPostService discussPostService ;

    @Autowired
    private UserService userService;

    @RequestMapping(path = "/index",method = RequestMethod.GET)
    public String getIndexPage(Model model){

        List<DiscussPost> discussPostsList = discussPostService.findDiscussPosts(0, 0, 10);
        List<Map<String , Object>> discussPosts = new ArrayList<>();
        if (discussPostsList != null){
            for (DiscussPost discussPost : discussPostsList) {
                Map<String , Object> map = new HashMap<>();
                map.put("post",discussPost);
                User user = userService.findUserById(discussPost.getId());
                map.put("user",user);
                discussPosts.add(map);
            }
        }
        model.addAttribute("discussPosts",discussPosts);
        return "/index";
    }
}
步骤八:编写对应的 UserService
/***
 * @author: Alascanfu
 * @date : Created in 2022/6/21 9:57
 * @description: UserService 的具体业务实现类
 * @modified By: Alascanfu
 **/
@Service
public class UserService {

    @Autowired
    private UserMapper userMapper;

    public User findUserById(int id){
        return userMapper.selectById(id);
    }
}
步骤九:改写社区首页动态获取信息
index.html —— 列表模块
<!-- 帖子列表 -->
<ul class="list-unstyled">
    <li class="media pb-3 pt-3 mb-3 border-bottom" th:each="map:${discussPosts}">
        <a th:href="${map.user.headerUrl}">
            <img th:src="${map.user.headerUrl}" class="mr-4 rounded-circle" alt="用户头像" style="width:50px;height:50px;">
        </a>
        <div class="media-body">
            <h6 class="mt-0 mb-3">
                <a href="#" th:utext="${map.post.title}">备战春招,面试刷题跟他复习,一个月全搞定!</a>
                <span class="badge badge-secondary bg-primary" th:if="${map.post.type==1}">置顶</span>
                <span class="badge badge-secondary bg-danger" th:if="${map.post.status==1}">精华</span>
            </h6>
            <div class="text-muted font-size-12">
                <u class="mr-3" th:utext="${map.user.username}"></u> 发布于 <b th:text="${#dates.format(map.post.createTime,'yyyy-MM-dd HH:mm:ss')}"></b>
                <ul class="d-inline float-right">
                    <li class="d-inline ml-2">赞 11</li>
                    <li class="d-inline ml-2">|</li>
                    <li class="d-inline ml-2">回帖 7</li>
                </ul>
            </div>
        </div>
    </li>
</ul>
步骤十:封装分页相关信息的组件
com.alascanfu.entity.Page
/***
 * @author: Alascanfu
 * @date : Created in 2022/6/21 19:45
 * @description: Page 类用于封装分页相关的信息实体类
 * @modified By: Alascanfu
 **/
public class Page {
    /** 当前页码 */
    private Integer currentPage = 1 ;

    /** 显示上限 */
    private Integer limitPages = 10 ;

    /** 数据总数 用于计算总的页数 */
    private Integer rows ;

    /** 查询路径用于复用分页链接 */
    private String path ;

    public Integer getCurrentPage() {
        return currentPage;
    }

    public void setCurrentPage(Integer currentPage) {
        if (currentPage >= 1 ){
            this.currentPage = currentPage;
        }
    }

    public Integer getLimitPages() {
        return limitPages;
    }

    public void setLimitPages(Integer limitPages) {
        if (limitPages >= 1 && limitPages <= 100){
            this.limitPages = limitPages;
        }
    }

    public Integer getRows() {
        return rows;
    }

    public void setRows(Integer rows) {
        if (rows >= 0 ){
            this.rows = rows;
        }
    }

    public String getPath() {
        return path;
    }

    public void setPath(String path) {
        this.path = path;
    }
    /** 获取当前页的起始行 */
    public Integer getOffset(){
        // defaultPage * limit - limit
        return (currentPage - 1 ) * limitPages;
    }

    /** 获取总的页数 */
    public Integer getTotal(){
        // rows / limit [+1]
        int total = rows % limitPages == 0 ? rows / limitPages : rows / limitPages + 1;
        return total;
    }
    /** 从第几页开始进行显示 */
    public Integer getFrom(){
        int from = currentPage - 2 ;
        return Math.max(from, 1);
    }
    /** 显示到多少页结束 */
    public Integer getTo(){
        int to = currentPage + 2 ;
        return Math.min(getTotal() , to);
    }
}
步骤十一:改写我们的 HomeController
com.alascanfu.HomeController
/***
 * @author: Alascanfu
 * @date : Created in 2022/6/21 10:39
 * @description:
 * @modified By: Alascanfu
 **/
@Controller
public class HomeController {
    @Autowired
    private DiscussPostService discussPostService ;

    @Autowired
    private UserService userService;

    @RequestMapping(path = "/index",method = RequestMethod.GET)
    public String getIndexPage(Model model , Page page){
        // 方法调用之前 SpringMVC 会自动实例化 Model 和 配置,并将配置注入给Model
        // 所以我们在 Thymeleaf 中可以直接访问 Page 对象中的数据
        page.setRows(discussPostService.findDiscussPostRows(0));
        page.setPath("/index");
        List<DiscussPost> discussPostsList = discussPostService.findDiscussPosts(0, page.getOffset(), page.getLimitPages());
        List<Map<String , Object>> discussPosts = new ArrayList<>();
        if (discussPostsList != null){
            for (DiscussPost discussPost : discussPostsList) {
                Map<String , Object> map = new HashMap<>();
                map.put("post",discussPost);
                User user = userService.findUserById(discussPost.getId());
                map.put("user",user);
                discussPosts.add(map);
            }
        }
        model.addAttribute("discussPosts",discussPosts);
        return "/index";
    }
}
步骤十二:回到 index 页面对我们的社区首页进行改写
<!-- 分页 -->
<nav class="mt-5" th:if="${page.rows>0}">
    <ul class="pagination justify-content-center">
        <li class="page-item"><a class="page-link" th:href="@{${page.path}(currentPage=1)}">首页</a></li>
        <li th:class="|page-item ${page.currentPage==1?'disabled':''}|">
            <a class="page-link" th:href="@{${page.path}(currentPage=${page.currentPage - 1})}">
                上一页
            </a>
        </li>
        <li th:class="|page-item ${page.currentPage==i?'active':''}|" th:each="i : ${#numbers.sequence(page.from,page.to)}">
            <a class="page-link" th:href="@{${page.path}(currentPage=${i})}" th:utext="${i}"></a>
        </li>
        <li th:class="|page-item ${page.currentPage==page.total?'disabled':''}|" >
            <a class="page-link" th:href="@{${page.path}(currentPage=${page.currentPage - 1})}">
                下一页
            </a>
        </li>
        <li class="page-item">
            <a class="page-link" th:href="@{${page.path}(currentPage=${page.total})}">
                末页
            </a>
        </li>
    </ul>
</nav>
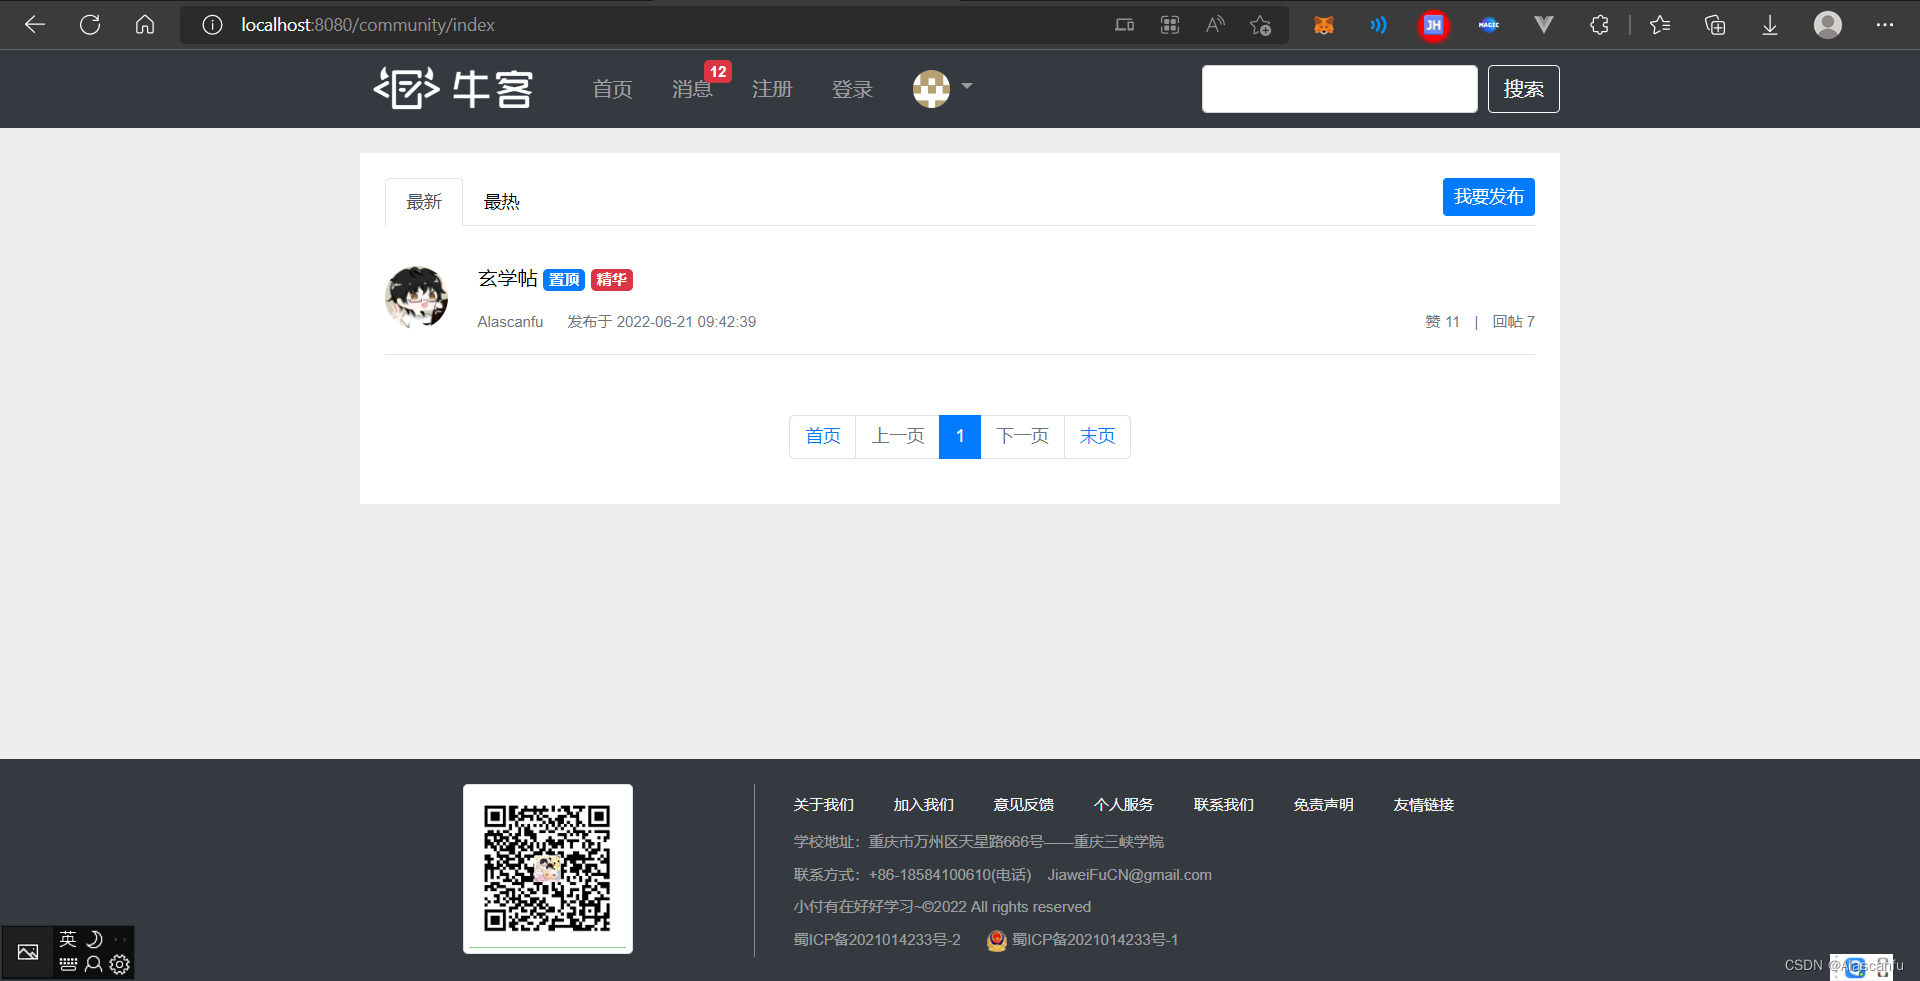
启动项目进行对应的测试
http://localhost:8080/community/index
📑 项目调试技巧
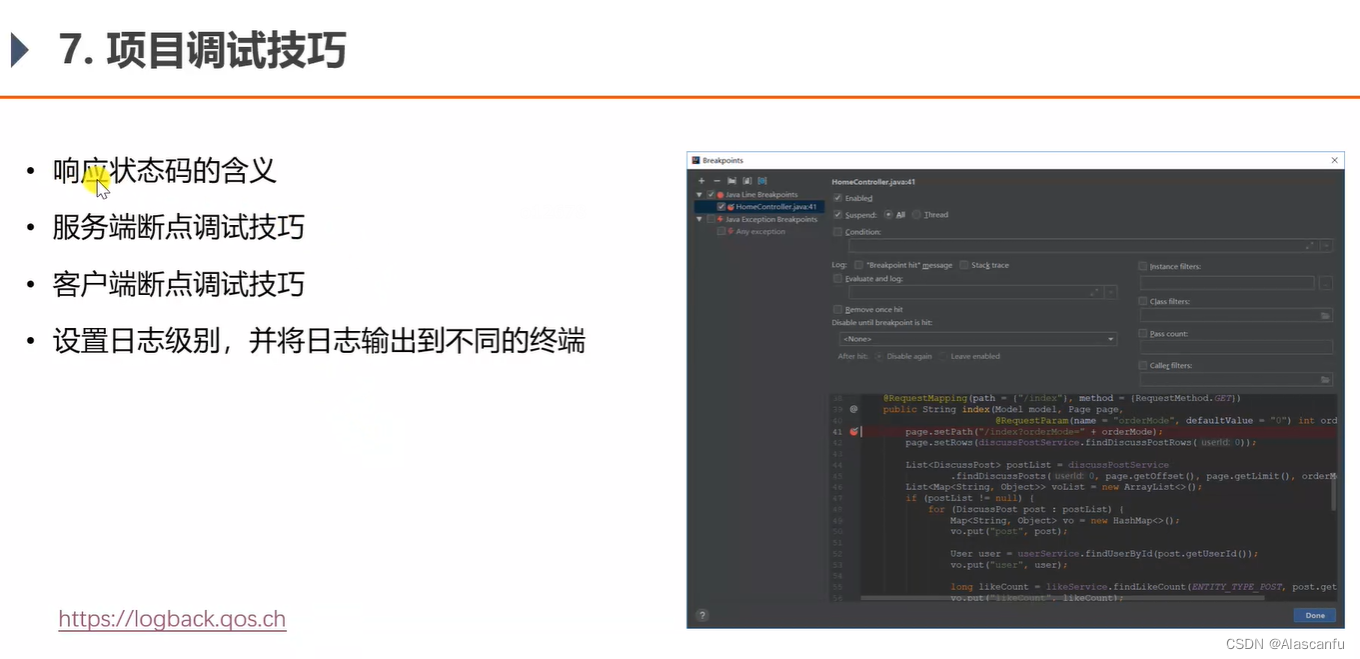
前端页面断点调试
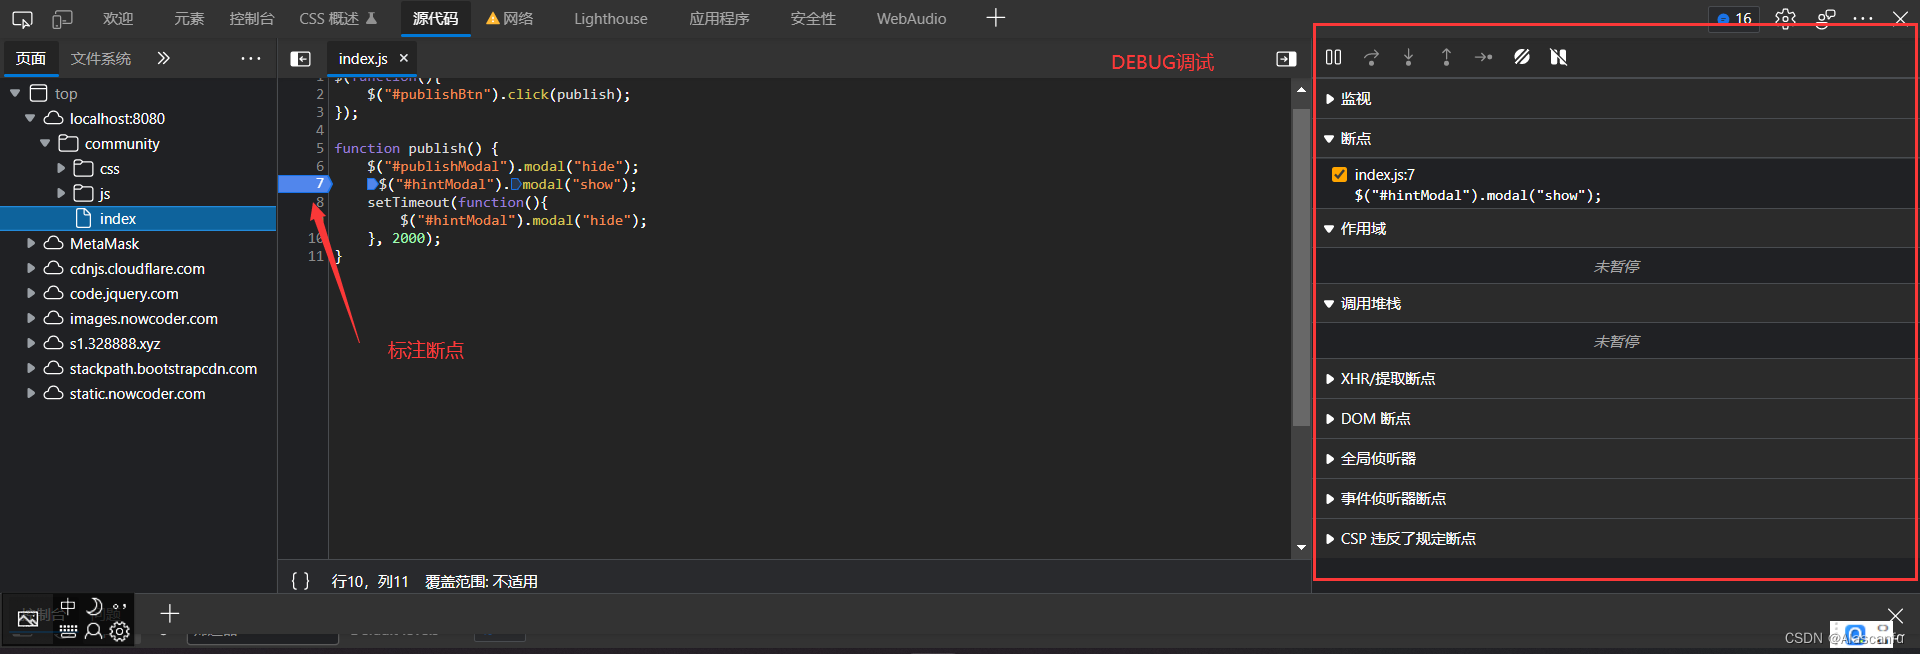
-
F10 到下一行进行调试
-
F11 进入到方法当中
-
F8 执行到底或者到下一个断点
日志工具的使用
通过配置文件配置日志隔离级别
logging:
  level:
    com.alascanfu: debug
其余配置如需请自行学习
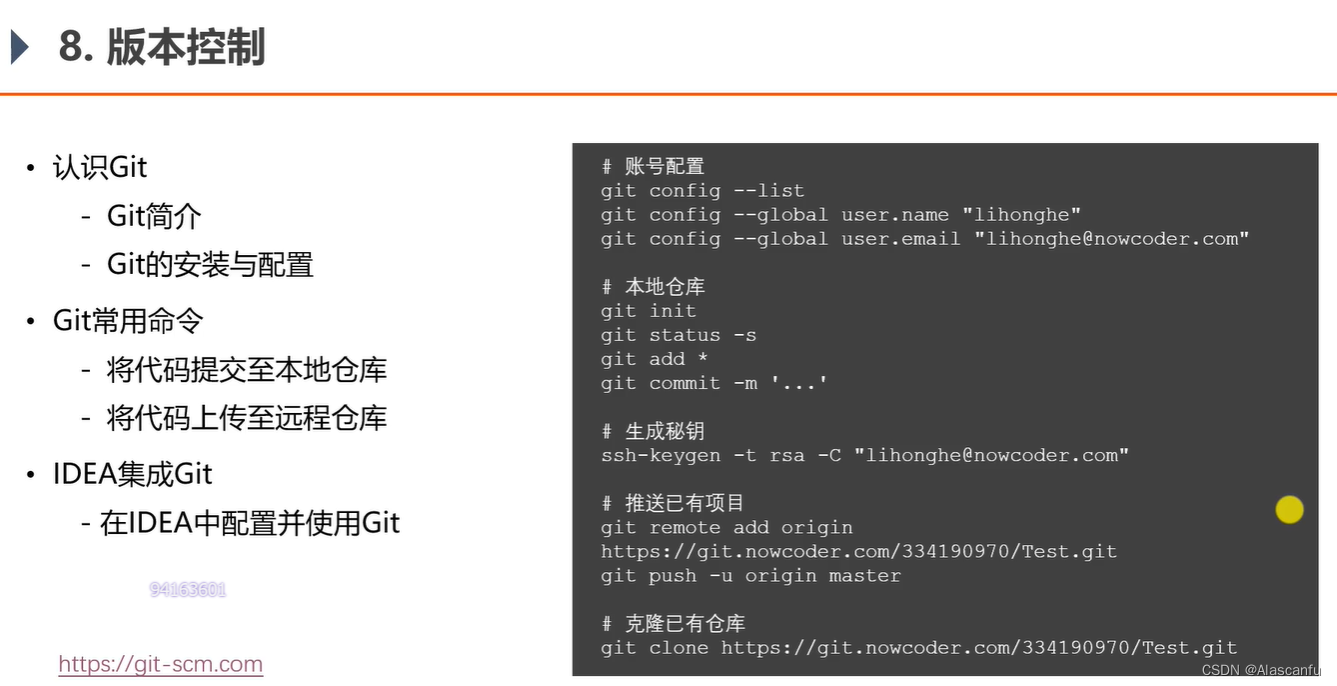
📑 版本控制

腾讯云面向开发者汇聚海量精品云计算使用和开发经验,营造开放的云计算技术生态圈。
更多推荐
 1
1 0
0- 0


 已为社区贡献2条内容

所有评论(0)