使用Keras模块搭建一个简单的神经网络模型
免责声明:接触Keras的时间并不长,本文主要用于记录在搭建第一个神经网络模型过程中遇到的问题,以及自己的一些感触,仅适合新手对Keras有一个初步的认识,以及提供一个上手的测试方法,在进行测试之前请事先安装好所需要的python环境以及相应模块。
--需要模块
matplotlib:用来画图的,可以直接在终端中使用 pip install matplotlib安装,或者在设置-项目-解释器中搜索安装
tensorflow:本次的内容主题,可以在tensorflow官网中安装,也可以直接参考这篇文章http://t.csdn.cn/NqsoW http://t.csdn.cn/NqsoW
在安装完成之后可以输出tensorflow的版本号测试是否安装成功
import tensorflow as tf
print(tf.__version__)sklearn:sklearn模块用的不多,在这里我们只会用到 train_test_split(训练测试分离模块)
--Begin
首先我们需要获取神经网络需要的数据集,为了方便理解,我们这里以
为例
----获取测试样本
start = -1000
stop = 1000
step = 1
x = [x / 10 for x in range(start * 10, stop * 10, step)]
y = [6*i-4 for i in x]注意:样本的取值要具有标记性,而且要全面,如果想预测函数关系,要把正数、负数、小数全都涉及到。
简单画个图:
plt.plot(x,y)
plt.xlabel('x')
plt.ylabel('y')众所周知,训练神经网络需要有训练集和测试集,所以我们需要将这1000个样本进行划分,这时候就需要用到sklearn中的train_test_split模块来划分数据集了 ,train_test_split可以参考这个http://t.csdn.cn/Uhty5http://t.csdn.cn/Uhty5
换成人话就是你 给了这个函数训练集、分割比、随机数种子,这个函数就能够返回分割后的训练集和测试集。
from sklearn.model_selection import train_test_split
train_x,val_x,train_y,val_y = train_test_split(x,y,test_size =0.2,random_state = 42)
👆这里是按照8:2的比例将样本分割,随机数种子42随便取的👆
画个图看看:
plt.figure(2)
plt.plot(train_x,train_y)
plt.xlabel('x1')
plt.ylabel('y1')
plt.figure(3)
plt.plot(val_x,val_y)
plt.xlabel('x2')
plt.ylabel('y2') 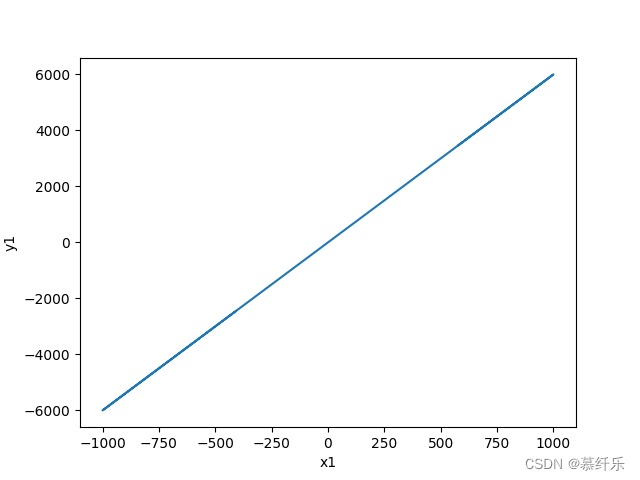
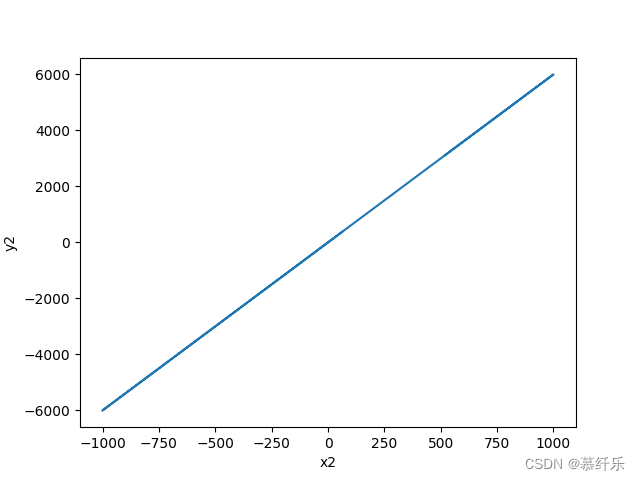
----搭建模型
有两种方式搭建:
一种是声明Sequential模型的时候就直接添加好每层神经元:
model = keras.Sequential(
    [keras.layers.Dense(16,activation='relu',input_dim=1),
    keras.layers.Dense(1,activation='linear')]
)
另一种是先声明Sequential模型,之后根据实际情况添加
model = keras.Sequential()
model.add(keras.layers.Dense(16, activation='relu', input_dim=1))
model.add(keras.layers.Dense(1, activation='linear'))
注意!!!
使用第一种方法的时候,那个中括号一定别忘记(这个地方很容易忘记)
解释一下,Sequential是keras中的api,能够方便快捷的创建一个神经网络模型,keras提供了8种神经网络接口层:
# - `Dense`:全连接层,每个神经元与上一层的所有神经元相连接。
# - `Conv2D`:二维卷积层,用于处理图像和空间数据。
# - `MaxPooling2D`:二维最大池化层,用于降低图像或空间数据的维度。
# - `Dropout`:随机失活层,用于防止过拟合。
# - `Activation`:激活函数层,对输入数据进行激活函数的计算。
# - `BatchNormalization`:批标准化层,用于加速模型训练过程。
# - `Flatten`:扁平层,用于将多维的输入数据展平为一维。
# - `LSTM`:长短时记忆网络层,用于处理序列数据。
每个神经元层的参数可以参考tensorflow官方文档下提供的API 接口:
Module: tf.keras | TensorFlow v2.13.0 (google.cn)
这里我们使用的是Dense全连接层来进行操作,具体上手可以根据需要合理选择。
Dense有三个参数:神经元个数,激活函数,输入数据的维度,在本例中使用神经网络进行拟合,输入数据为一维,所以输入1即可。
注意:
x: Input data. It could be:
              - A Numpy array (or array-like), or a list of arrays
                (in case the model has multiple inputs).
              - A TensorFlow tensor, or a list of tensors
                (in case the model has multiple inputs).
              - A dict mapping input names to the corresponding array/tensors,
                if the model has named inputs.
              - A `tf.data` dataset. Should return a tuple
                of either `(inputs, targets)` or
                `(inputs, targets, sample_weights)`.
              - A generator or `keras.utils.Sequence` returning `(inputs,
                targets)` or `(inputs, targets, sample_weights)`.
              - A `tf.keras.utils.experimental.DatasetCreator`, which wraps a
                callable that takes a single argument of type
                `tf.distribute.InputContext`, and returns a `tf.data.Dataset`.
                `DatasetCreator` should be used when users prefer to specify the
                per-replica batching and sharding logic for the `Dataset`.
                See `tf.keras.utils.experimental.DatasetCreator` doc for more
                information.
              A more detailed description of unpacking behavior for iterator
              types (Dataset, generator, Sequence) is given below. If these
              include `sample_weights` as a third component, note that sample
              weighting applies to the `weighted_metrics` argument but not the
              `metrics` argument in `compile()`. If using
              `tf.distribute.experimental.ParameterServerStrategy`, only
              `DatasetCreator` type is supported for `x`.
查看Dense函数的源码中会有形参的类型要求,在搭建模型的时候需要注意!!!
避免传入的参数出错,导致结果不符合预期。
----编译模型
#编译神经网络模型
model.compile(optimizer='adam',loss='mean_squared_error',metrics=['mean_absolute_error'])在完成模型搭建之后就可以使用compile函数来进行编译,在这里compile的三个参数含义分别为:
optimizer:优化器类型,有adam,sgd(梯度)等
loss:损失函数,有mean_squared_error(均方误差),binary_crossentropy等
metrics:评价指标,即用来评价拟合好坏使用的方式,这里使用的仍然是均方误差作为标准。
----训练模型
#训练模型
model.fit(train_x,train_y,batch_size=32,epochs=40,validation_data=(val_x,val_y))
#保存模型
model.save('model.h5')
使用 fit 函数进行模型训练,输入我们使用的训练样本以及测试样本,参数解释如下:
batch_size: 每个训练批次的样本数量
epochs:训练的批次
validation_data: 验证集
----预测结果
注意预测结果的输入也要是numpy数组
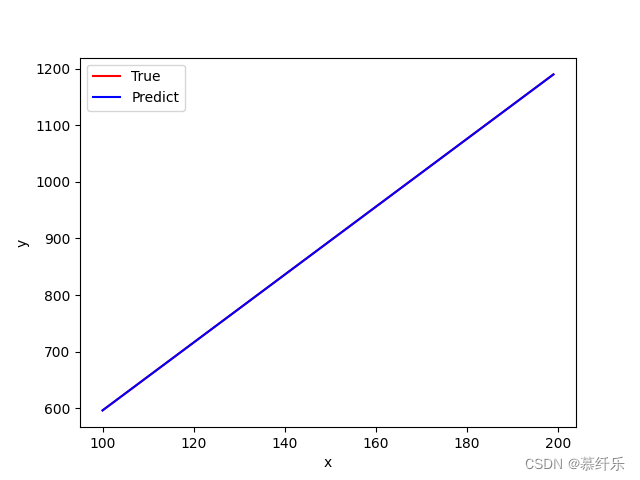

OK, 结果基本一致!!
···一点牢骚
在实际应用中,神经网络往往需要更加复杂的调整,比如神经元的深度,每个隐含层神经元的数目,加入正则化防止过拟合(L1,L2等),比简单拟合一个线性关系复杂的多。例如在做完这个拟合线性关系之后我尝试拟合了很久二次函数关系,但是拟合的效果都不是很好,咨询老师也只是让我自己去看论坛。。
算了,反正还有时间慢慢学😀
----代码
import tensorflow as tf
from tensorflow import keras
import matplotlib.pyplot as plt
from sklearn.model_selection import train_test_split
import numpy as np

# 准备数据集
# 使用函数 y = x^2 - 1 作为数据集
start = -1000
stop = 1000
step = 1
x = [x / 10 for x in range(start * 10, stop * 10, step)]
y = [6*i-4 for i in x]

plt.figure(1)
plt.plot(x, y)
plt.xlabel('x')
plt.ylabel('y')
# 将设置的标签显示在图表中
rand_ratio = 0.8
train_x, val_x, train_y, val_y = train_test_split(x, y, test_size=0.2, random_state=42)

# random_state为随机数种子

train_x = np.array(train_x)
train_y = np.array(train_y)
val_x = np.array(val_x)
val_y = np.array(val_y)
model = keras.Sequential(
    [keras.layers.Dense(16, input_dim=1, activation='relu'),
     keras.layers.Dense(1, activation='linear')]
)
# 编译神经网络模型
model.compile(optimizer='adam', loss='mean_squared_error', metrics=['mean_absolute_error', 'accuracy'])
# 训练模型
model.fit(train_x, train_y, epochs=40, validation_data=(val_x, val_y))
# 预测结果
x_test = [i for i in range(100, 200)]
#转换成numpy数组
x_test = np.array(x_test)
y_predict = []
y_predict_t = model.predict(x_test)
print(y_predict_t)
for i in y_predict_t:
    for j in i:
        y_predict.append(j)
print(y_predict)
y_ture = [6 * i - 4 for i in x_test]
plt.figure(2)
plt.plot(x_test, y_ture, label='True', color='red')
plt.plot(x_test, y_predict, label='Predict', color='blue')
plt.xlabel('x')
plt.ylabel('y')
plt.legend(['True', 'Predict'])
plt.show()

腾讯云面向开发者汇聚海量精品云计算使用和开发经验,营造开放的云计算技术生态圈。
更多推荐
 0
0 0
0- 0


 已为社区贡献1条内容

所有评论(0)