kubernetes ARM版 离线部署k8s
在ARM架构的硬件上离线部署Kubernetes以及KubeSphere,你需要提前准备所有必要的二进制文件、镜像和其他资源,因为ARM架构下的软件包可能与x86架构不同。
前言
在ARM架构的硬件上离线部署Kubernetes,你需要提前准备所有必要的二进制文件、镜像和其他资源,因为ARM架构下的软件包可能与x86架构不同。
整体思路
前置条件:无论在线安装or离线安装,都需要做的前置操作
外网环境:在有网络的条件下,安装k8s成功之后,导出【离线安装包】
内网环境:将【离线安装包】传至内网,执行部署操作
前置条件(在线or离线部署均需check)
关闭防火墙
sudo systemctl stop firewalld
sudo systemctl disable firewalld
sudo systemctl status firewalld
关闭 selinux
# 永久关闭动作
sudo sed -i 's/enforcing/disabled/' /etc/selinux/config

# :
cat /etc/selinux/config

# This file controls the state of SELinux on the system.
# SELINUX= can take one of these three values:
#     disabled - SELinux security policy is enforced.
#     permissive - SELinux prints warnings instead of disabled.
#     disabled - No SELinux policy is loaded.
SELINUX=disabled
# SELINUXTYPE= can take one of three values:
#     targeted - Targeted processes are protected,
#     minimum - Modification of targeted policy. Only selected processes are protected.
#     mls - Multi Level Security protection.
SELINUXTYPE=targeted
关闭swap分区
## 临时关闭
swapoff -a &	# 稍等几分钟
free -m 		# 验证

## 永久关闭
vim /etc/fstab  ## 将swap分区那行记录注释掉
#/dev/mapper/cl-swap     swap                    swap    defaults        0 0
网络配置
旨在确保 Kubernetes 的网络流量遵循预期的网络配置和安全策略。以下是每个步骤和设置背后的原理和目的:
加载内核模块
cat <<EOF | sudo tee /etc/modules-load.d/k8s.conf
overlay
br_netfilter
EOF

sudo modprobe overlay
sudo modprobe br_netfilter
- 内核模块:
overlay:用于支持overlay文件系统,这在容器运行时(如Docker)中非常常见,因为它允许在不同的层(镜像和容器)之间共享文件。br_netfilter:用于支持桥接网络的包过滤。当网桥接口传输数据包时,它允许这些数据包被iptables处理。
加载这些模块是为了确保Kubernetes能够处理网络数据包并提供服务的隔离。
设置 sysctl 参数
cat <<EOF | sudo tee /etc/sysctl.d/k8s.conf
net.bridge.bridge-nf-call-iptables  = 1
net.bridge.bridge-nf-call-ip6tables = 1
net.ipv4.ip_forward                 = 1
EOF
-
net.bridge.bridge-nf-call-iptables和net.bridge.bridge-nf-call-ip6tables:这两个sysctl参数的设置允许桥接的网络流量调用iptables(IPv4和IPv6),这意味着通过网桥的流量将遵循在iptables中定义的规则。这样做是为了能对Pod之间的流量进行更细粒度的控制和安全管理。 -
net.ipv4.ip_forward:此设置启用IPv4的IP转发功能。它允许主机转发到来而非目标为本机的数据包,这是容器技术中从一个网络接口转发数据包到另一个接口的关键。
启用IP转发
# 这个命令直接启用内核的IP转发功能,即使不重启机器也可以立即生效。
# 这对初始化网络转发能力至关重要
echo 1 > /proc/sys/net/ipv4/ip_forward
验证
模块验证:
lsmod | grep br_netfilter
lsmod | grep overlay
sysctl设置验证:
sysctl net.bridge.bridge-nf-call-iptables net.bridge.bridge-nf-call-ip6tables net.ipv4.ip_forward
这些命令用来检查系统参数配置是否正确设置为1。这一步确保你的网络系统配置允许桥接网络流量参与iptables规则判定,并且支持IP数据包转发。
时间同步
在线部署
sudo yum install ntpdate -y
ntpdate time.windows.com
离线部署
手动同步时间
如果节点数量不多,可以手动同步它们的时间。连接到每一个节点并使用 date 或 timedatectl 命令设置时间。
sudo date -s "2024-11-18 15:47:14"
脚本同步
#!/bin/bash
TIME="2024-11-18 15:47:14"
NODES=("node1" "node2" "node3")  # 这里替换为你的节点名称或IP

for NODE in "${NODES[@]}"; do
    ssh root@$NODE "date -s '$TIME'"
done
确保 SSH 配置完成,并且可以无密码访问其他节点,然后运行脚本在所有节点上同步时间。
更新/etc/hosts(视自身情况进行更新)
cat >> /etc/hosts << EOF
11.0.1.10   k8s-master1
11.0.1.11   k8s-master2
11.0.1.13   k8s-node1
EOF
系统生效
sudo sysctl --system外网环境
整体思路:
- 在阿里云,开通临时服务器(ARM机器),香港(避免有些镜像拉取不到)
- 通过yum工具,安装:socat、conntrack、ebtables、ipset、kubeadm、kubelet 和 kubectl
- 安装容器运行时:containerd
- 在线安装k8s:通过kubeadm安装,且配置网络插件flannel
- 【离线包】通过repotrack工具,导出rpm依赖包
- 【离线包】docker save:导出镜像依赖
安装 containerd
安装步骤
containerd ARM版 二进制安装containerd-CSDN博客
避免containerd进程禁用了cri模块插件(需在安装完docker or containerd后执行!!)
sudo vim /etc/containerd/config.toml

## 注释掉 or 将cri从数组中去除:disabled_plugins = ["cri"]

# 重启containerd
sudo systemctl restart containerd
在线安装rpm相关依赖
配置Kubernetes的yum镜像源
#阿里源 aarch64架构
cat > /etc/yum.repos.d/kubernetes.repo <<EOF
[kubernetes]
name=Kubernetes
baseurl=https://mirrors.aliyun.com/kubernetes/yum/repos/kubernetes-el7-aarch64
enabled=1
gpgcheck=1
repo_gpgcheck=1
gpgkey=http://mirrors.aliyun.com/kubernetes/yum/doc/yum-key.gpg http://mirrors.aliyun.com/kubernetes/yum/doc/rpm-package-key.gpg
EOF
在线安装依赖rpm包
参考链接:kubernetes socat、conntrack、ebtables、ipset的各自用途是什么?-CSDN博客
sudo yum install -y socat conntrack ebtables ipvsadm ipset jq iptables curl sysstat libseccomp wget vim net-tools git在线安装相关k8s组件 rpm包
# 下载 k8s 相关
yum install -y kubelet-1.27.3-0 kubeadm-1.27.3-0 kubectl-1.27.3-0
启动kubelet
sudo systemctl enable --now kubelet初始化配置文件
kubeadm config print init-defaults > ./kubeadm-init-conf.yml具体内容:
apiVersion: kubeadm.k8s.io/v1beta3
bootstrapTokens:
- groups:
  - system:bootstrappers:kubeadm:default-node-token
  token: abcdef.0123456789abcdef
  ttl: 24h0m0s
  usages:
  - signing
  - authentication
kind: InitConfiguration
localAPIEndpoint:
  advertiseAddress: 11.0.1.10    # 设置k8s-master1 ip
  bindPort: 6443
nodeRegistration:
  criSocket: unix:///var/run/containerd/containerd.sock
  imagePullPolicy: IfNotPresent
  name: k8s-master1                        # use k8s-master1 节点的域名
  taints: null
---
apiServer:
  timeoutForControlPlane: 4m0s
apiVersion: kubeadm.k8s.io/v1beta3
certificatesDir: /etc/kubernetes/pki
clusterName: kubernetes
controllerManager: {}
dns: {}
etcd:
  local:
    dataDir: /var/lib/etcd
imageRepository: registry.aliyuncs.com/google_containers    # use aliyun repo
kind: ClusterConfiguration
kubernetesVersion: 1.27.3        # 注意设置目标版本
networking:
  dnsDomain: cluster.local
  podSubnet: "10.244.0.0/16"      # 配置 POD 所在网段为我们虚拟机不重叠的网段(这里用的是 Flannel 默认网段)
  serviceSubnet: 10.96.0.0/12
scheduler: {}
初始化k8s集群
执行该步骤时,在线拉取镜像会等待一段时间,具体取决于网络速度。
# 增加--upload-certs参数后,在join master节点时,自动将证书同步到目标节点(join节点)
kubeadm init --config kubeadm-init-conf.yml --upload-certs
安装网络插件flannel
flannel 网络插件的部署通过 kube-flannel.yaml配置文件进行。在控制平面节点或具有 kubeconfig 凭据的节点上安装 Pod 网络附加组件。
kubectl apply -f kube-flannel.ymlkube-flannel.yaml:
apiVersion: v1
kind: Namespace
metadata:
  labels:
    k8s-app: flannel
    pod-security.kubernetes.io/enforce: privileged
  name: kube-flannel
---
apiVersion: v1
kind: ServiceAccount
metadata:
  labels:
    k8s-app: flannel
  name: flannel
  namespace: kube-flannel
---
apiVersion: rbac.authorization.k8s.io/v1
kind: ClusterRole
metadata:
  labels:
    k8s-app: flannel
  name: flannel
rules:
- apiGroups:
  - ""
  resources:
  - pods
  verbs:
  - get
- apiGroups:
  - ""
  resources:
  - nodes
  verbs:
  - get
  - list
  - watch
- apiGroups:
  - ""
  resources:
  - nodes/status
  verbs:
  - patch
- apiGroups:
  - networking.k8s.io
  resources:
  - clustercidrs
  verbs:
  - list
  - watch
---
apiVersion: rbac.authorization.k8s.io/v1
kind: ClusterRoleBinding
metadata:
  labels:
    k8s-app: flannel
  name: flannel
roleRef:
  apiGroup: rbac.authorization.k8s.io
  kind: ClusterRole
  name: flannel
subjects:
- kind: ServiceAccount
  name: flannel
  namespace: kube-flannel
---
apiVersion: v1
data:
  cni-conf.json: |
    {
      "name": "cbr0",
      "cniVersion": "0.3.1",
      "plugins": [
        {
          "type": "flannel",
          "delegate": {
            "hairpinMode": true,
            "isDefaultGateway": true
          }
        },
        {
          "type": "portmap",
          "capabilities": {
            "portMappings": true
          }
        }
      ]
    }
  net-conf.json: |
    {
      "Network": "10.244.0.0/16",
      "Backend": {
        "Type": "vxlan"
      }
    }
kind: ConfigMap
metadata:
  labels:
    app: flannel
    k8s-app: flannel
    tier: node
  name: kube-flannel-cfg
  namespace: kube-flannel
---
apiVersion: apps/v1
kind: DaemonSet
metadata:
  labels:
    app: flannel
    k8s-app: flannel
    tier: node
  name: kube-flannel-ds
  namespace: kube-flannel
spec:
  selector:
    matchLabels:
      app: flannel
      k8s-app: flannel
  template:
    metadata:
      labels:
        app: flannel
        k8s-app: flannel
        tier: node
    spec:
      affinity:
        nodeAffinity:
          requiredDuringSchedulingIgnoredDuringExecution:
            nodeSelectorTerms:
            - matchExpressions:
              - key: kubernetes.io/os
                operator: In
                values:
                - linux
      containers:
      - args:
        - --ip-masq
        - --kube-subnet-mgr
        command:
        - /opt/bin/flanneld
        env:
        - name: POD_NAME
          valueFrom:
            fieldRef:
              fieldPath: metadata.name
        - name: POD_NAMESPACE
          valueFrom:
            fieldRef:
              fieldPath: metadata.namespace
        - name: EVENT_QUEUE_DEPTH
          value: "5000"
        image: docker.io/flannel/flannel:v0.26.1
        name: kube-flannel
        resources:
          requests:
            cpu: 100m
            memory: 50Mi
        securityContext:
          capabilities:
            add:
            - NET_ADMIN
            - NET_RAW
          privileged: false
        volumeMounts:
        - mountPath: /run/flannel
          name: run
        - mountPath: /etc/kube-flannel/
          name: flannel-cfg
        - mountPath: /run/xtables.lock
          name: xtables-lock
      hostNetwork: true
      initContainers:
      - args:
        - -f
        - /flannel
        - /opt/cni/bin/flannel
        command:
        - cp
        image: docker.io/flannel/flannel-cni-plugin:v1.5.1-flannel2
        name: install-cni-plugin
        volumeMounts:
        - mountPath: /opt/cni/bin
          name: cni-plugin
      - args:
        - -f
        - /etc/kube-flannel/cni-conf.json
        - /etc/cni/net.d/10-flannel.conflist
        command:
        - cp
        image: docker.io/flannel/flannel:v0.26.1
        name: install-cni
        volumeMounts:
        - mountPath: /etc/cni/net.d
          name: cni
        - mountPath: /etc/kube-flannel/
          name: flannel-cfg
      priorityClassName: system-node-critical
      serviceAccountName: flannel
      tolerations:
      - effect: NoSchedule
        operator: Exists
      volumes:
      - hostPath:
          path: /run/flannel
        name: run
      - hostPath:
          path: /opt/cni/bin
        name: cni-plugin
      - hostPath:
          path: /etc/cni/net.d
        name: cni
      - configMap:
          name: kube-flannel-cfg
        name: flannel-cfg
      - hostPath:
          path: /run/xtables.lock
          type: FileOrCreate
        name: xtables-lock
验证k8s集群
该步骤目的:确定k8s核心组件的pod已经启动且均为ready状态
# 查看所有pod信息
kubectl get pods --all-namespaces -o wide

# 查看所有node信息
kubectl get nodes -o wide
导出离线安装包
导出k8s-rpm依赖包
repotrack kubeadm-1.27.3-0
repotrack kubectl-1.27.3-0
repotrack kubelet-1.27.3-0
repotrack kubernetes-cni-1.2.0-0
repotrack cri-tools-1.26.0-0
repotrack socat-1.7.4.1-1.0.1.al8
repotrack conntrack-tools-1.4.4-11.0.1.al8
导出k8s-核心组件镜像
# 拉取 k8s 组件镜像
ctr -n k8s.io images pull --all-platforms registry.aliyuncs.com/google_containers/coredns:v1.10.1
ctr -n k8s.io images pull --all-platforms registry.aliyuncs.com/google_containers/etcd:3.5.7-0
ctr -n k8s.io images pull --all-platforms registry.aliyuncs.com/google_containers/kube-apiserver:v1.27.3
ctr -n k8s.io images pull --all-platforms registry.aliyuncs.com/google_containers/kube-controller-manager:v1.27.3
ctr -n k8s.io images pull --all-platforms registry.aliyuncs.com/google_containers/kube-proxy:v1.27.3
ctr -n k8s.io images pull --all-platforms registry.aliyuncs.com/google_containers/kube-scheduler:v1.27.3
ctr -n k8s.io images pull --all-platforms registry.aliyuncs.com/google_containers/pause:3.9

# 导出 k8s 组件镜像
ctr -n k8s.io images export --all-platforms coredns_v1.10.1.tar registry.aliyuncs.com/google_containers/coredns:v1.10.1
ctr -n k8s.io images export --all-platforms etcd_3.5.7-0.tar registry.aliyuncs.com/google_containers/etcd:3.5.7-0
ctr -n k8s.io images export --all-platforms kube-apiserver_v1.27.3.tar registry.aliyuncs.com/google_containers/kube-apiserver:v1.27.3
ctr -n k8s.io images export --all-platforms kube-controller-manager_v1.27.3.tar registry.aliyuncs.com/google_containers/kube-controller-manager:v1.27.3
ctr -n k8s.io images export --all-platforms kube-proxy_v1.27.3.tar registry.aliyuncs.com/google_containers/kube-proxy:v1.27.3
ctr -n k8s.io images export --all-platforms kube-scheduler_v1.27.3.tar registry.aliyuncs.com/google_containers/kube-scheduler:v1.27.3
ctr -n k8s.io images export --all-platforms pause_3.9.tar registry.aliyuncs.com/google_containers/pause:3.9

# 导入 k8s 组件镜像
ctr -n k8s.io images import --all-platforms coredns_v1.10.1.tar
ctr -n k8s.io images import --all-platforms etcd_3.5.7-0.tar
ctr -n k8s.io images import --all-platforms kube-apiserver_v1.27.3.tar
ctr -n k8s.io images import --all-platforms kube-controller-manager_v1.27.3.tar
ctr -n k8s.io images import --all-platforms kube-proxy_v1.27.3.tar
ctr -n k8s.io images import --all-platforms kube-scheduler_v1.27.3.tar
ctr -n k8s.io images import --all-platforms pause_3.9.tar
导出containerd离线包
wget https://github.com/containerd/containerd/releases/download/v1.7.23/cri-containerd-1.7.23-linux-arm64.tar.gz导出网络插件flannel镜像
# 拉取镜像
ctr images pull --all-platforms docker.io/flannel/flannel:v0.26.1
ctr images pull --all-platforms docker.io/flannel/flannel-cni-plugin:v1.5.1-flannel2

# 导出镜像
ctr images export --all-platforms flannel_v0.26.1.tar docker.io/flannel/flannel:v0.26.1
ctr images export --all-platforms flannel-cni-plugin_v1.5.1-flannel2.tar docker.io/flannel/flannel-cni-plugin:v1.5.1-flannel2

# 导入镜像
ctr -n k8s.io images import --all-platforms flannel_v0.26.1.tar
ctr -n k8s.io images import --all-platforms flannel-cni-plugin_v1.5.1-flannel2.tar
导出k8s初始化配置文件 kubeadm-init-conf.yml
kubeadm-init-conf.yml 具体内容:
apiVersion: kubeadm.k8s.io/v1beta3
bootstrapTokens:
- groups:
  - system:bootstrappers:kubeadm:default-node-token
  token: abcdef.0123456789abcdef
  ttl: 24h0m0s
  usages:
  - signing
  - authentication
kind: InitConfiguration
localAPIEndpoint:
  advertiseAddress: 11.0.1.10    # 设置k8s-master1 ip
  bindPort: 6443
nodeRegistration:
  criSocket: unix:///var/run/containerd/containerd.sock
  imagePullPolicy: IfNotPresent
  name: k8s-master1                        # use k8s-master1 节点的域名
  taints: null
---
apiServer:
  timeoutForControlPlane: 4m0s
apiVersion: kubeadm.k8s.io/v1beta3
certificatesDir: /etc/kubernetes/pki
clusterName: kubernetes
controllerManager: {}
dns: {}
etcd:
  local:
    dataDir: /var/lib/etcd
imageRepository: registry.aliyuncs.com/google_containers    # use aliyun repo
kind: ClusterConfiguration
kubernetesVersion: 1.27.3        # 注意设置目标版本
networking:
  dnsDomain: cluster.local
  podSubnet: "10.244.0.0/16"      # 配置 POD 所在网段为我们虚拟机不重叠的网段(这里用的是 Flannel 默认网段)
  serviceSubnet: 10.96.0.0/12
scheduler: {}
导出flannel配置文件
kube-flannel.yaml:
apiVersion: v1
kind: Namespace
metadata:
  labels:
    k8s-app: flannel
    pod-security.kubernetes.io/enforce: privileged
  name: kube-flannel
---
apiVersion: v1
kind: ServiceAccount
metadata:
  labels:
    k8s-app: flannel
  name: flannel
  namespace: kube-flannel
---
apiVersion: rbac.authorization.k8s.io/v1
kind: ClusterRole
metadata:
  labels:
    k8s-app: flannel
  name: flannel
rules:
- apiGroups:
  - ""
  resources:
  - pods
  verbs:
  - get
- apiGroups:
  - ""
  resources:
  - nodes
  verbs:
  - get
  - list
  - watch
- apiGroups:
  - ""
  resources:
  - nodes/status
  verbs:
  - patch
- apiGroups:
  - networking.k8s.io
  resources:
  - clustercidrs
  verbs:
  - list
  - watch
---
apiVersion: rbac.authorization.k8s.io/v1
kind: ClusterRoleBinding
metadata:
  labels:
    k8s-app: flannel
  name: flannel
roleRef:
  apiGroup: rbac.authorization.k8s.io
  kind: ClusterRole
  name: flannel
subjects:
- kind: ServiceAccount
  name: flannel
  namespace: kube-flannel
---
apiVersion: v1
data:
  cni-conf.json: |
    {
      "name": "cbr0",
      "cniVersion": "0.3.1",
      "plugins": [
        {
          "type": "flannel",
          "delegate": {
            "hairpinMode": true,
            "isDefaultGateway": true
          }
        },
        {
          "type": "portmap",
          "capabilities": {
            "portMappings": true
          }
        }
      ]
    }
  net-conf.json: |
    {
      "Network": "10.244.0.0/16",
      "Backend": {
        "Type": "vxlan"
      }
    }
kind: ConfigMap
metadata:
  labels:
    app: flannel
    k8s-app: flannel
    tier: node
  name: kube-flannel-cfg
  namespace: kube-flannel
---
apiVersion: apps/v1
kind: DaemonSet
metadata:
  labels:
    app: flannel
    k8s-app: flannel
    tier: node
  name: kube-flannel-ds
  namespace: kube-flannel
spec:
  selector:
    matchLabels:
      app: flannel
      k8s-app: flannel
  template:
    metadata:
      labels:
        app: flannel
        k8s-app: flannel
        tier: node
    spec:
      affinity:
        nodeAffinity:
          requiredDuringSchedulingIgnoredDuringExecution:
            nodeSelectorTerms:
            - matchExpressions:
              - key: kubernetes.io/os
                operator: In
                values:
                - linux
      containers:
      - args:
        - --ip-masq
        - --kube-subnet-mgr
        command:
        - /opt/bin/flanneld
        env:
        - name: POD_NAME
          valueFrom:
            fieldRef:
              fieldPath: metadata.name
        - name: POD_NAMESPACE
          valueFrom:
            fieldRef:
              fieldPath: metadata.namespace
        - name: EVENT_QUEUE_DEPTH
          value: "5000"
        image: docker.io/flannel/flannel:v0.26.1
        name: kube-flannel
        resources:
          requests:
            cpu: 100m
            memory: 50Mi
        securityContext:
          capabilities:
            add:
            - NET_ADMIN
            - NET_RAW
          privileged: false
        volumeMounts:
        - mountPath: /run/flannel
          name: run
        - mountPath: /etc/kube-flannel/
          name: flannel-cfg
        - mountPath: /run/xtables.lock
          name: xtables-lock
      hostNetwork: true
      initContainers:
      - args:
        - -f
        - /flannel
        - /opt/cni/bin/flannel
        command:
        - cp
        image: docker.io/flannel/flannel-cni-plugin:v1.5.1-flannel2
        name: install-cni-plugin
        volumeMounts:
        - mountPath: /opt/cni/bin
          name: cni-plugin
      - args:
        - -f
        - /etc/kube-flannel/cni-conf.json
        - /etc/cni/net.d/10-flannel.conflist
        command:
        - cp
        image: docker.io/flannel/flannel:v0.26.1
        name: install-cni
        volumeMounts:
        - mountPath: /etc/cni/net.d
          name: cni
        - mountPath: /etc/kube-flannel/
          name: flannel-cfg
      priorityClassName: system-node-critical
      serviceAccountName: flannel
      tolerations:
      - effect: NoSchedule
        operator: Exists
      volumes:
      - hostPath:
          path: /run/flannel
        name: run
      - hostPath:
          path: /opt/cni/bin
        name: cni-plugin
      - hostPath:
          path: /etc/cni/net.d
        name: cni
      - configMap:
          name: kube-flannel-cfg
        name: flannel-cfg
      - hostPath:
          path: /run/xtables.lock
          type: FileOrCreate
        name: xtables-lock
内网环境
离线安装包
k8s1.27.3-containerd-arm-离线部署包.zip.001:
https://download.csdn.net/download/weixin_43674738/92409625
k8s1.27.3-containerd-arm-离线部署包.zip.002
https://download.csdn.net/download/weixin_43674738/92410036
k8s1.27.3-containerd-arm-离线部署包.zip.003
https://download.csdn.net/download/weixin_43674738/92410059
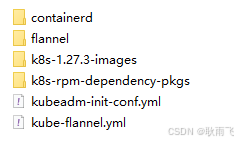
上述3个zip包下载完成后(注意:此3个zip包必须在同一目录下),解压之后的结果:
安装containerd
参考:containerd ARM版 二进制安装containerd-CSDN博客
安装k8s-rpm依赖包
# 备份当前系统yum源配置文件
ll /etc/yum.repos.d
mkdir -p /etc/yum.repos.d/bak
mv /etc/yum.repos.d/*.repo* /etc/yum.repos.d/bak

# 创建本地 yum 源
vi /etc/yum.repos.d/local.repo
## 文件内容
[LocalRepositry]
name=local repositry
baseurl=file:///opt/rpm_offline
gpgcheck=0
enabled=1

# 创建本地rpm包
mkdir -p /opt/rpm_offline
cd /opt/rpm_offline
cp -r <target_path>/* ./    # target_path:k8s-rpm依赖包的路径

# 创建仓库元数据
createrepo  -v /opt/rpm_offline

# yum install 相关软件包
yum install kubeadm-1.27.3-0
yum install kubectl-1.27.3-0
yum install kubelet-1.27.3-0
yum install kubernetes-cni-1.2.0-0
yum install cri-tools-1.26.0-0
yum install socat-1.7.4.1-1.0.1.al8
yum install conntrack-tools-1.4.4-11.0.1.al8

# 验证
kubeadm version
kubectl version
kubelet --version

# 恢复当前系统yum源配置文件
rm /etc/yum.repos.d/local.repo
mv /etc/yum.repos.d/bak/* /etc/yum.repos.d/
导入k8s组件依赖镜像
# 导入 flannel 镜像
ctr -n k8s.io images import --all-platforms flannel_v0.26.1.tar
ctr -n k8s.io images import --all-platforms flannel-cni-plugin_v1.5.1-flannel2.tar

# 导入 k8s 组件镜像
ctr -n k8s.io images import --all-platforms coredns_v1.10.1.tar
ctr -n k8s.io images import --all-platforms etcd_3.5.7-0.tar
ctr -n k8s.io images import --all-platforms kube-apiserver_v1.27.3.tar
ctr -n k8s.io images import --all-platforms kube-controller-manager_v1.27.3.tar
ctr -n k8s.io images import --all-platforms kube-proxy_v1.27.3.tar
ctr -n k8s.io images import --all-platforms kube-scheduler_v1.27.3.tar
ctr -n k8s.io images import --all-platforms pause_3.9.tar
k8s集群初始化
# 增加--upload-certs参数后,在join master节点时,自动将证书同步到目标节点(join节点)
kubeadm init --config kubeadm-init-conf.yml --upload-certs
安装网络插件flannel
flannel 网络插件的部署通过 kube-flannel.yaml配置文件进行。在控制平面节点或具有 kubeconfig 凭据的节点上安装 Pod 网络附加组件。
kubectl apply -f kube-flannel.yml验证k8s集群
该步骤目的:确定k8s核心组件的pod已经启动且均为ready状态
# 查看所有pod信息
kubectl get pods --all-namespaces -o wide

# 查看所有node信息
kubectl get nodes -o wide
FAQ
重新初始化k8s集群时报错:10250端口占用
netstat -ntlup|grep 10250
tcp6       0      0 :::10250                :::*                    LISTEN      935471/kubelet
sudo kill -9 935471
为什么关闭 selinux?
为什么在部署 Kubernetes 时常建议关闭 SELinux?
-
兼容性和灵活性:
- Kubernetes依赖于容器运行时(例如Docker、containerd)对容器进行管理,而这些操作可能涉及文件系统的共享、网络配置等。在默认配置下,SELinux的严格权限控制可能与Kubernetes所需的操作权限相冲突,导致Pod无法顺利运行。
-
简化配置:
- 为使Kubernetes正常工作,SELinux的策略需要精确配置。尽管SELinux可以提供额外的安全层,配置错误可能会导致不必要的权限问题。关闭SELinux可以避免这些复杂问题,让部署过程变得更加简单。
-
广泛的默认建议:
- 许多Kubernetes的安装指南和文档为了方便起见,通常建议在初始部署时将SELinux设置为permissive(宽容模式)或完全关闭,以避免潜在的问题。这样,管理员可以在成功部署后再考虑逐步开启和配置SELinux,以加强安全性。
SELinux 的作用
-
访问控制:
- SELinux(Security-Enhanced Linux)是Linux系统中的一个安全模块,提供了一种强制访问控制(MAC)机制,与传统的基于用户的访问控制(DAC)机制互补。它通过定义具体的策略来控制进程对系统资源的访问。
-
安全策略:
- SELinux使用策略规则来描述允许或拒绝的行为。每一个文件、进程、网络端口等都有一个安全上下文,SELinux根据这些上下文来判断是否允许某一特定行为。
-
运行模式:
- Enforcing(强制模式):SELinux根据策略主动拒绝不符合规则的访问。
- Permissive(宽容模式):不阻止不符合规则的访问,但会记录日志,便于管理员调试和调整策略。
- Disabled(禁用模式):完全关闭SELinux,不进行策略检查。
通过合理的配置,SELinux可以提供强大的安全保障。不过,在创建和管理像Kubernetes这样的动态环境时,需要对SELinux策略做适当调整,以确保不会影响应用程序的正常运行。这样调整的复杂性也是很多人选择临时关闭它的原因。

腾讯云面向开发者汇聚海量精品云计算使用和开发经验,营造开放的云计算技术生态圈。
更多推荐
 22
22 0
0- 0


 已为社区贡献2条内容

所有评论(0)