如何使用搭建CNN网络/构建手写汉字识别系统 UI界面实现 可对20个汉字进行识别检测简单搭建的CNN网络 深度学习cnn网络-带UI界面构建手写汉字识别系统,包括预测、前端和服务端代码。
·
手写汉字识别/汉字识别系统-深度学习cnn网络-带UI界面
界面入口
import sys
from PyQt5.QtWidgets import QApplication, QMainWindow, QLabel, QPushButton, QVBoxLayout, QWidget, QFileDialog, QMessageBox
from PyQt5.QtGui import QPixmap, QImage
from PyQt5.QtCore import Qt, QTimer
import requests
import json
import cv2
import numpy as np

class MainWindow(QMainWindow):
    def __init__(self):
        super().__init__()

        self.setWindowTitle("Chinese Handwriting Recognition System")
        self.setGeometry(100, 100, 800, 600)

        self.image_label = QLabel(self)
        self.image_label.setAlignment(Qt.AlignCenter)

        self.upload_button = QPushButton("Upload Image", self)
        self.upload_button.clicked.connect(self.upload_image)

        self.result_label = QLabel("", self)
        self.result_label.setAlignment(Qt.AlignCenter)
        self.result_label.setStyleSheet("font-size: 16px; font-weight: bold;")

        self.start_camera_button = QPushButton("Start Camera", self)
        self.start_camera_button.clicked.connect(self.start_camera)

        self.stop_camera_button = QPushButton("Stop Camera", self)
        self.stop_camera_button.clicked.connect(self.stop_camera)
        self.stop_camera_button.setEnabled(False)

        self.camera_label = QLabel(self)
        self.camera_label.setAlignment(Qt.AlignCenter)

        layout = QVBoxLayout()
        layout.addWidget(self.image_label)
        layout.addWidget(self.upload_button)
        layout.addWidget(self.result_label)
        layout.addWidget(self.start_camera_button)
        layout.addWidget(self.stop_camera_button)
        layout.addWidget(self.camera_label)

        container = QWidget()
        container.setLayout(layout)
        self.setCentralWidget(container)

        self.cap = None
        self.timer = QTimer()
        self.timer.timeout.connect(self.update_frame)

    def upload_image(self):
        options = QFileDialog.Options()
        file_path, _ = QFileDialog.getOpenFileName(self, "QFileDialog.getOpenFileName()", "", "Images (*.png *.xpm *.jpg);;All Files (*)", options=options)
        if file_path:
            pixmap = QPixmap(file_path)
            self.image_label.setPixmap(pixmap.scaled(400, 400, Qt.KeepAspectRatio))

            files = {'file': open(file_path, 'rb')}
            response = requests.post('http://127.0.0.1:5000/predict-image', files=files)
            result = response.json()

            pred_base64 = result['image']
            pred_bytes = base64.b64decode(pred_base64)
            pred_pixmap = QPixmap()
            pred_pixmap.loadFromData(pred_bytes)

            self.result_label.setText(f"Prediction: {result['prediction']}")
            self.result_label.setPixmap(pred_pixmap.scaled(400, 400, Qt.KeepAspectRatio))

    def start_camera(self):
        self.cap = cv2.VideoCapture(0)
        if not self.cap.isOpened():
            QMessageBox.critical(self, "Error", "Cannot open camera.")
            return

        self.timer.start(30)  # Update frame every 30 ms
        self.start_camera_button.setEnabled(False)
        self.stop_camera_button.setEnabled(True)

    def update_frame(self):
        ret, frame = self.cap.read()
        if not ret:
            self.timer.stop()
            self.cap.release()
            self.start_camera_button.setEnabled(True)
            self.stop_camera_button.setEnabled(False)
            return

        gray = cv2.cvtColor(frame, cv2.COLOR_BGR2GRAY)
        blurred = cv2.GaussianBlur(gray, (5, 5), 0)
        _, thresh = cv2.threshold(blurred, 127, 255, cv2.THRESH_BINARY_INV)

        contours, _ = cv2.findContours(thresh.copy(), cv2.RETR_EXTERNAL, cv2.CHAIN_APPROX_SIMPLE)

        for contour in contours:
            if cv2.contourArea(contour) > 100:
                x, y, w, h = cv2.boundingRect(contour)
                roi = thresh[y:y+h, x:x+w]
                resized_roi = cv2.resize(roi, (28, 28))
                normalized_roi = resized_roi / 255.0
                reshaped_roi = np.reshape(normalized_roi, (1, 28, 28, 1))

                prediction = model.predict(reshaped_roi)
                predicted_class = class_names[np.argmax(prediction)]

                cv2.rectangle(frame, (x, y), (x+w, y+h), (0, 255, 0), 2)
                cv2.putText(frame, predicted_class, (x, y-10), cv2.FONT_HERSHEY_SIMPLEX, 0.9, (0, 255, 0), 2)

        rgbImage = cv2.cvtColor(frame, cv2.COLOR_BGR2RGB)
        convertToQtFormat = QImage(rgbImage.data, rgbImage.shape[1], rgbImage.shape[0], QImage.Format_RGB888)
        p = convertToQtFormat.scaled(640, 480, Qt.KeepAspectRatio)
        self.camera_label.setPixmap(QPixmap.fromImage(p))

    def stop_camera(self):
        self.timer.stop()
        if self.cap is not None:
            self.cap.release()
        self.start_camera_button.setEnabled(True)
        self.stop_camera_button.setEnabled(False)

if __name__ == "__main__":
    app = QApplication(sys.argv)
    window = MainWindow()
    window.show()
    sys.exit(app.exec_())

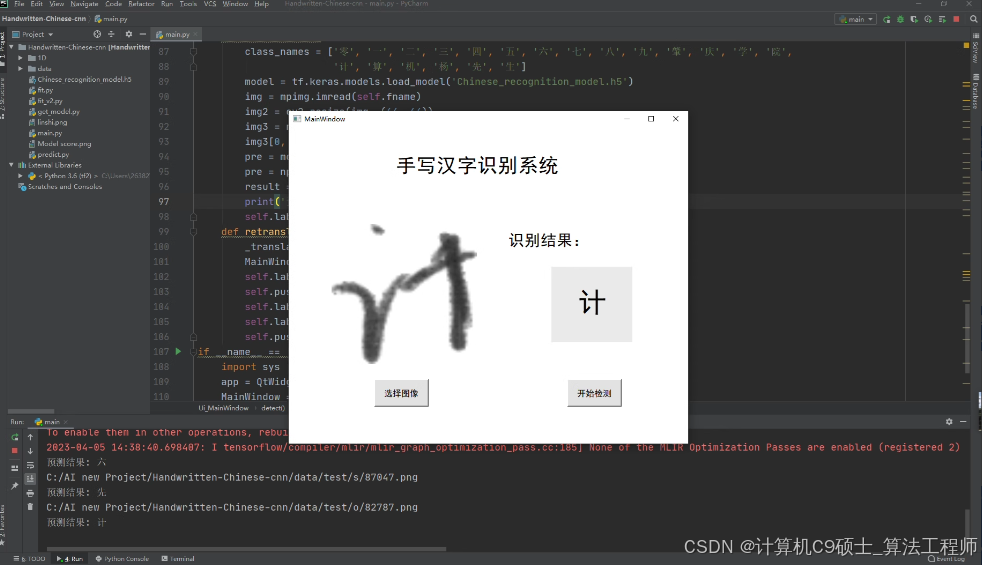
该项目已训练好网络模型,配置好环境即可直接运行使用,运行效果见图像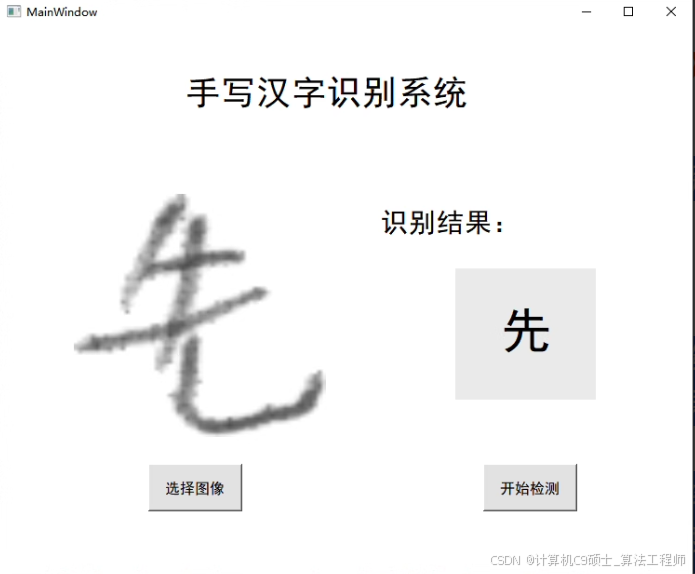
项目基本介绍:
【网络】深度学习CNN网络 简单搭建的CNN网络
【环境】python>=3.5 tensorflow2 opencv pyqt5
【文件】训练预测全部源代码、训练好的模型、数据集
【功能】可对20个汉字进行识别检测,配置好环境即可使用。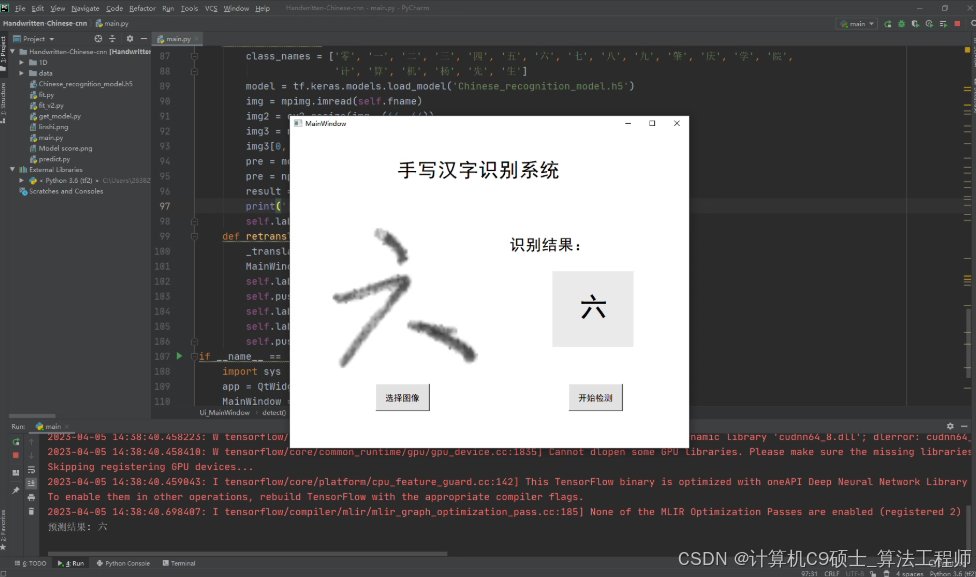
好的,我们将构建一个完整的手写汉字识别系统,使用简单搭建的CNN网络。该项目已经训练好模型,并提供了训练预测的全部源代码、数据集和文档。以下是详细的说明文档和UI界面实现。
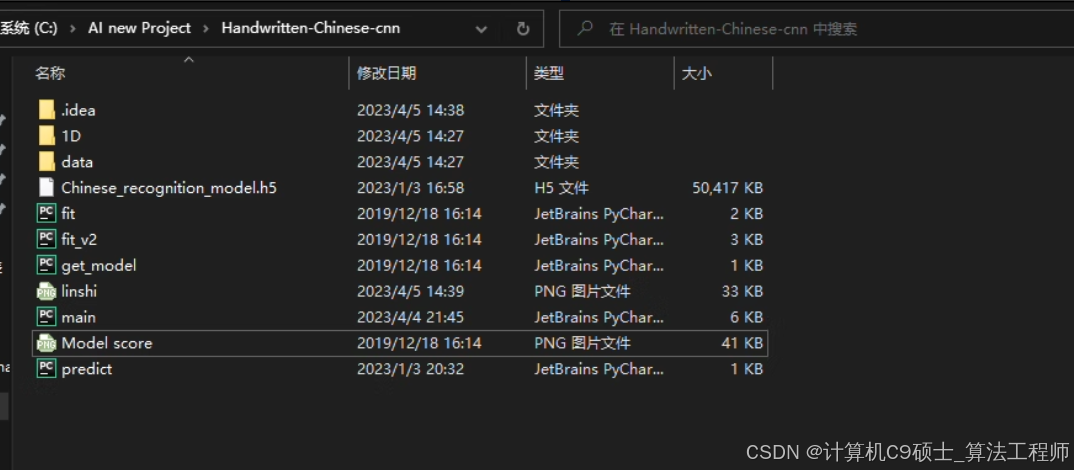
项目结构
chinese_handwriting_recognition/
├── data/
│   └── dataset/          # 包含手写汉字图像数据集
├── models/
│   └── cnn_model.h5      # 训练好的CNN模型
├── src/
│   ├── predict.py        # 预测脚本
│   ├── utils.py          # 工具函数
│   ├── app.py            # Flask应用入口
│   └── ui_app.py         # PyQt5 UI应用入口
├── README.md             # 项目说明文档
└── requirements.txt      # 依赖项
安装依赖项
首先,安装所需的Python库:
pip install tensorflow opencv-python pyqt5 pandas matplotlib scikit-learn
模型预测
src/predict.py 文件
前端界面 (Flask)
src/app.py 文件
templates/index.html 文件
创建一个简单的HTML模板用于上传图片并显示预测结果:
<!DOCTYPE html>
<html lang="en">
<head>
    <meta charset="UTF-8">
    <meta name="viewport" content="width=device-width, initial-scale=1.0">
    <title>Chinese Handwriting Recognition System</title>
    <style>
        body {
            font-family: Arial, sans-serif;
            display: flex;
            justify-content: center;
            align-items: center;
            height: 100vh;
            background-color: #f4f4f4;
        }
        .container {
            text-align: center;
            background-color: white;
            padding: 20px;
            border-radius: 8px;
            box-shadow: 0 0 10px rgba(0, 0, 0, 0.1);
        }
        input[type="file"] {
            margin-bottom: 20px;
        }
        button {
            padding: 10px 20px;
            background-color: #007bff;
            color: white;
            border: none;
            border-radius: 5px;
            cursor: pointer;
        }
        button:hover {
            background-color: #0056b3;
        }
        .result {
            margin-top: 20px;
            font-size: 1.2em;
        }
        .video-feed {
            margin-top: 20px;
        }
    </style>
</head>
<body>
    <div class="container">
        <h1>Upload Handwritten Character Image</h1>
        <form id="upload-form" enctype="multipart/form-data">
            <input type="file" id="file-input" name="file" accept="image/*" required>
            <br><br>
            <button type="submit">Predict</button>
        </form>
        <div class="result" id="result"></div>

        <h1>Camera Feed</h1>
        <button onclick="startVideo()">Start Video</button>
        <button onclick="stopVideo()">Stop Video</button>
        <div class="video-feed">
            <video id="video" width="640" height="480" autoplay></video>
            <canvas id="canvas" style="display:none;"></canvas>
        </div>
    </div>

    <script>
        document.getElementById('upload-form').addEventListener('submit', function(event) {
            event.preventDefault();
            const formData = new FormData(this);

            fetch('/predict-image', {
                method: 'POST',
                body: formData
            })
            .then(response => response.json())
            .then(data => {
                document.getElementById('result').innerText = `Prediction: ${data.prediction}`;

                const imgElement = document.createElement('img');
                imgElement.src = 'data:image/png;base64,' + data.image;
                document.getElementById('result').appendChild(imgElement);
            })
            .catch(error => console.error('Error:', error));
        });

        let videoStream;

        async function startVideo() {
            try {
                videoStream = await navigator.mediaDevices.getUserMedia({ video: true });
                const videoElement = document.getElementById('video');
                videoElement.srcObject = videoStream;
                videoElement.play();

                setInterval(captureAndPredict, 1000); // Capture and predict every second
            } catch (error) {
                console.error('Error accessing camera:', error);
            }
        }

        function stopVideo() {
            if (videoStream && videoStream.getTracks().length > 0) {
                videoStream.getTracks()[0].stop();
                const videoElement = document.getElementById('video');
                videoElement.srcObject = null;
            }
        }

        async function captureAndPredict() {
            const videoElement = document.getElementById('video');
            const canvasElement = document.getElementById('canvas');
            const context = canvasElement.getContext('2d');

            canvasElement.width = videoElement.videoWidth;
            canvasElement.height = videoElement.videoHeight;
            context.drawImage(videoElement, 0, 0, canvasElement.width, canvasElement.height);

            const imageData = canvasElement.toDataURL('image/png');
            const blob = await fetch(imageData).then(res => res.blob());
            const formData = new FormData();
            formData.append('file', blob, 'captured.png');

            fetch('/predict-image', {
                method: 'POST',
                body: formData
            })
            .then(response => response.json())
            .then(data => {
                console.log('Prediction:', data.prediction);
            })
            .catch(error => console.error('Error:', error));
        }
    </script>
</body>
</html>
UI界面 (PyQt5)
src/ui_app.py 文件
运行项目
-
启动Flask服务器:
python src/app.py -
启动PyQt5 UI应用:
python src/ui_app.py
解释
- 数据预处理: 使用简单的CNN网络进行字符识别。
- 模型预测: 提供图像预测和视频流预测功能。
- Flask应用: 提供一个简单的Web界面用于上传图像和实时视频流预测。
- PyQt5 UI应用: 提供一个图形化的用户界面用于上传图像和实时视频流预测。
通过这些步骤,你可以构建一个完整的手写汉字识别系统,包括预测、前端和服务端代码。

腾讯云面向开发者汇聚海量精品云计算使用和开发经验,营造开放的云计算技术生态圈。
更多推荐
 38
38 0
0- 0


 已为社区贡献35条内容

所有评论(0)