yolov8缝合模块的具体操作(8.2.100版本)
·
1. yolov8训练自己的数据集
见博客(很重要):yolov8训练自己的数据集
2.改进yolov8网络架构
以添加SEAttention模块为例
1.进入到ultralytics/nn/modules/conv.py
在该py文件末尾添加以下代码
class SEAttention(nn.Module):
    # 初始化SE模块,channel为通道数,reduction为降维比率
    def __init__(self, channel=512, reduction=16):
        super().__init__()
        self.avg_pool = nn.AdaptiveAvgPool2d(1)  # 自适应平均池化层,将特征图的空间维度压缩为1x1
        self.fc = nn.Sequential(  # 定义两个全连接层作为激励操作,通过降维和升维调整通道重要性
            nn.Linear(channel, channel // reduction, bias=False),  # 降维,减少参数数量和计算量
            nn.ReLU(inplace=True),  # ReLU激活函数,引入非线性
            nn.Linear(channel // reduction, channel, bias=False),  # 升维,恢复到原始通道数
            nn.Sigmoid()  # Sigmoid激活函数,输出每个通道的重要性系数
        )

    # 权重初始化方法
    def init_weights(self):
        for m in self.modules():  # 遍历模块中的所有子模块
            if isinstance(m, nn.Conv2d):  # 对于卷积层
                init.kaiming_normal_(m.weight, mode='fan_out')  # 使用Kaiming初始化方法初始化权重
                if m.bias is not None:
                    init.constant_(m.bias, 0)  # 如果有偏置项,则初始化为0
            elif isinstance(m, nn.BatchNorm2d):  # 对于批归一化层
                init.constant_(m.weight, 1)  # 权重初始化为1
                init.constant_(m.bias, 0)  # 偏置初始化为0
            elif isinstance(m, nn.Linear):  # 对于全连接层
                init.normal_(m.weight, std=0.001)  # 权重使用正态分布初始化
                if m.bias is not None:
                    init.constant_(m.bias, 0)  # 偏置初始化为0

    def forward(self, x):
        b, c, _, _ = x.size()  # 输入特征图的形状 (B, C, H, W)
        y = self.avg_pool(x).view(b, c)  # 平均池化后只作用于通道
        y = self.fc(y).view(b, c, 1, 1)  # 全连接层生成权重 (B, C, 1, 1)
        output = x * y.expand_as(x)  # 权重广播并乘以输入
        return output
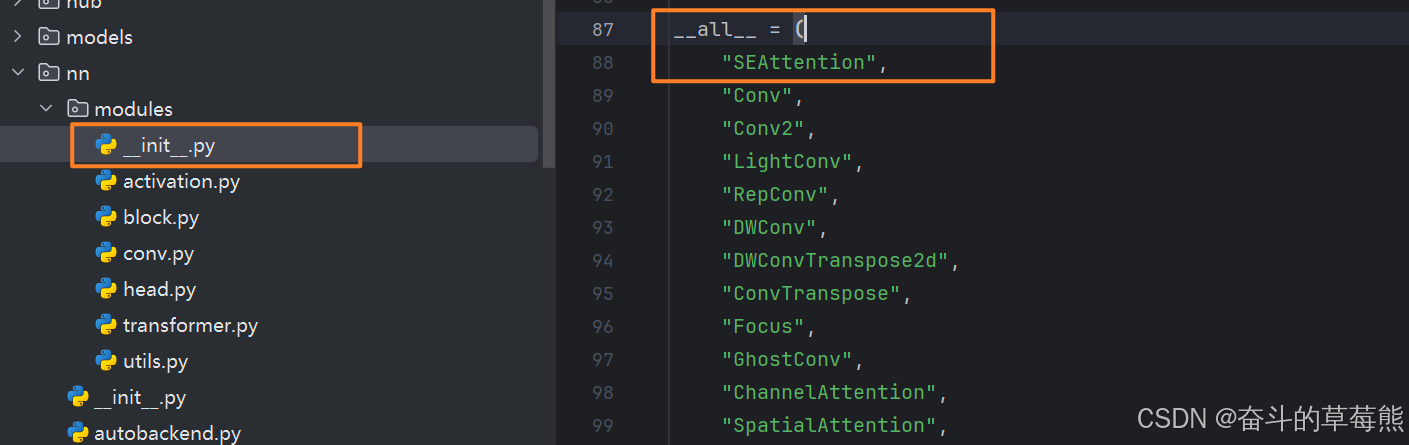
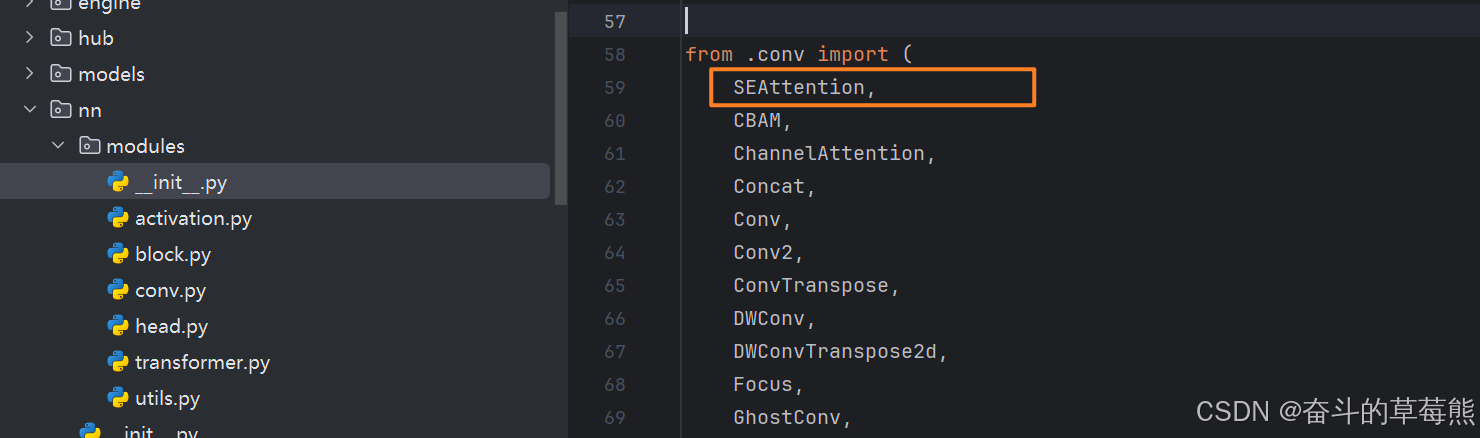
2.进入到ultralytics/nn/modules/init.py
黄框处加入模块名称
 3.进入到
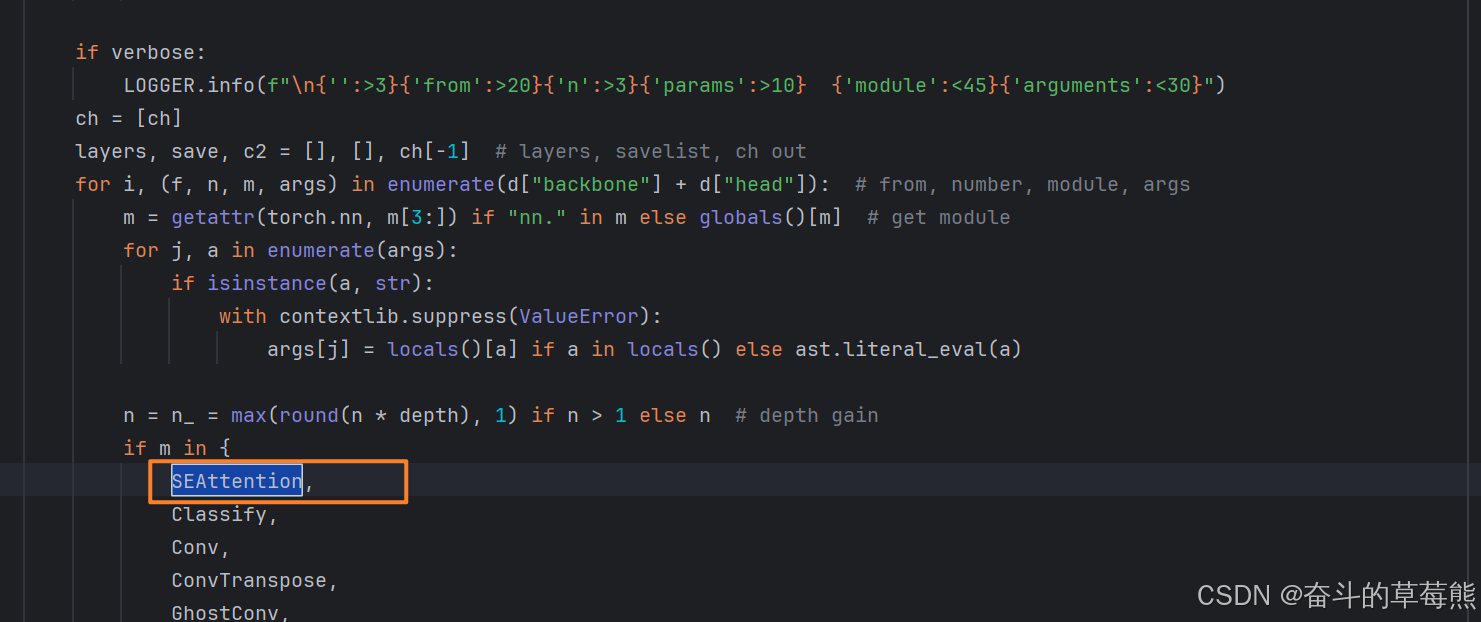
3.进入到ultralytics/nn/tasks.py
黄框处添加模块名称

4.进入ultralytics/cfg/models/v8
复制一份yolov8.yaml命名为yolov8n-SEAttention.yaml
在head,backbone部分分别添加以下代码,并修改
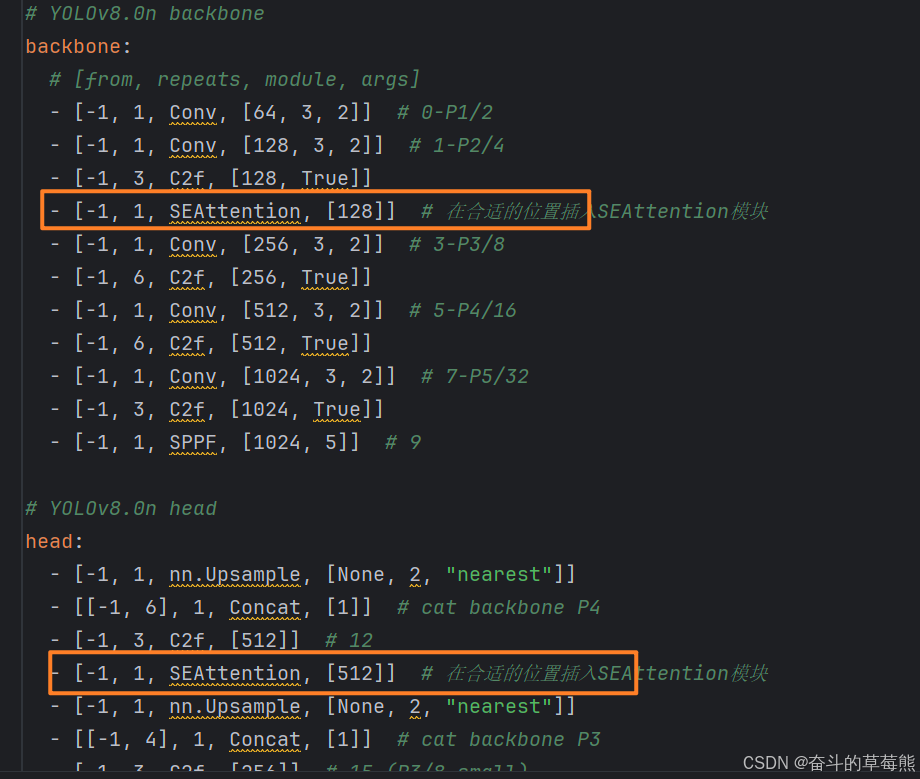
供复制
backbone:
  # [from, repeats, module, args]
  - [-1, 1, Conv, [64, 3, 2]]  # 0-P1/2
  - [-1, 1, Conv, [128, 3, 2]]  # 1-P2/4
  - [-1, 3, C2f, [128, True]]
  - [-1, 1, SEAttention, [128]]  # 在合适的位置插入SEAttention模块
  - [-1, 1, Conv, [256, 3, 2]]  # 3-P3/8
  - [-1, 6, C2f, [256, True]]
  - [-1, 1, Conv, [512, 3, 2]]  # 5-P4/16
  - [-1, 6, C2f, [512, True]]
  - [-1, 1, Conv, [1024, 3, 2]]  # 7-P5/32
  - [-1, 3, C2f, [1024, True]]
  - [-1, 1, SPPF, [1024, 5]]  # 9

# YOLOv8.0n head
head:
  - [-1, 1, nn.Upsample, [None, 2, "nearest"]]
  - [[-1, 6], 1, Concat, [1]]  # cat backbone P4
  - [-1, 3, C2f, [512]]  # 12
  - [-1, 1, SEAttention, [512]]  # 在合适的位置插入SEAttention模块
  - [-1, 1, nn.Upsample, [None, 2, "nearest"]]
  - [[-1, 4], 1, Concat, [1]]  # cat backbone P3
  - [-1, 3, C2f, [256]]  # 15 (P3/8-small)
  - [-1, 1, Conv, [256, 3, 2]]
  - [[-1, 12], 1, Concat, [1]]  # cat head P4
  - [-1, 3, C2f, [512]]  # 18 (P4/16-medium)
  - [-1, 1, Conv, [512, 3, 2]]
  - [[-1, 9], 1, Concat, [1]]  # cat head P5
  - [-1, 3, C2f, [1024]]  # 21 (P5/32-large)
  - [[15, 18, 21], 1, Detect, [nc]]  # Detect(P3, P4, P5)
3.测试运行
根目录下新建yolov8.py,编写以下代码
from ultralytics import YOLO

if __name__ == '__main__':
    # 直接使用预训练模型创建模型.
    # model = YOLO('yolov8n.pt')
    # model.train(**{'cfg': 'ultralytics/cfg/exp1.yaml', 'data': 'dataset/data.yaml'})

    # 使用yaml配置文件来创建模型,并导入预训练权重.
    model = YOLO('ultralytics/cfg/models/v8/yolov8n-SEAttention.yaml')
    # print(model)

    model.train(cfg="ultralytics/cfg/default.yaml", data="litchi.yaml",
                epochs=5, batch=2, workers=2)

    # # 模型验证
    # model = YOLO('runs/detect/yolov8n_exp/weights/best.pt')
    # model.val(**{'data': 'dataset/data.yaml'})
    #
    # # 模型推理
    # model = YOLO('runs/detect/yolov8n_exp/weights/best.pt')
    # model.predict(source='dataset/images/test', **{'save': True})
注意:model.train()函数内部的litchi.yaml替换为你自定义的,具体见上述第一点
右键运行,可以看到终端有该模块,表示模块添加成功

腾讯云面向开发者汇聚海量精品云计算使用和开发经验,营造开放的云计算技术生态圈。
更多推荐
 11
11 0
0- 0


 已为社区贡献2条内容

所有评论(0)