使用 YOLOv5深度学习目标检测算法Yolo 模型进行目标检测违停检测,道路车辆检测与分析 可检测识别违停车辆数据集及车辆检测
深度学习目标检测算法及框架使用 YOLOv5 模型进行目标检测违停检测,道路车辆检测与分析 可检测识别违停车辆数据集及车辆检测以下文字及代码仅供参考。
深度学习目标检测算法及框架使用 YOLOv5 模型进行目标检测违停检测,道路车辆检测与分析 可检测识别违停车辆数据集及车辆检测
以下文字及代码仅供参考。
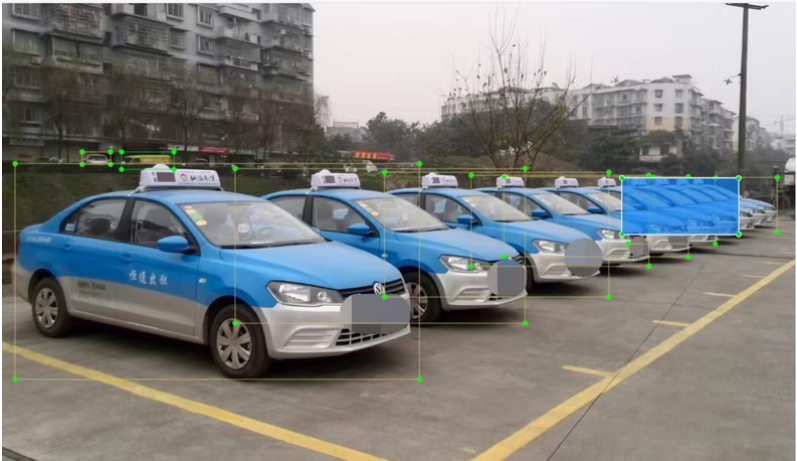
道路汽车车辆违停数据集
皮卡、面包车、小轿车、suv、公共汽车、卡车数据,
数据集描述
划分训练集5000,验证集799;
已标注yolo格式、voc格式,可直接训练;
可用于道路车辆检测、机动车违停;
标签类别及标签个数:
pickuptruck:424
van:903
car:5778
suv:1588
bus:615
truck:1371
汽车数据集,我们将使用 YOLOv5 模型进行目标检测。YOLOv5 是一个高效的目标检测模型,适用于道路车辆检测、机动车违停等场景。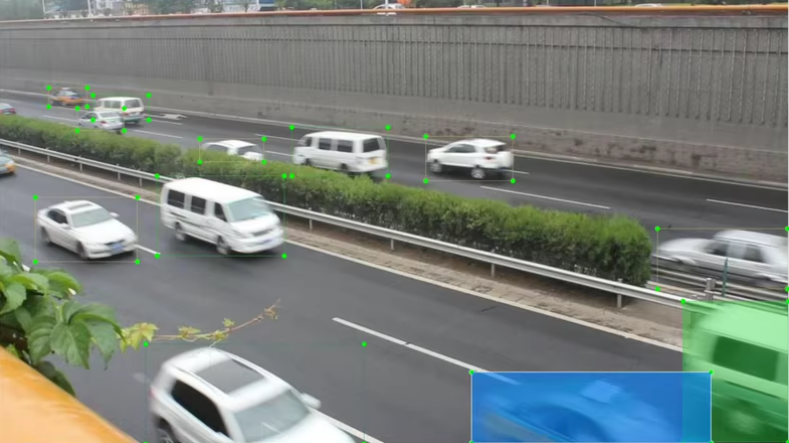
1. 环境搭建
首先需要设置好环境,并安装必要的依赖项。
# 创建虚拟环境(可选)
conda create -n vehicle_detection python=3.8
conda activate vehicle_detection

# 安装 PyTorch 和 torchvision
pip install torch torchvision

# 克隆 YOLOv5 仓库
git clone https://github.com/ultralytics/yolov5
cd yolov5

# 安装 YOLOv5 的依赖
pip install -r requirements.txt
2. 数据准备
假设你的数据集已经按照 YOLO 格式标注,并且划分为了训练集和验证集。文件结构如下: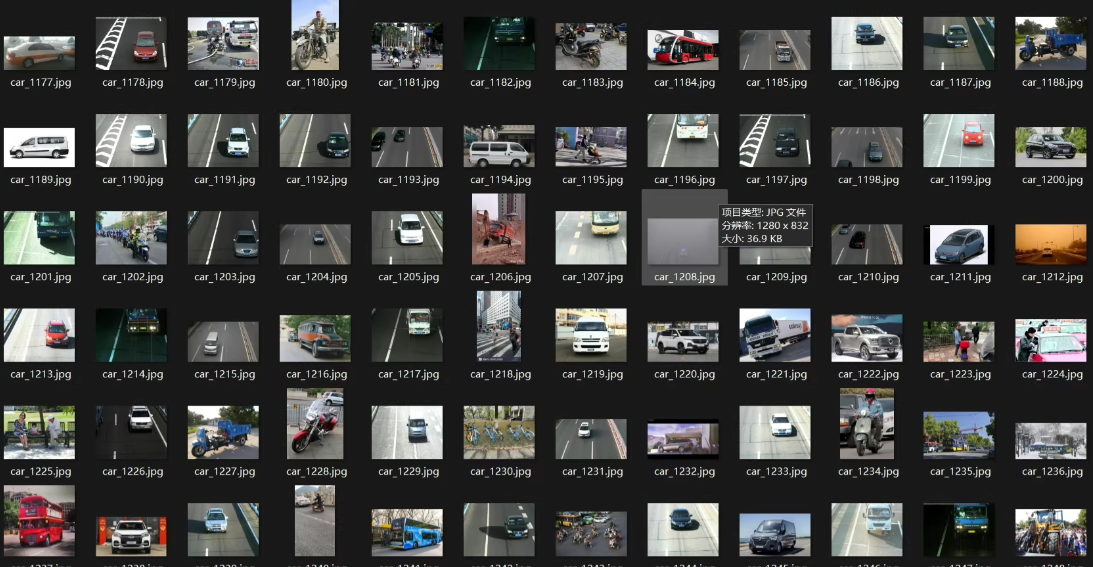
dataset/
├── images/
│   ├── train/
│   └── val/
├── labels/
│   ├── train/
│   └── val/
创建一个 data.yaml 文件,用于描述数据集路径和类别信息:
# data.yaml
train: dataset/images/train
val: dataset/images/val

nc: 6  # 类别数量(皮卡、面包车、小轿车、suv、公共汽车、卡车)
names: ['pickuptruck', 'van', 'car', 'suv', 'bus', 'truck']  # 类别名称
3. 模型训练
配置超参数
编辑 yolov5/data/hyps/hyp.scratch.yaml 文件,调整超参数以适应你的数据集。例如:
lr0: 0.01  # 初始学习率
momentum: 0.937
weight_decay: 0.0005
开始训练
运行以下命令开始训练:
python train.py --img 640 --batch 16 --epochs 100 --data data.yaml --cfg models/yolov5s.yaml --weights yolov5s.pt --name vehicle_detection
--img 640: 输入图像大小。--batch 16: 批量大小。--epochs 100: 训练轮数。--data data.yaml: 数据集配置文件。--cfg models/yolov5s.yaml: 使用 YOLOv5 的小型模型(适合小数据集)。--weights yolov5s.pt: 加载预训练权重。--name vehicle_detection: 训练结果保存目录。
4. 模型推理
单张图片推理
仅供参考。
训练完成后,可以使用以下命令对单张图片进行推理:
python detect.py --weights runs/train/vehicle_detection/weights/best.pt --img 640 --conf 0.25 --source dataset/images/val/image_001.jpg
--weights: 使用训练好的模型权重。--img 640: 输入图像大小。--conf 0.25: 置信度阈值。--source: 输入图像路径。
推理结果会保存在 runs/detect/exp/ 文件夹中。
批量推理
如果需要对多张图片或视频进行批量推理,可以将 --source 参数设置为文件夹路径或视频路径:
# 对文件夹中的所有图片进行推理
python detect.py --weights runs/train/vehicle_detection/weights/best.pt --img 640 --conf 0.25 --source dataset/images/val/

# 对视频进行推理
python detect.py --weights runs/train/vehicle_detection/weights/best.pt --img 640 --conf 0.25 --source video.mp4
5. 性能评估
mAP 和其他指标
训练完成后,YOLOv5 会自动生成性能评估报告,包括 mAP(mean Average Precision)、Precision、Recall 等指标。这些信息会保存在 runs/train/vehicle_detection/results.csv 文件中。
你也可以手动运行验证脚本:
python val.py --data data.yaml --weights runs/train/vehicle_detection/weights/best.pt --img 640
6. 构建 GUI 应用程序(可选)
假设你这位同学,如果你想构建一个简单的图形用户界面来加载图像并运行检测,可以使用 PyQt5。这里提供了一个简单的例子:
仅供参考。
import sys
from PyQt5.QtWidgets import QApplication, QMainWindow, QLabel, QPushButton, QVBoxLayout, QWidget, QFileDialog
from PyQt5.QtGui import QPixmap
from PIL import Image, ImageQt
import torch
from pathlib import Path

class DetectionApp(QMainWindow):
    def __init__(self):
        super().__init__()
        self.initUI()
        self.model = torch.hub.load('ultralytics/yolov5', 'custom', path='runs/train/vehicle_detection/weights/best.pt')

    def initUI(self):
        self.setWindowTitle("车辆检测系统")
        self.setGeometry(100, 100, 800, 600)

        layout = QVBoxLayout()

        self.image_label = QLabel(self)
        self.image_label.setText("请选择一张图片进行检测")
        self.image_label.setAlignment(Qt.AlignCenter)
        layout.addWidget(self.image_label)

        self.load_button = QPushButton("加载图像", self)
        self.load_button.clicked.connect(self.load_image)
        layout.addWidget(self.load_button)

        self.detect_button = QPushButton("检测车辆", self)
        self.detect_button.clicked.connect(self.detect_vehicle)
        layout.addWidget(self.detect_button)

        container = QWidget()
        container.setLayout(layout)
        self.setCentralWidget(container)

    def load_image(self):
        options = QFileDialog.Options()
        file_name, _ = QFileDialog.getOpenFileName(self, "选择图像文件", "", "Images (*.png *.jpg *.jpeg)", options=options)
        if file_name:
            self.image_path = file_name
            pixmap = QPixmap(file_name)
            self.image_label.setPixmap(pixmap.scaled(640, 640))

    def detect_vehicle(self):
        if hasattr(self, 'image_path'):
            results = self.model(self.image_path)
            img_with_boxes = results.render()[0]

            # 将结果转换为 QImage 并显示
            height, width, channel = img_with_boxes.shape
            bytes_per_line = 3 * width
            q_img = ImageQt.Image.fromarray(img_with_boxes).convert("RGB").rgbSwapped()
            self.image_label.setPixmap(QPixmap.fromImage(q_img))
        else:
            self.image_label.setText("请先加载一张图片")

if __name__ == '__main__':
    app = QApplication(sys.argv)
    window = DetectionApp()
    window.show()
    sys.exit(app.exec_())
仅供参考,同学们,

腾讯云面向开发者汇聚海量精品云计算使用和开发经验,营造开放的云计算技术生态圈。
更多推荐
 26
26 0
0- 0


 已为社区贡献10条内容

所有评论(0)