【公有云部署模型】yolo模型公有云部署
部署yolo模型,提供公网api访问接口
·
利用huggaingface部署自己的yolo模型,例如下图,方便访问和api调试。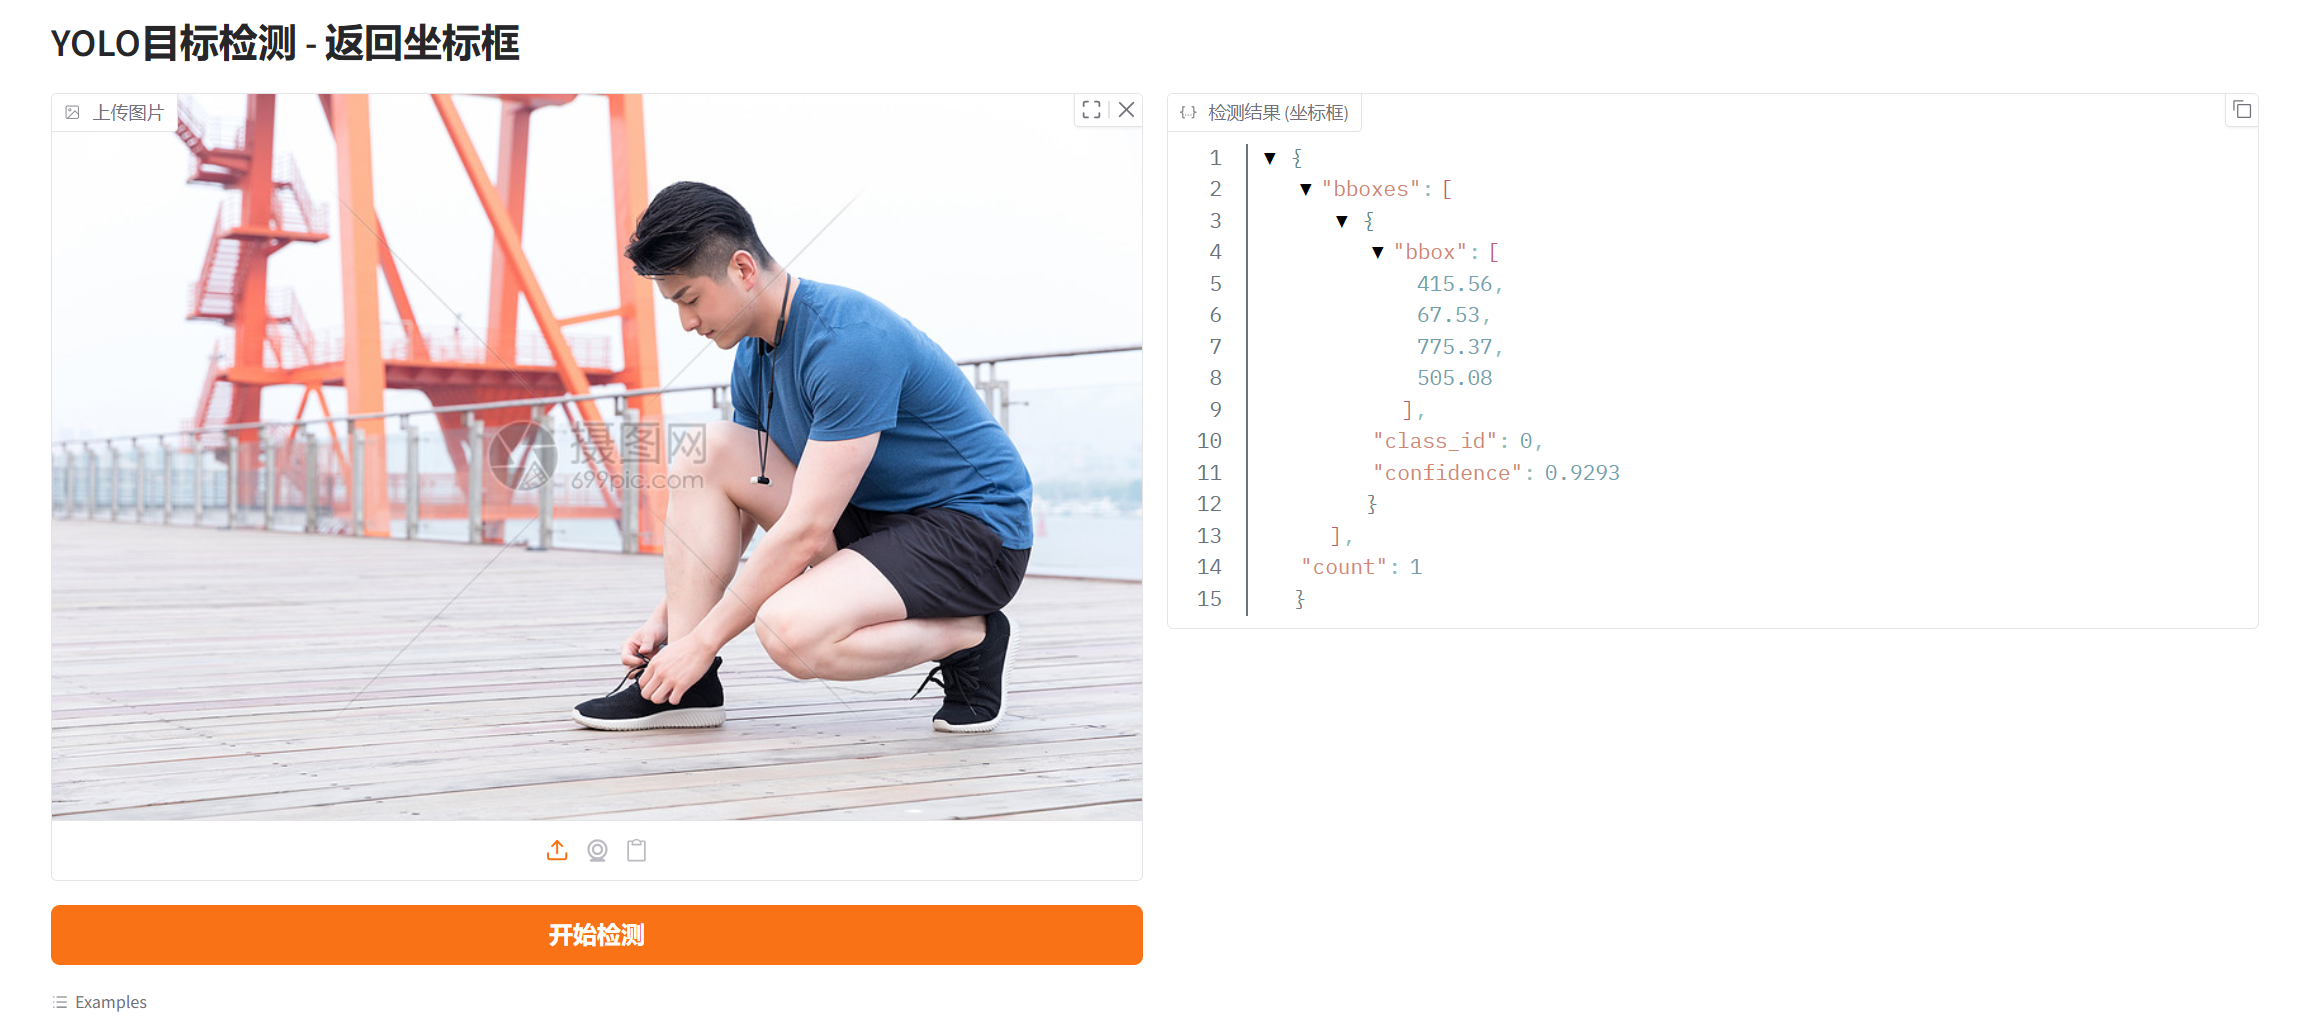
1 构建步骤
1.1创建新的space
访问 https://huggingface.co/spaces
点击"Create new Space"
选择SDK:Gradio (推荐)或Streamlit
选择硬件:CPU(免费)或GPU(付费)
1.2上传文件
在你的space界面中,点击“+Contribute”,单出的对话框中点击“upload files”,如下图所示。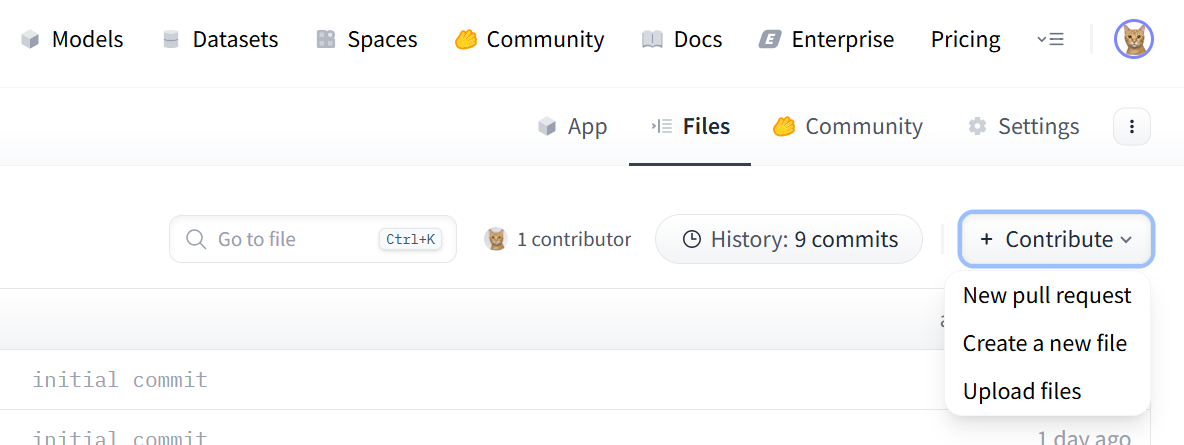
以yolo模型调用为例,你需要上传三个文件,分别是app.py、test.pt和requirements.txt,模型会自己构建环境。模型文件可以用标准的yolo模型,改名即可。
app.py
import gradio as gr
from ultralytics import YOLO
import numpy as np
from PIL import Image

# 加载模型
model = YOLO('test.pt')  # 替换为你的模型文件名

def detect_bboxes(image):
    """
    只返回边界框坐标的检测函数
    """
    try:
        # YOLO推理
        results = model(image)

        # 提取边界框坐标
        bboxes = []
        for r in results:
            if r.boxes is not None:
                for box in r.boxes:
                    # 获取坐标 [x1, y1, x2, y2]
                    coords = box.xyxy[0].cpu().numpy().tolist()

                    bbox_info = {
                        "bbox": [round(coord, 2) for coord in coords],  # 四舍五入到2位小数
                        "class_id": int(box.cls.item()),
                        "confidence": round(float(box.conf.item()), 4)
                    }
                    bboxes.append(bbox_info)

        return {"bboxes": bboxes, "count": len(bboxes)}

    except Exception as e:
        return {"error": str(e), "bboxes": [], "count": 0}

# 创建Gradio界面
with gr.Blocks(title="YOLO边界框检测") as demo:
    gr.Markdown("# YOLO目标检测 - 返回坐标框")

    with gr.Row():
        with gr.Column():
            input_image = gr.Image(type="pil", label="上传图片")
            detect_btn = gr.Button("开始检测", variant="primary")

        with gr.Column():
            output_json = gr.JSON(label="检测结果 (坐标框)")

    detect_btn.click(
        fn=detect_bboxes,
        inputs=input_image,
        outputs=output_json
    )

    # 添加示例
    gr.Examples(
        examples=[
            # 如果你有示例图片,可以在这里添加路径
            # ["example1.jpg"],
            # ["example2.jpg"],
        ],
        inputs=input_image,
        outputs=output_json,
        fn=detect_bboxes,
        cache_examples=False
    )

if __name__ == "__main__":
    demo.launch(mcp_server=True)
requirement.txt
torch
torchvision
ultralytics
opencv-python
gradio
pillow
numpy
2.api调用
代码如下,注意修改为你的space的名字。调用起来会比较慢,因为涉及到了数据上传、模型推理(免费的只能用cpu推理)。
from gradio_client import Client, handle_file

client = Client("yourname/spacename")
result = client.predict(
    image=handle_file('https://ultralytics.com/images/zidane.jpg'),
    api_name="/detect_bboxes"
)
print(result)
结果如下:
Loaded as API: https://hantianshuo-yolo-demo.hf.space ✔
{'bboxes': [{'bbox': [748.51, 41.81, 1148.07, 711.11], 'class_id': 0, 'confidence': 0.8405}, {'bbox': [148.56, 203.08, 1125.28, 714.99], 'class_id': 0, 'confidence': 0.7793}, {'bbox': [361.39, 437.73, 524.66, 717.32], 'class_id': 27, 'confidence': 0.452}], 'count': 3}

腾讯云面向开发者汇聚海量精品云计算使用和开发经验,营造开放的云计算技术生态圈。
更多推荐
 4
4 0
0- 0


 已为社区贡献8条内容

所有评论(0)