Jenkins持续集成入门指南:自动化构建与部署的最佳实践
目录
八、Jenkins pipeline构建前端node.js项目
编辑(3) Jenkins用户的公钥传给tomcat服务器的root用户
一、部署Jenkins
1. 安装
# 注意以下命令需要“科学上网”
wget -O /etc/yum.repos.d/jenkins.repo \
https://pkg.jenkins.io/redhat-stable/jenkins.repo
rpm --import https://pkg.jenkins.io/redhat-stable/jenkins.io-2023.key
yum upgrade #暂时未操作此步骤
yum install fontconfig java-21-openjdk -y
yum install jenkins git maven -y
systemctl daemon-reload
systemctl start jenkins
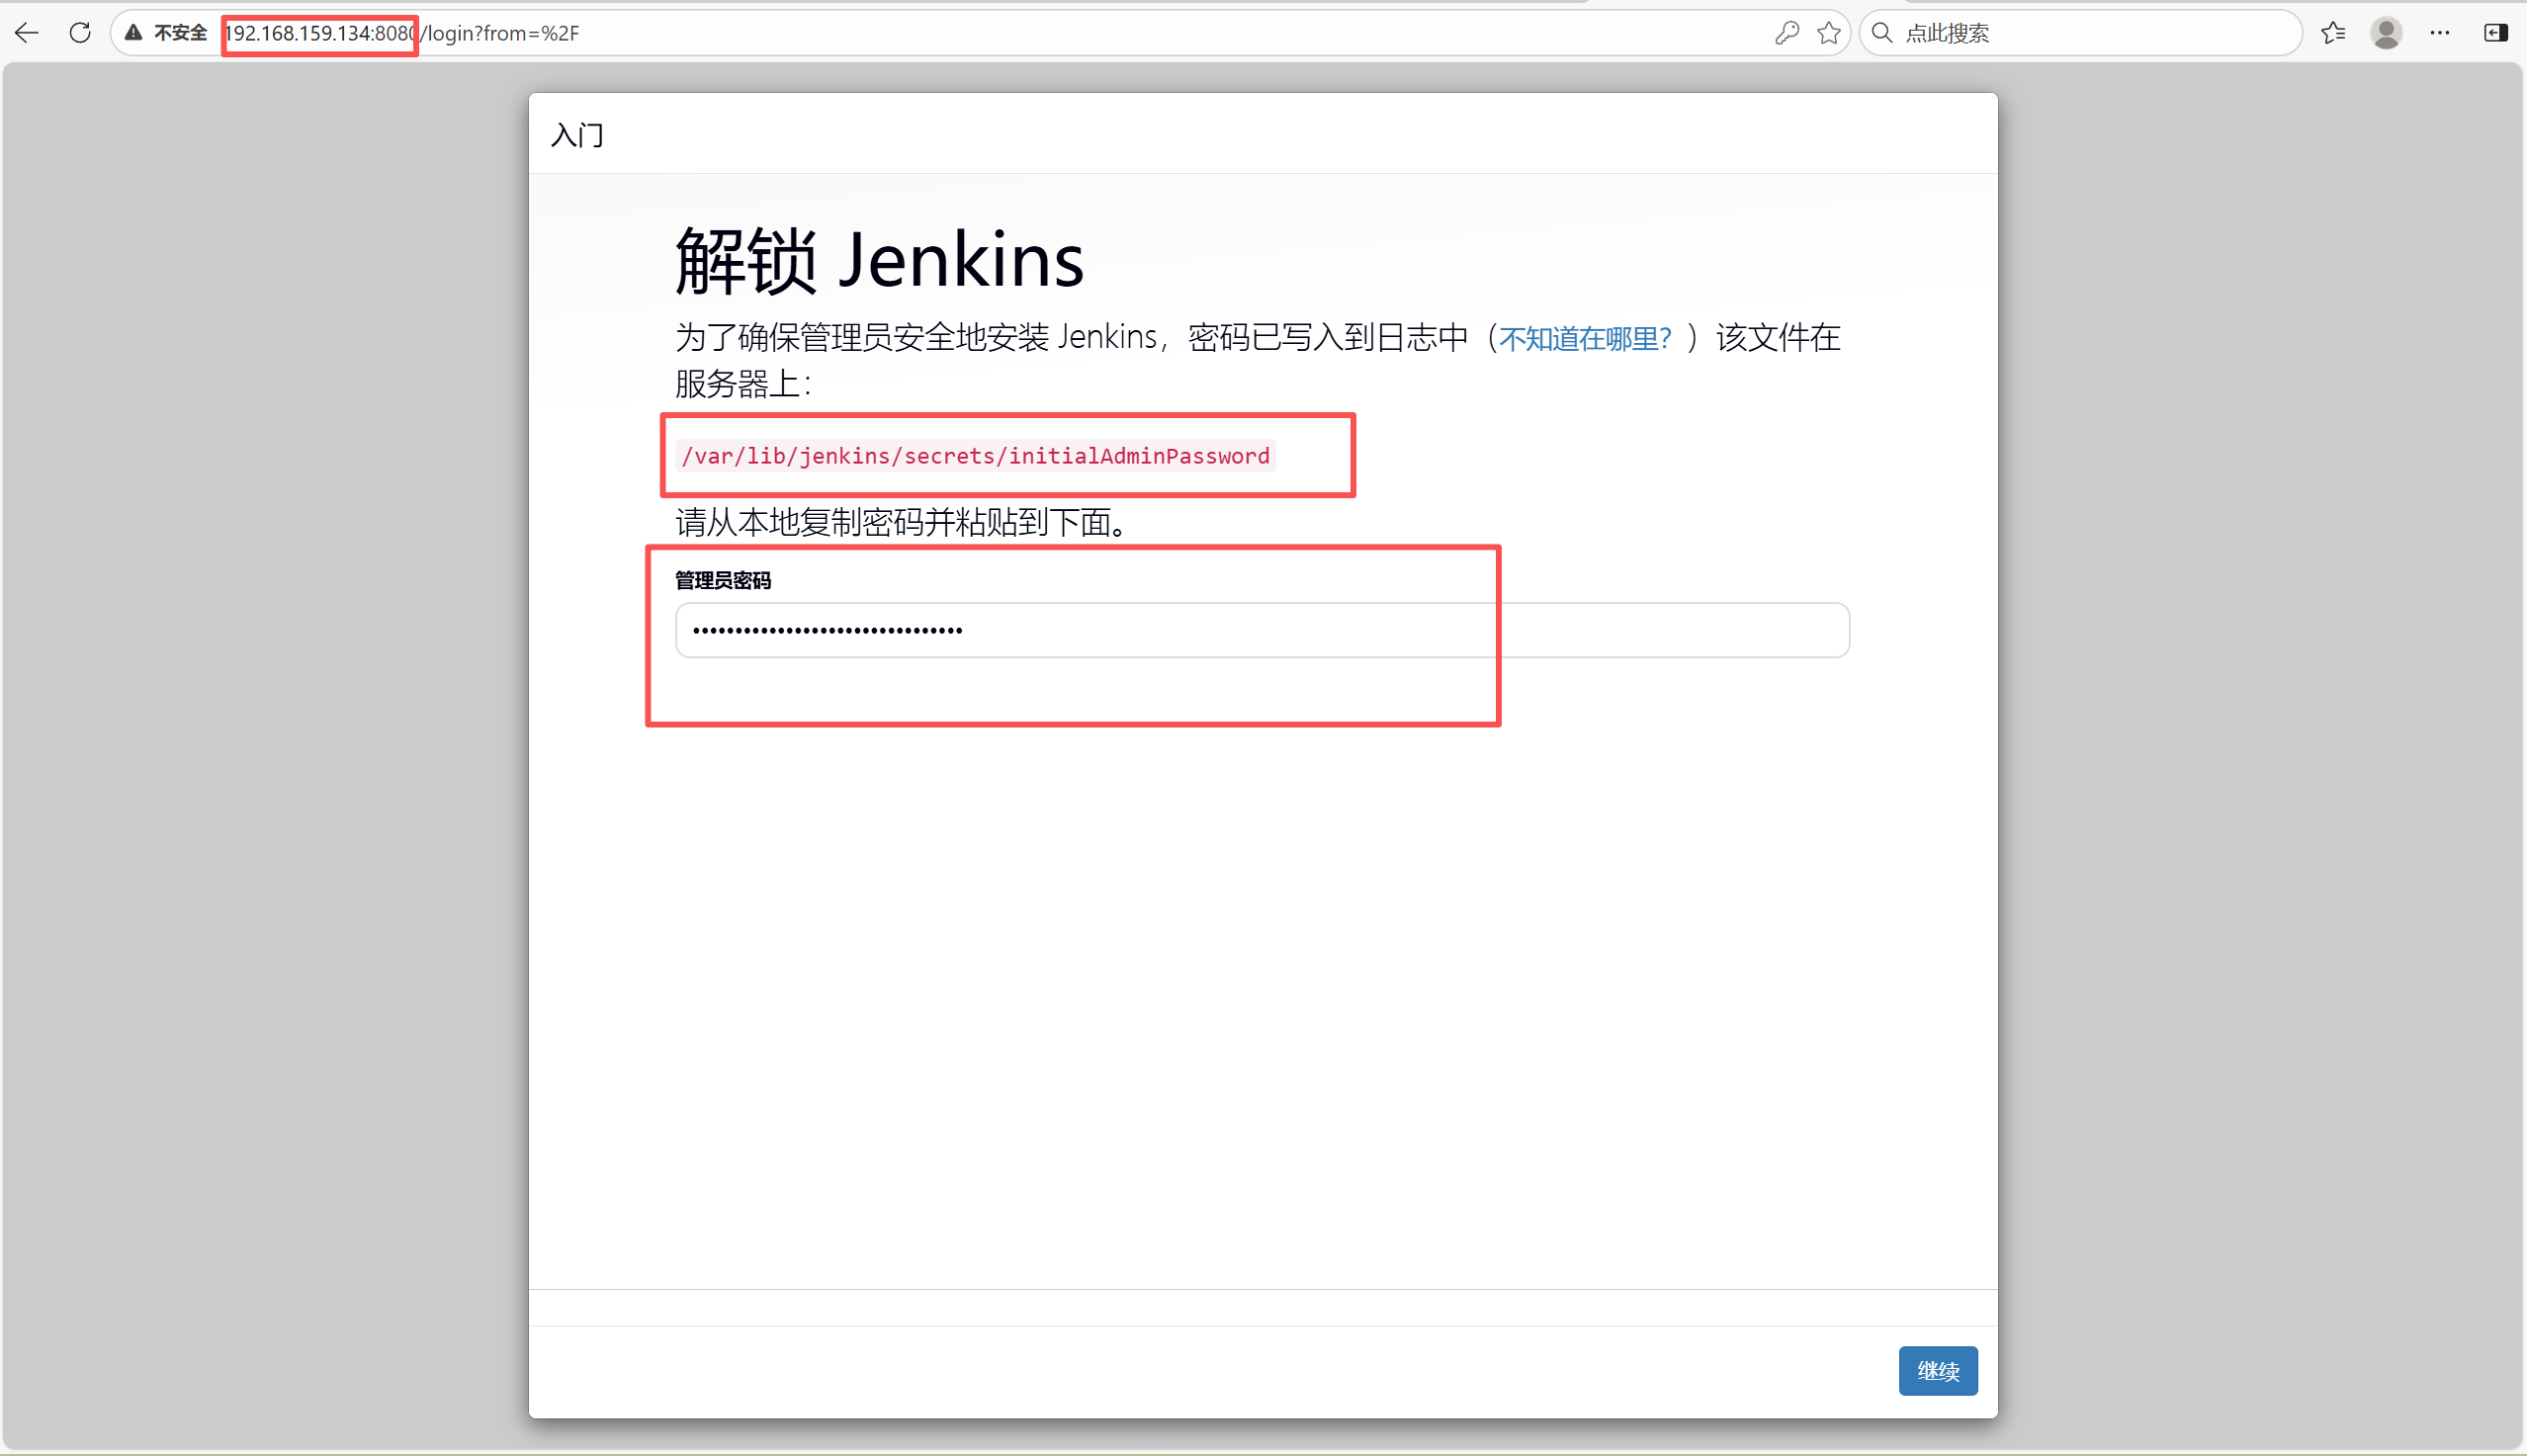
2. 查看初始化密码
cat /var/lib/jenkins/secrets/initialAdminPassword
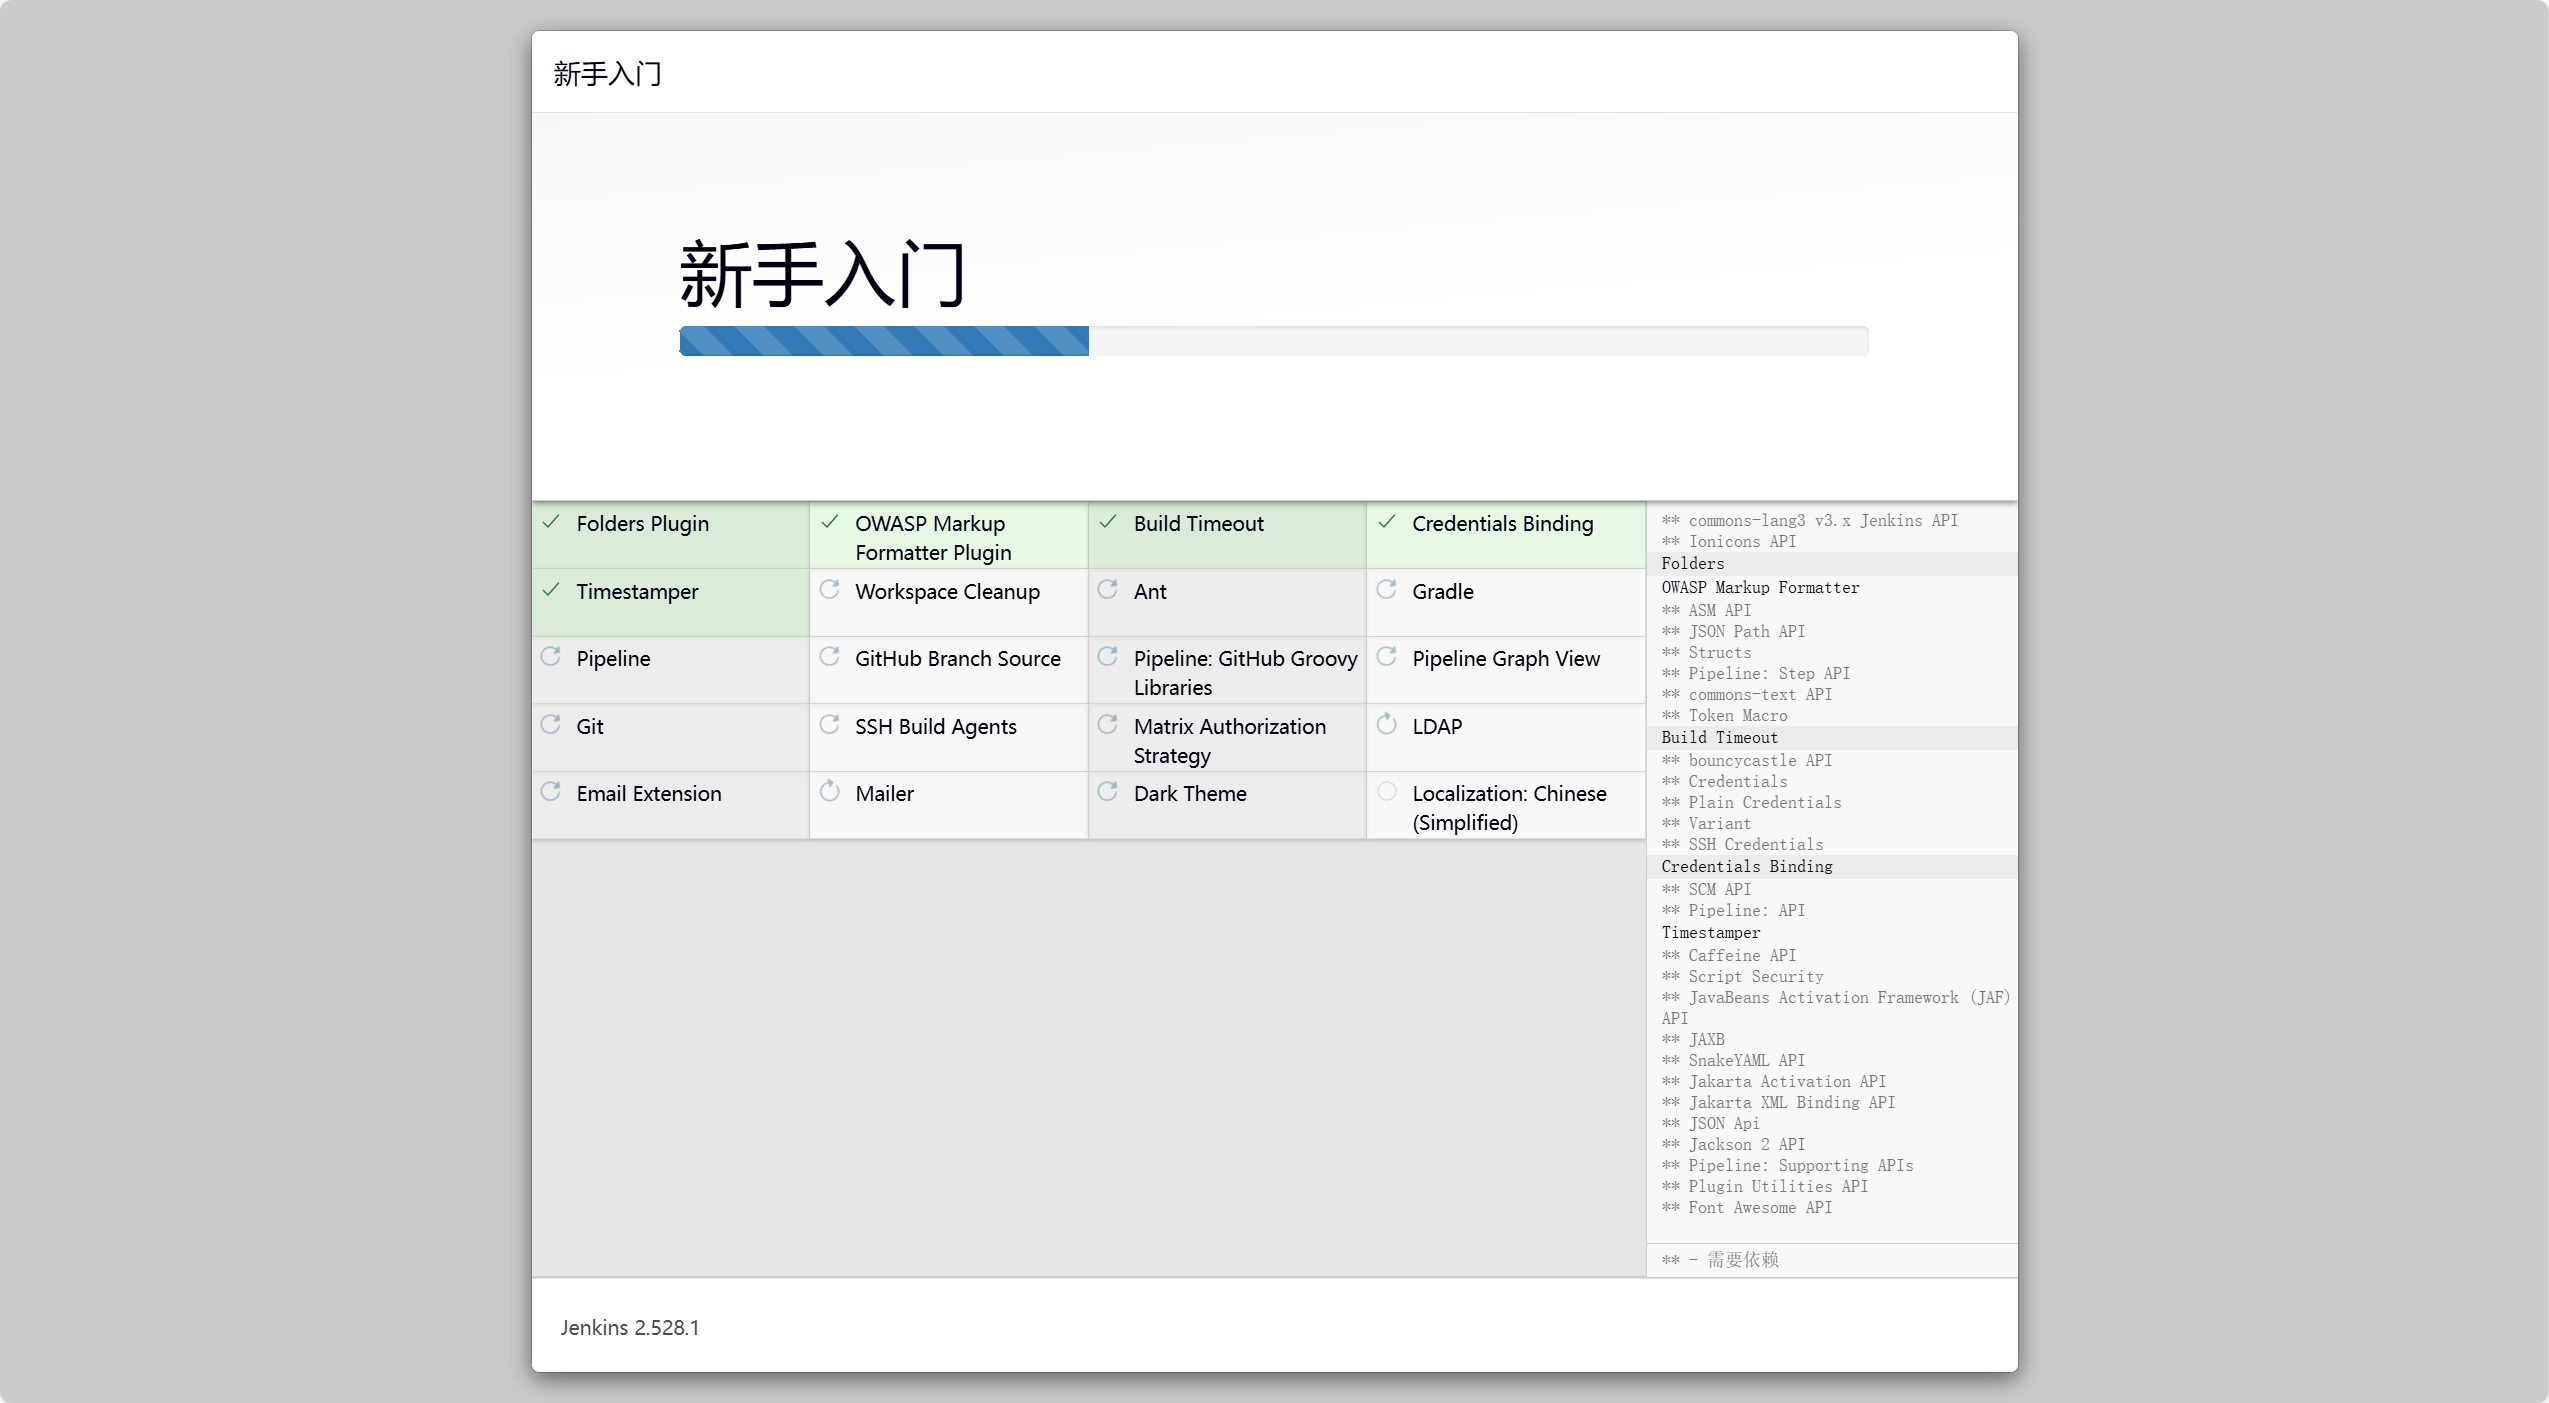
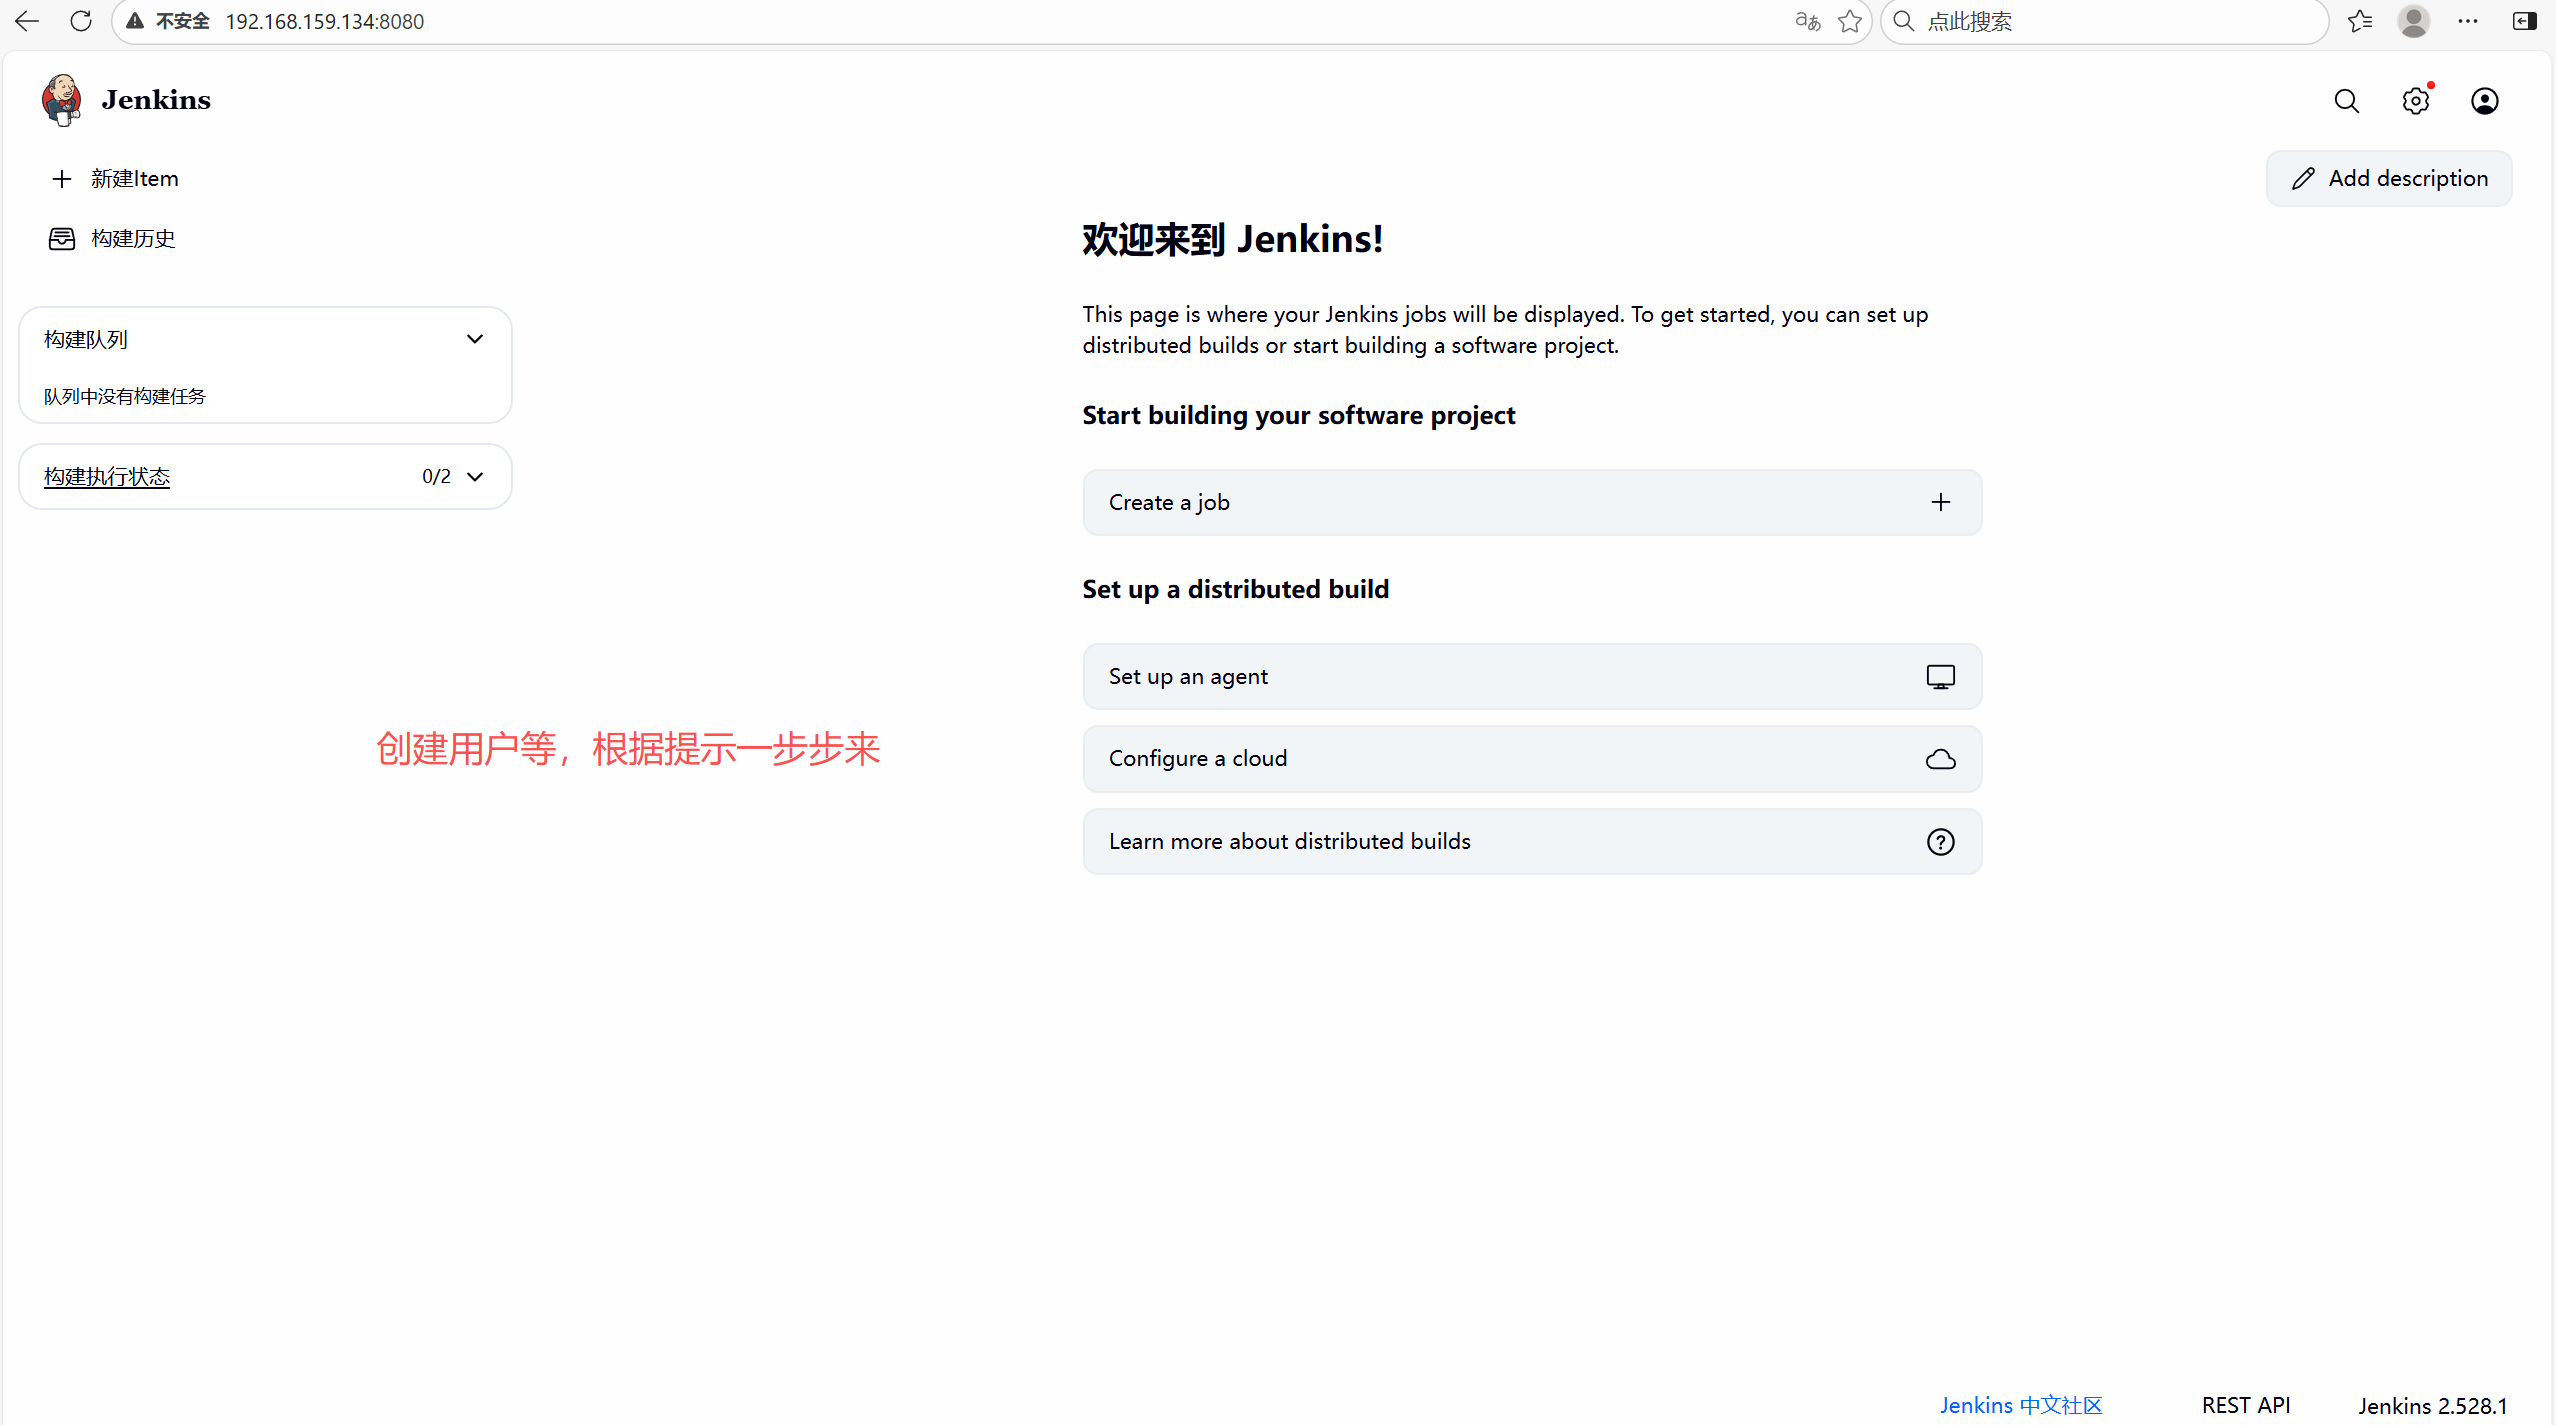
3. 浏览器登录Jenkins
二、 Gitlab安装并创建测试项目
三、配置Jenkins连接Gitlab
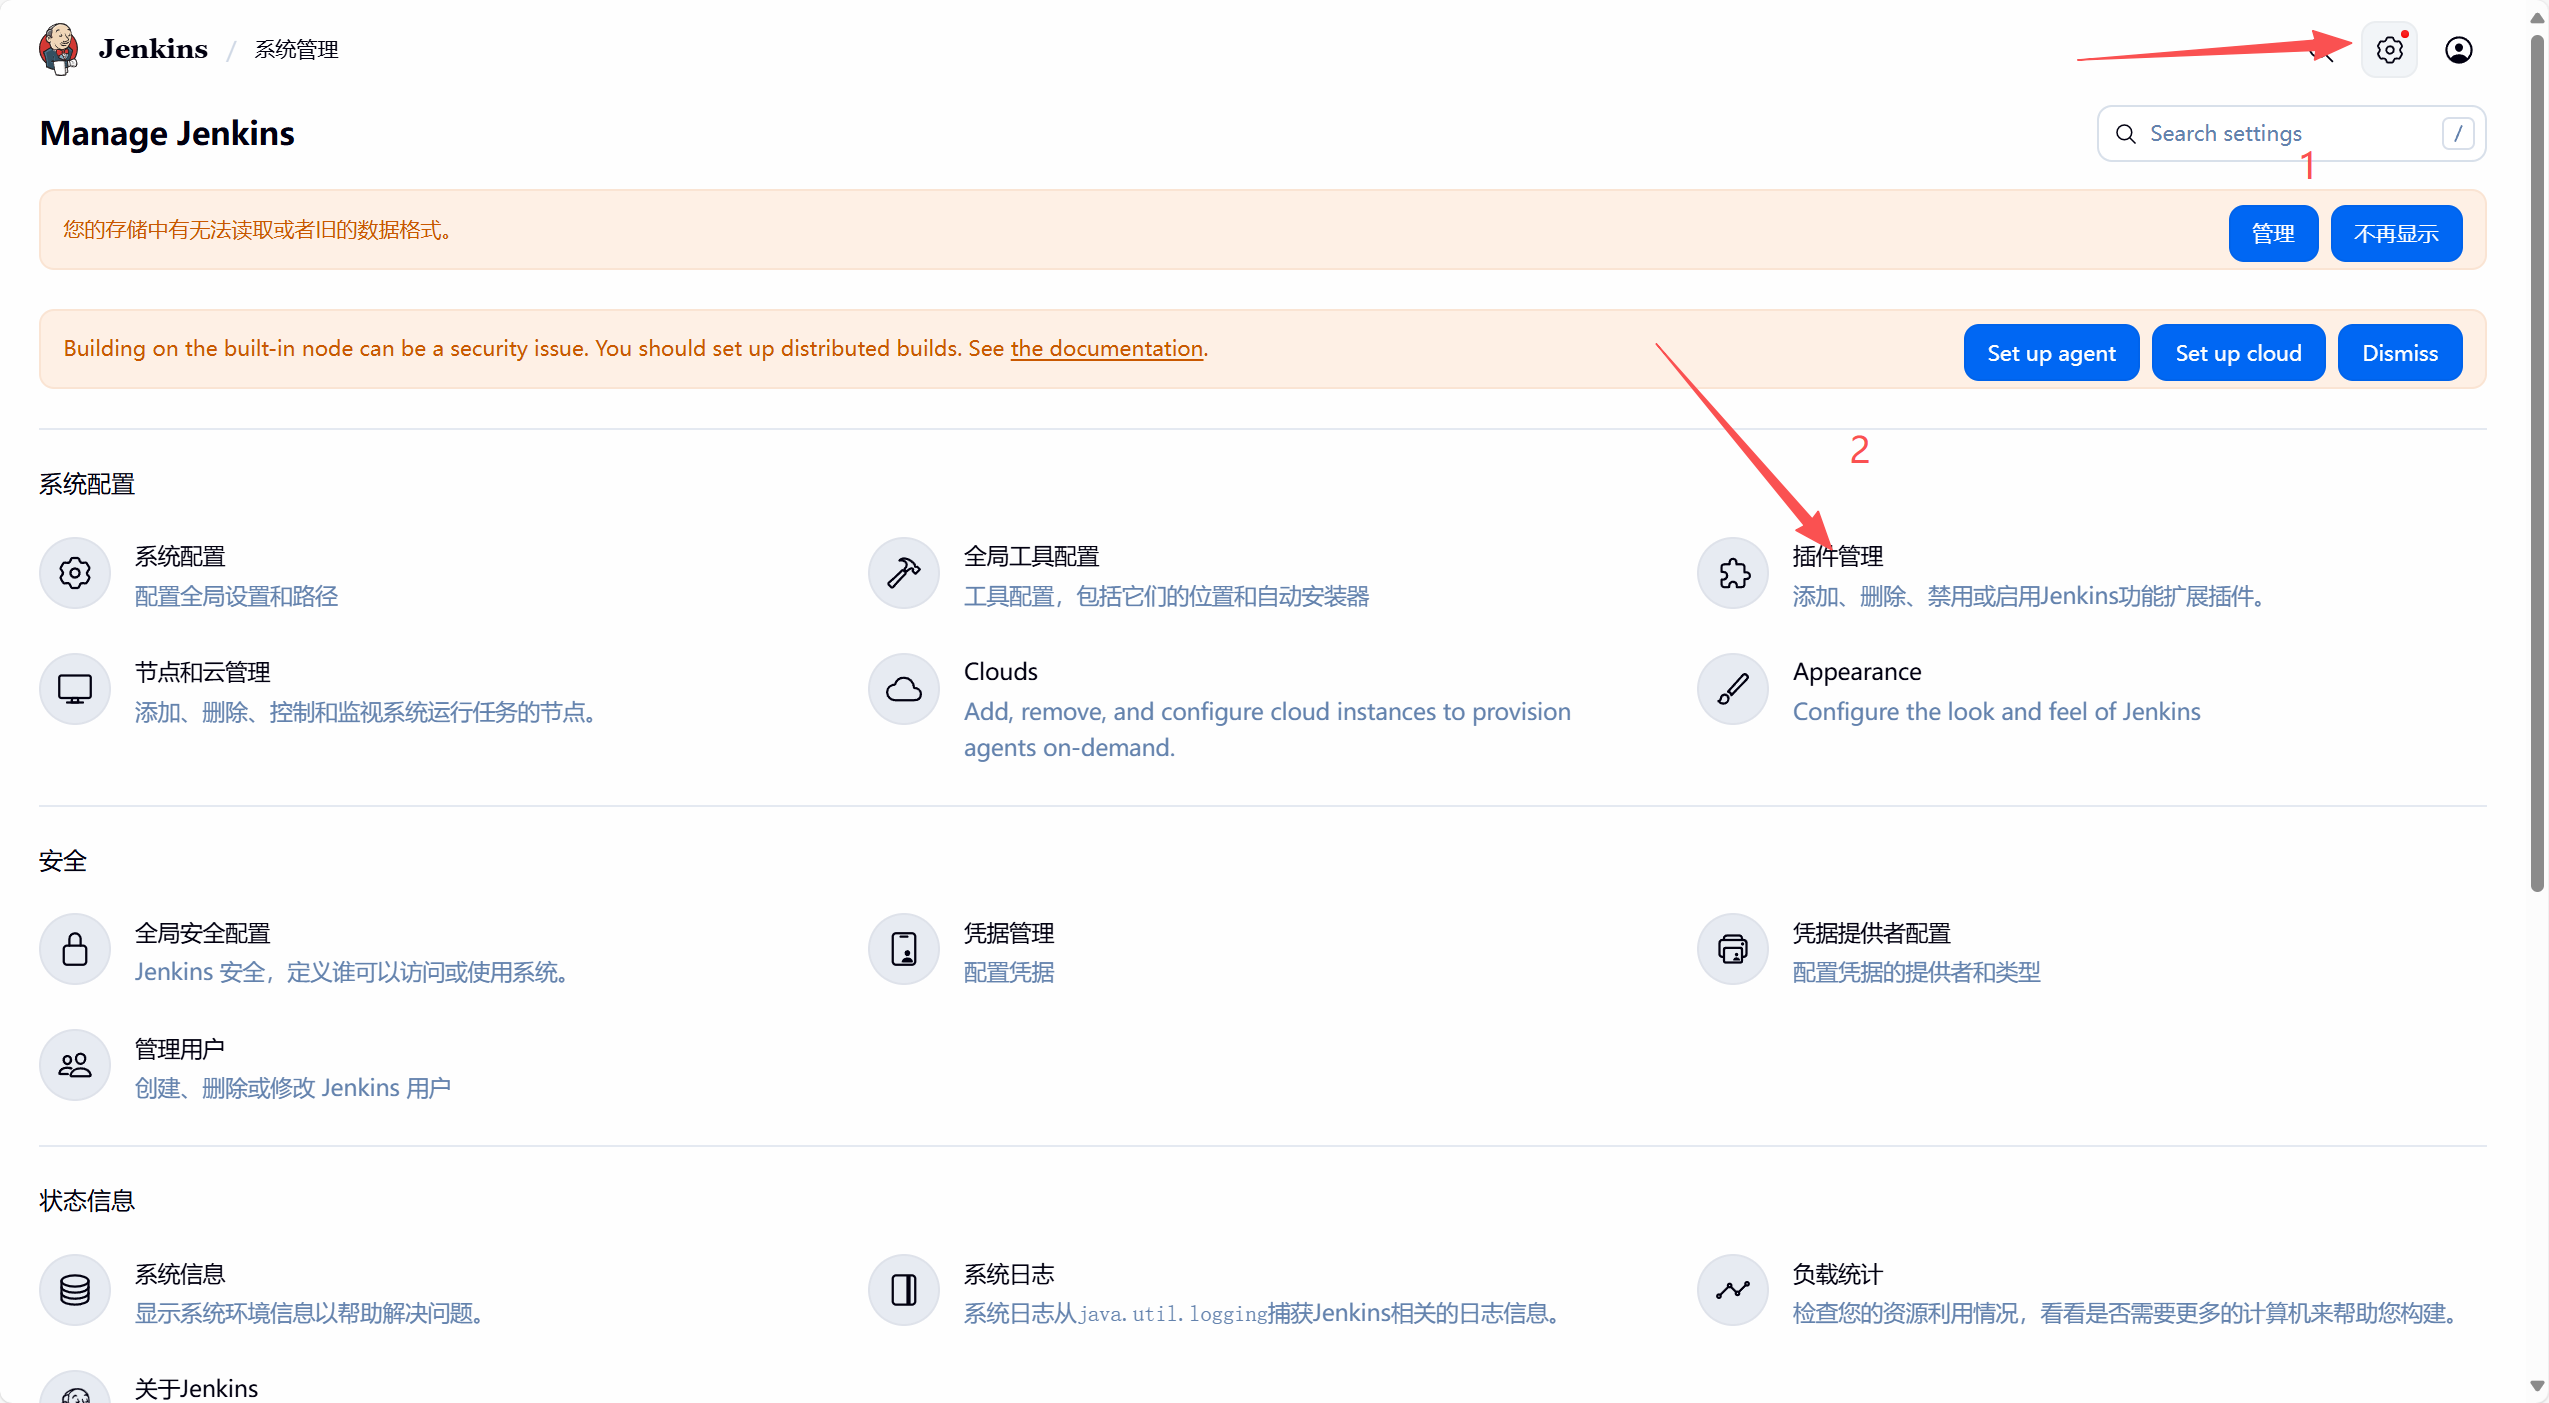
1. 安装插件
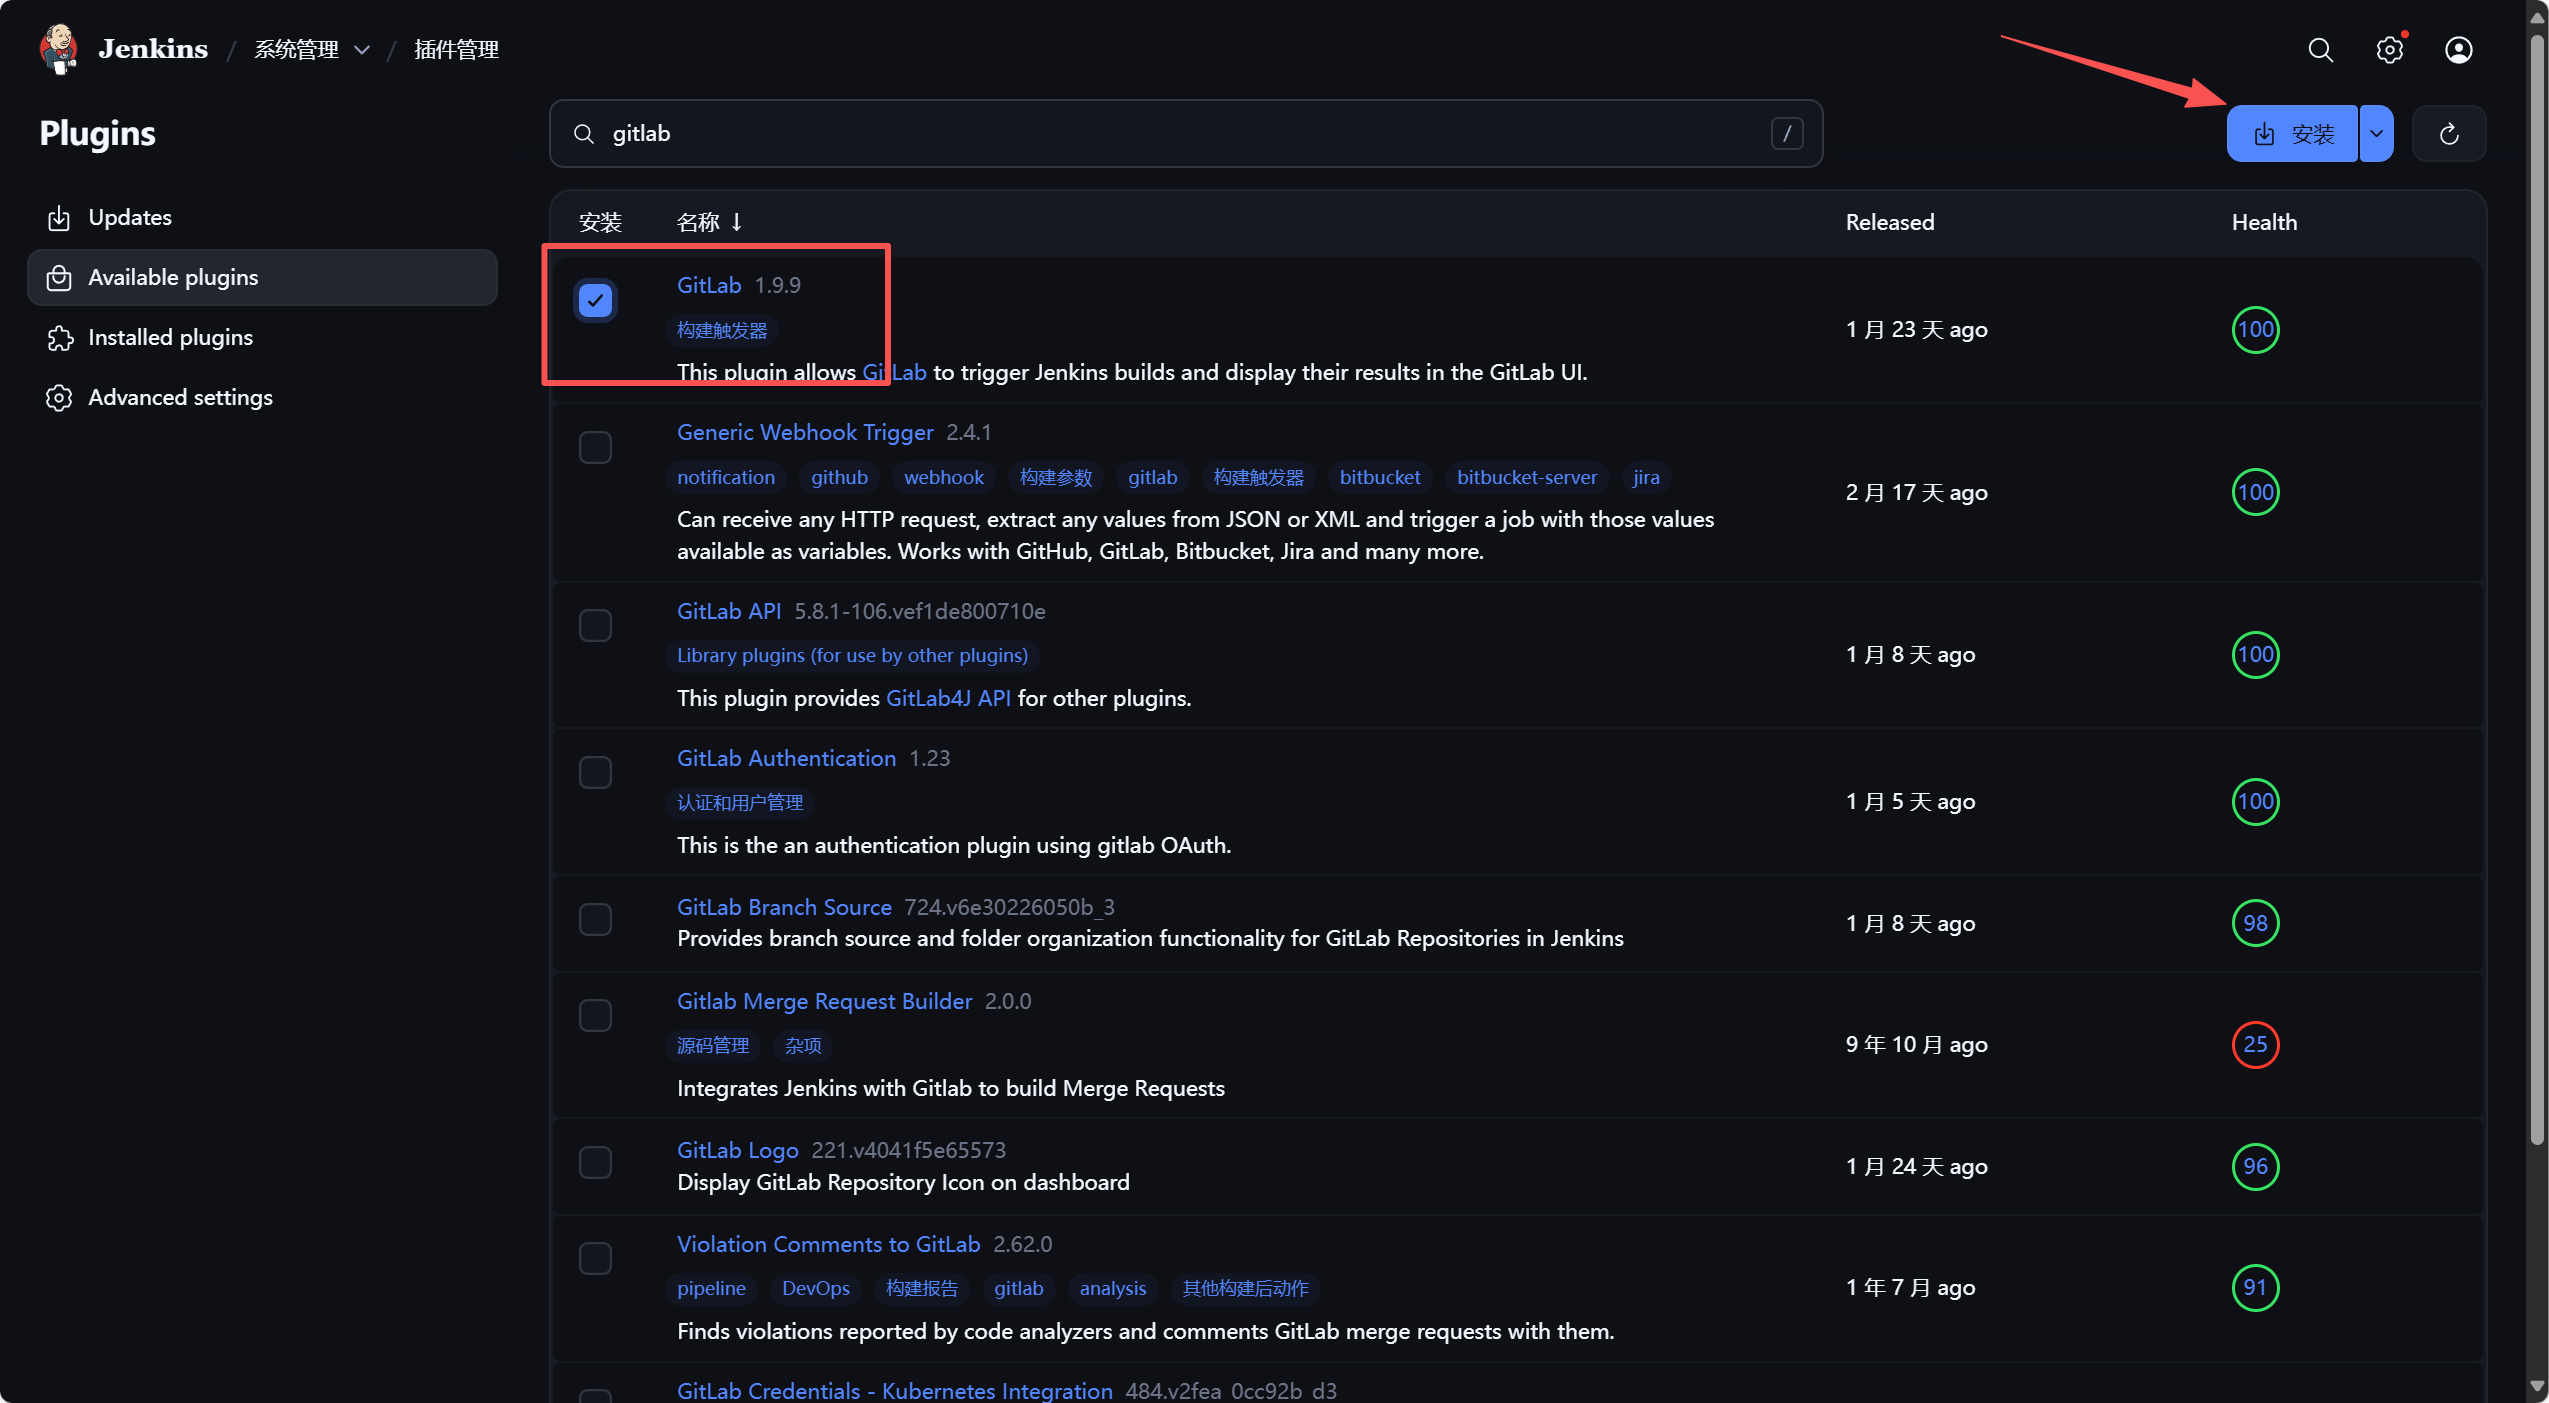
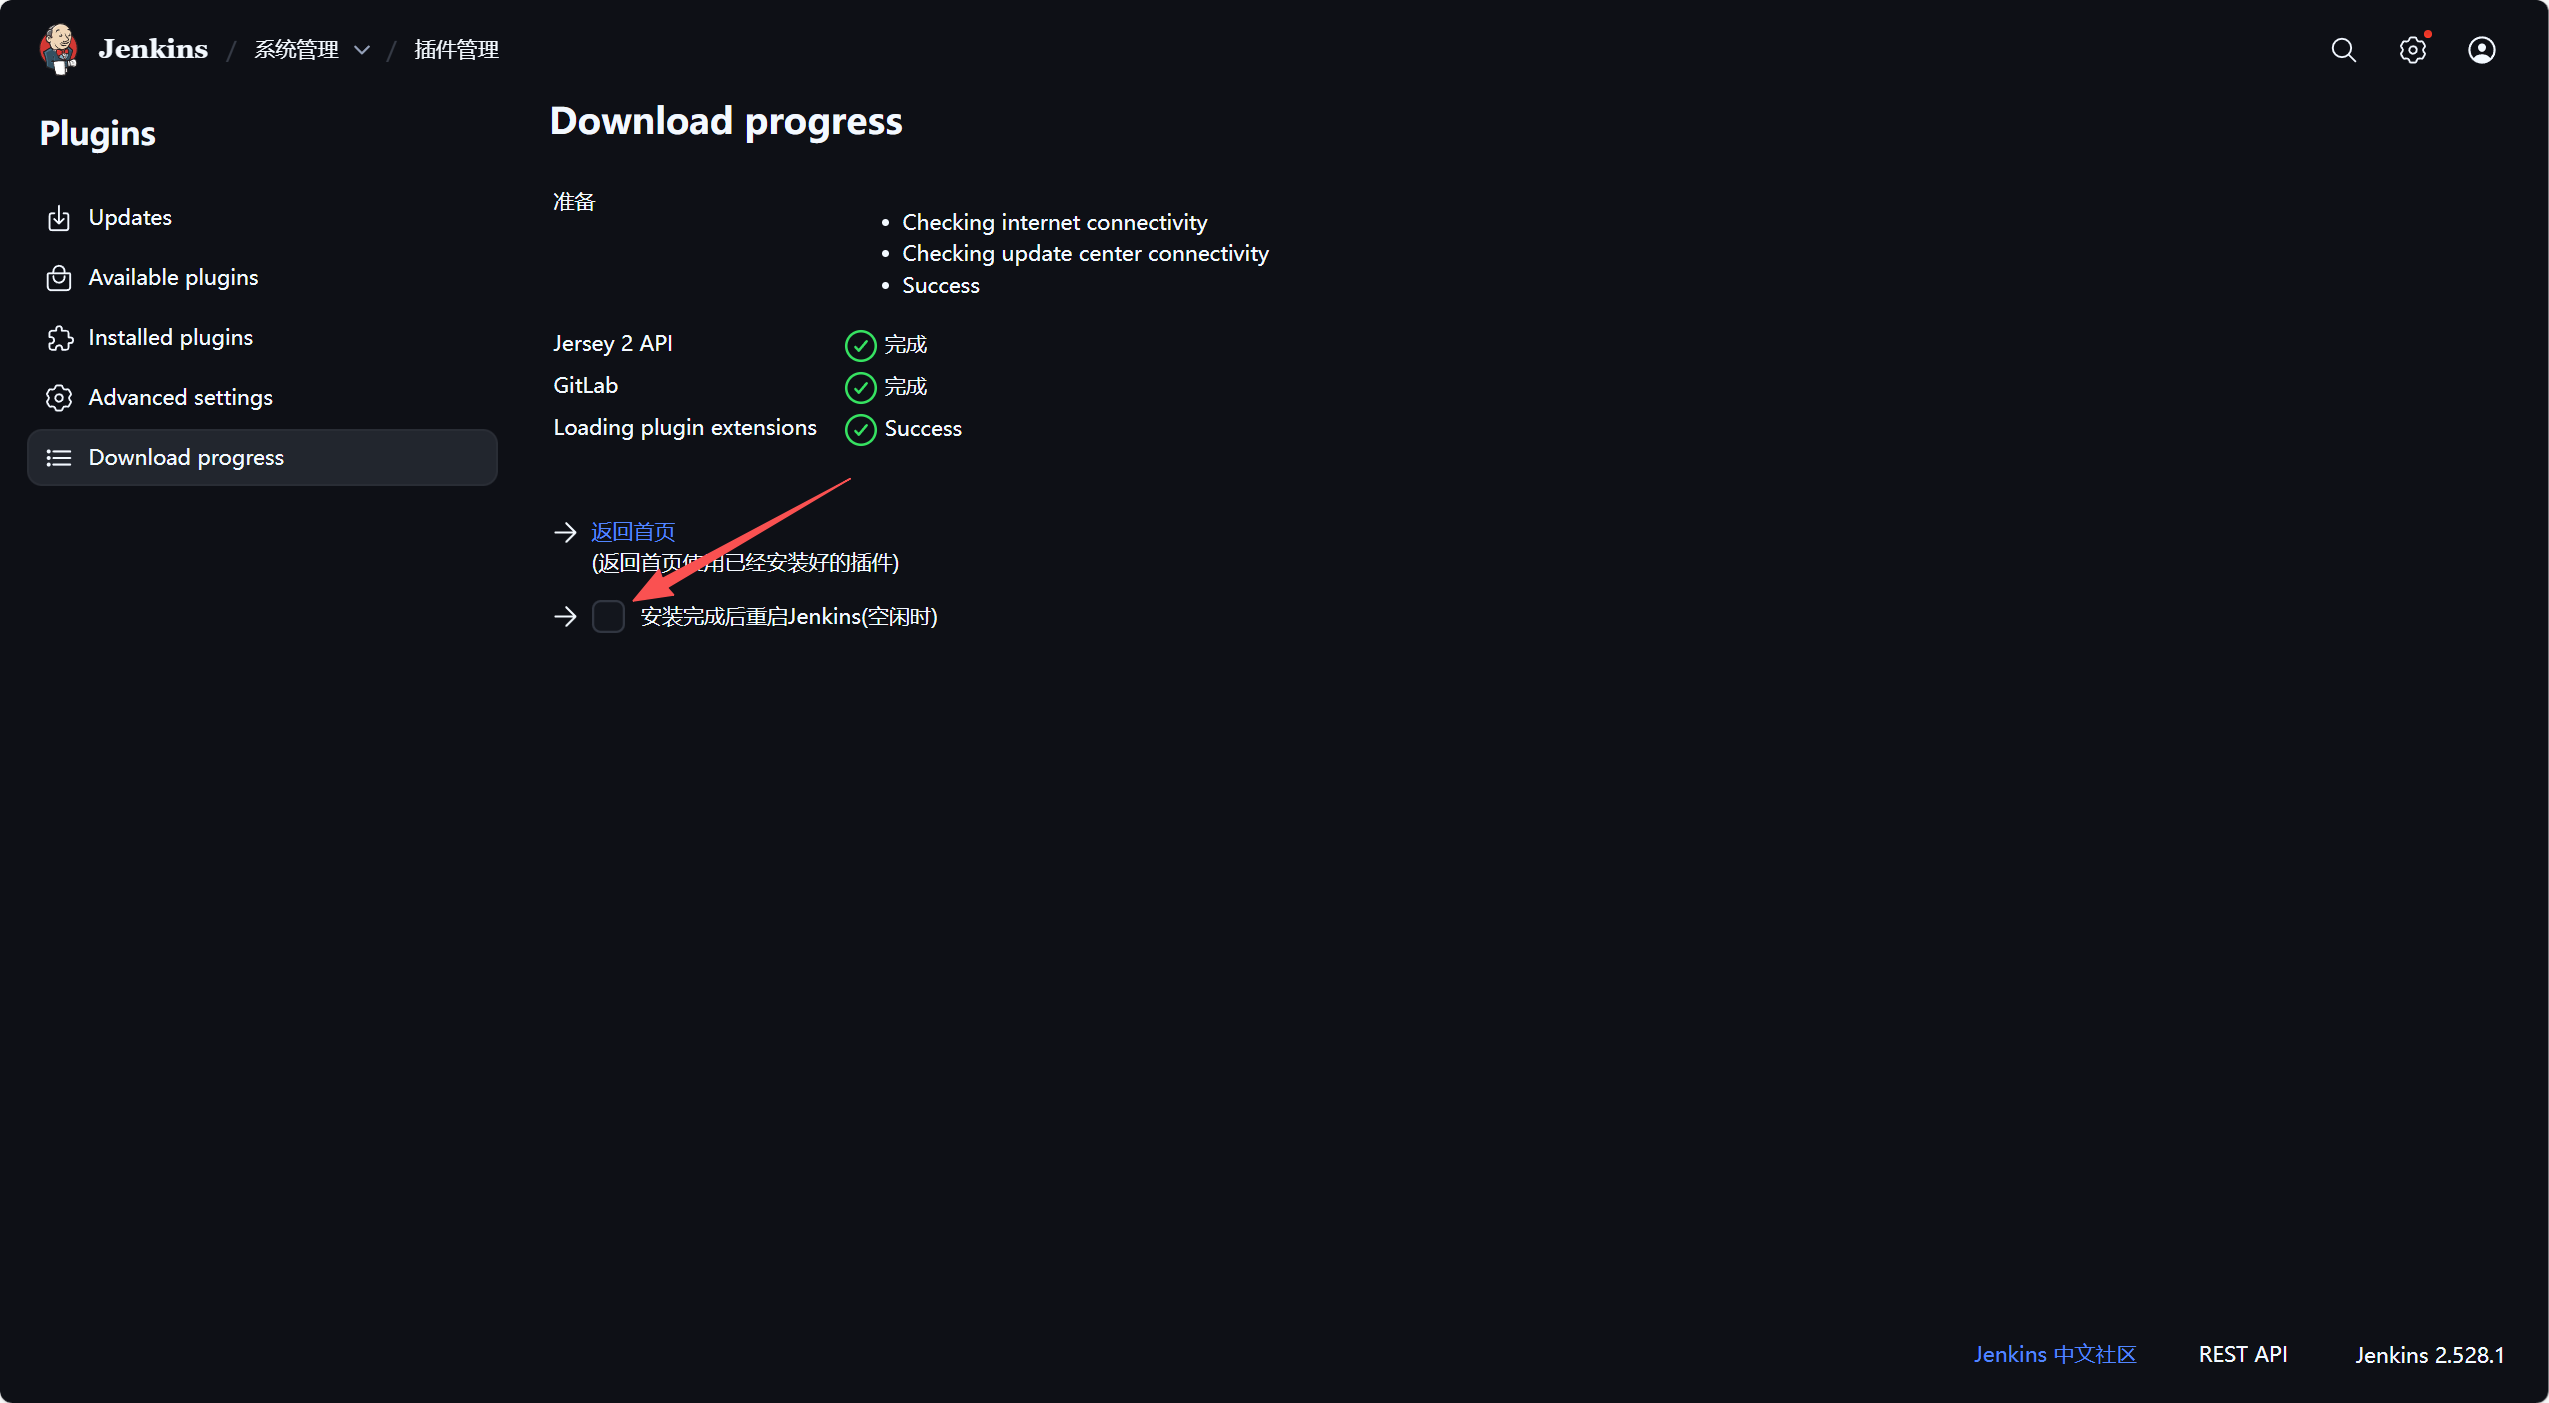
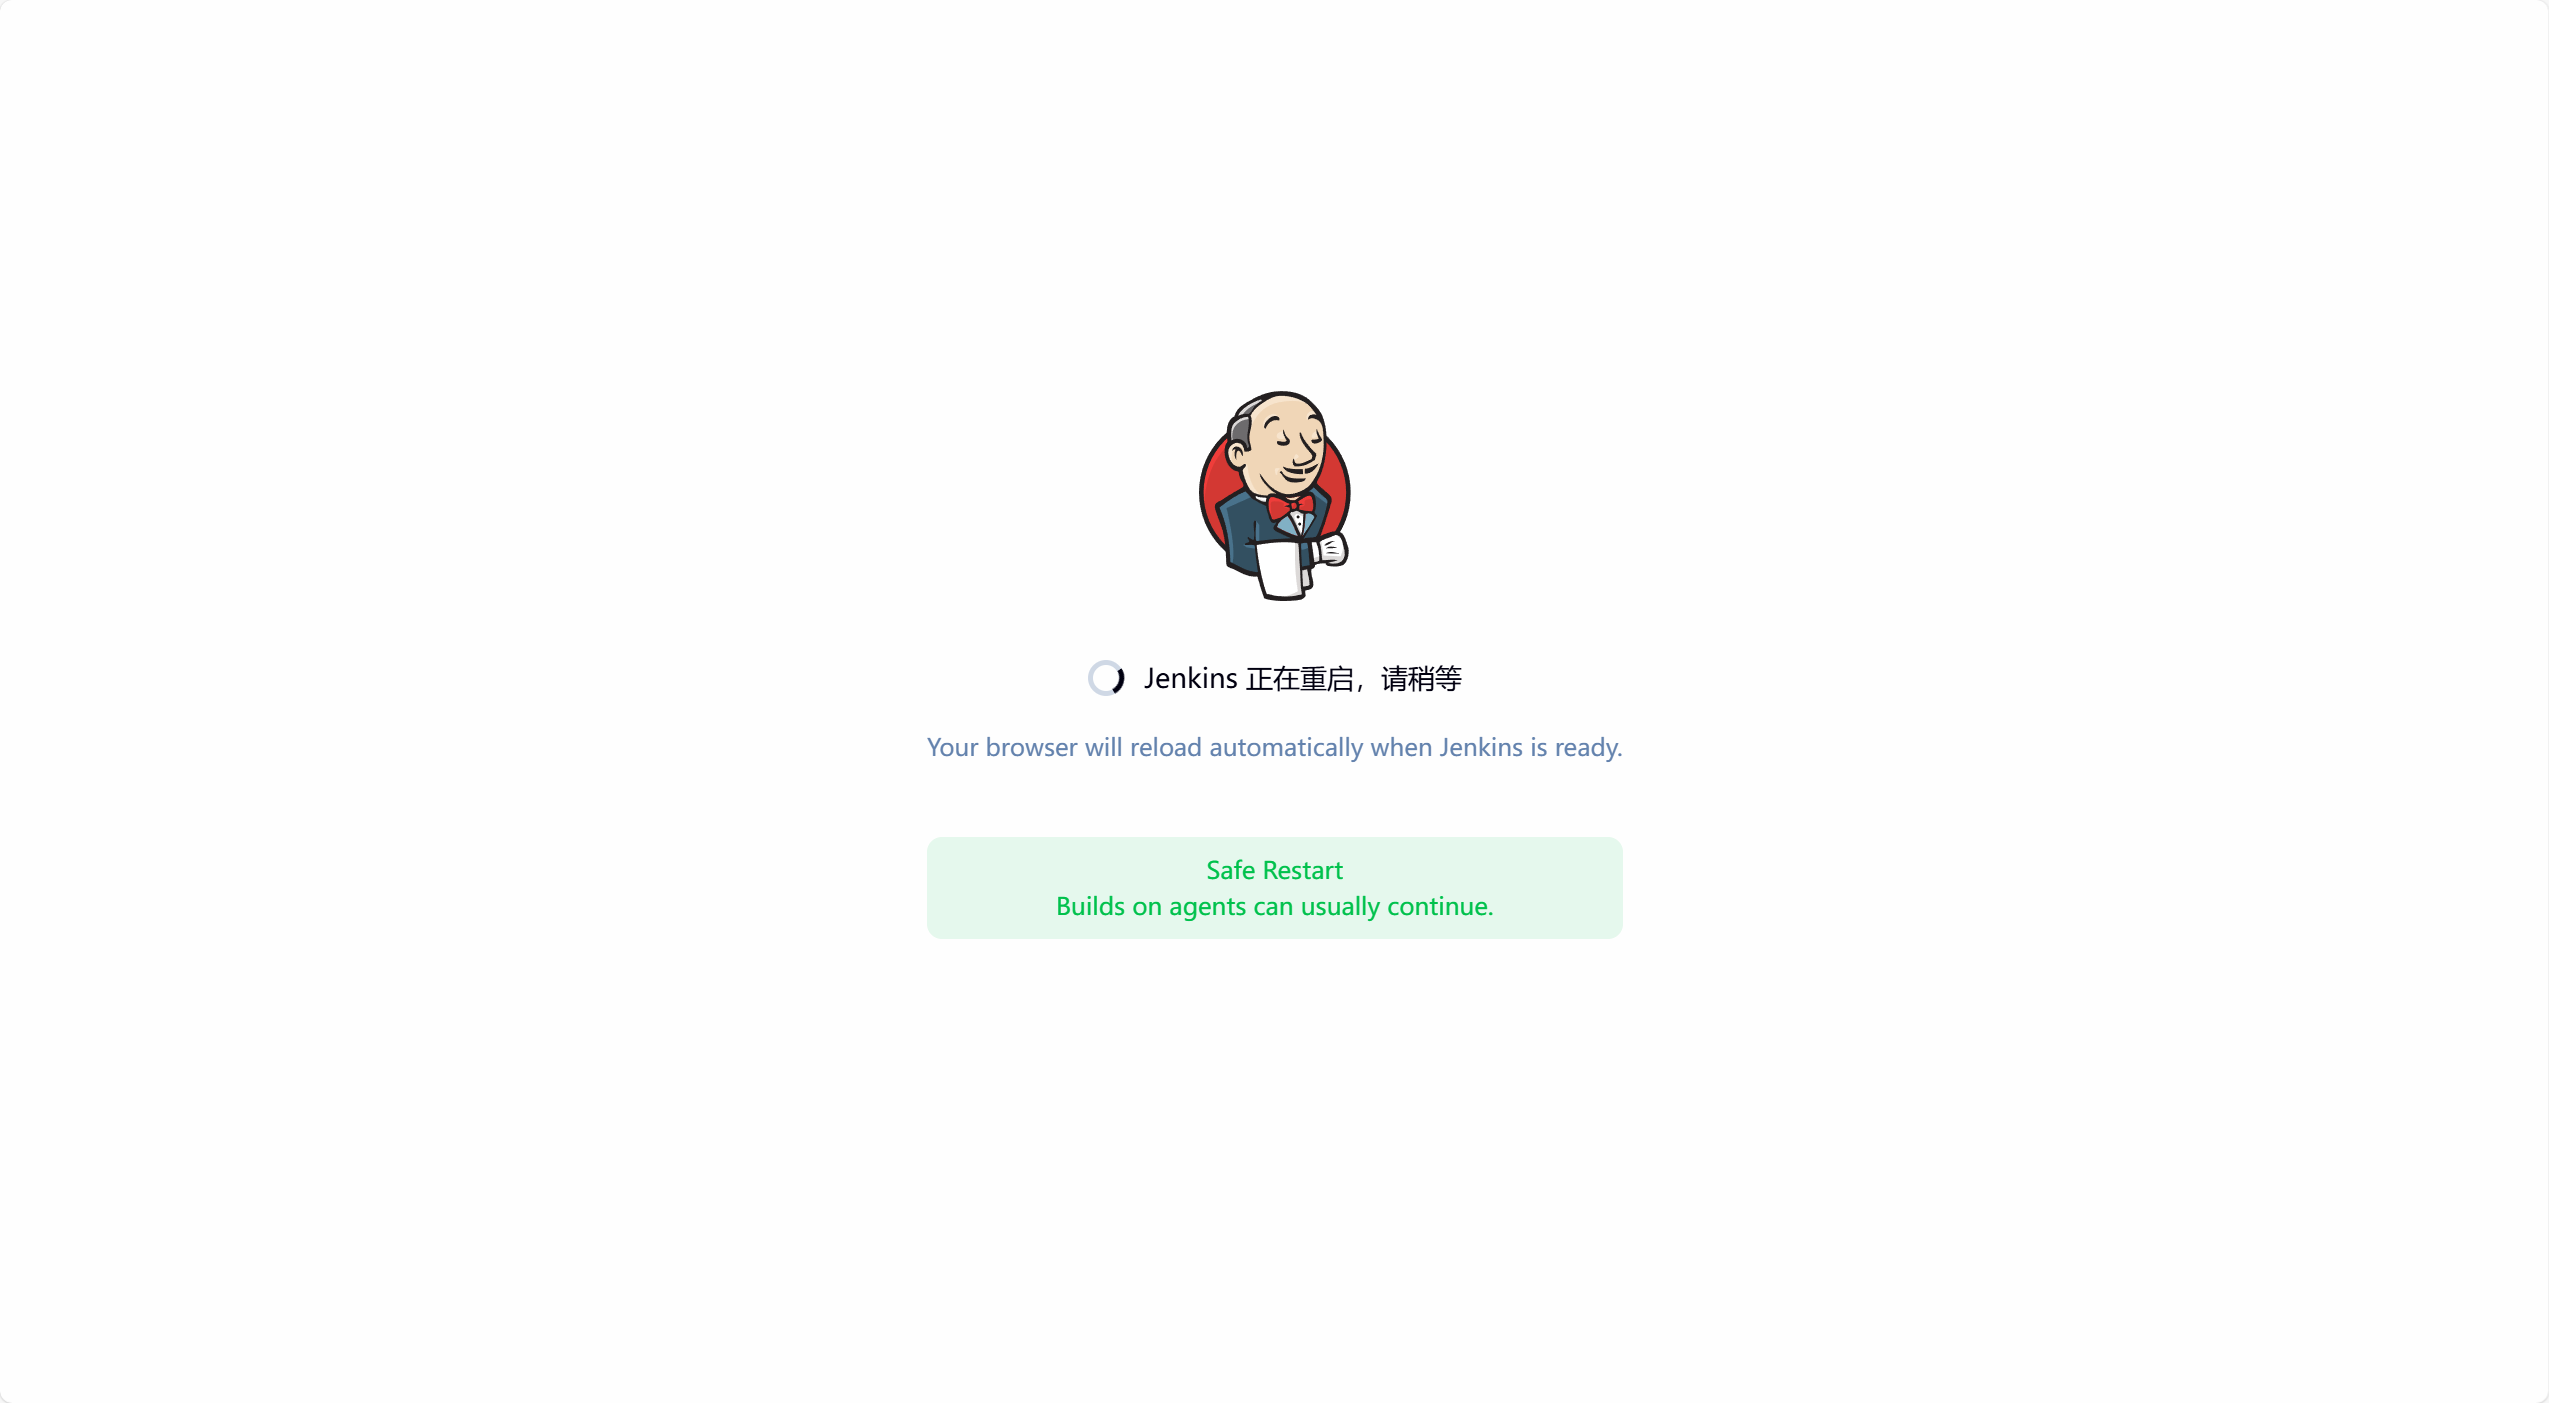
2. 配置Gitlab凭证
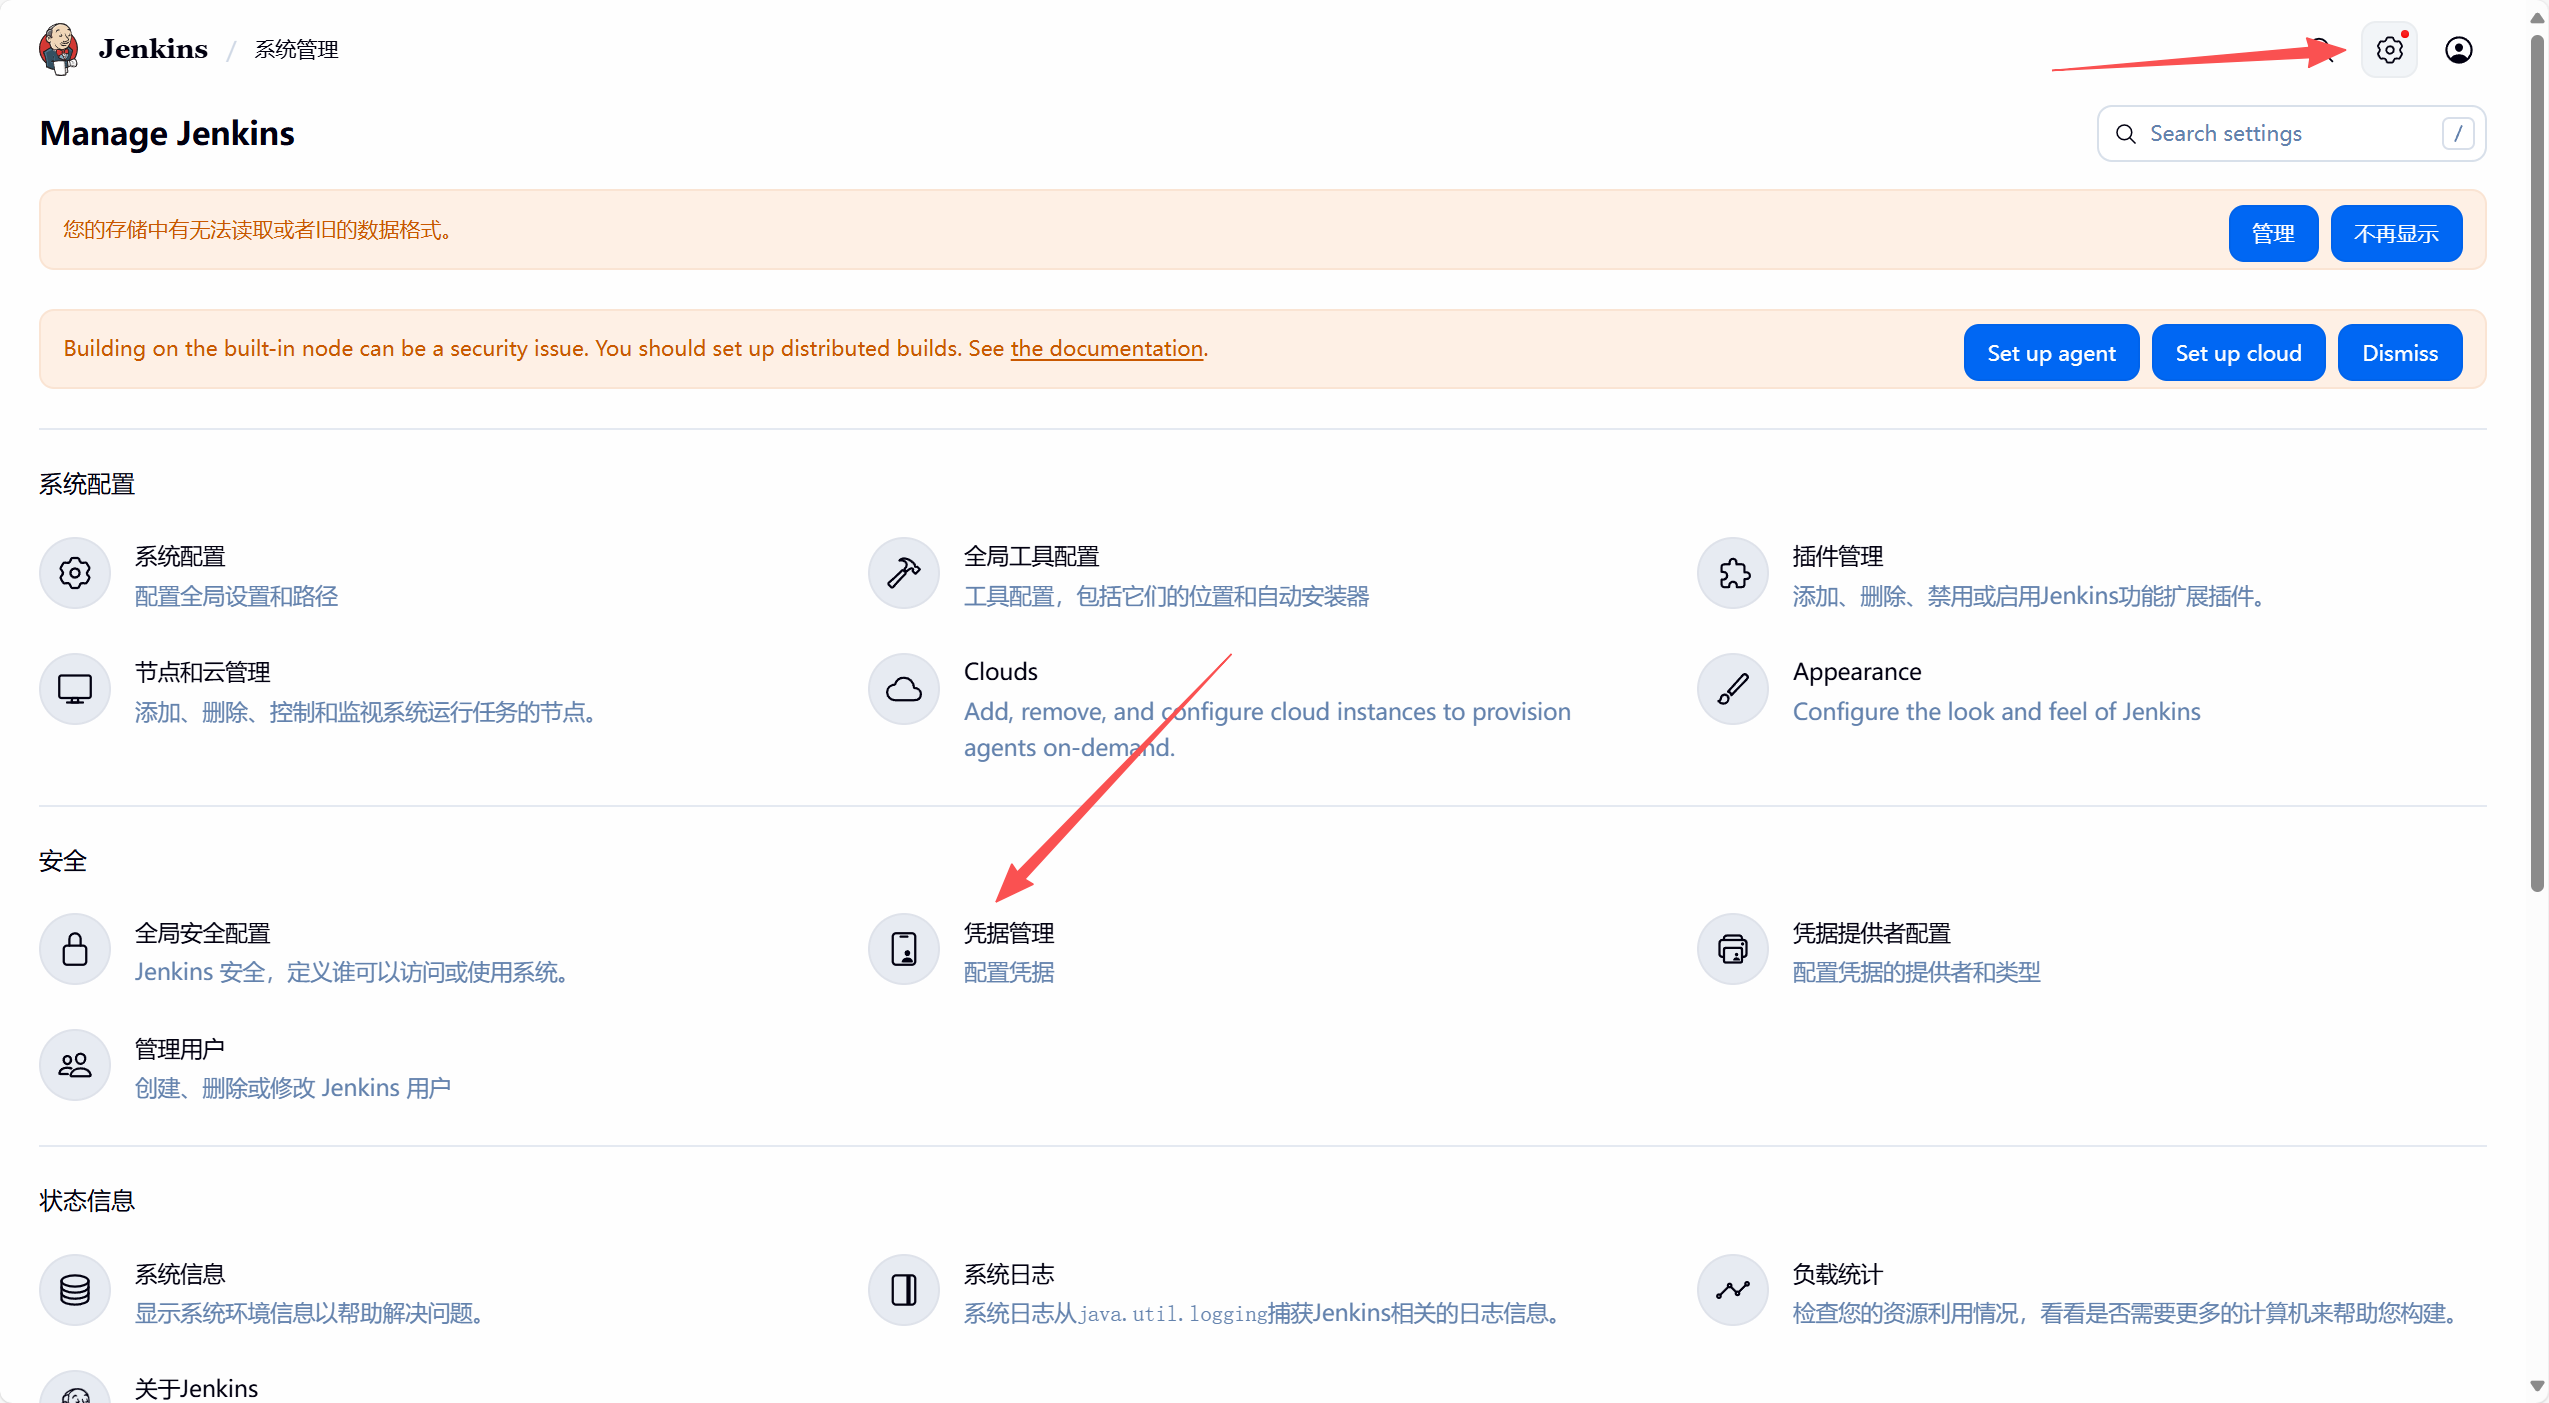
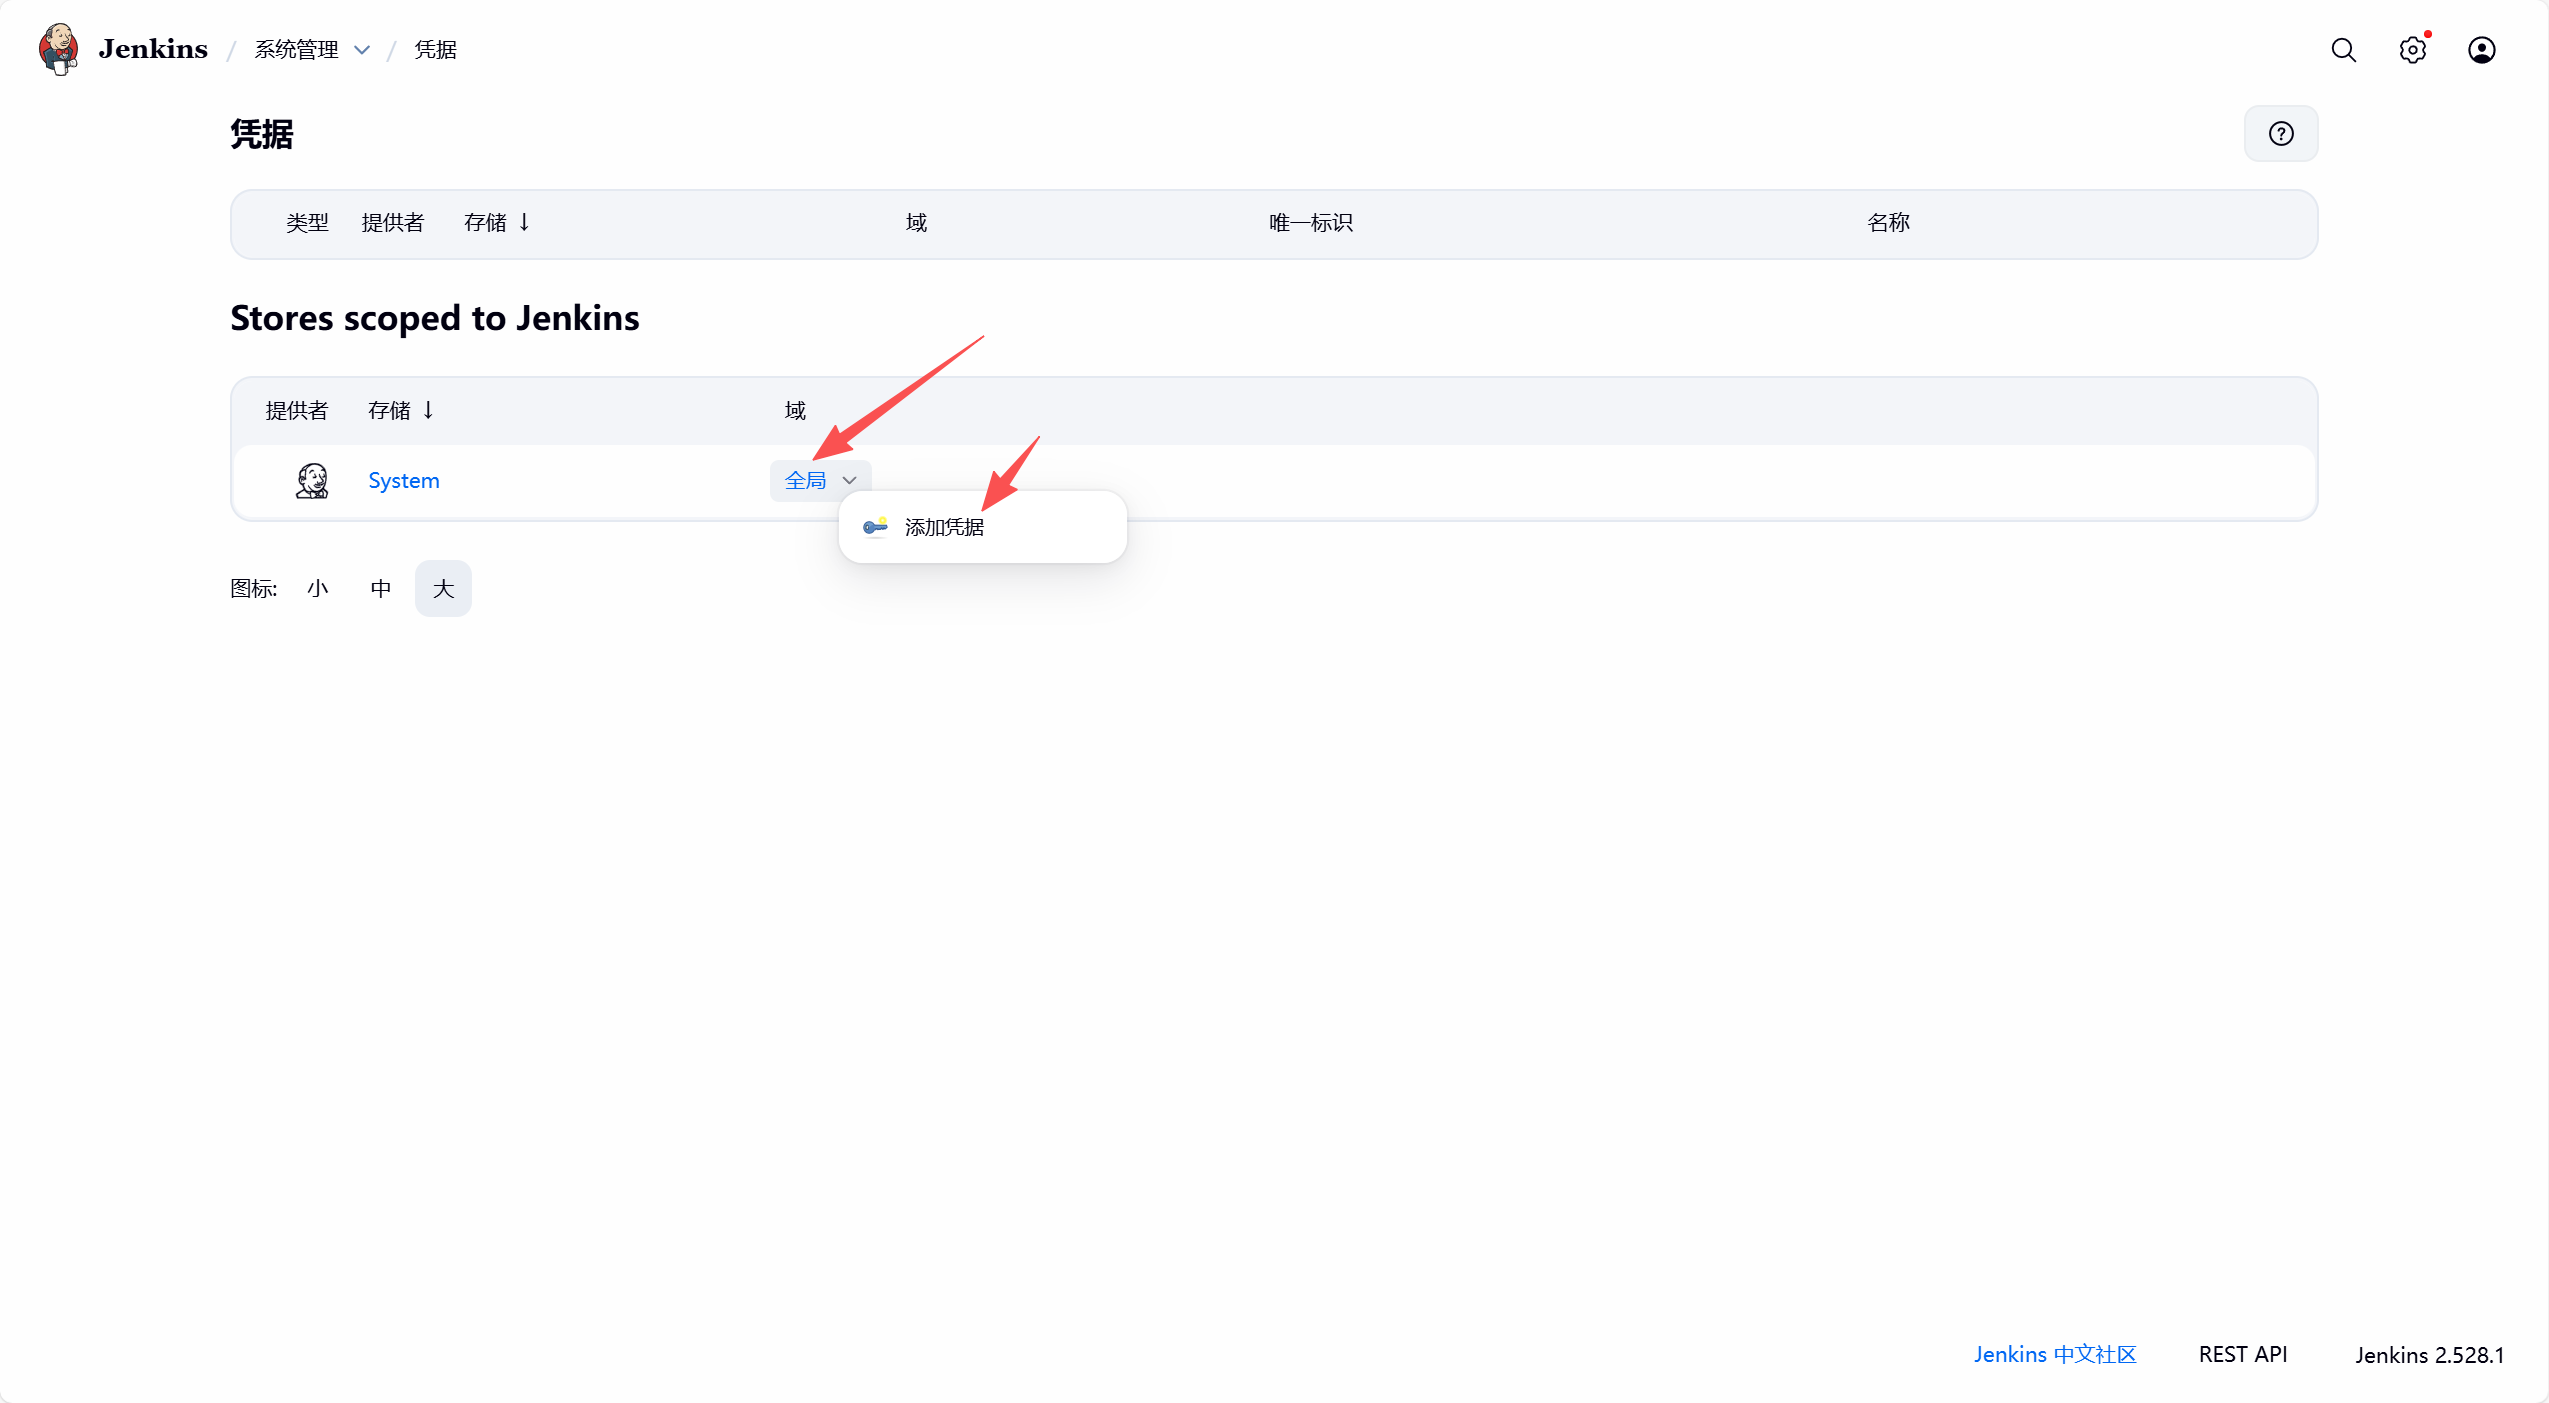
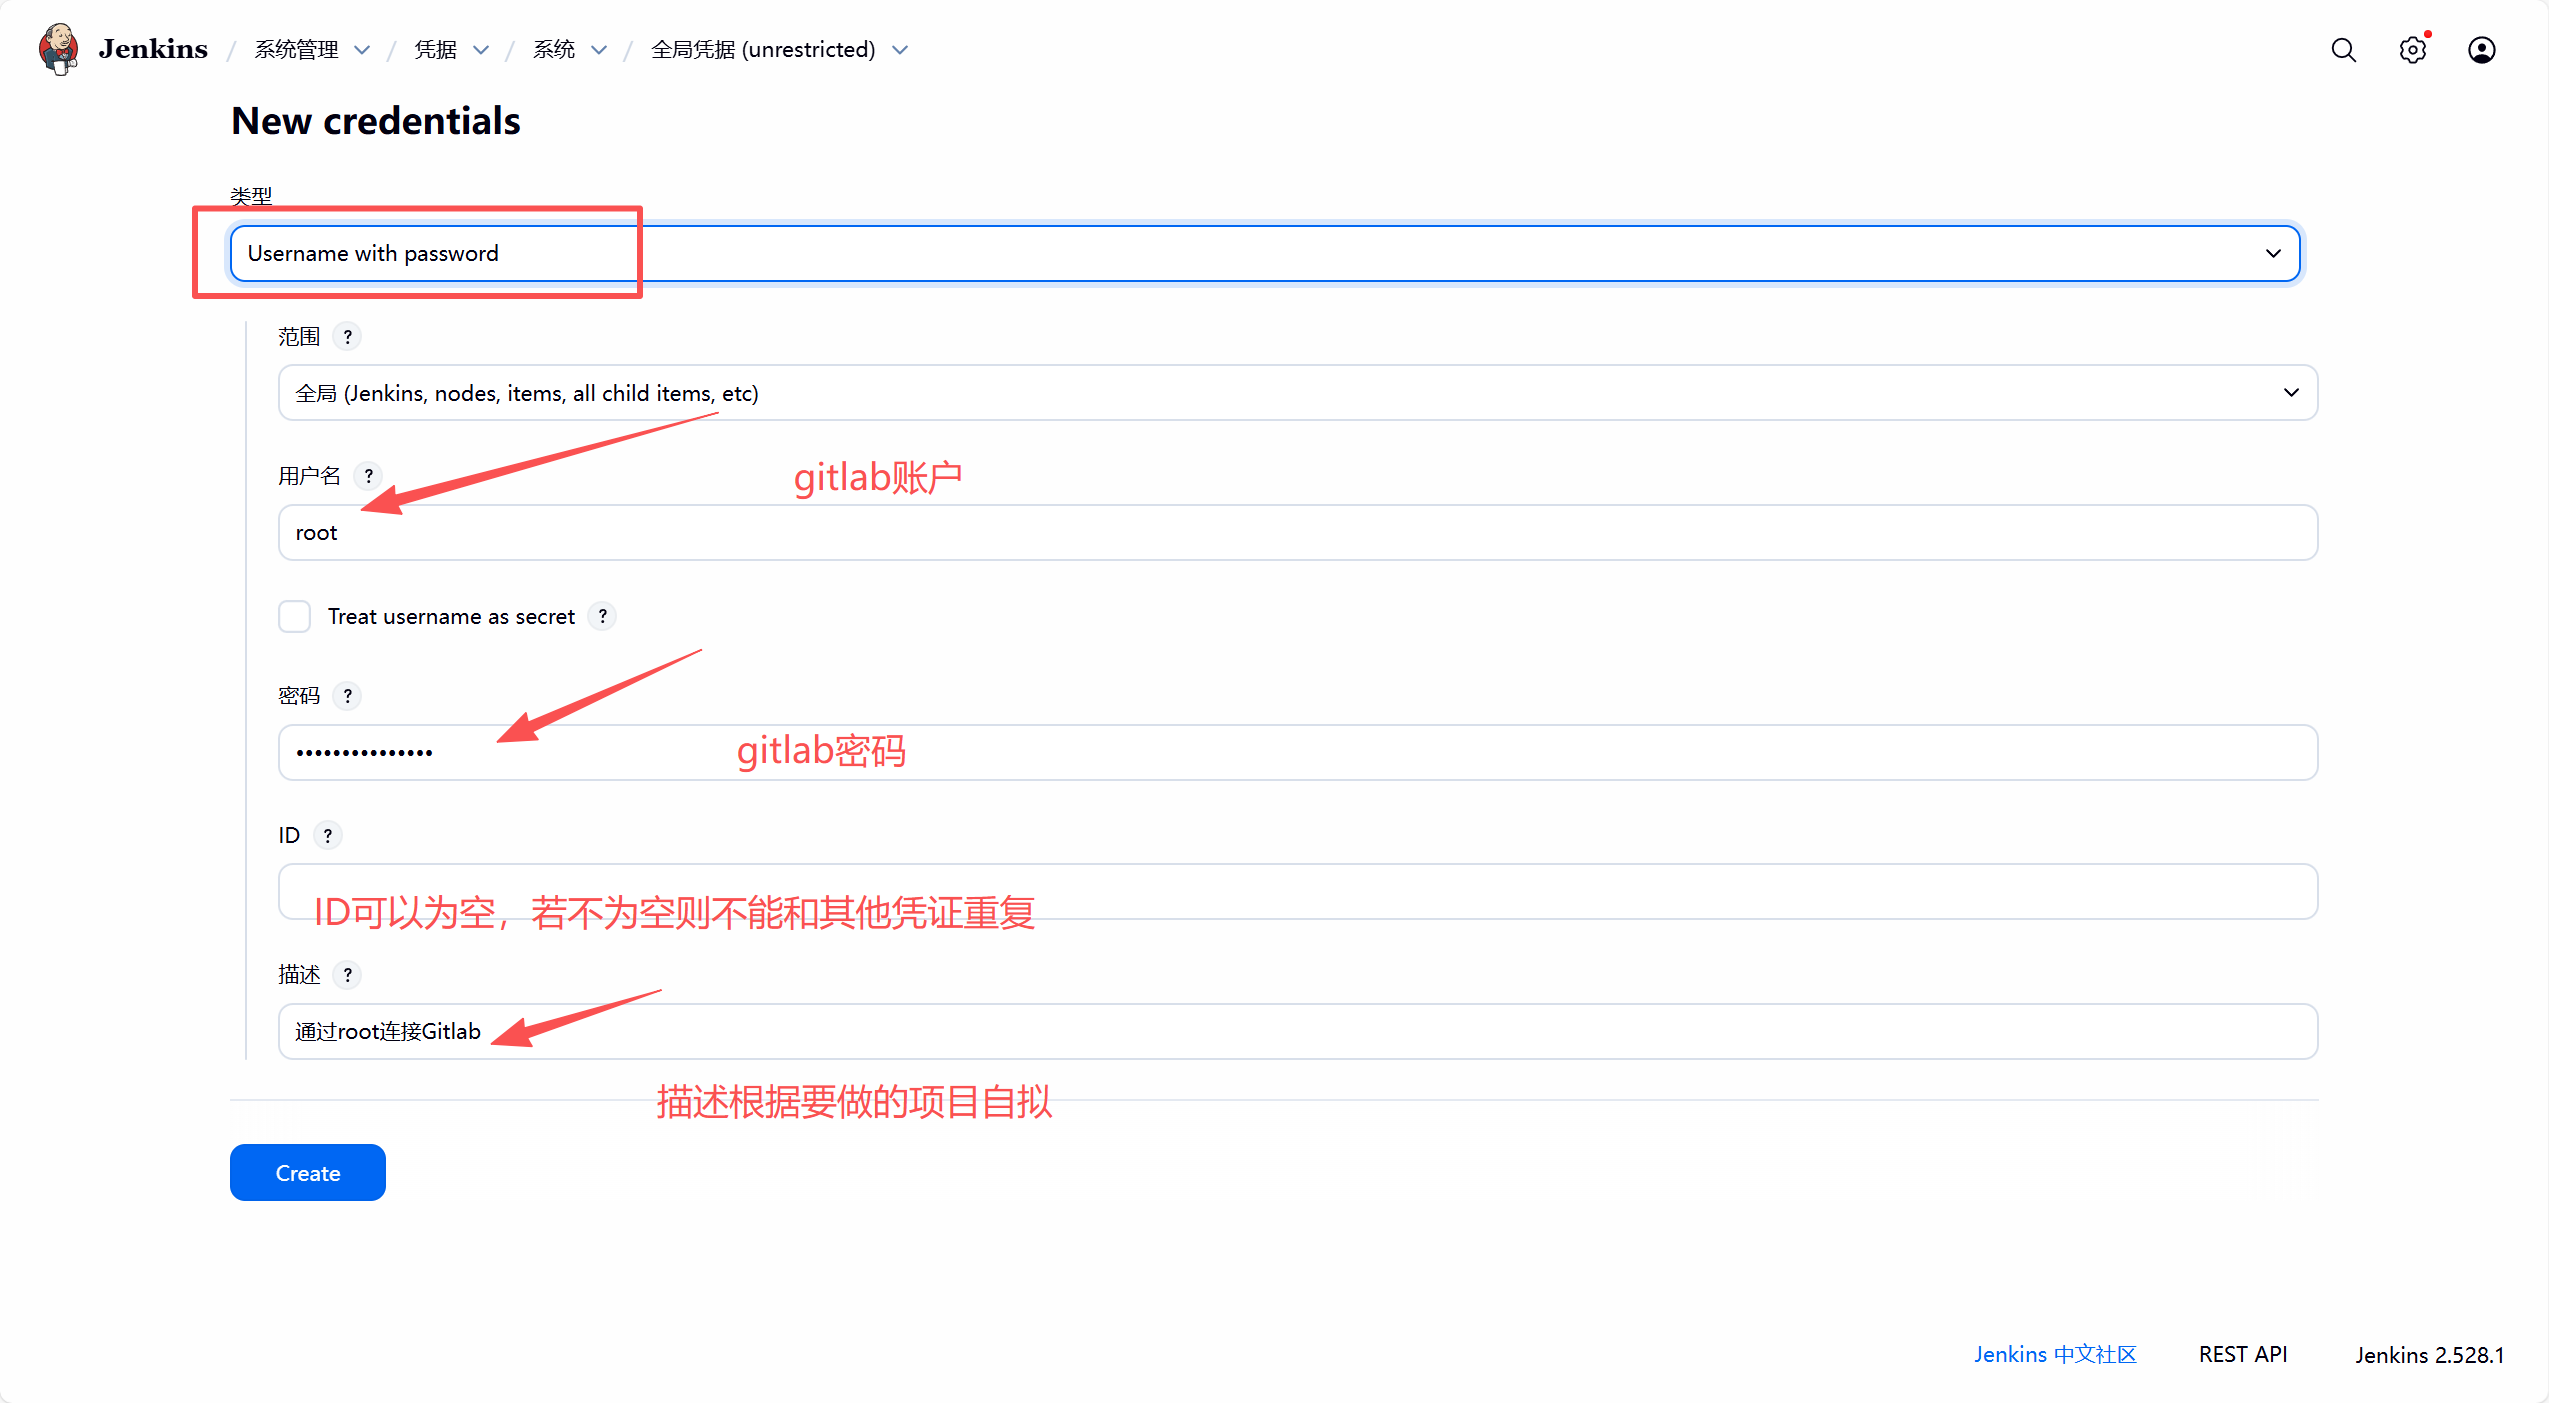
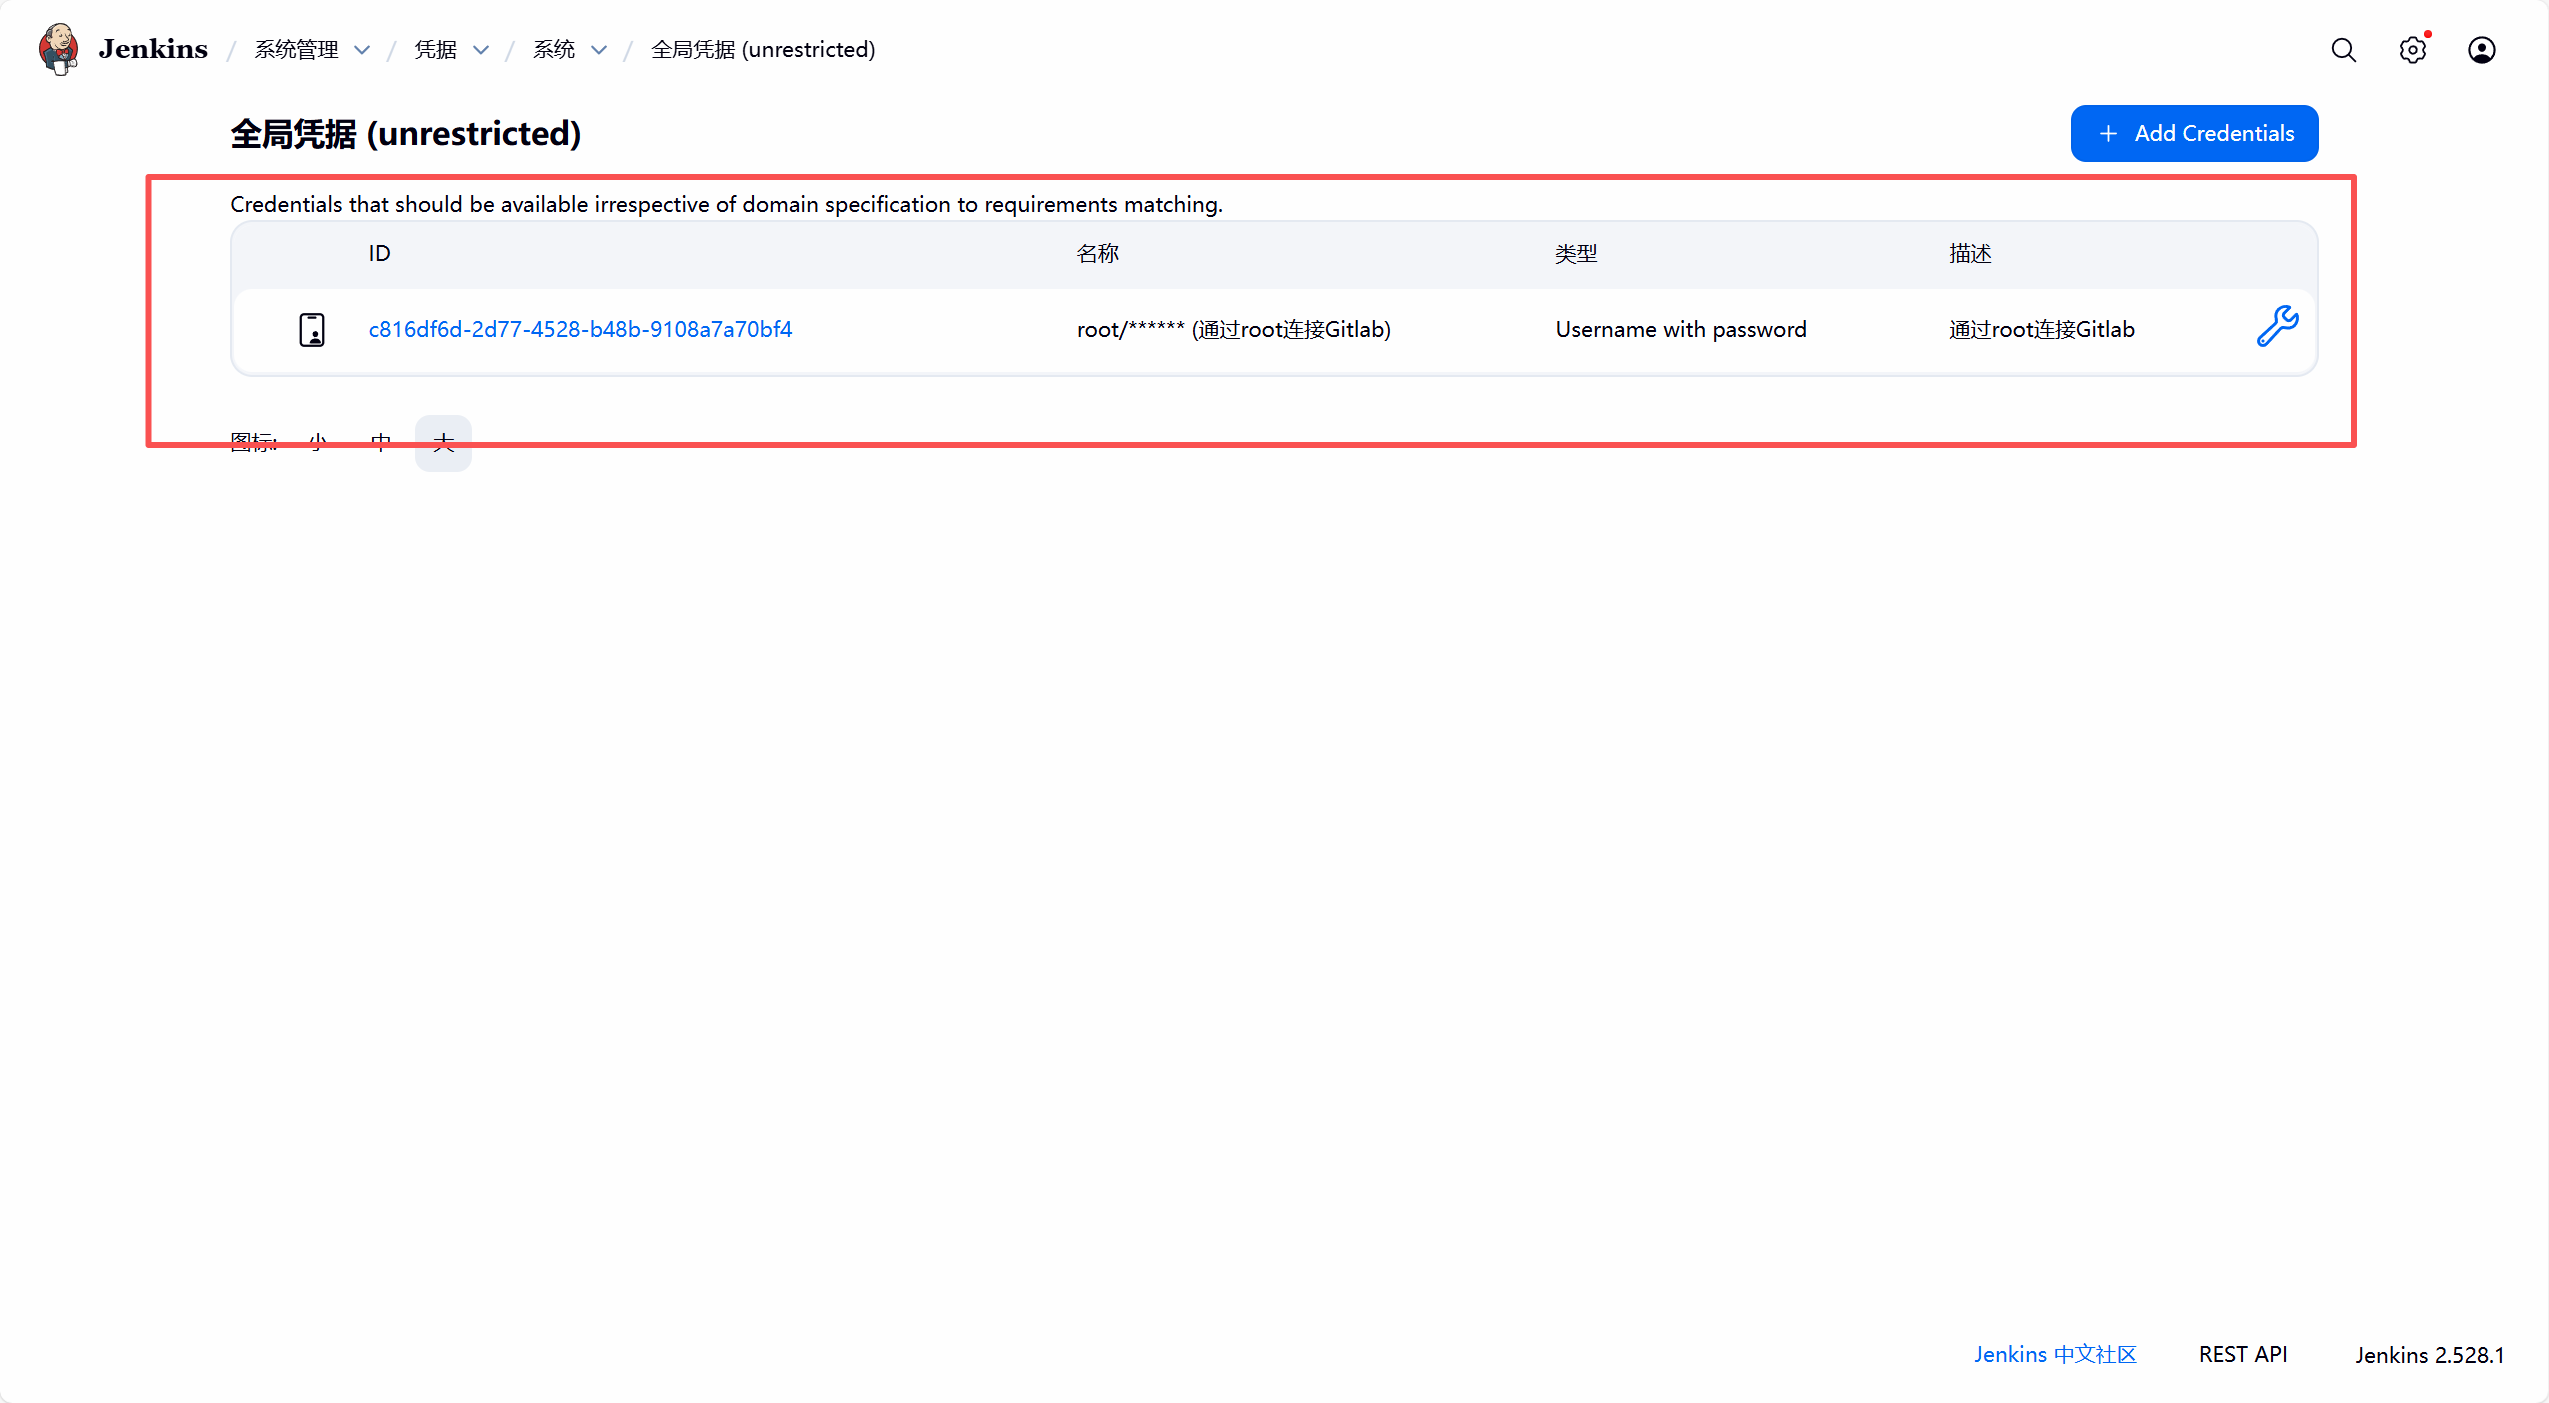
3. 创建任务
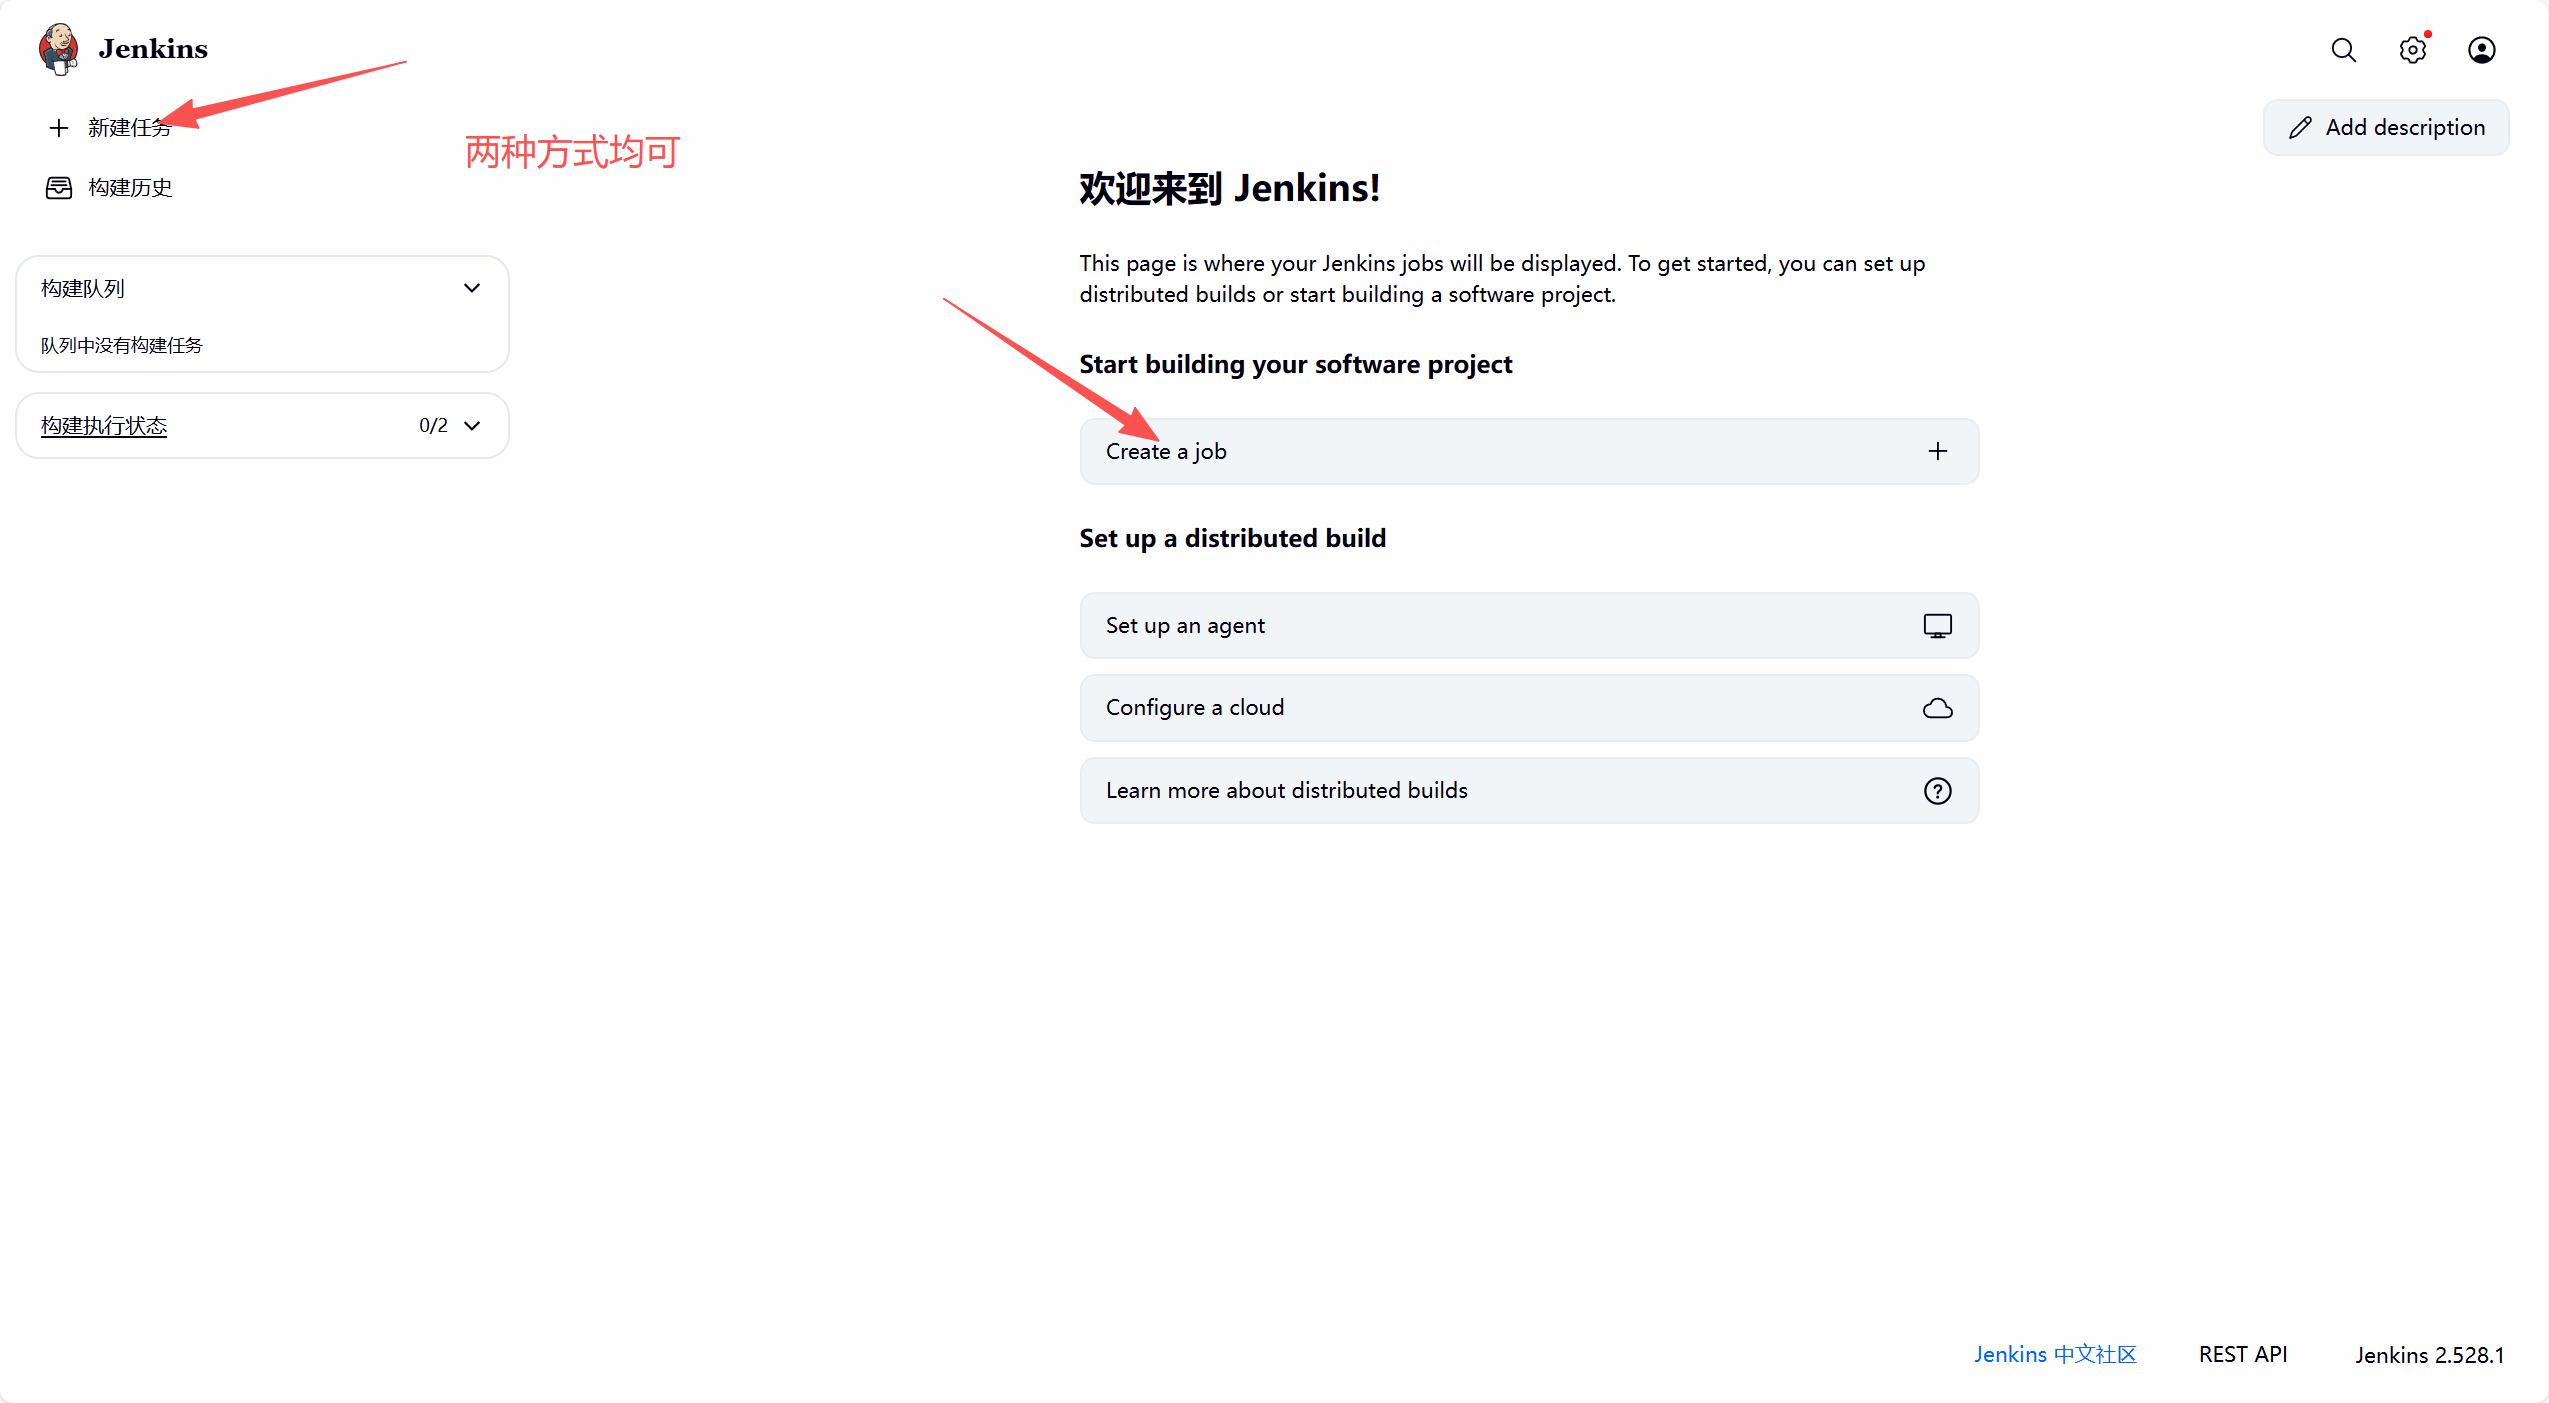
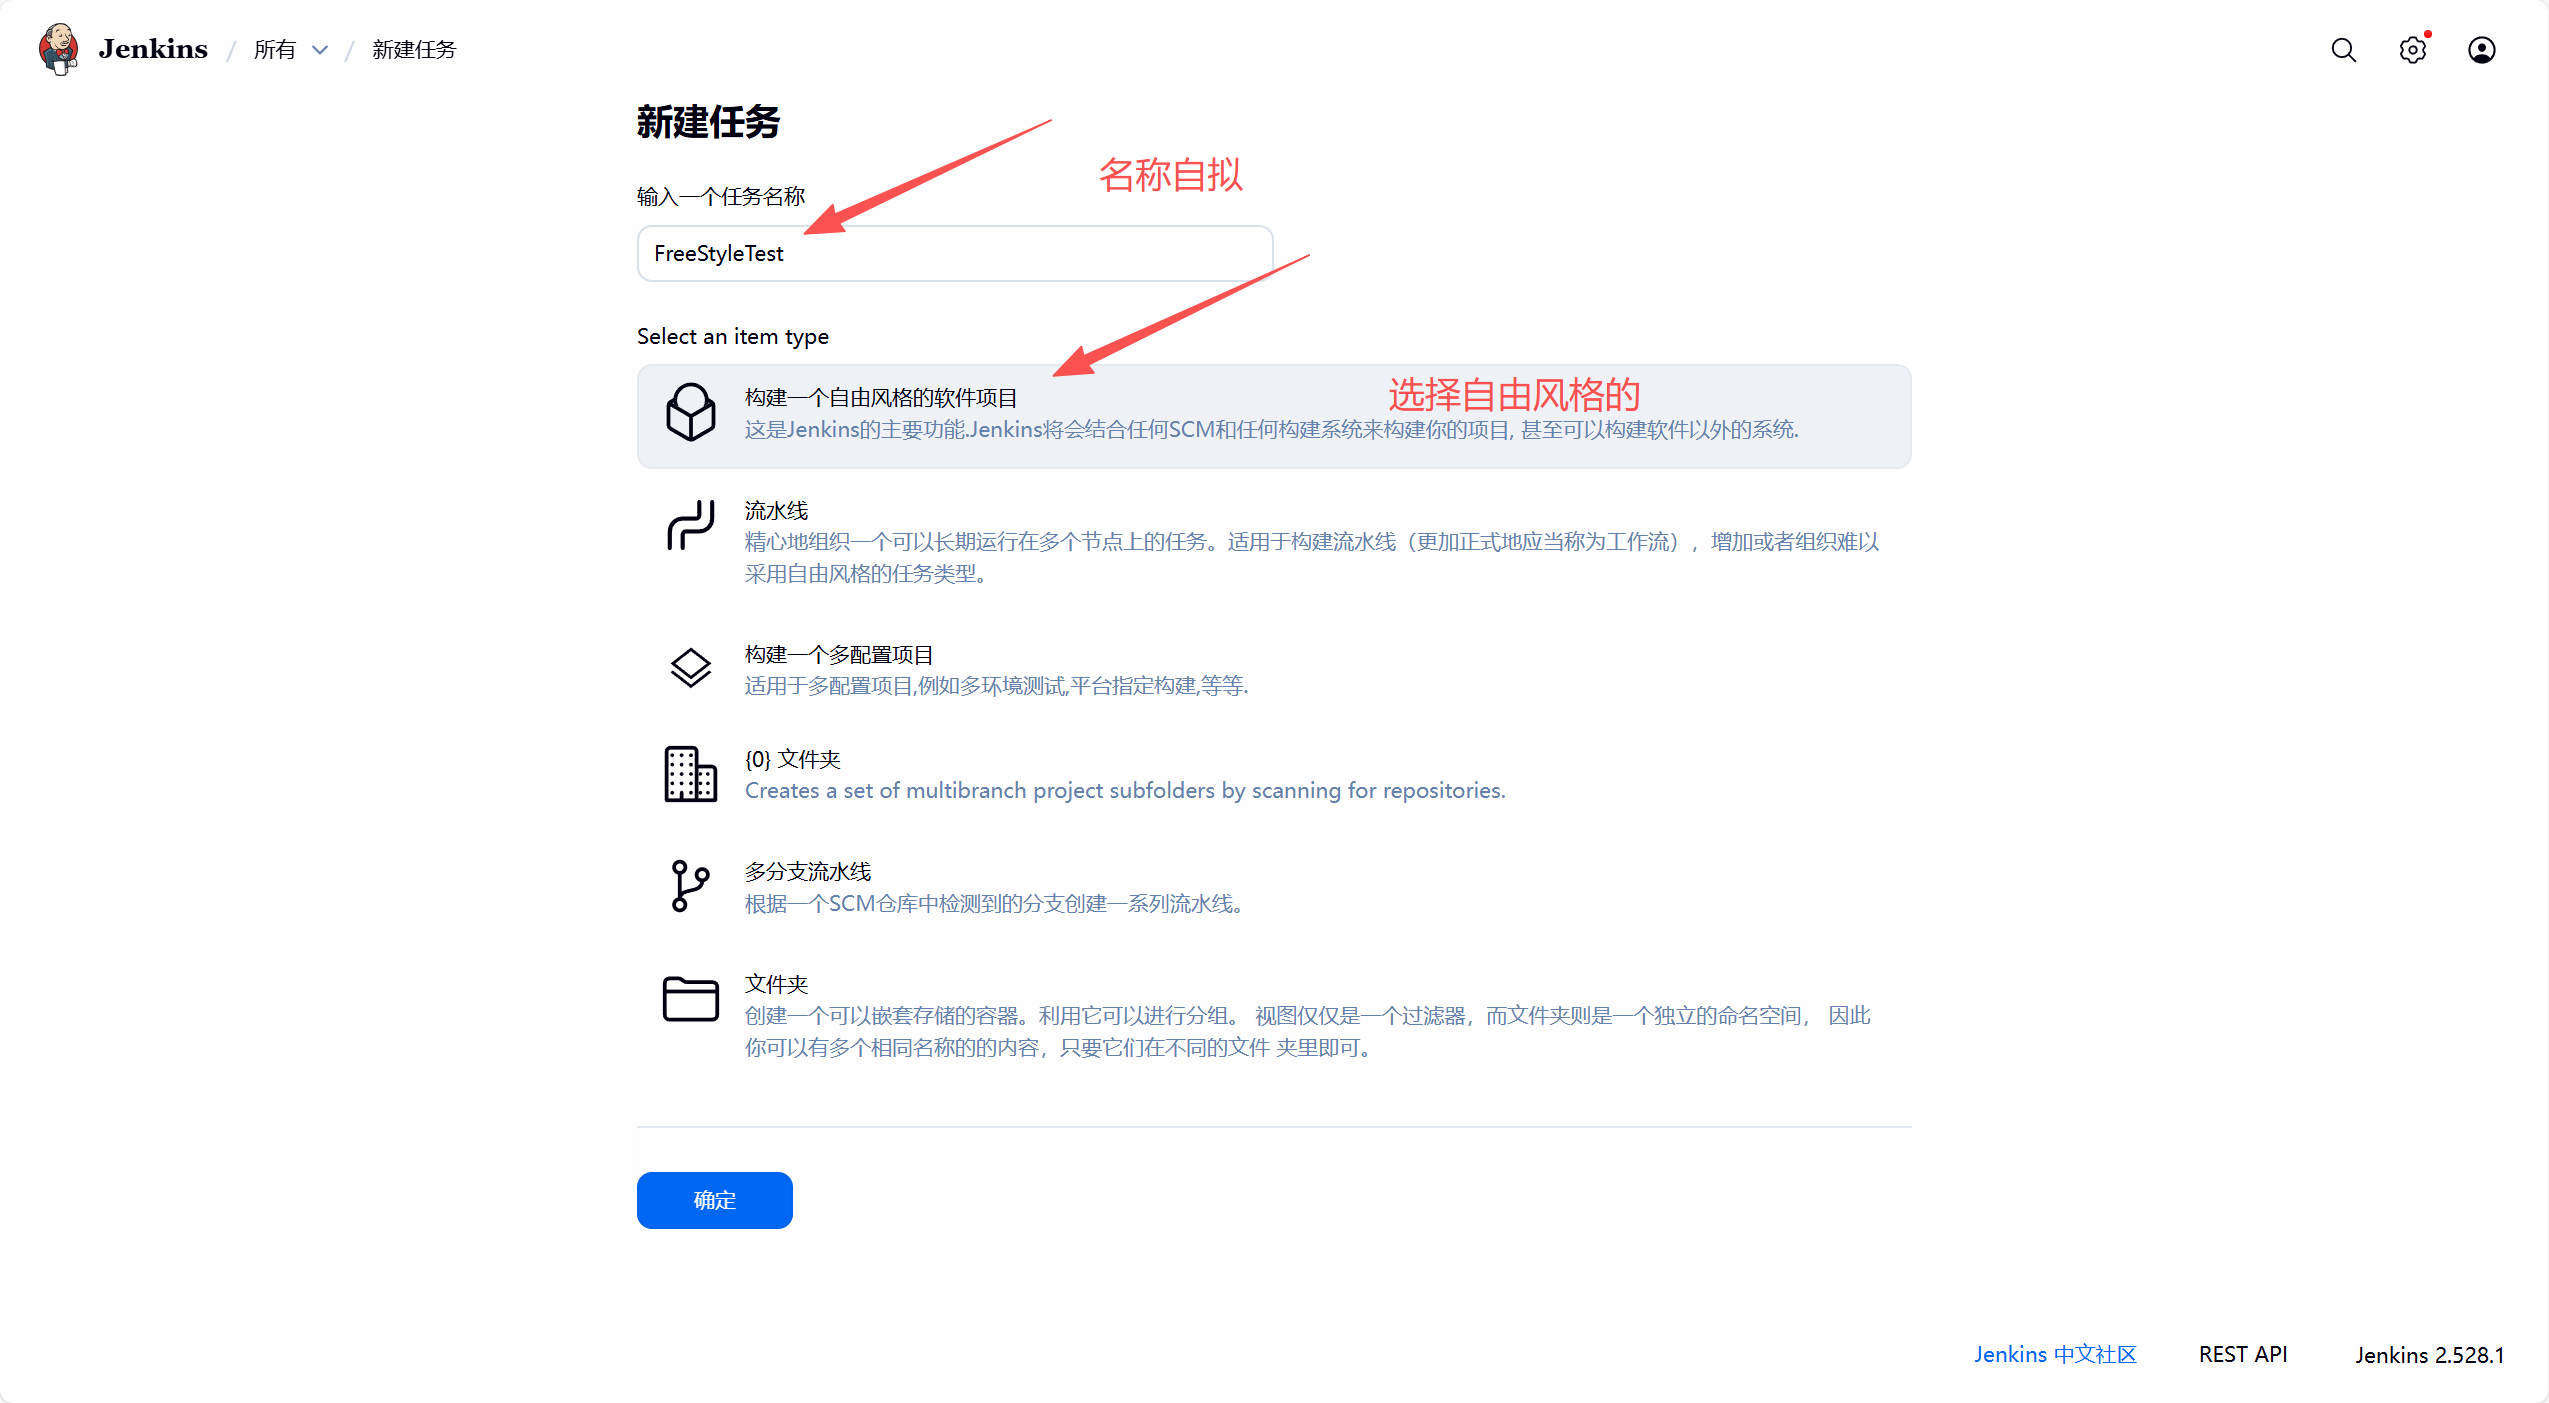
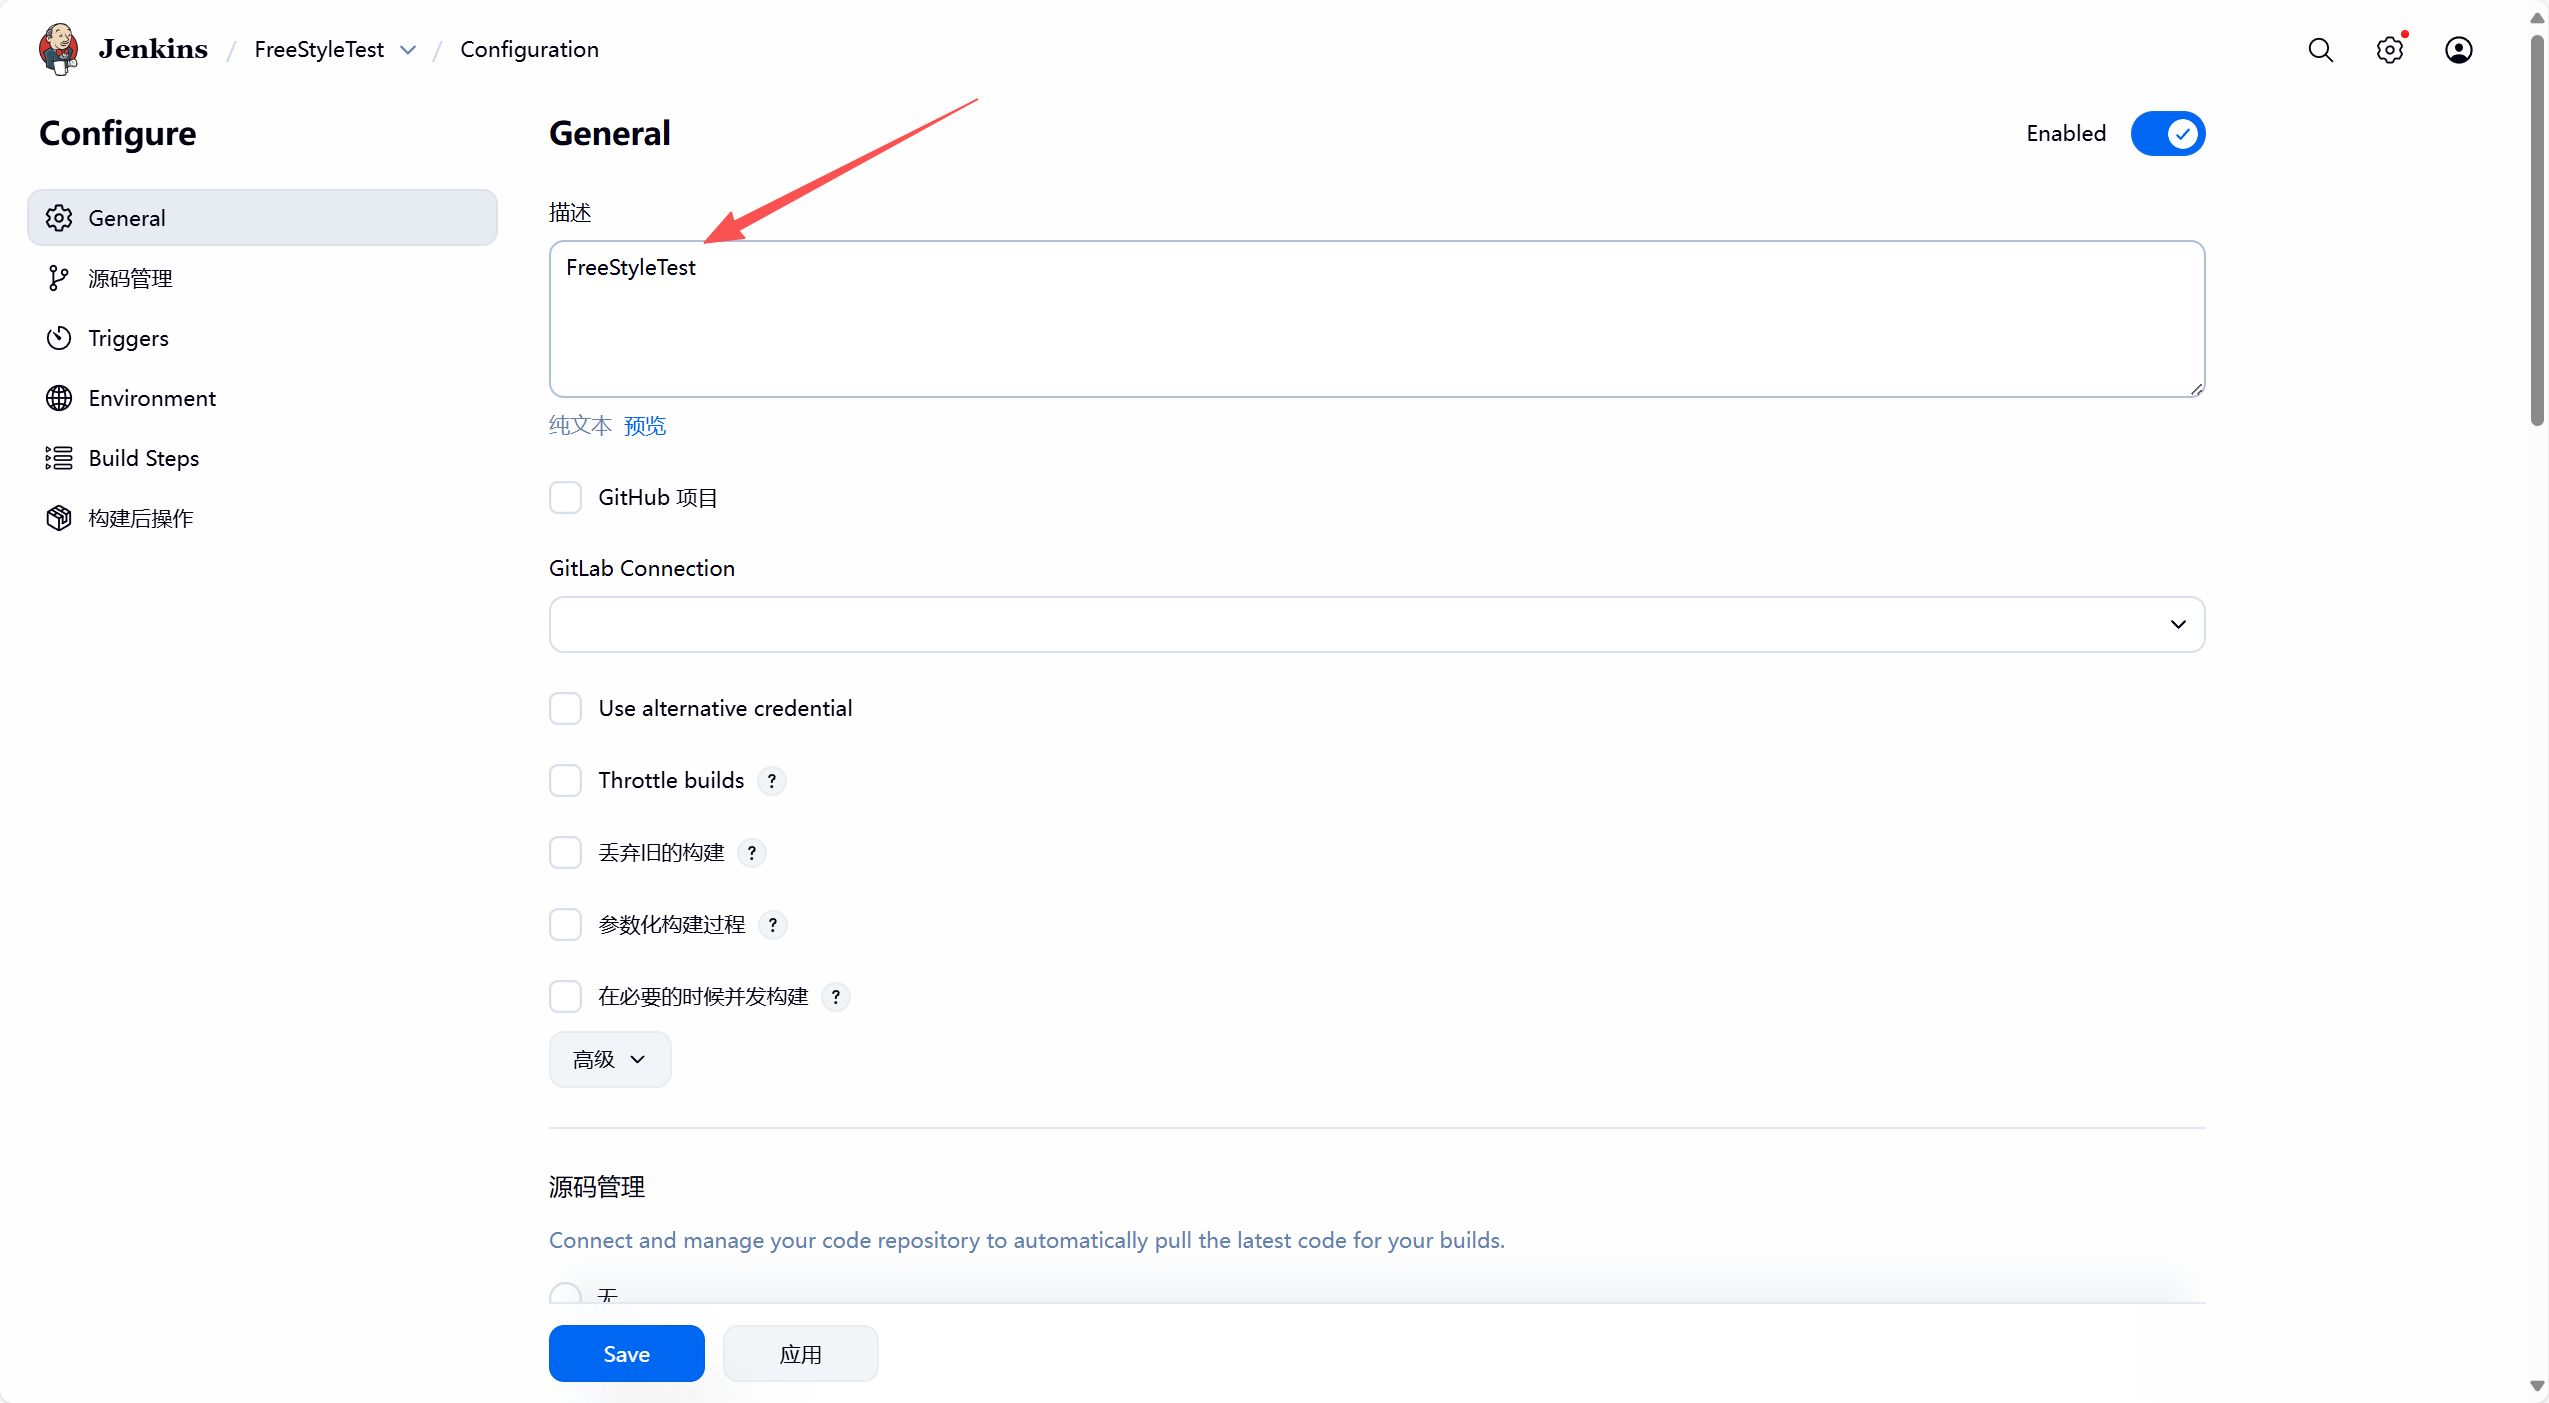
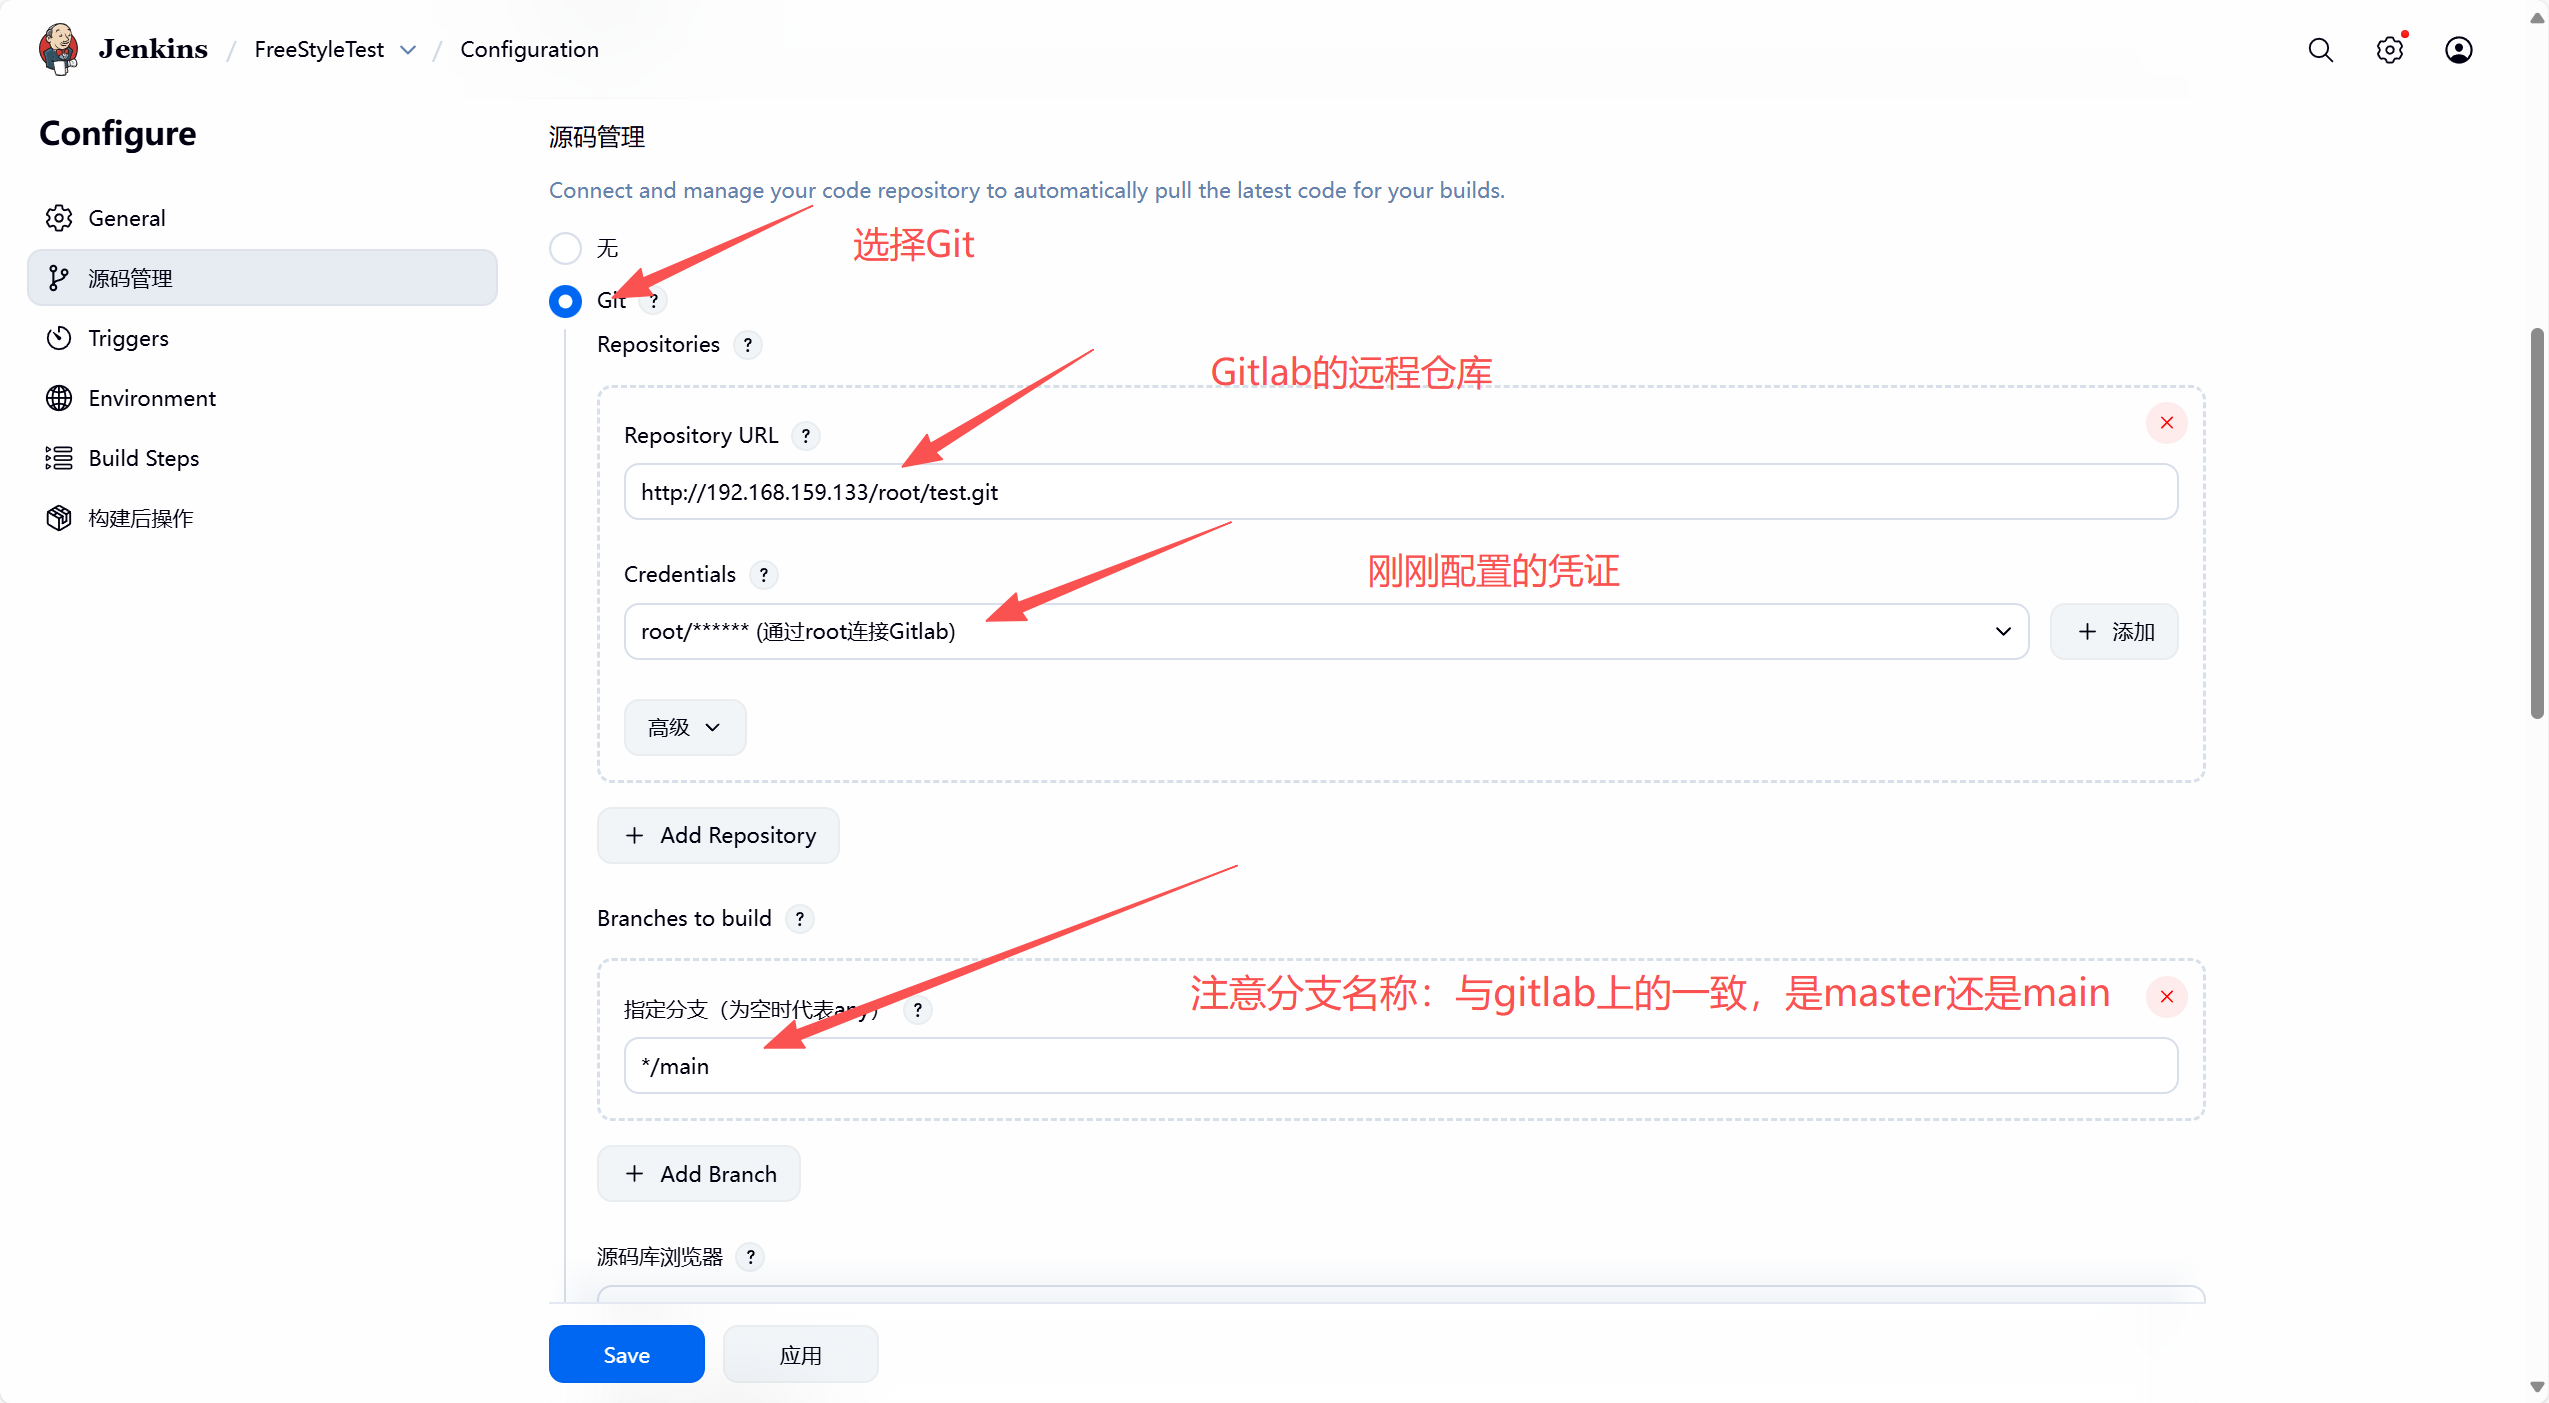
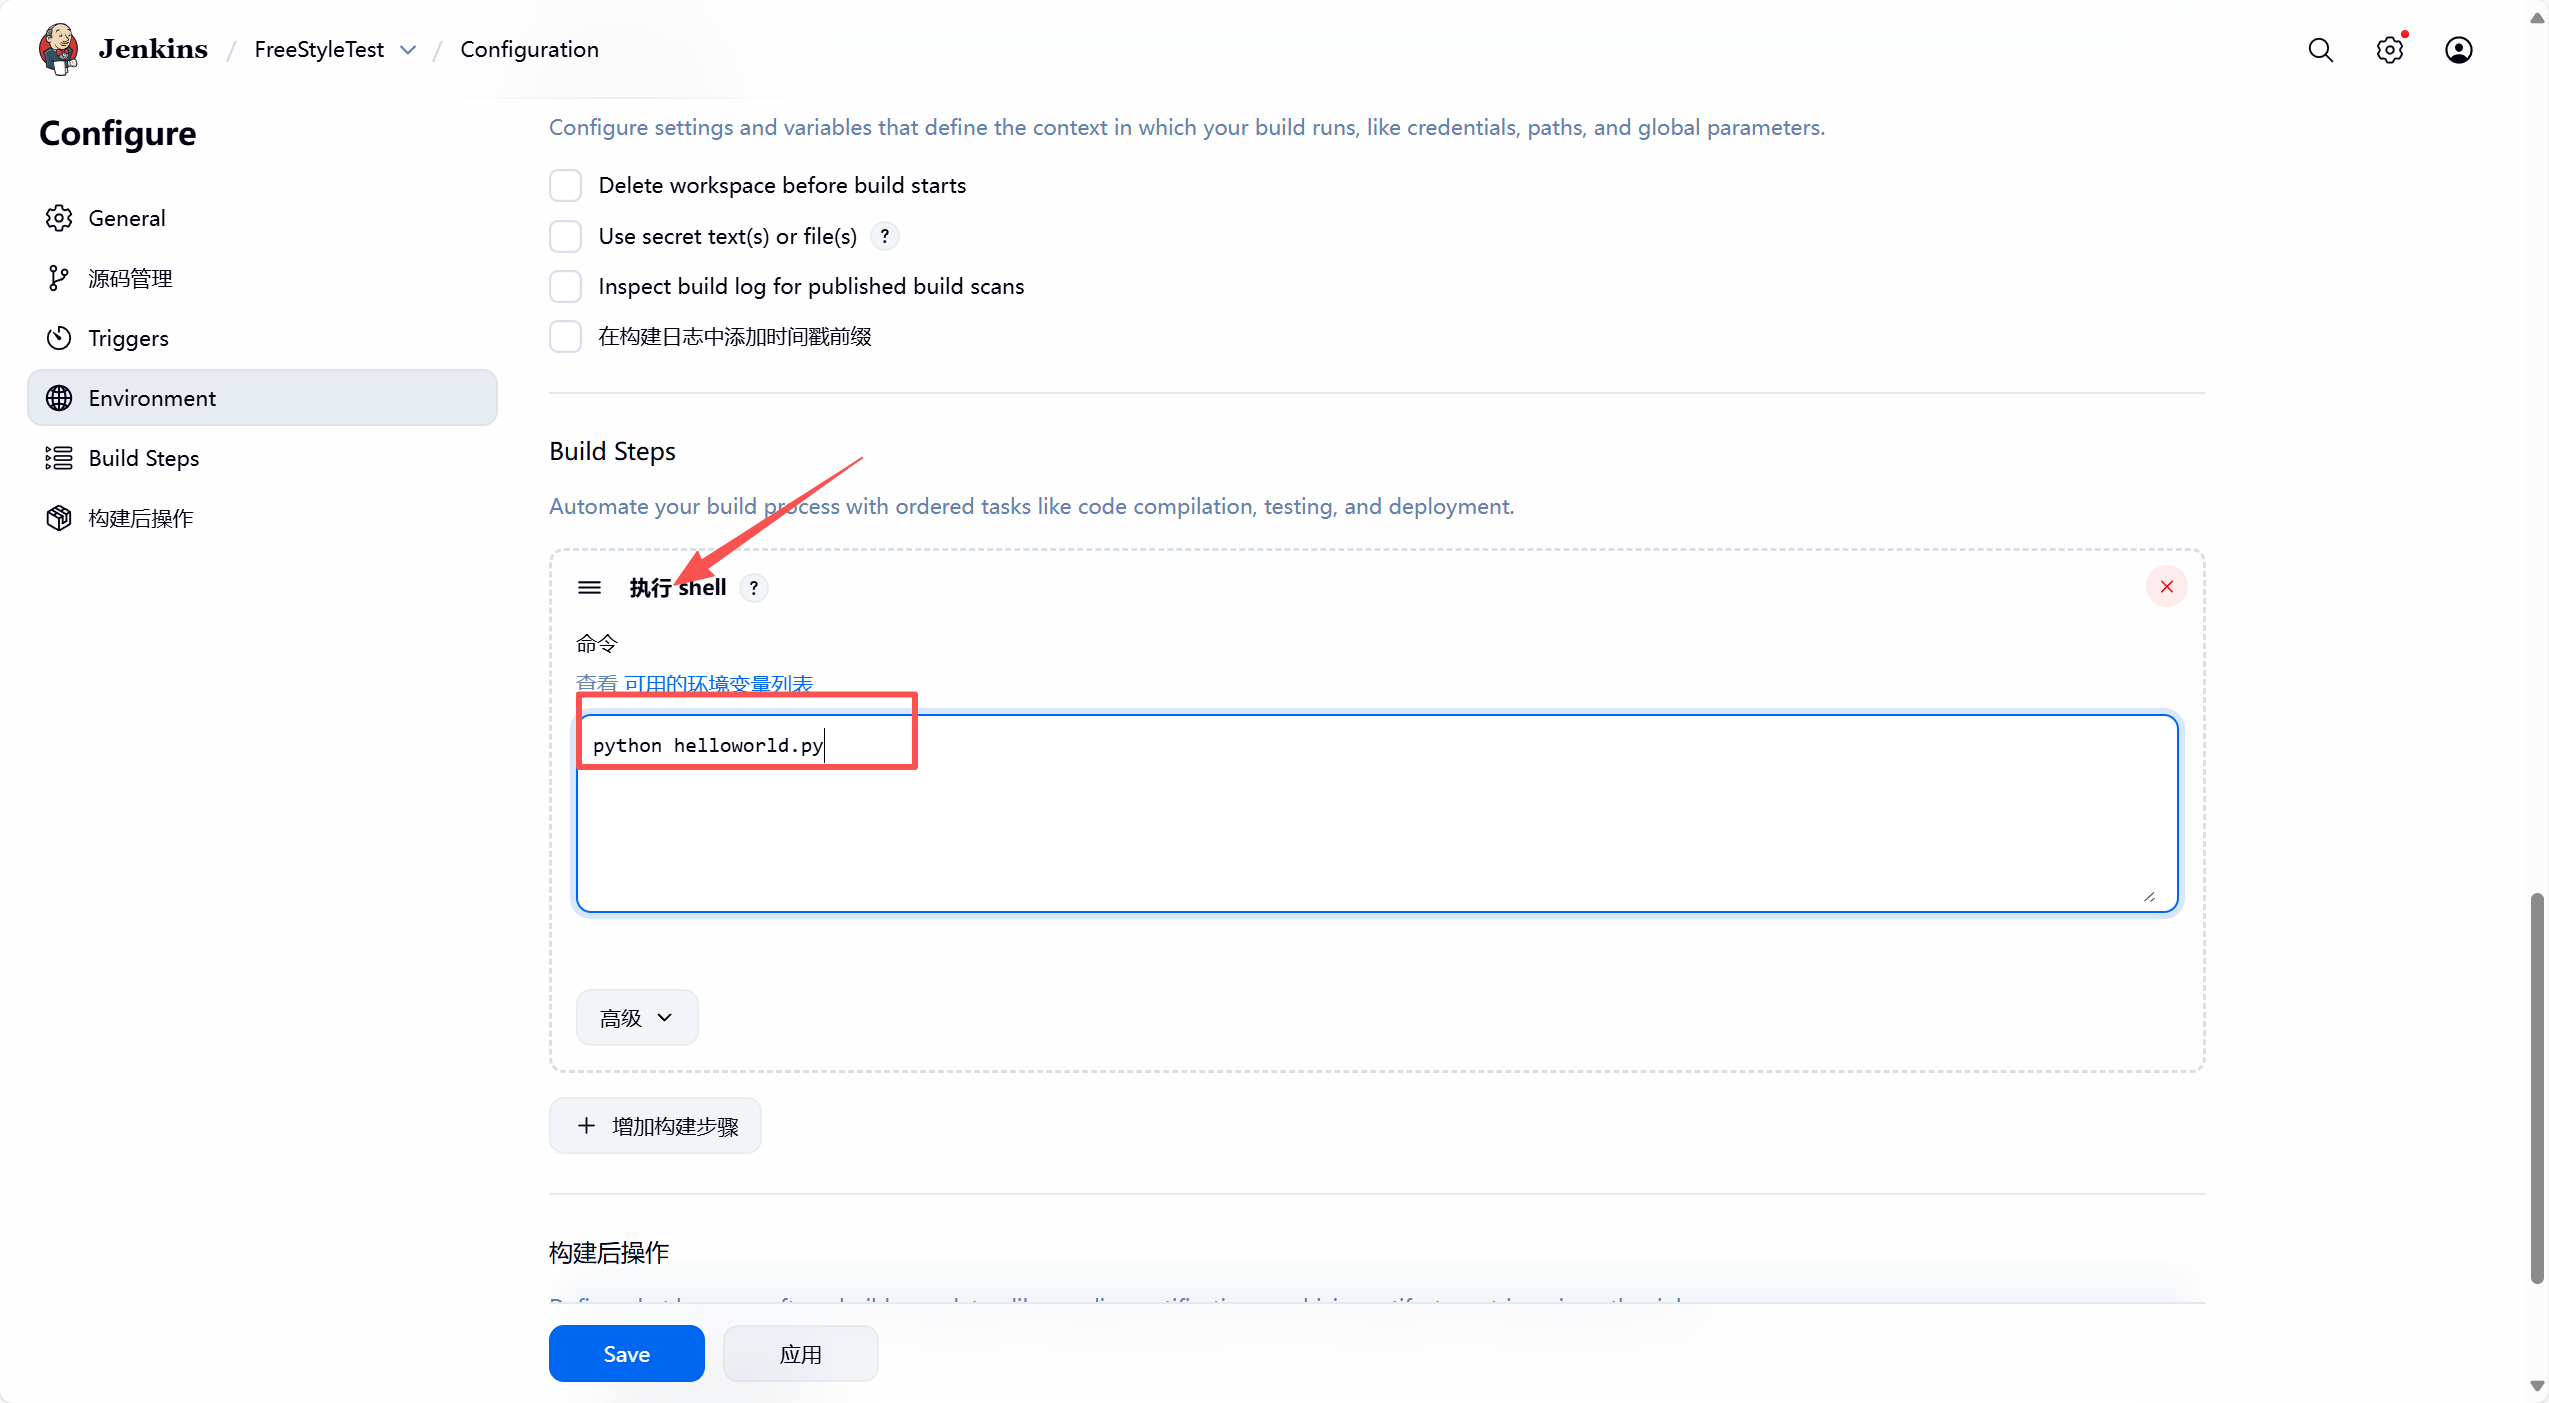
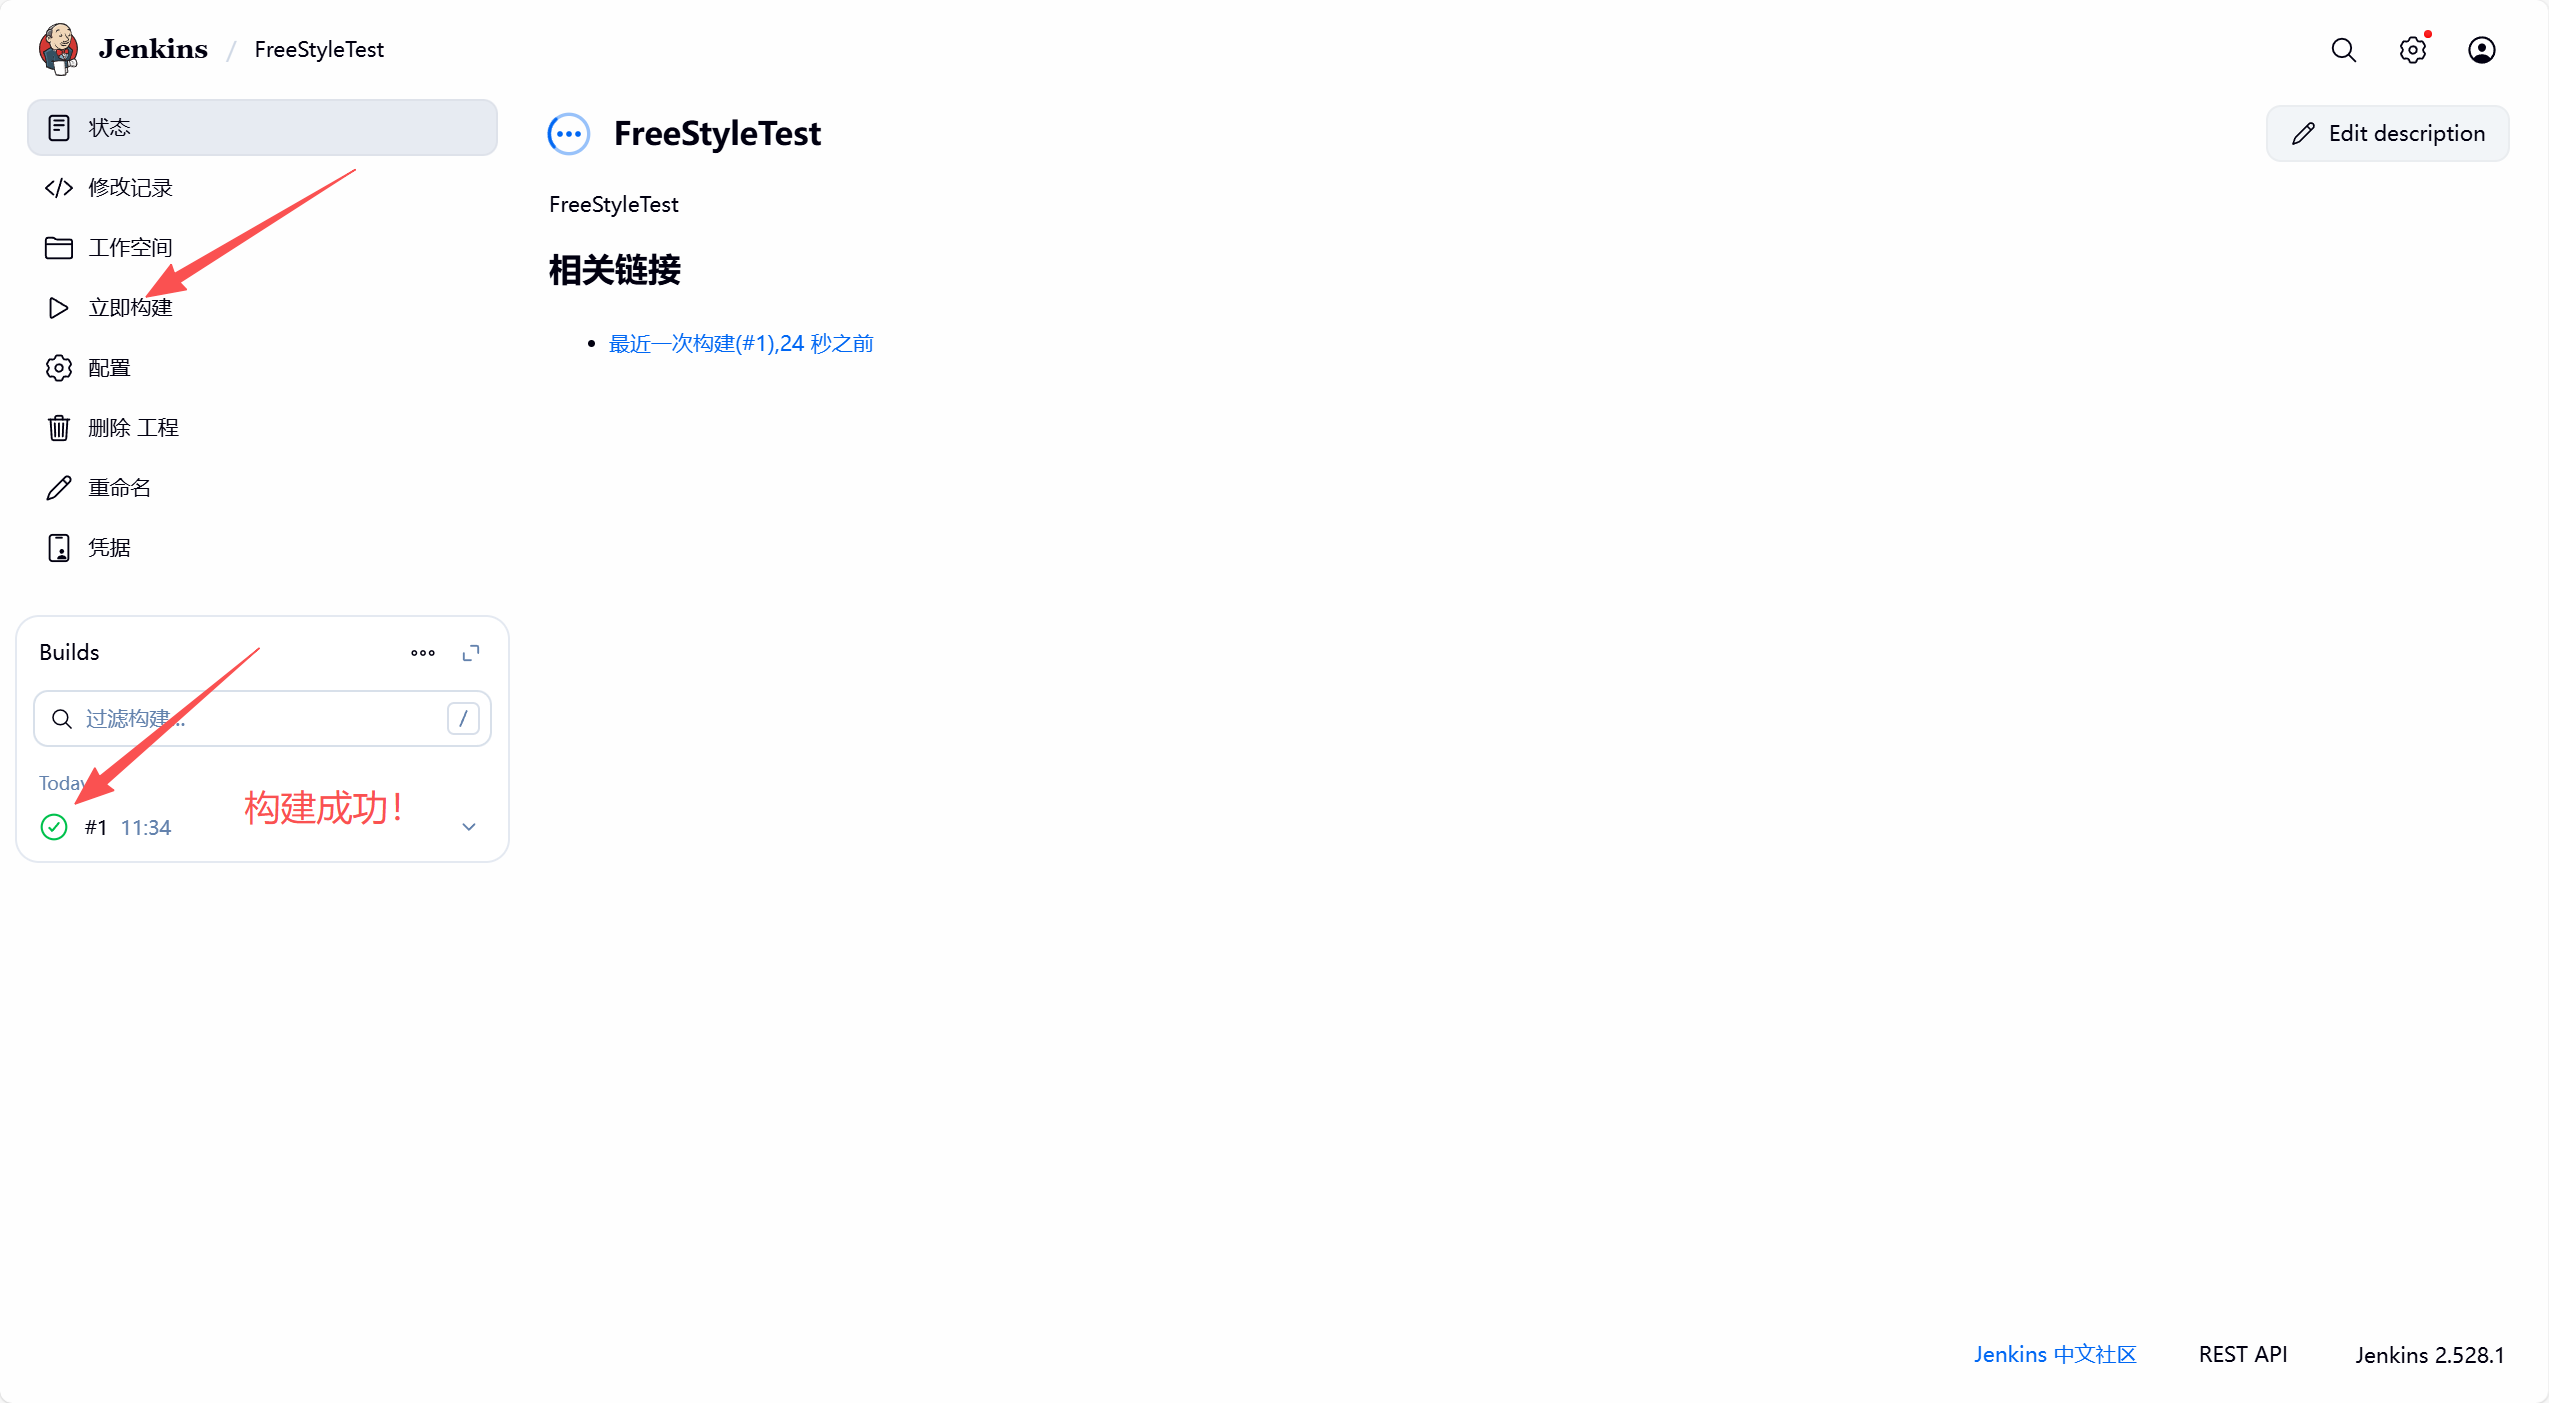
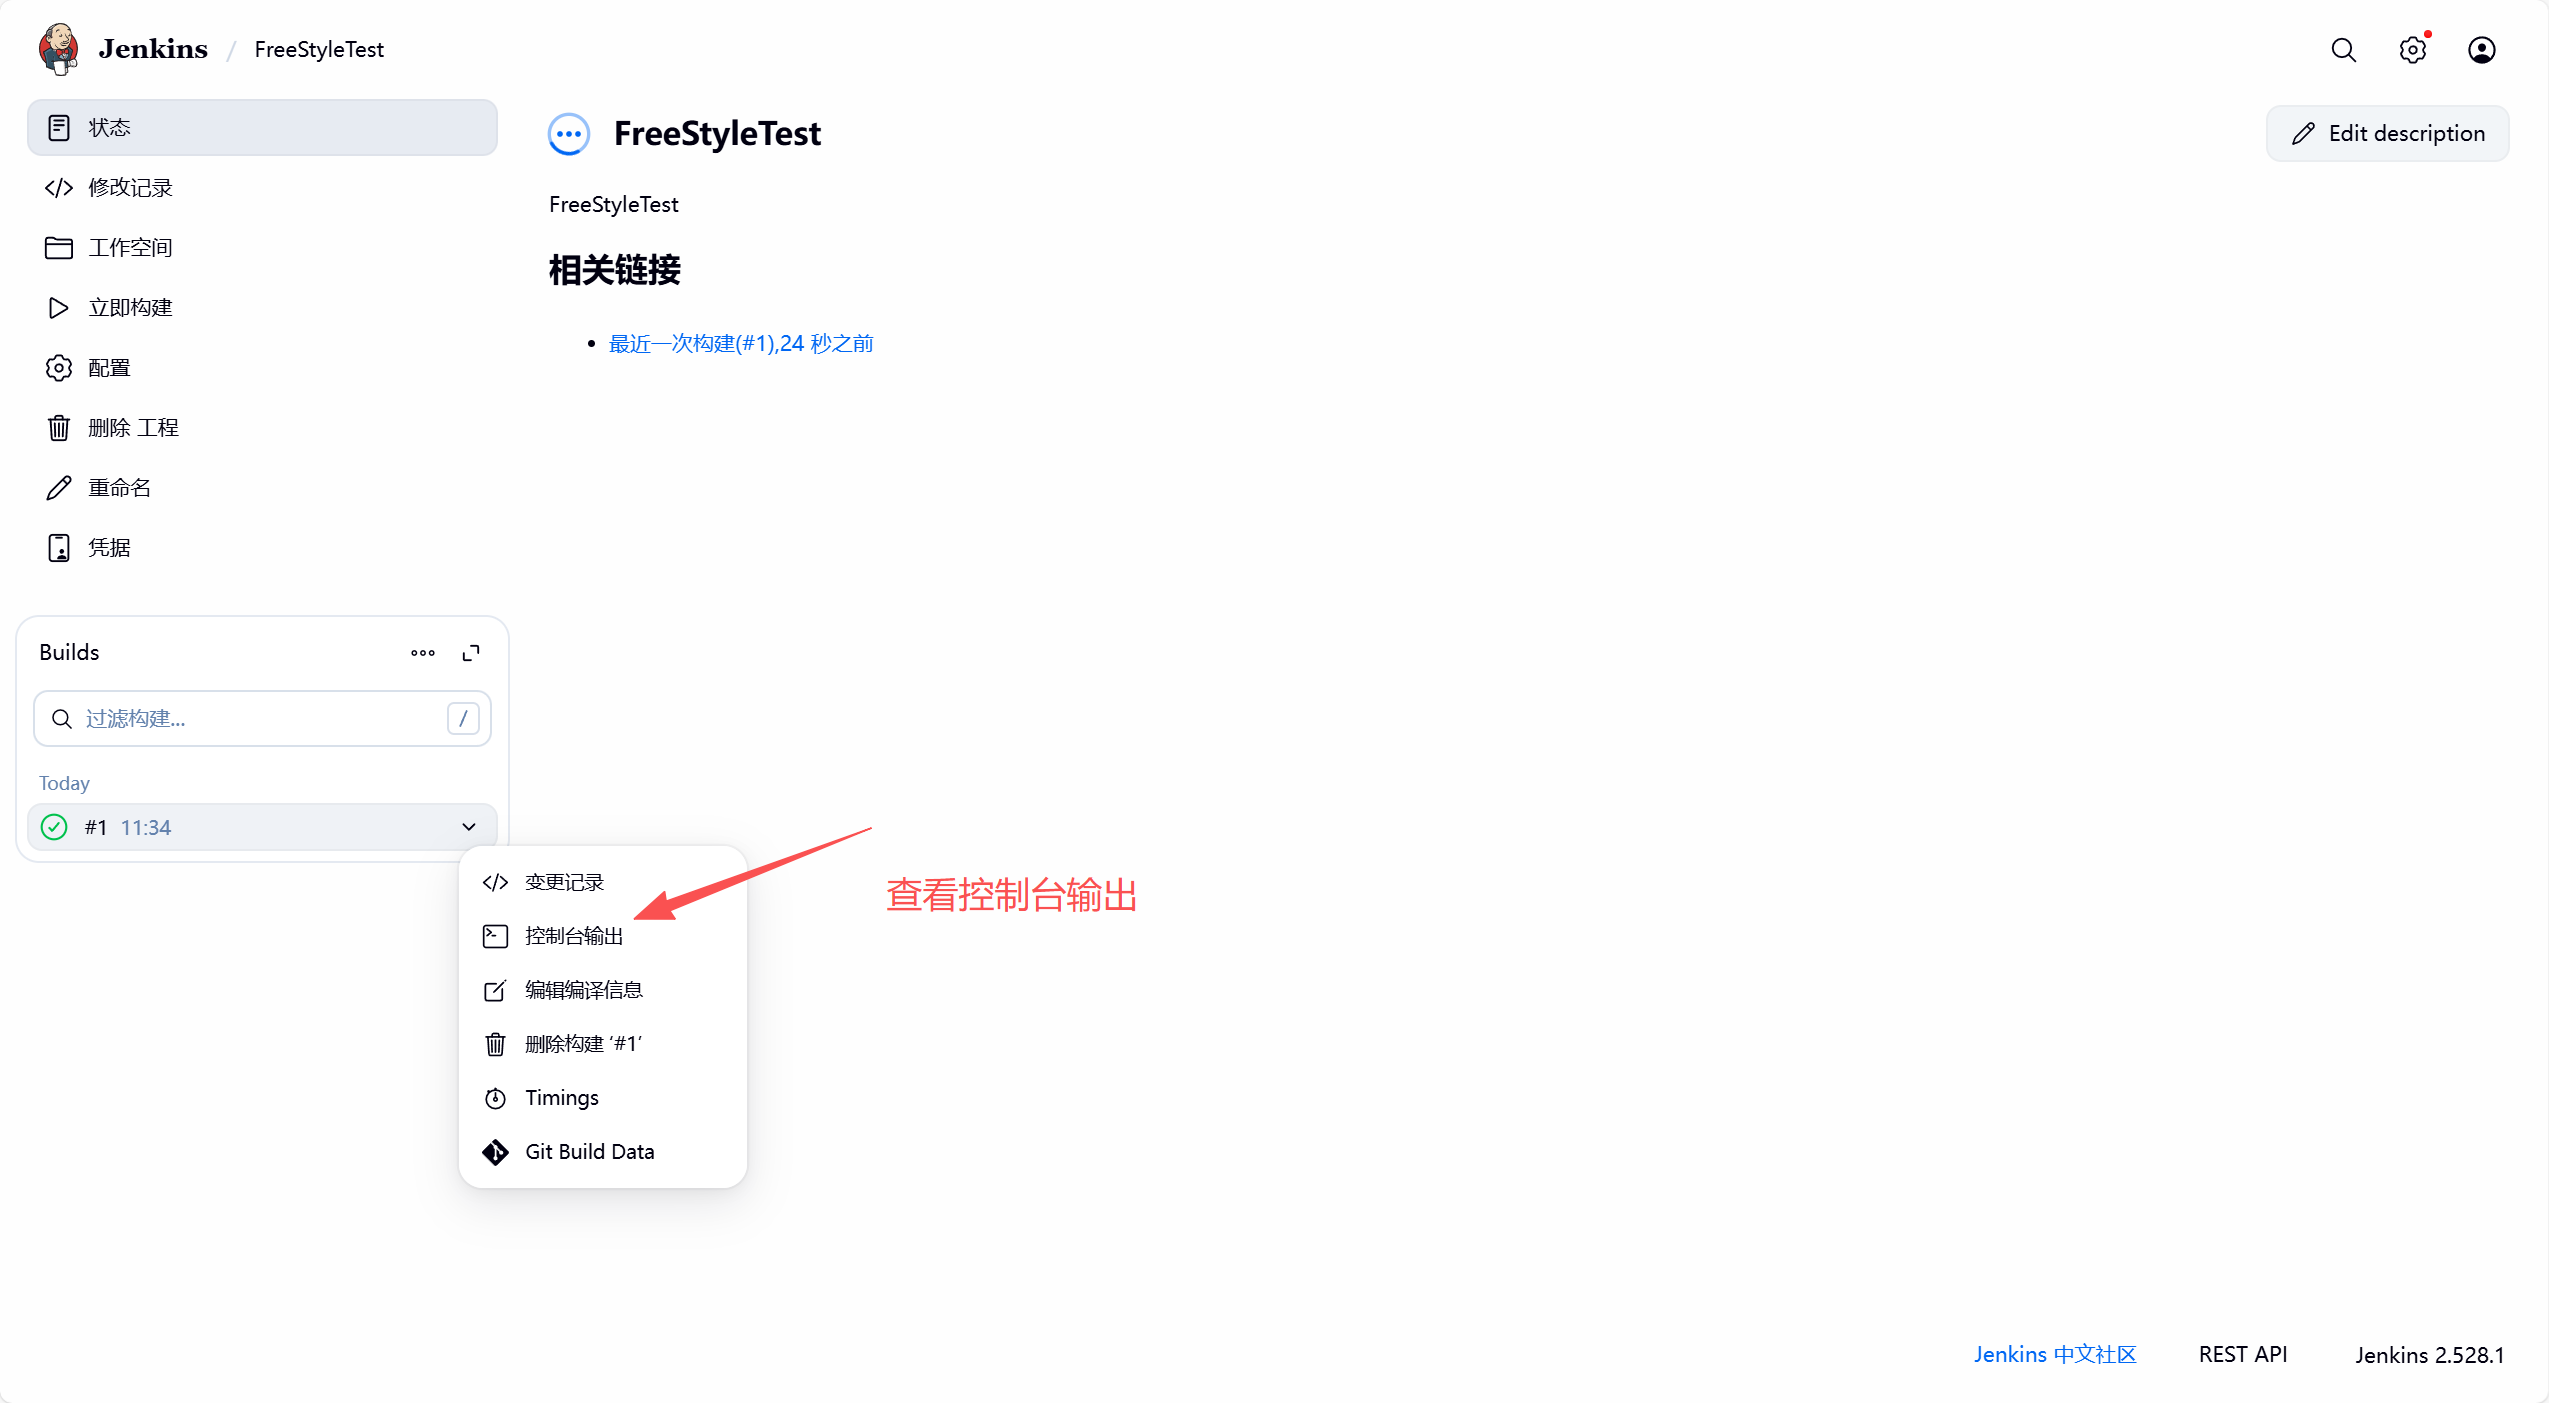
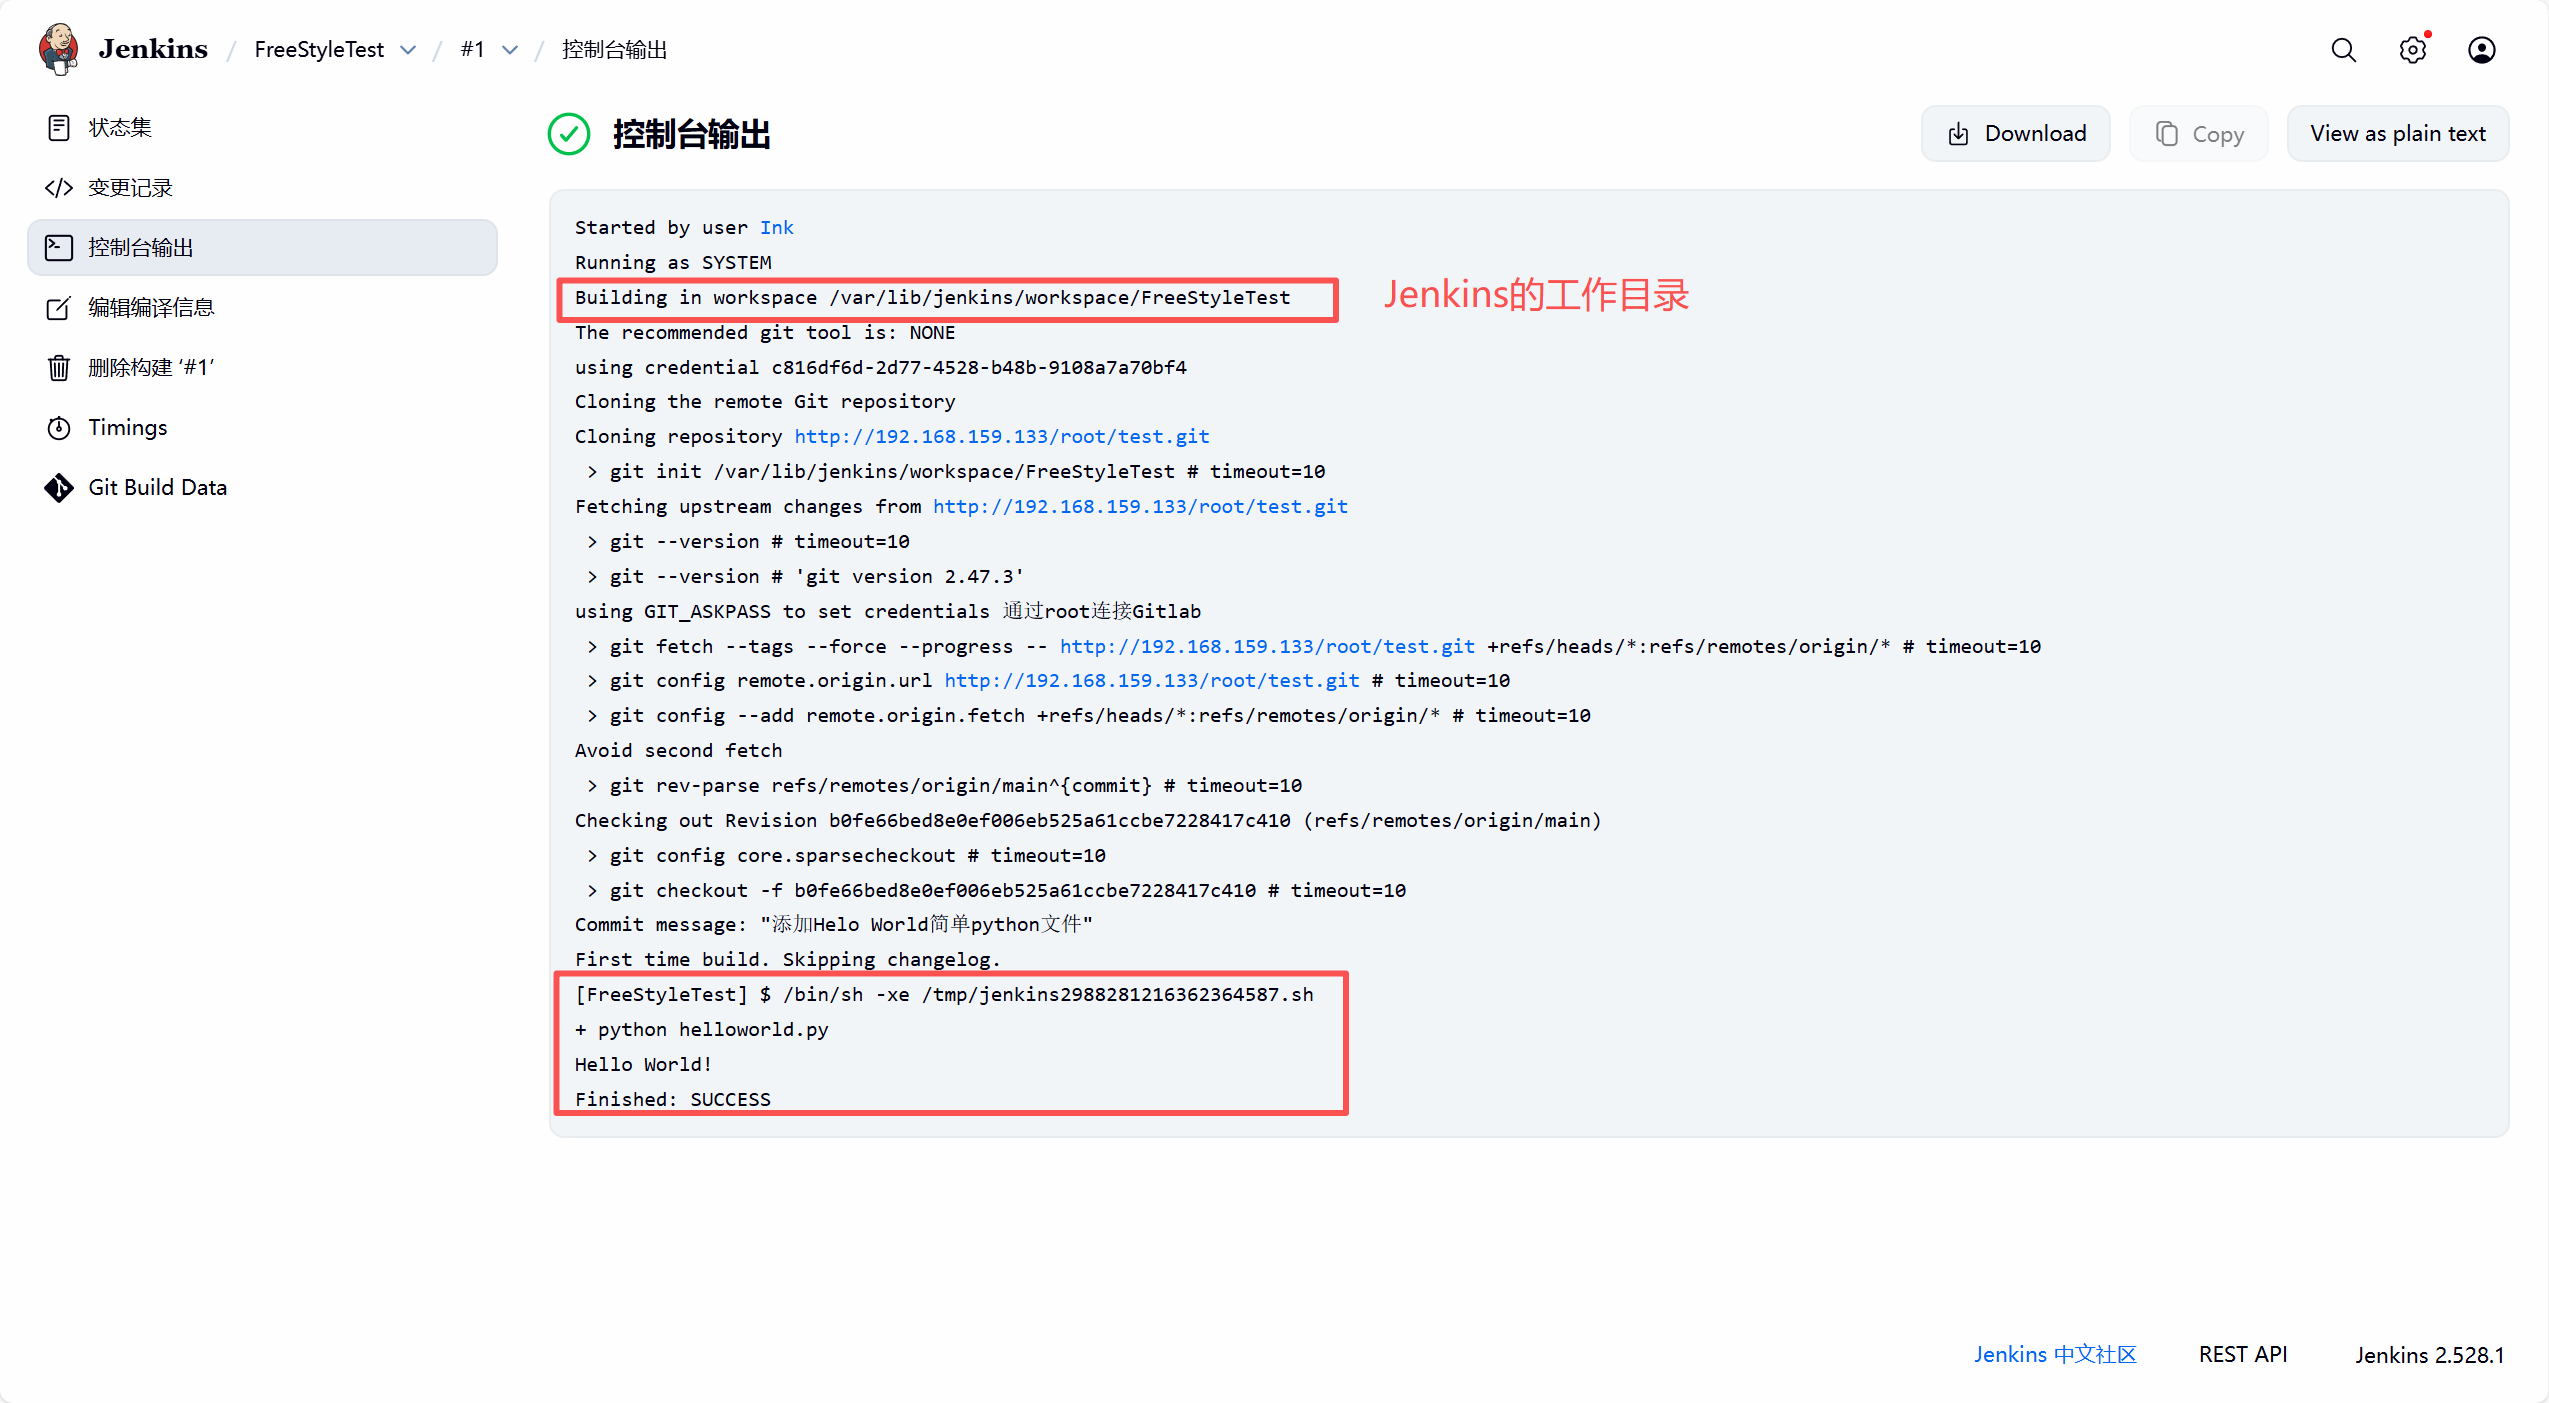
# 可以查看一下Jenkins的工作目录(远程仓库的项目)
[root@Jenkins ~]# ls /var/lib/jenkins/workspace/FreeStyleTest
develop docs helloworld.py os_info.py README.md
[root@Jenkins ~]# cat /var/lib/jenkins/workspace/FreeStyleTest/helloworld.py
#!/usr/bin/env python
print("Hello World!")[root@Jenkins ~]#
四、配置邮件通知
1. 安装Email Extension插件
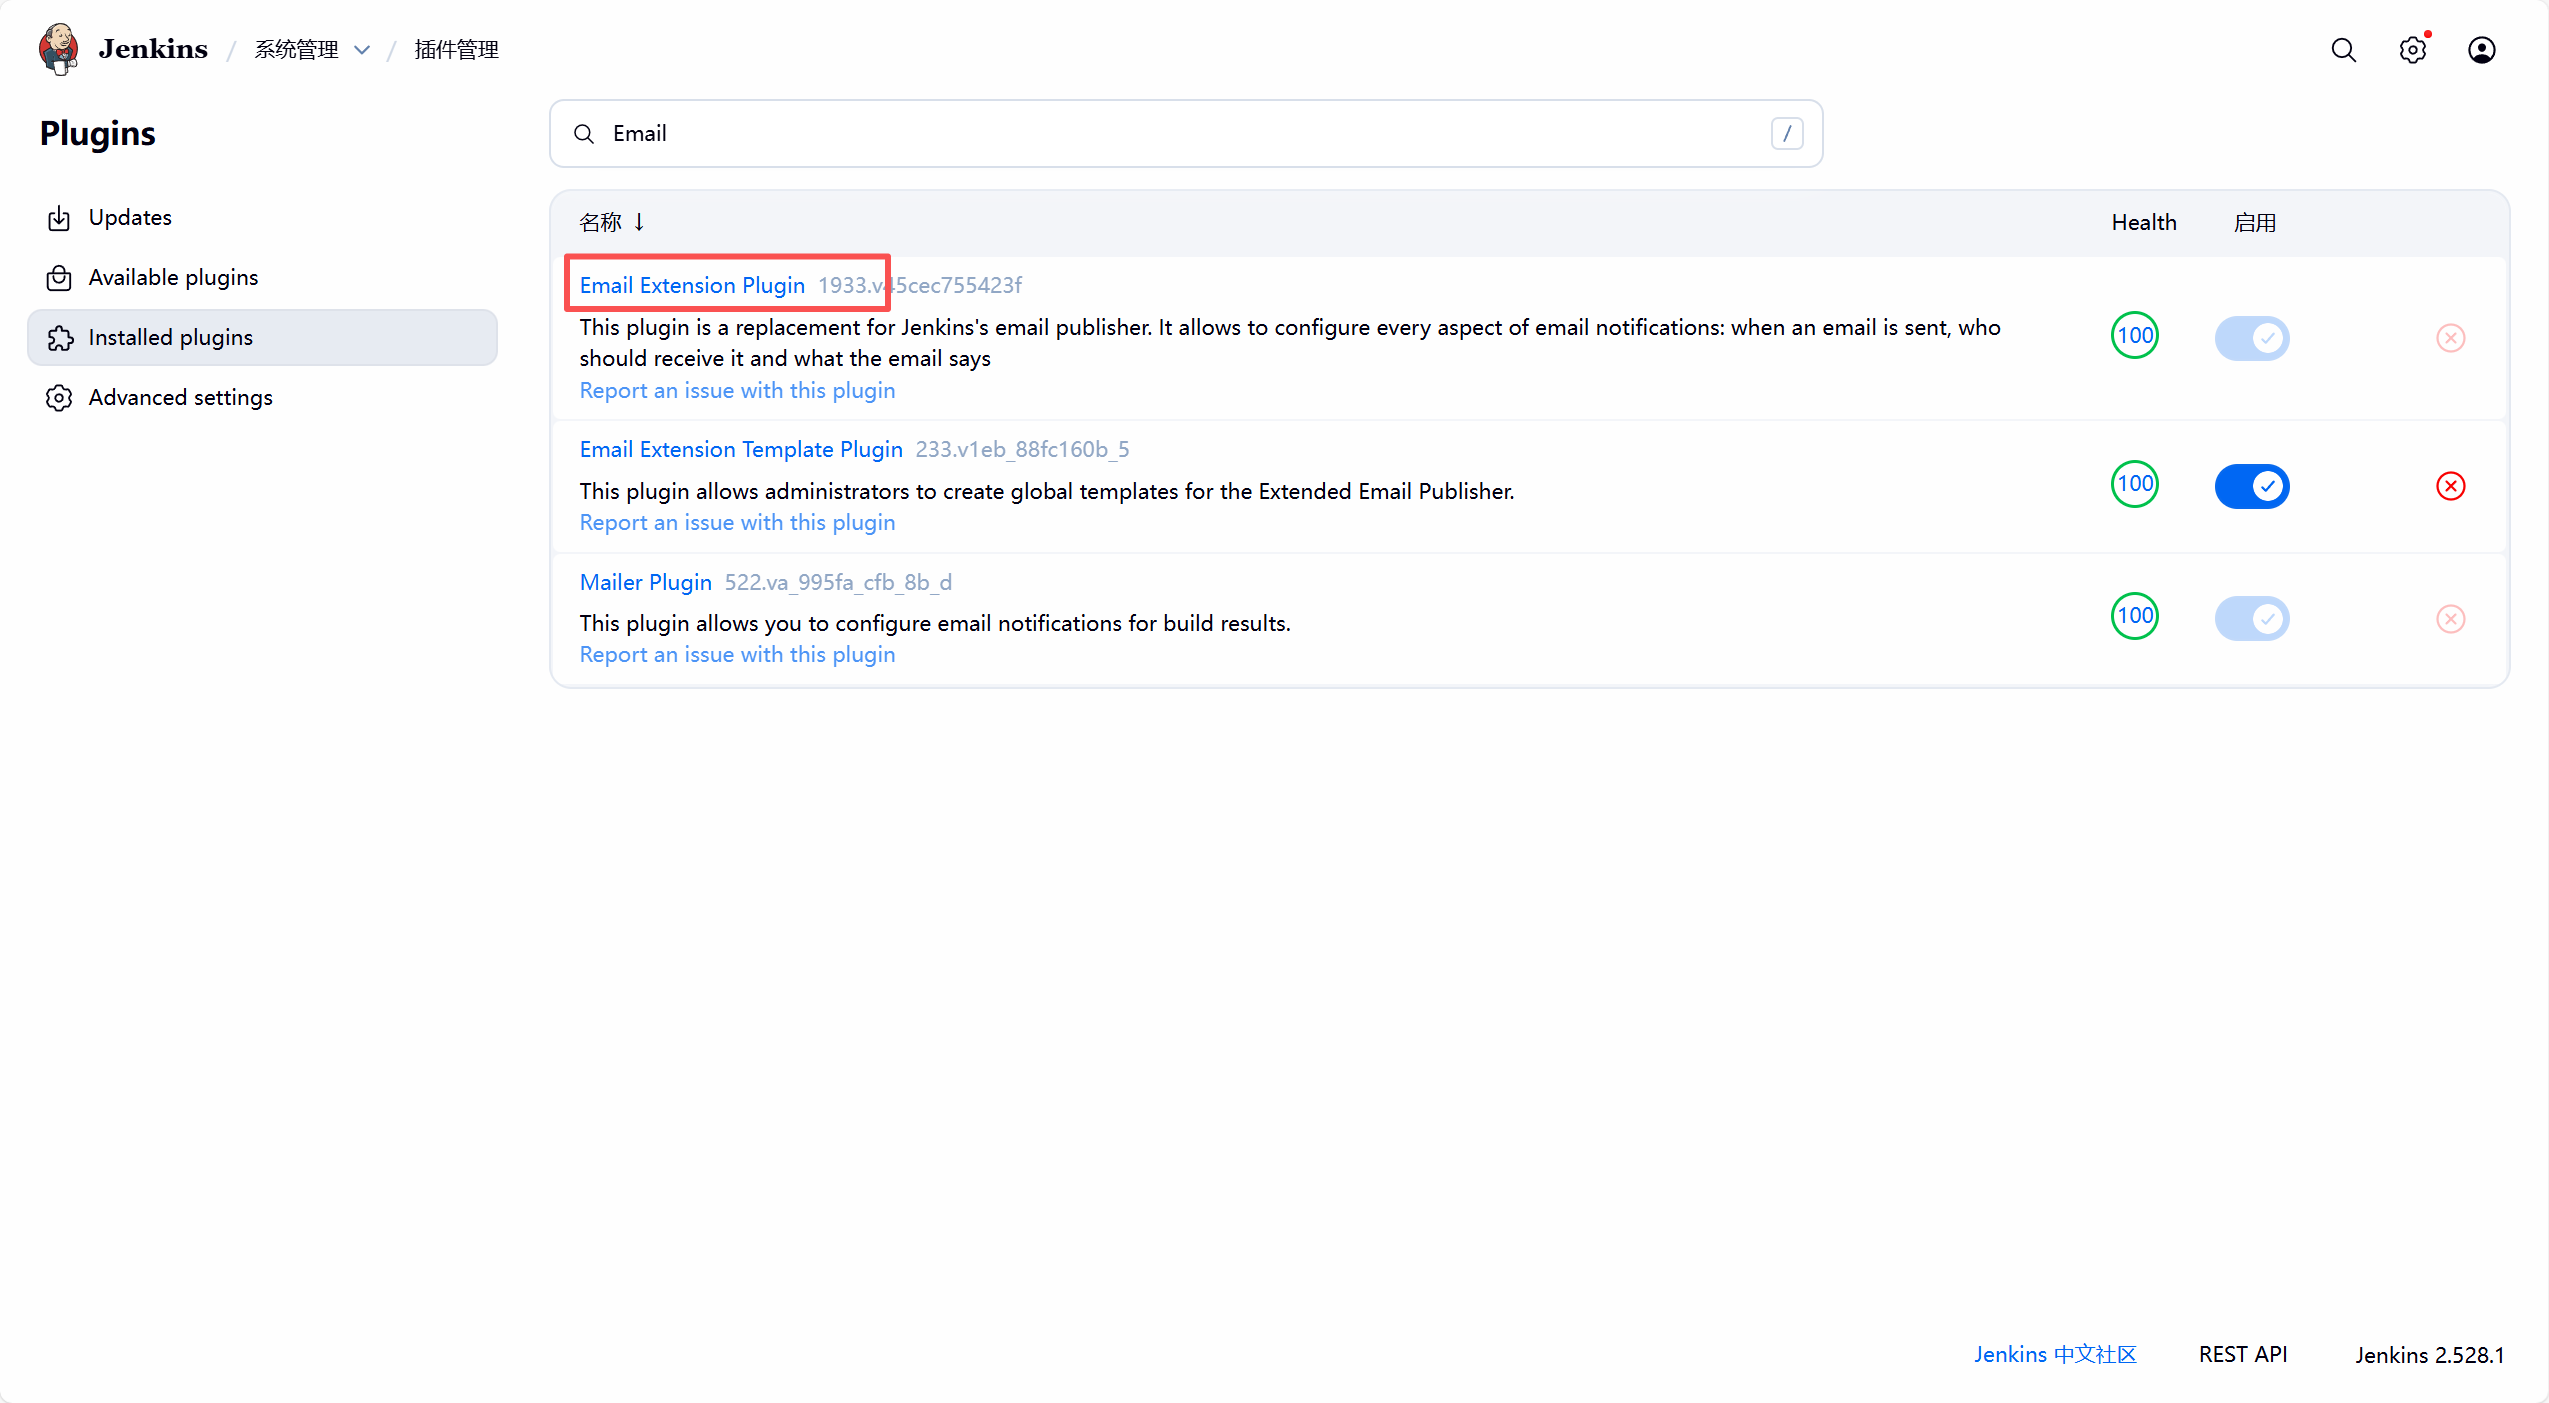
2. 配置SMTP服务器
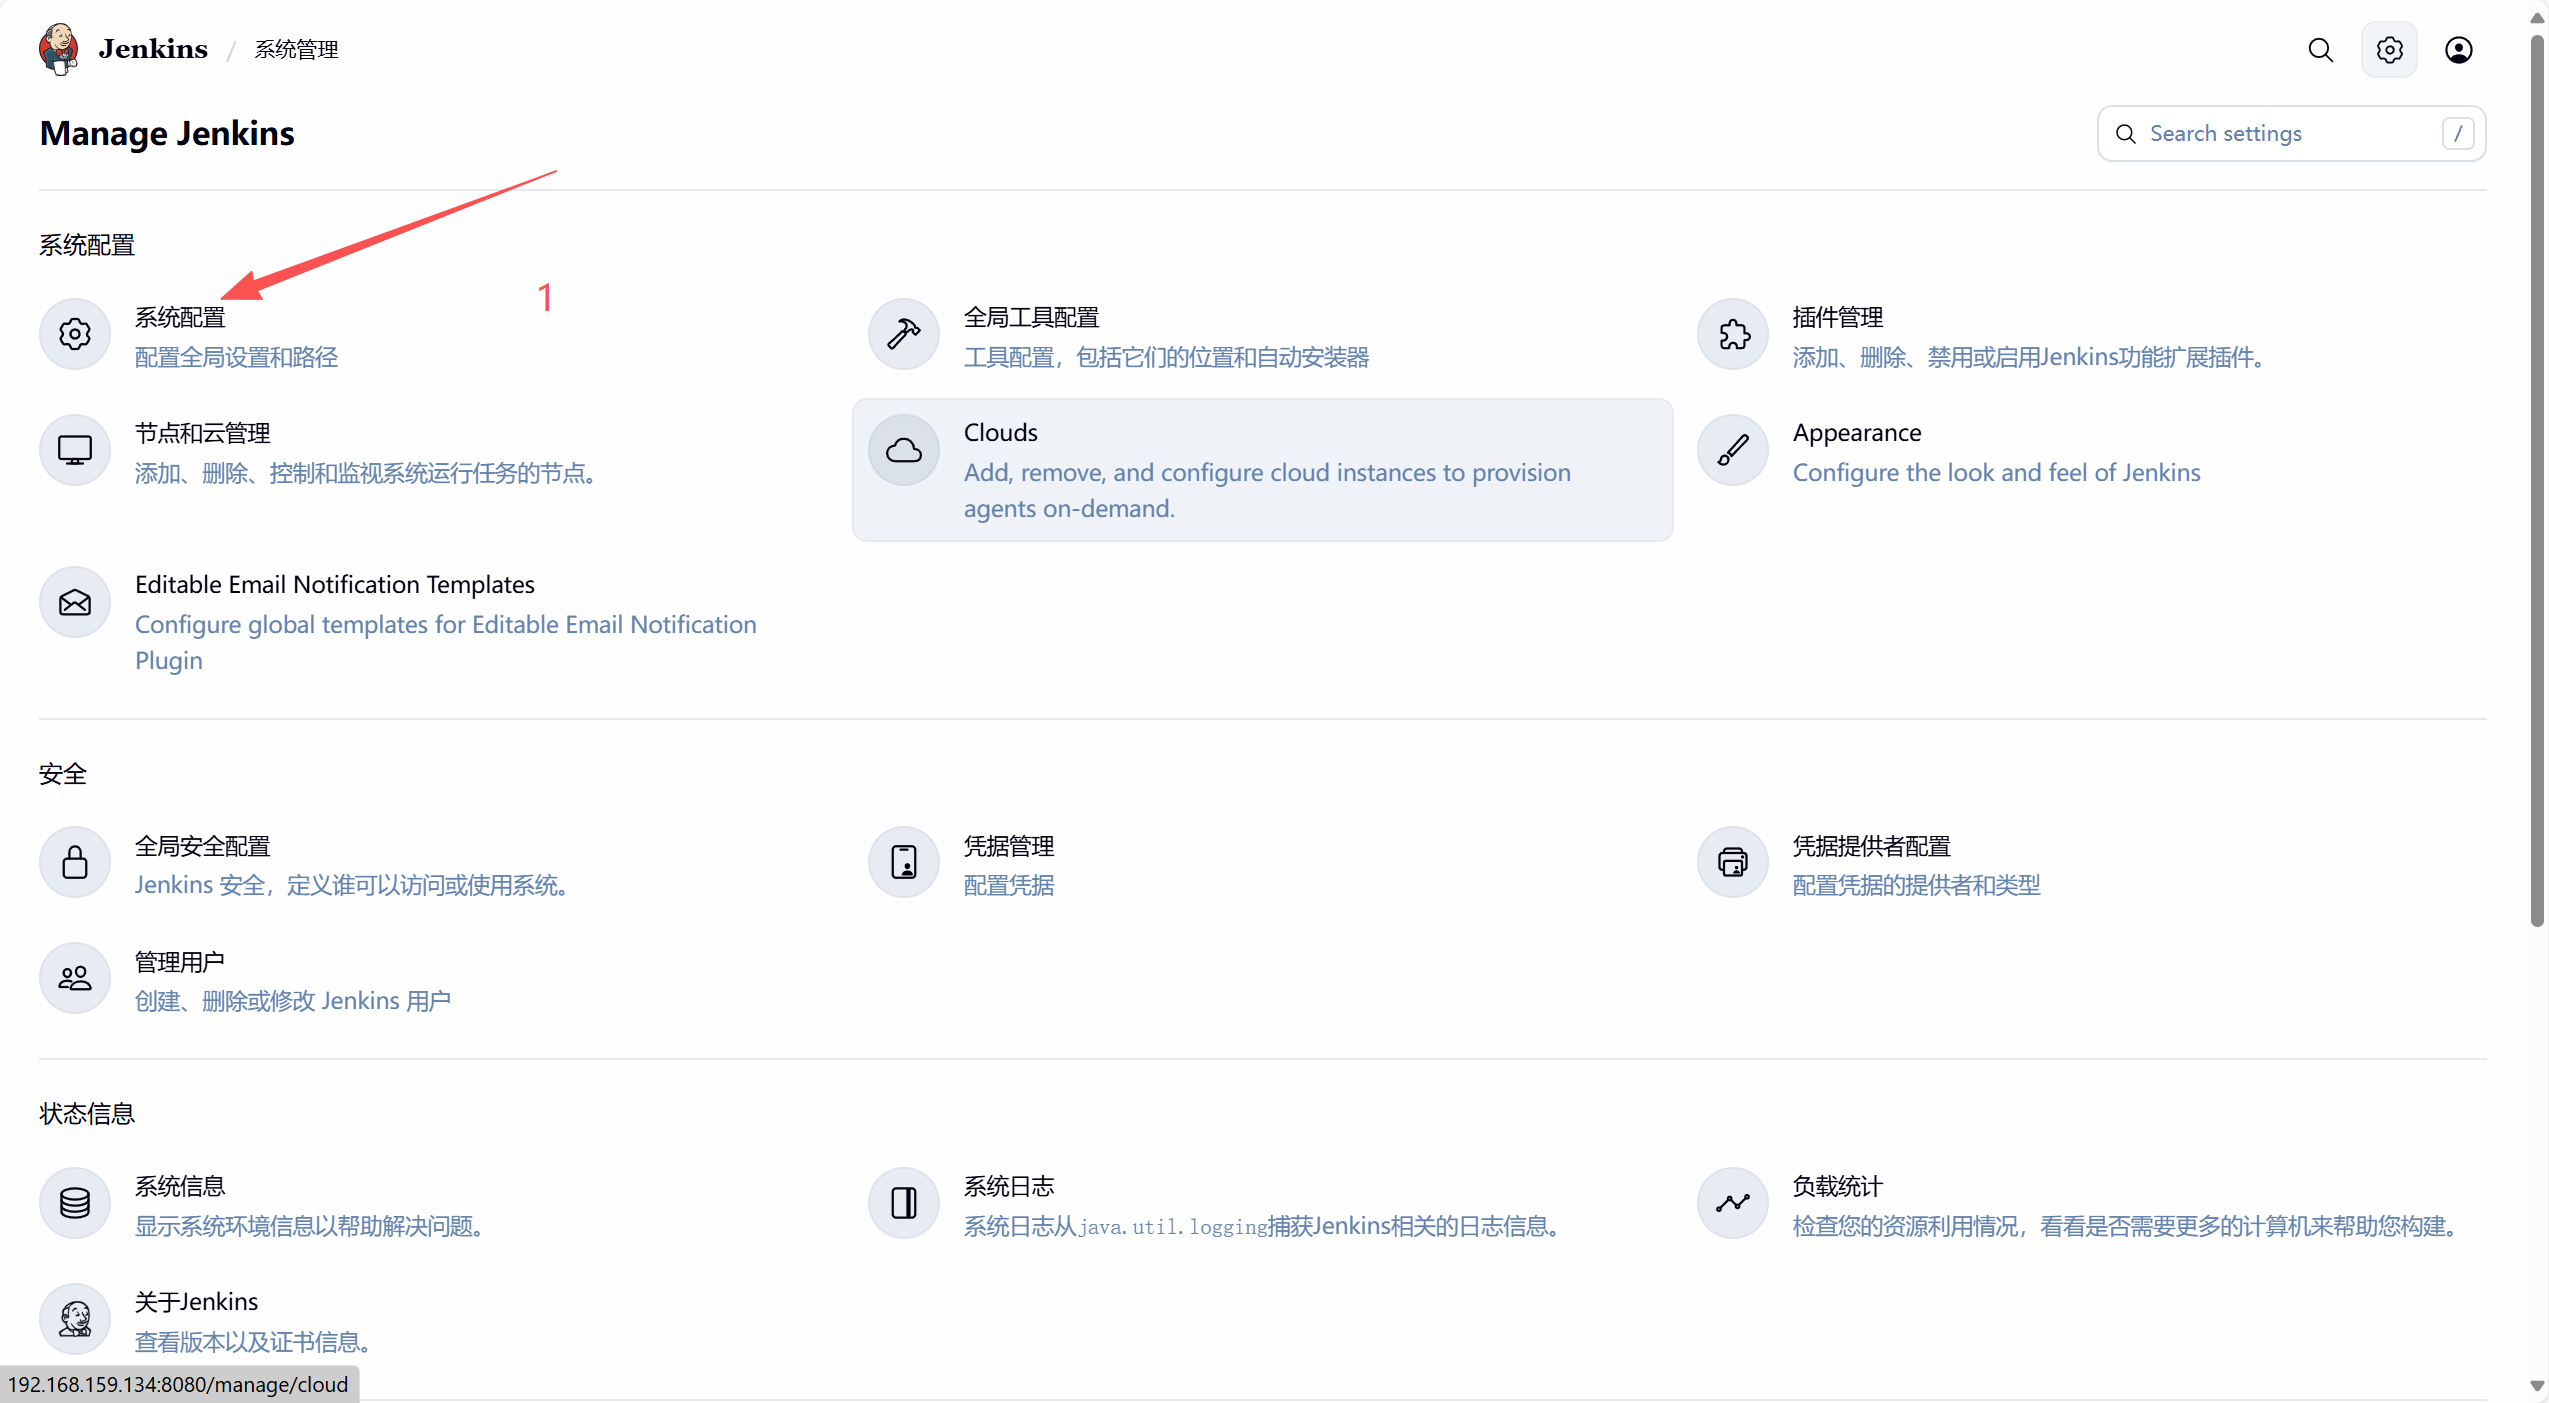
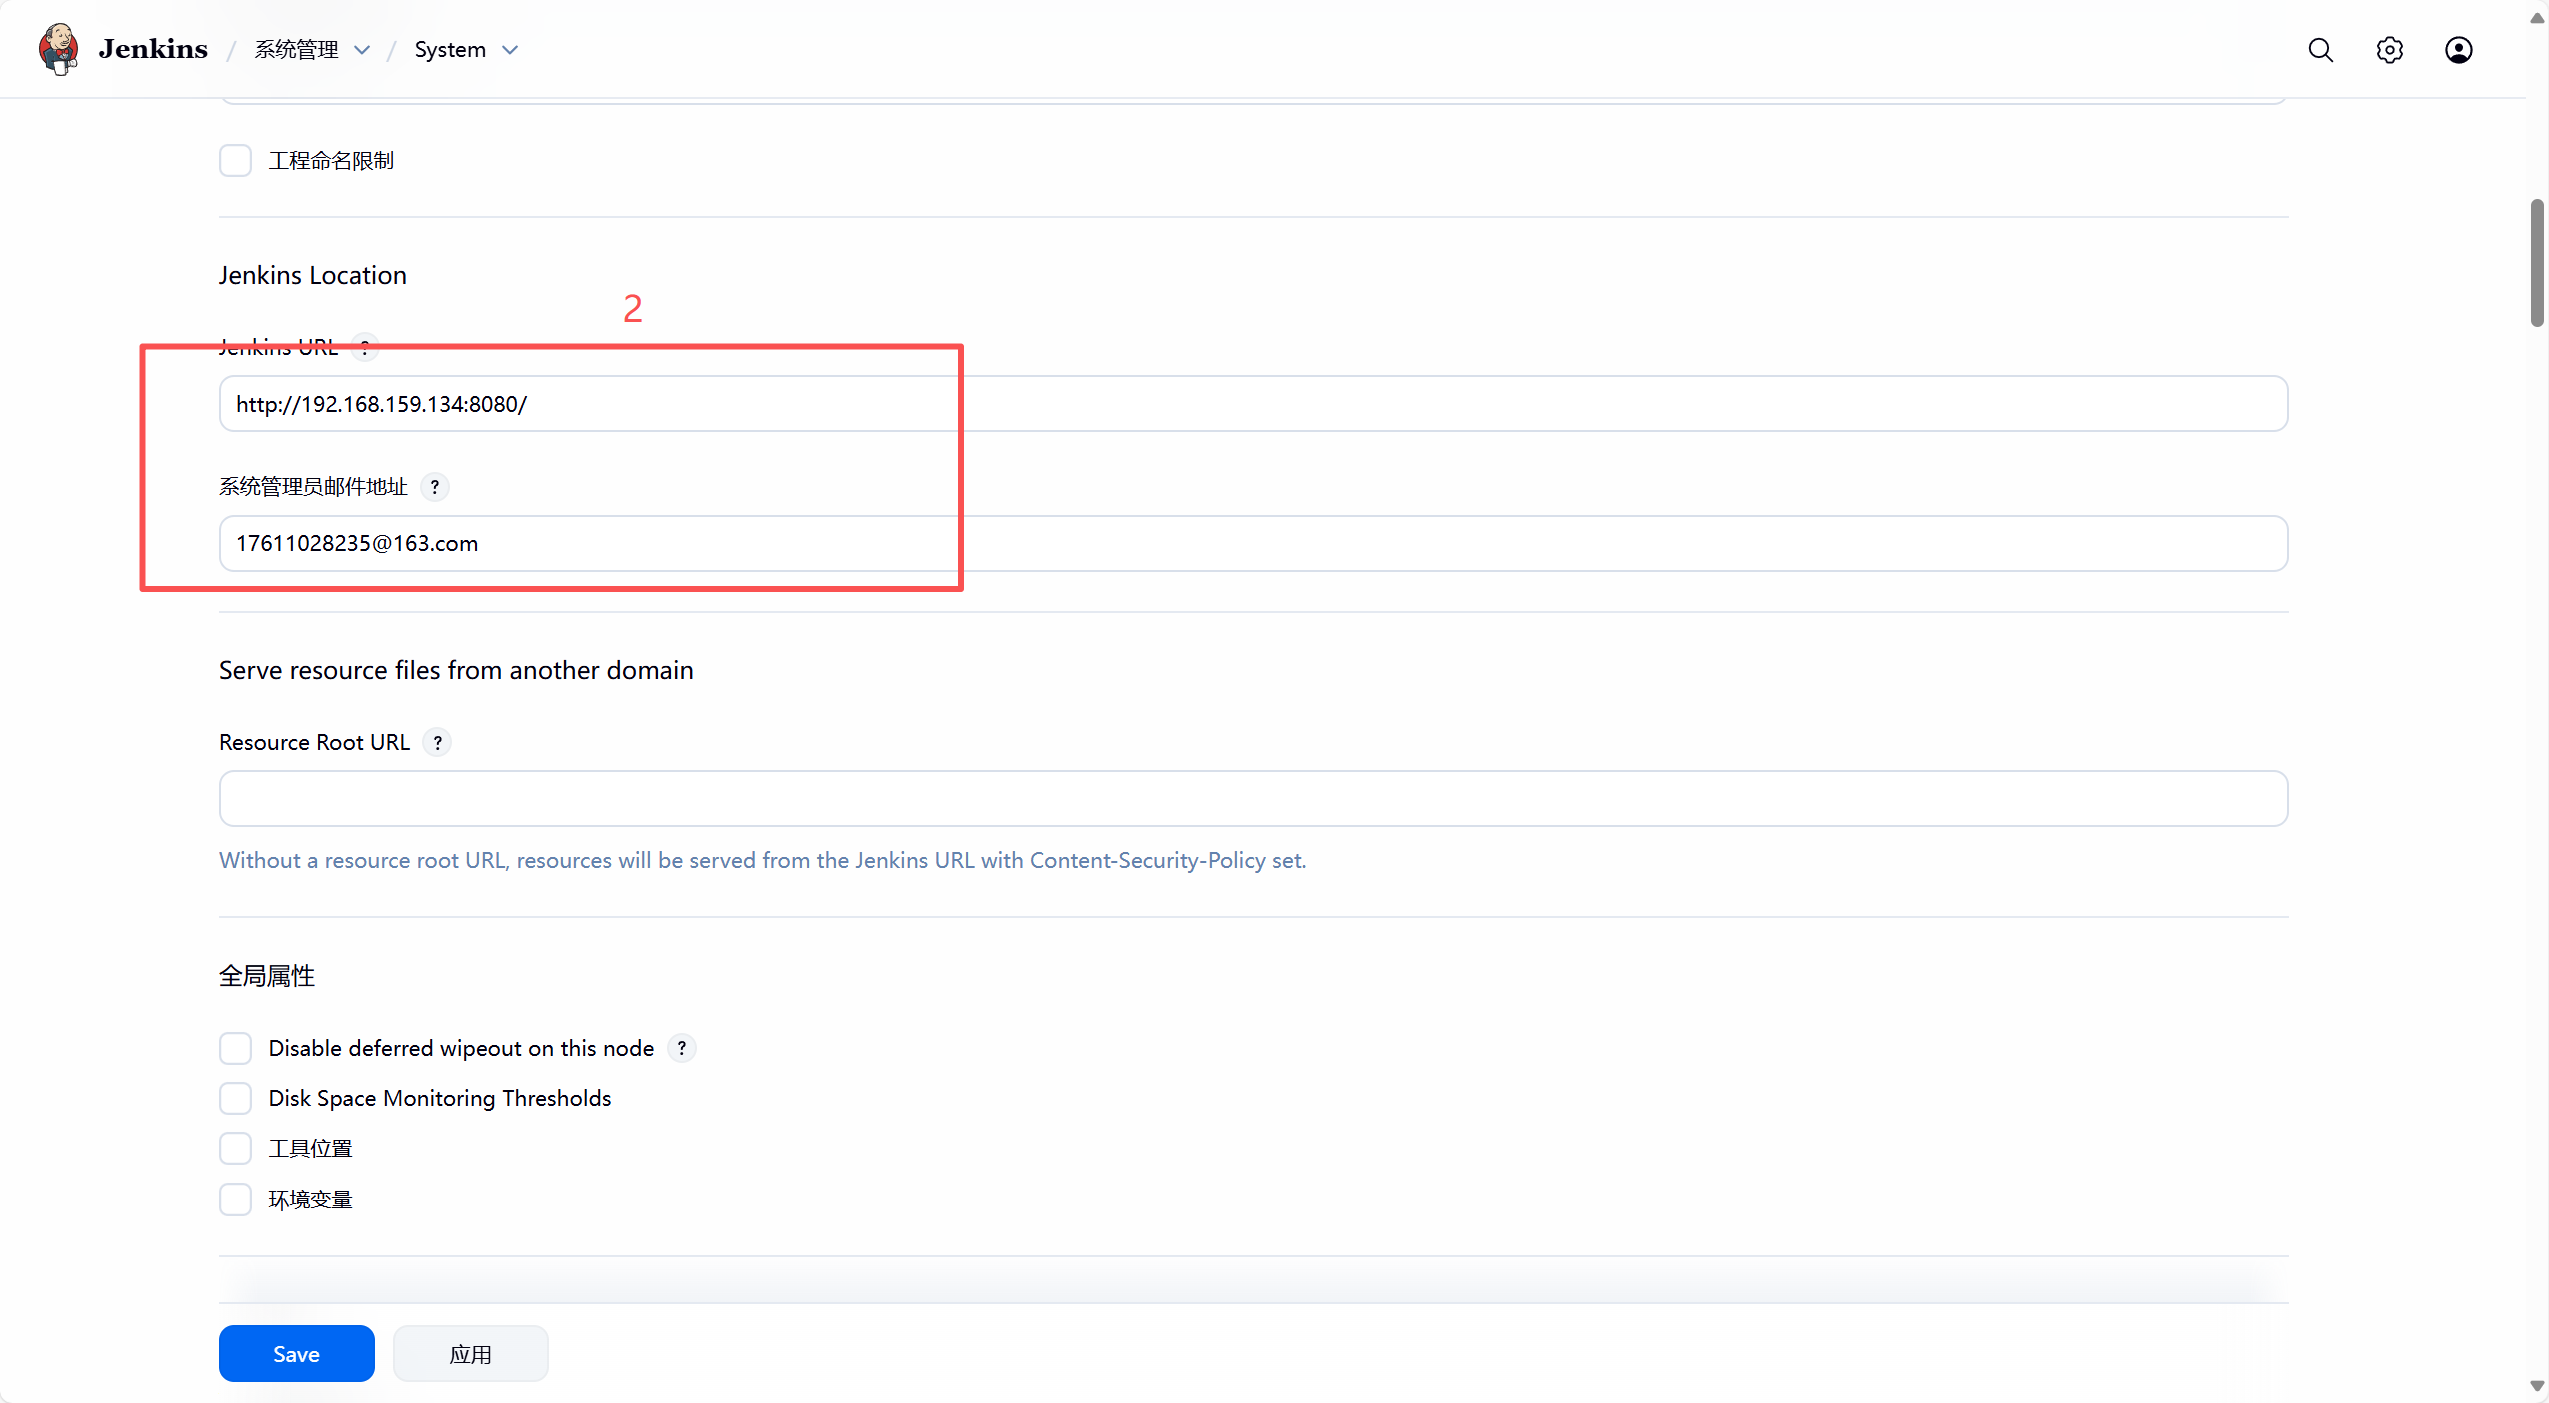
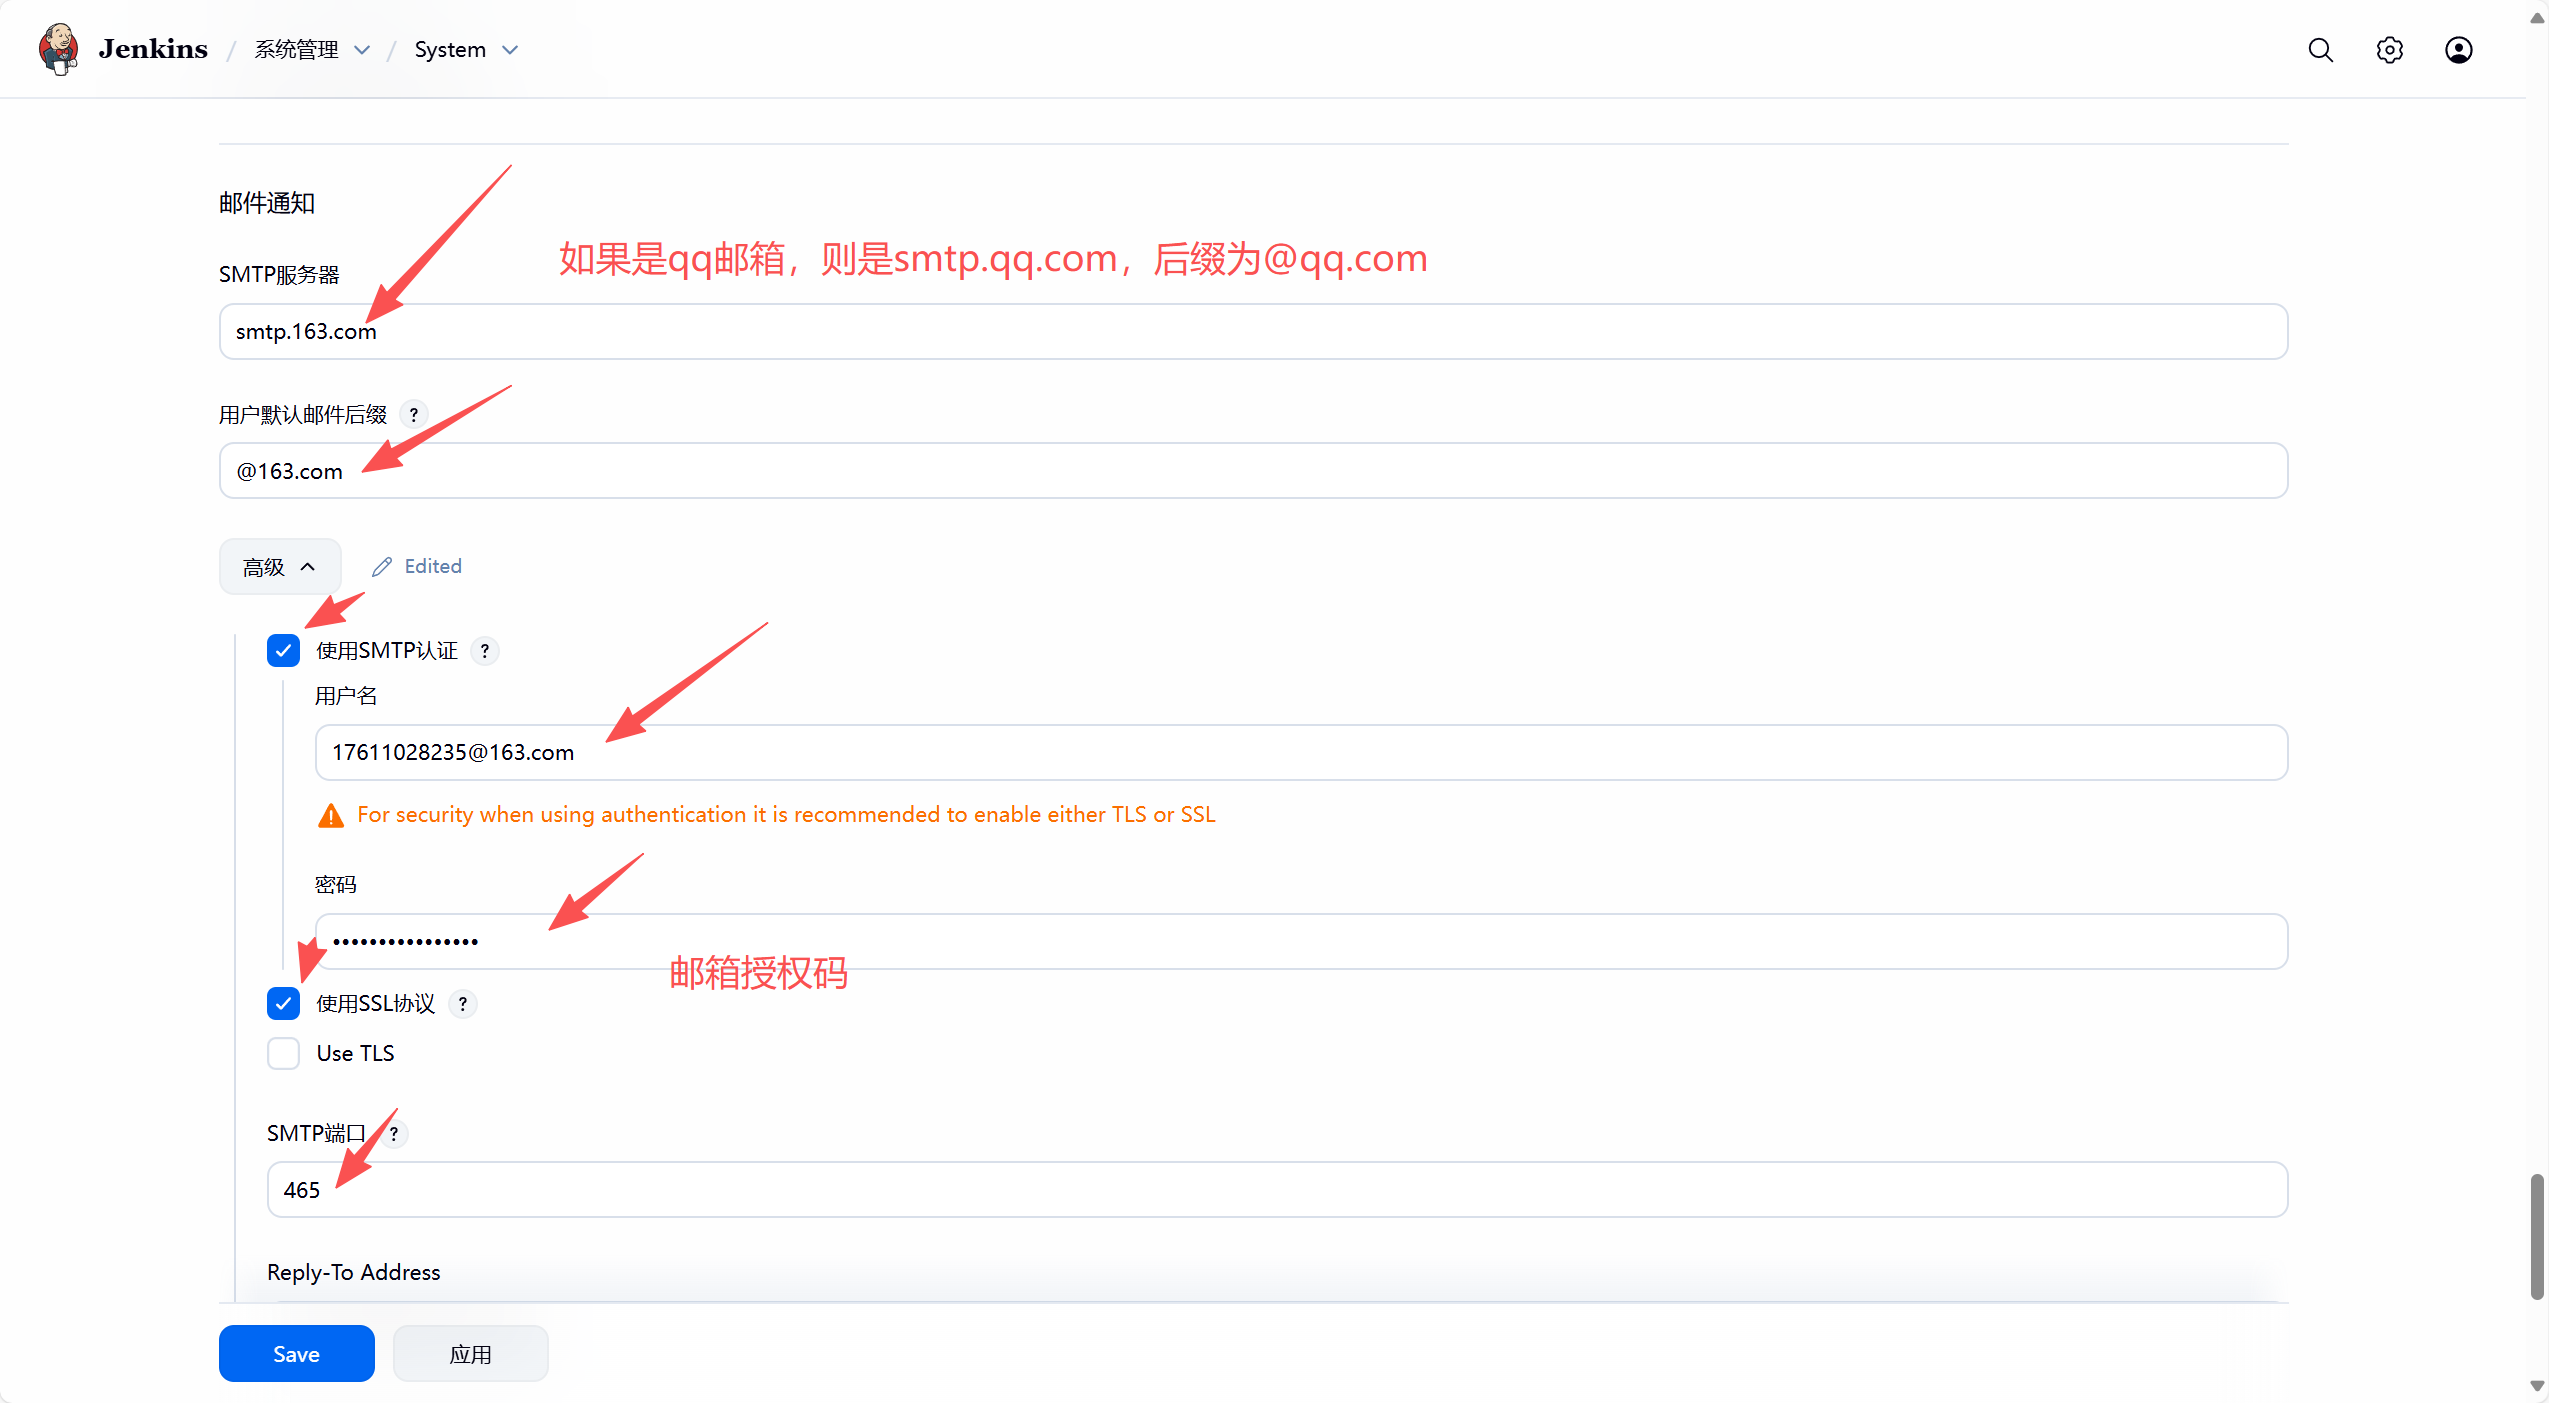
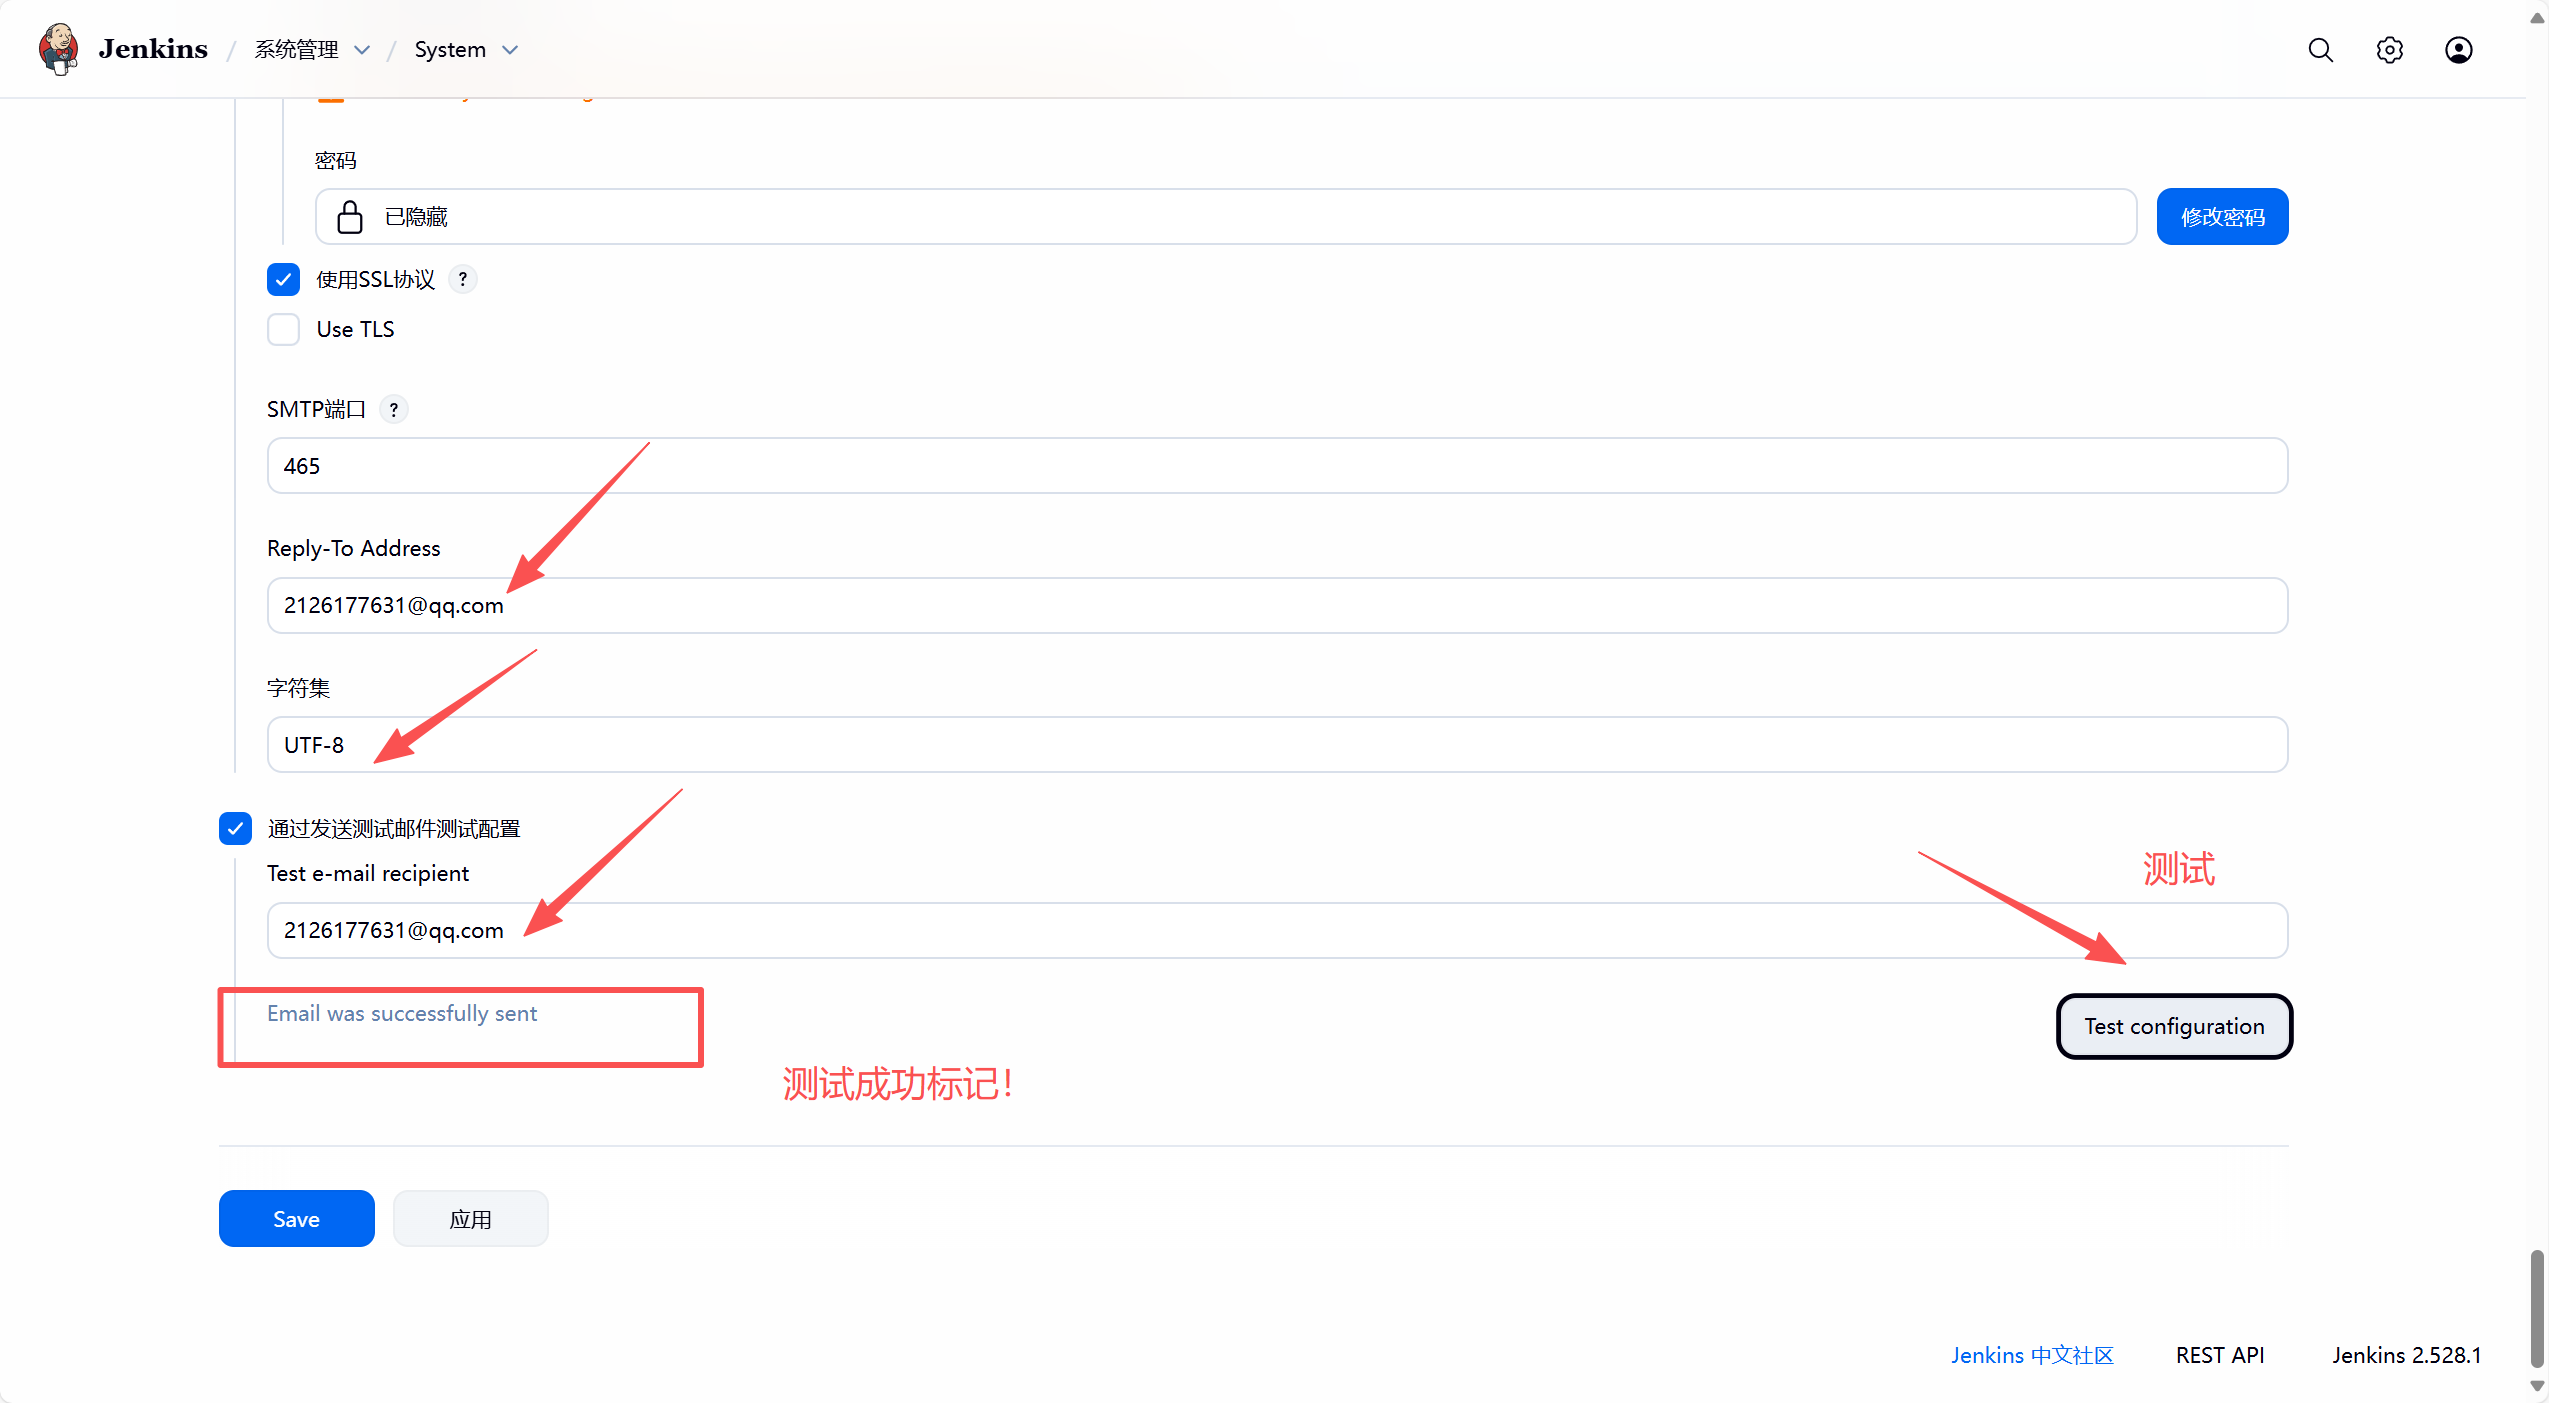
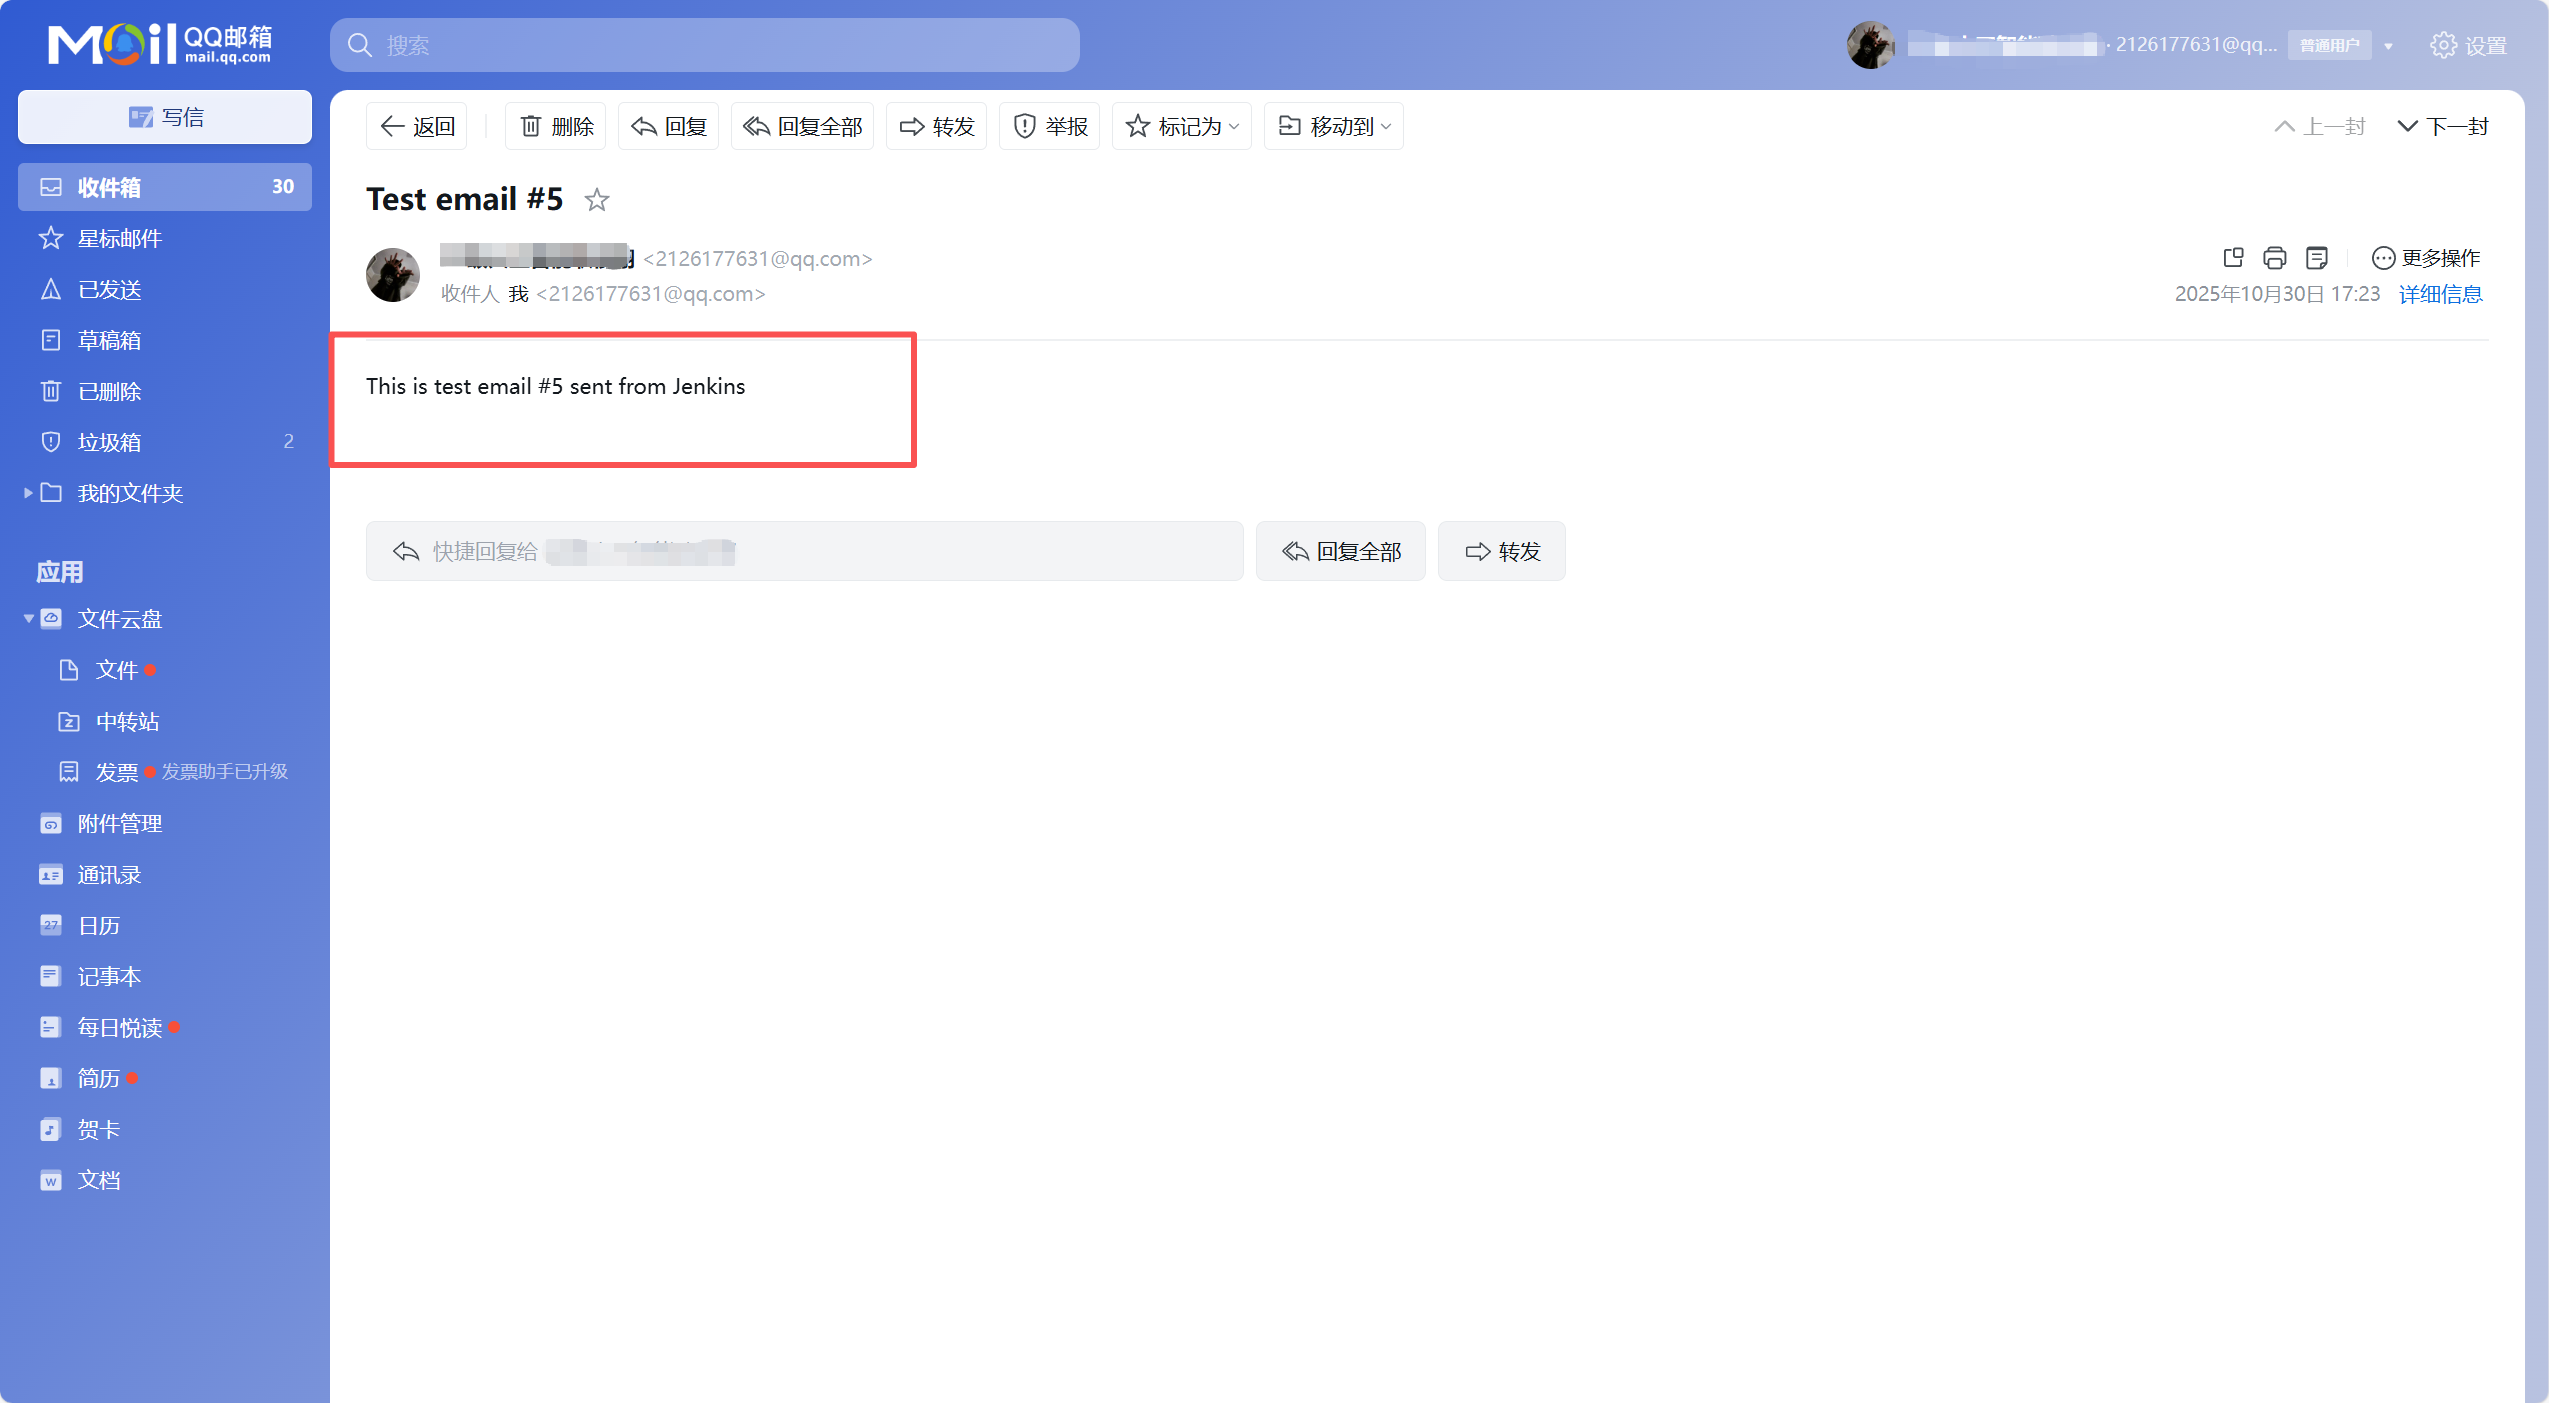
3. 配置 Jenkins 任务的邮件通知
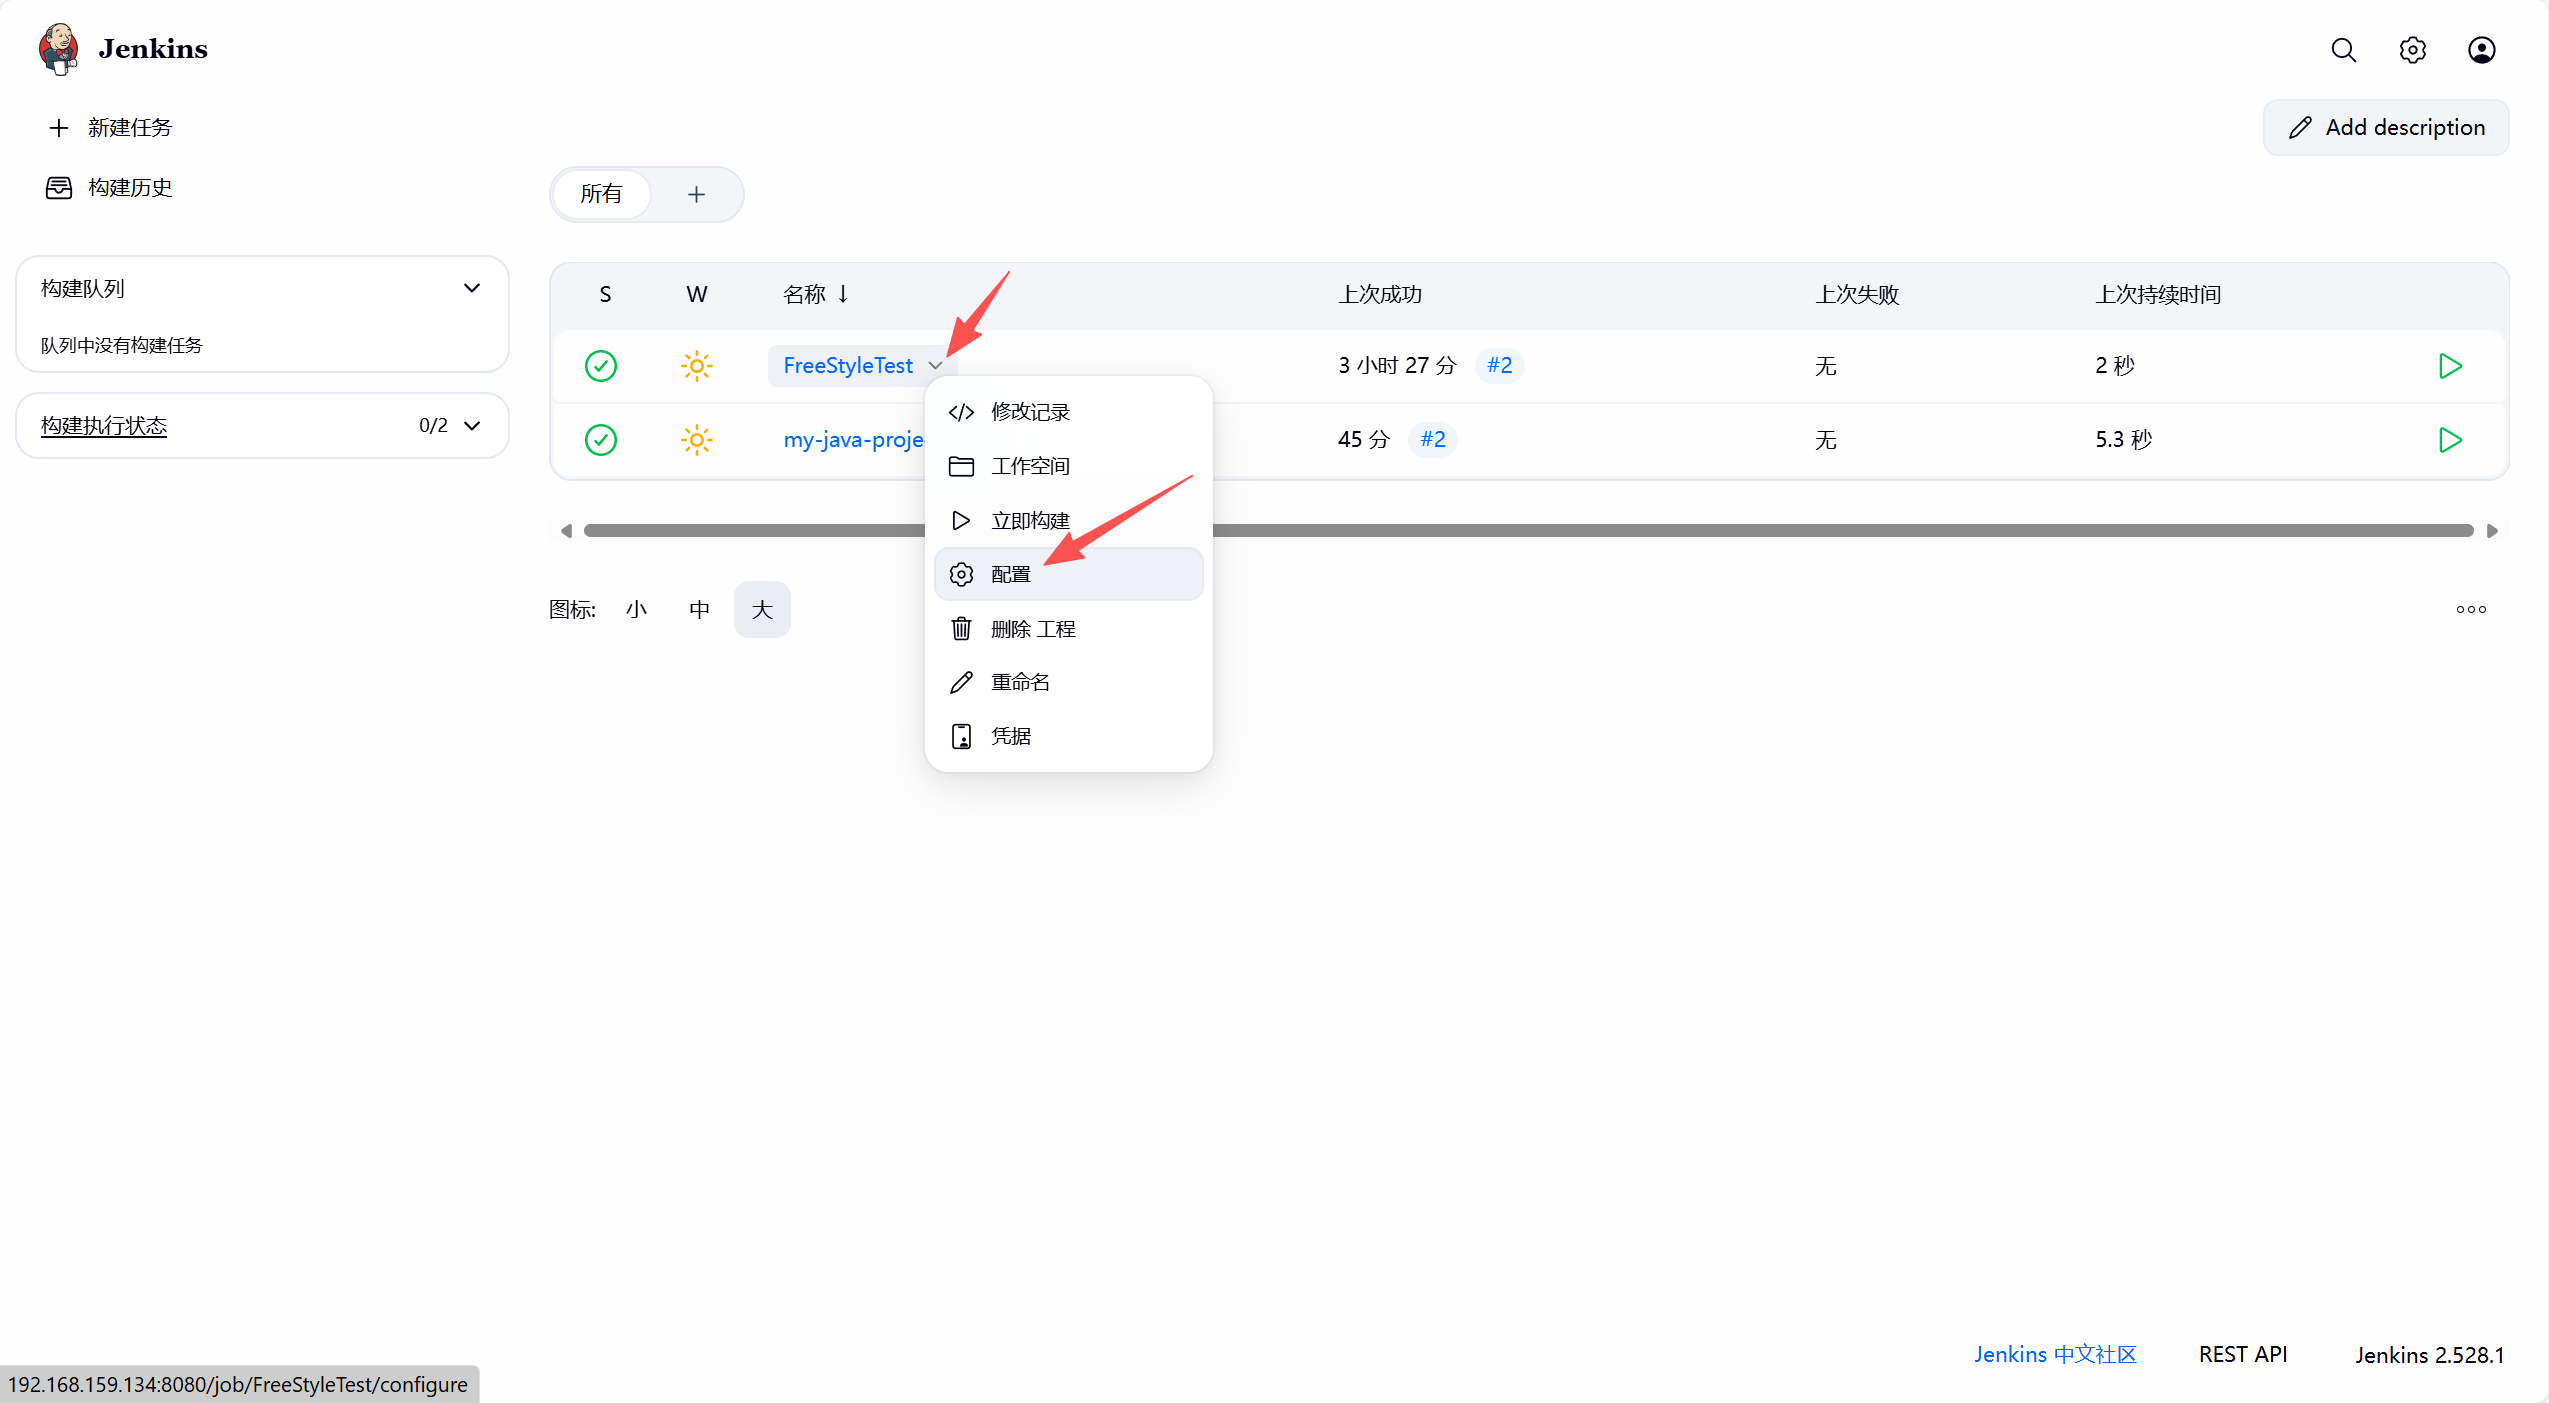
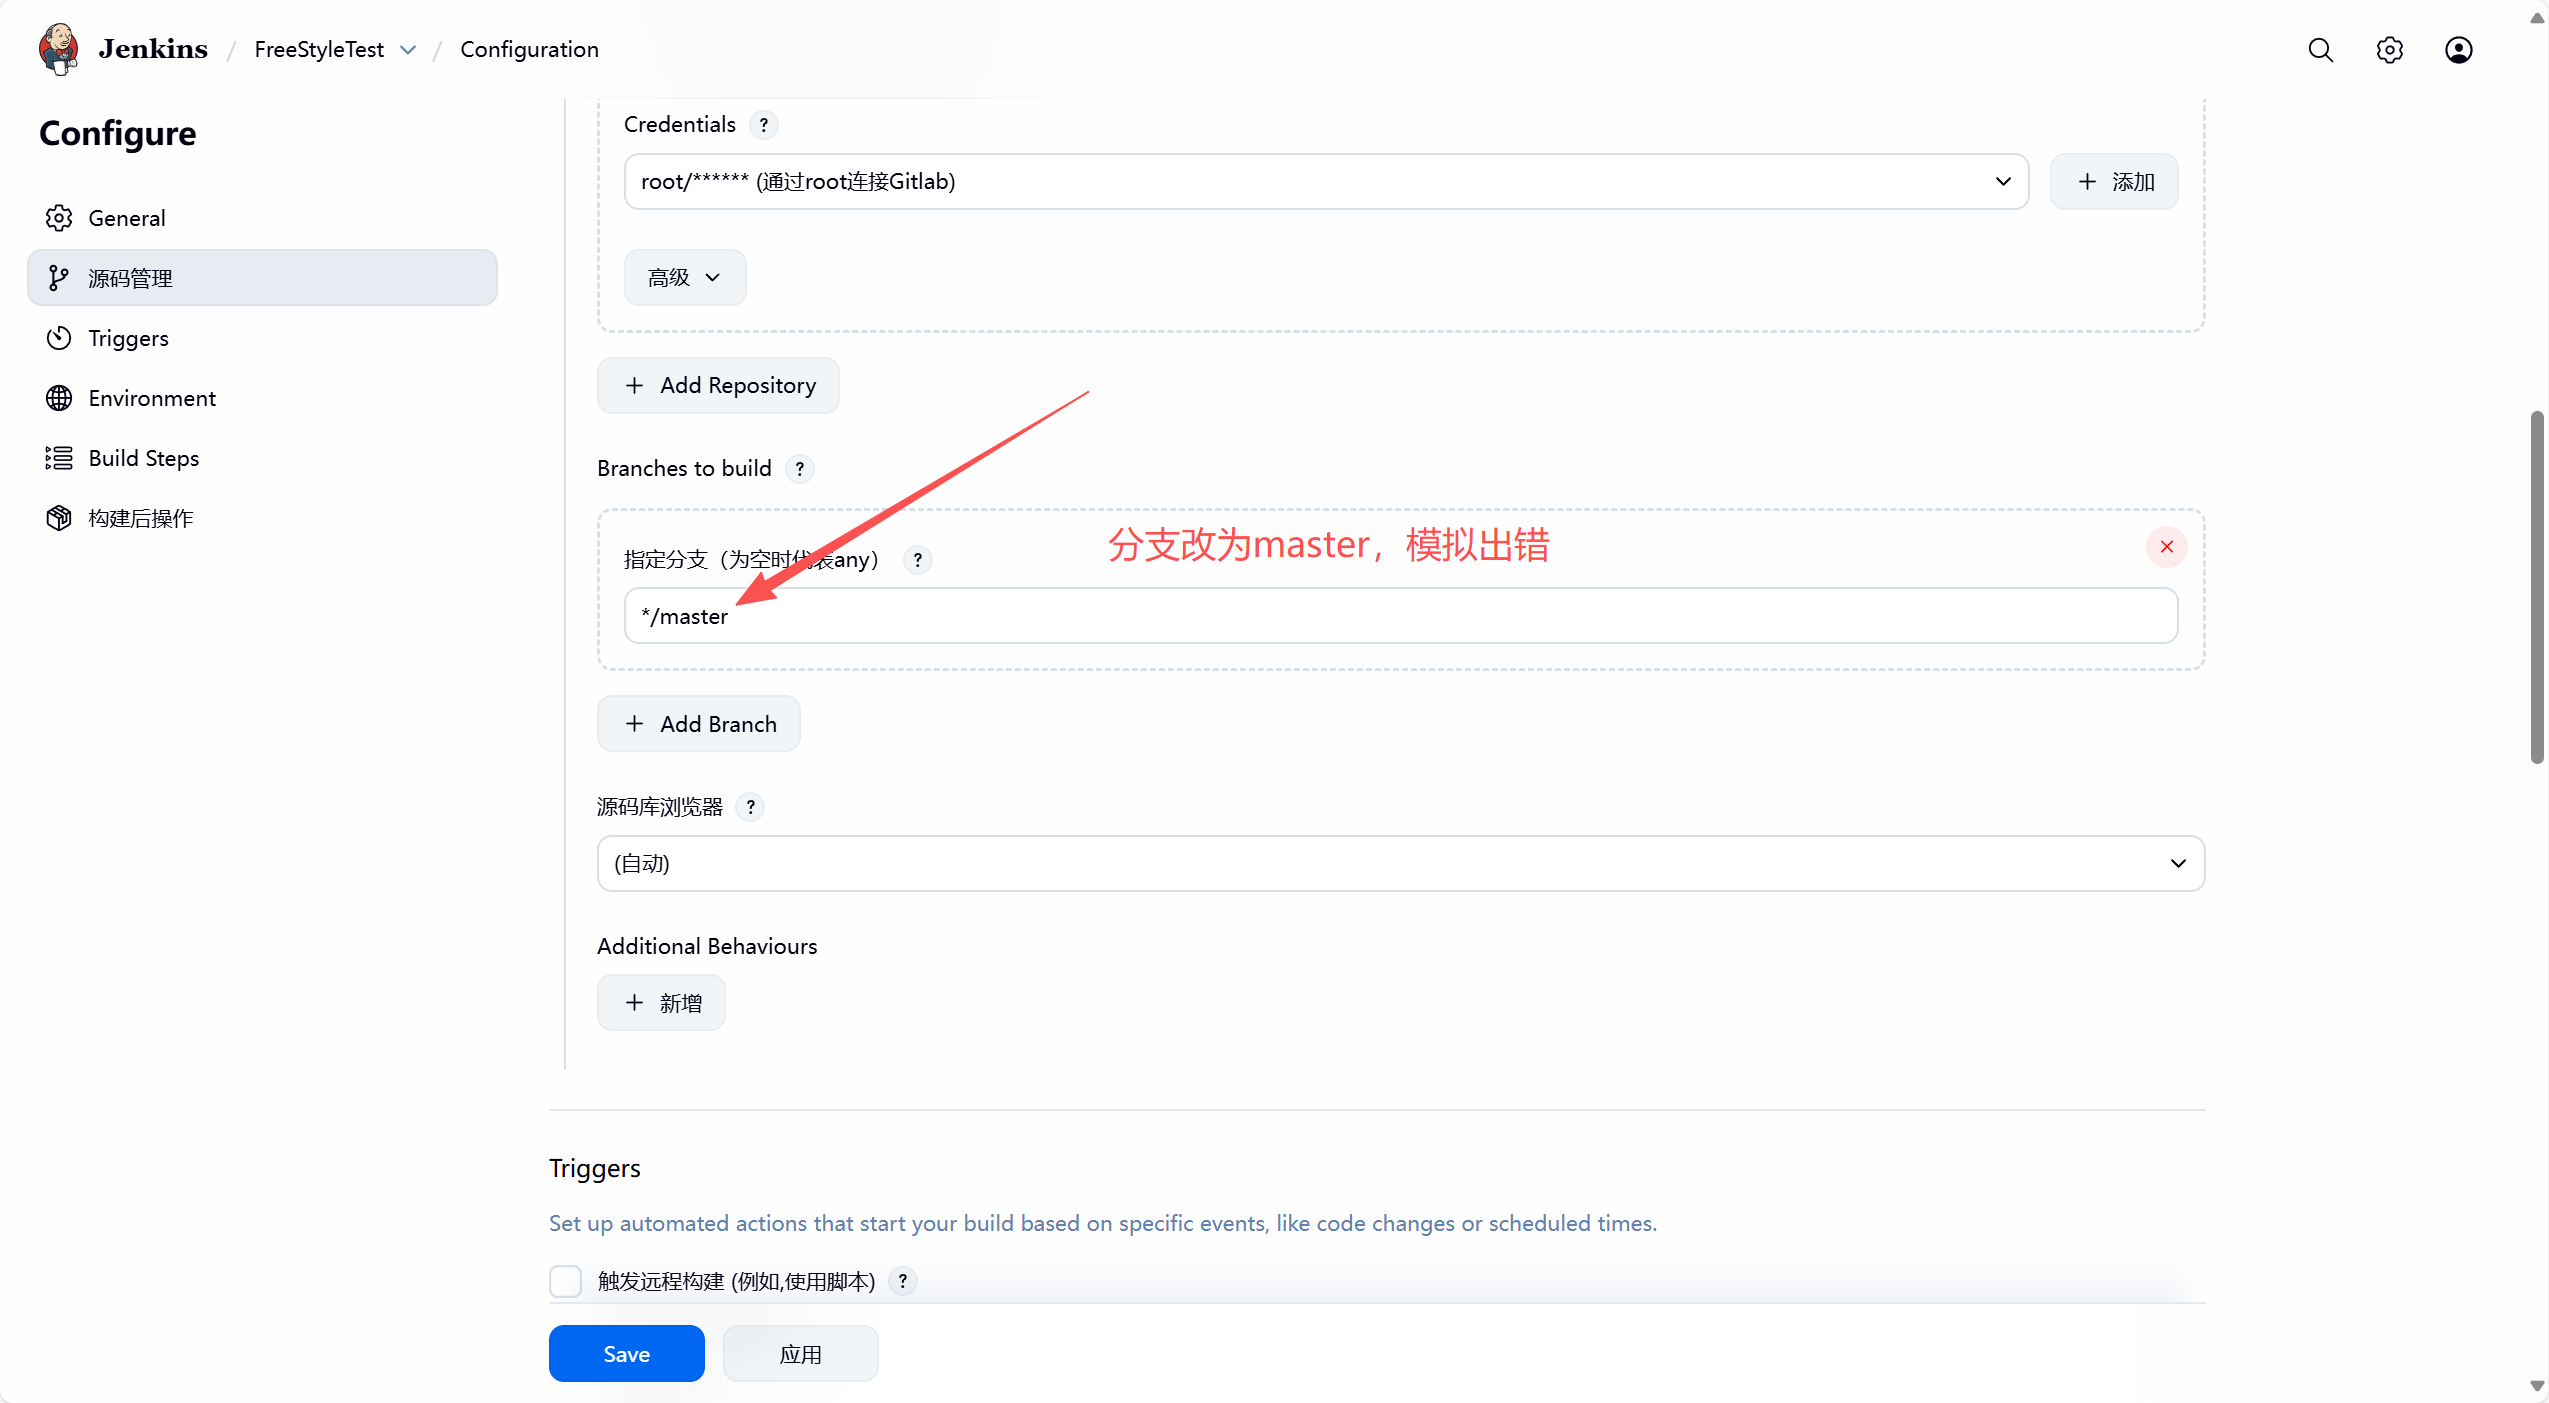

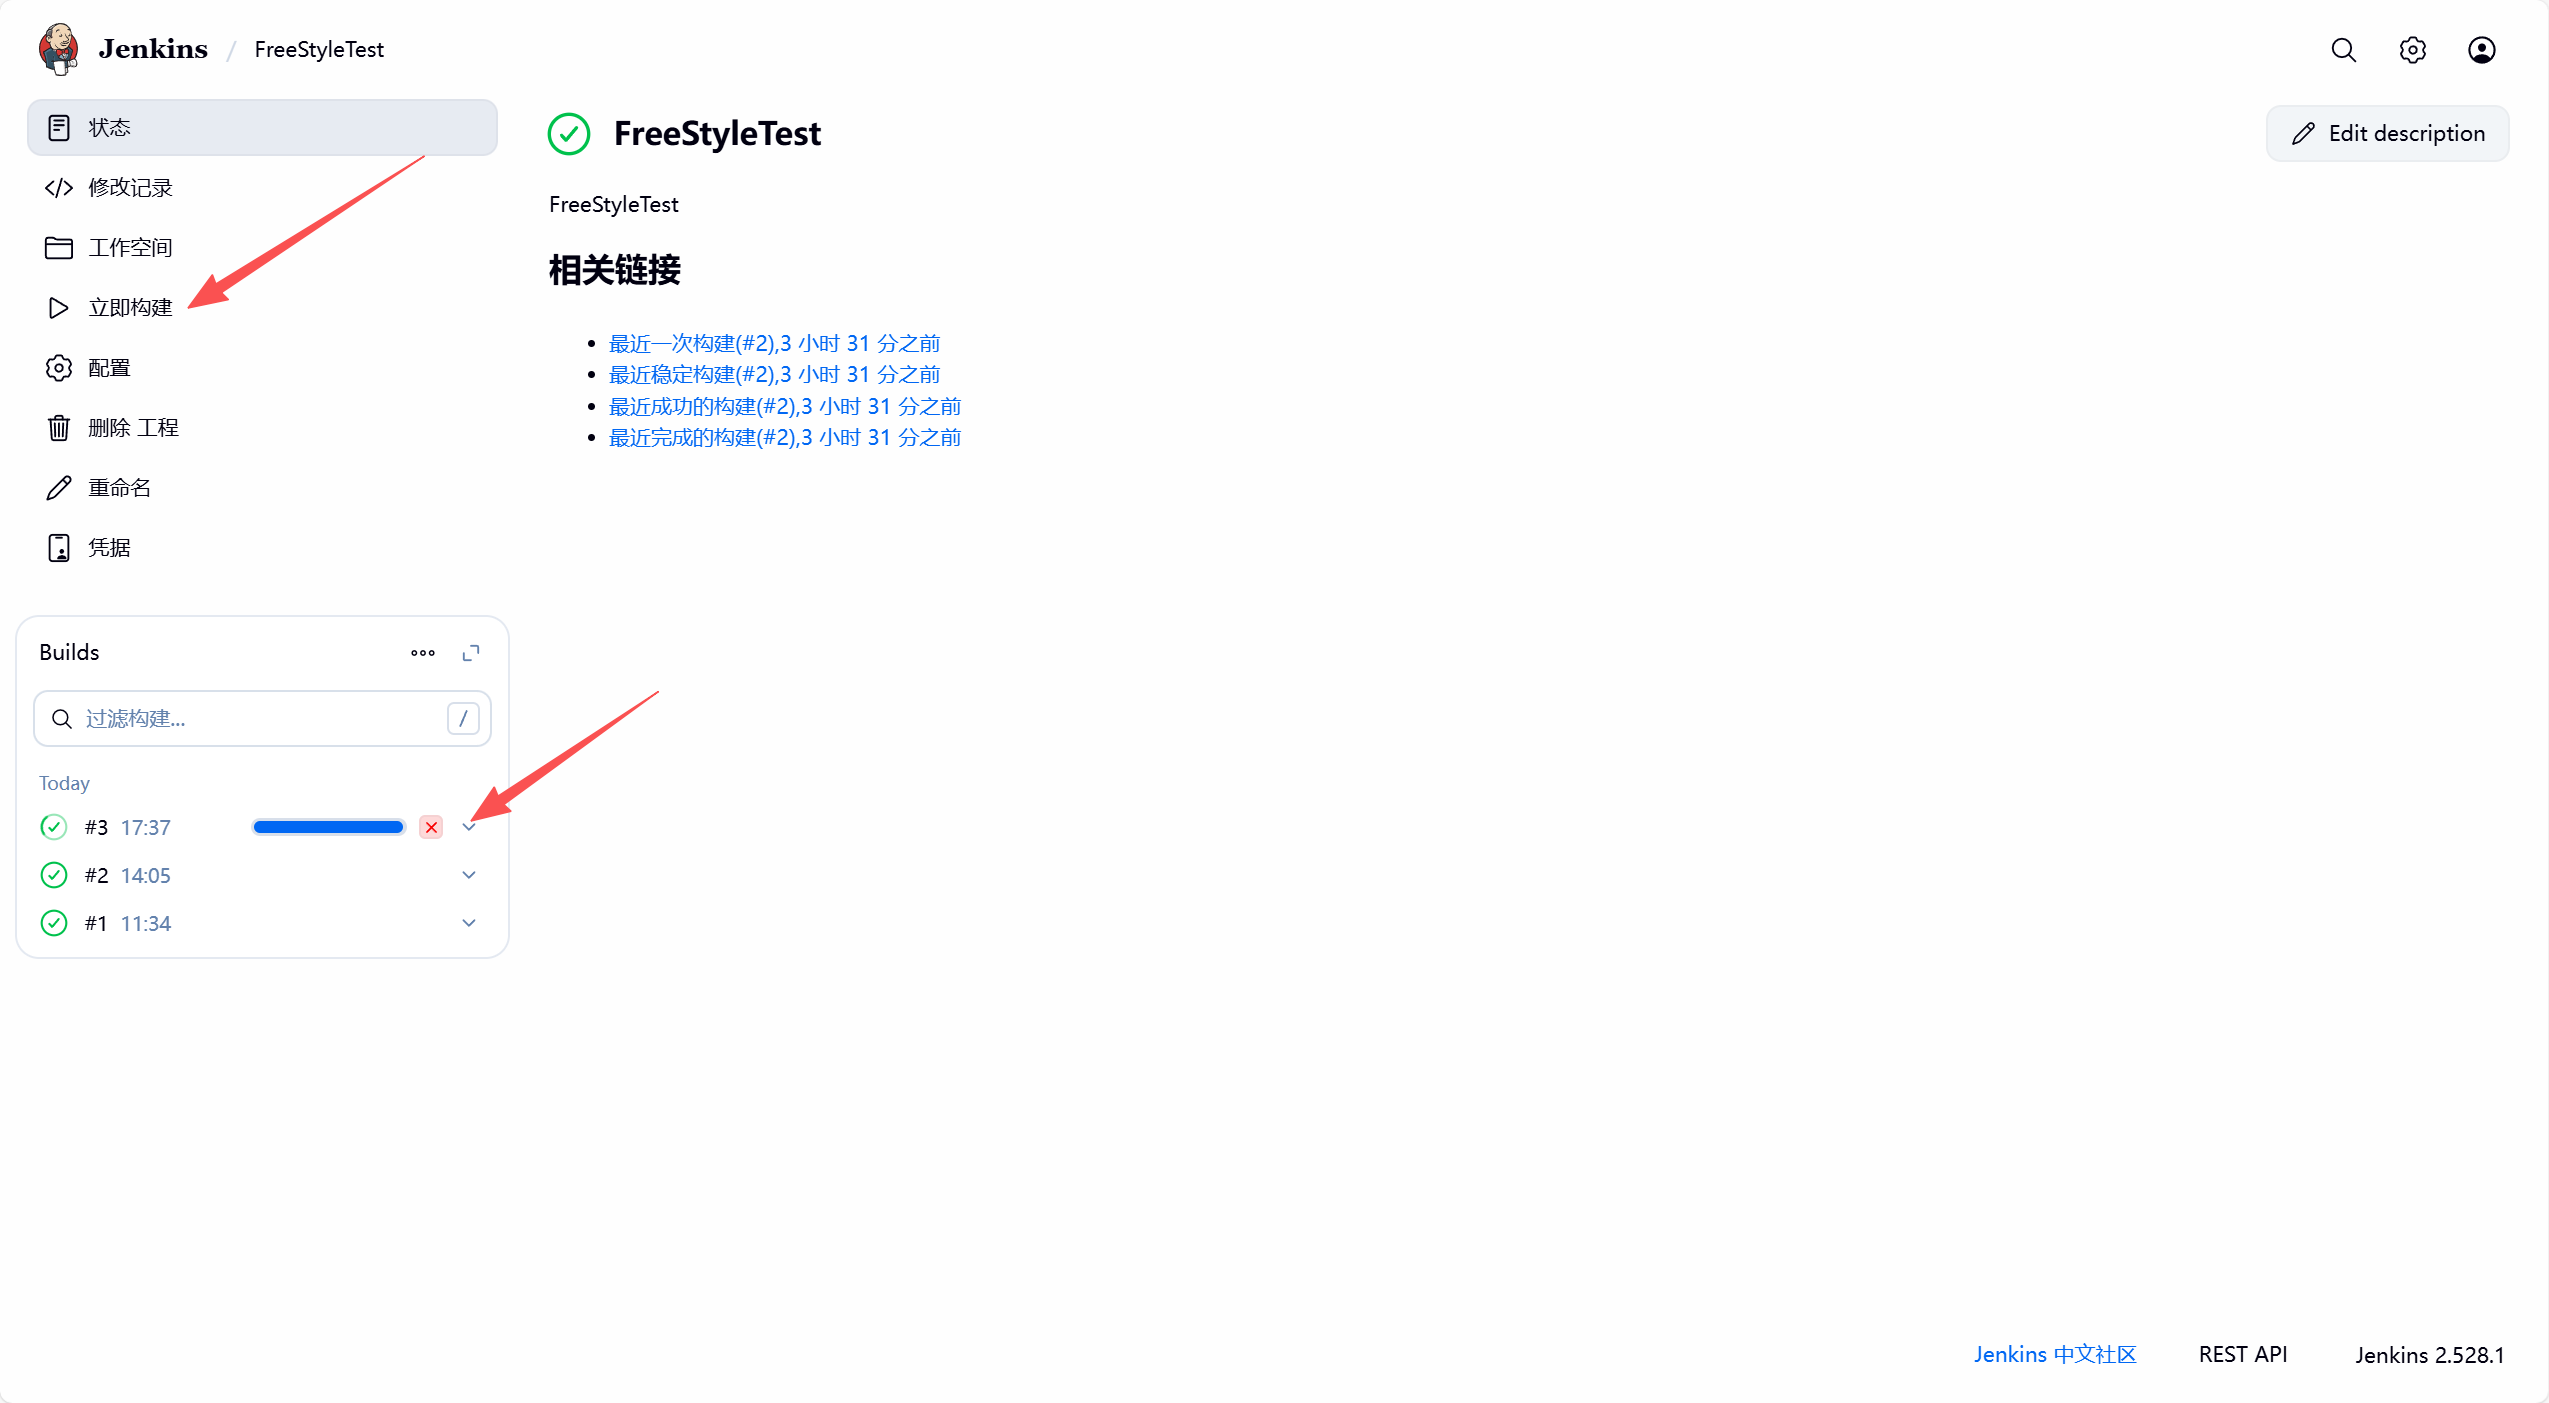
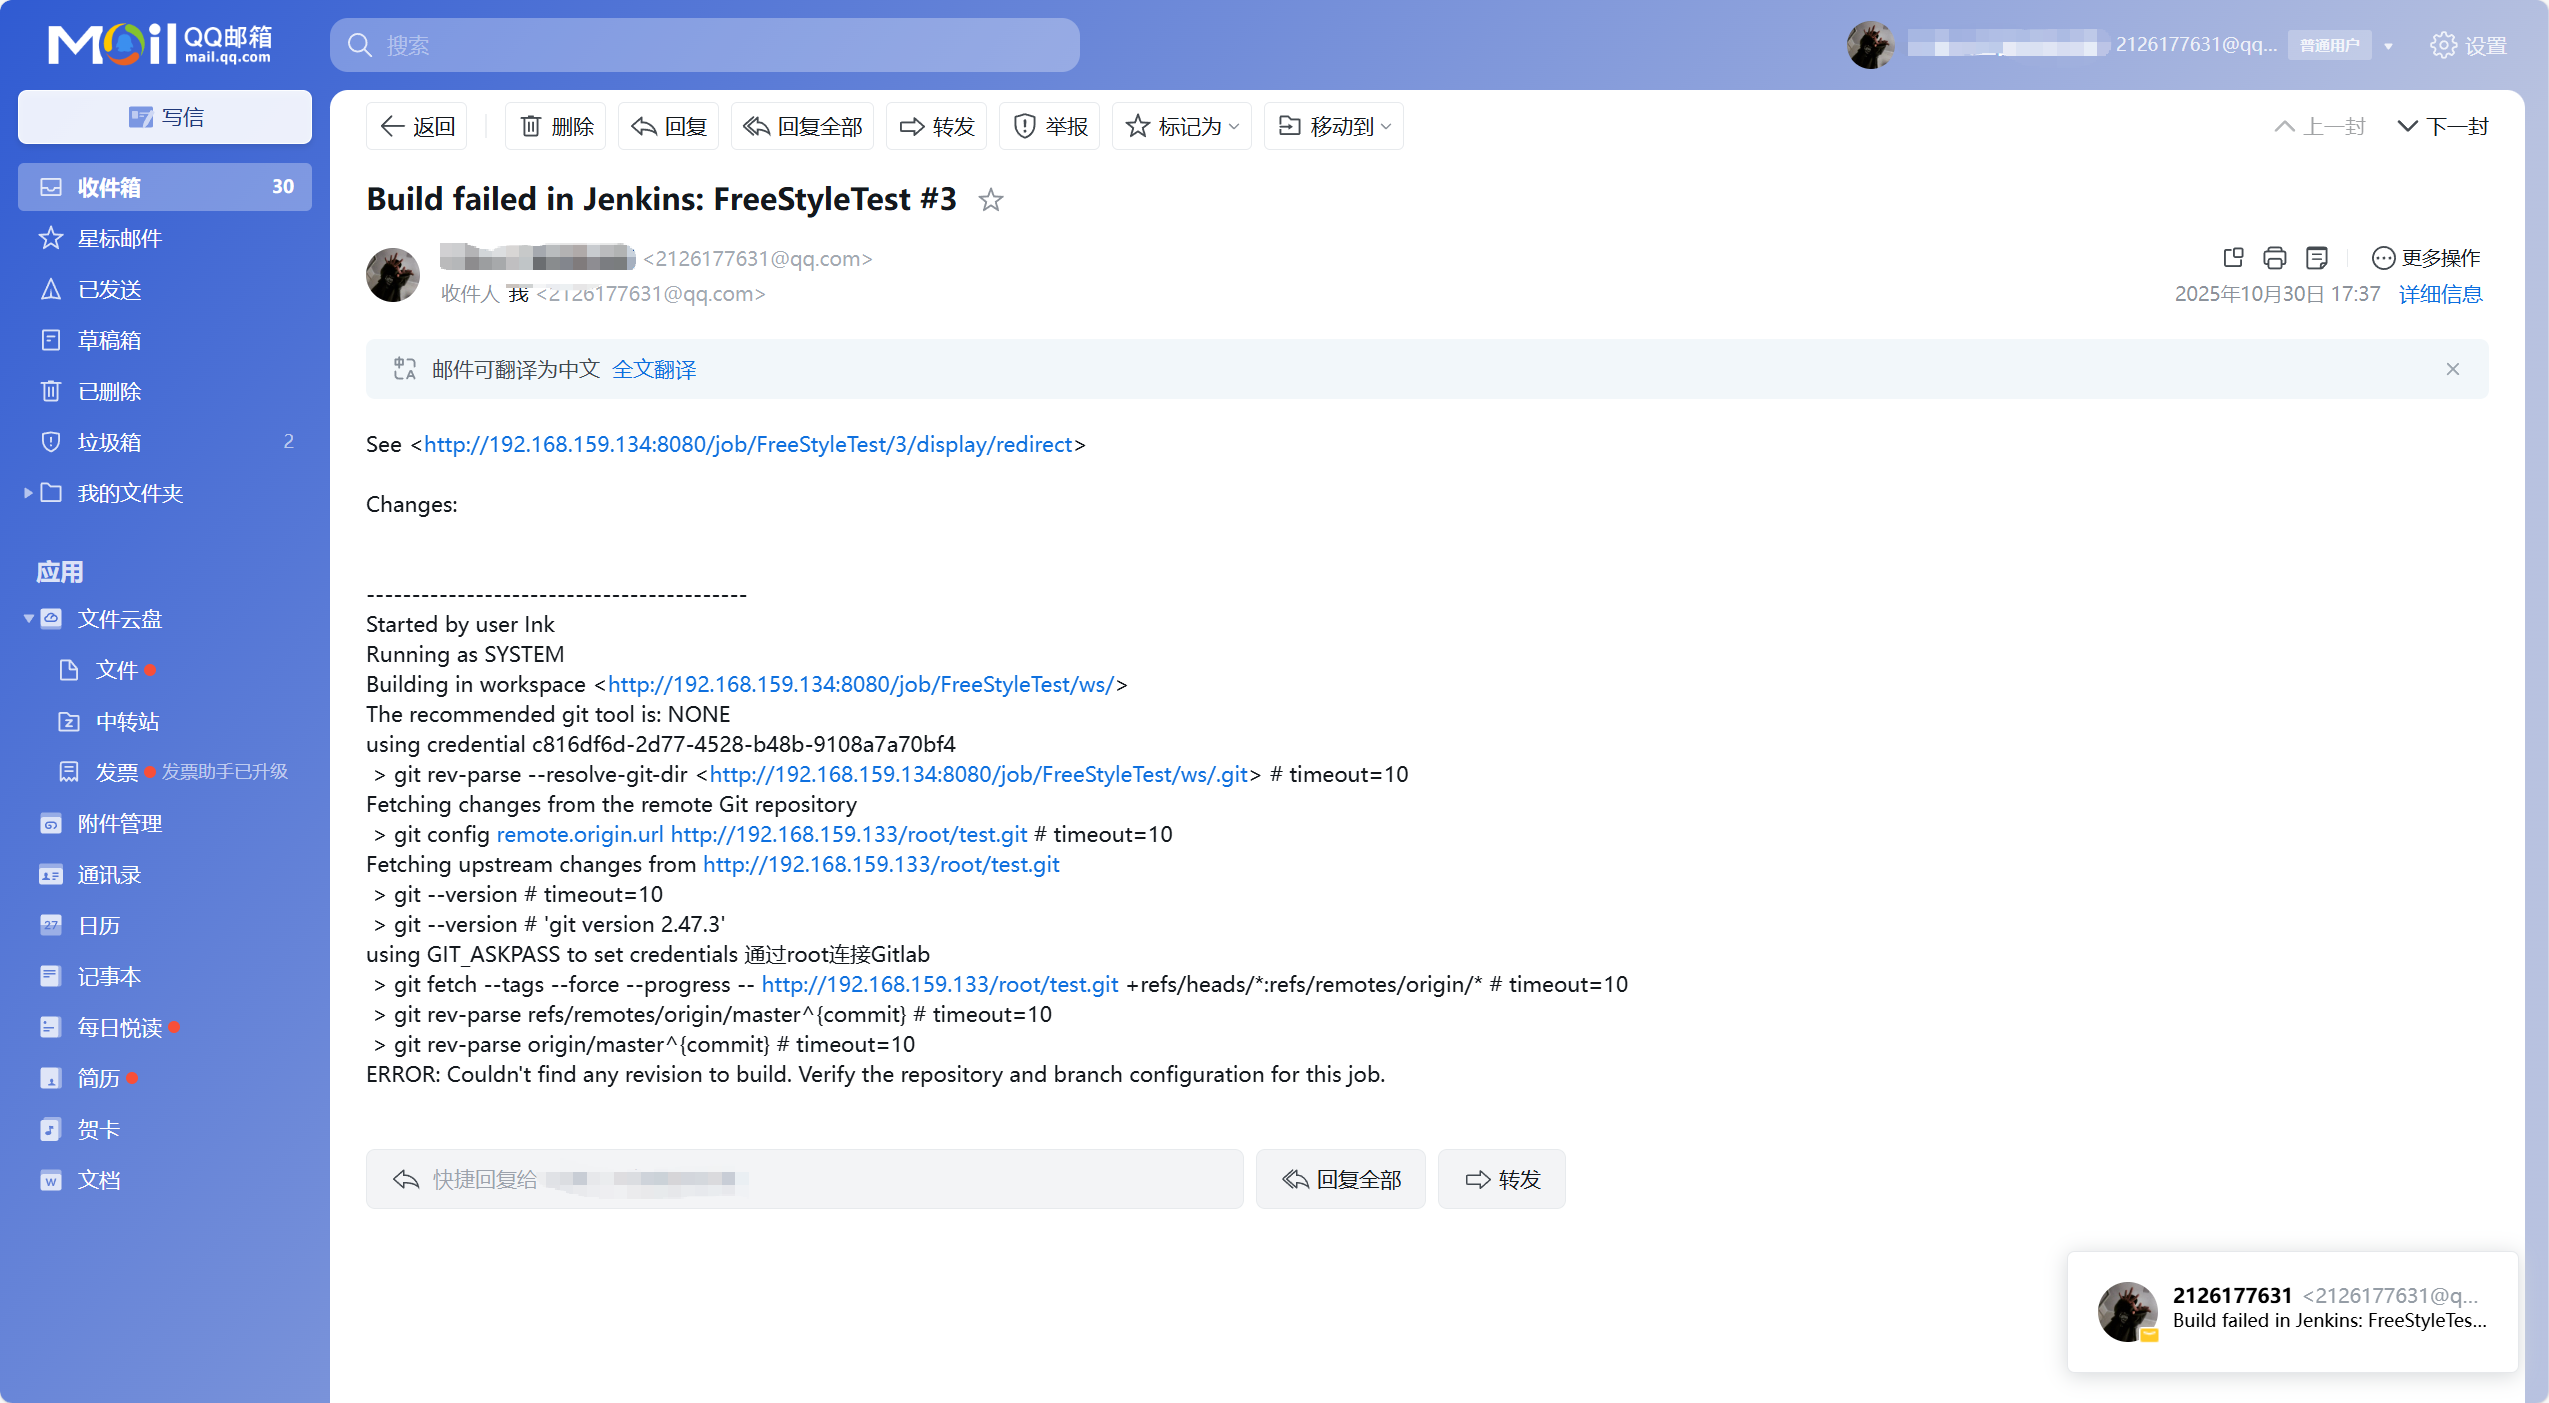
五、流水线
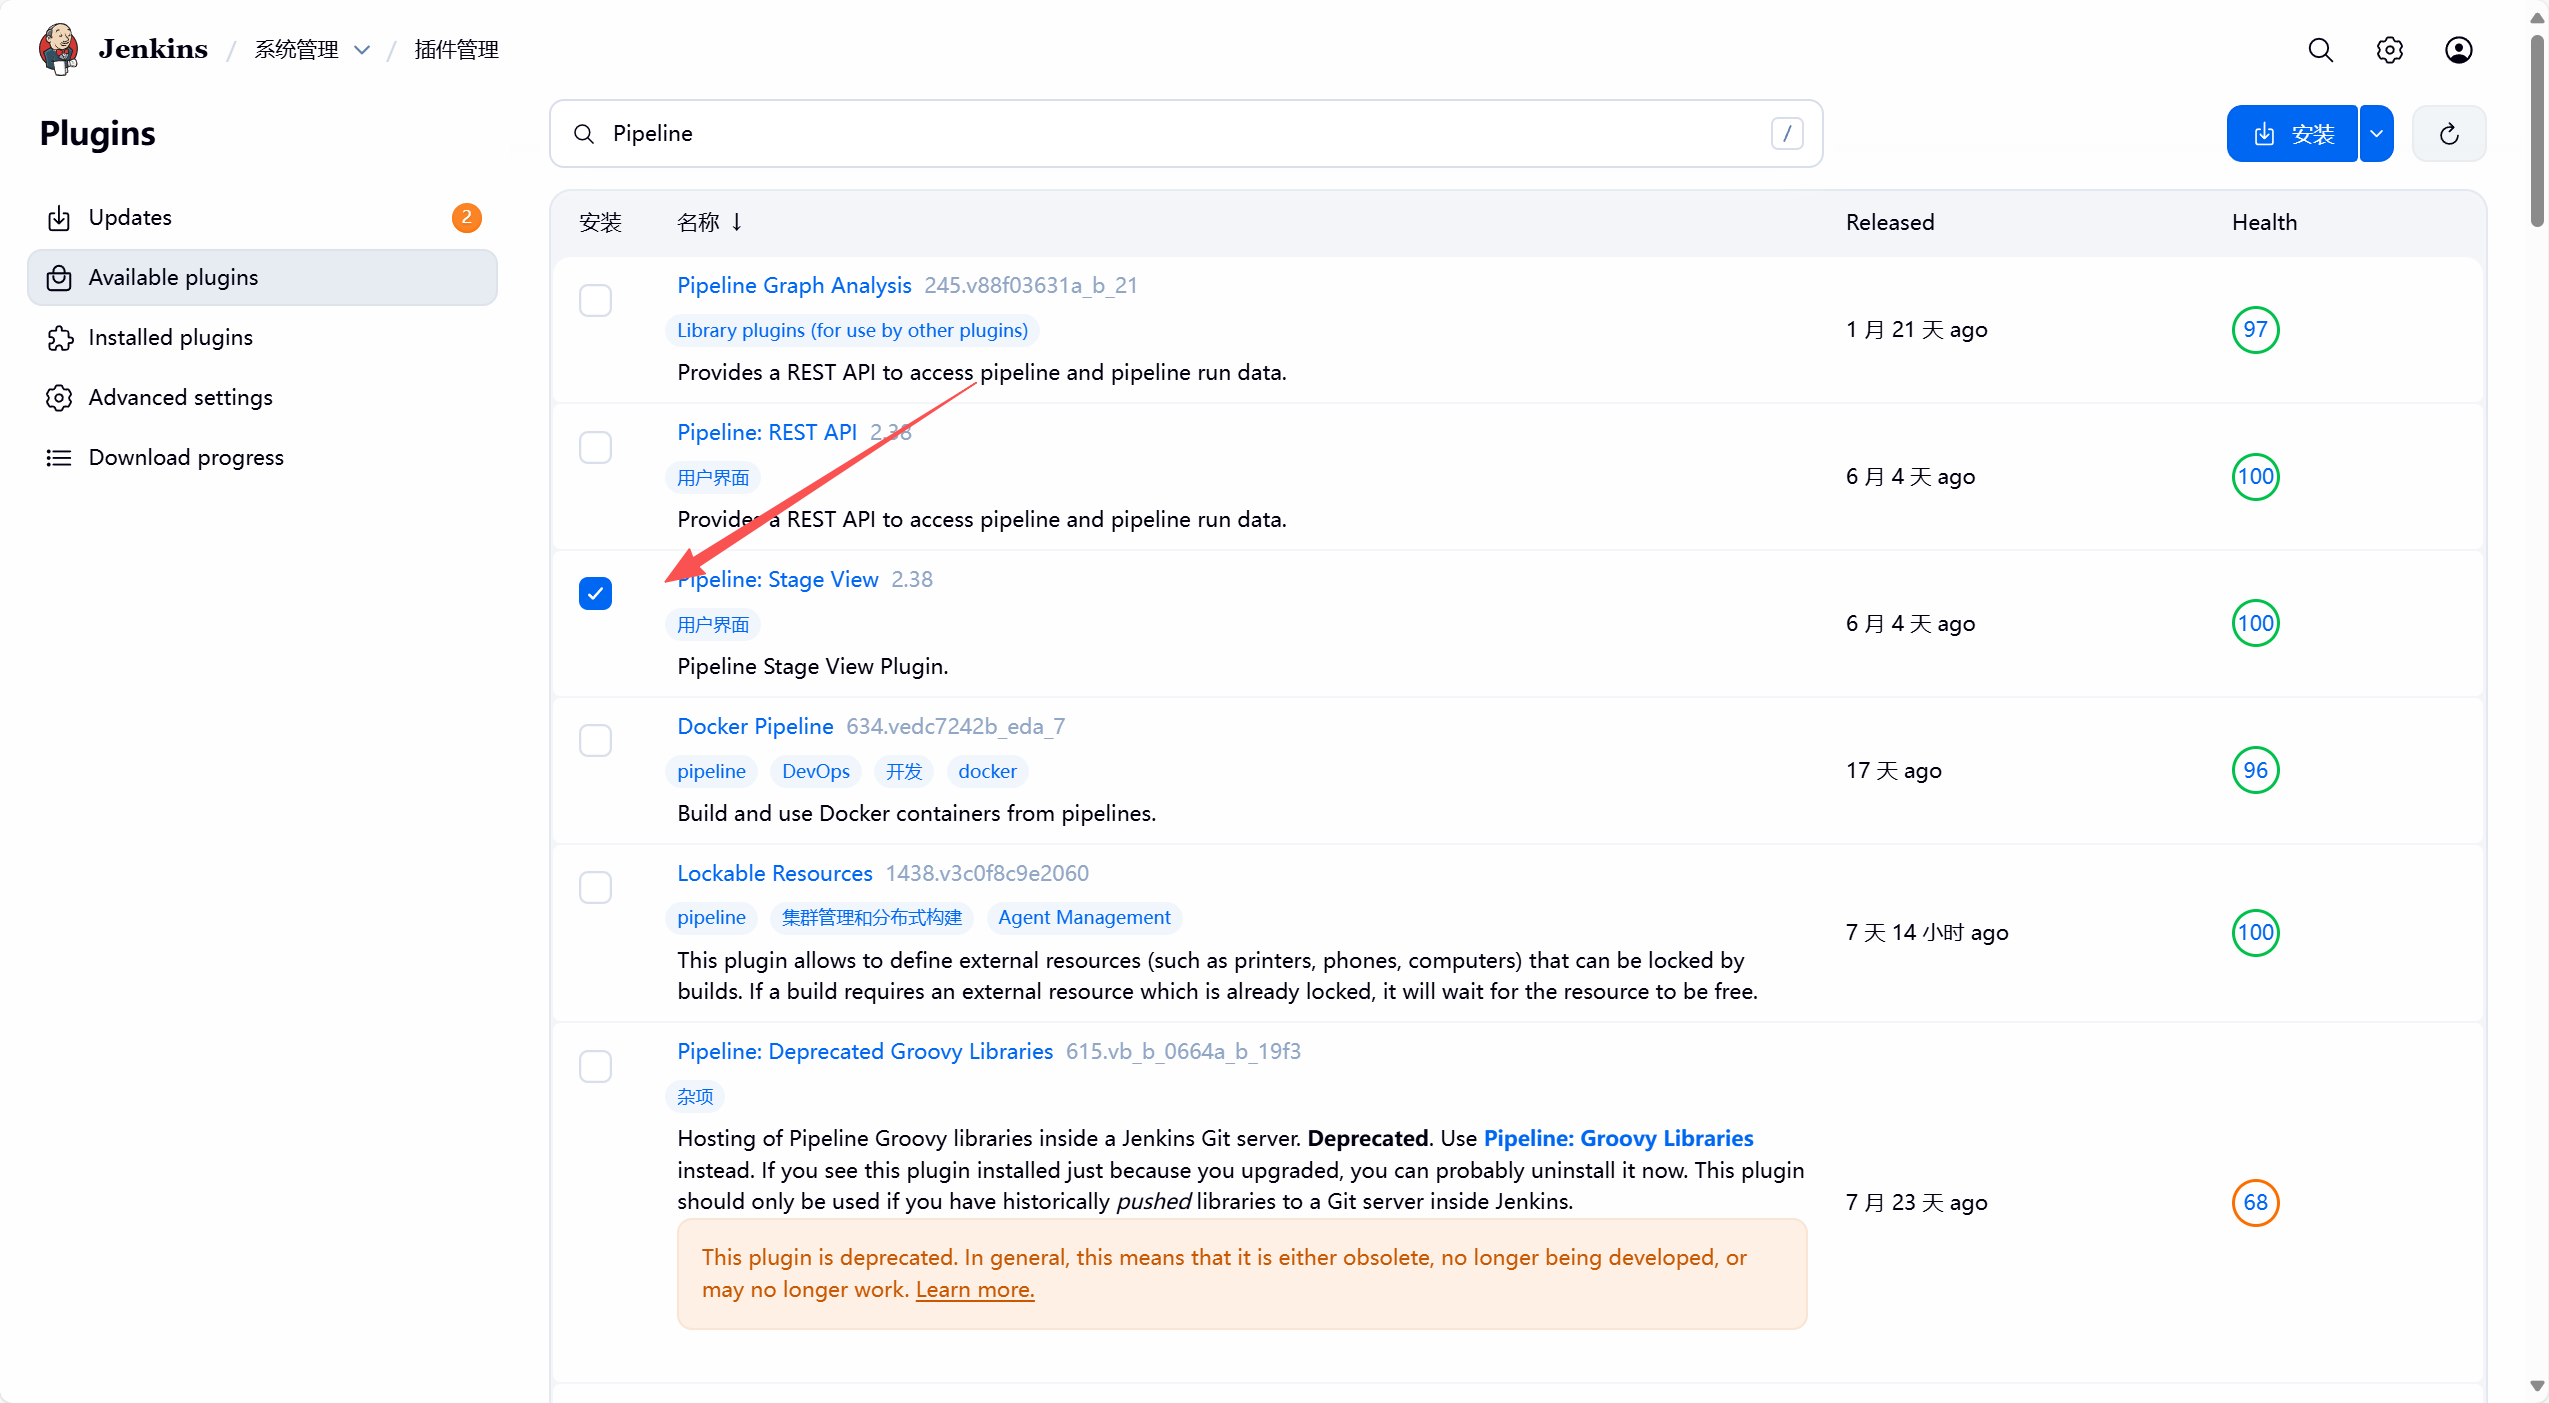
1. 安装插件
Pipeline 插件之前已经安装了,仅需要安装Pipeline: Stage View
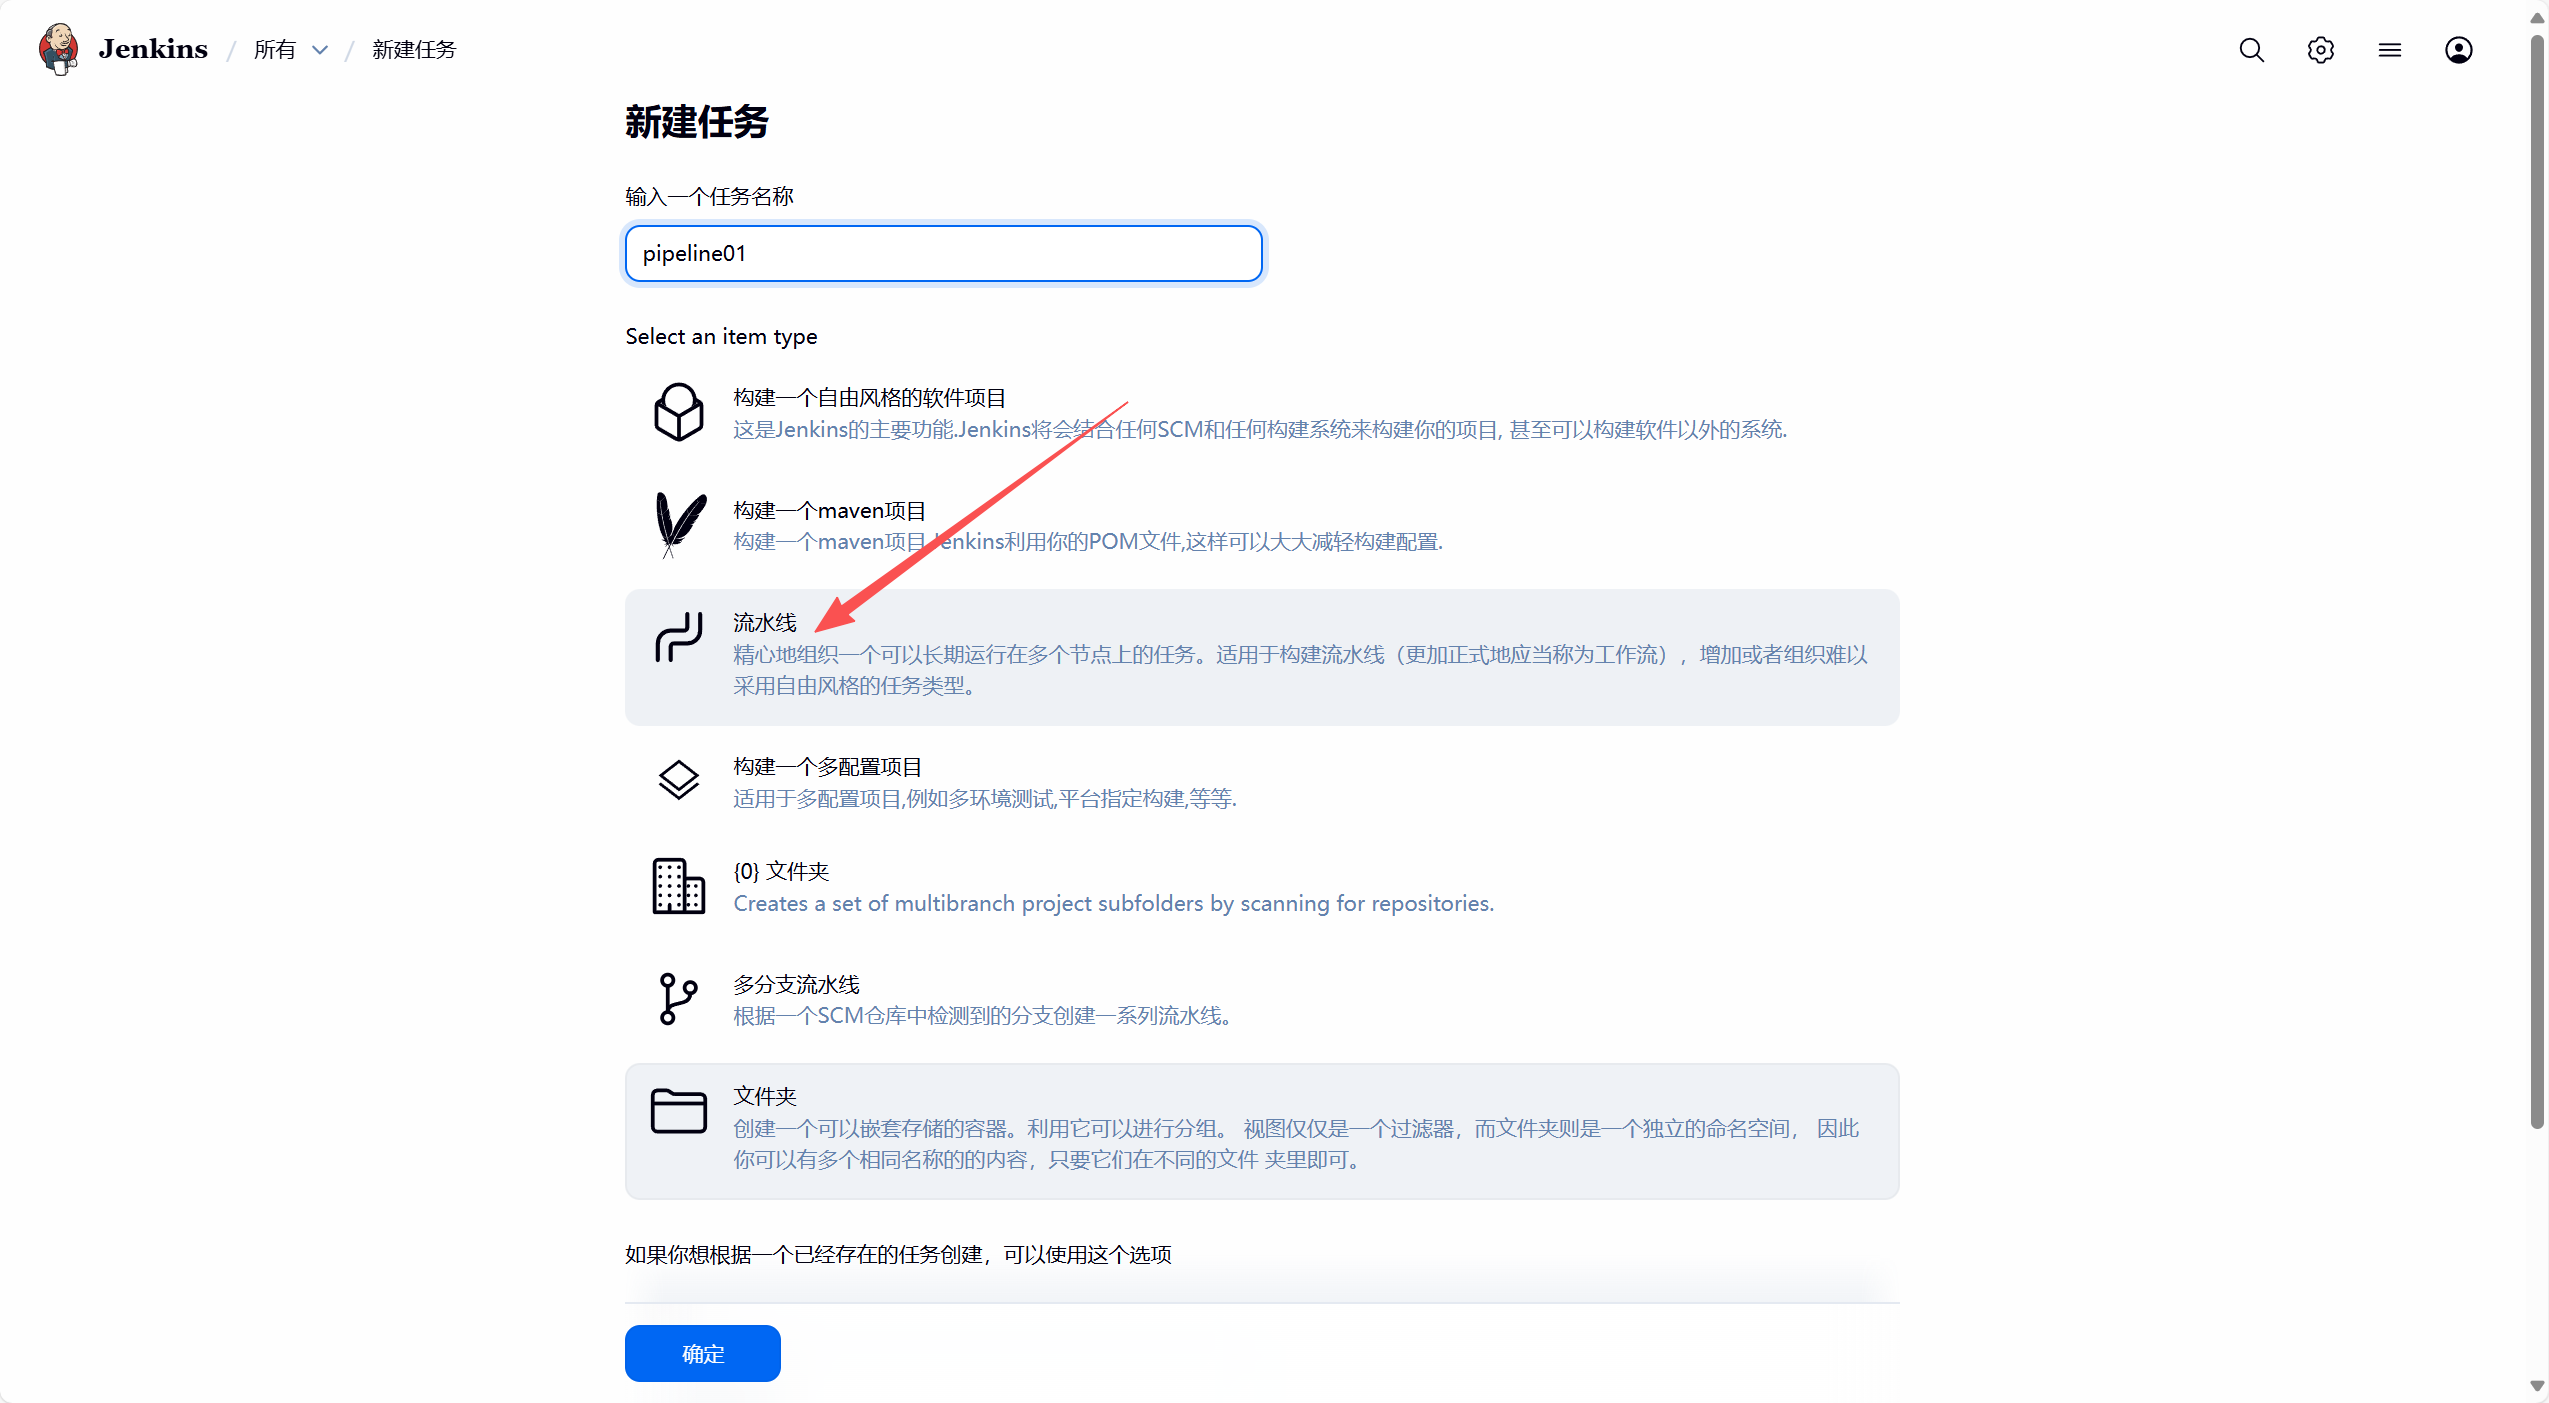
流水线创建有3种方式:
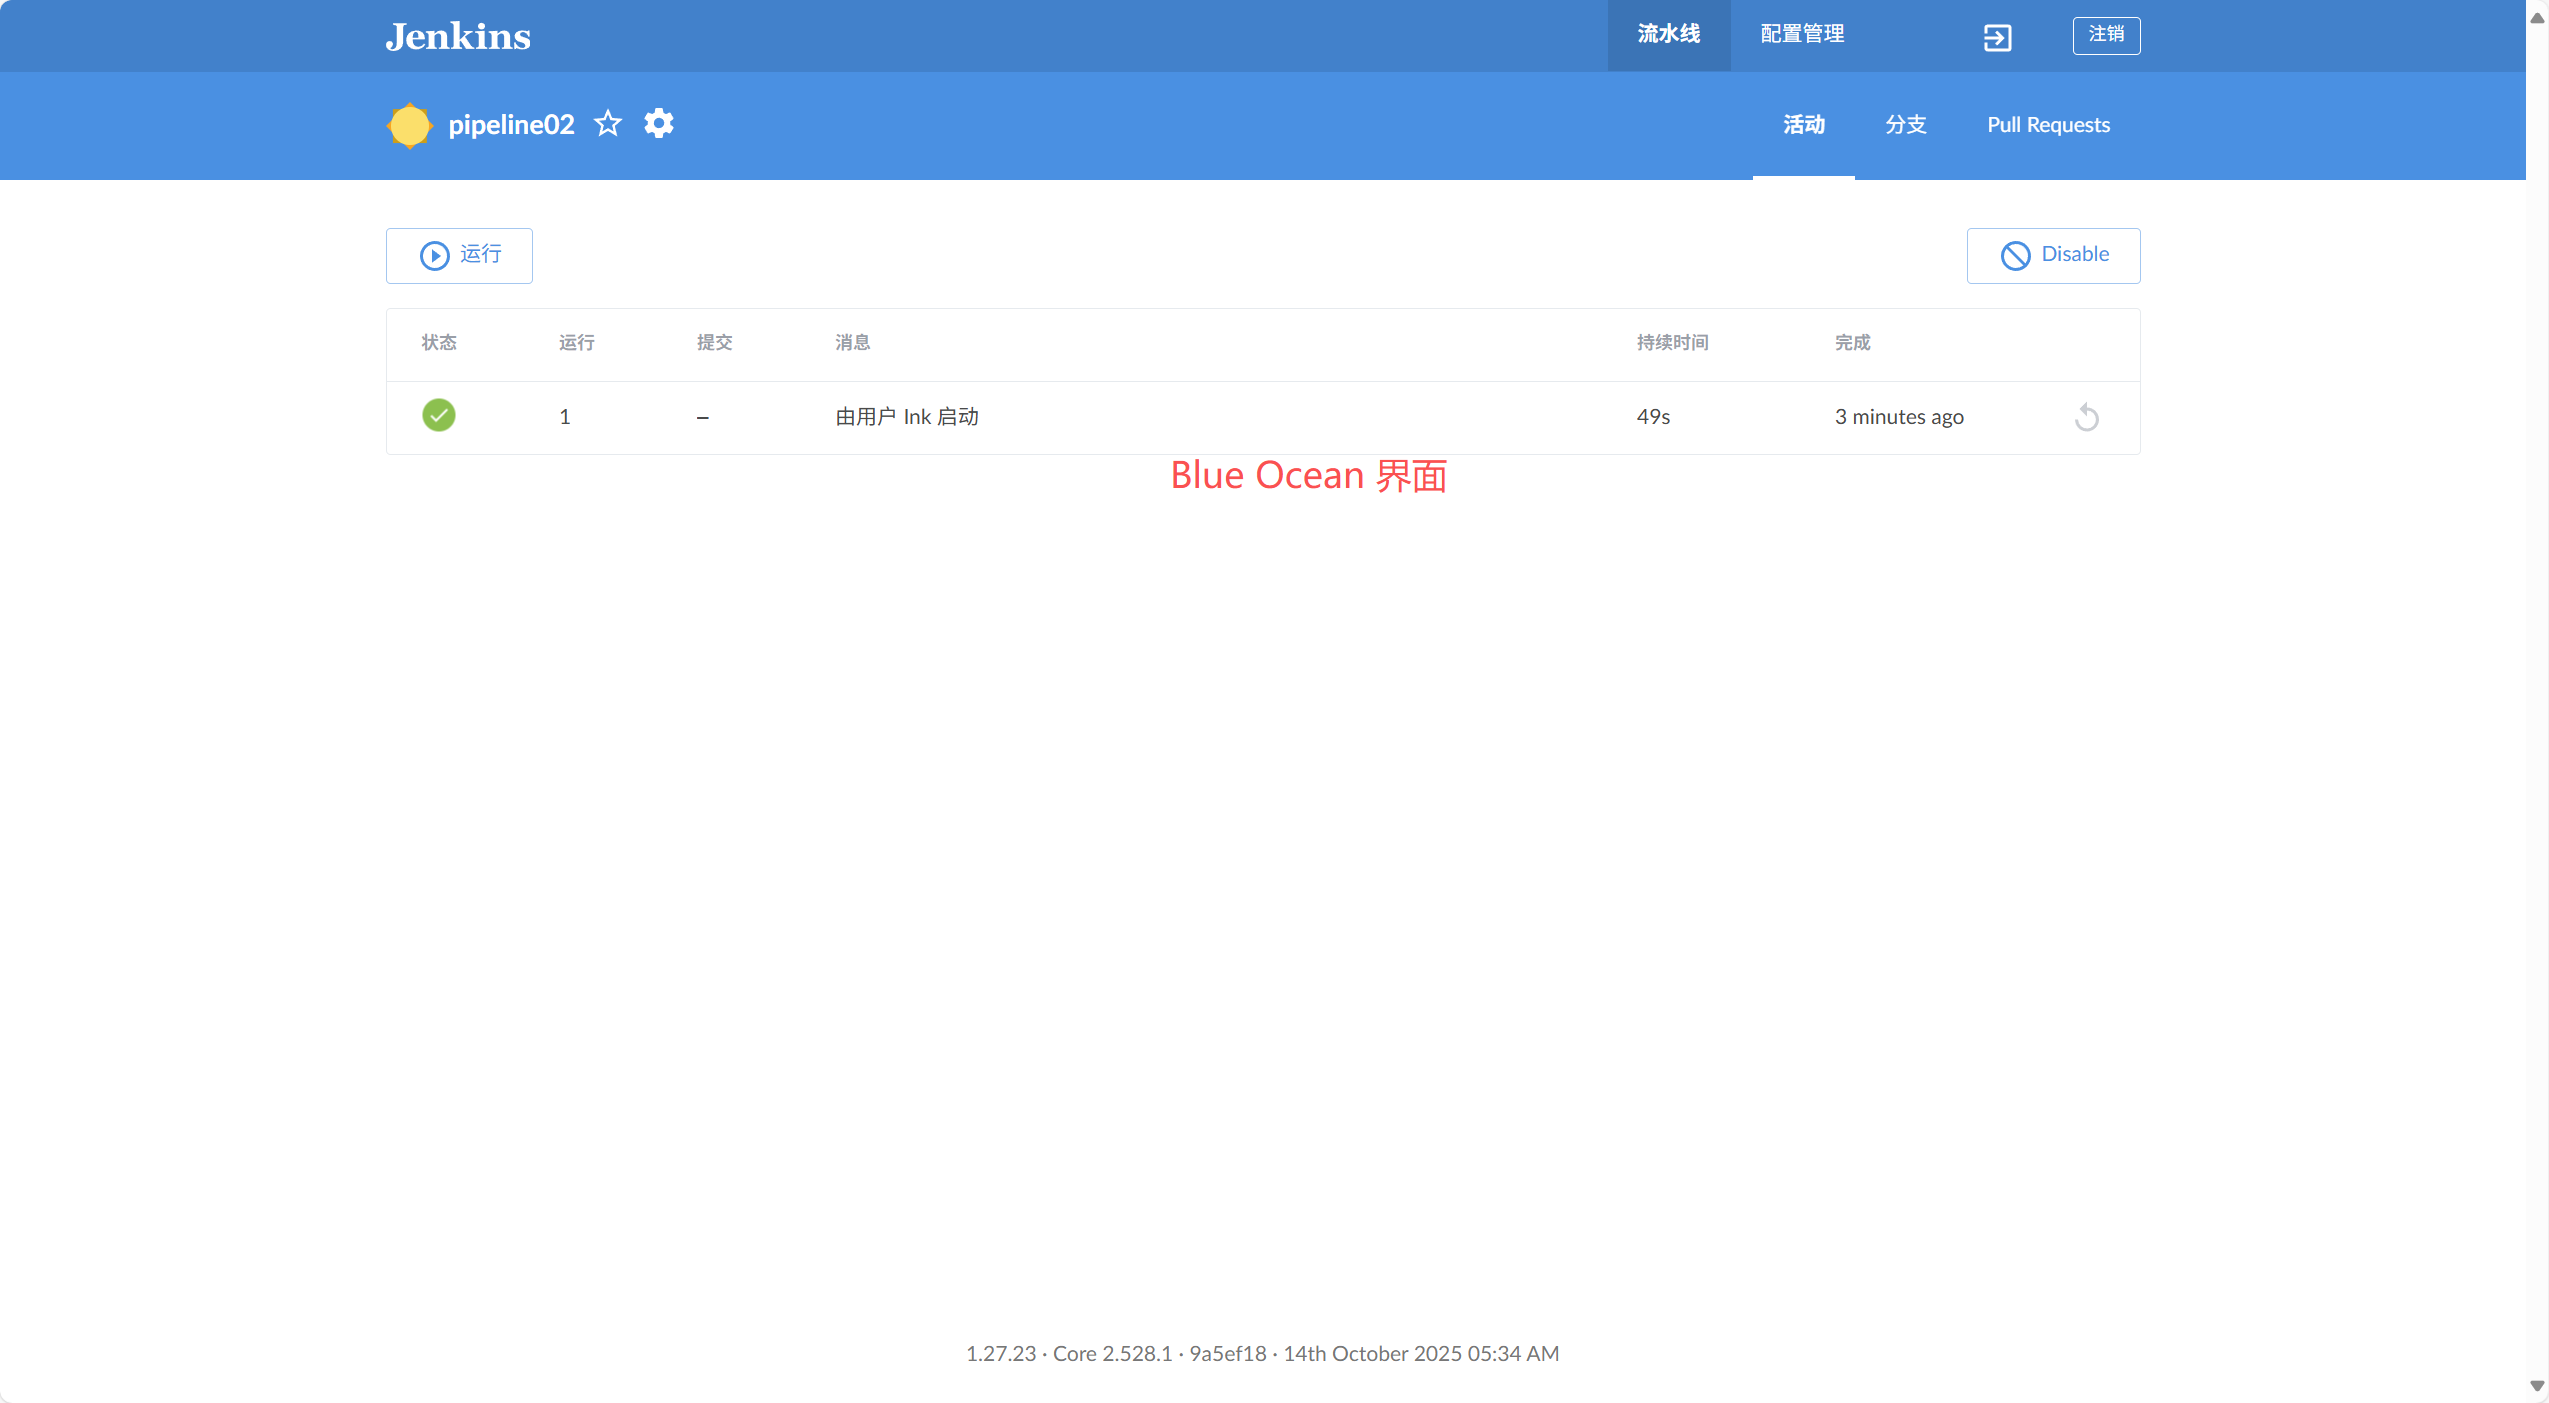
1.通过 Blue Ocean - 在 Blue Ocean 中设置一个流水线项目后,Blue Ocean UI 会帮你编写流水线的
Jenkinsfile文件并提交到源代码管理系统。2.通过经典 UI - 尽管 Jenkins 支持在经典 UI 中直接进入流水线,但通常认为最好的实践是在
Jenkinsfile文件中定义流水线,Jenkins 之后会直接从源代码管理系统加载。3.在源码管理系统中定义 - 你可以手动编写一个
Jenkinsfile文件,然后提交到项目的源代码管理仓库中。
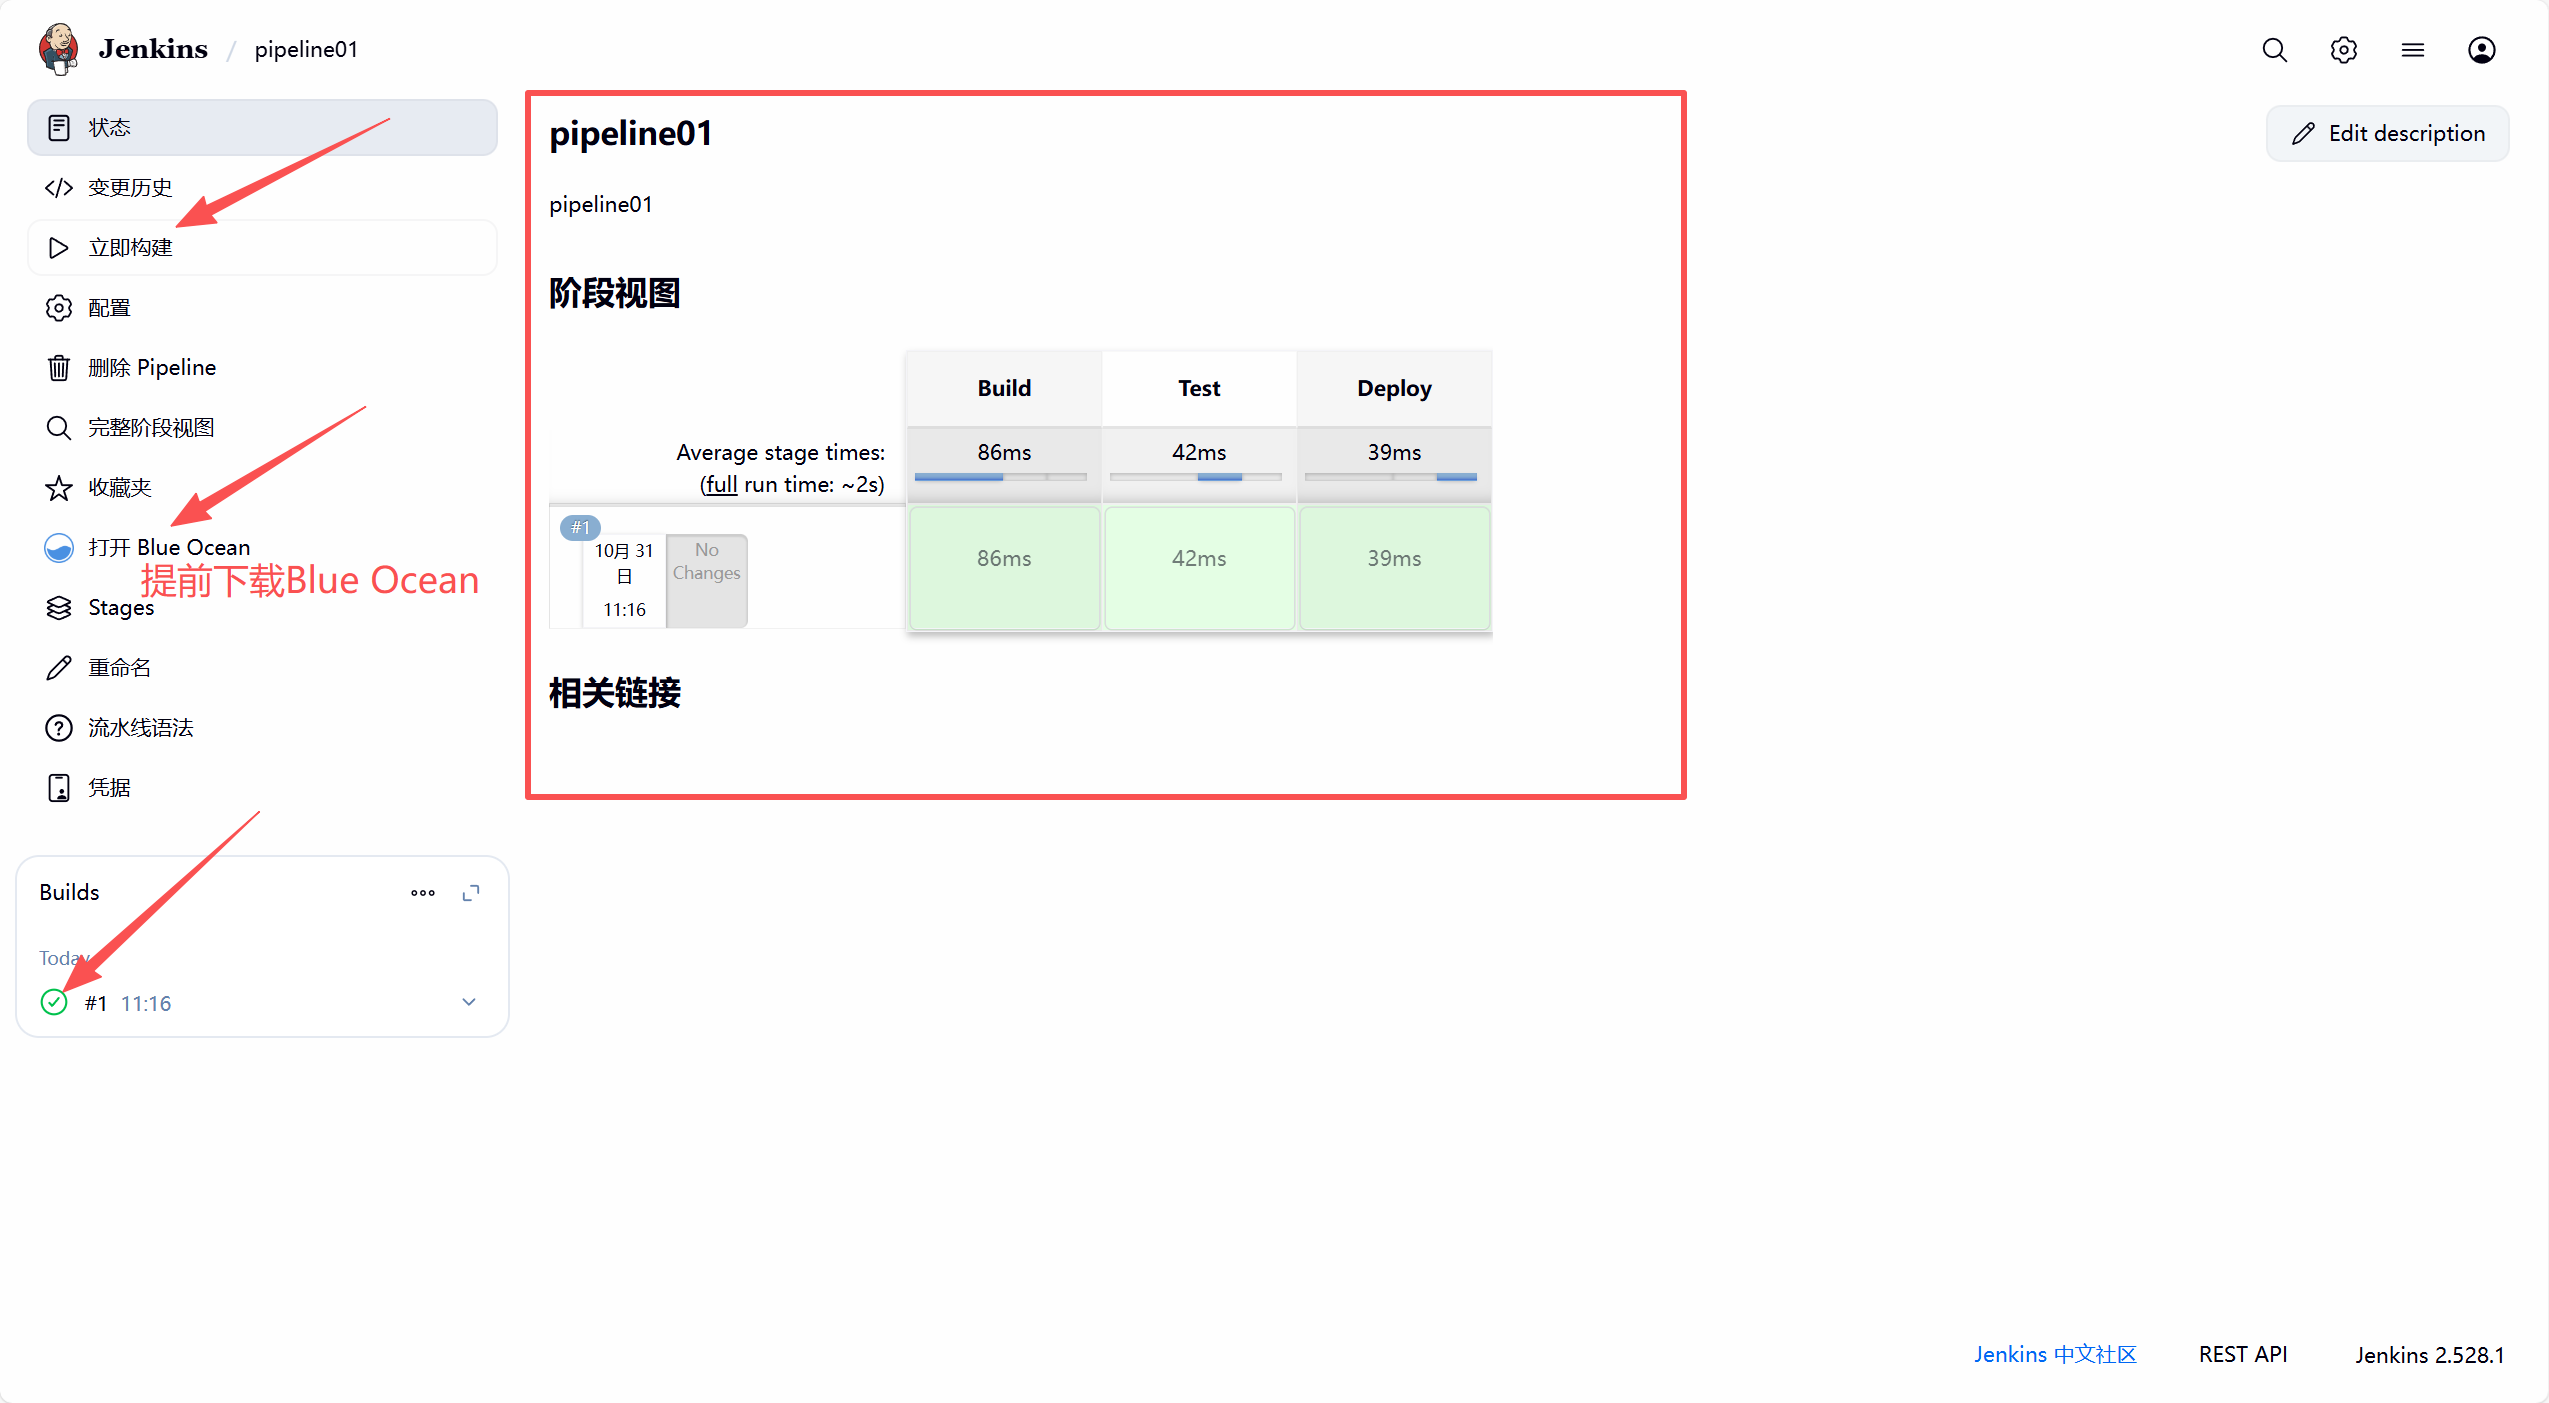
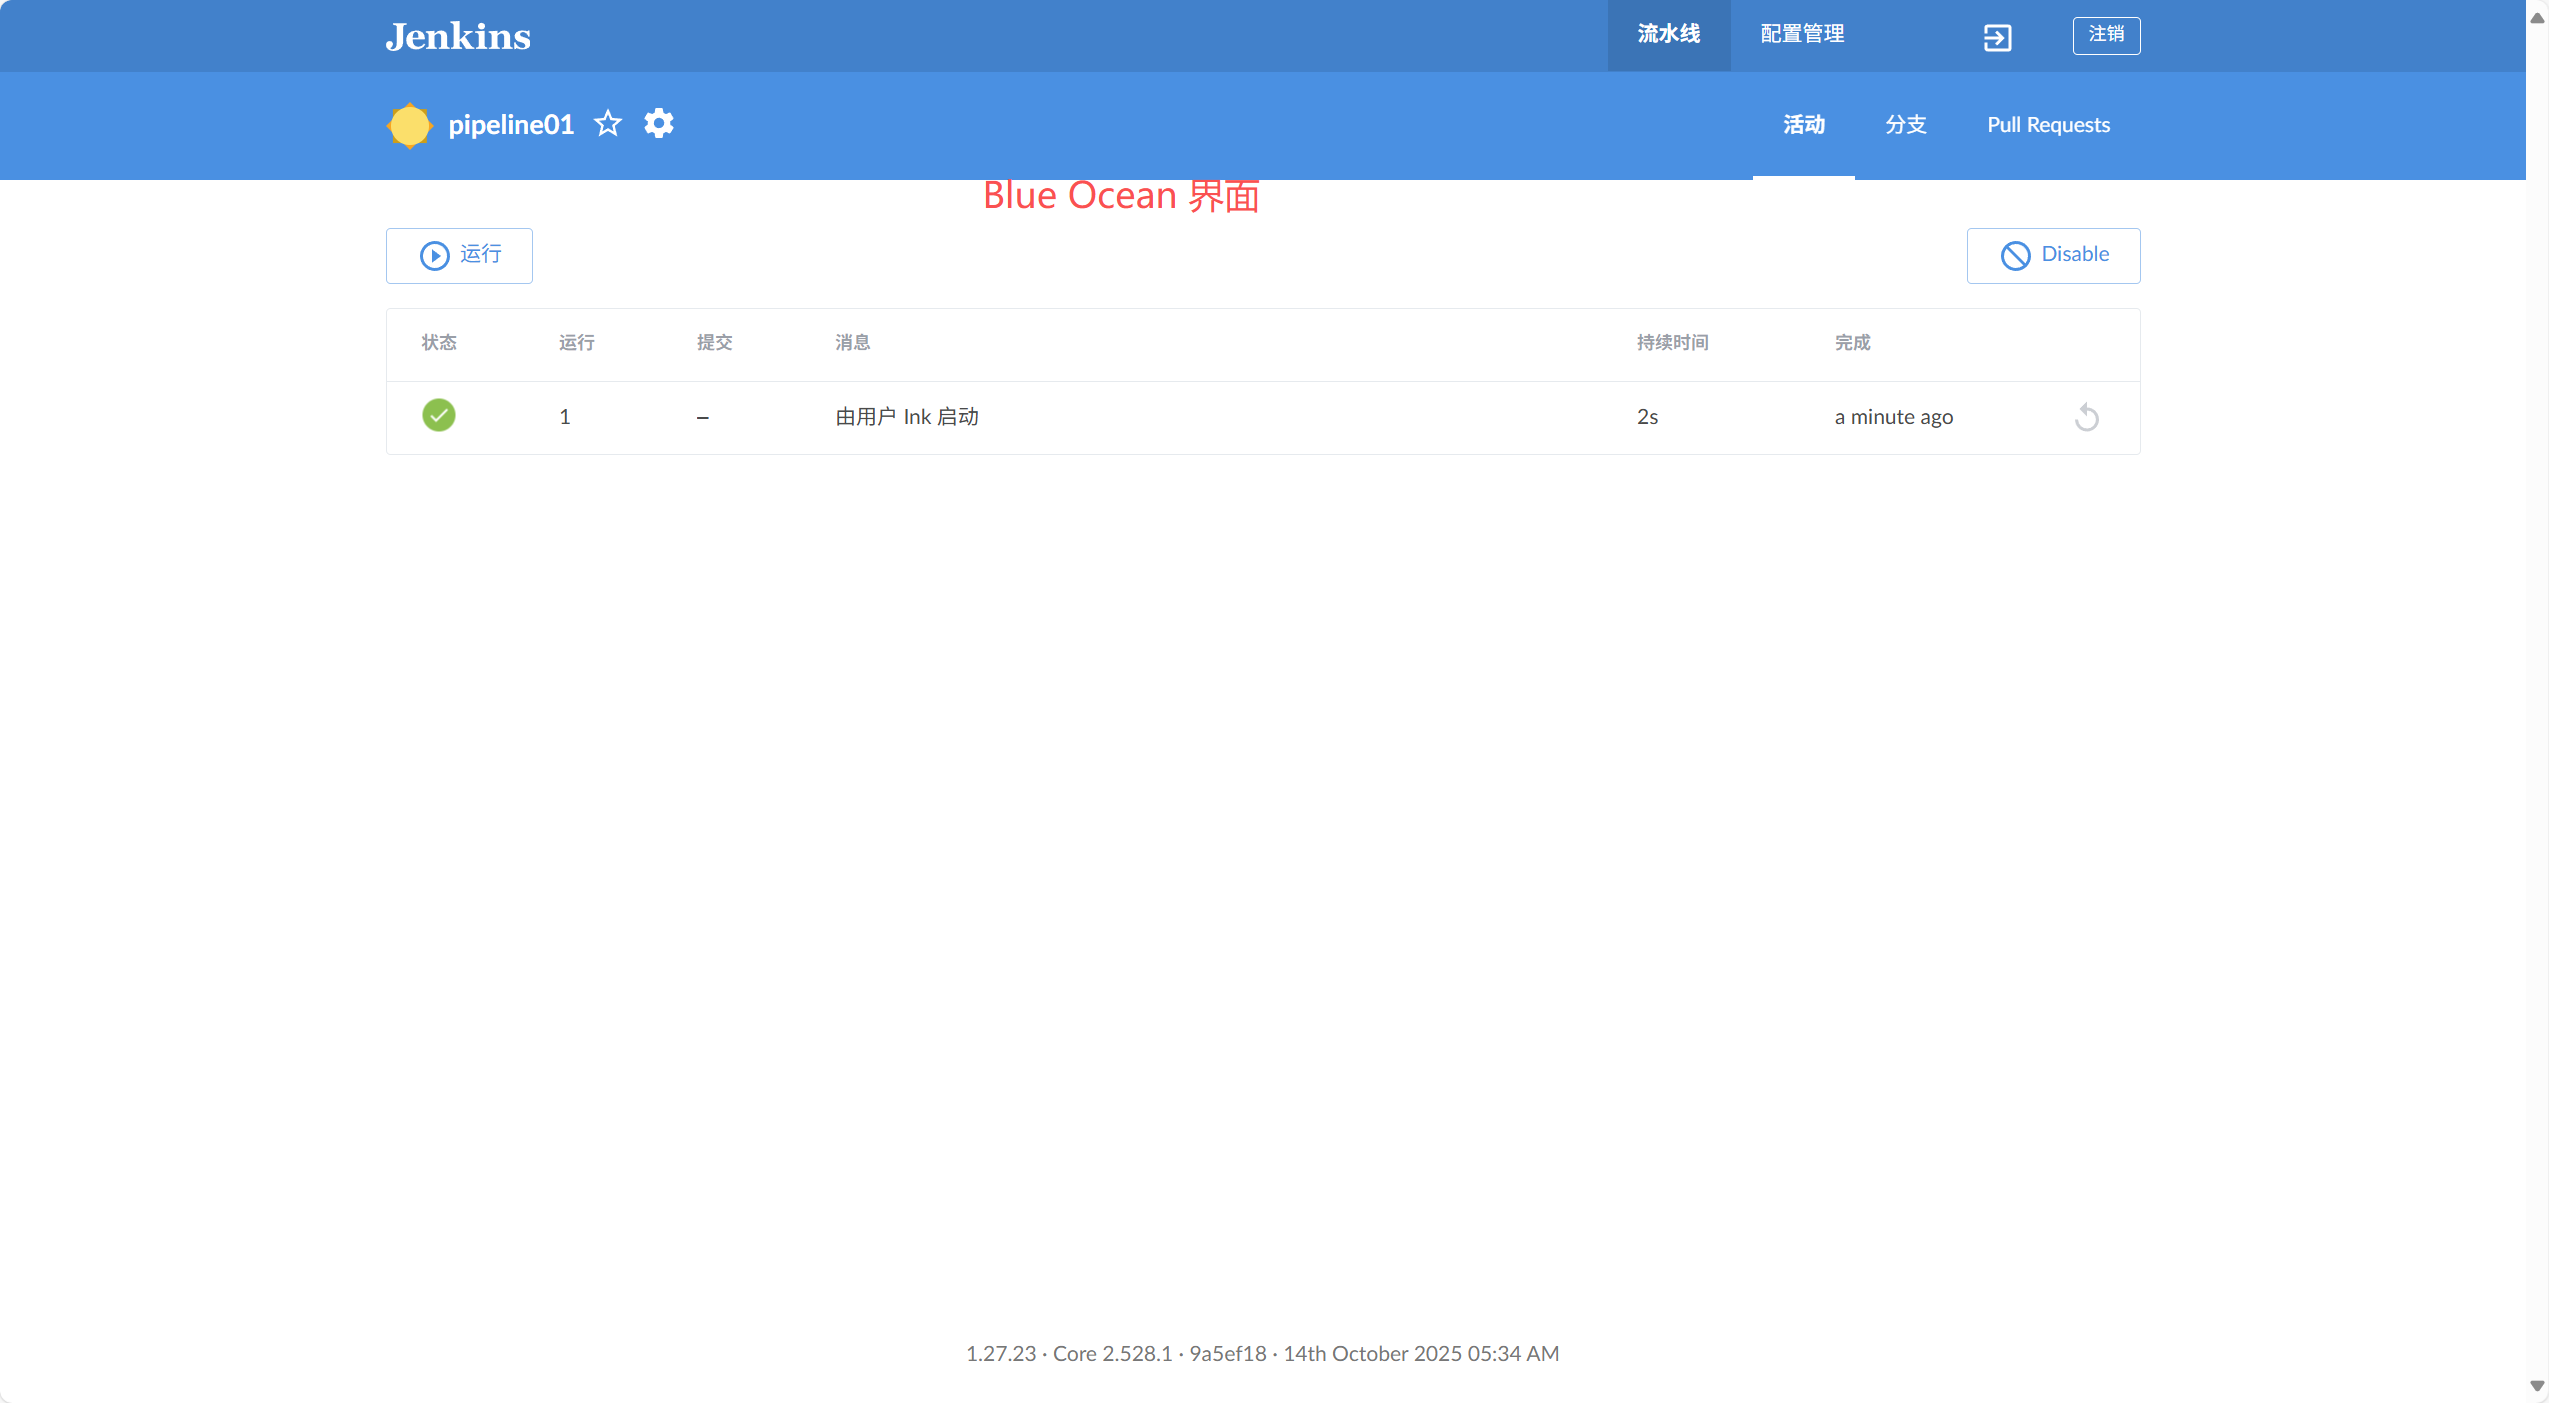
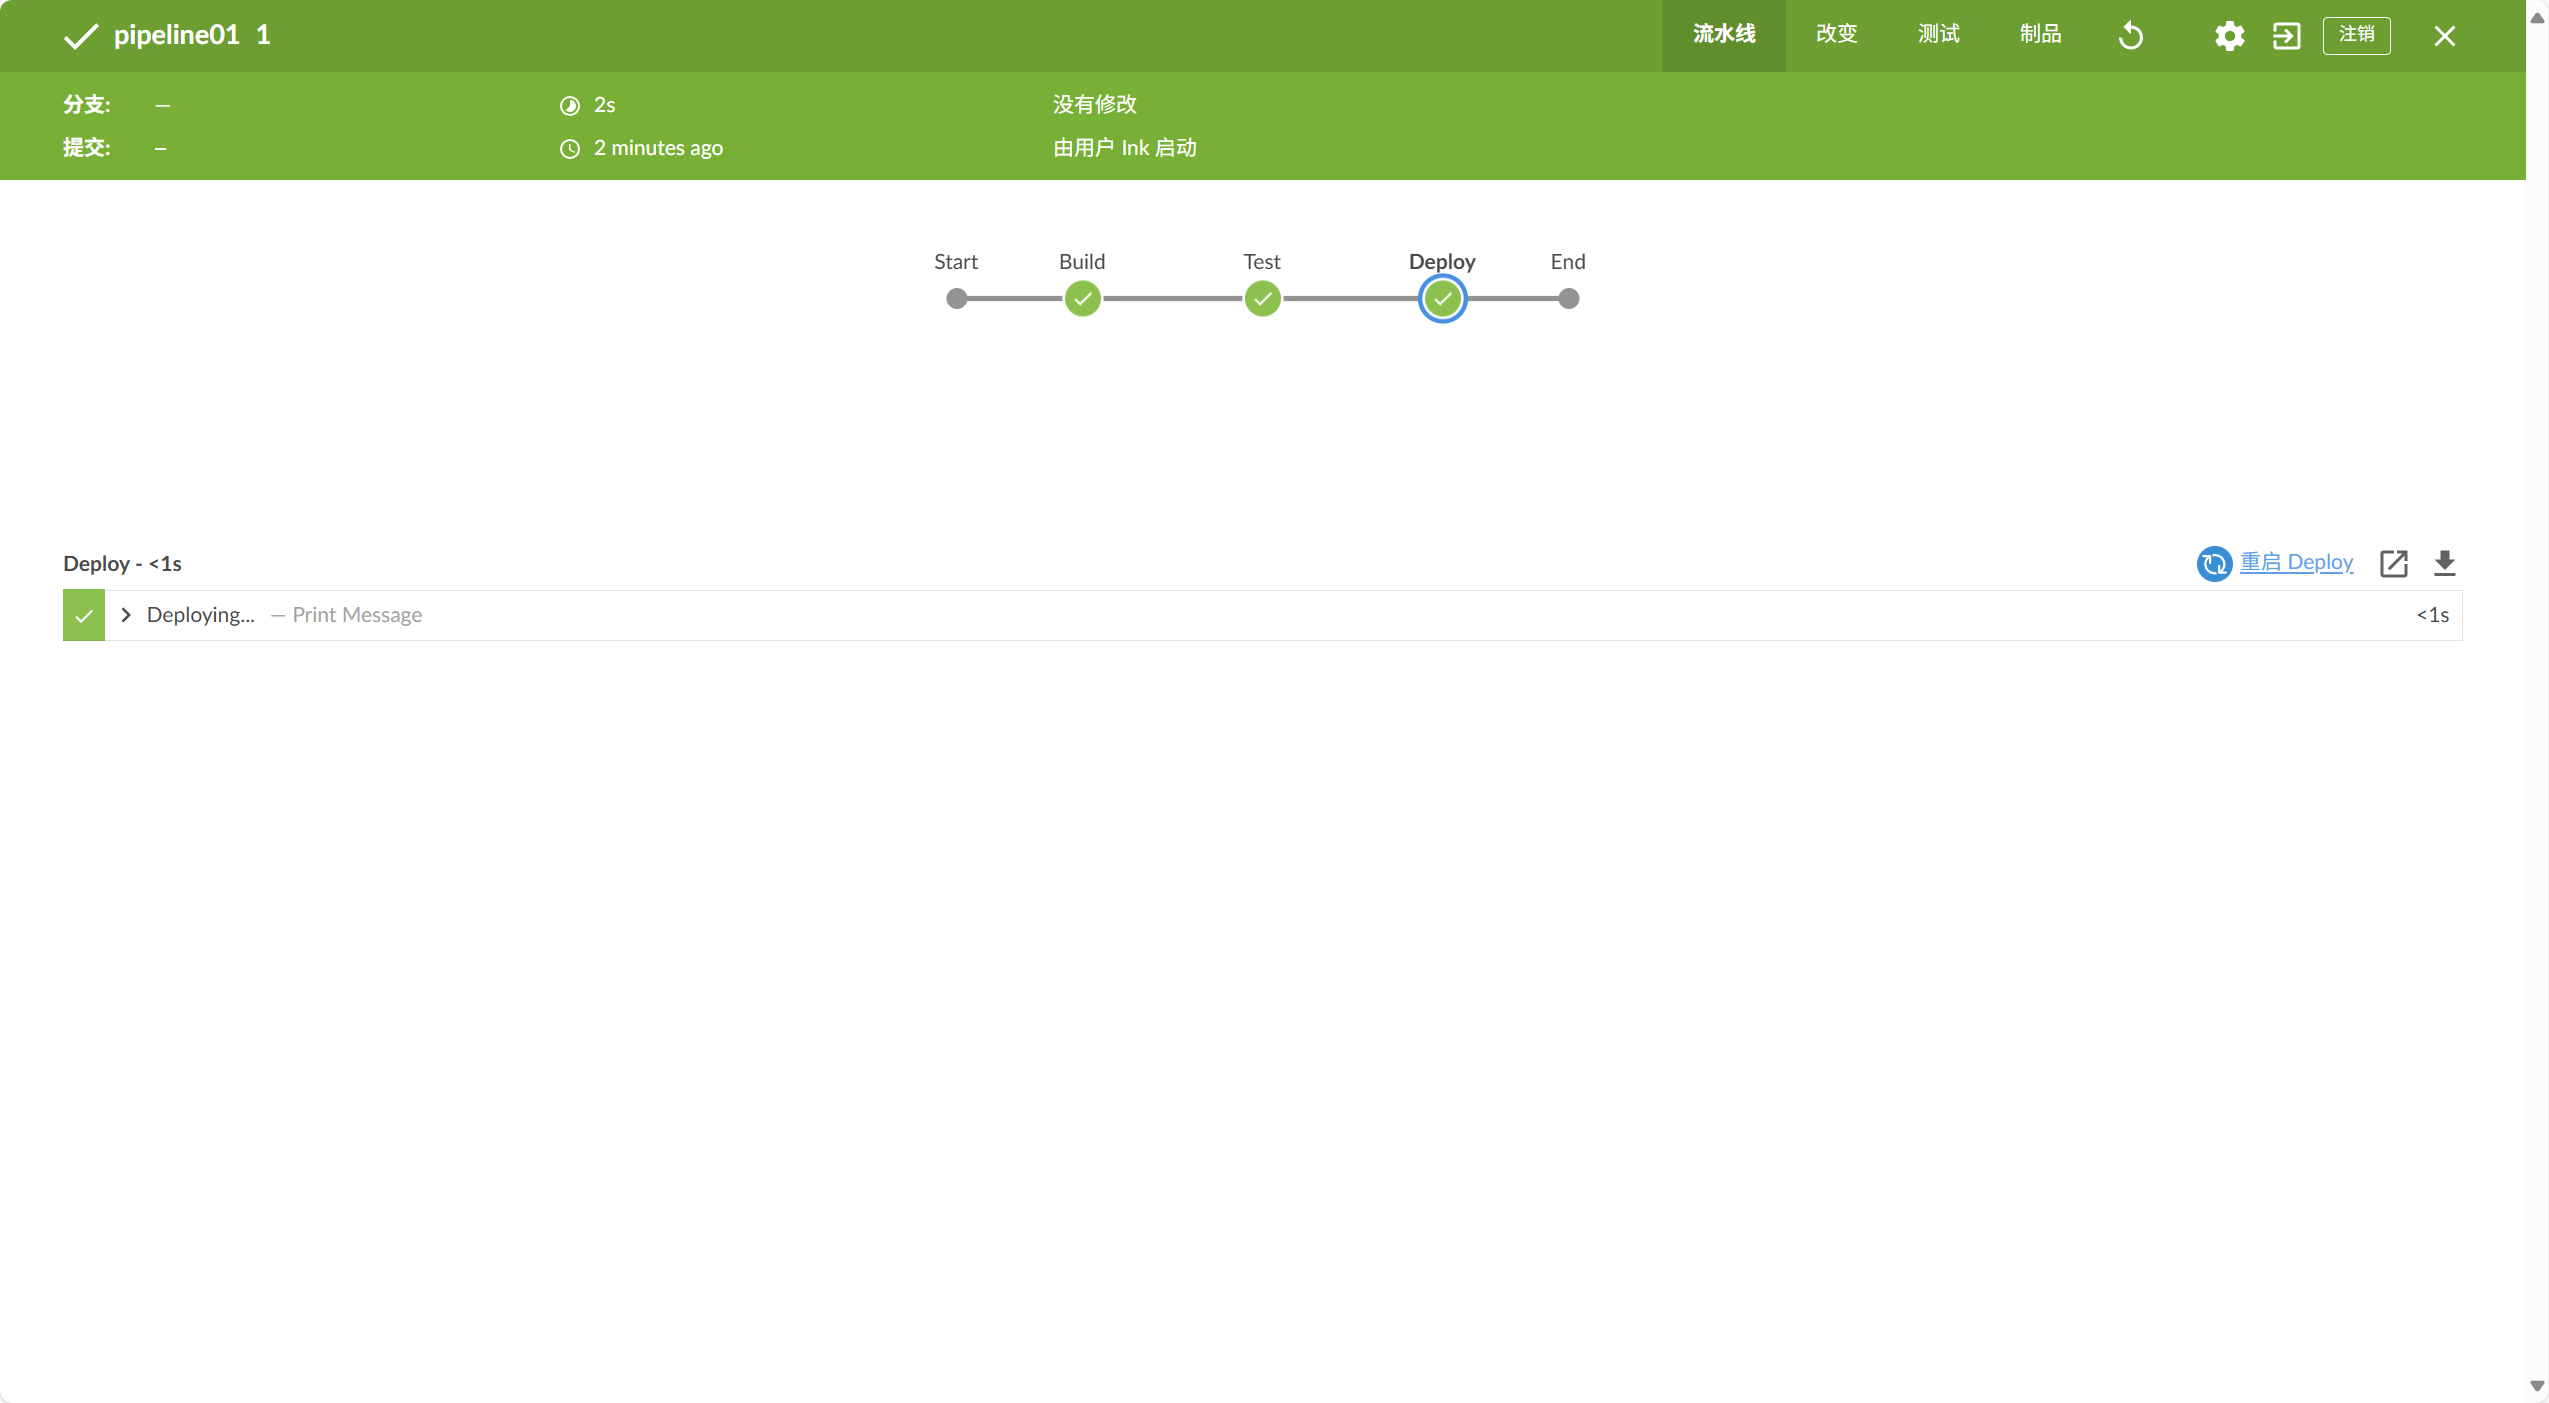
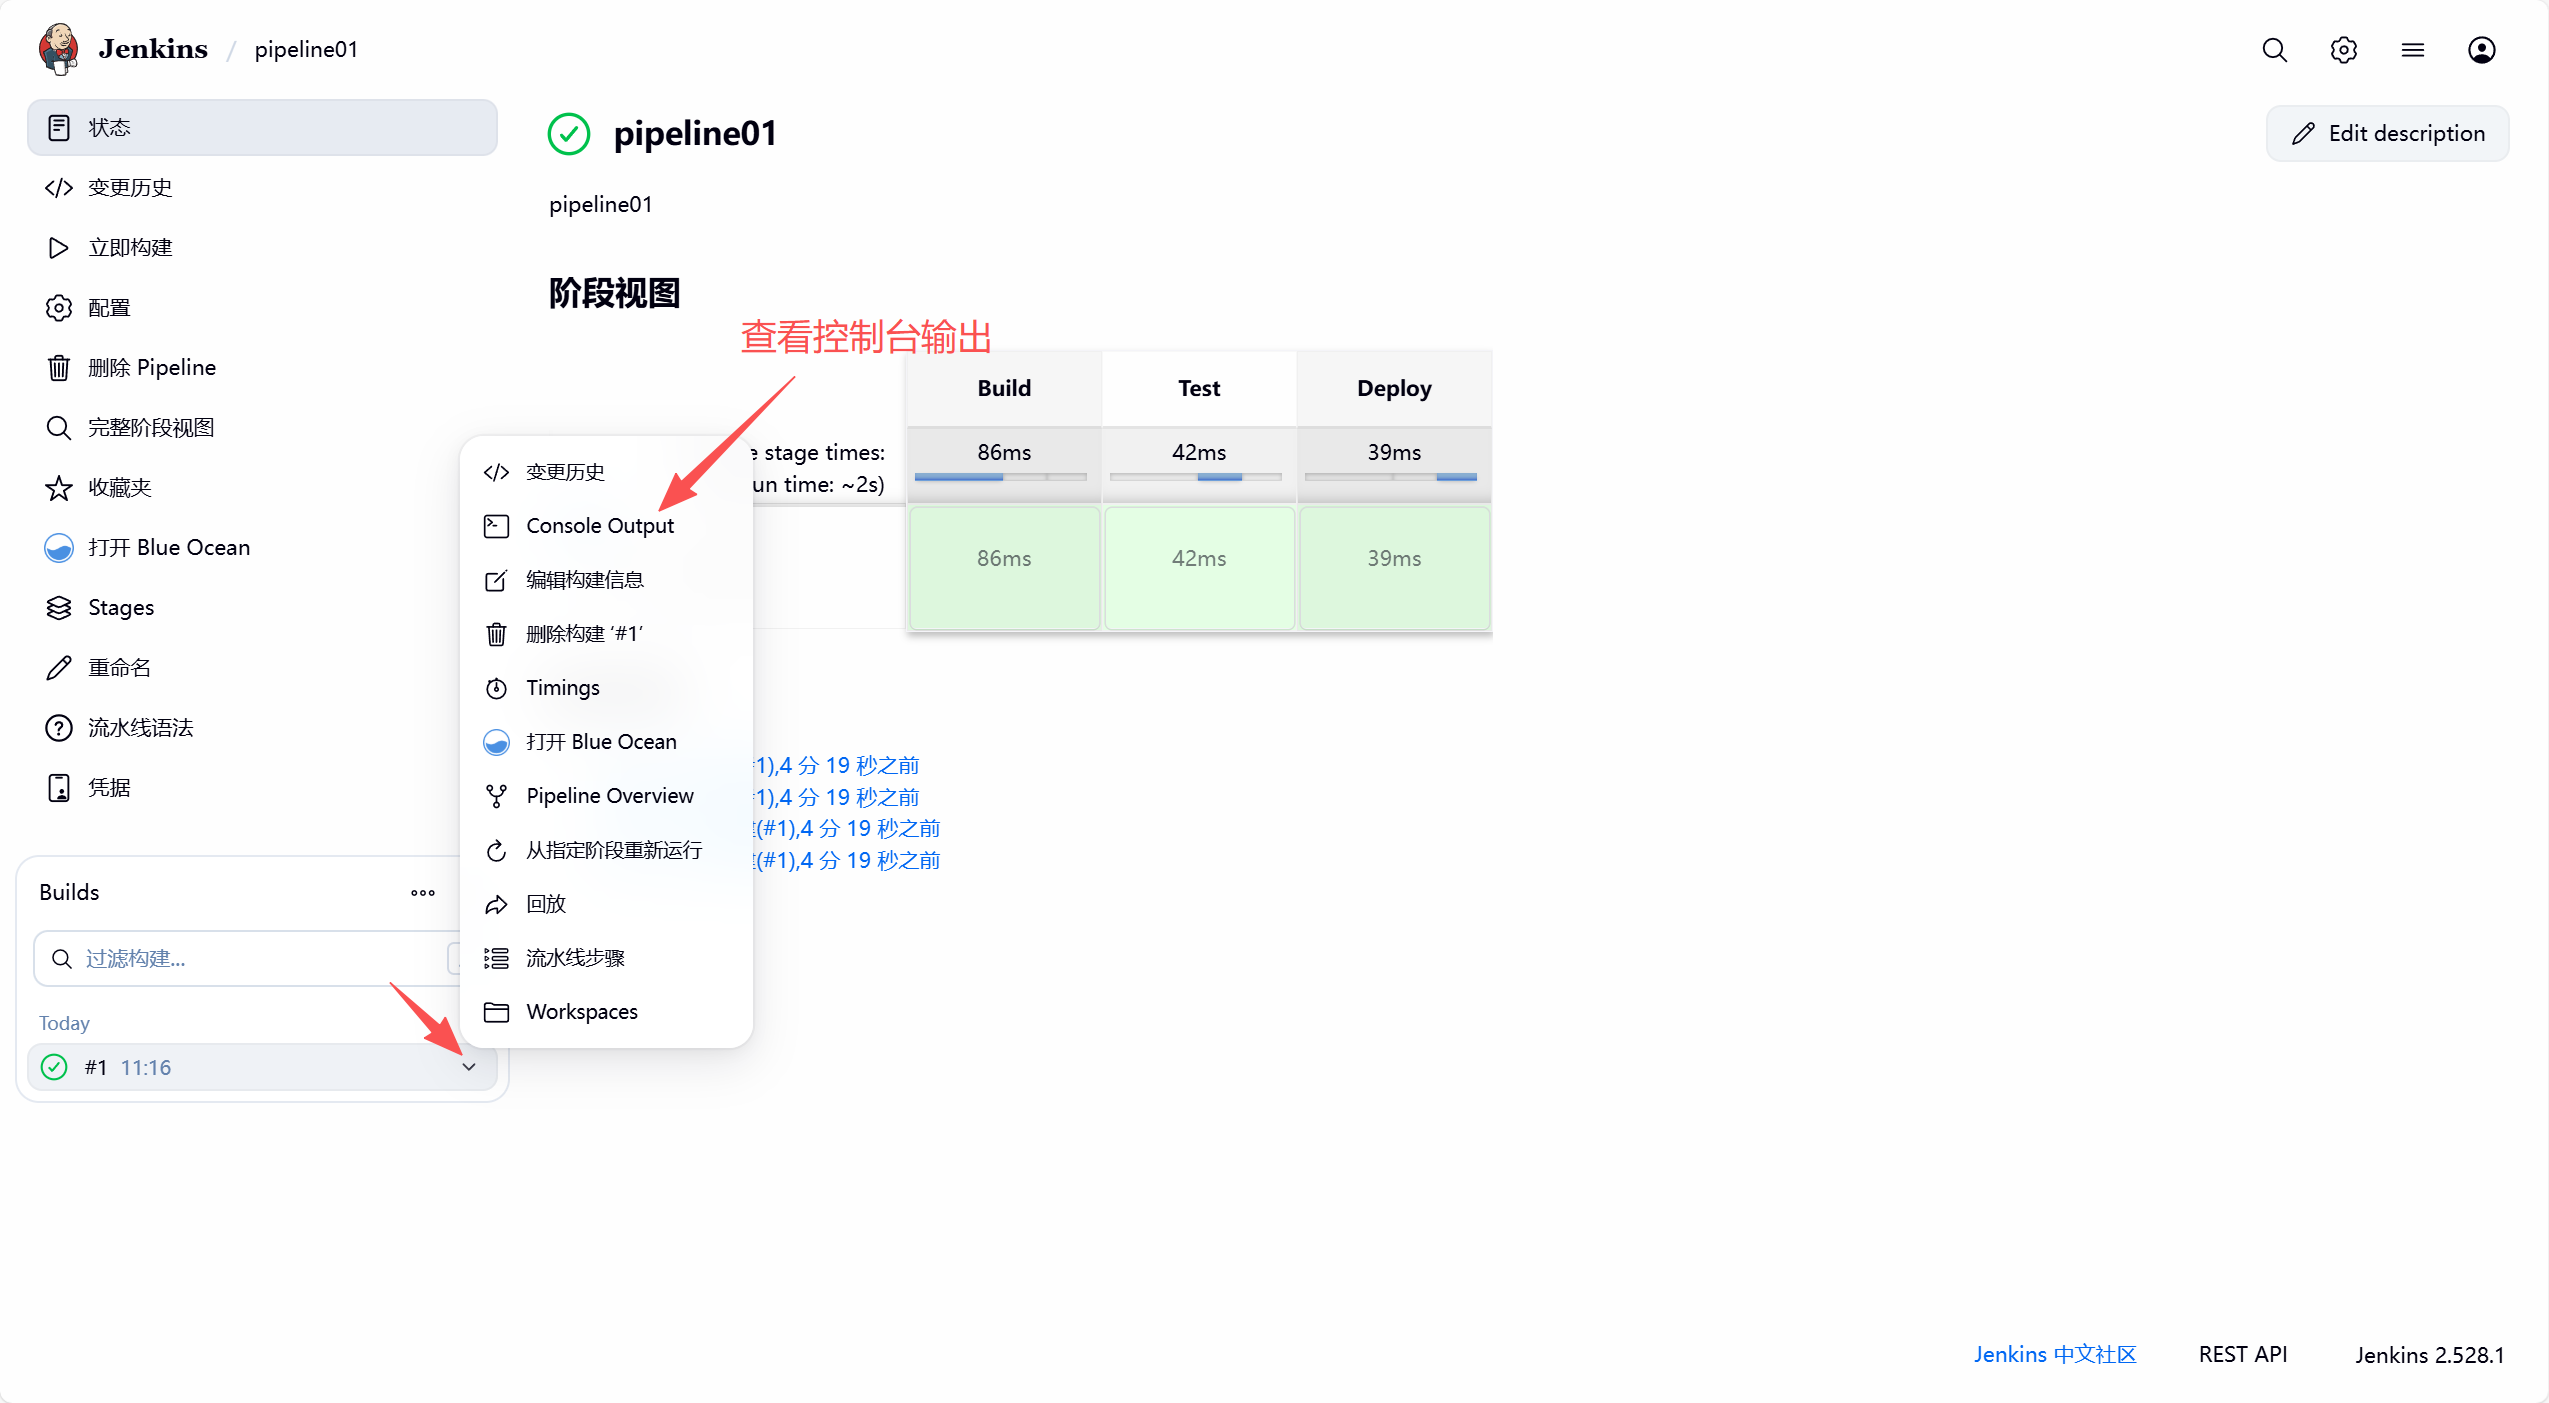
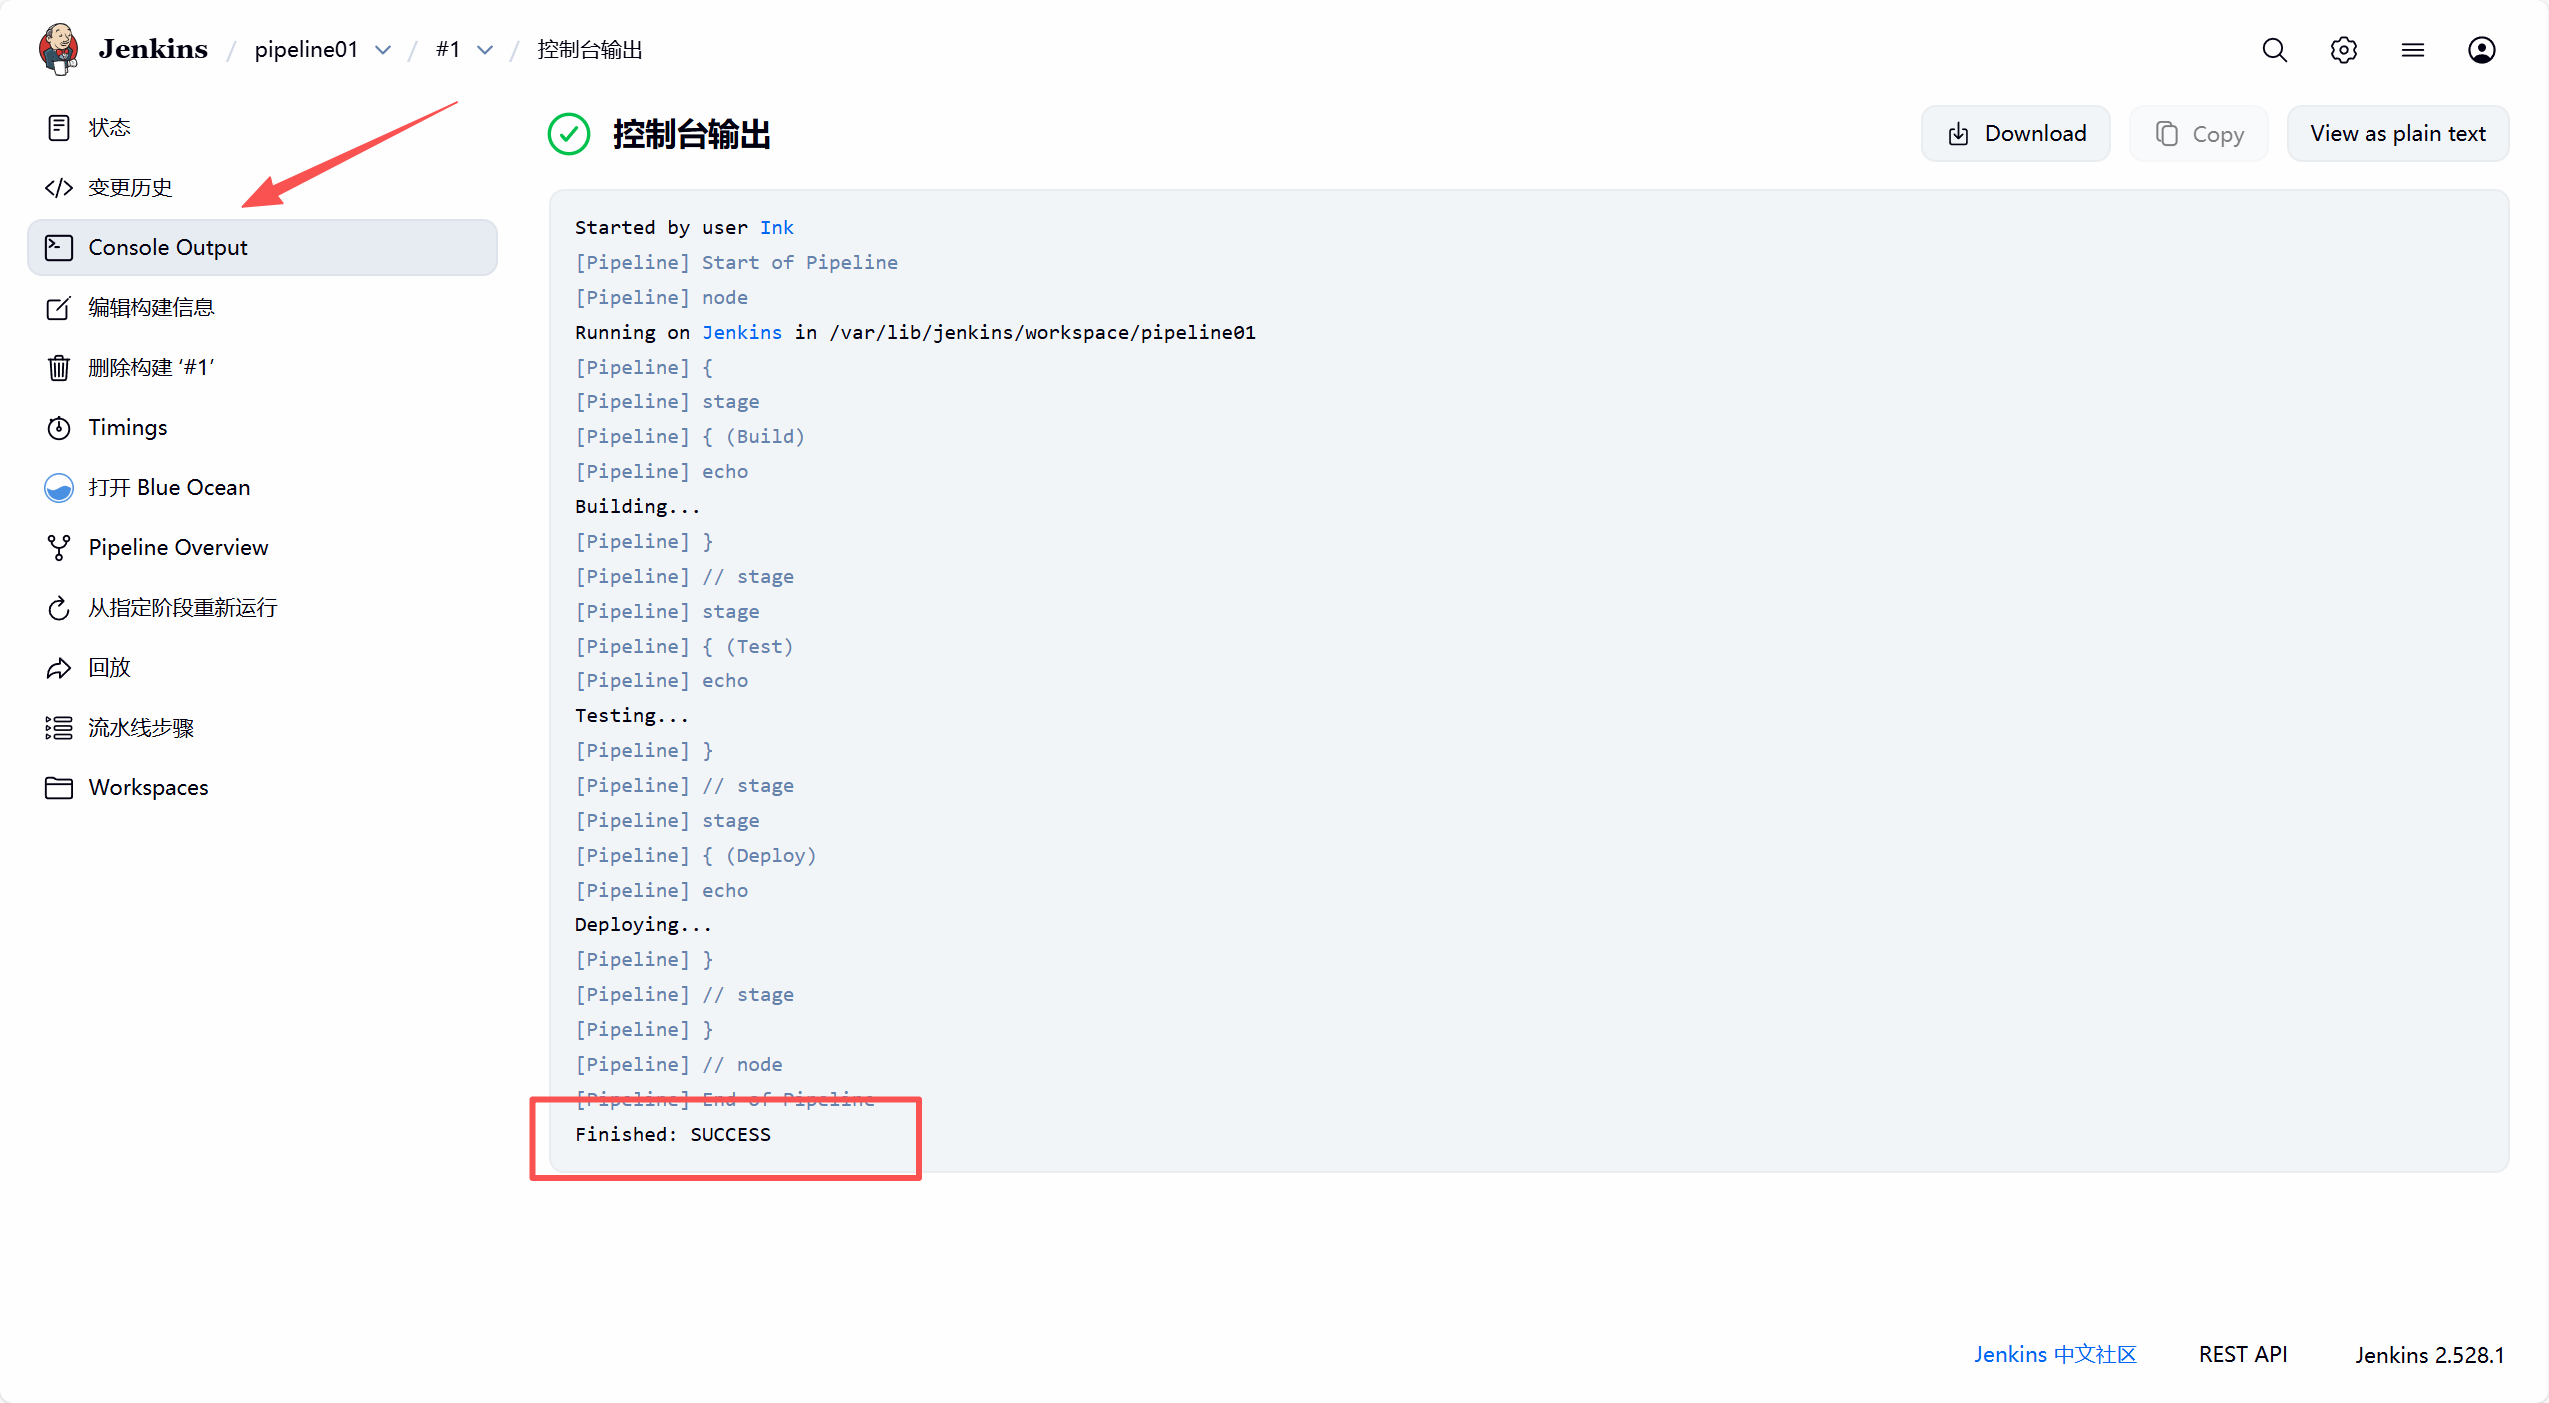
2. 创建Pipeline
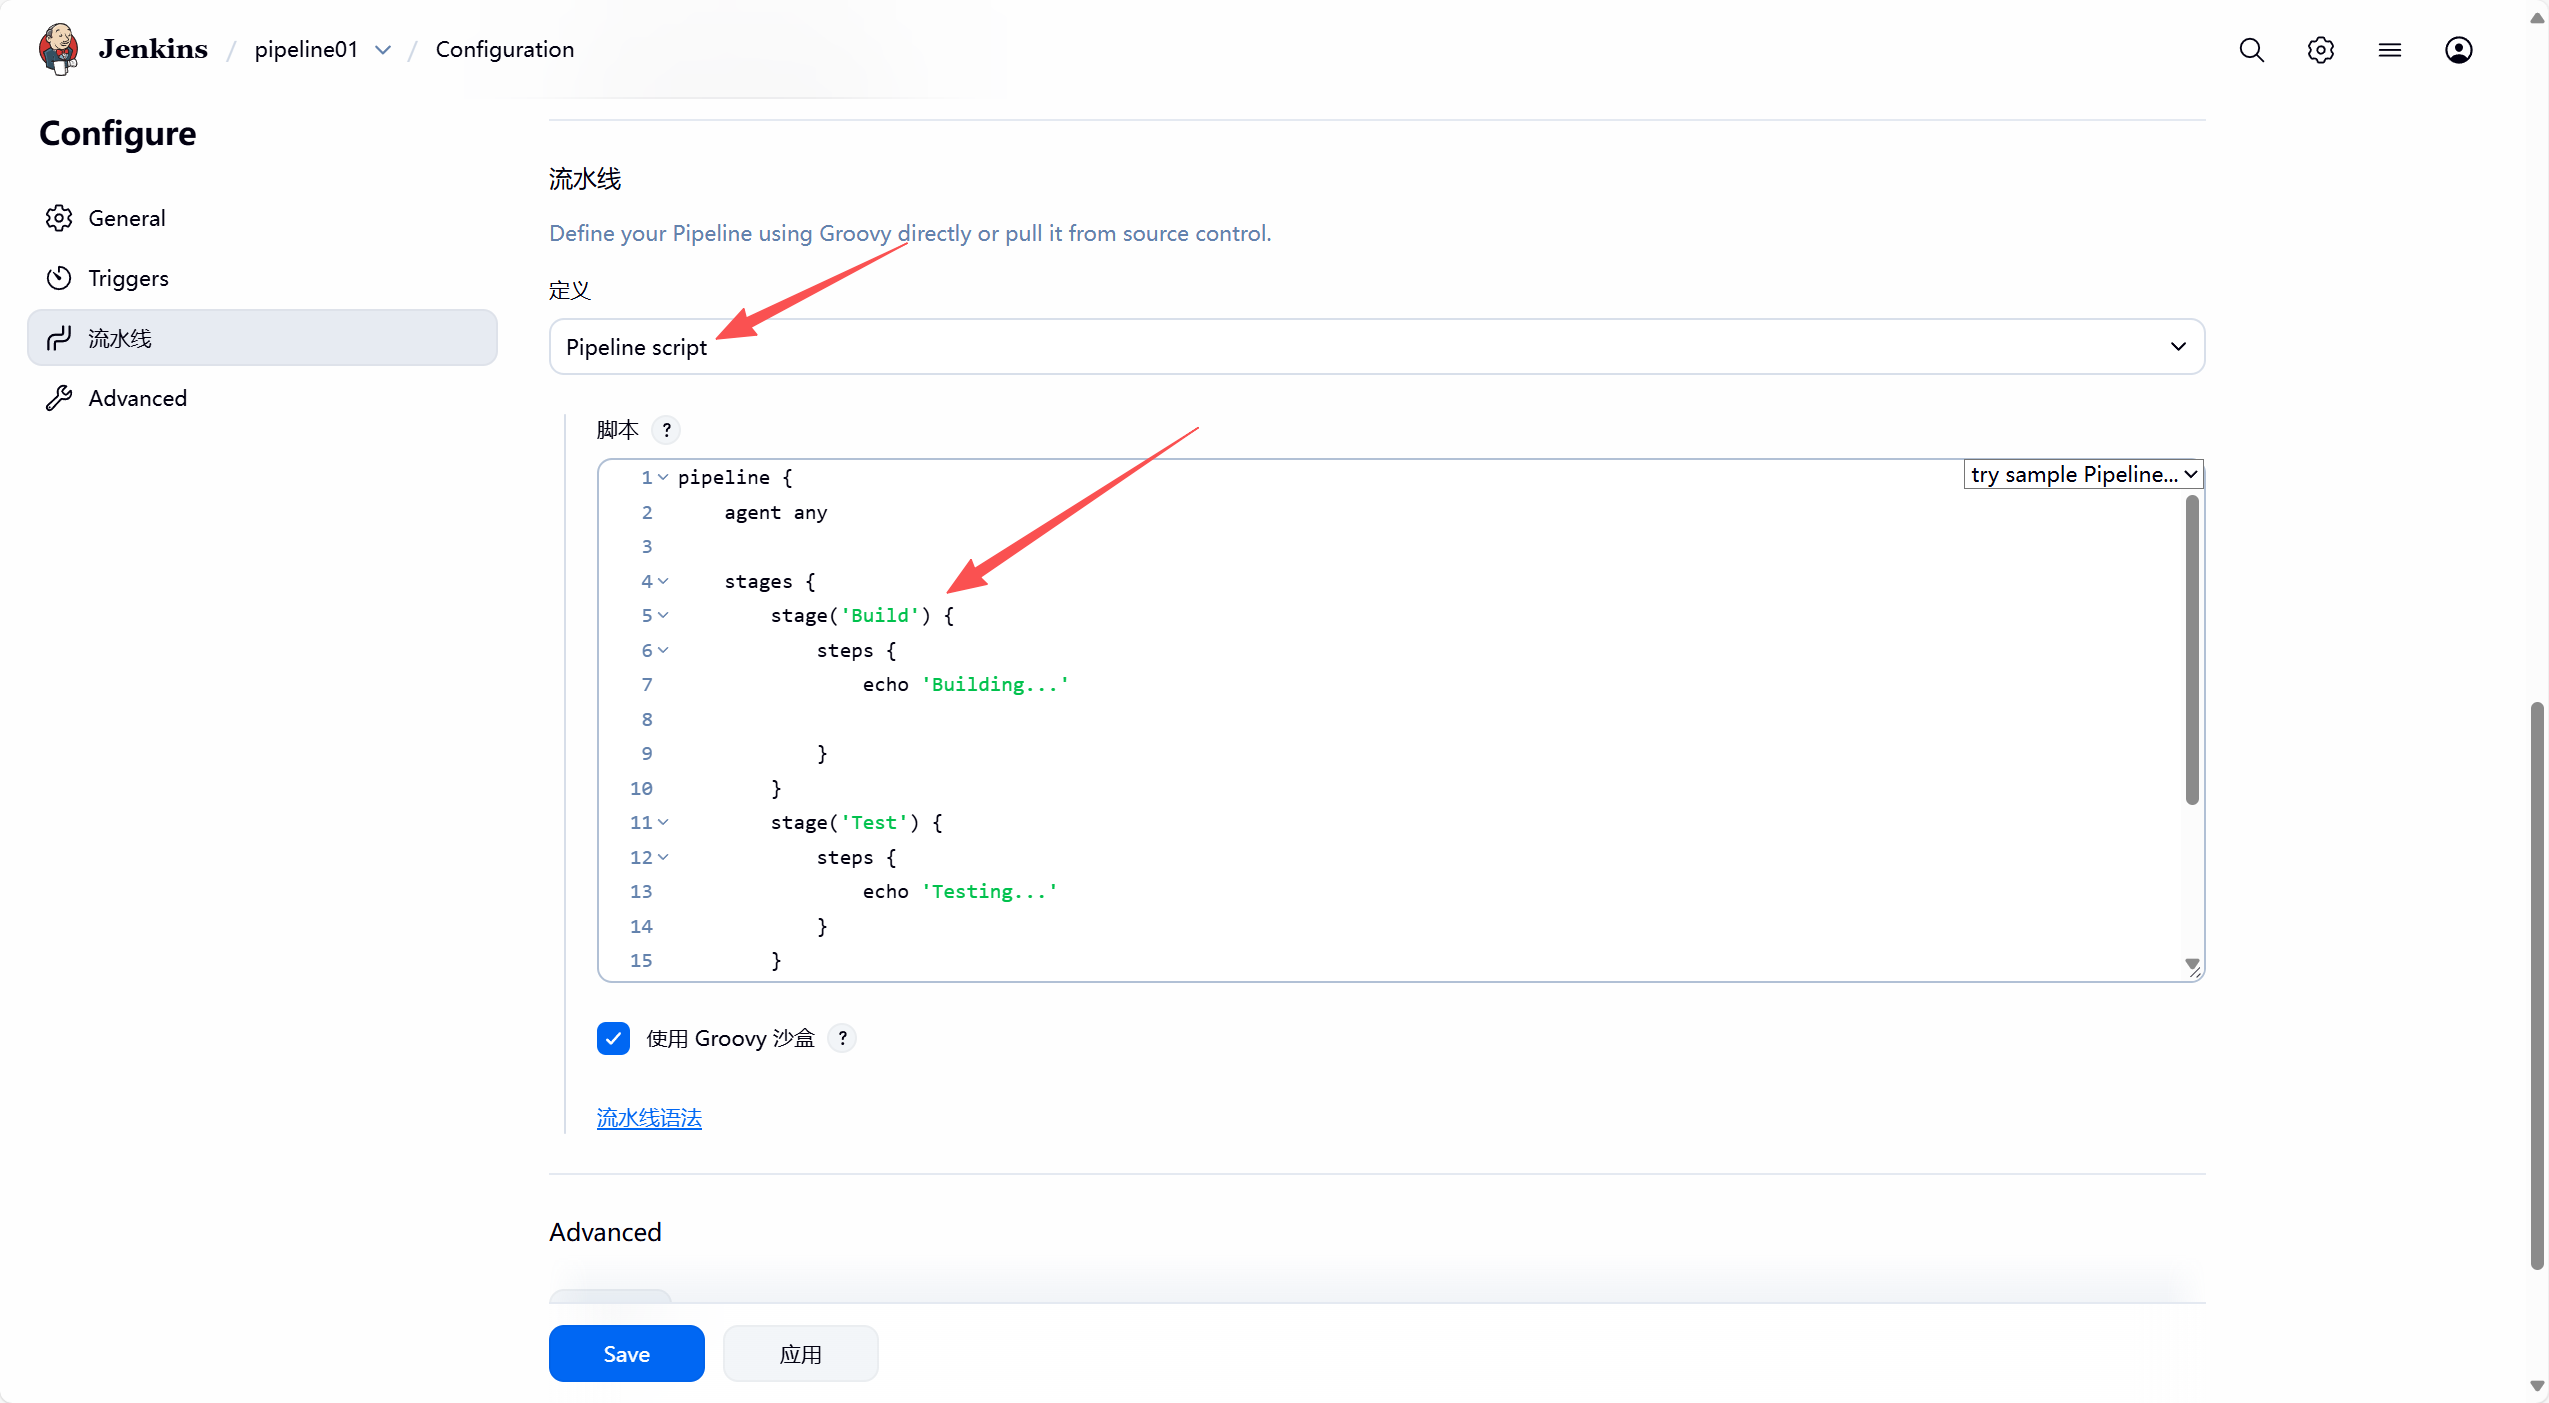
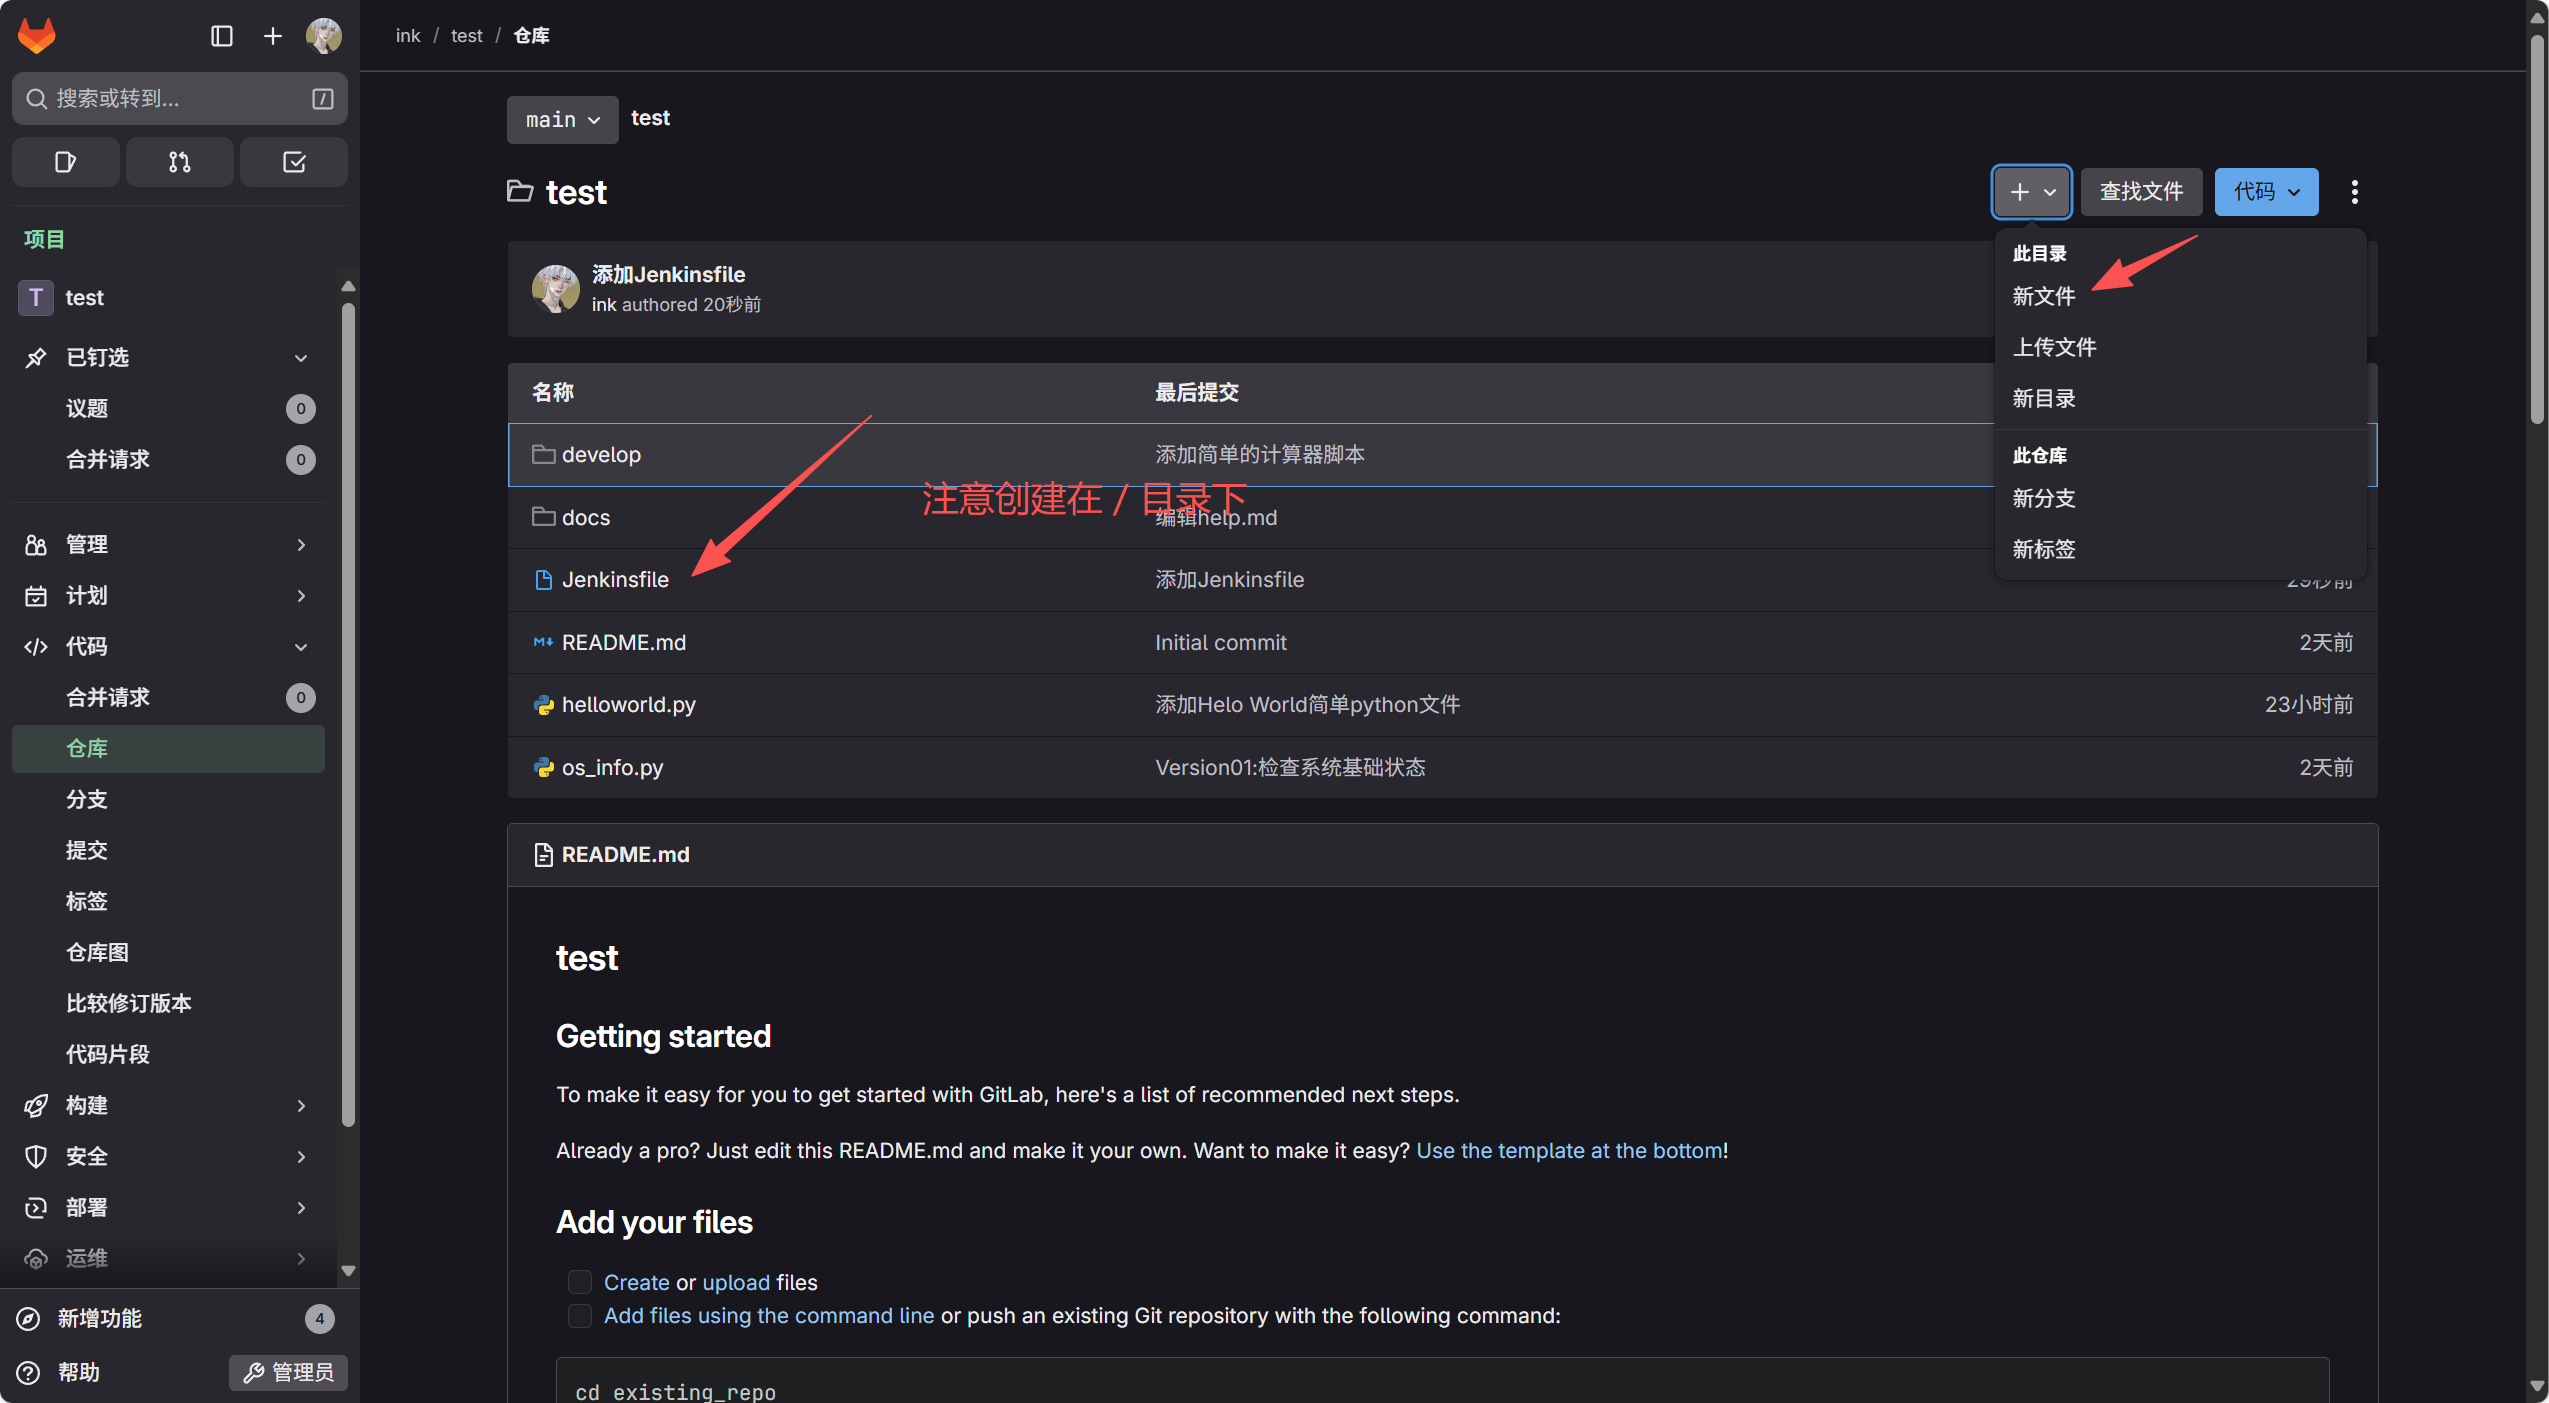
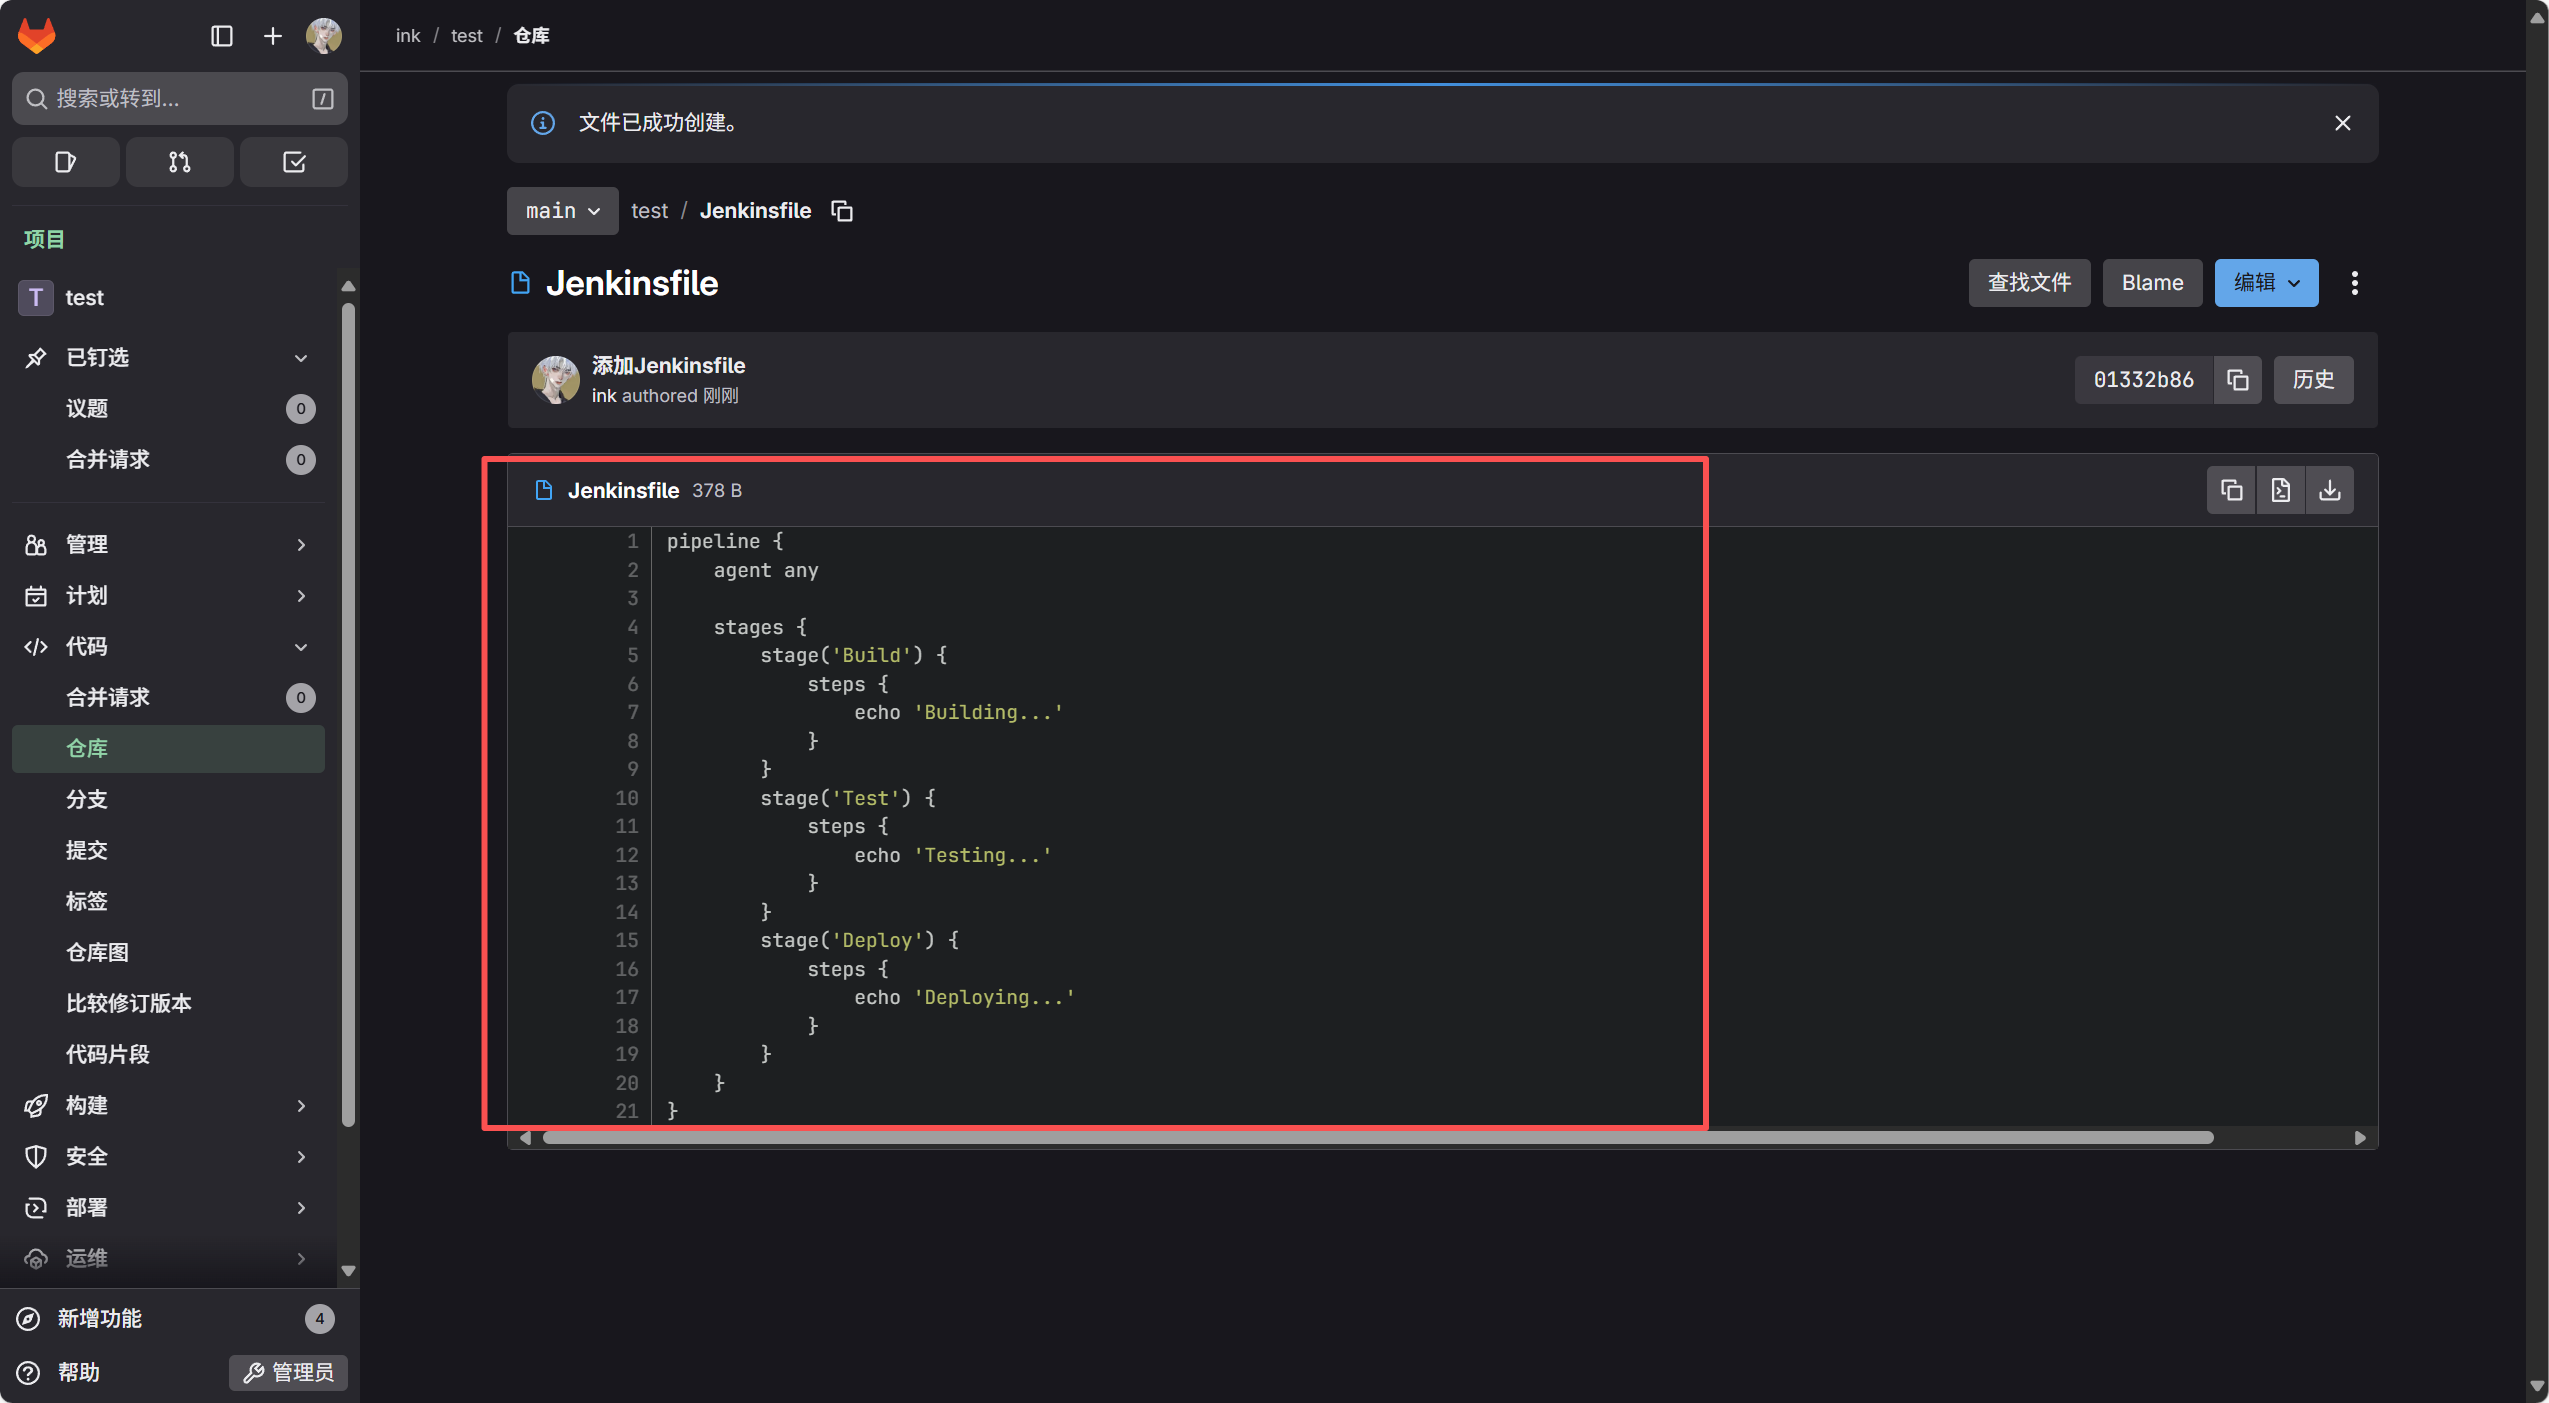
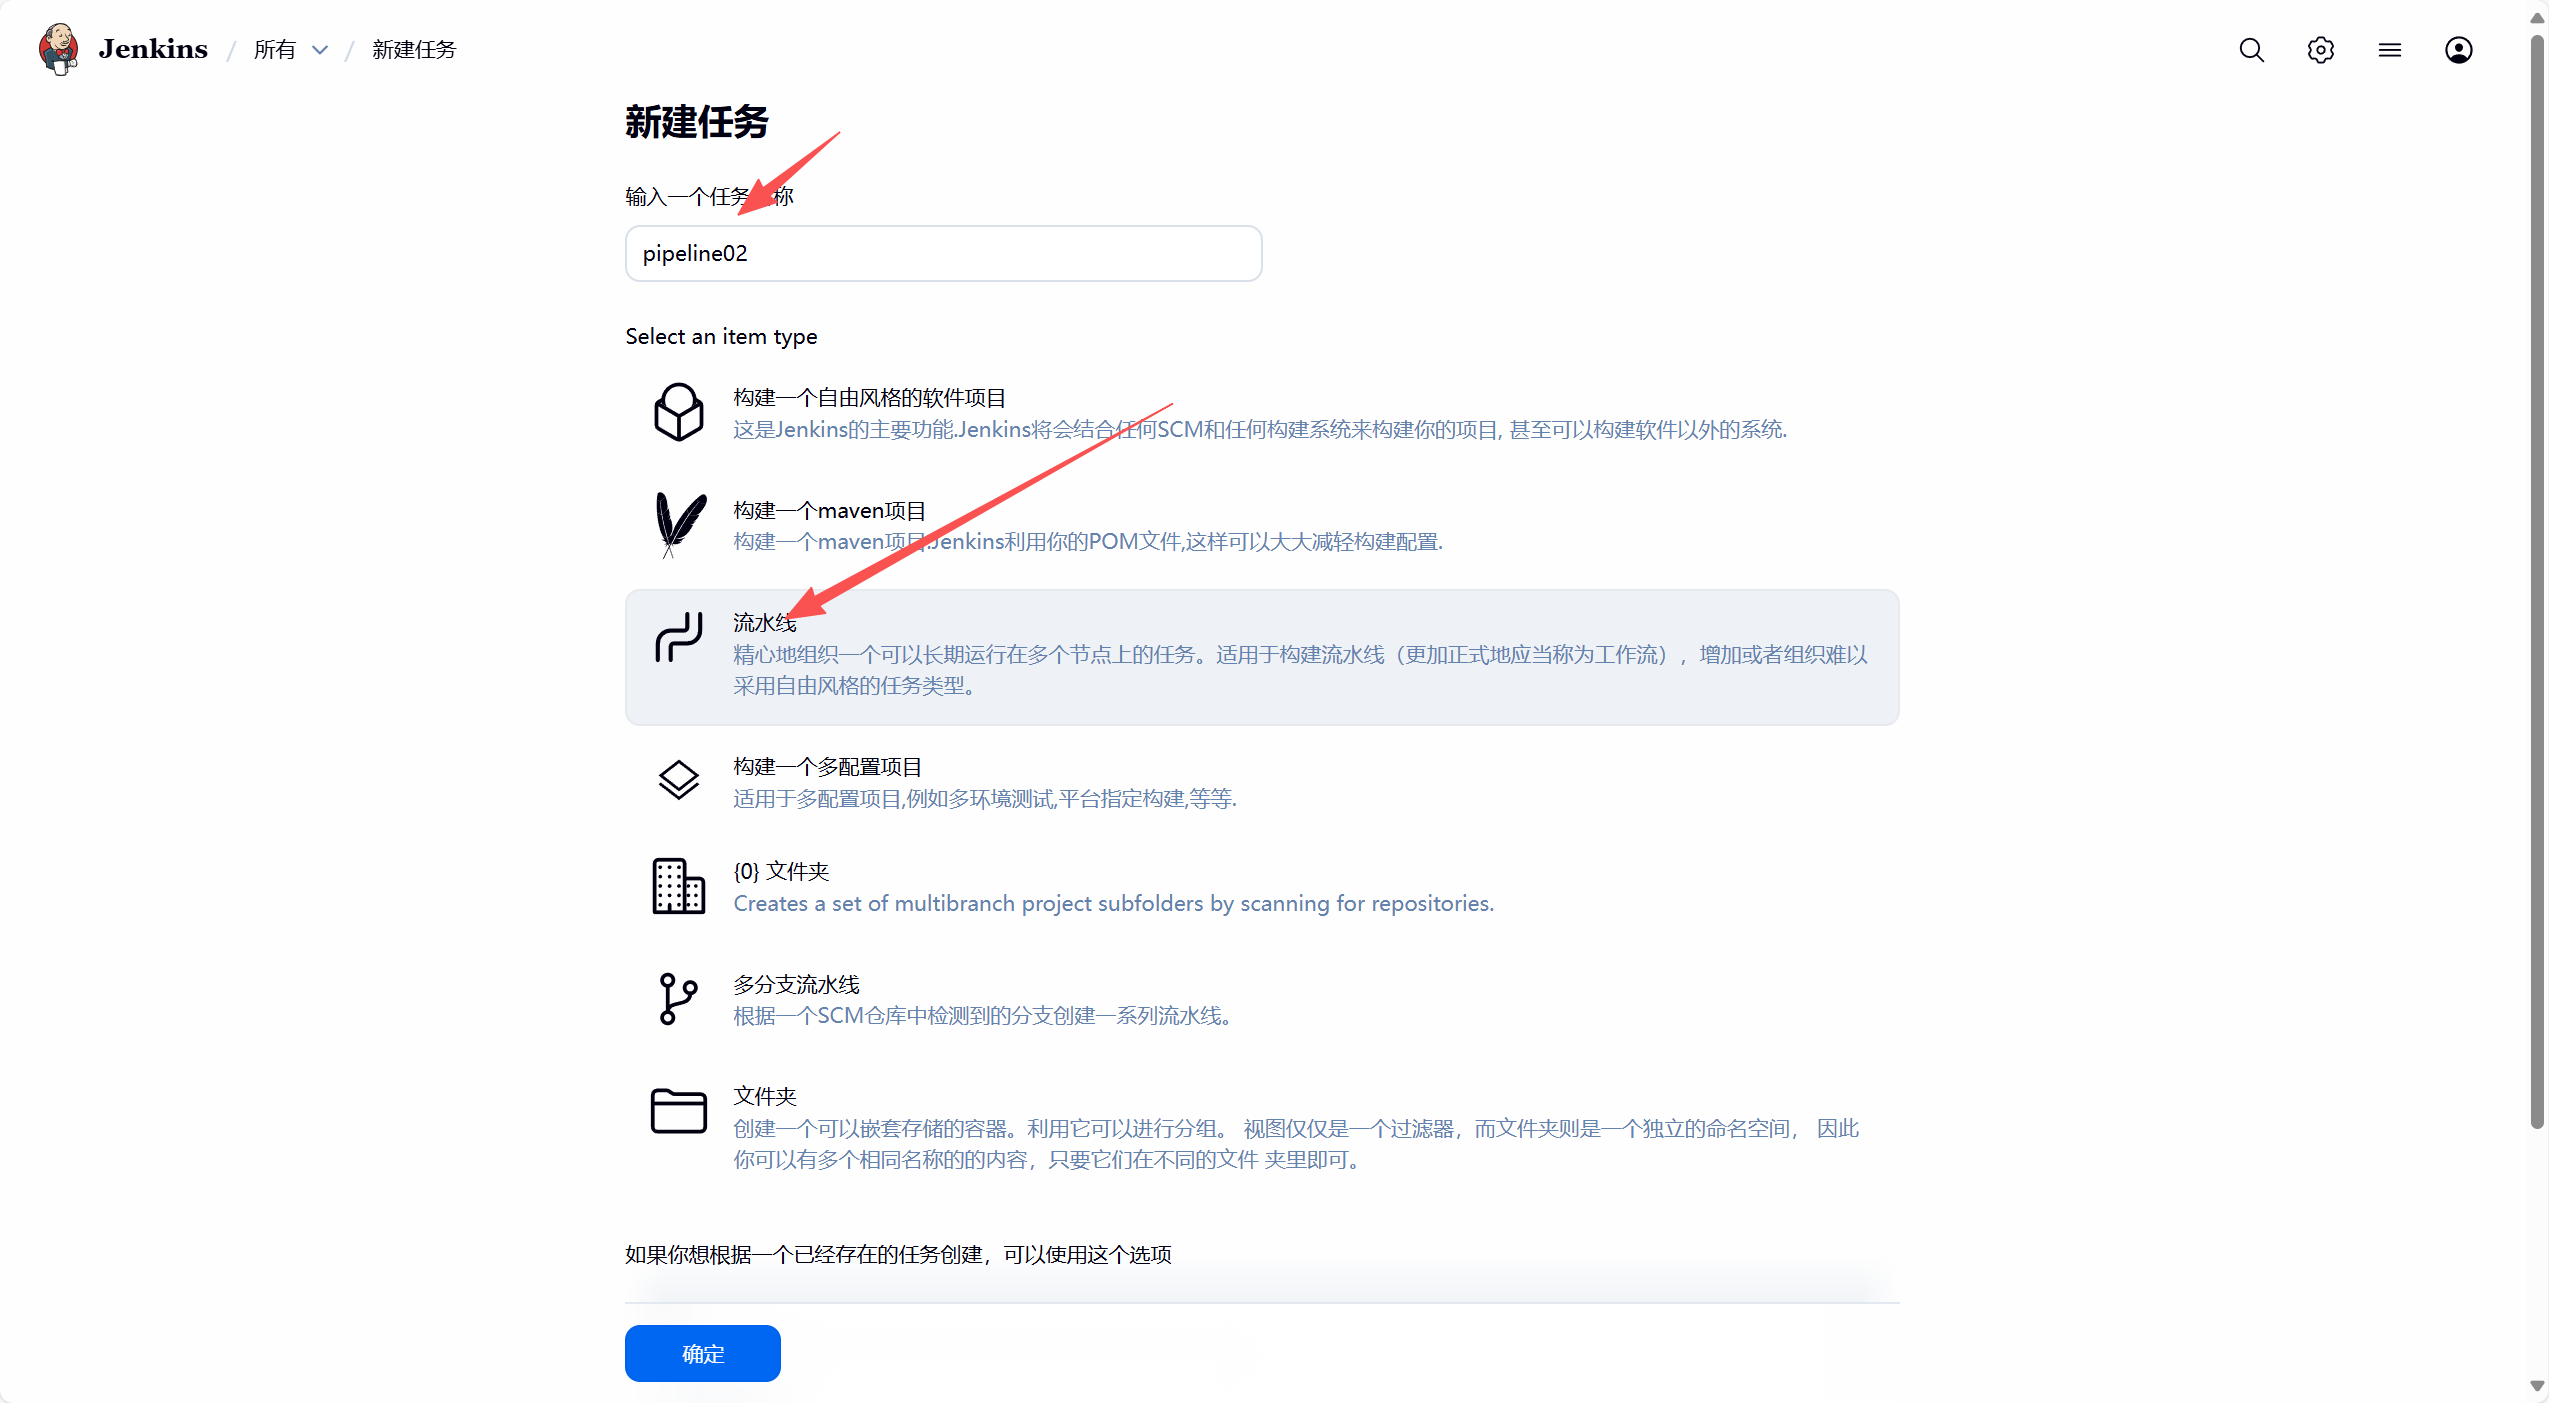
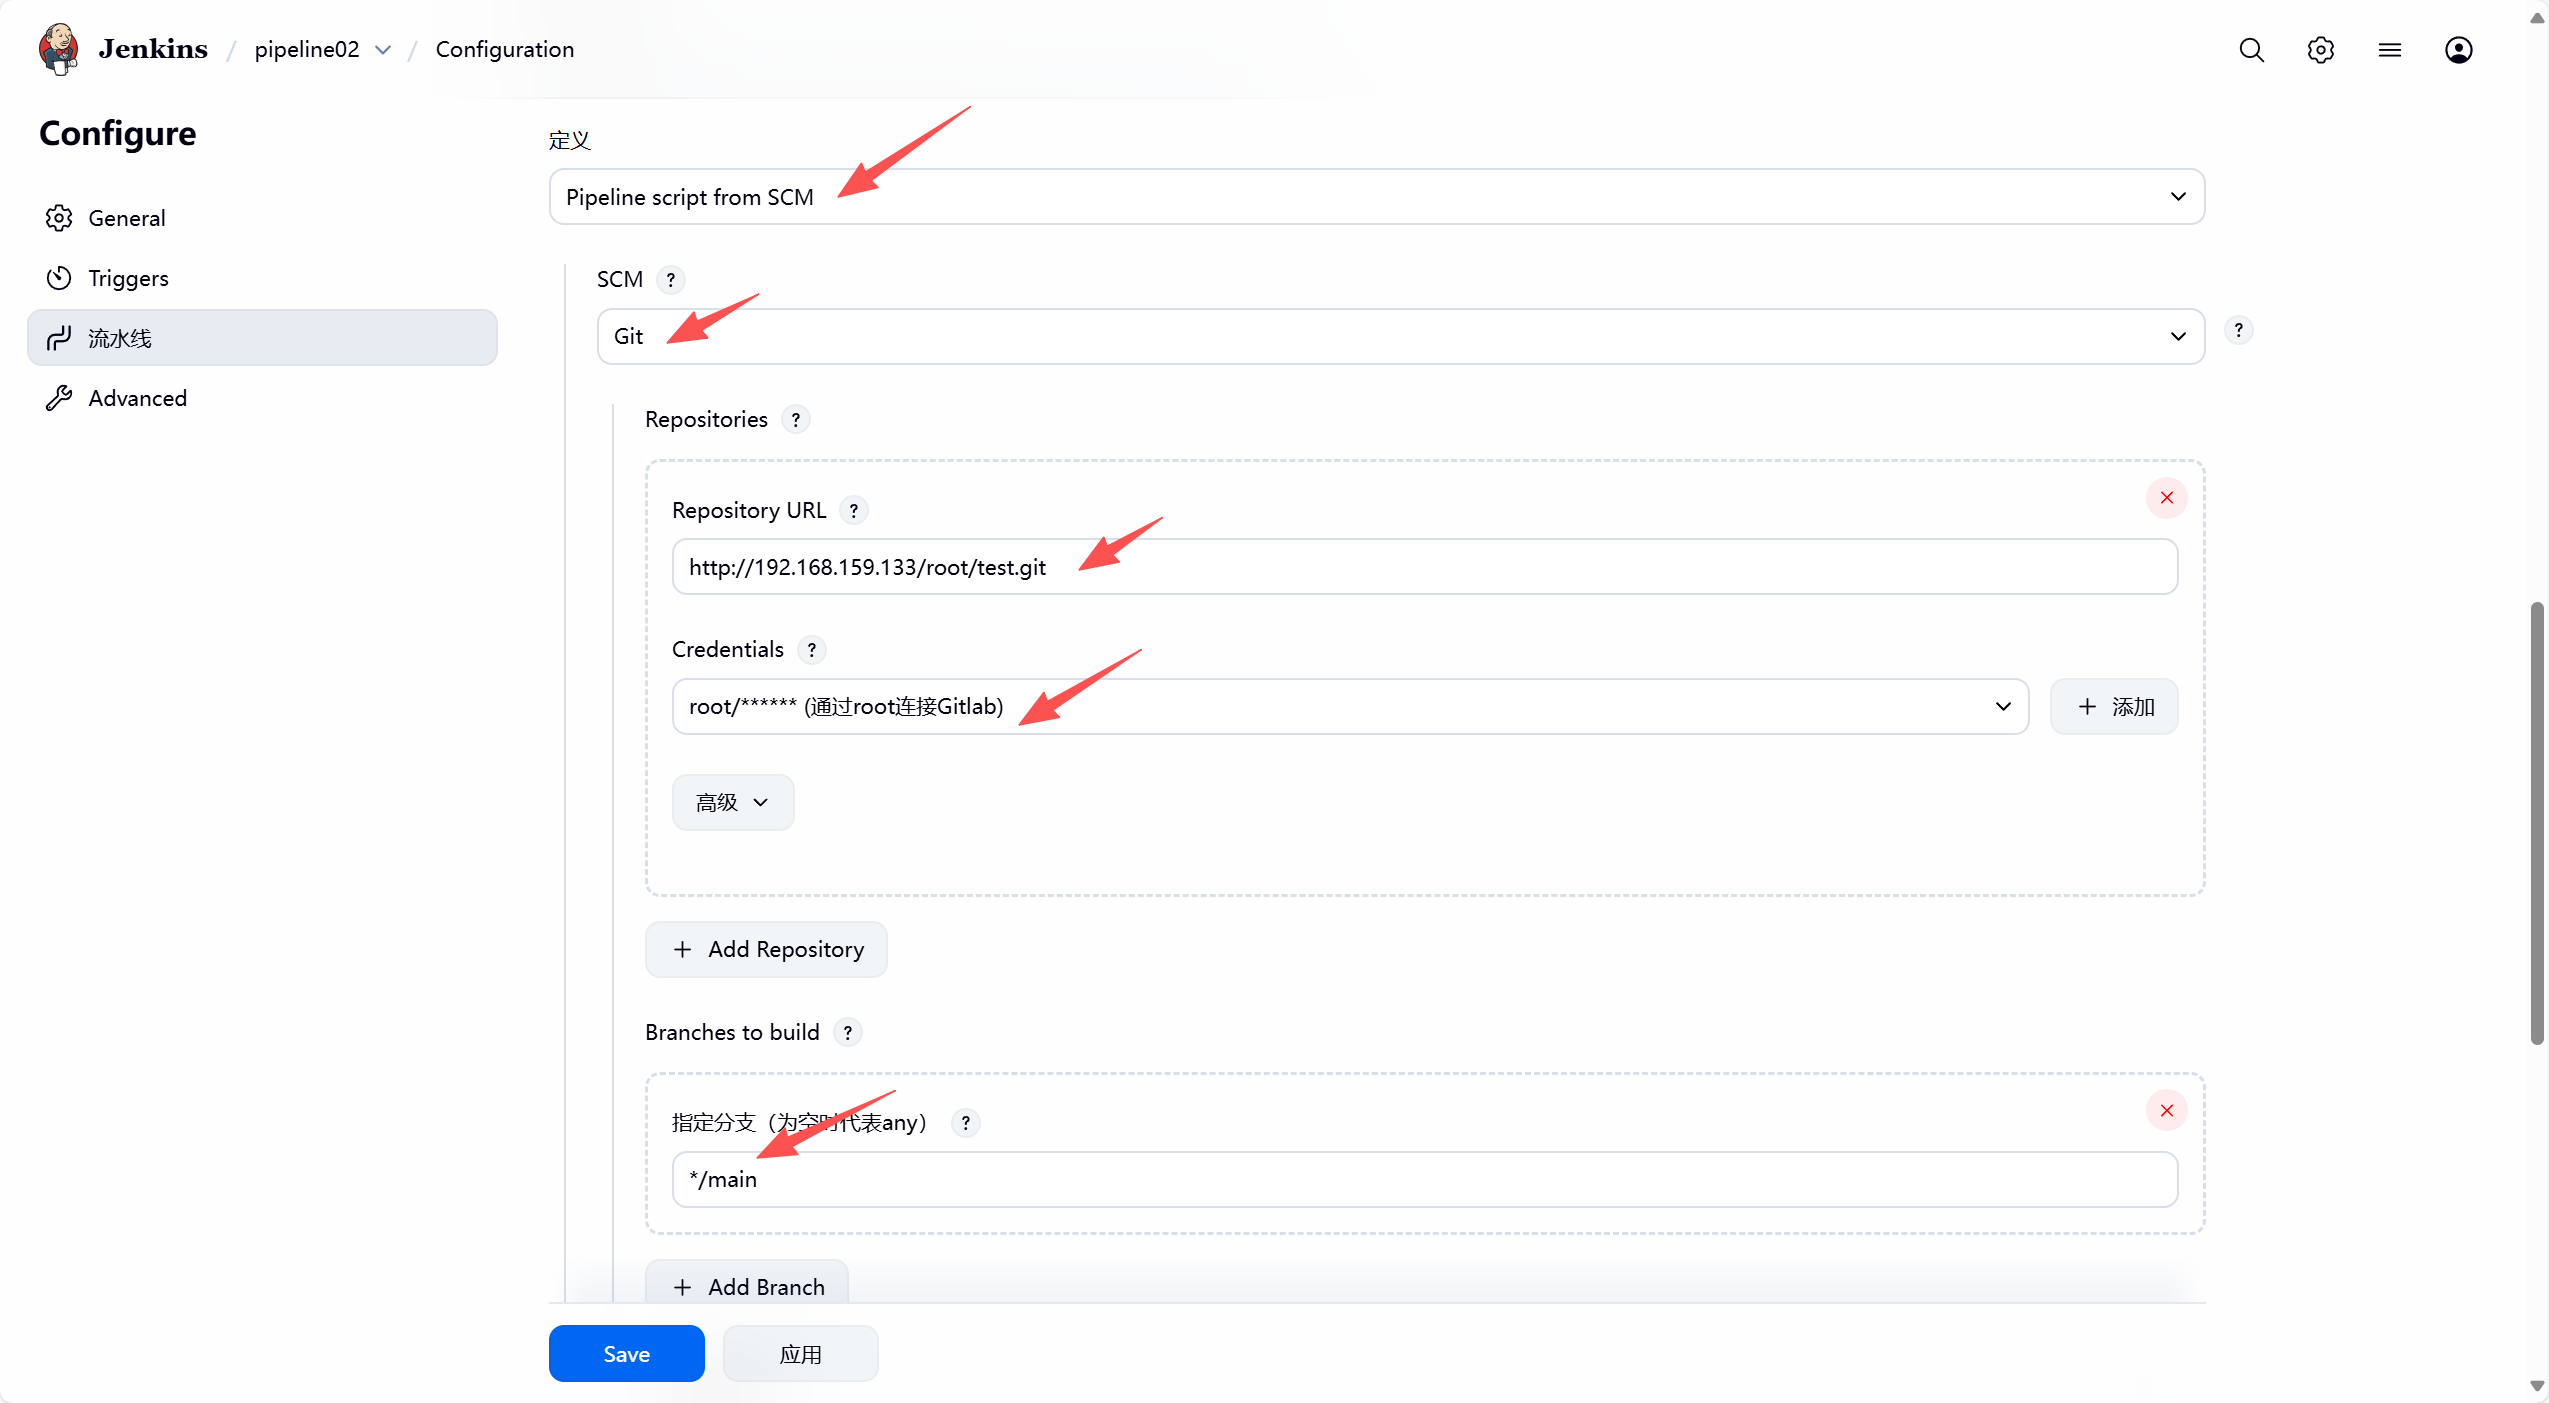
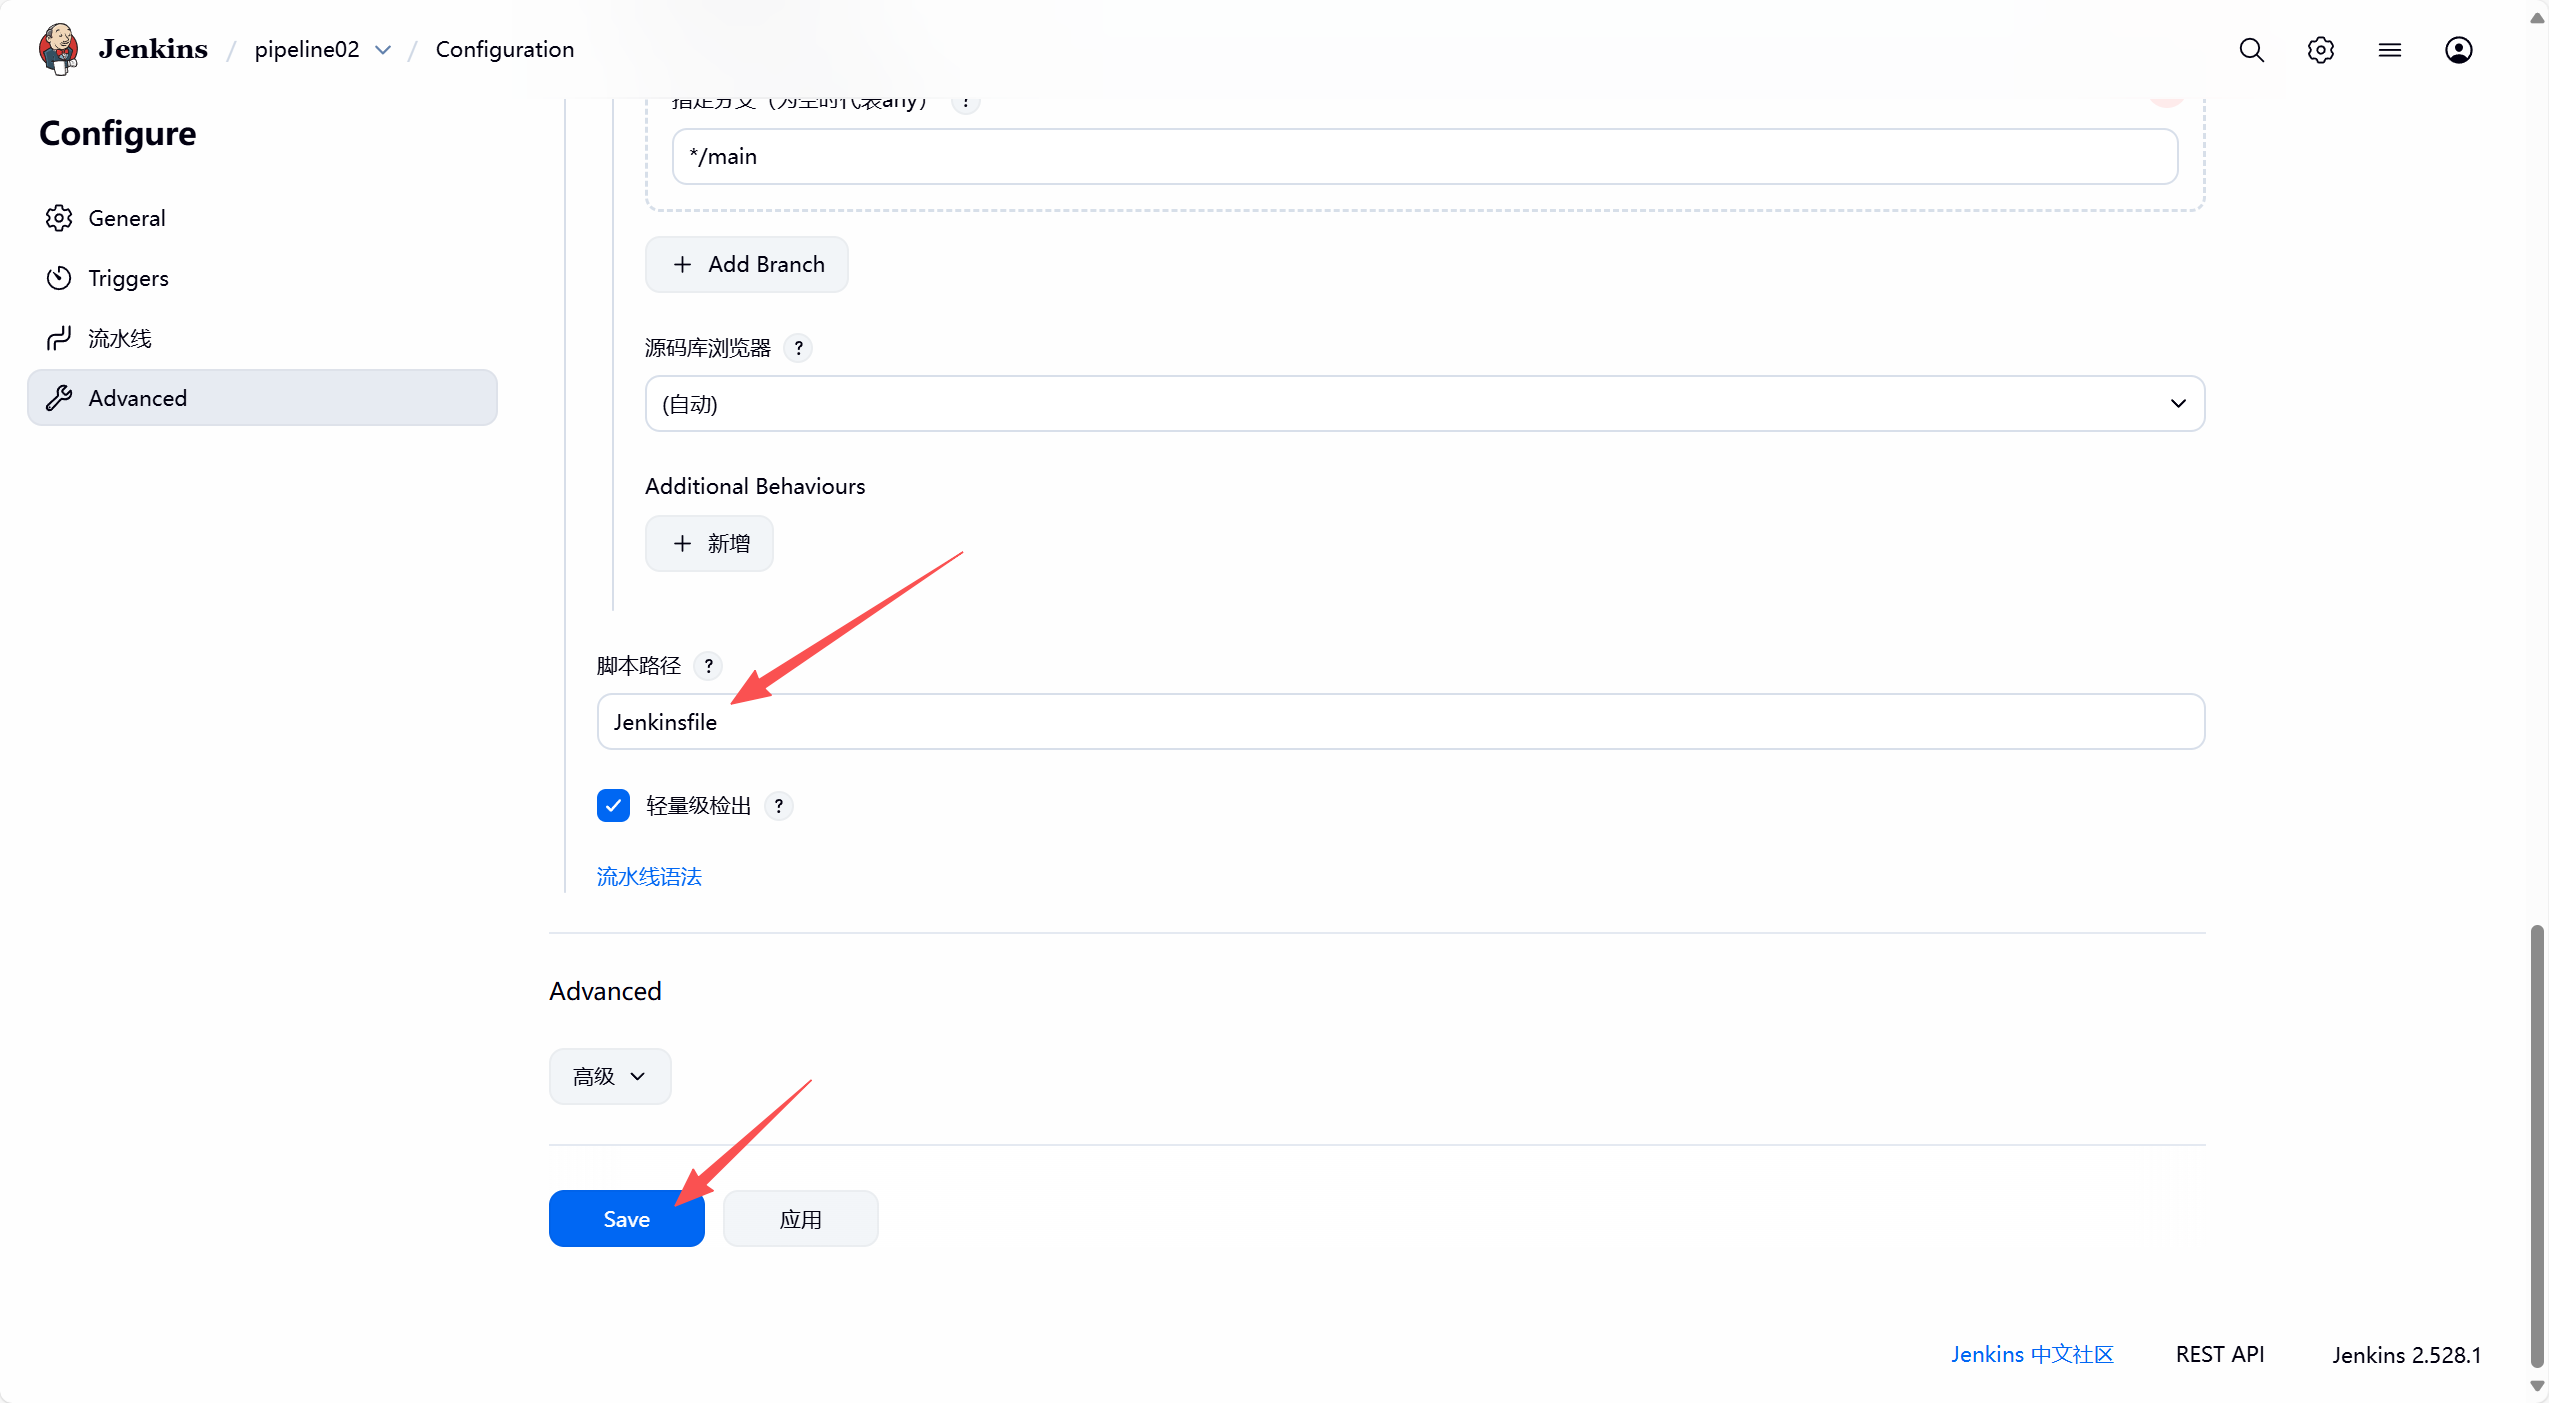
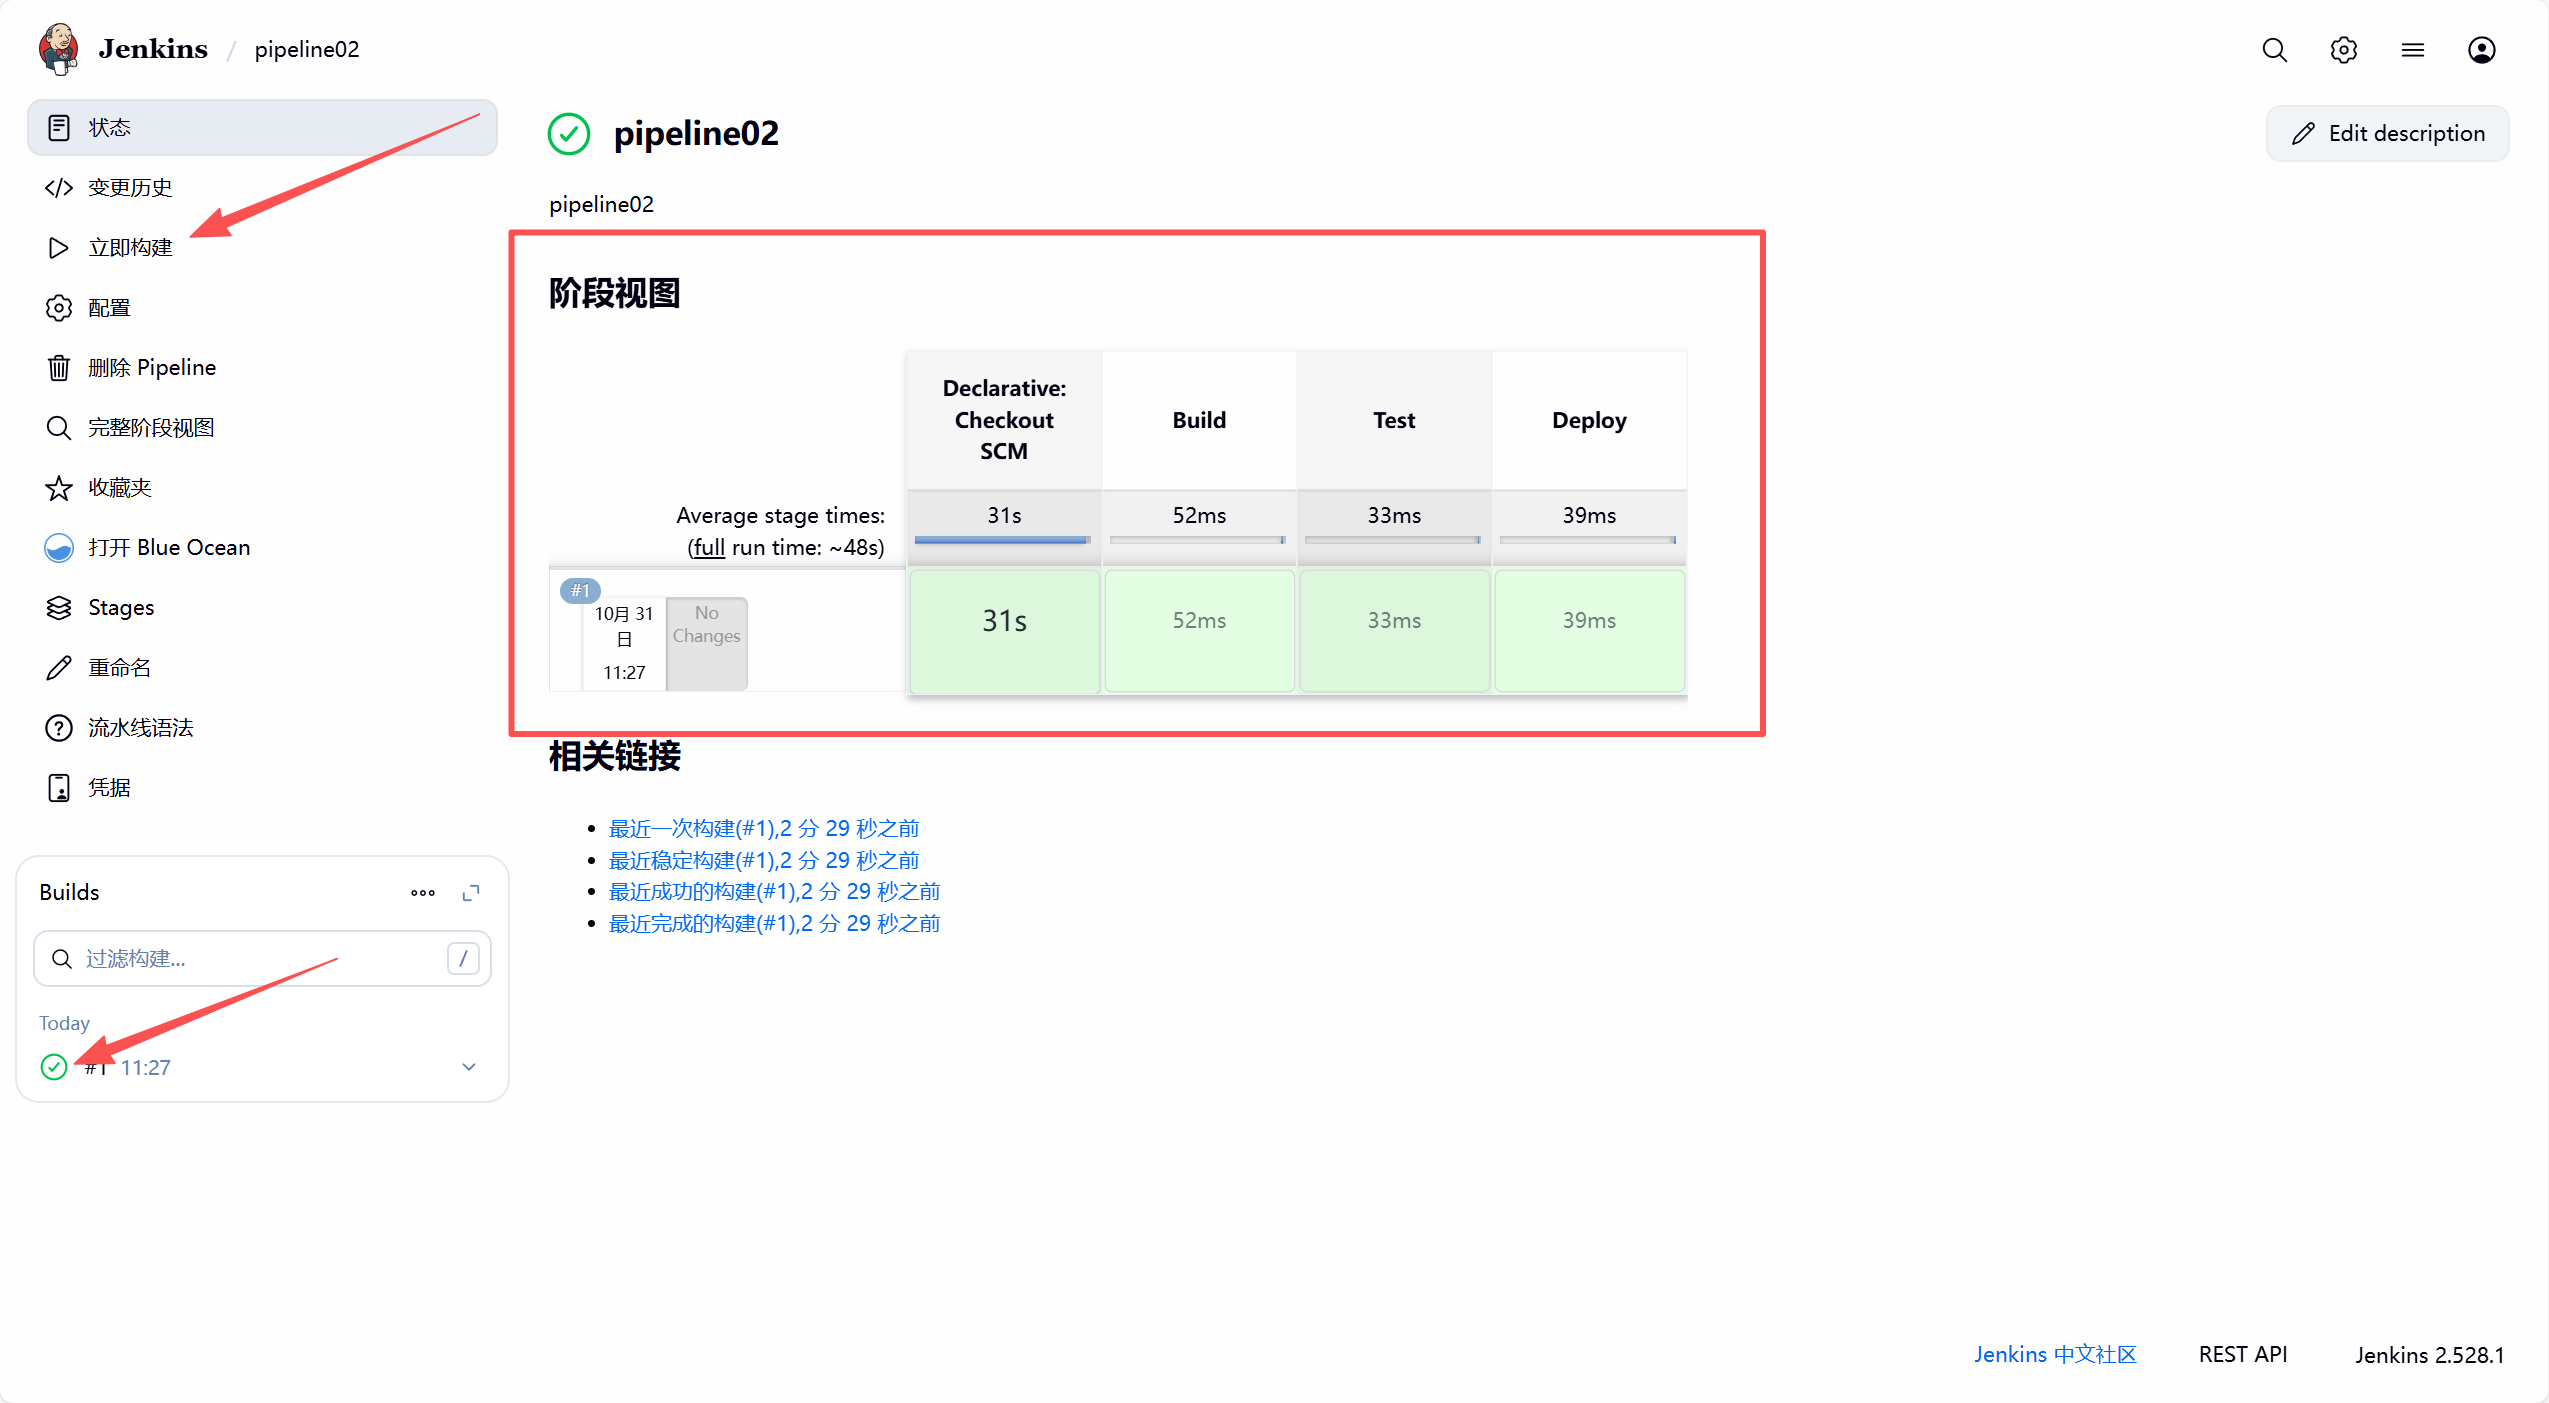
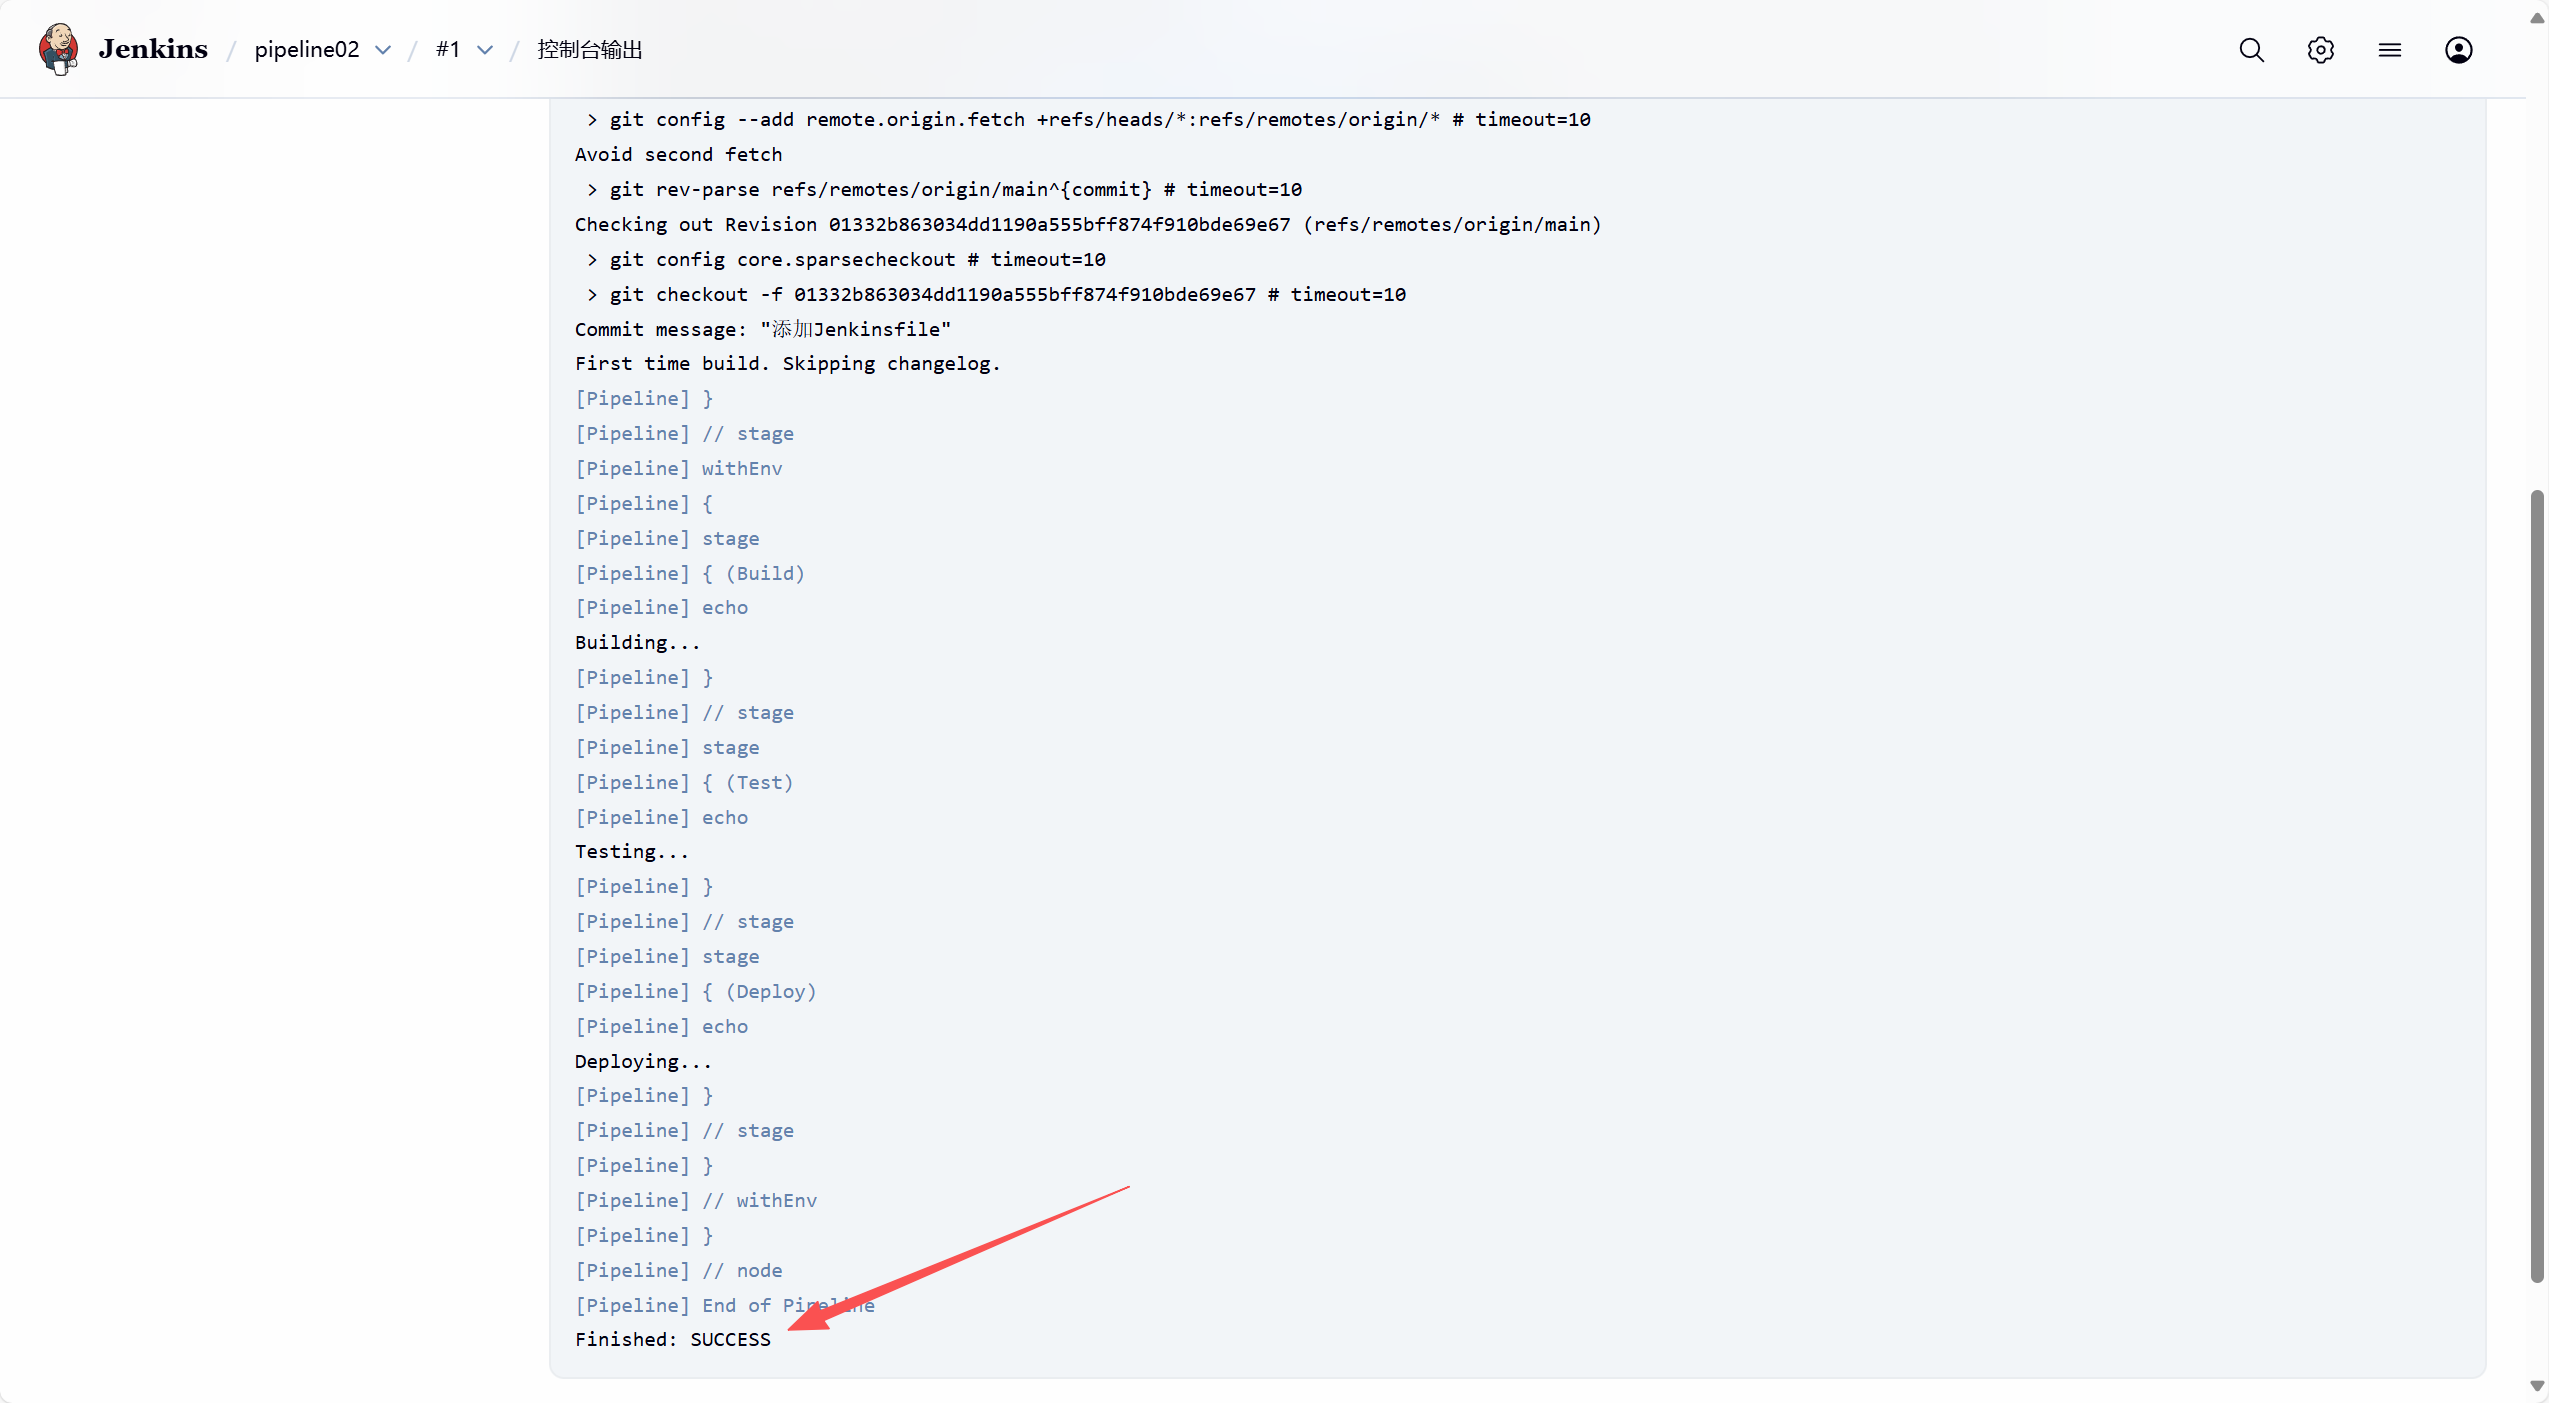
3. 使用源代码管理
六、本地普通Java应用
1. Maven 构建示例
1.1 安装和配置maven
[root@tomcat ~]# yum -y install maven

[root@tomcat ~]# mvn --version
Apache Maven 3.6.3 (Red Hat 3.6.3-22)
Maven home: /usr/share/maven
Java version: 17.0.16, vendor: Red Hat, Inc., runtime: /usr/lib/jvm/java-17-openjdk-17.0.16.0.8-2.el9.x86_64
Default locale: en_US, platform encoding: UTF-8
OS name: "linux", version: "5.14.0-592.el9.x86_64", arch: "amd64", family: "unix"
1.2 构建普通java应用
1. 2.1 创建一个简单的 Java 项目
(1)项目结构
my-java-project/
│
├── pom.xml
└── src/
    └── main/
        └── java/
            └── com/
                └── example/
                    └── App.java
(2)pom.xml 文件内容
创建 pom.xml 文件,设置 Maven 构建工具和相关依赖项:
<project xmlns="http://maven.apache.org/POM/4.0.0"
         xmlns:xsi="http://www.w3.org/2001/XMLSchema-instance"
         xsi:schemaLocation="http://maven.apache.org/POM/4.0.0 http://maven.apache.org/xsd/maven-4.0.0.xsd">
    <modelVersion>4.0.0</modelVersion>

    <groupId>com.example</groupId>
    <artifactId>my-java-project</artifactId>
    <version>1.0-SNAPSHOT</version>
    <packaging>jar</packaging>

    <dependencies>
        <!-- JUnit 5 for testing -->
        <dependency>
            <groupId>org.junit.jupiter</groupId>
            <artifactId>junit-jupiter-api</artifactId>
            <version>5.7.0</version>
            <scope>test</scope>
        </dependency>
    </dependencies>

    <build>
        <plugins>
            <plugin>
                <groupId>org.apache.maven.plugins</groupId>
                <artifactId>maven-compiler-plugin</artifactId>
                <version>3.8.1</version>
                <configuration>
                    <source>17</source>
                    <target>17</target>
                </configuration>
            </plugin>

            <plugin>
                <groupId>org.apache.maven.plugins</groupId>
                <artifactId>maven-jar-plugin</artifactId>
                <version>3.1.0</version>
                <configuration>
                    <archive>
                        <manifestEntries>
                            <Main-Class>com.example.App</Main-Class>  <!-- 入口类 -->
                        </manifestEntries>
                    </archive>
                </configuration>
            </plugin>
        </plugins>
    </build>

</project>
(3) App.java 文件内容
在 src/main/java/com/example/ 目录下创建 App.java 文件:
package com.example;

public class App {
    public static void main(String[] args) {
        System.out.println("Hello, World!");
    }
}
1.3 使用 Maven 构建并测试该项目
(1)构建项目
在项目根目录下运行以下命令来构建项目:
[root@tomcat my-java-project]# pwd
/my-java-project
[root@tomcat my-java-project]# mvn clean package
构建完成后,target/ 目录下会出现一个 my-java-project-1.0-SNAPSHOT.jar 文件。
(2) 运行项目
[root@tomcat my-java-project]# java -jar target/my-java-project-1.0-SNAPSHOT.jar
Hello, World!
1.4 上传项目源代码到gitlab服务器
1.4.1 gitlab服务器上创建新的仓库
1.4.2 存放项目源代码的机器上执行如下操作
cd my-java-project/
rm -rf target/
git config --global init.defaultBranch main
git init
git config --global user.email "ink@java.com"
git config --global user.name "ink_java"
git add .
git commit -m "Initial commit"
git log
git remote add origin http://192.168.159.133/root/my-java-project.git
git pull origin main --rebase
git push -u origin main
1.5 Jenkins 配置 Maven 构建
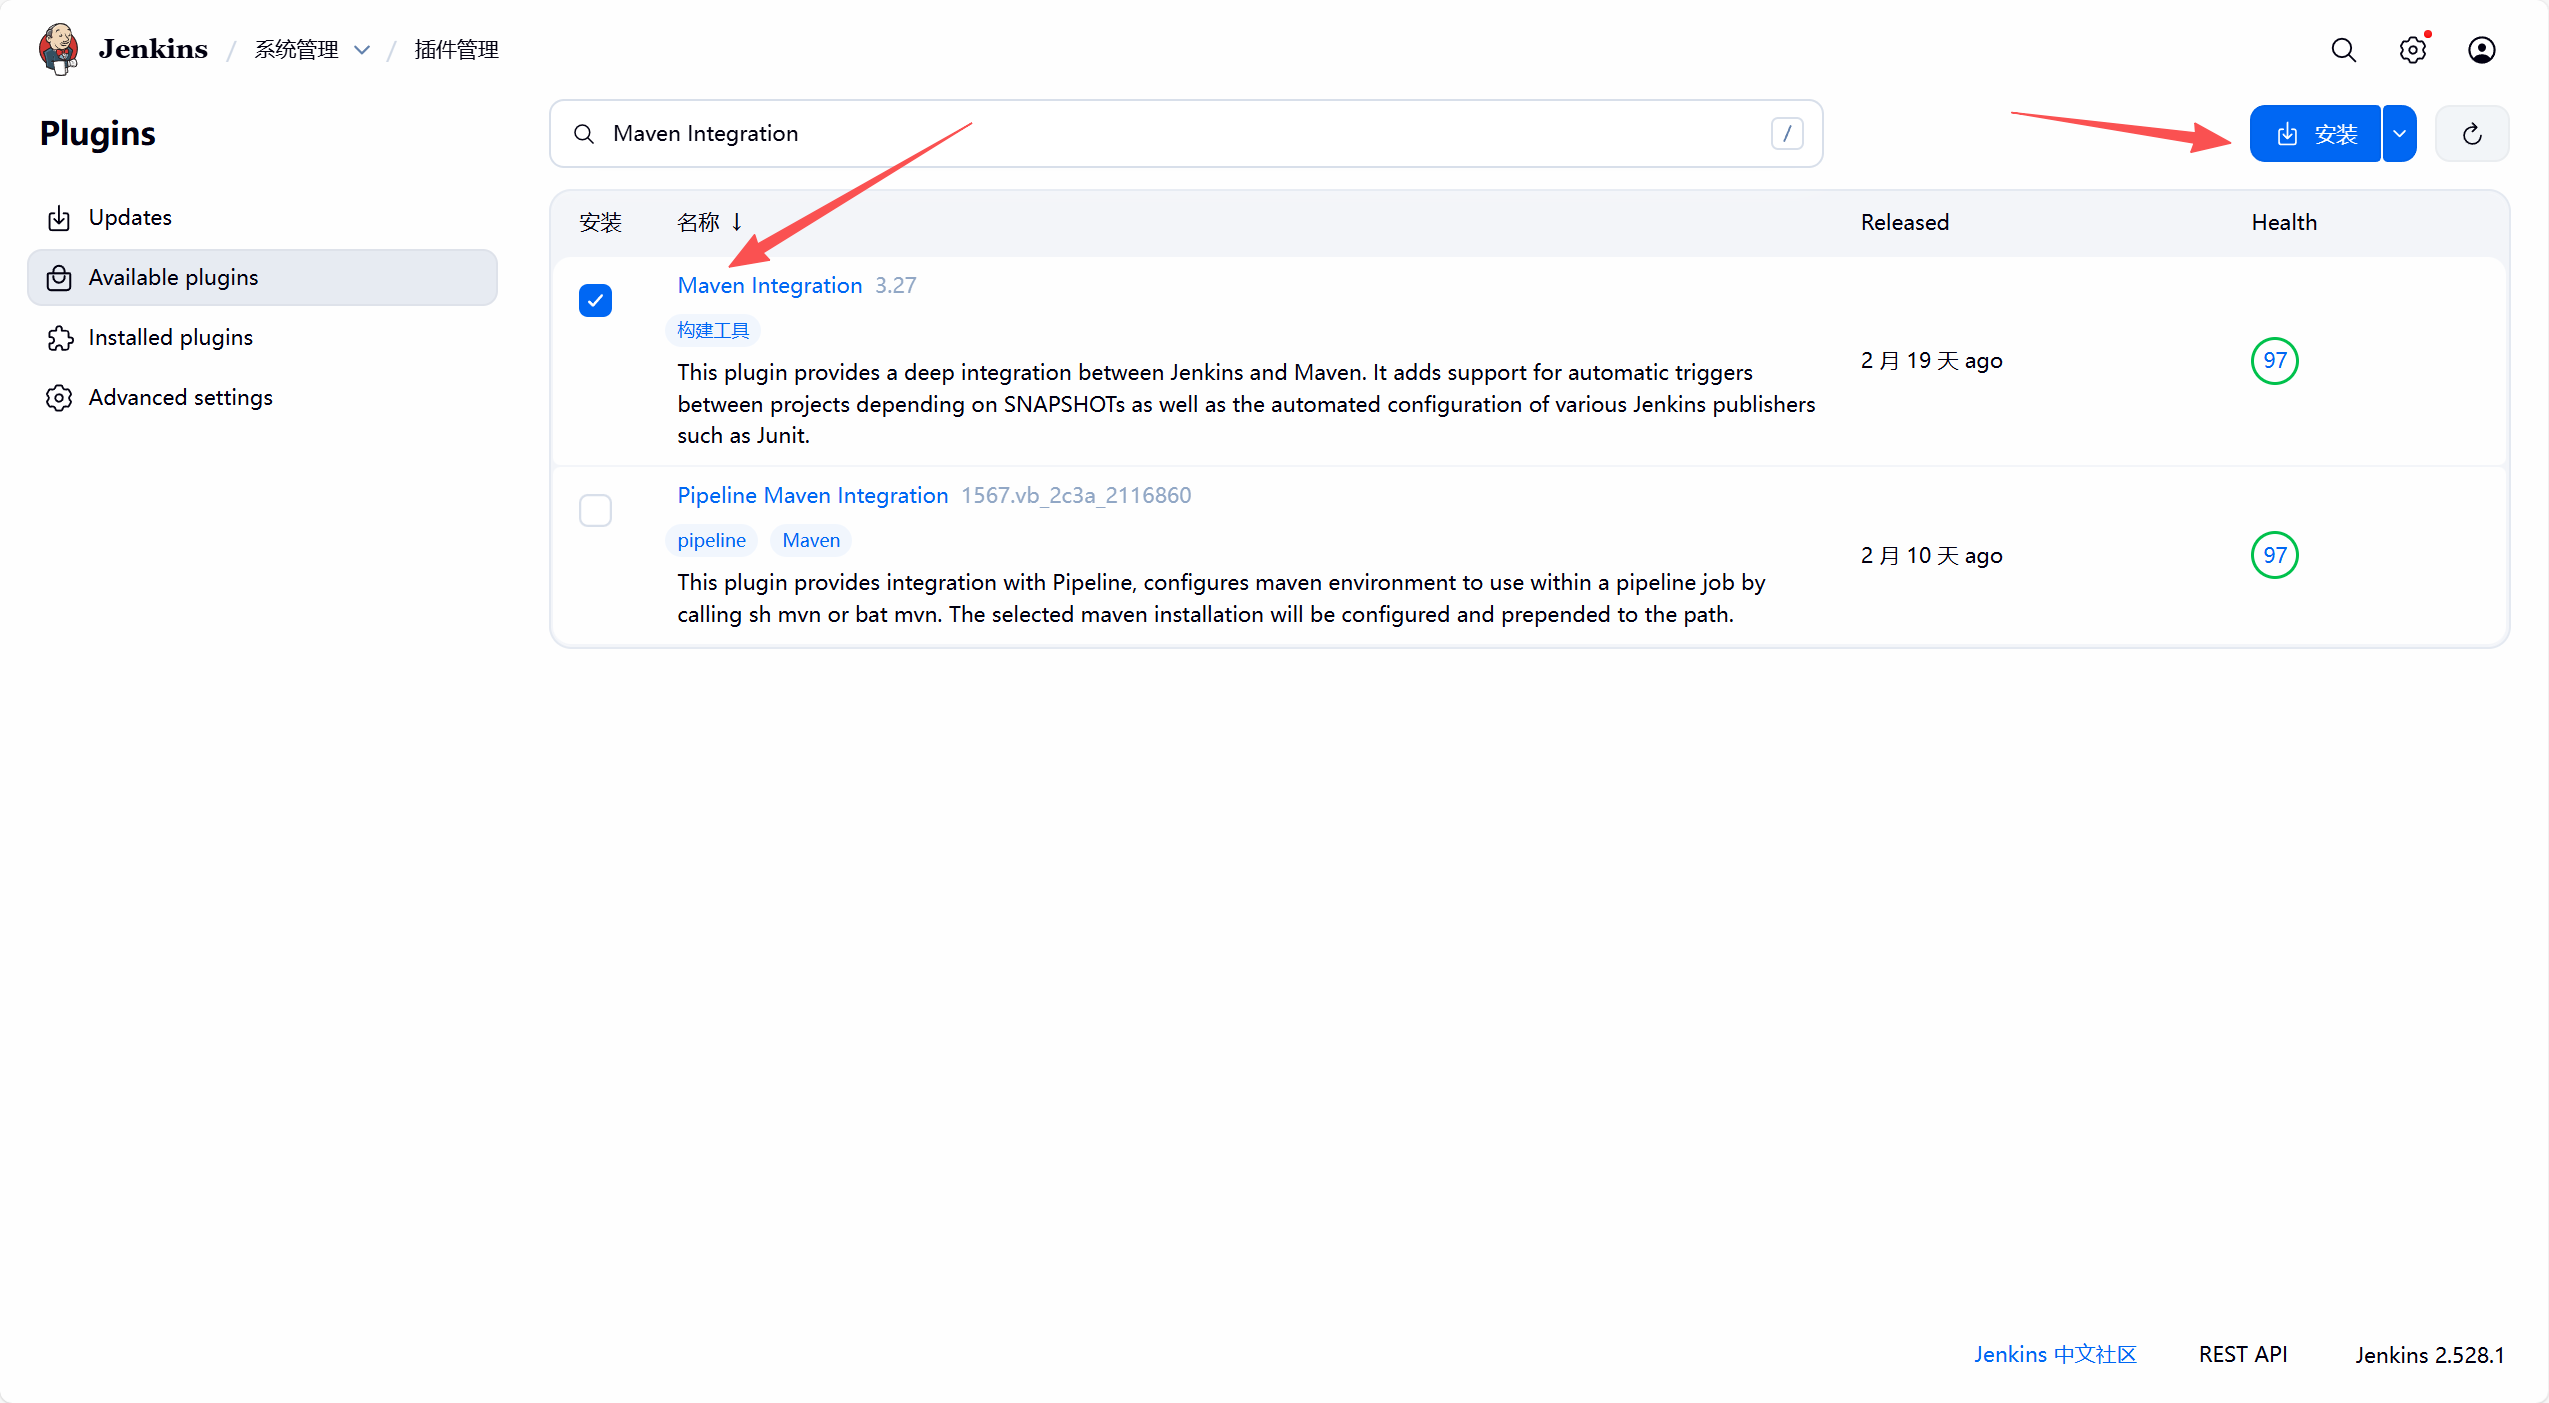
1.5.1 安装maven插件(安装完重启)
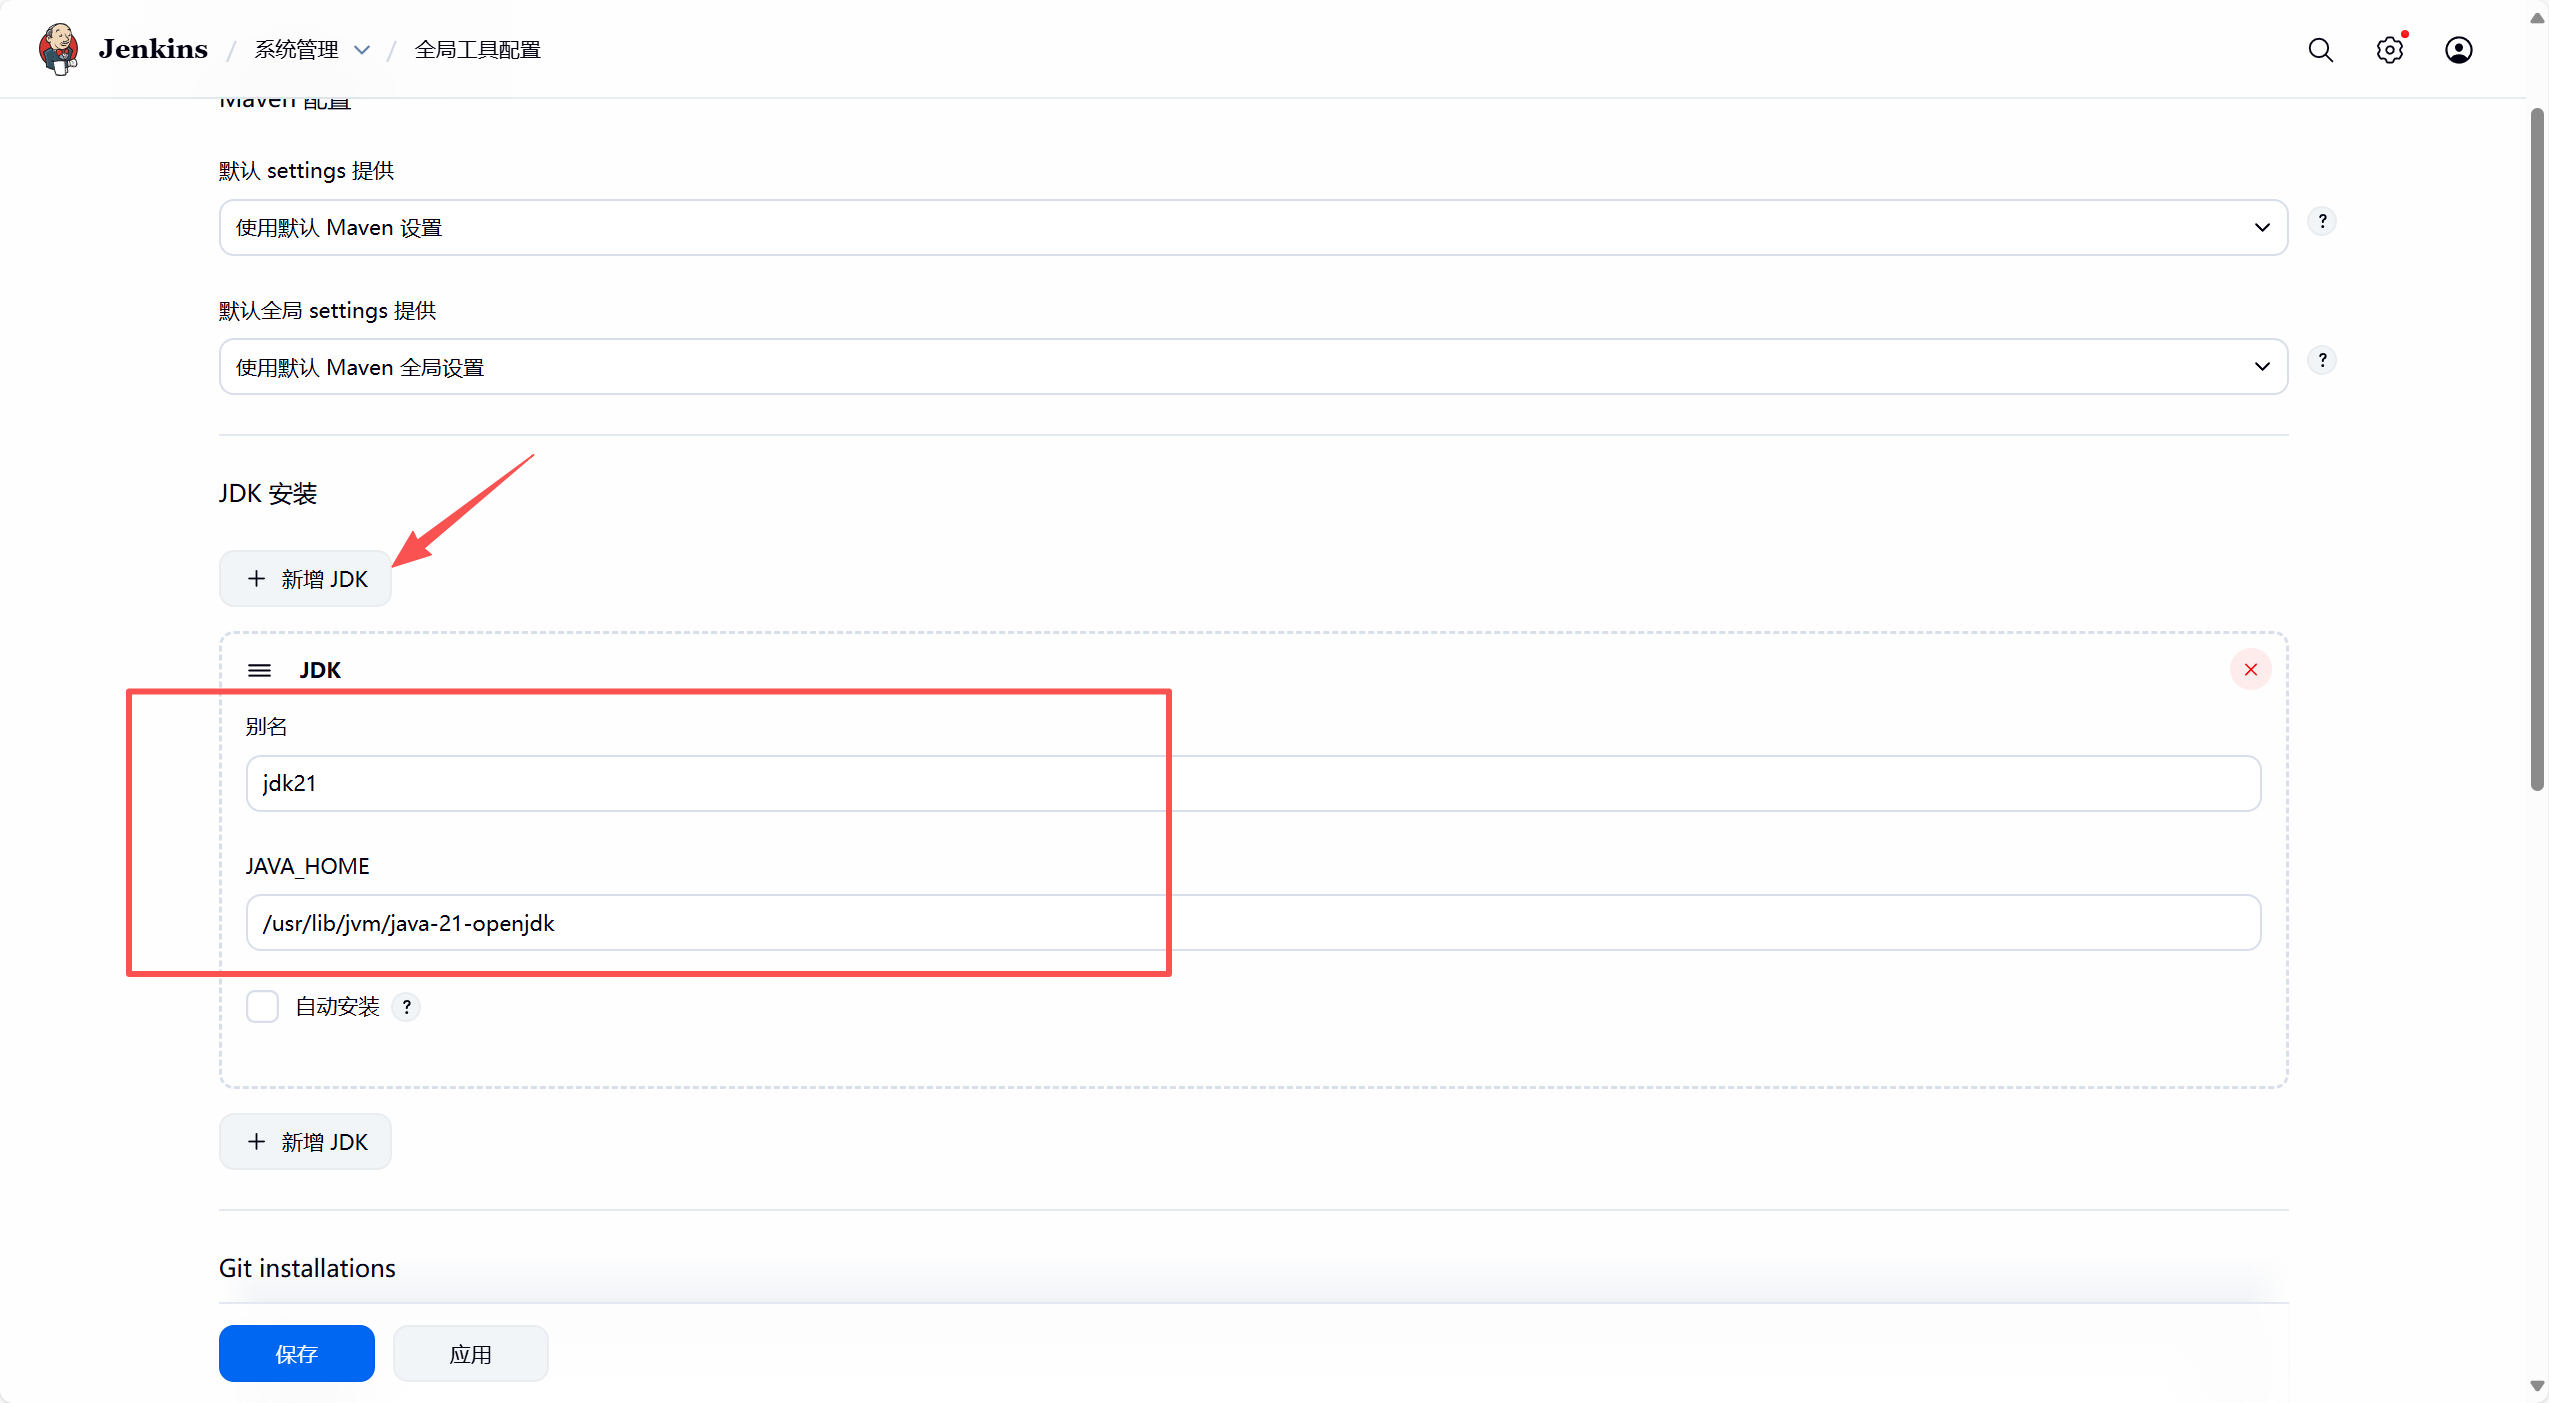
1.5.2 配置jdk环境
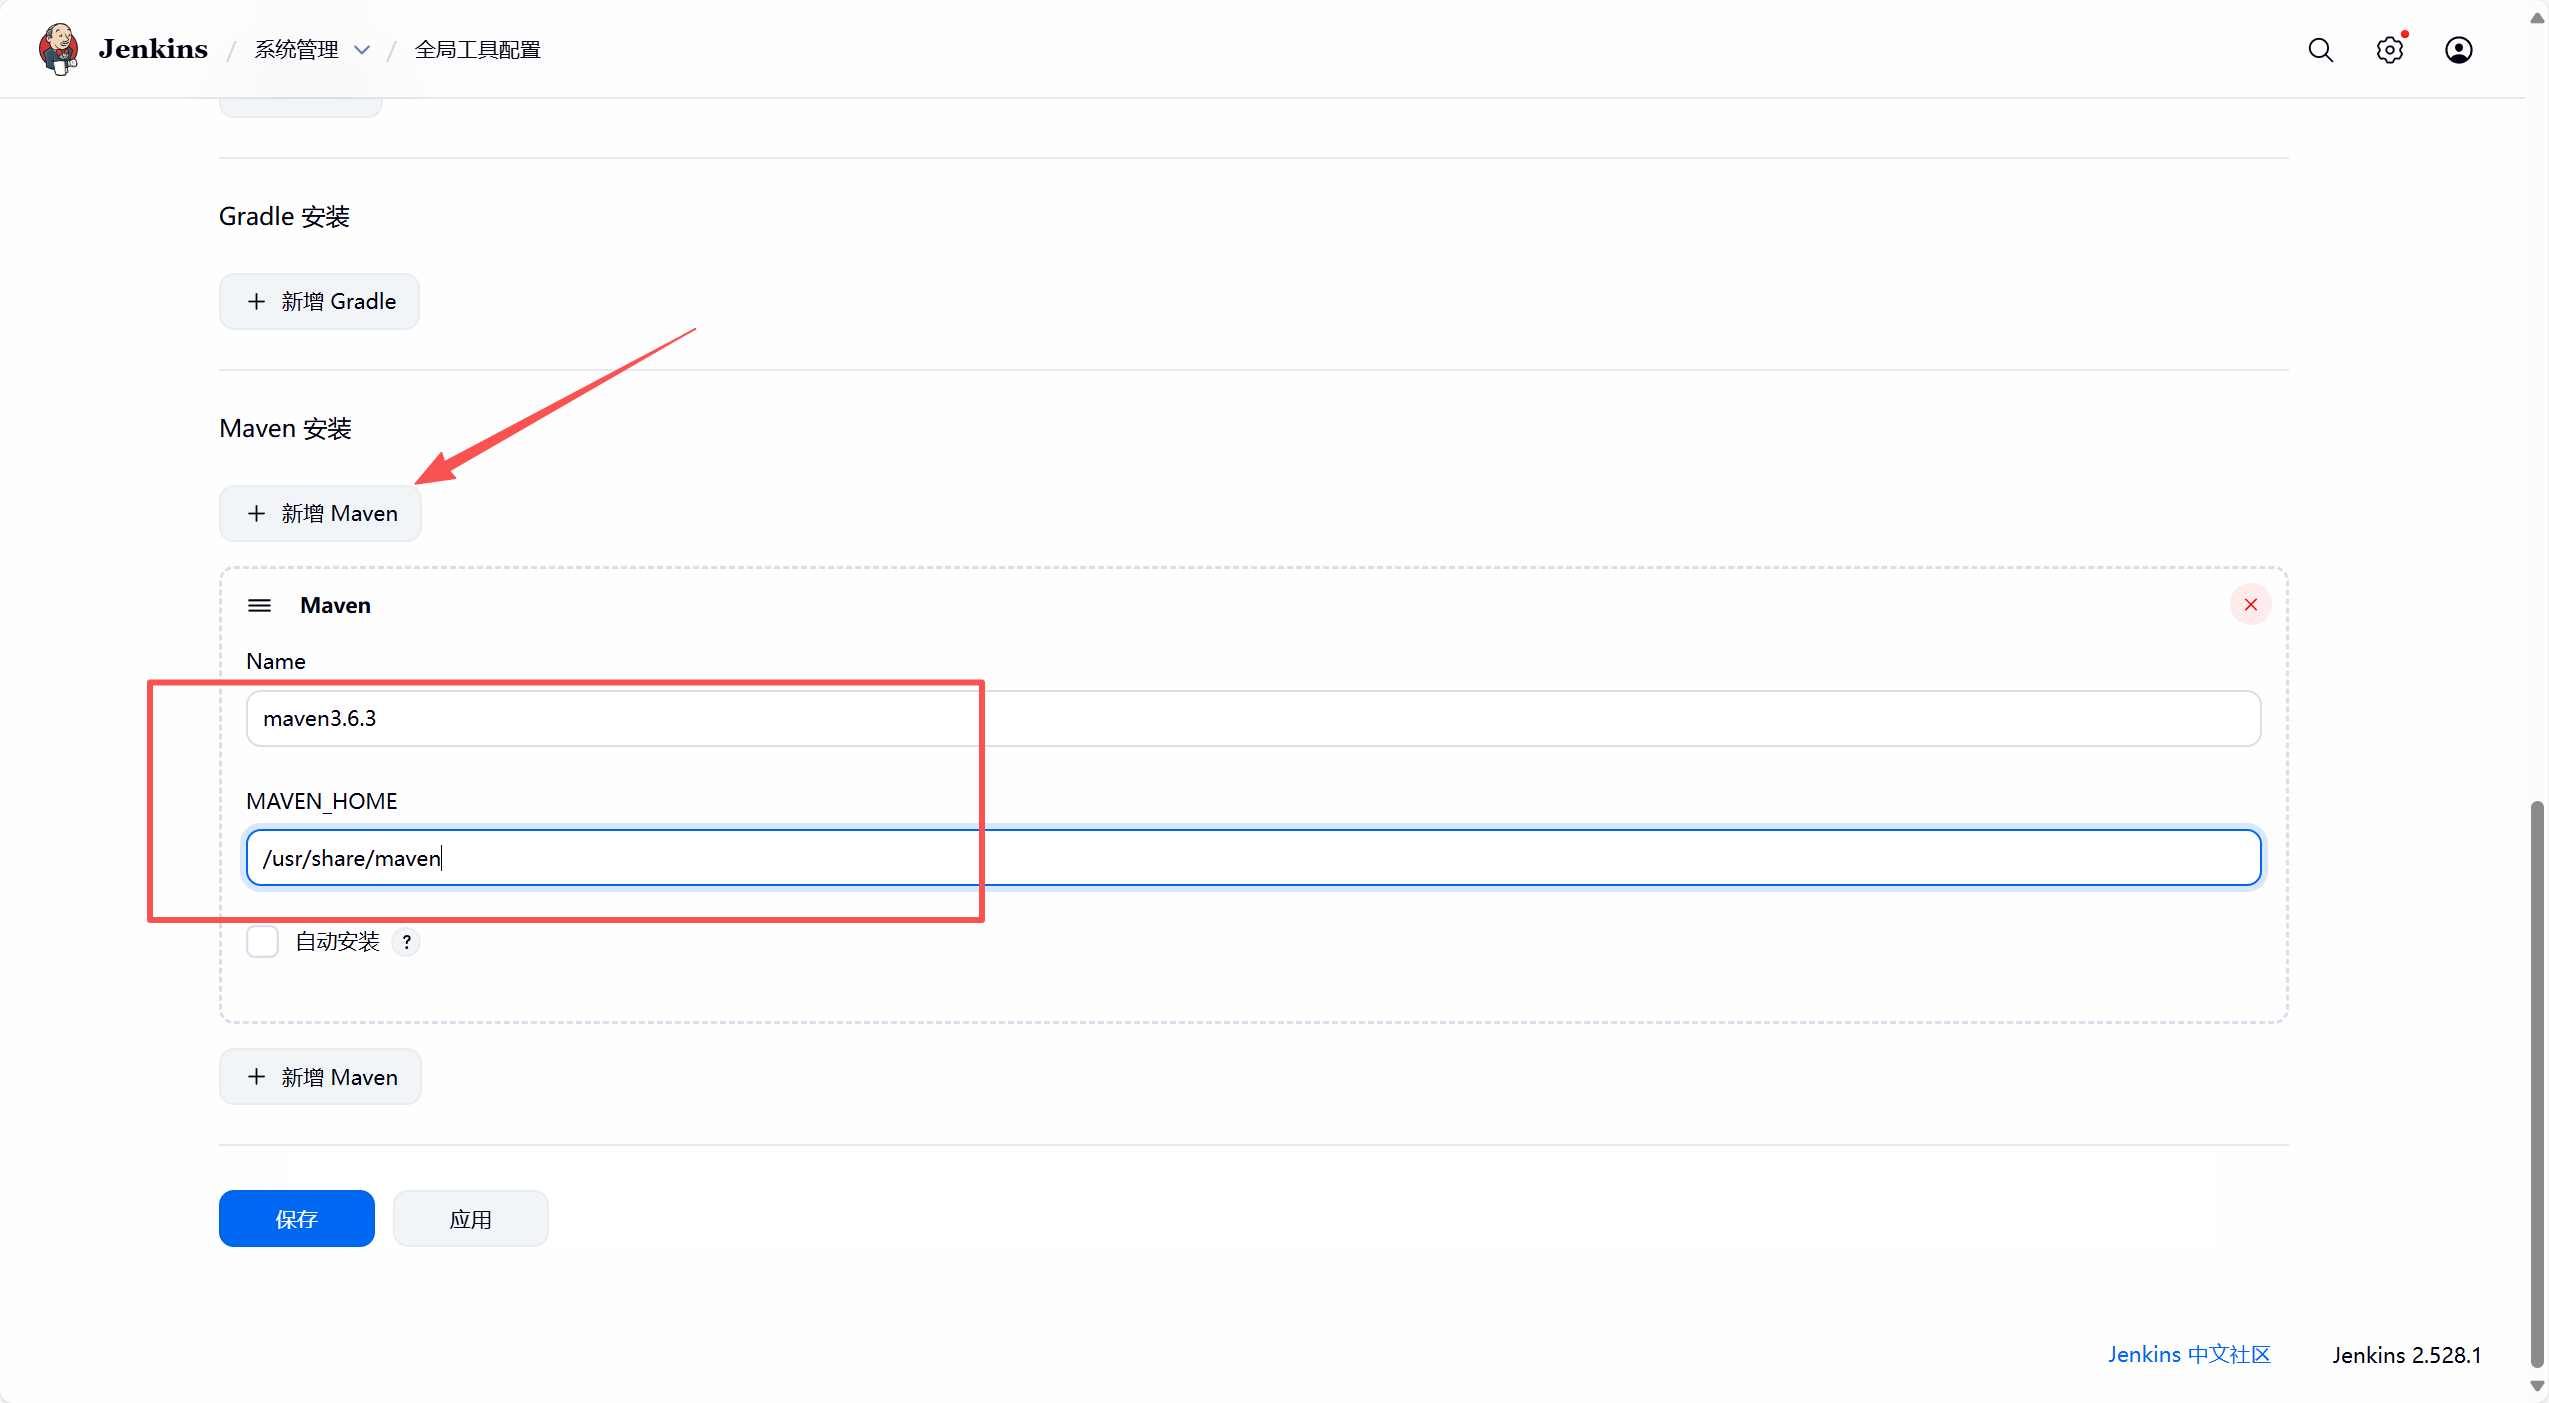
1.5.3 配置Maven环境
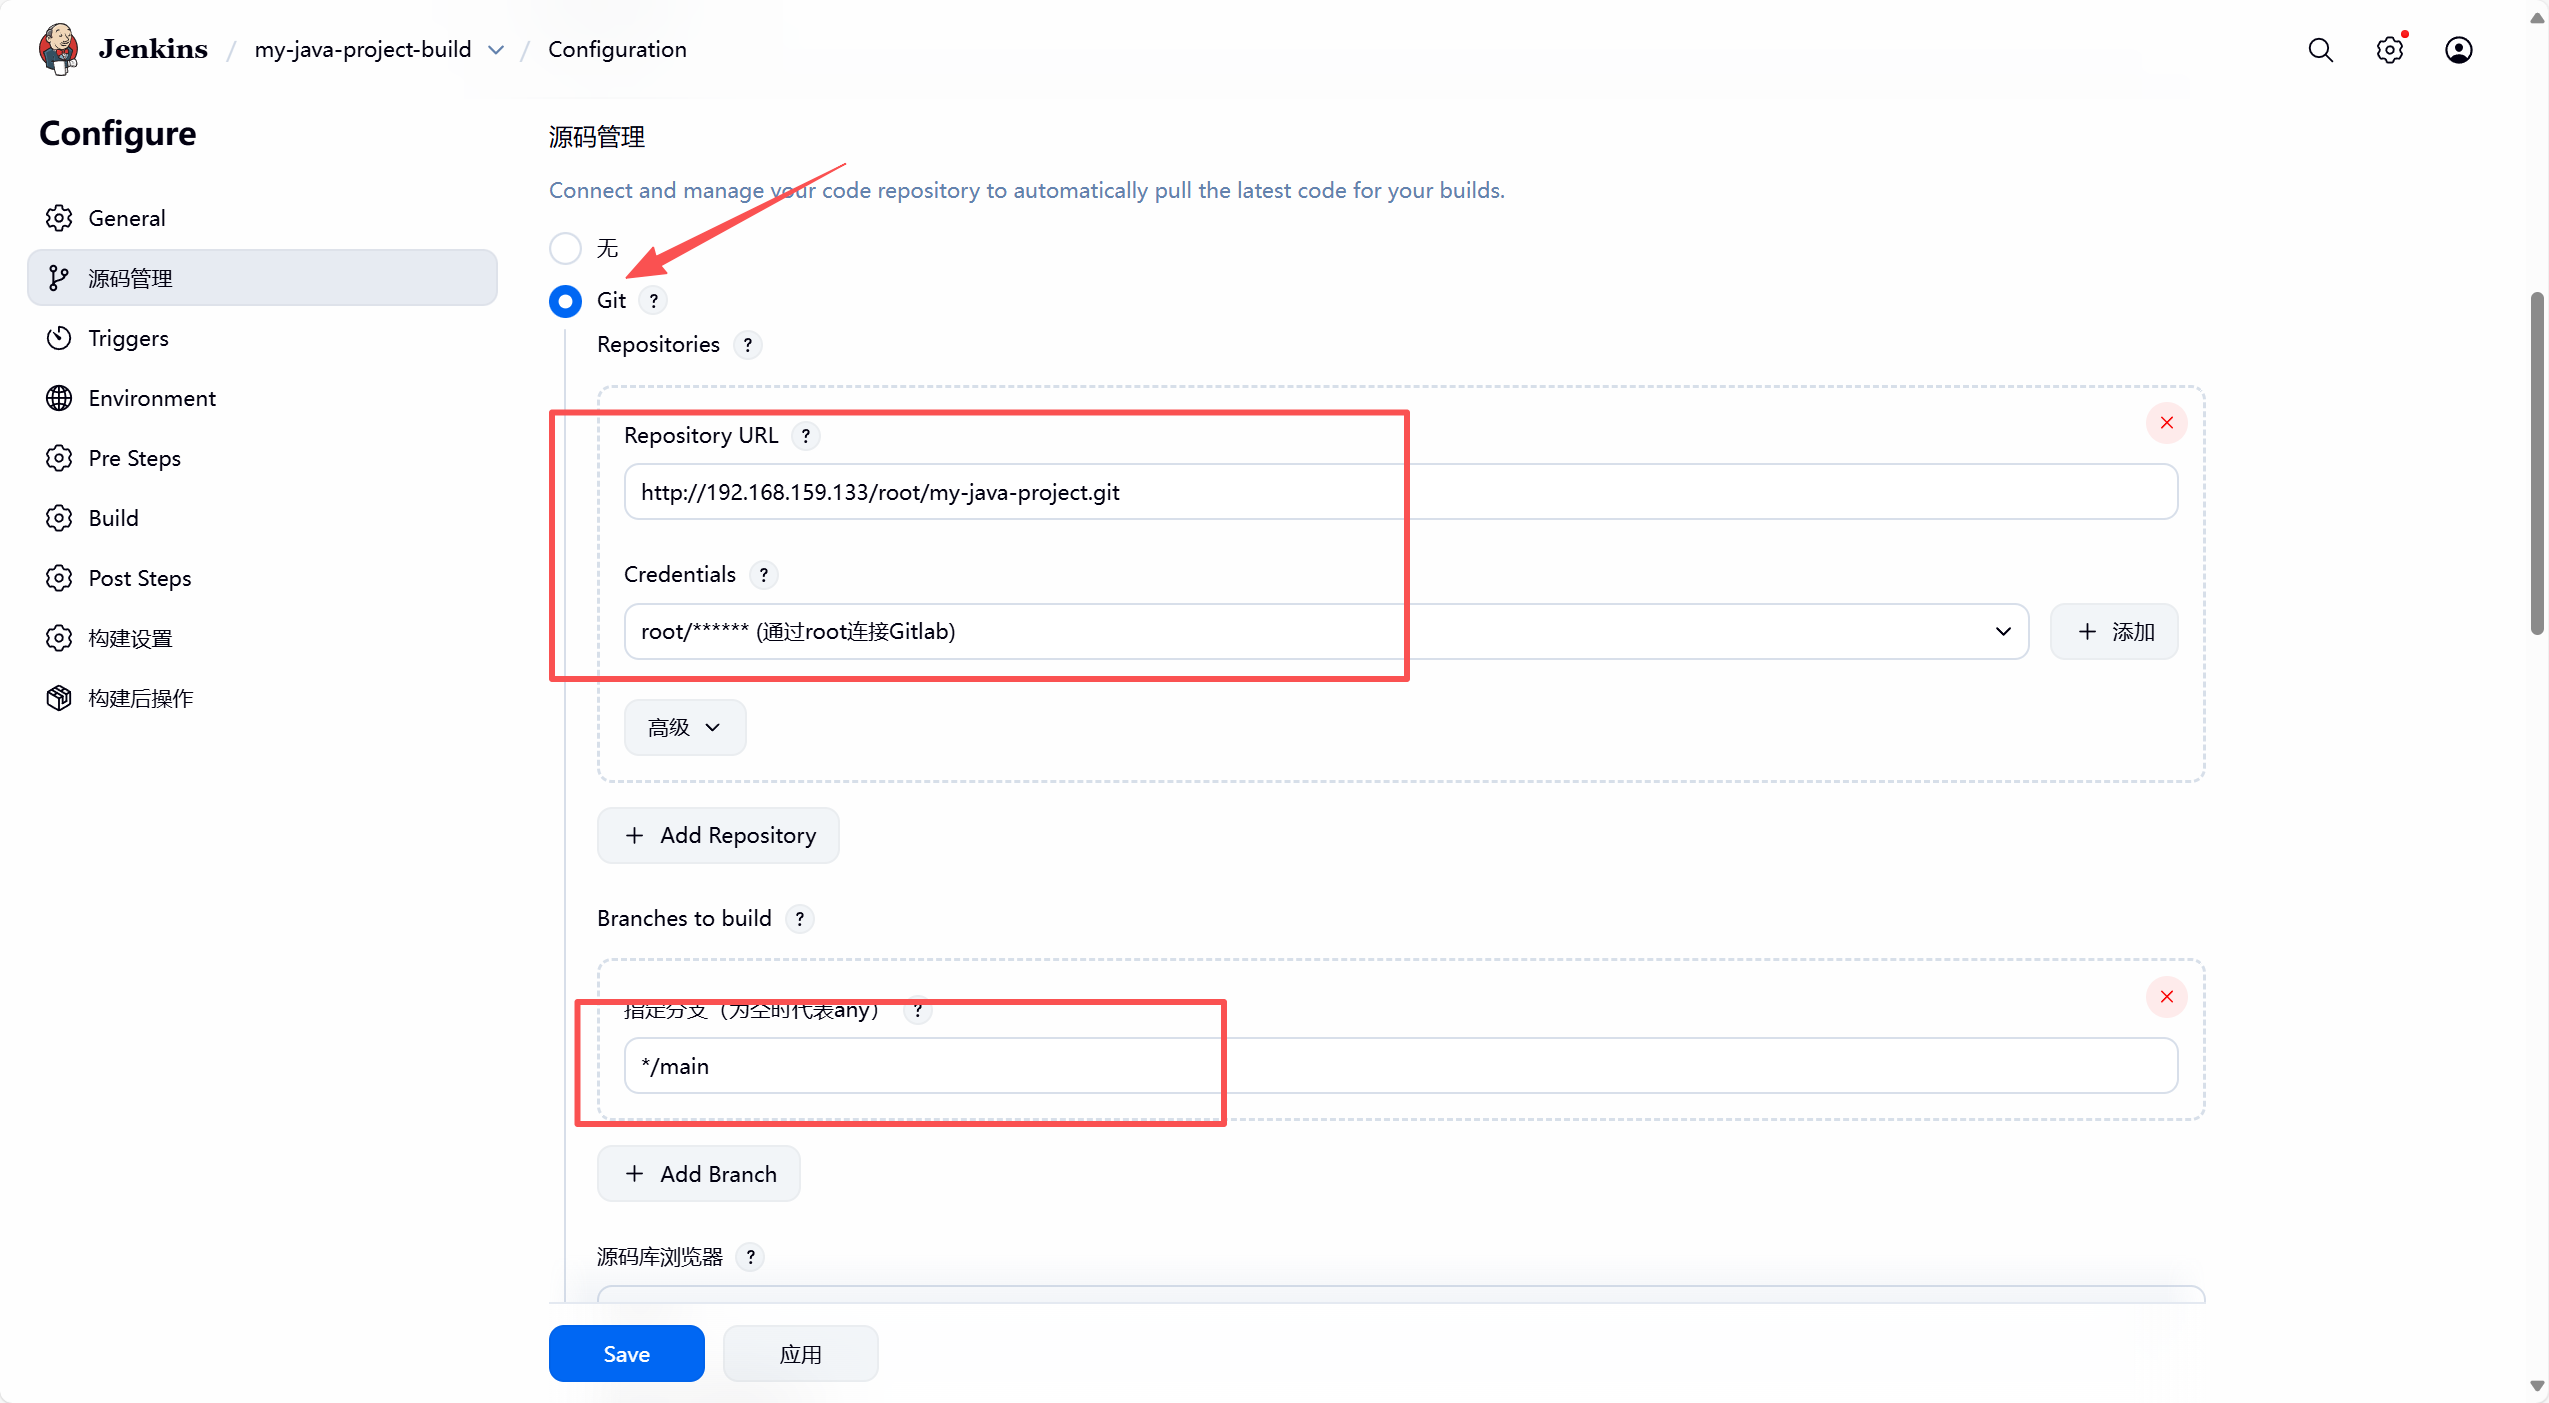
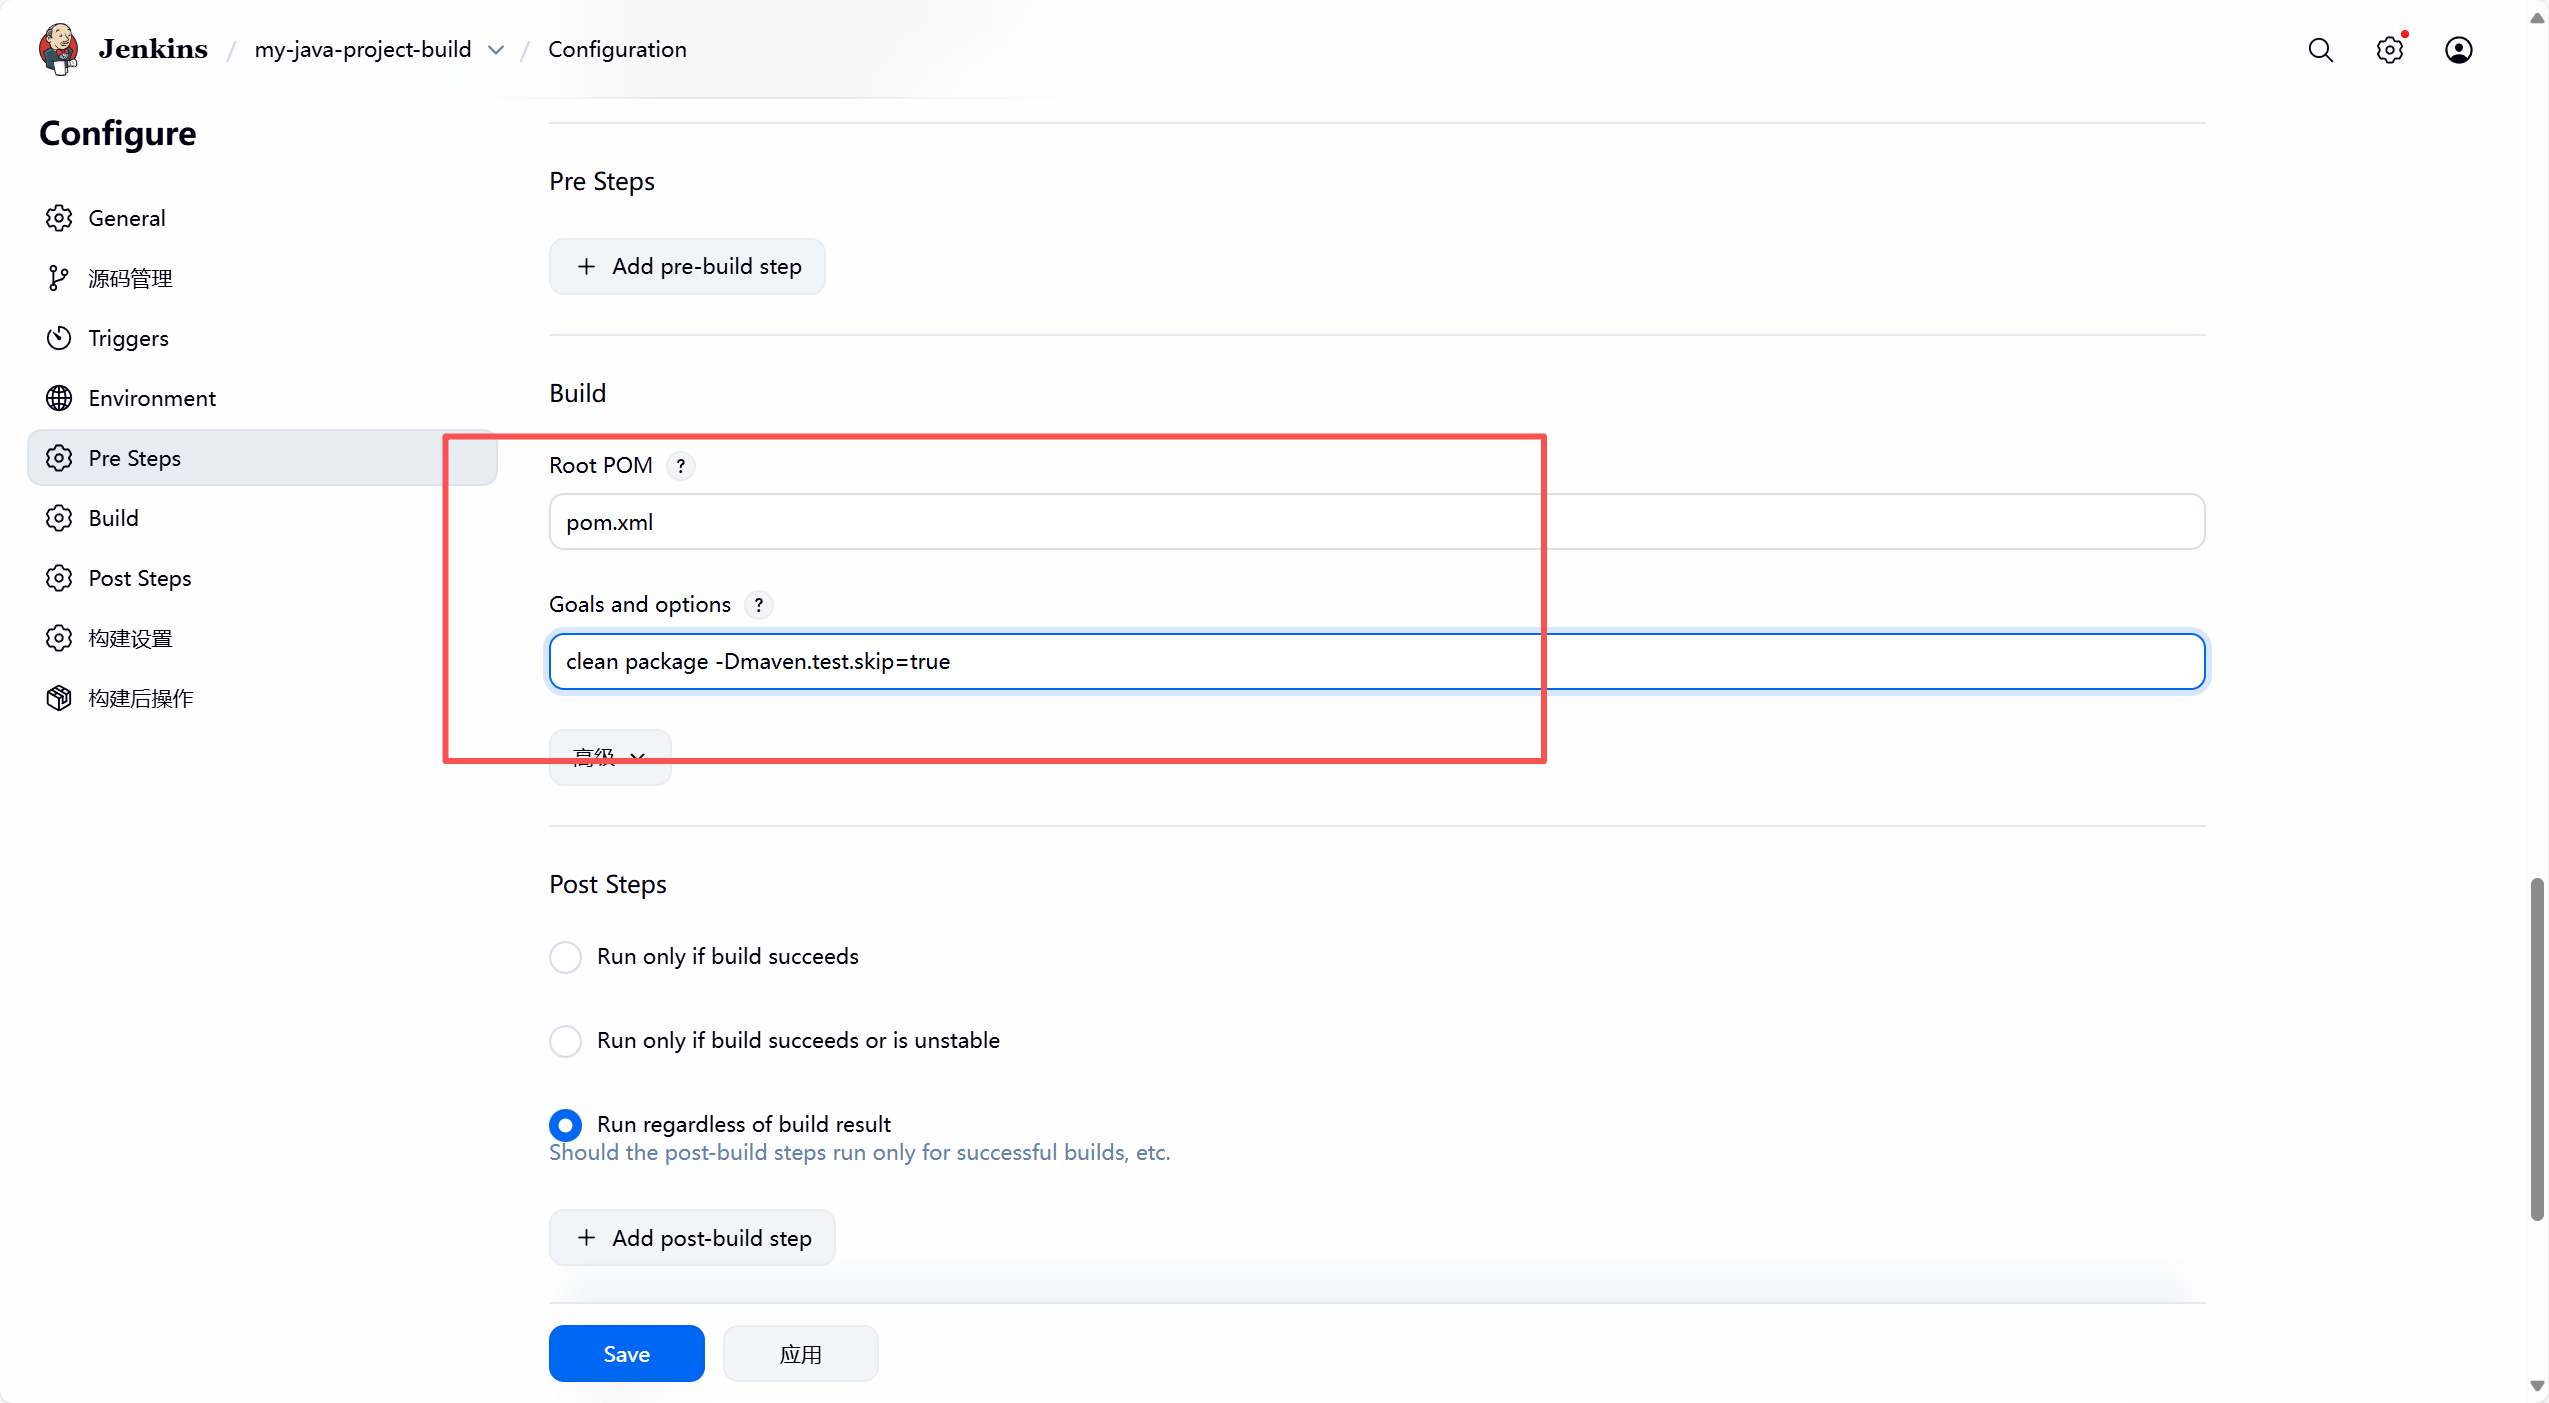
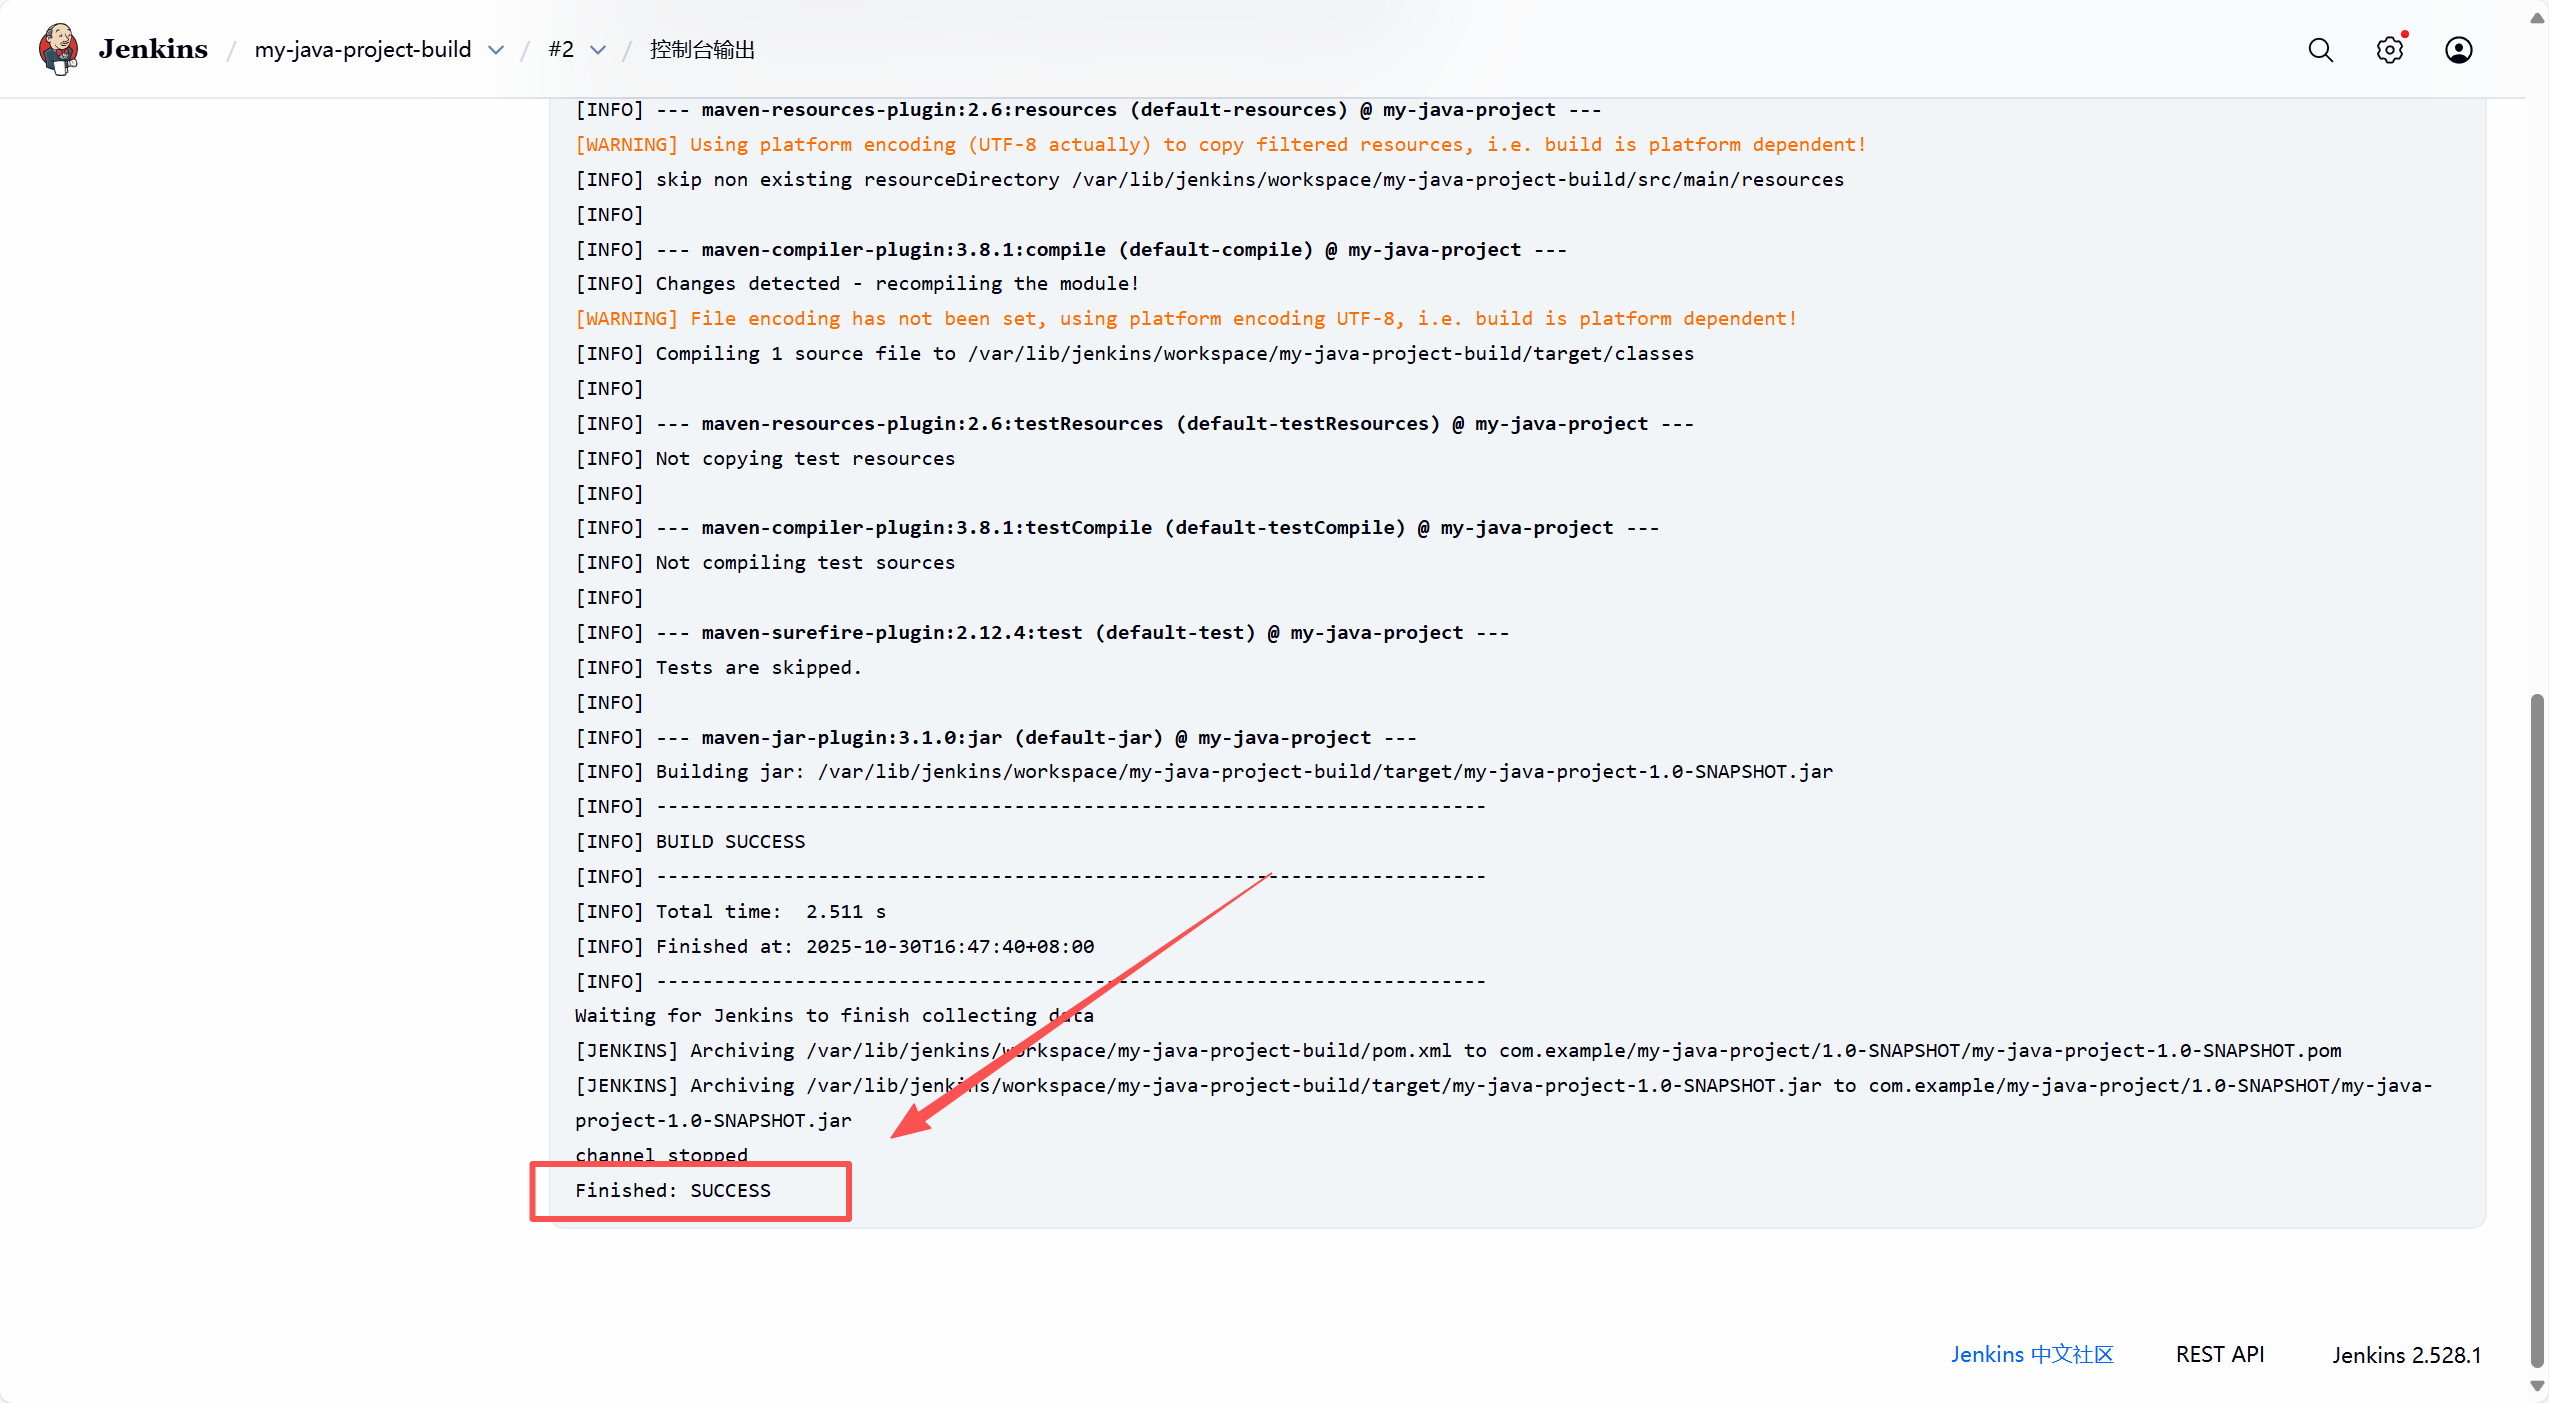
1.5.4 执行构建
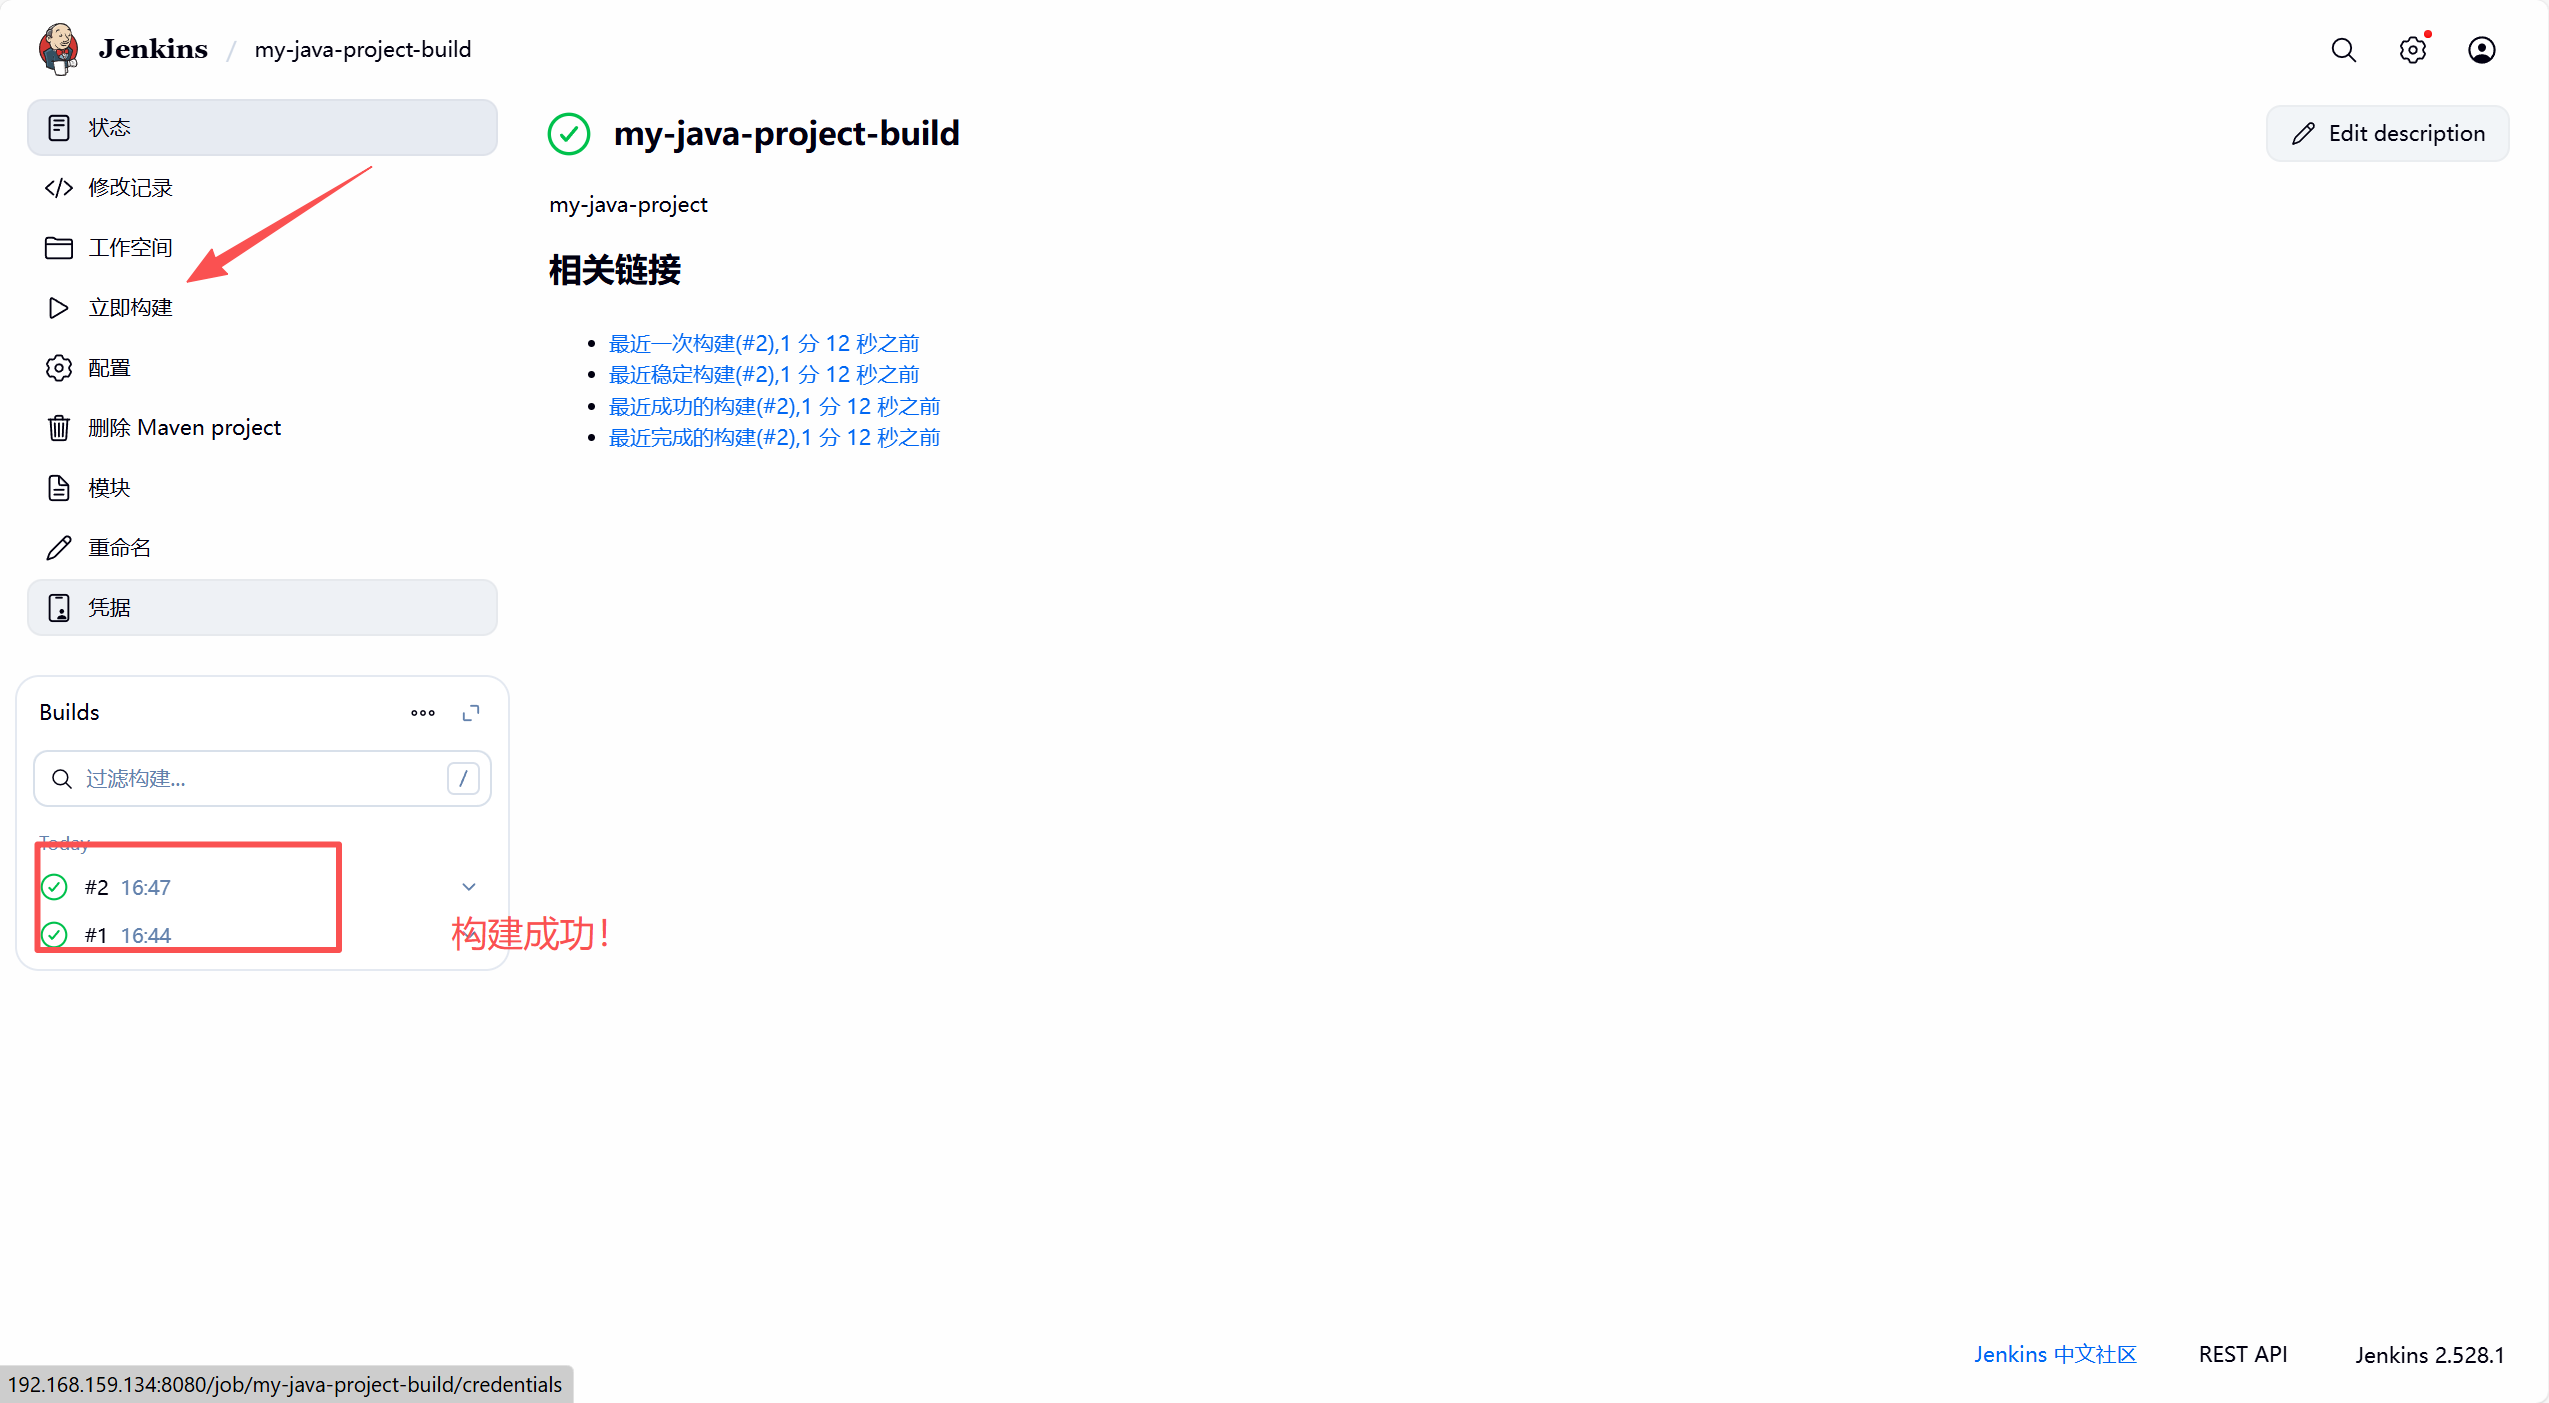
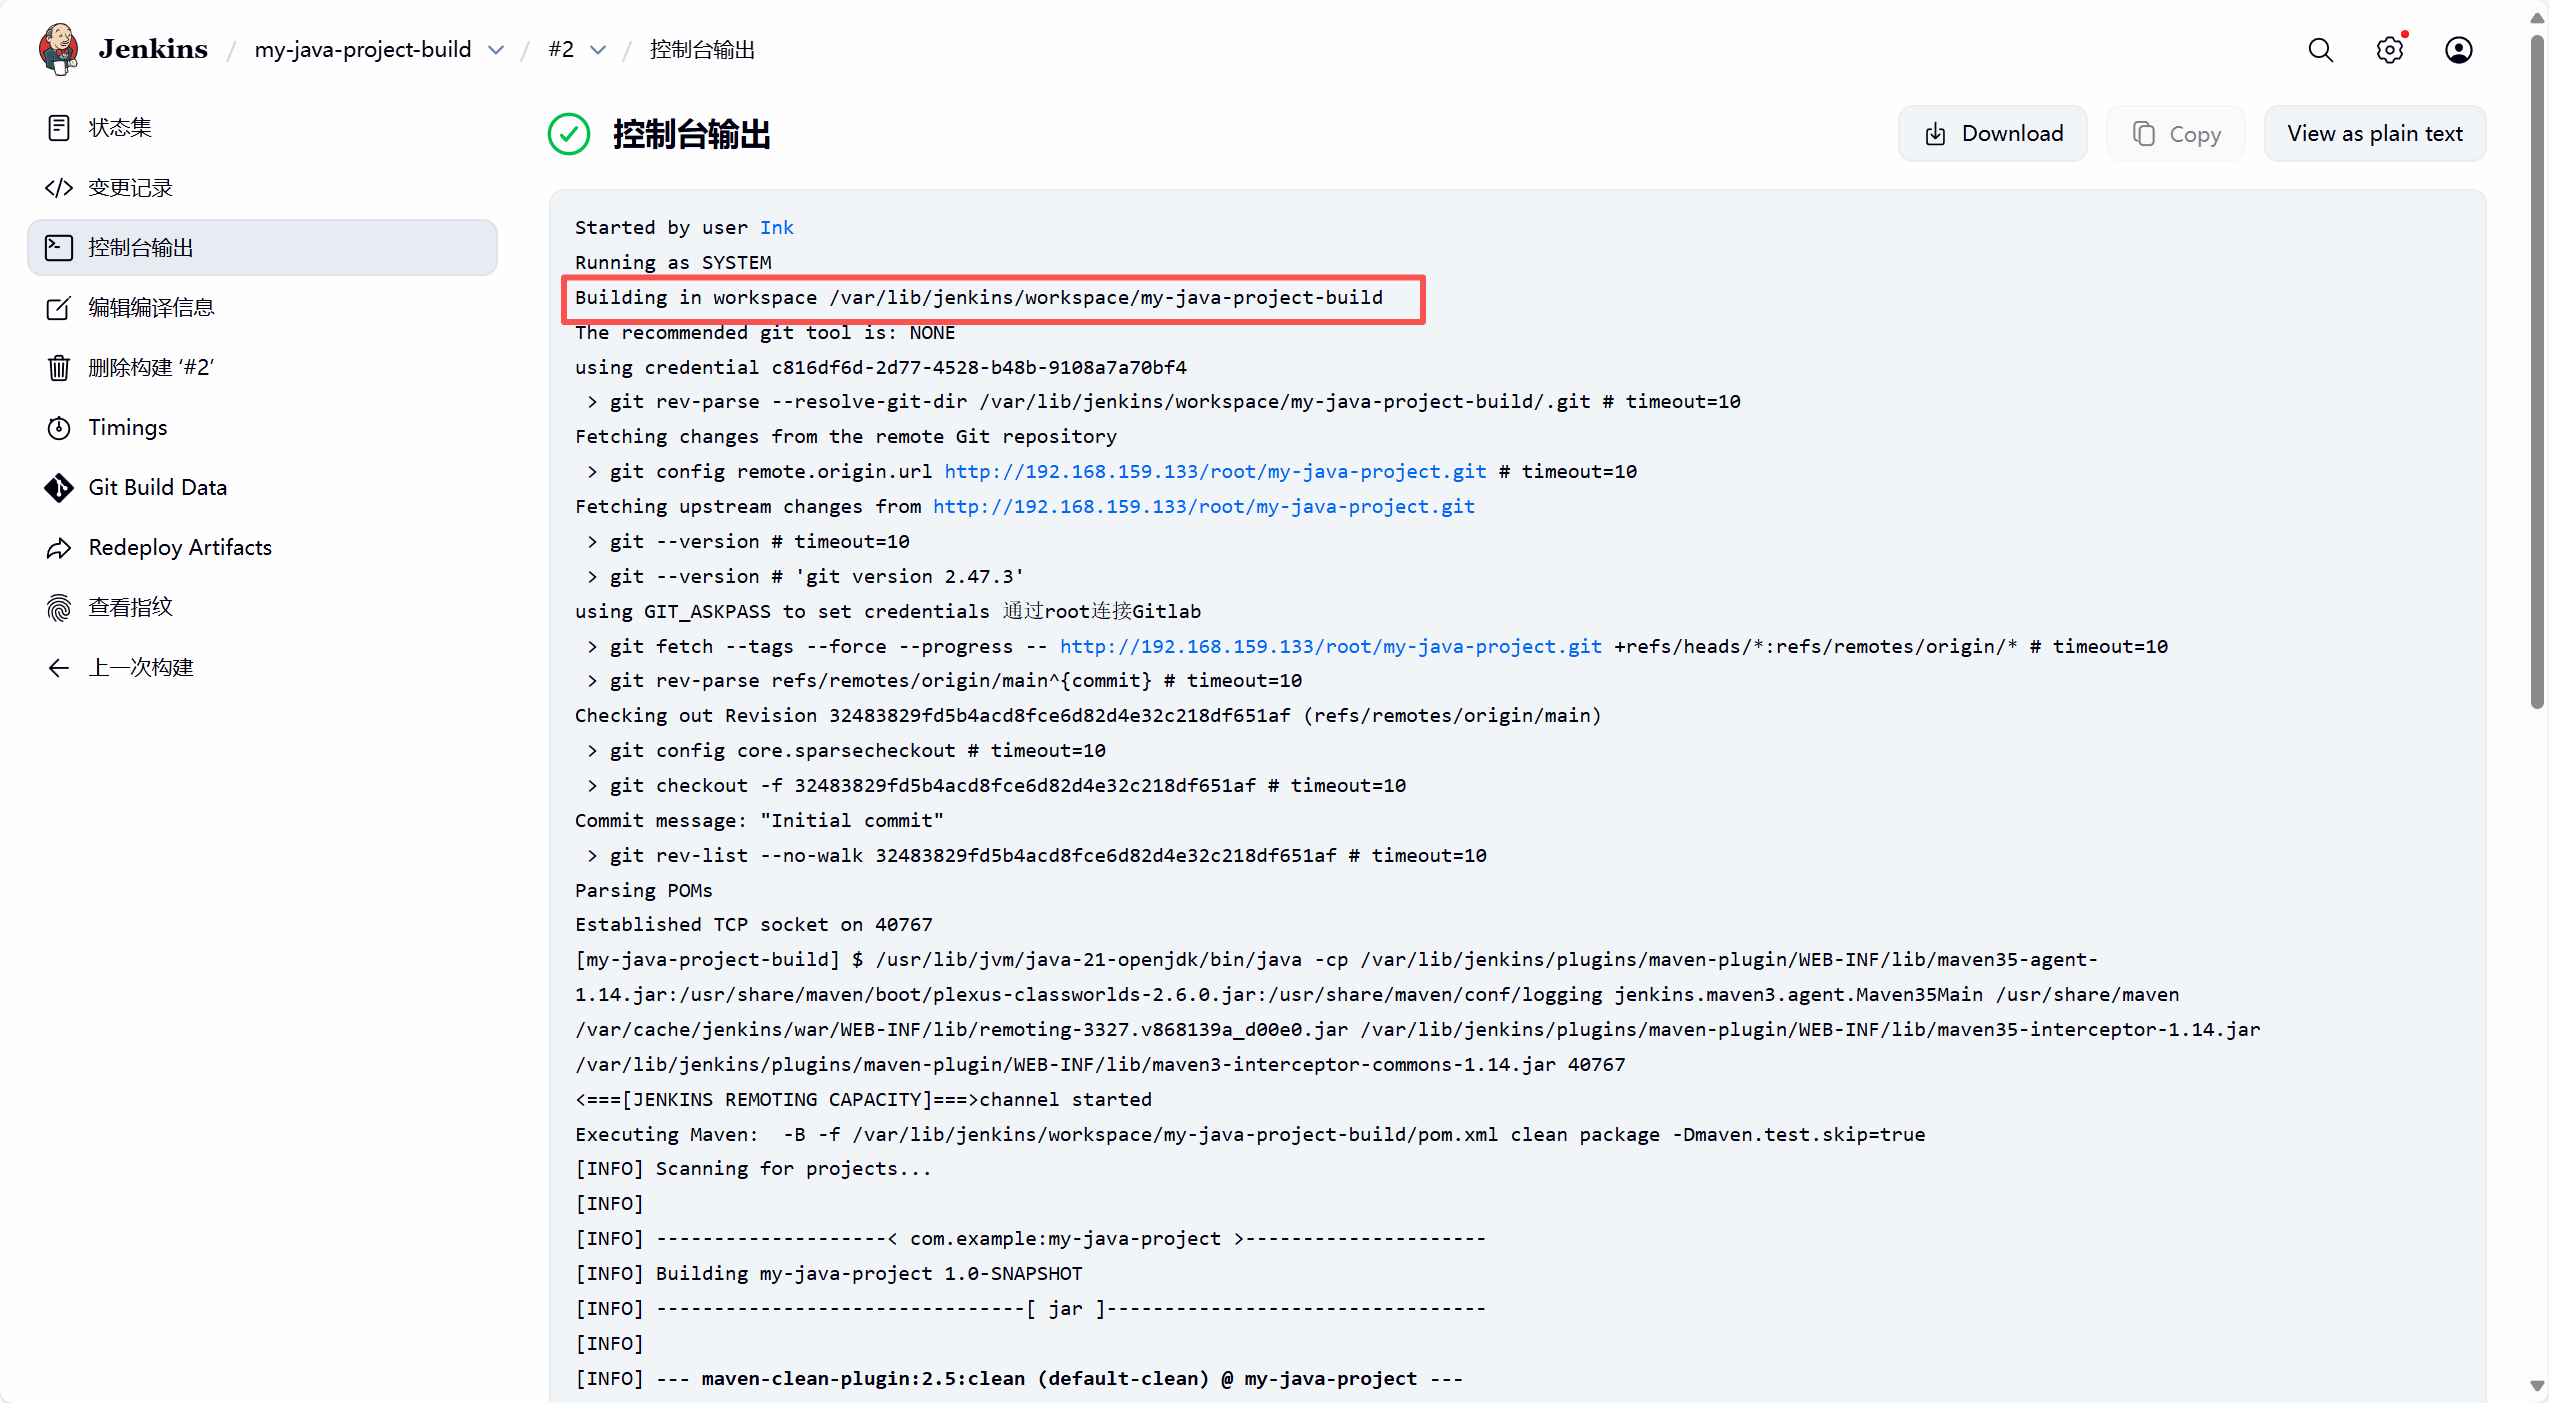
[root@Jenkins ~]# ls /var/lib/jenkins/workspace/my-java-project-build
pom.xml README.md src target
七、Java web 应用
总体步骤和六、本地普通Java应用大体一致。
jenkins用户生成和传公钥给tomcat服务器的root用户!!!
注意java maven 的版本兼容问题!!!
八、Jenkins pipeline构建前端node.js项目
1. tomcat服务器配置
# 安装 Node.js 和 npm
[root@tomcat ~]# dnf install nodejs npm -y
[root@tomcat ~]# node --version
v16.20.2
[root@tomcat ~]# npm --version
8.19.4

# 创建项目目录并初始化
[root@tomcat ~]# cd /opt/
[root@tomcat opt]# mkdir my-nodejs-movie-list
[root@tomcat opt]# cd my-nodejs-movie-list
[root@tomcat my-nodejs-movie-list]# npm init -y
Wrote to /opt/my-nodejs-movie-list/package.json:

{
  "name": "my-nodejs-movie-list",
  "version": "1.0.0",
  "description": "",
  "main": "index.js",
  "scripts": {
    "test": "echo \"Error: no test specified\" && exit 1"
  },
  "keywords": [],
  "author": "",
  "license": "ISC"
}


[root@tomcat my-nodejs-movie-list]# tree
.
├── app.js
├── ecosystem.config.js
├── movieData.js
└── package.json

0 directories, 4 files

# 启动服务器
[root@tomcat my-nodejs-movie-list]# node app.js
🎬 个人电影清单服务器已启动!
📍 服务器运行在: http://localhost:3000
👉 试试在浏览器打开: http://你的服务器IP:3000/movies
🛑 要停止服务器,请按 Ctrl + C


# 测试【另开启一个终端】
[root@tomcat ~]# curl http://localhost:3000/movies
{"success":true,"data":[{"id":1,"name":"阿凡达","year":"2009"},{"id":2,"name":"泰坦尼克号","year":"1997"},{"id":3,"name":"盗梦空间","year":"2010"}]}[root@tomcat ~]# 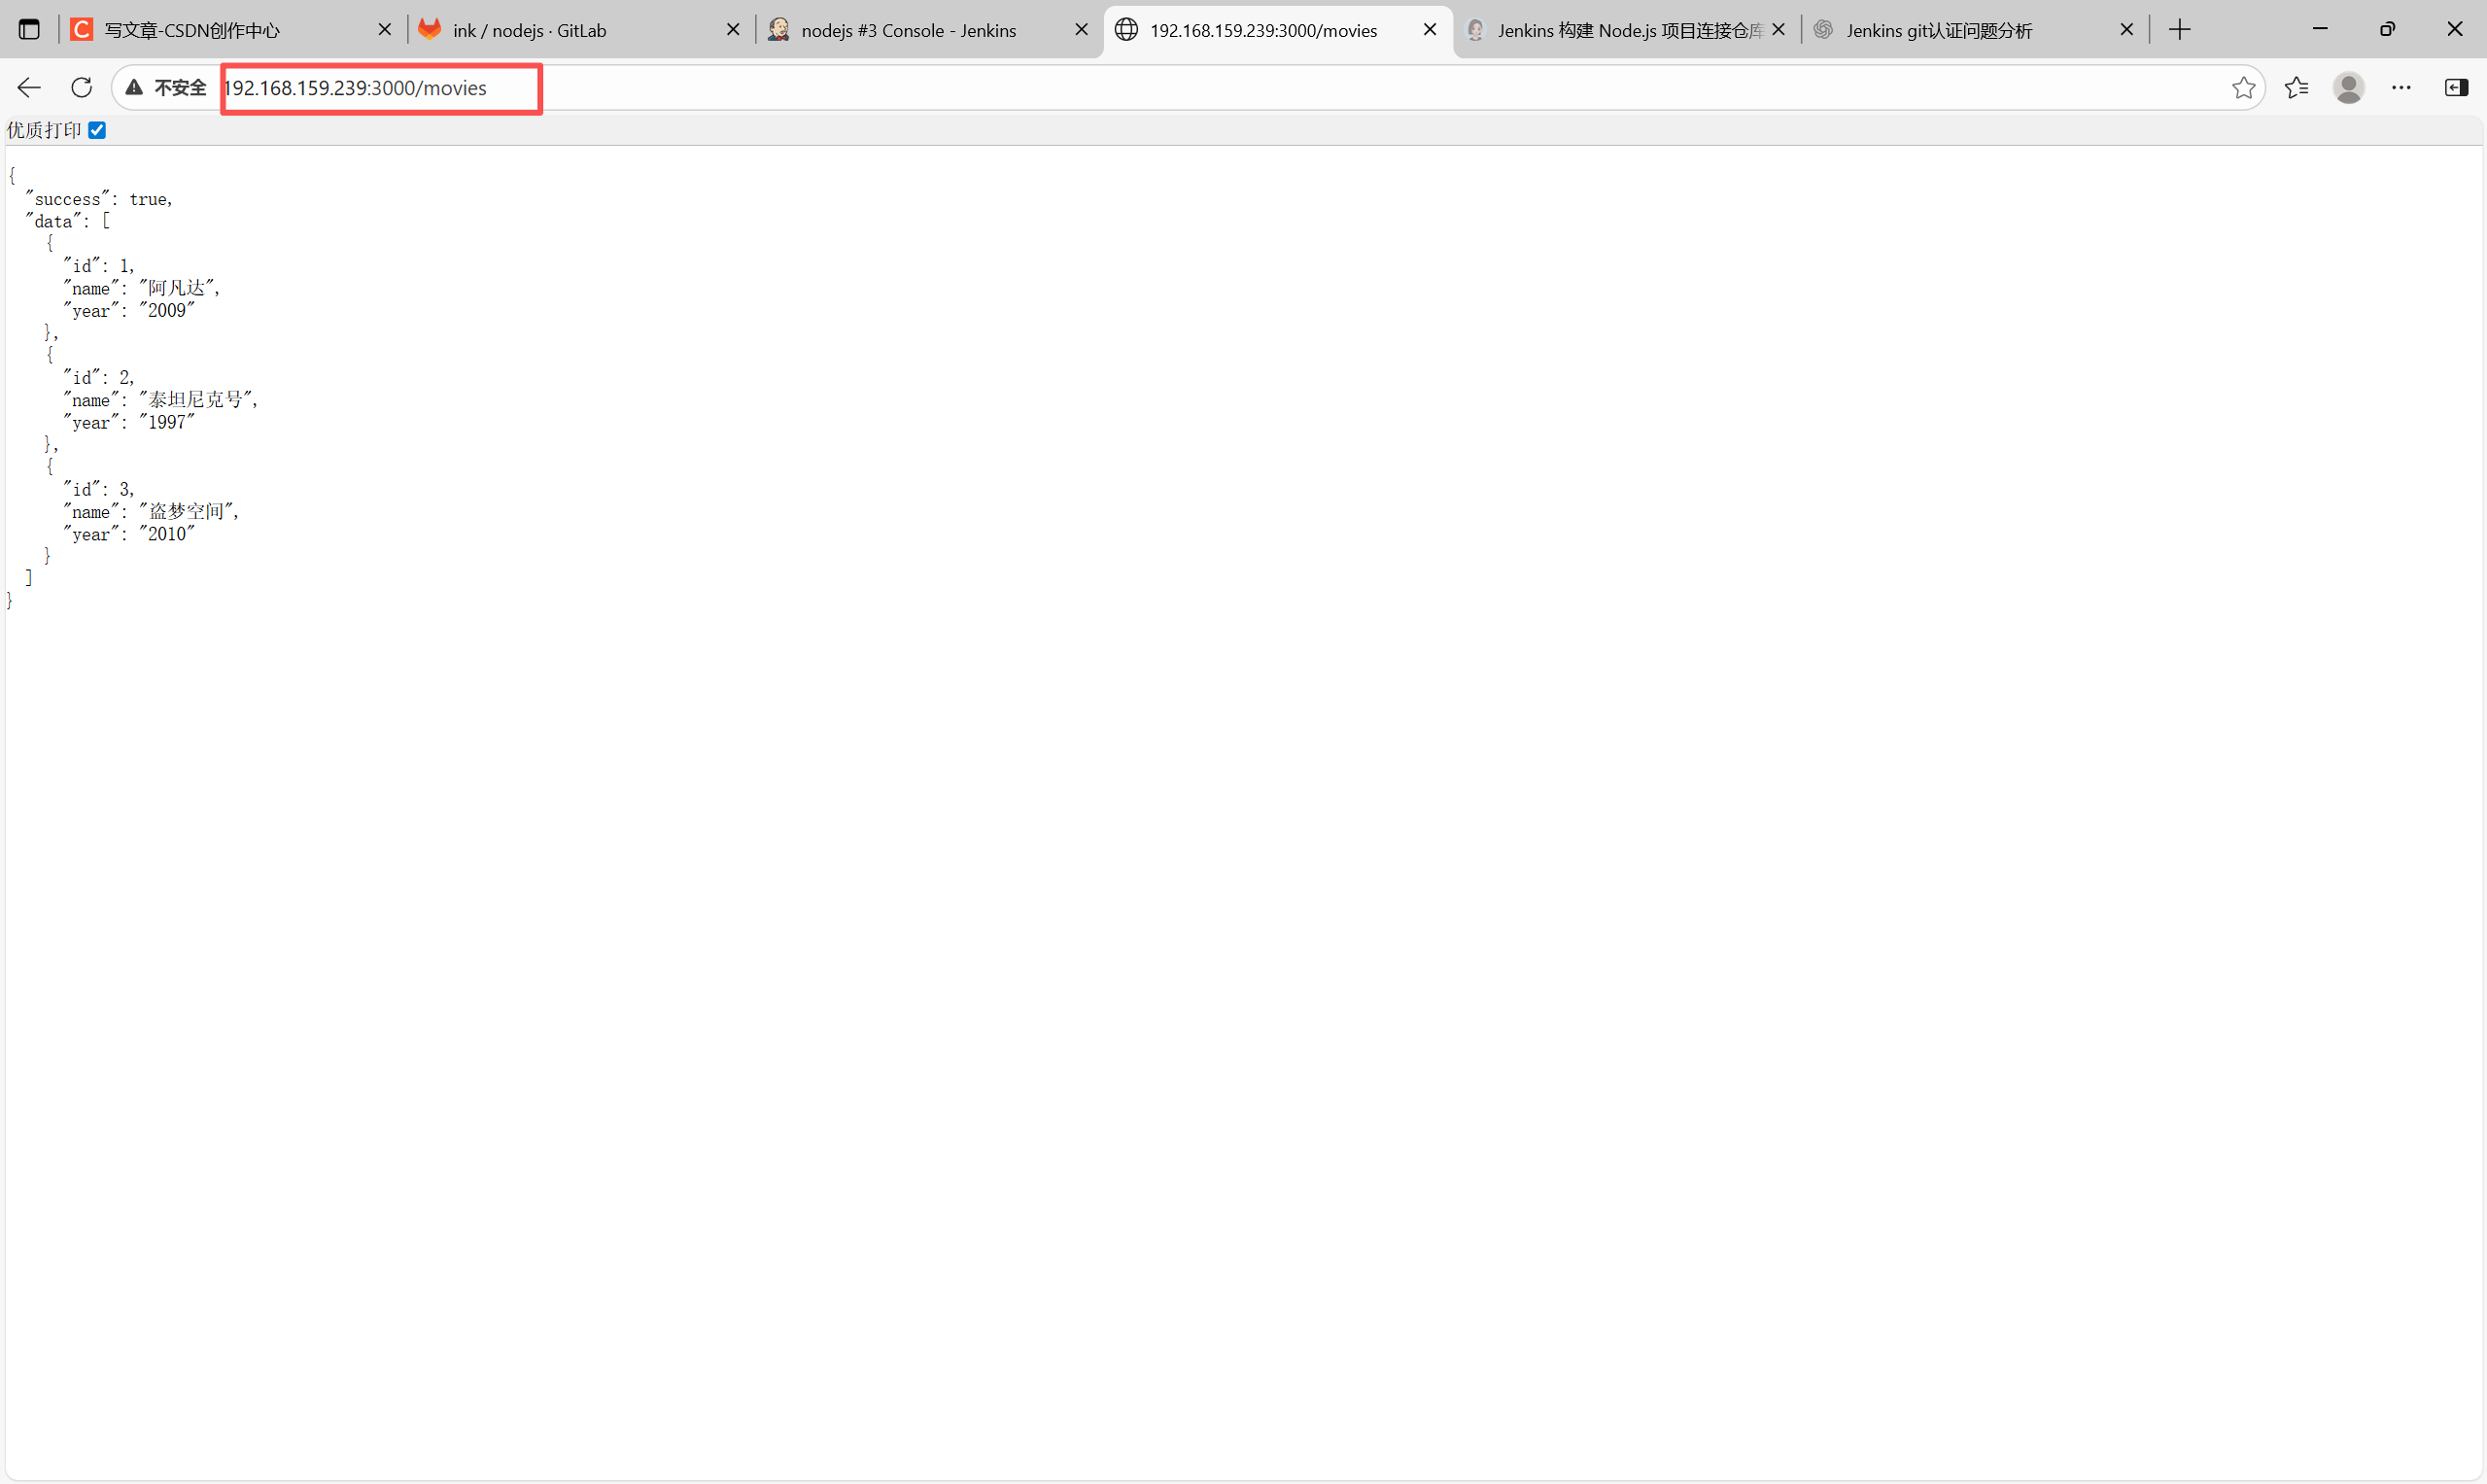
# 测试2:添加一部新电影
[root@tomcat ~]# curl -X POST -d "name=星际穿越&year=2014" http://localhost:3000/movies
{"success":true,"message":"电影添加成功!","data":{"id":4,"name":"星际穿越","year":"2014"}}

[root@tomcat ~]# curl http://localhost:3000/movies
{"success":true,"data":[{"id":1,"name":"阿凡达","year":"2009"},{"id":2,"name":"泰坦尼克号","year":"1997"},{"id":3,"name":"盗梦空间","year":"2010"},{"id":4,"name":"星际穿越","year":"2014"}]}[root@tomcat ~]#

# 测试4:删除一部电影(例如删除ID为2的电影)
[root@tomcat ~]# curl -X DELETE http://localhost:3000/movies/2

[root@tomcat ~]# curl http://localhost:3000/movies
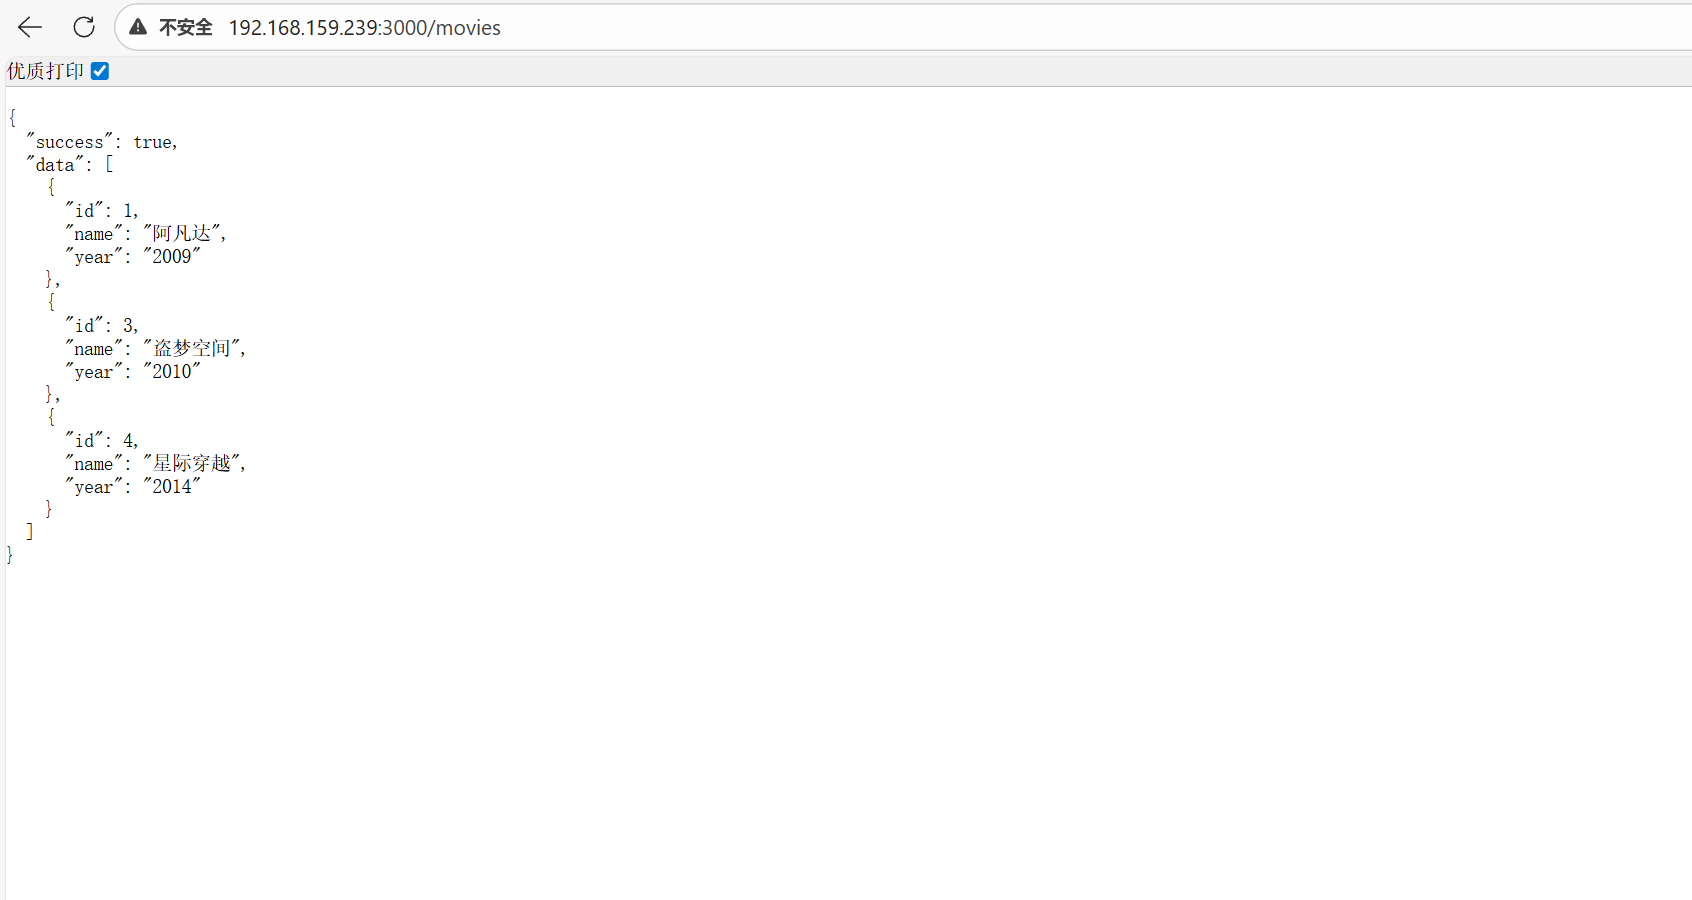
{"success":true,"data":[{"id":1,"name":"阿凡达","year":"2009"},{"id":3,"name":"盗梦空间","year":"2010"},{"id":4,"name":"星际穿越","year":"2014"}]}
2. jenkins服务器配置
插件需求:
GitLab Plugin
SSH Pipeline Steps
NodeJS Plugin
Publish Over SSH
SSH Agent
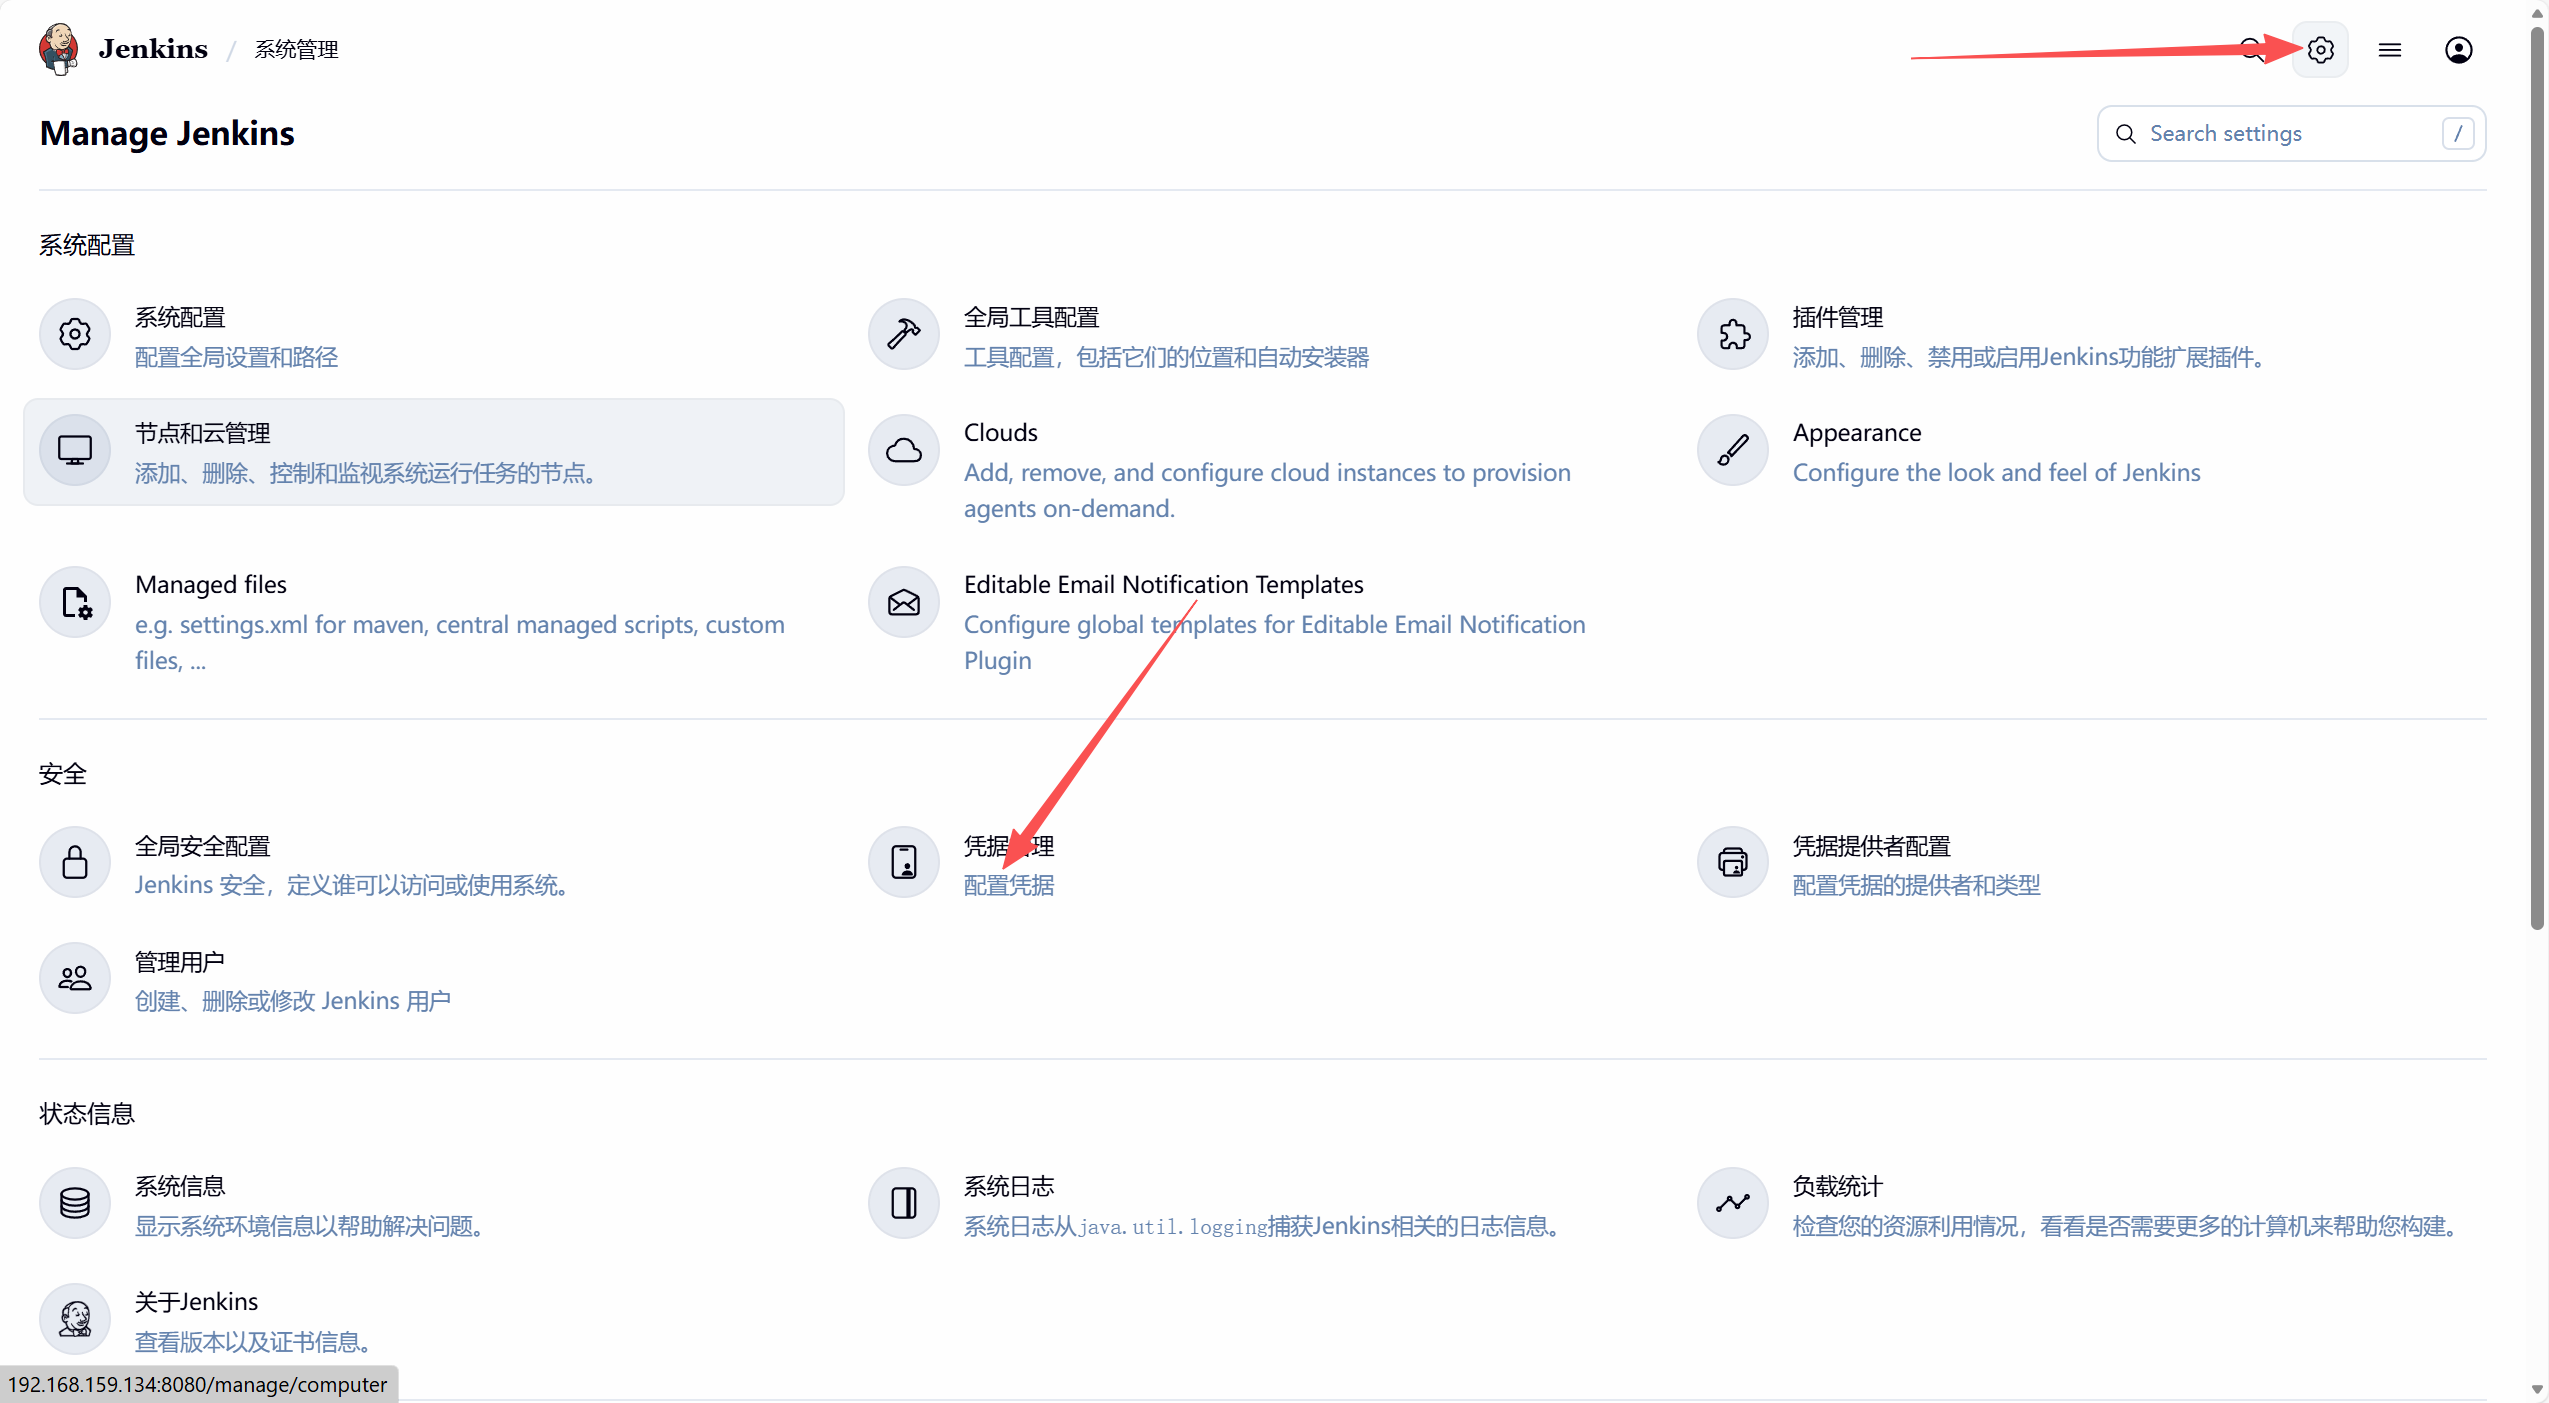
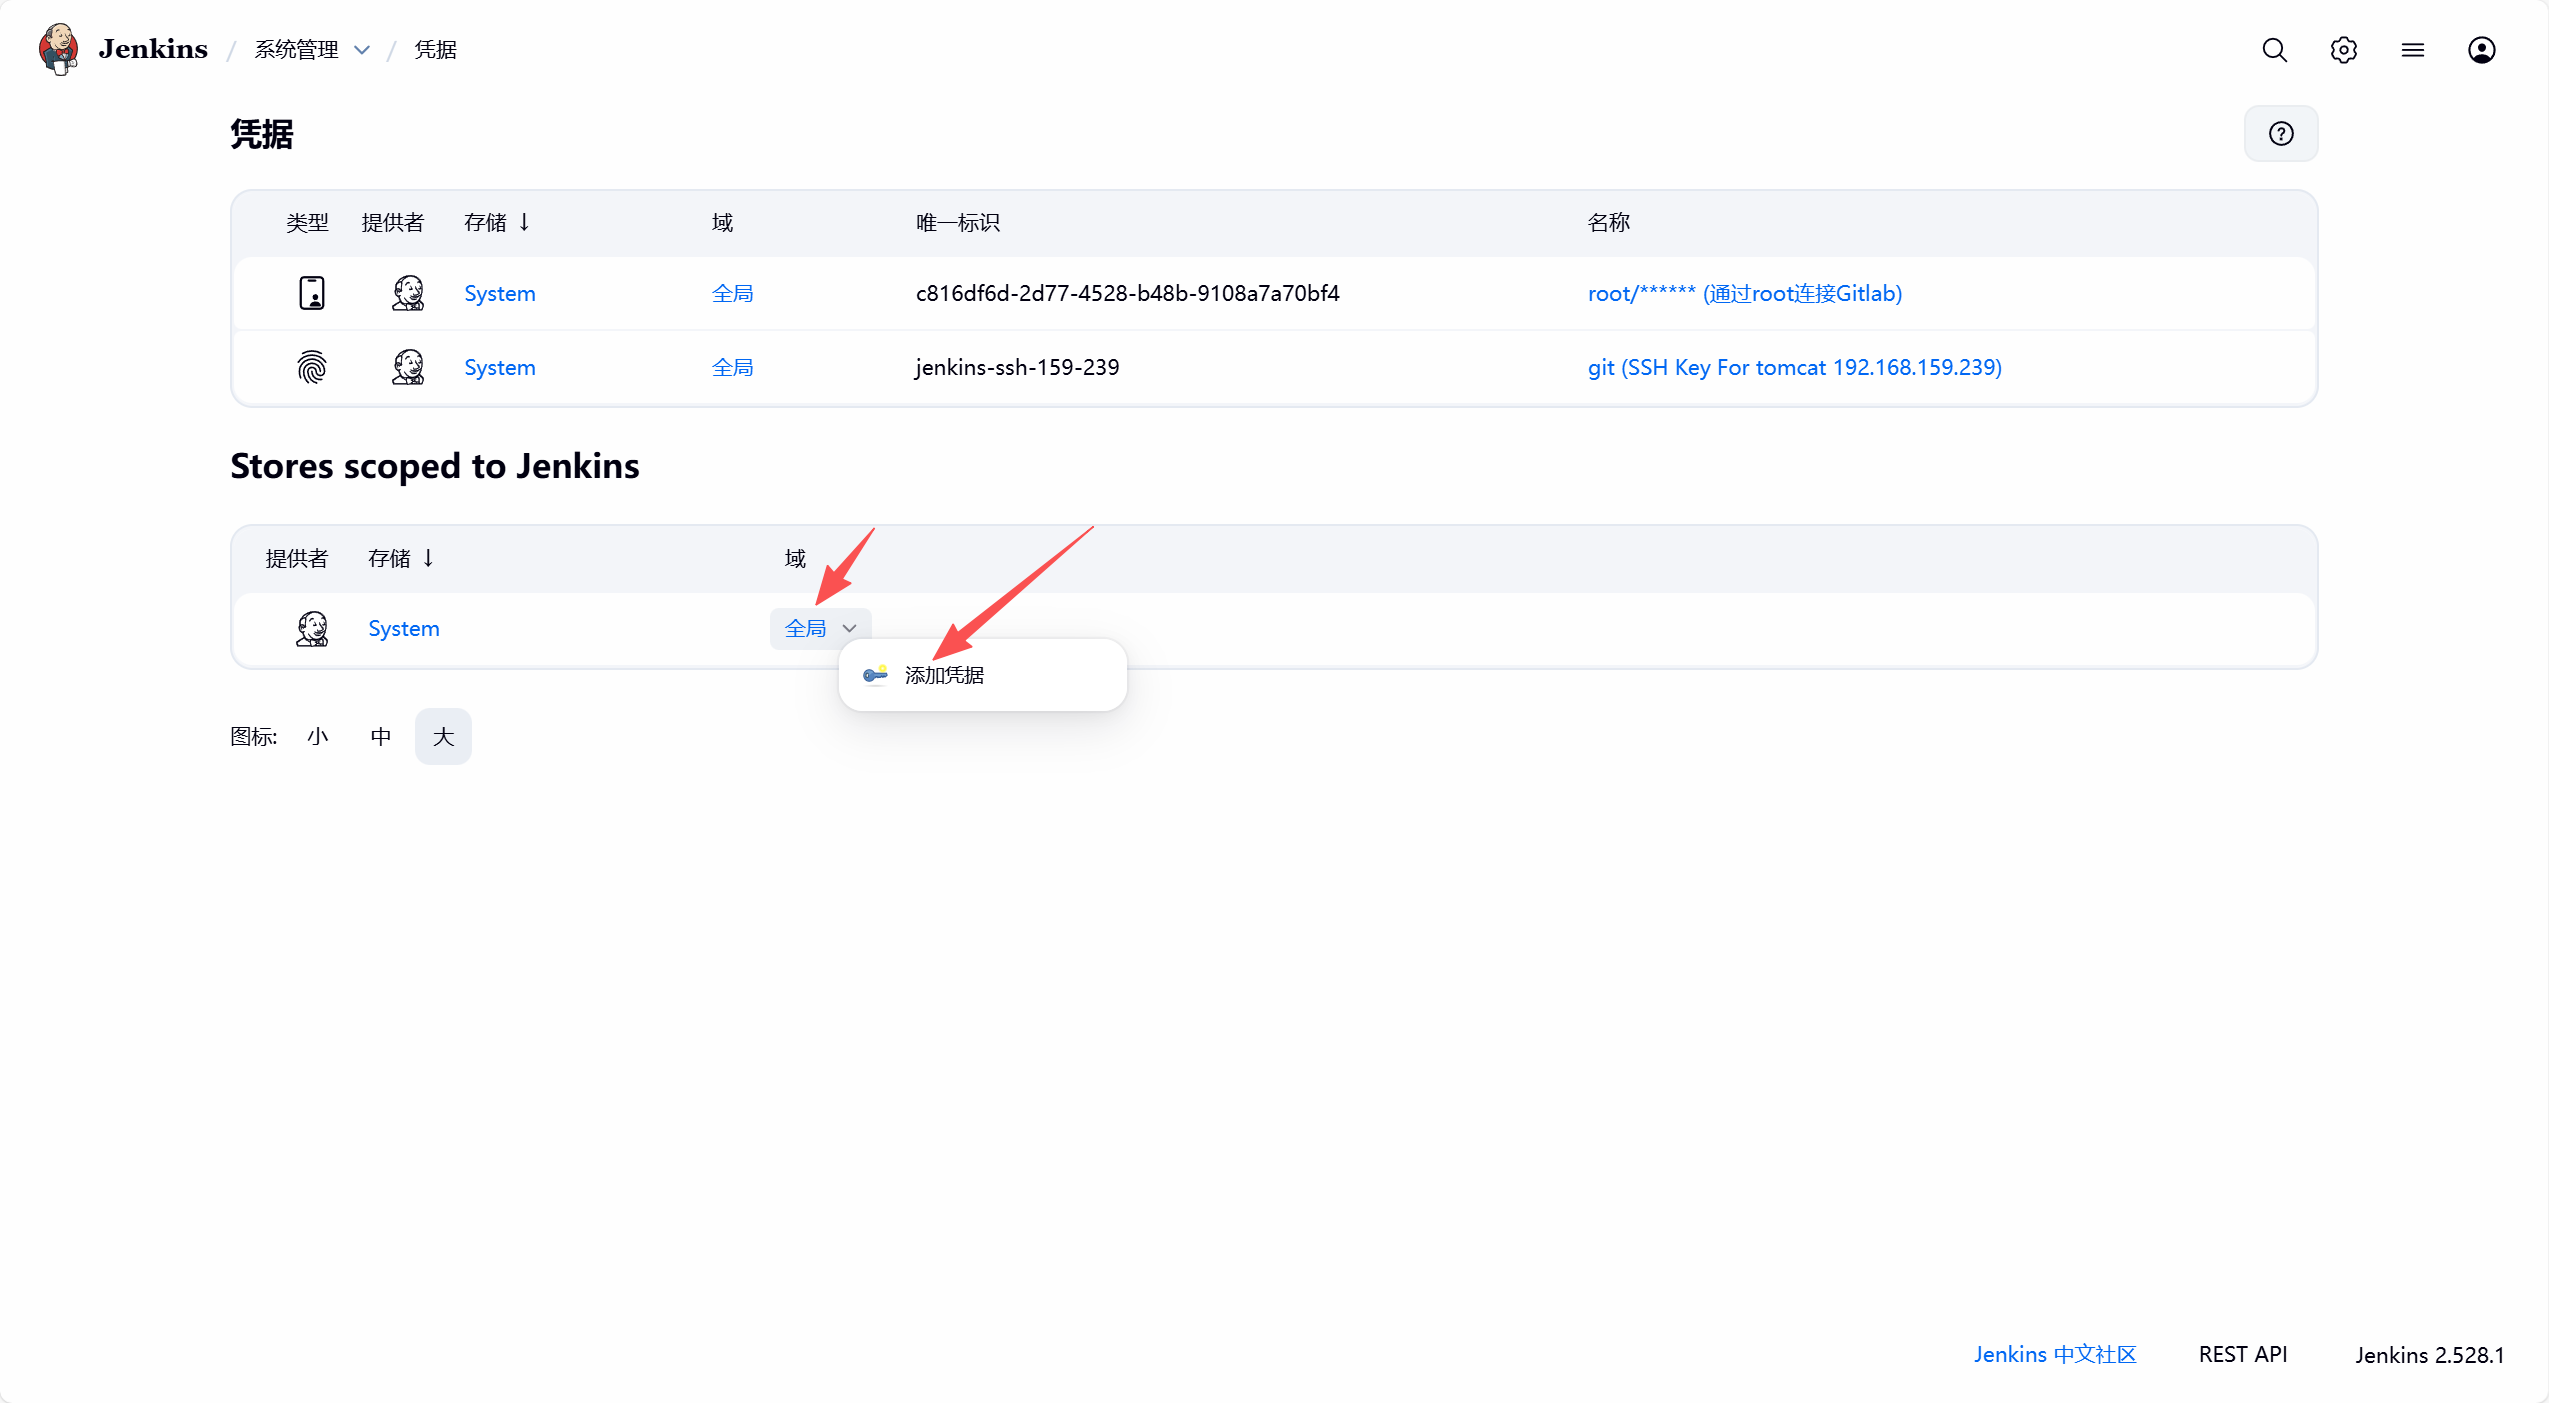
(1)配置ssh凭据
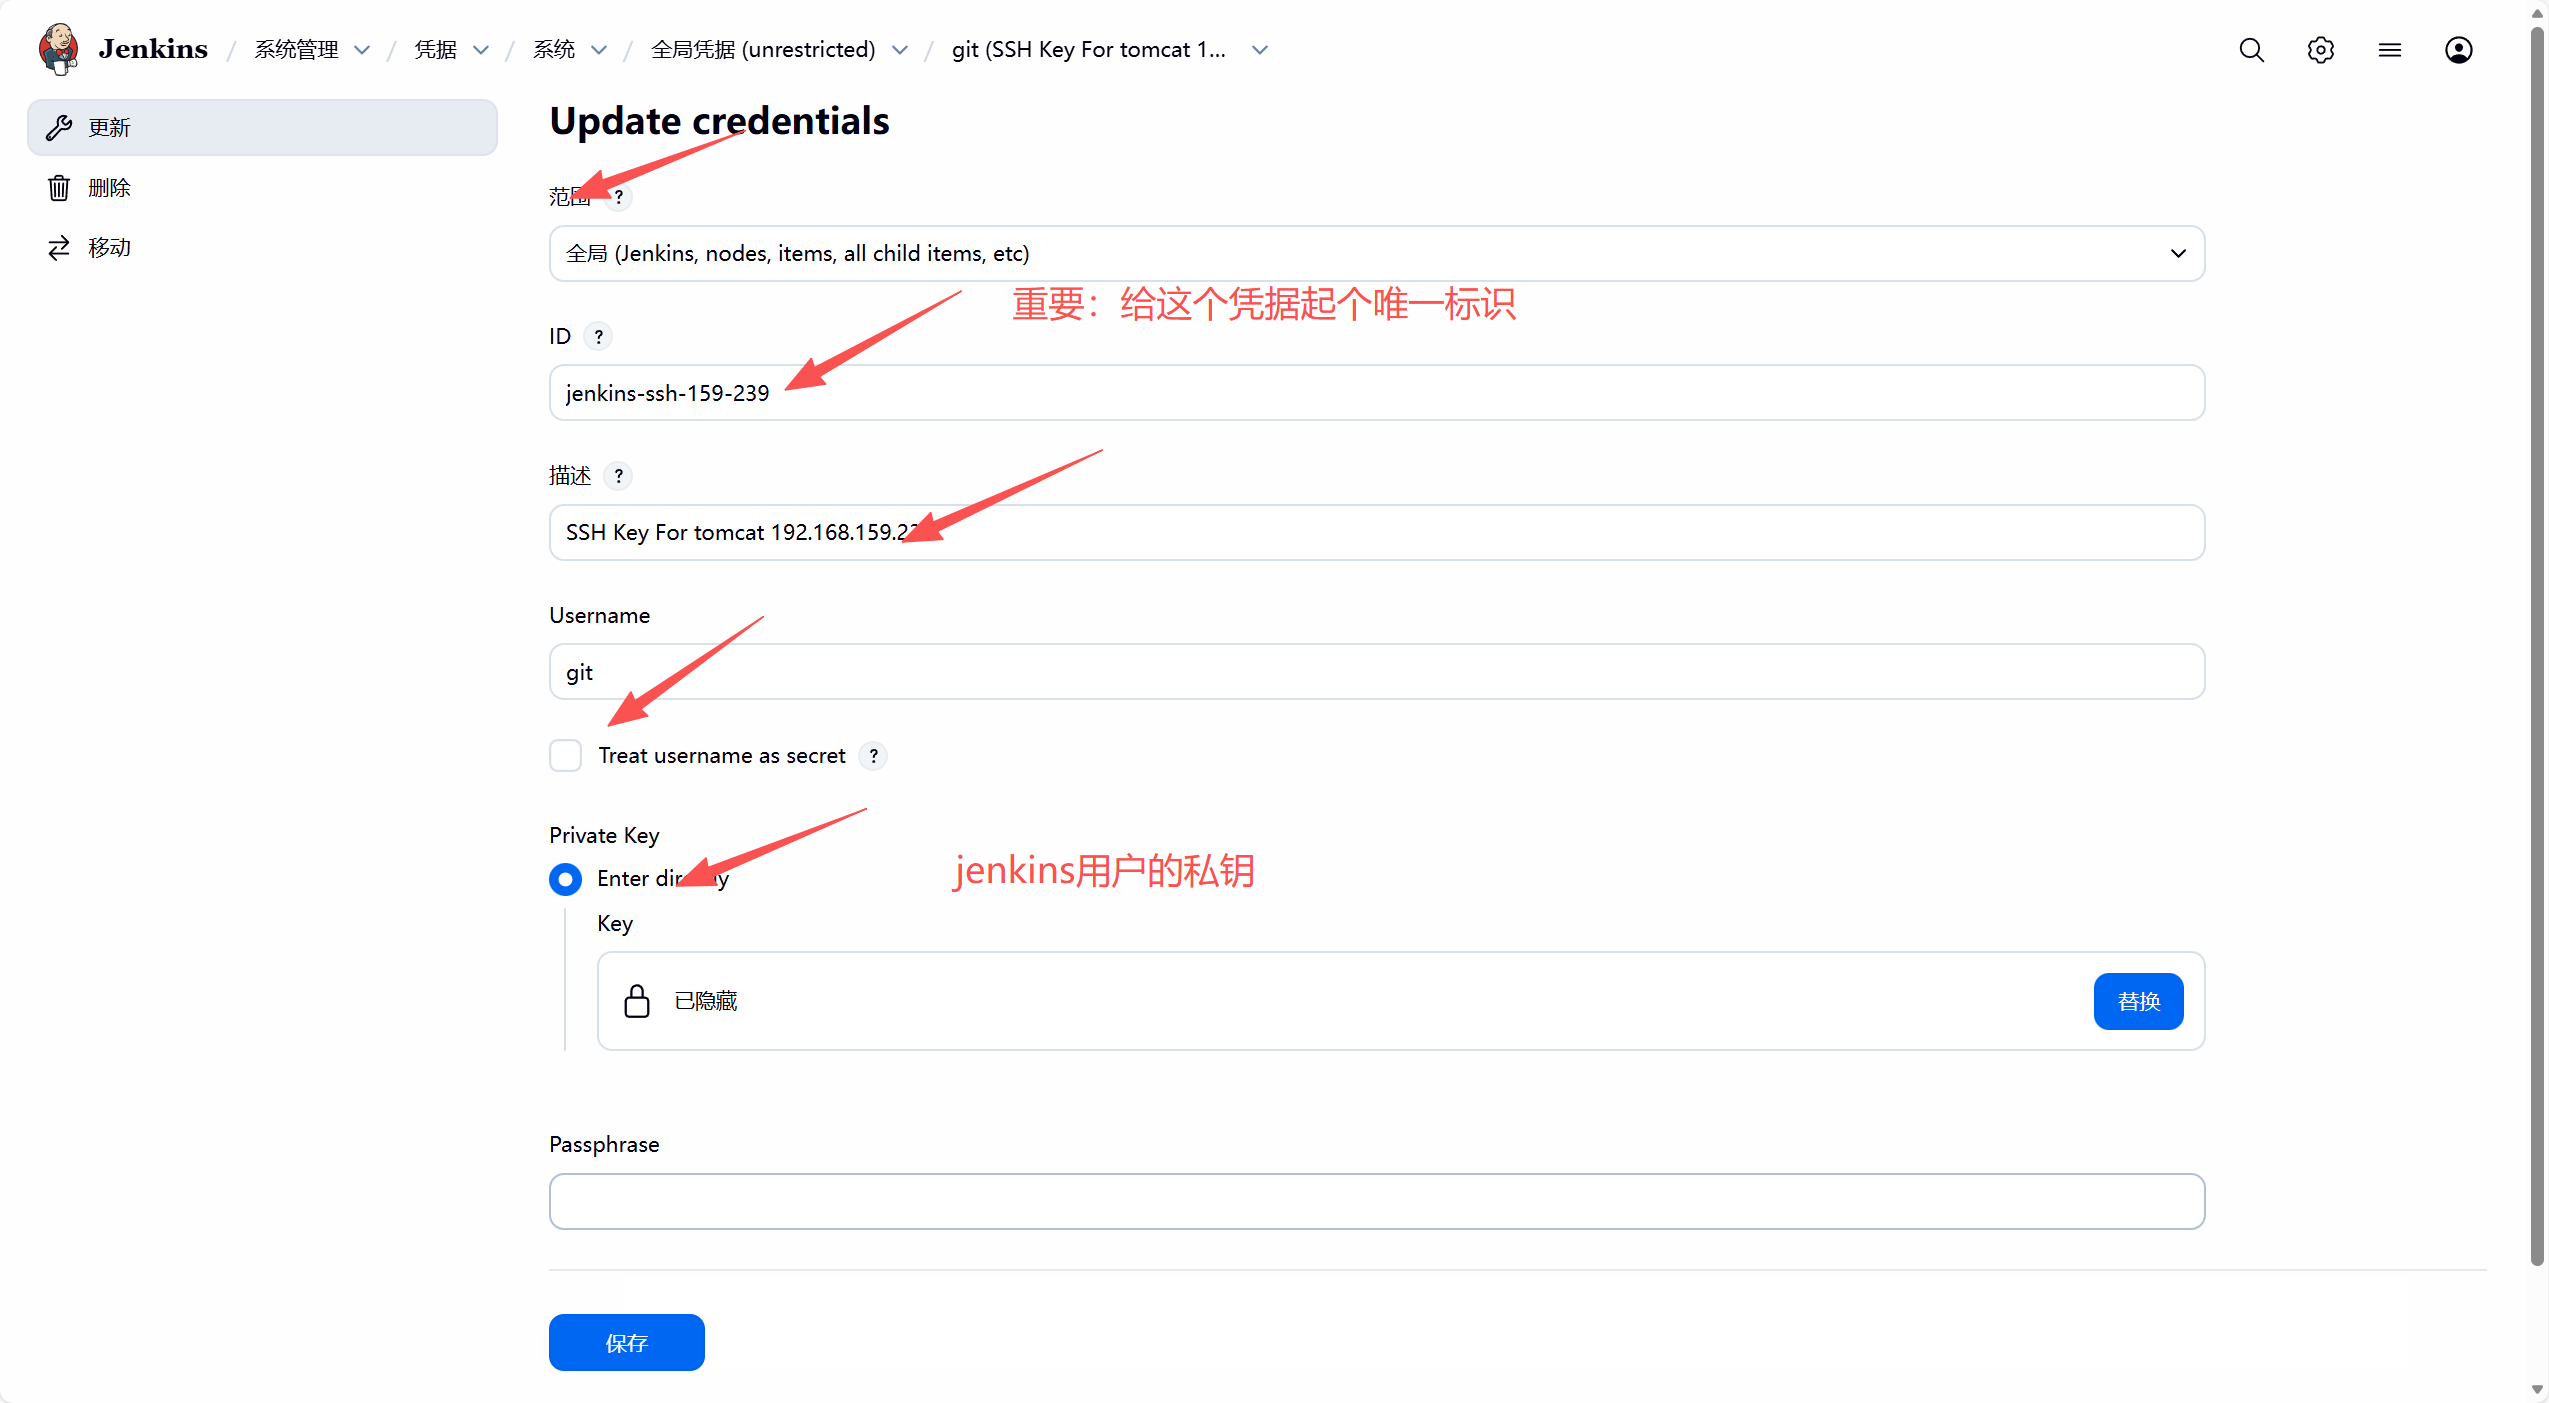
(2)创建任务
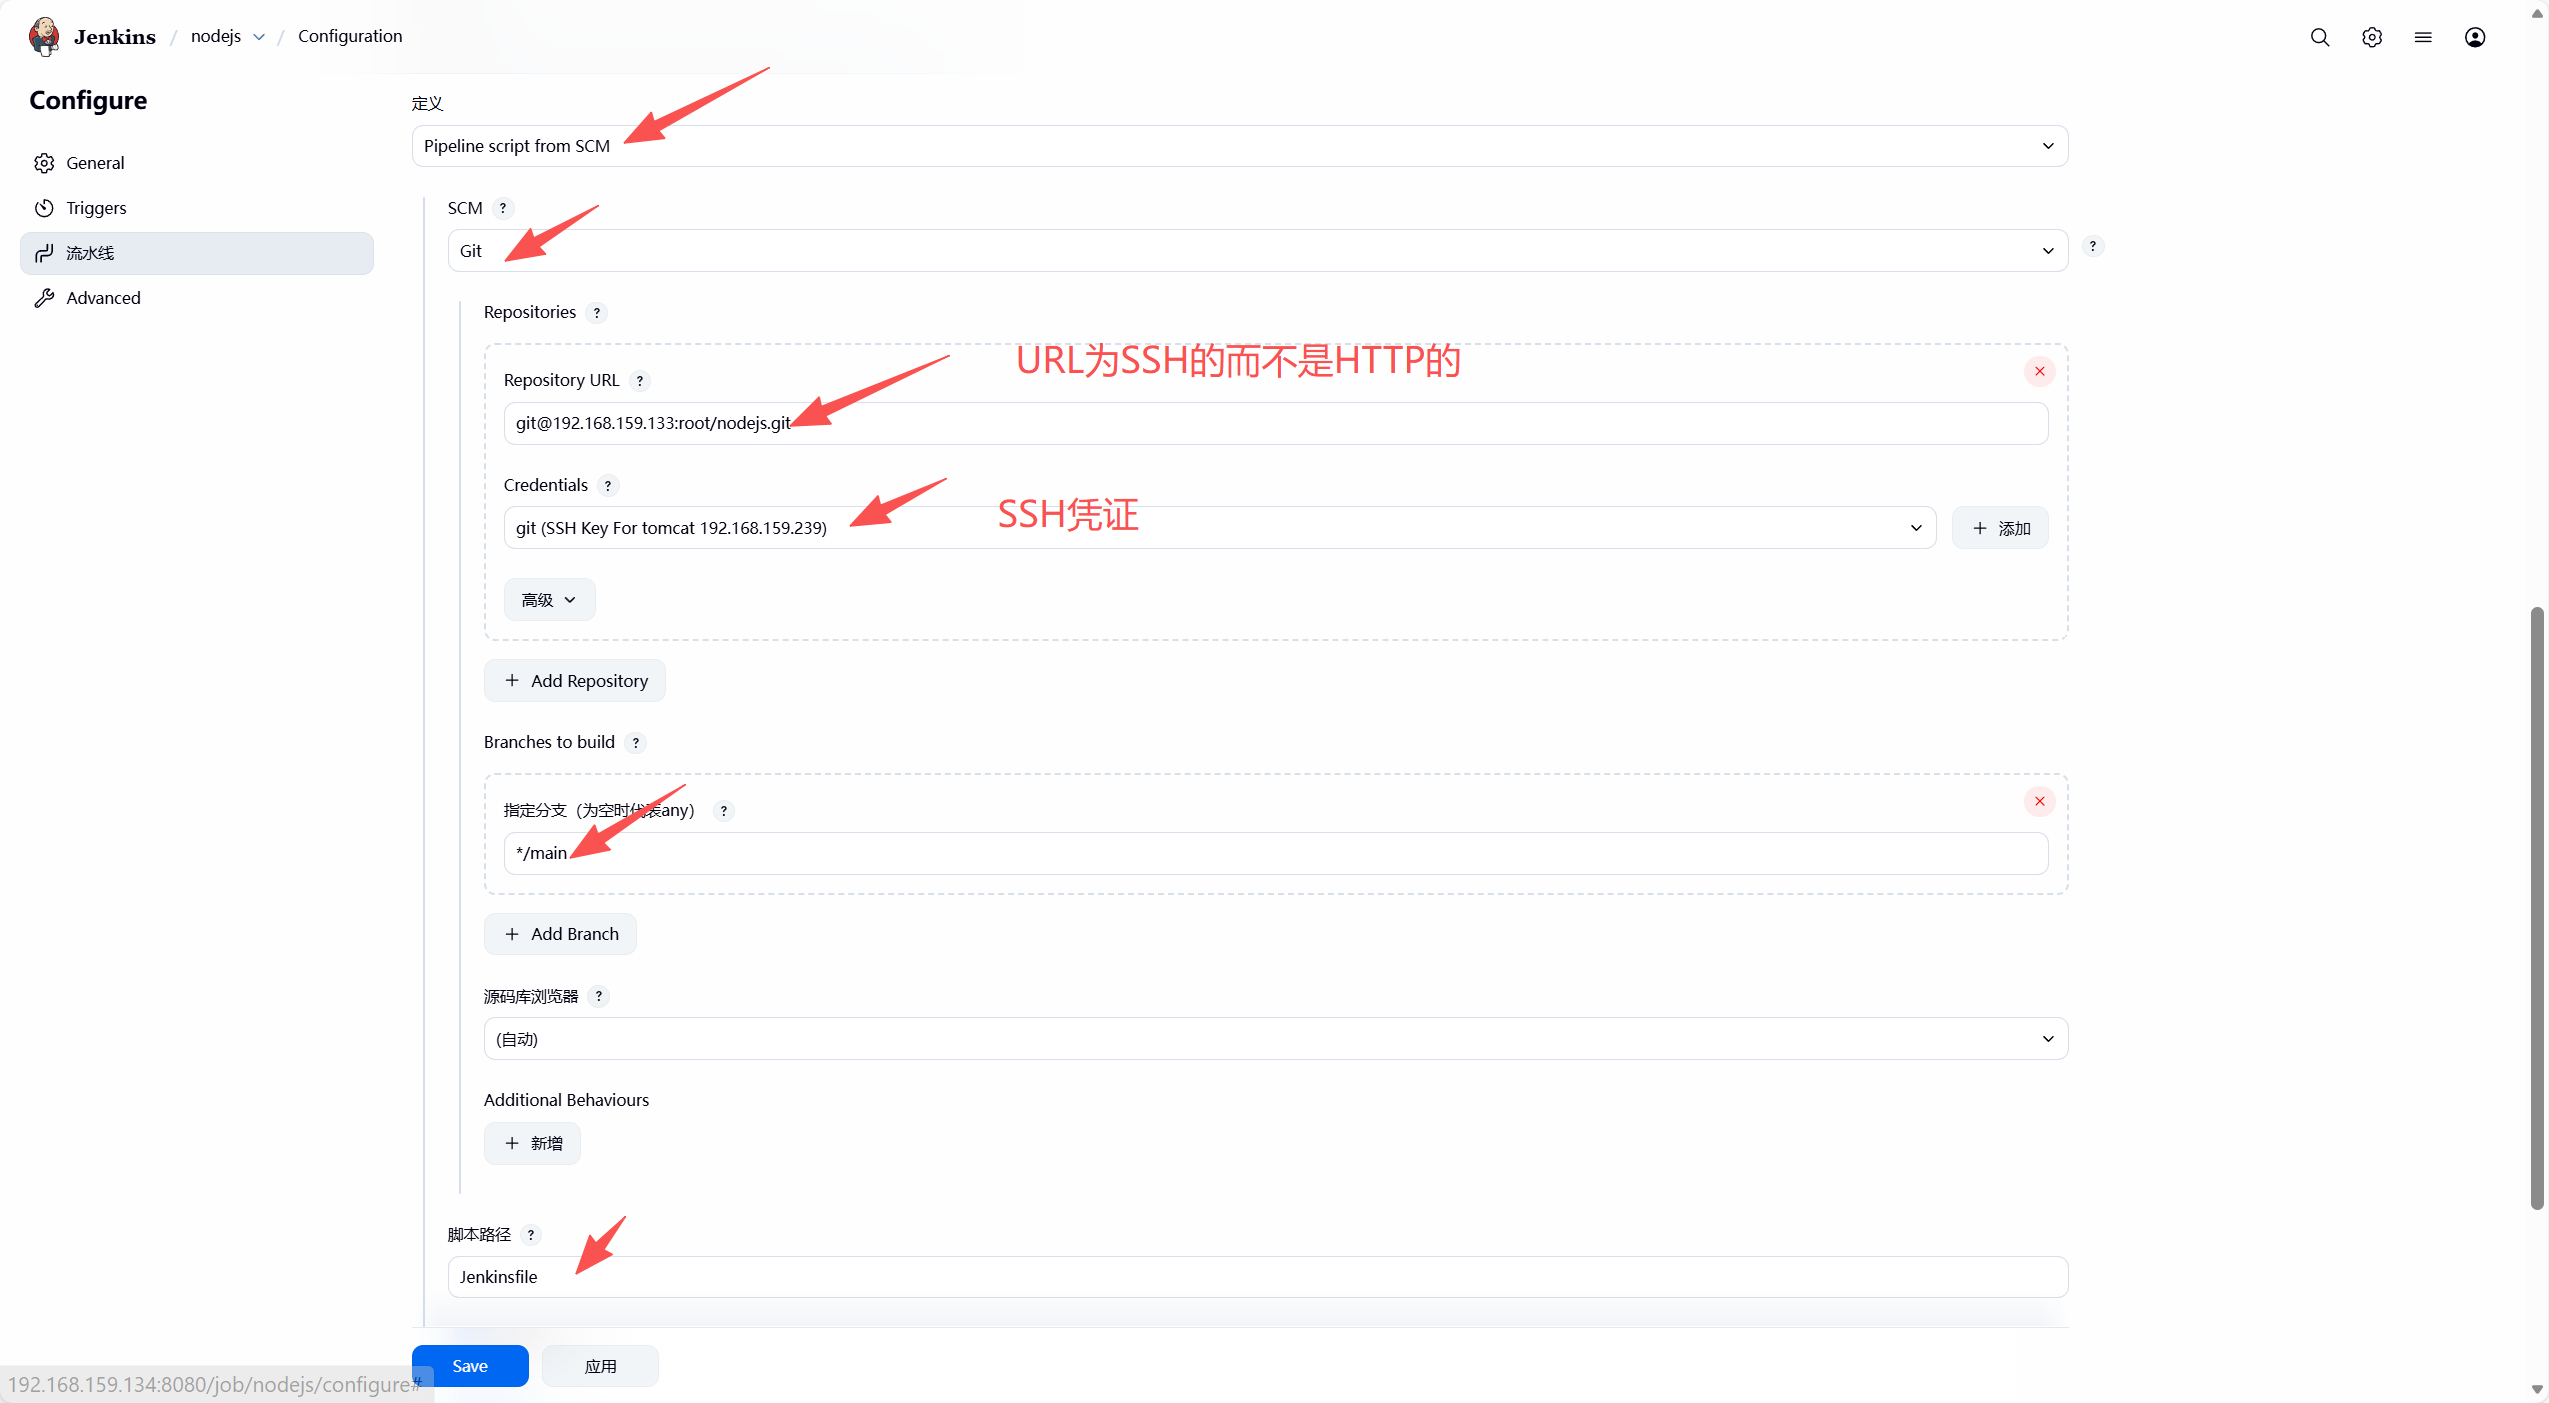 (3) Jenkins用户的公钥传给tomcat服务器的root用户
[jenkins@Jenkins ~]$ ssh-copy-id root@192.168.159.239

[jenkins@Jenkins ~]$ ssh root@192.168.159.239
Warning: your password will expire in 0 days.
Warning: your password will expire in 0 days.
Last login: Mon Nov  3 19:36:28 2025 from 192.168.159.134
[root@tomcat ~]# exit
logout
Connection to 192.168.159.239 closed.
3. gitlab服务器配置
(1)上传Jenkins公钥
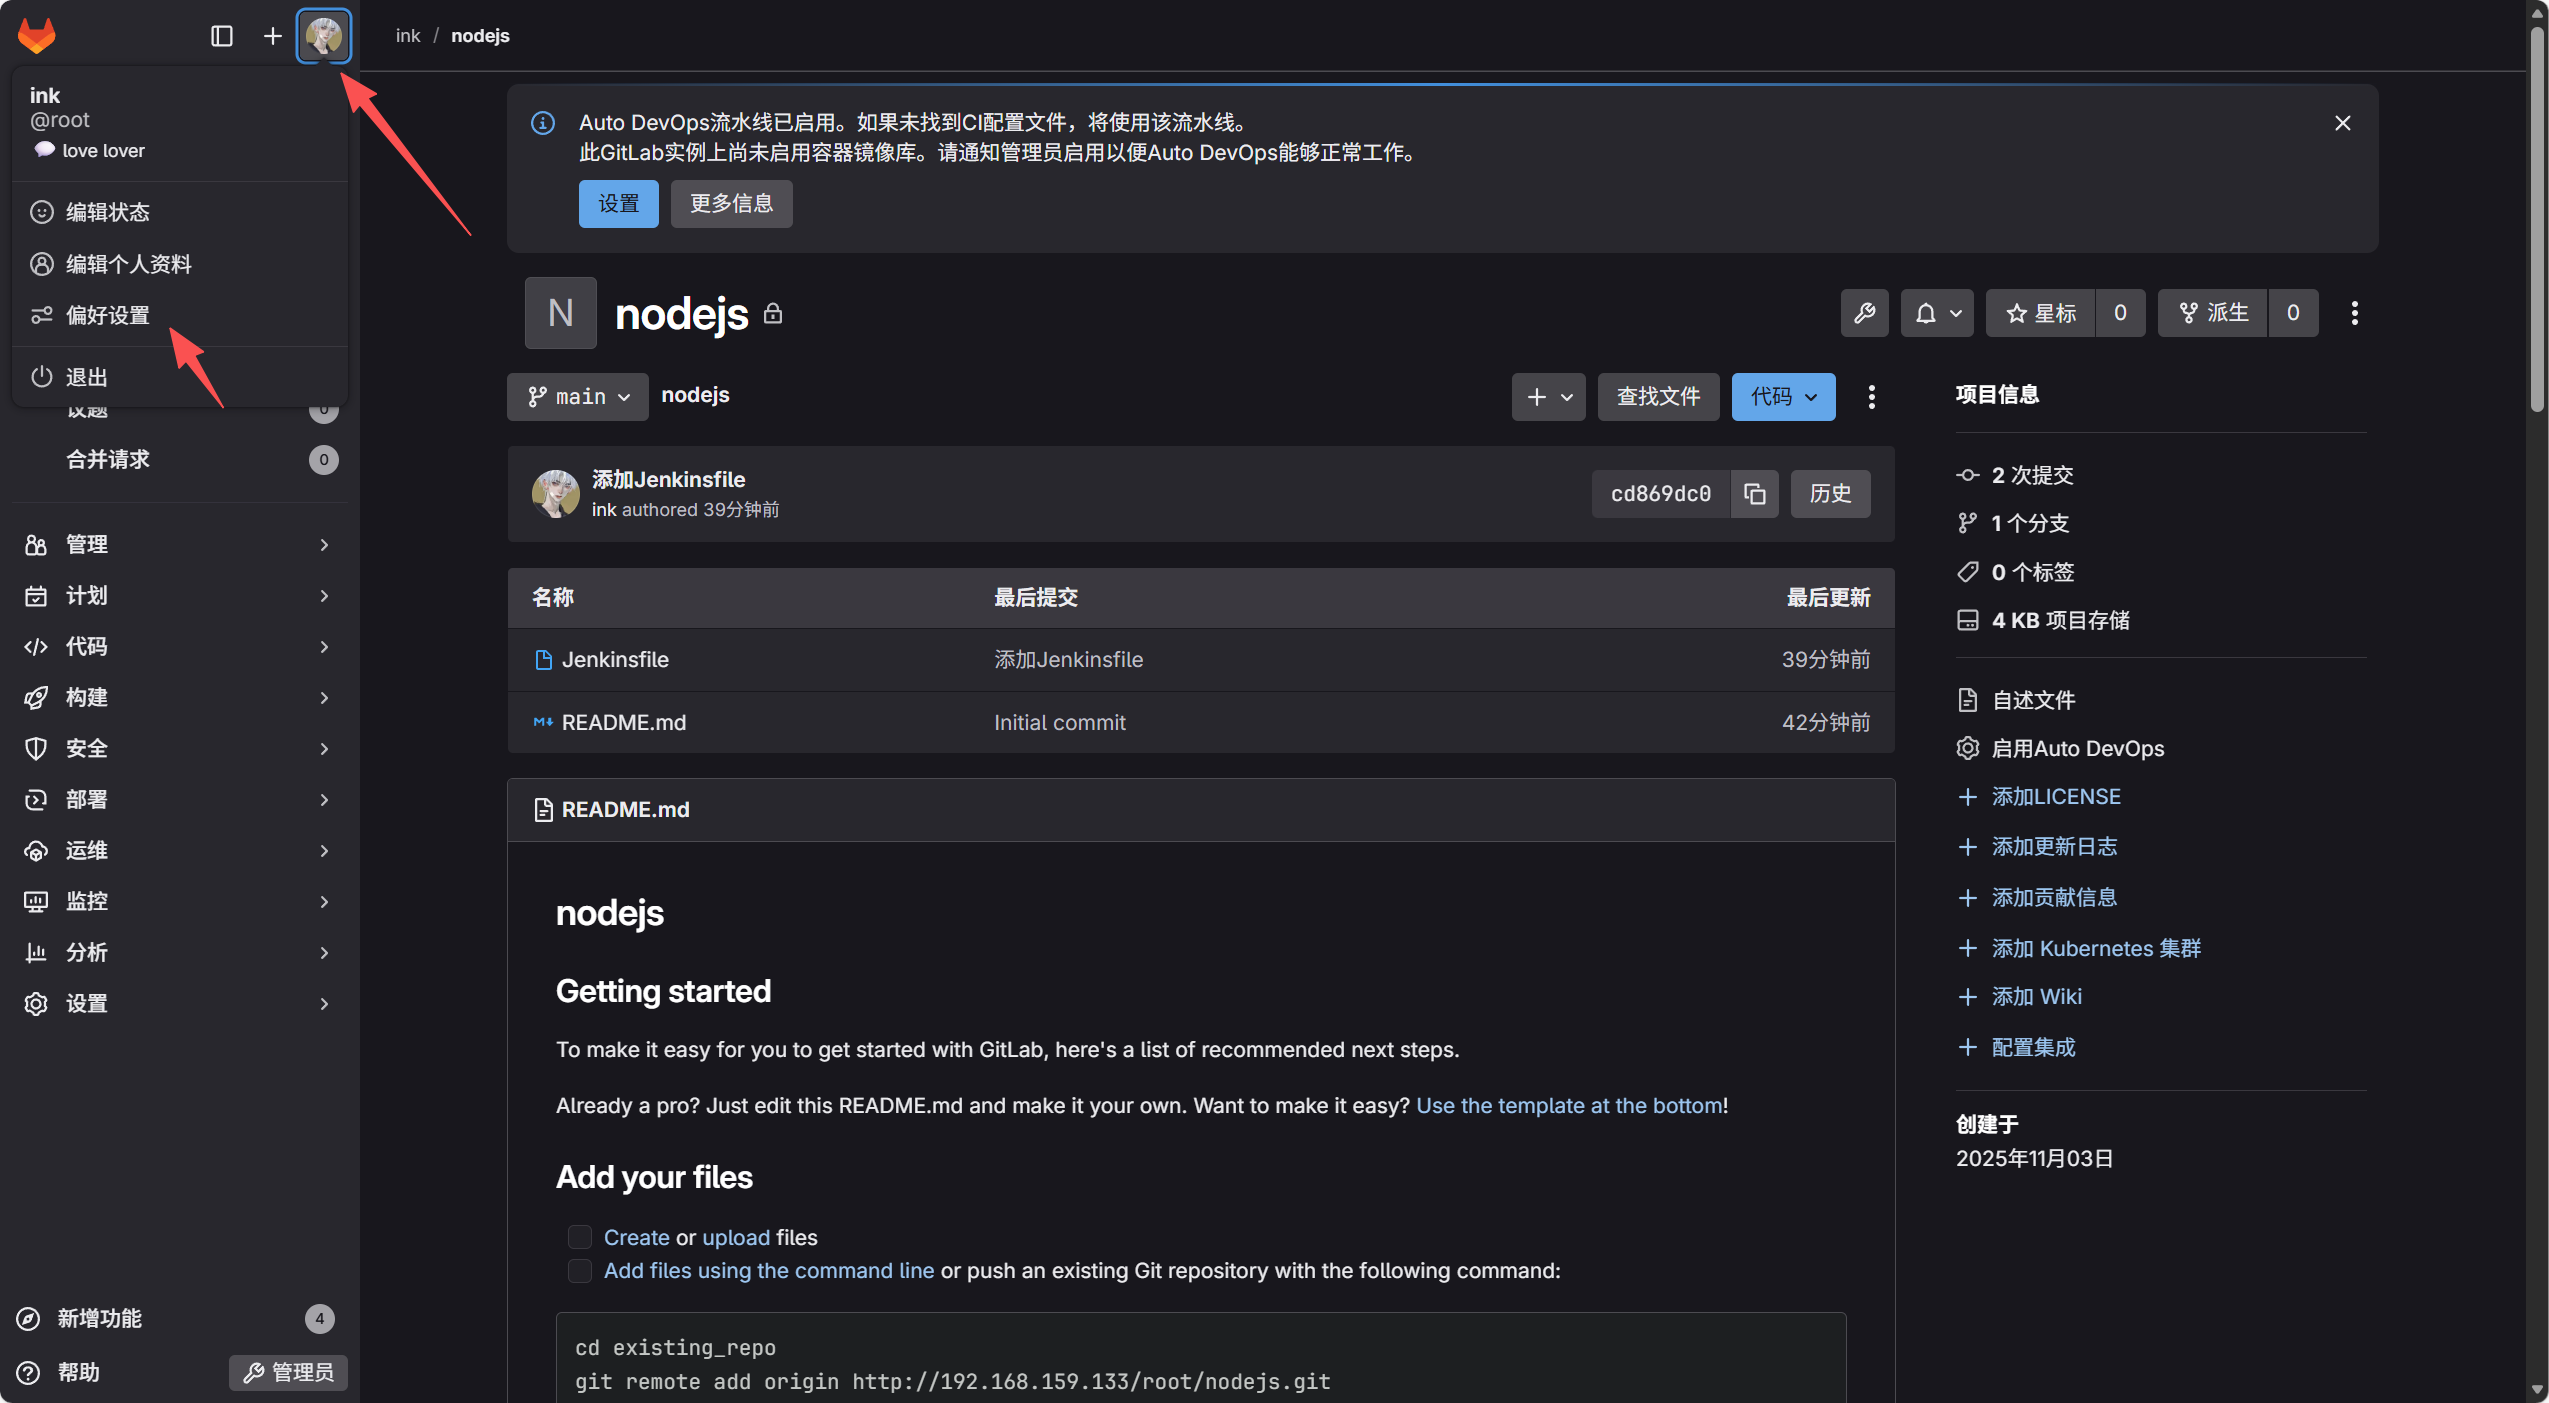
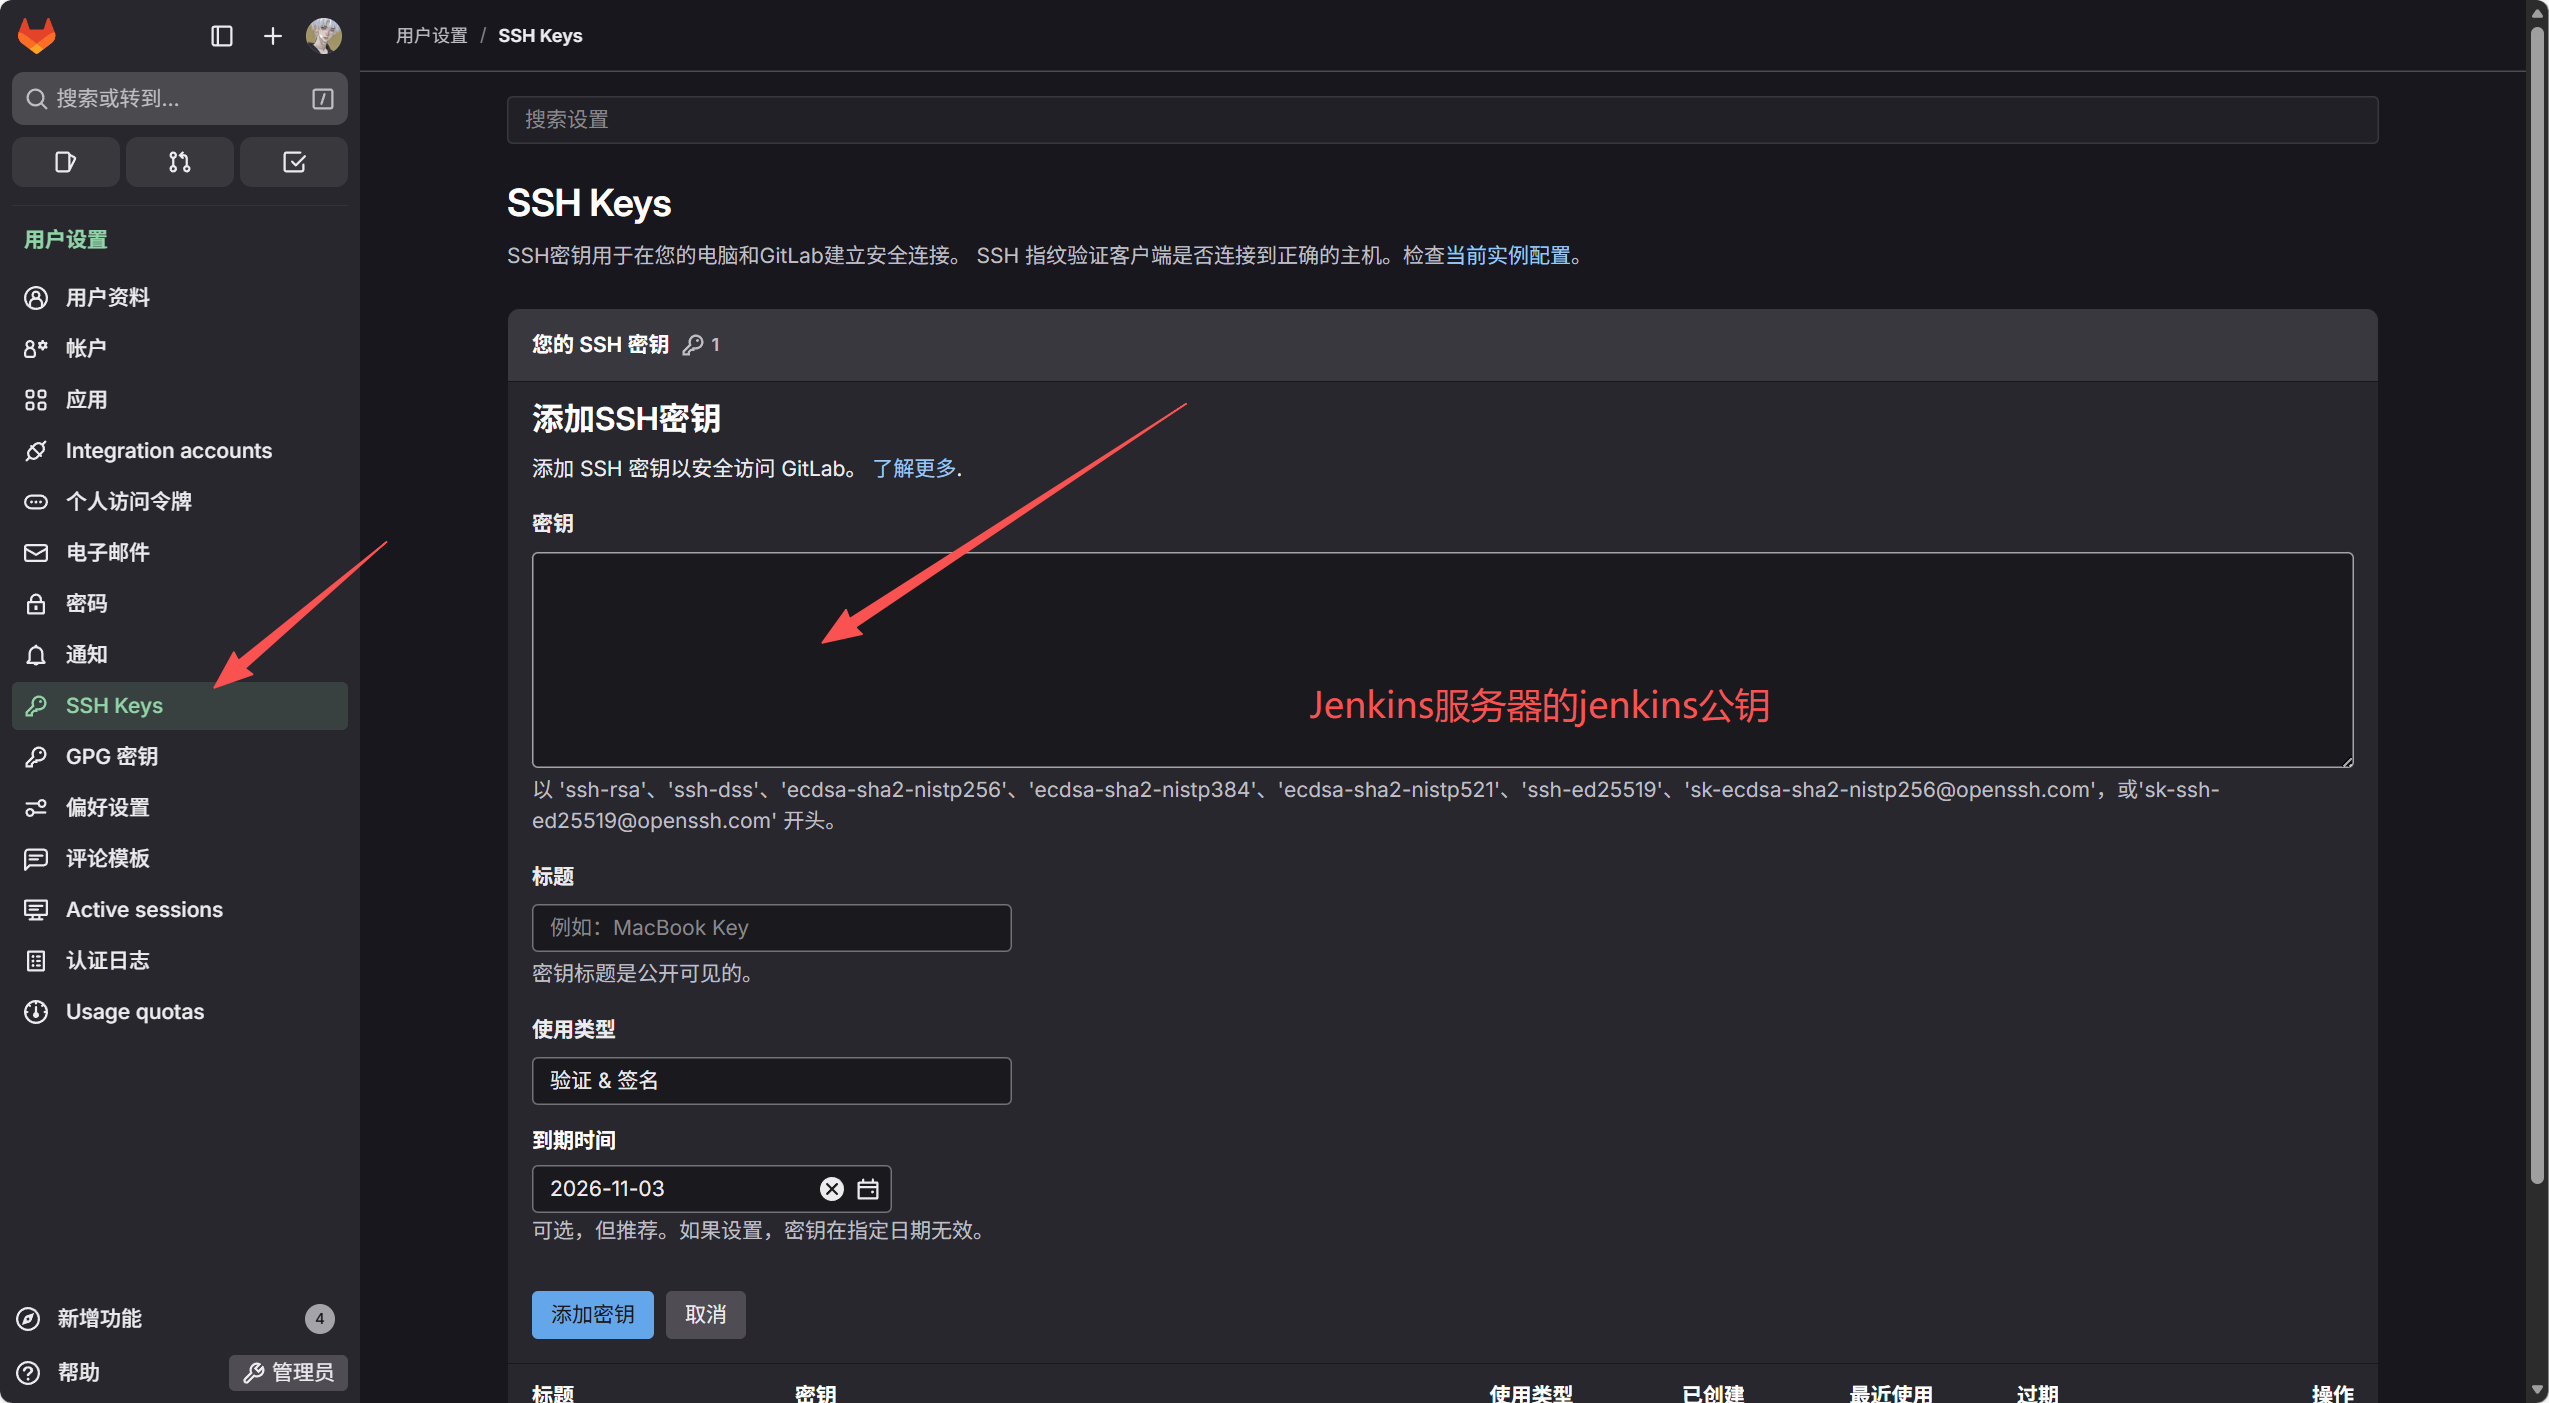
(2) 创建项目和文件Jenkinsfile
pipeline {
    agent any

    stages {
        stage('Test SSH Connection') {
            steps {
                script {
                    // 测试方法1:使用 sshagent
                    sshagent(['jenkins-ssh-159-239']) {
                        sh """
                            echo "=== 测试 SSH 连接 ==="
                            ssh -o StrictHostKeyChecking=no root@192.168.159.239 "
                                echo '连接成功!'
                                echo '当前用户: \$(whoami)'
                                echo '当前目录: \$(pwd)'
                                echo 'Node.js 版本:'
                                node -v
                                echo '系统信息:'
                                uname -a
                            "
                        """
                    }

                }
            }
        }
    }

    post {
        always {
            echo "SSH 连接测试完成"
        }
    }
}
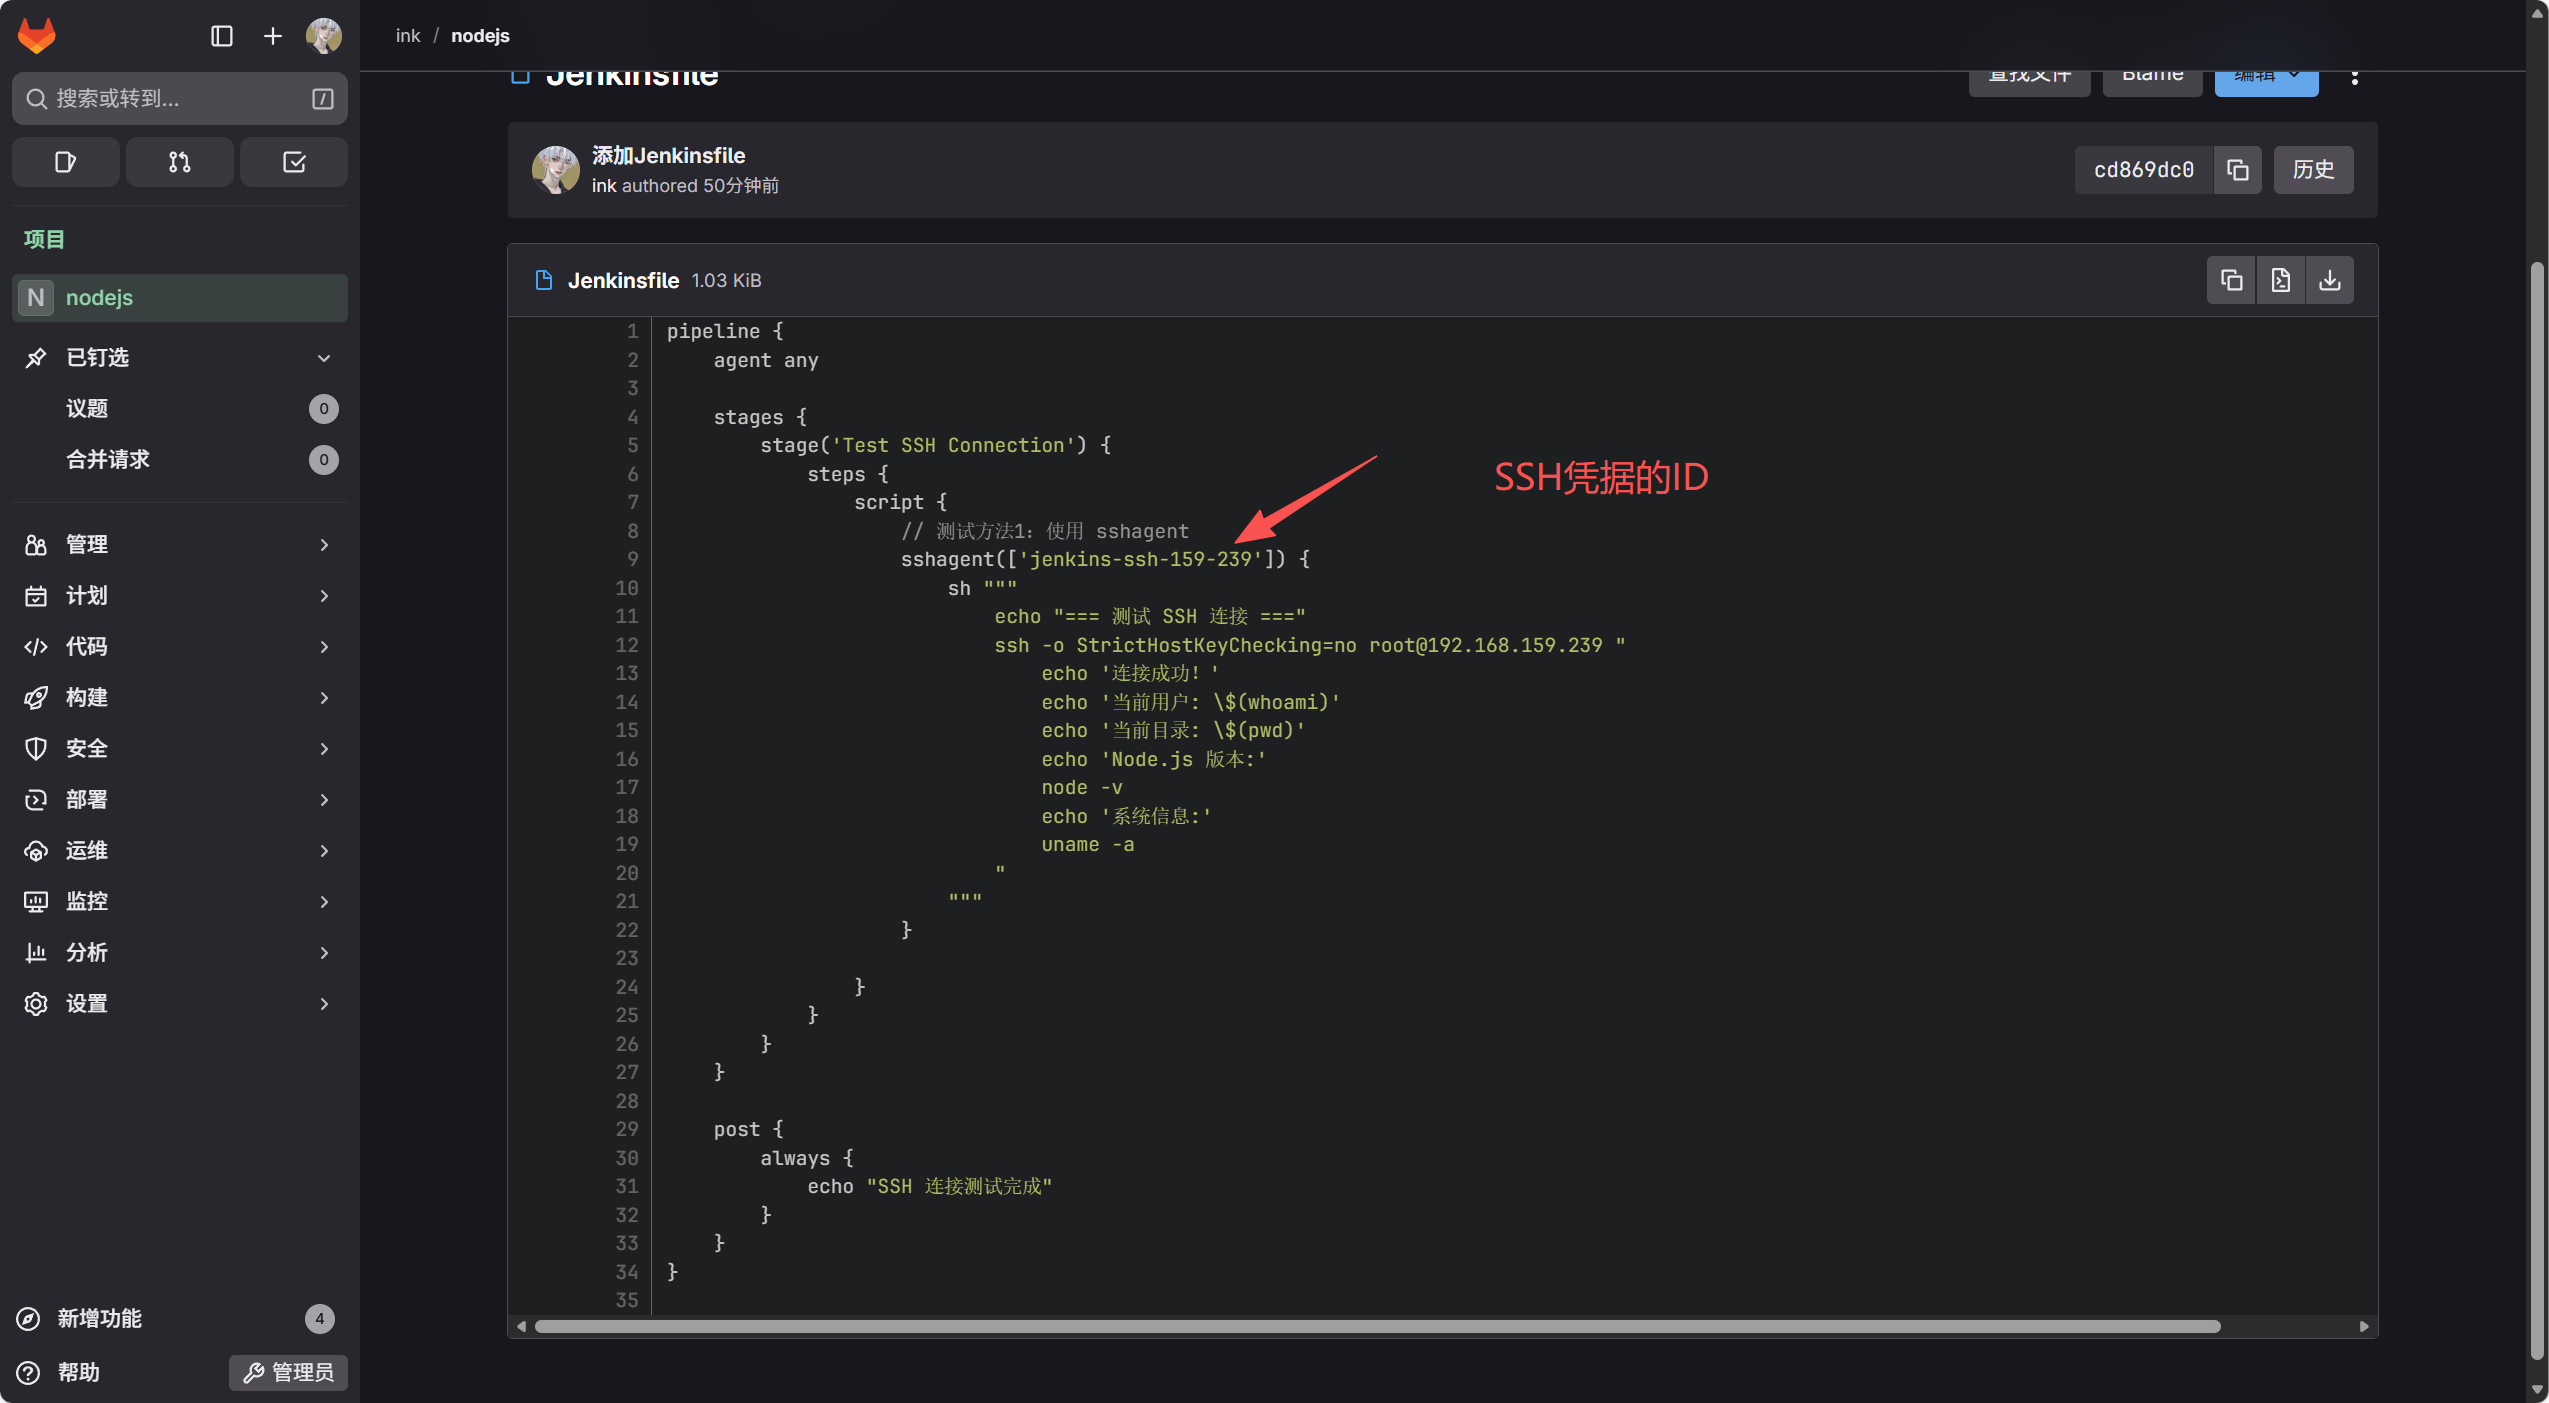
4. 最终构建
以上配置完成,执行构建
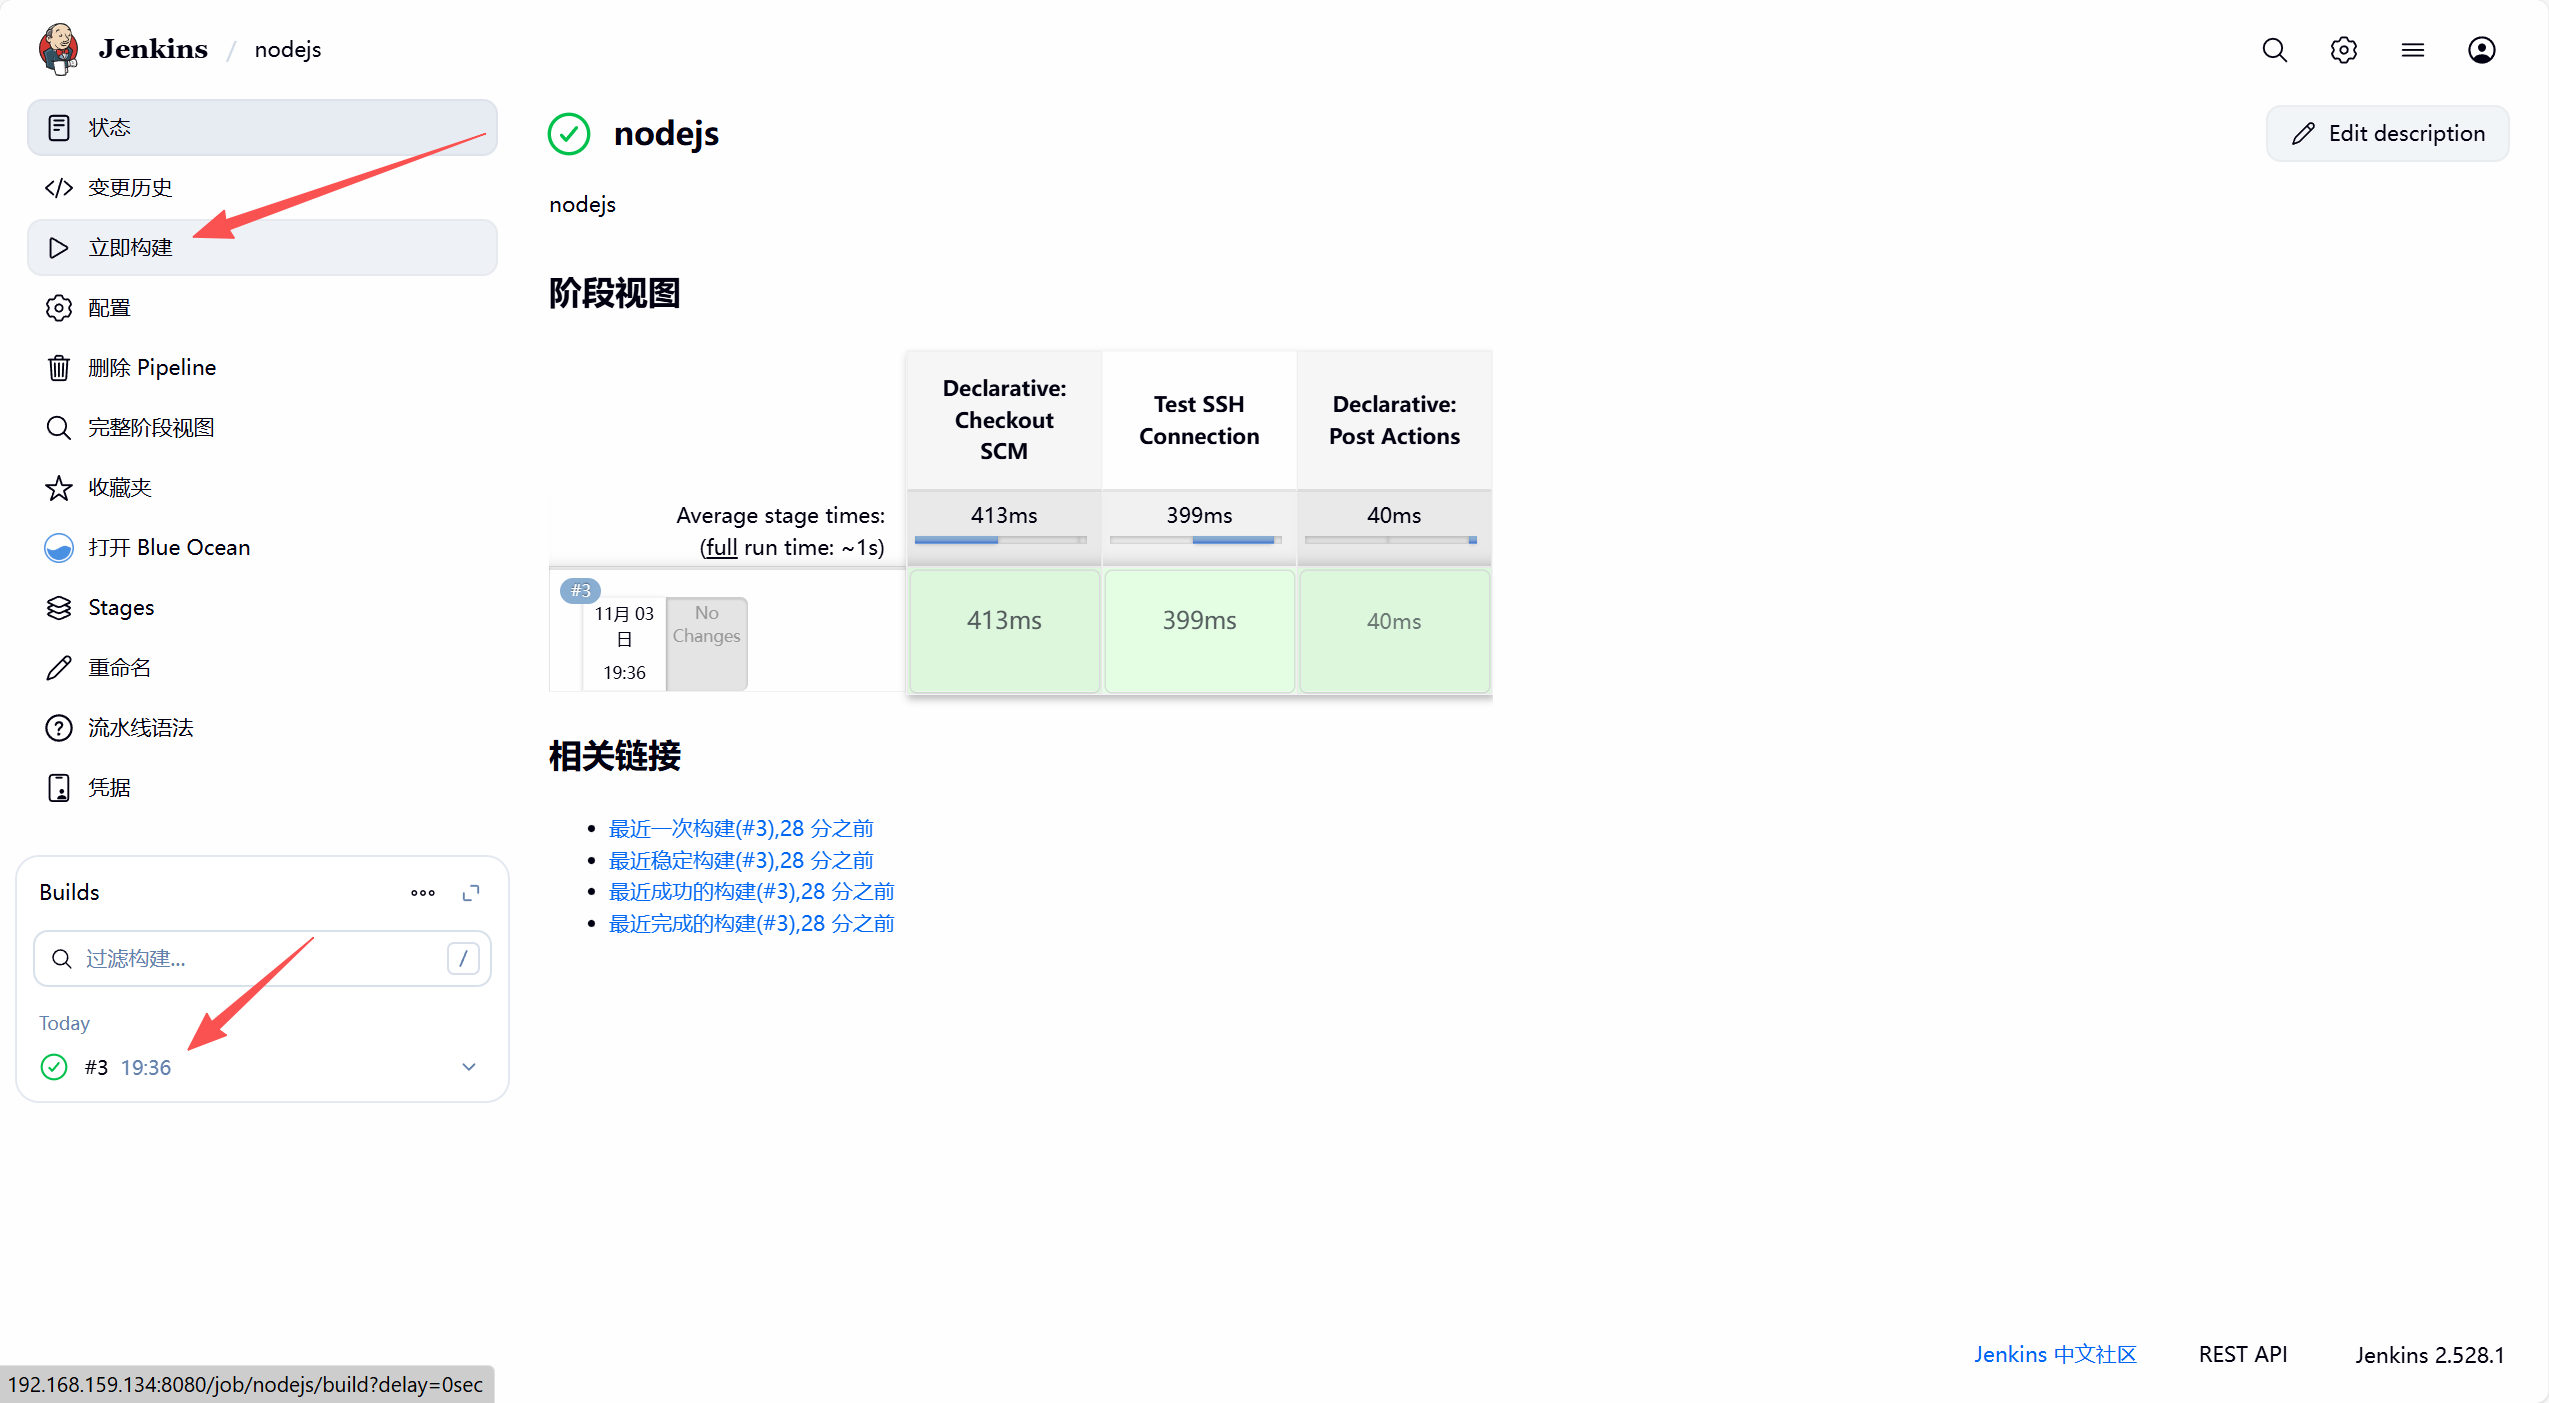
查看控制台输出
Started by user Ink
Obtained Jenkinsfile from git git@192.168.159.133:root/nodejs.git
[Pipeline] Start of Pipeline
[Pipeline] node
Running on Jenkins in /var/lib/jenkins/workspace/nodejs
[Pipeline] {
[Pipeline] stage
[Pipeline] { (Declarative: Checkout SCM)
[Pipeline] checkout
Selected Git installation does not exist. Using Default
The recommended git tool is: NONE
using credential jenkins-ssh-159-239
 > git rev-parse --resolve-git-dir /var/lib/jenkins/workspace/nodejs/.git # timeout=10
Fetching changes from the remote Git repository
 > git config remote.origin.url git@192.168.159.133:root/nodejs.git # timeout=10
Fetching upstream changes from git@192.168.159.133:root/nodejs.git
 > git --version # timeout=10
 > git --version # 'git version 2.47.3'
using GIT_SSH to set credentials SSH Key For tomcat 192.168.159.239
[INFO] SELinux is present on the host and we could not confirm that it does not apply actively: will try to relabel temporary files now; this may complain if context labeling not applicable after all
 > /usr/bin/chcon --type=ssh_home_t /var/lib/jenkins/workspace/nodejs@tmp/jenkins-gitclient-ssh4028068105717078342.key
Verifying host key using known hosts file
 > git fetch --tags --force --progress -- git@192.168.159.133:root/nodejs.git +refs/heads/*:refs/remotes/origin/* # timeout=10
 > git rev-parse refs/remotes/origin/main^{commit} # timeout=10
Checking out Revision cd869dc0b9ca6ad3ee2bd62bb18f35809a3e0f98 (refs/remotes/origin/main)
 > git config core.sparsecheckout # timeout=10
 > git checkout -f cd869dc0b9ca6ad3ee2bd62bb18f35809a3e0f98 # timeout=10
Commit message: "添加Jenkinsfile"
 > git rev-list --no-walk cd869dc0b9ca6ad3ee2bd62bb18f35809a3e0f98 # timeout=10
[Pipeline] }
[Pipeline] // stage
[Pipeline] withEnv
[Pipeline] {
[Pipeline] stage
[Pipeline] { (Test SSH Connection)
[Pipeline] script
[Pipeline] {
[Pipeline] sshagent
[ssh-agent] Using credentials git (SSH Key For tomcat 192.168.159.239)
$ ssh-agent
SSH_AUTH_SOCK=/tmp/ssh-XXXXXXG6jrmK/agent.6473
SSH_AGENT_PID=6476
Running ssh-add (command line suppressed)
Identity added: /var/lib/jenkins/workspace/nodejs@tmp/private_key_16695974110225731368.key (jenkins@Jenkins)
[ssh-agent] Started.
[Pipeline] {
[Pipeline] sh
+ echo '=== 测试 SSH 连接 ==='
=== 测试 SSH 连接 ===
++ whoami
++ pwd
+ ssh -o StrictHostKeyChecking=no root@192.168.159.239 '
                                echo '\''连接成功!'\''
                                echo '\''当前用户: jenkins'\''
                                echo '\''当前目录: /var/lib/jenkins/workspace/nodejs'\''
                                echo '\''Node.js 版本:'\''
                                node -v
                                echo '\''系统信息:'\''
                                uname -a
                            '
Warning: your password will expire in 0 days.
连接成功!
当前用户: jenkins
当前目录: /var/lib/jenkins/workspace/nodejs
Node.js 版本:
v16.20.2
系统信息:
Linux tomcat 5.14.0-592.el9.x86_64 #1 SMP PREEMPT_DYNAMIC Fri Jun 6 09:58:38 UTC 2025 x86_64 x86_64 x86_64 GNU/Linux
[Pipeline] }
$ ssh-agent -k
unset SSH_AUTH_SOCK;
unset SSH_AGENT_PID;
echo Agent pid 6476 killed;
[ssh-agent] Stopped.
[Pipeline] // sshagent
[Pipeline] }
[Pipeline] // script
[Pipeline] }
[Pipeline] // stage
[Pipeline] stage
[Pipeline] { (Declarative: Post Actions)
[Pipeline] echo
SSH 连接测试完成
[Pipeline] }
[Pipeline] // stage
[Pipeline] }
[Pipeline] // withEnv
[Pipeline] }
[Pipeline] // node
[Pipeline] End of Pipeline
Finished: SUCCESS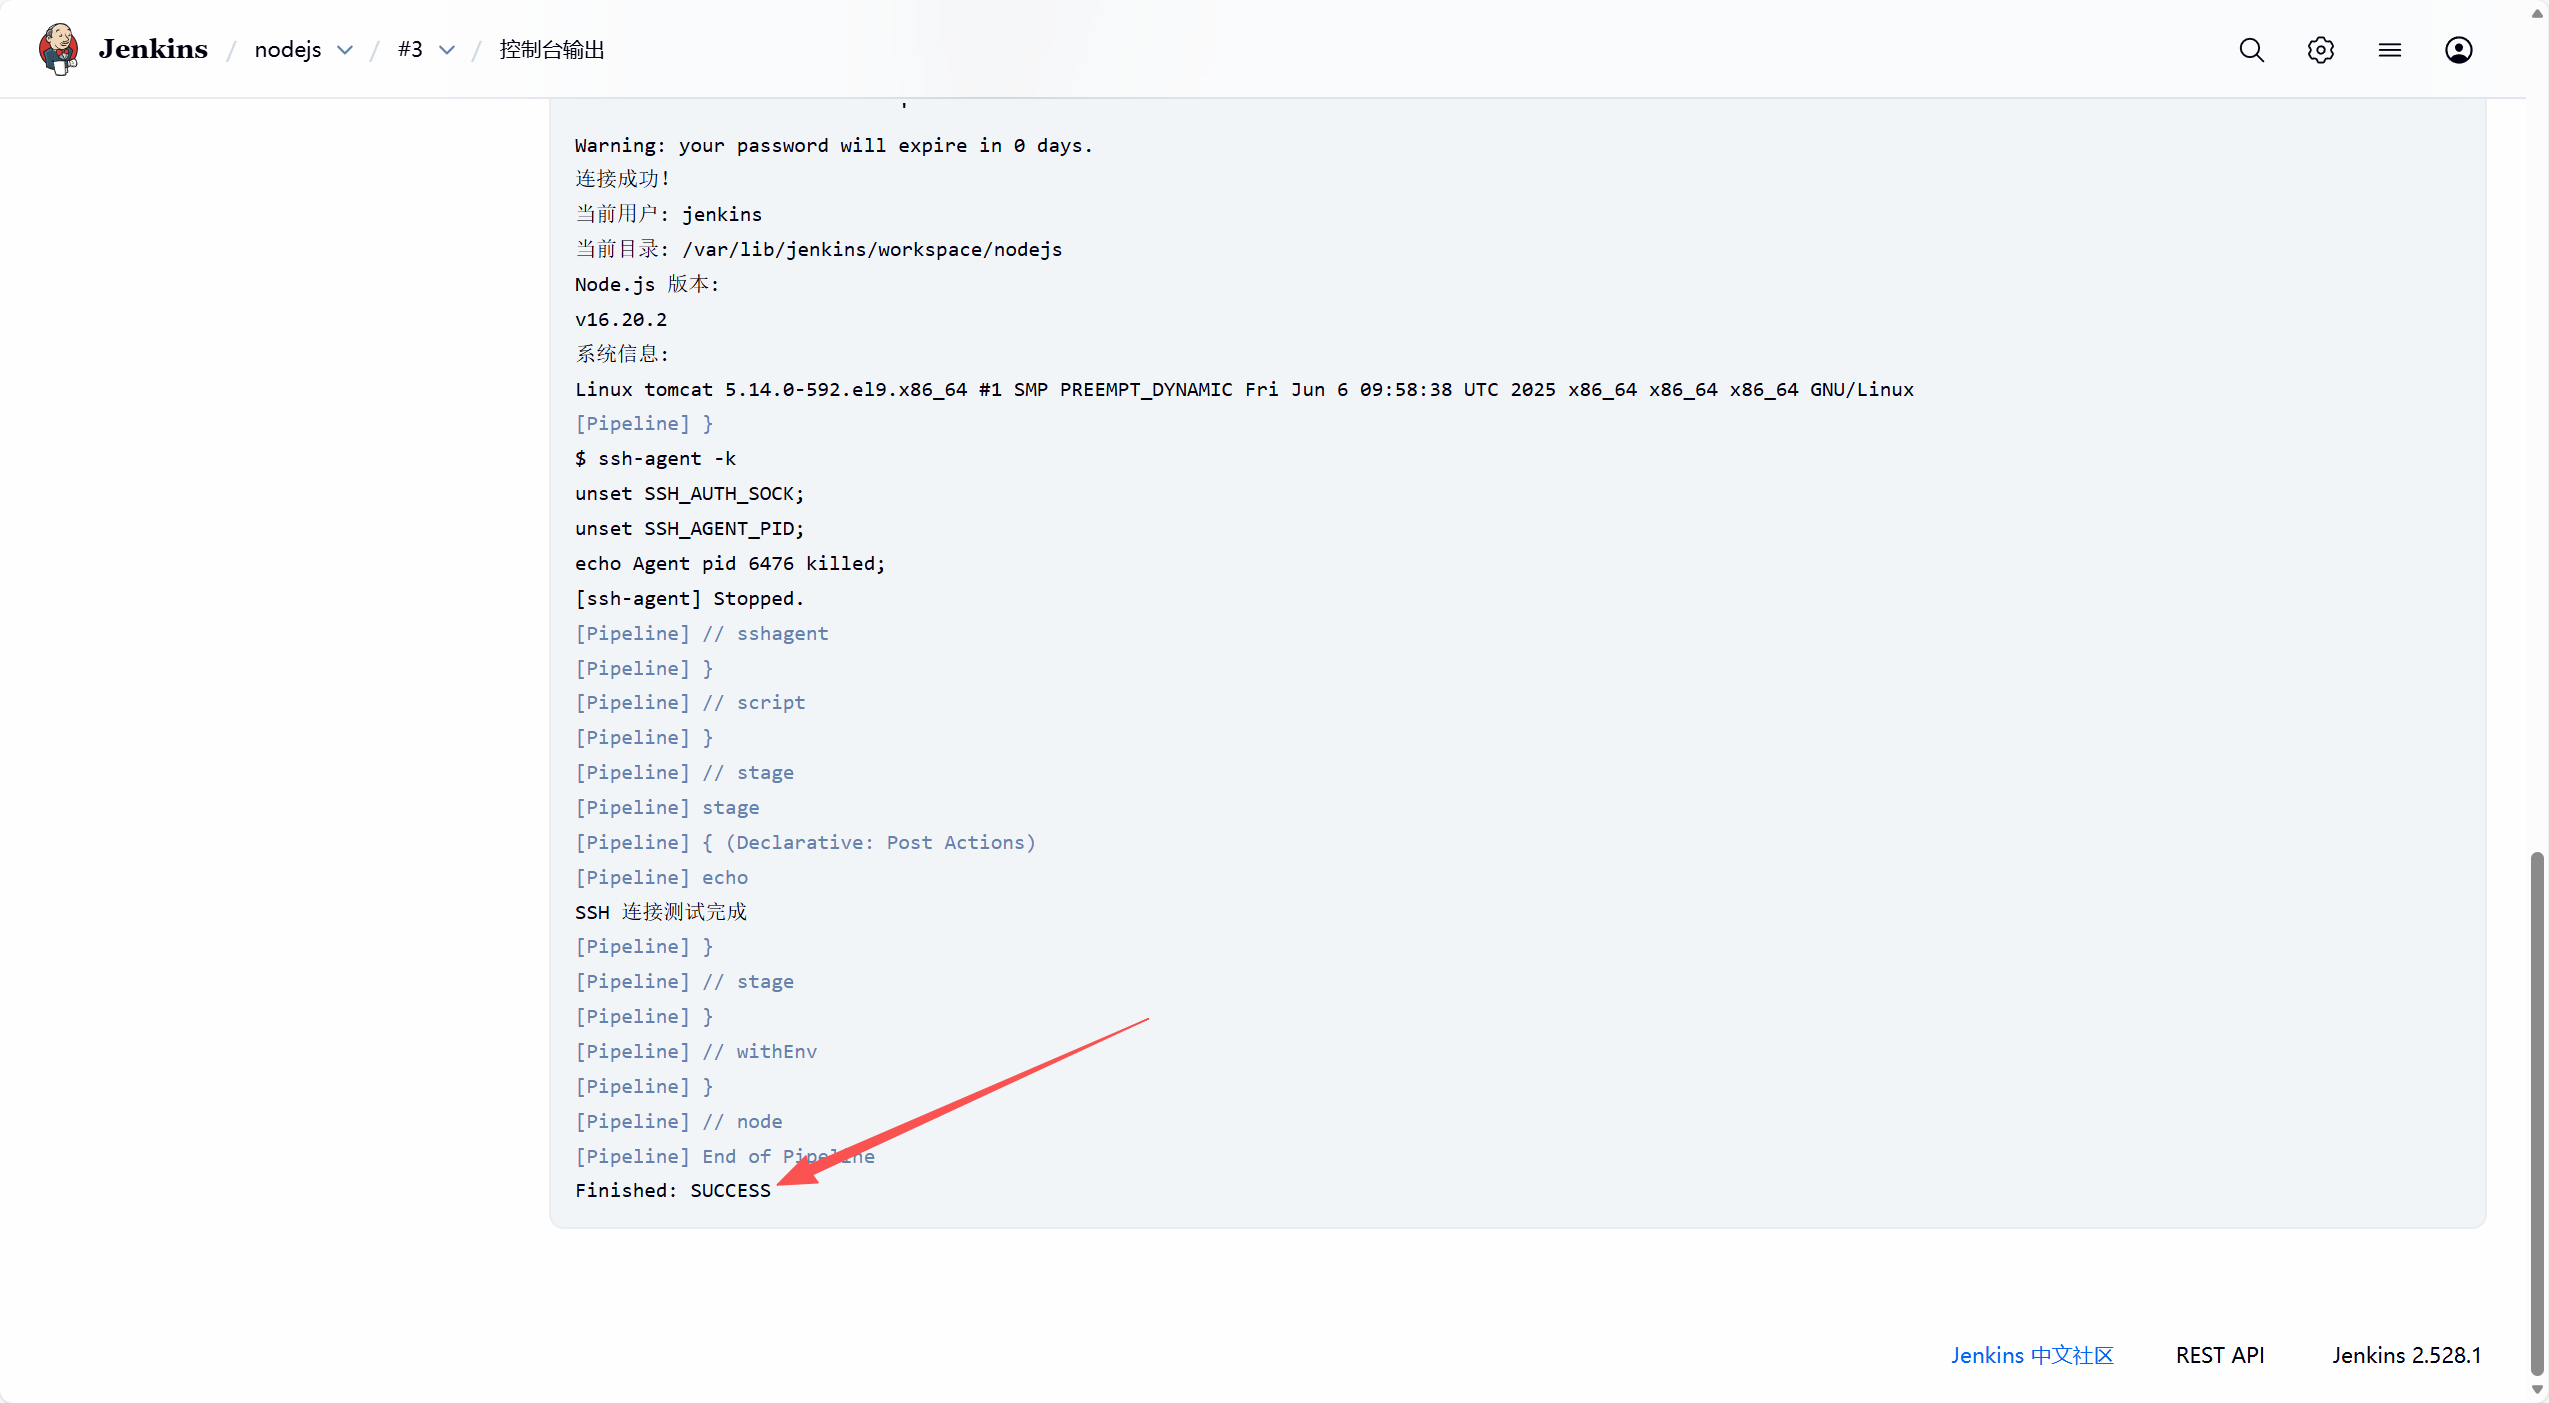
检测
九、Slave
1. 准备工作
1.1 系统信息
| 组件 | IP 地址 | 已安装软件 |
|---|---|---|
| JenkinsMaster | 192.168.159.134 | Jenkins (已运行) |
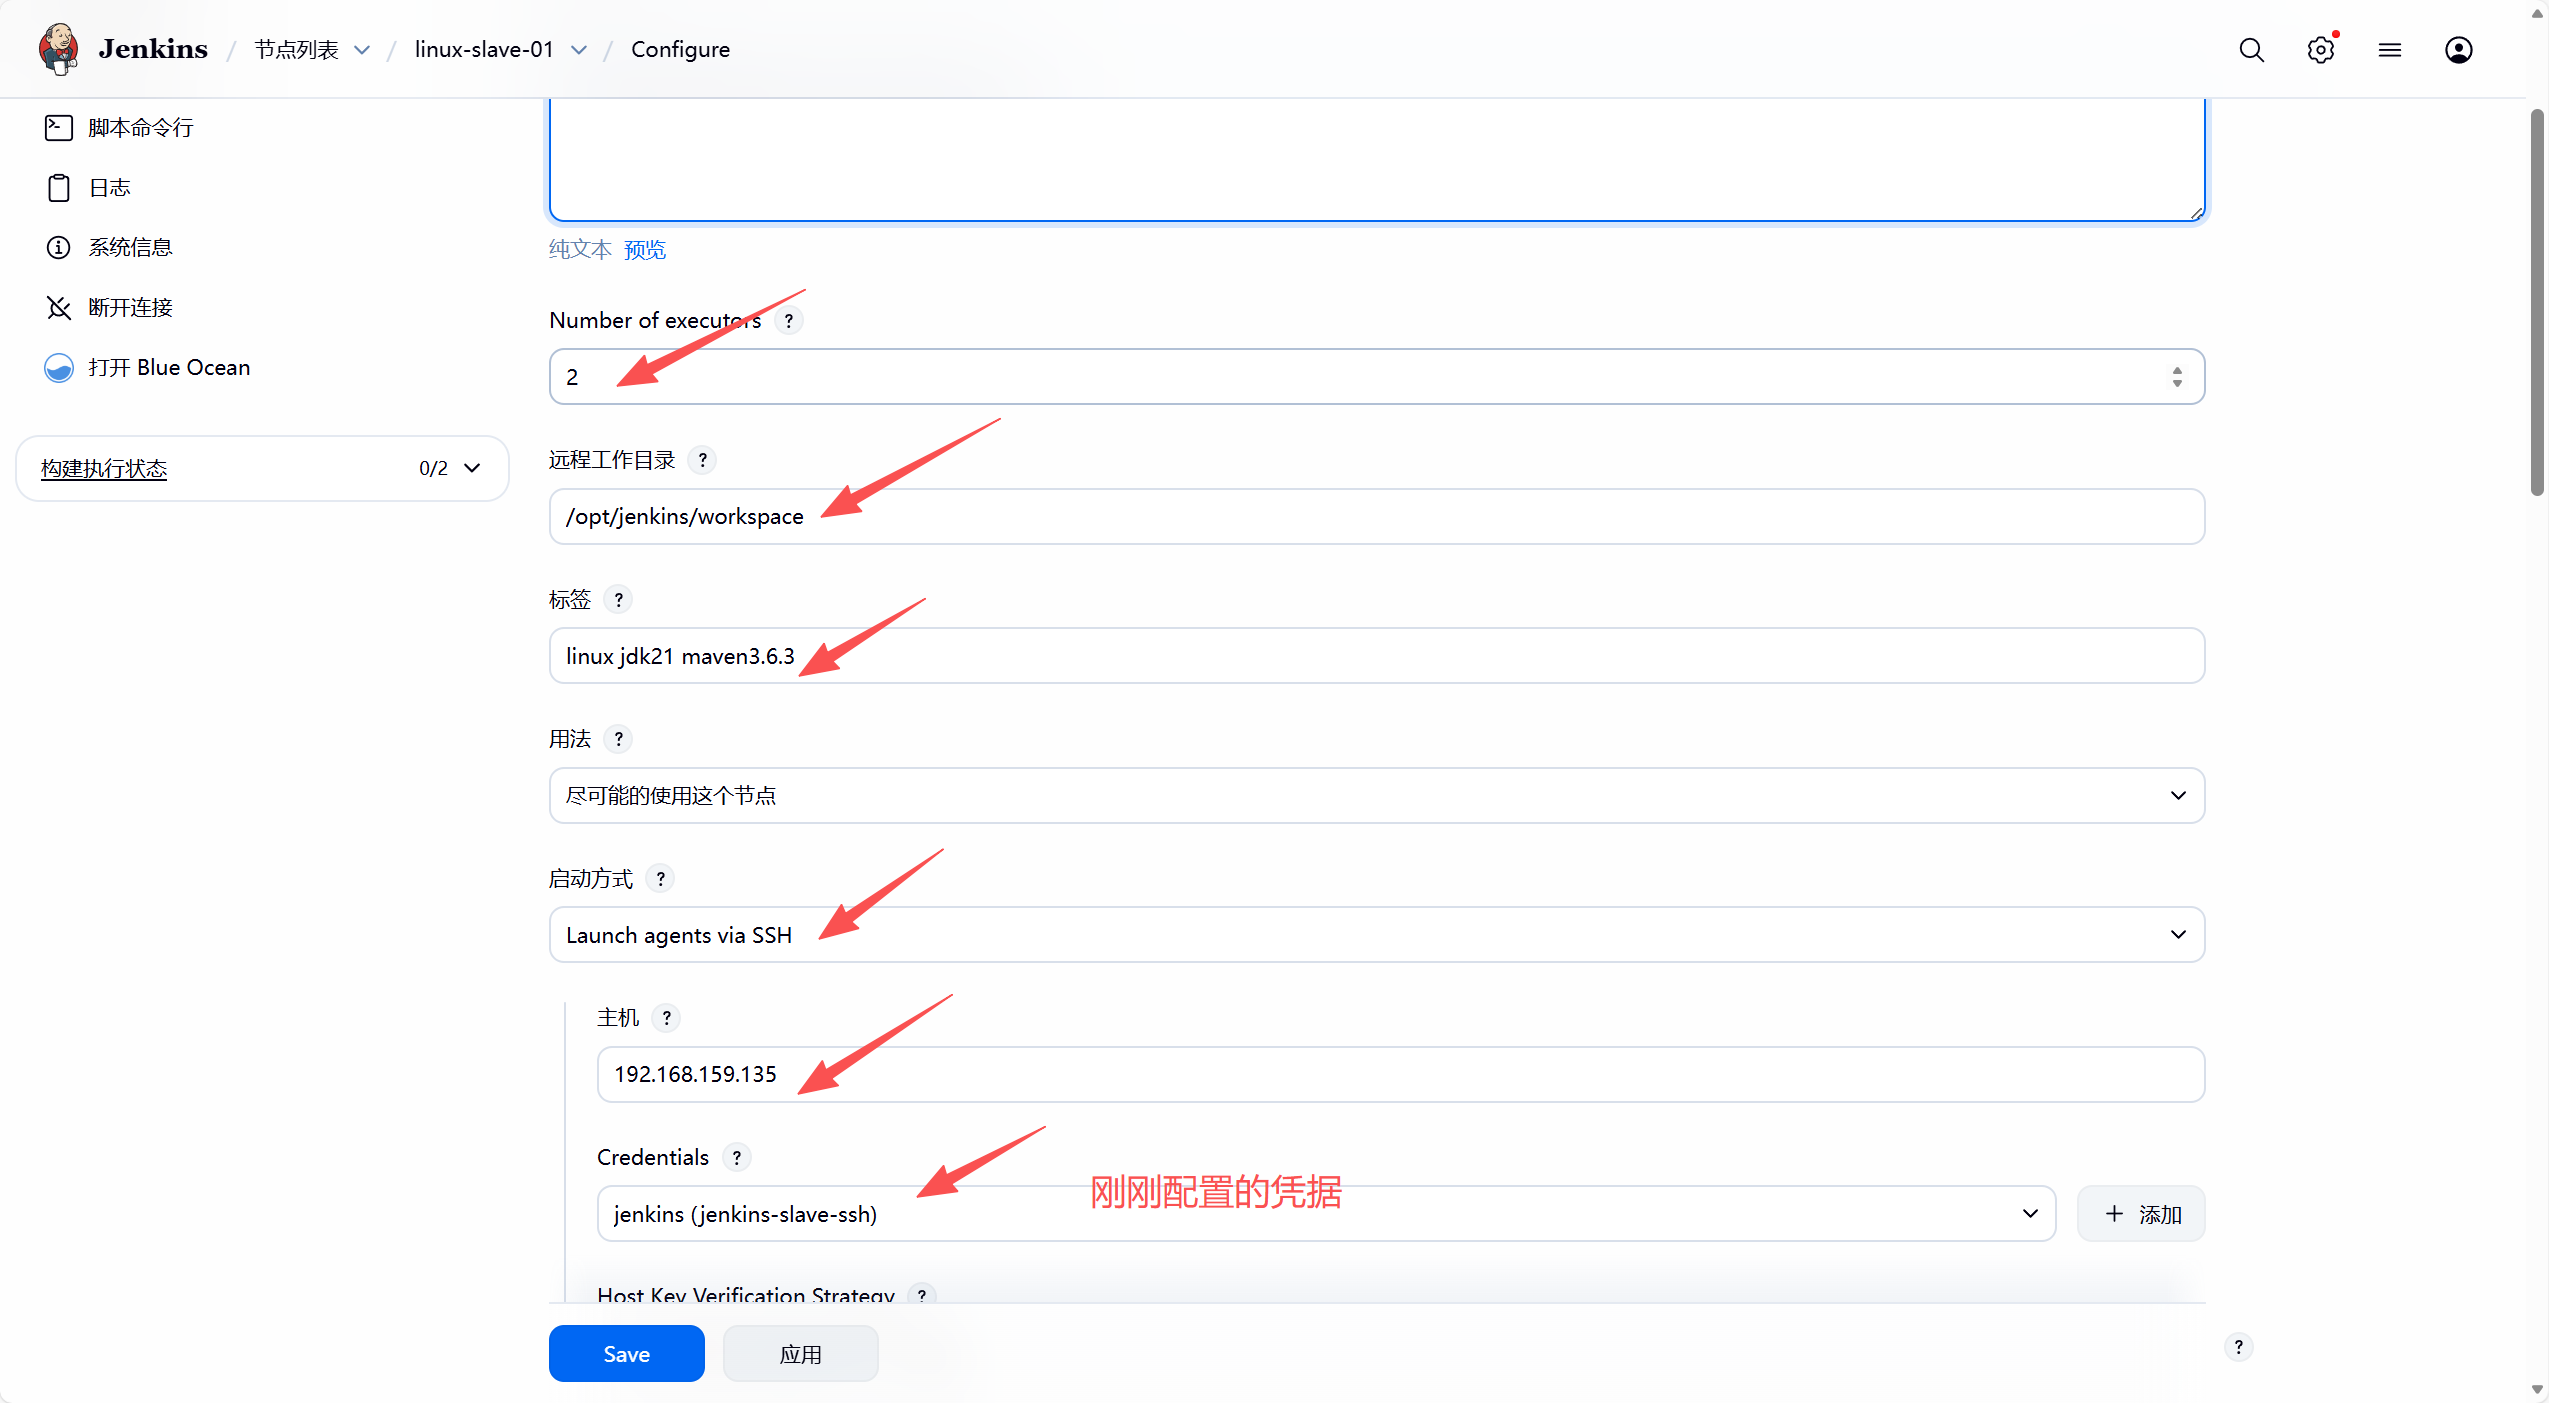
| JenkinsSlave | 192.168.159.135 | JDK 21, Maven 3.6.3 |
1.2 网络要求
-
确保 Master 和 Slave 之间网络互通
-
检查防火墙设置,确保 SSH 端口(22)开放2.
2. Slave 节点配置
2.1 创建专用用户
# 在 Slave 节点上执行
useradd -m -d /home/jenkins -s /bin/bash jenkins
passwd jenkins  # 设置密码,如设置为 123

# 创建工作目录
mkdir -p /opt/jenkins/workspace
chown jenkins:jenkins /opt/jenkins/workspace
2.2 配置环境变量
# 切换到 jenkins 用户
su - jenkins

# 编辑 .bashrc 文件,添加以下内容
vim ~/.bashrc
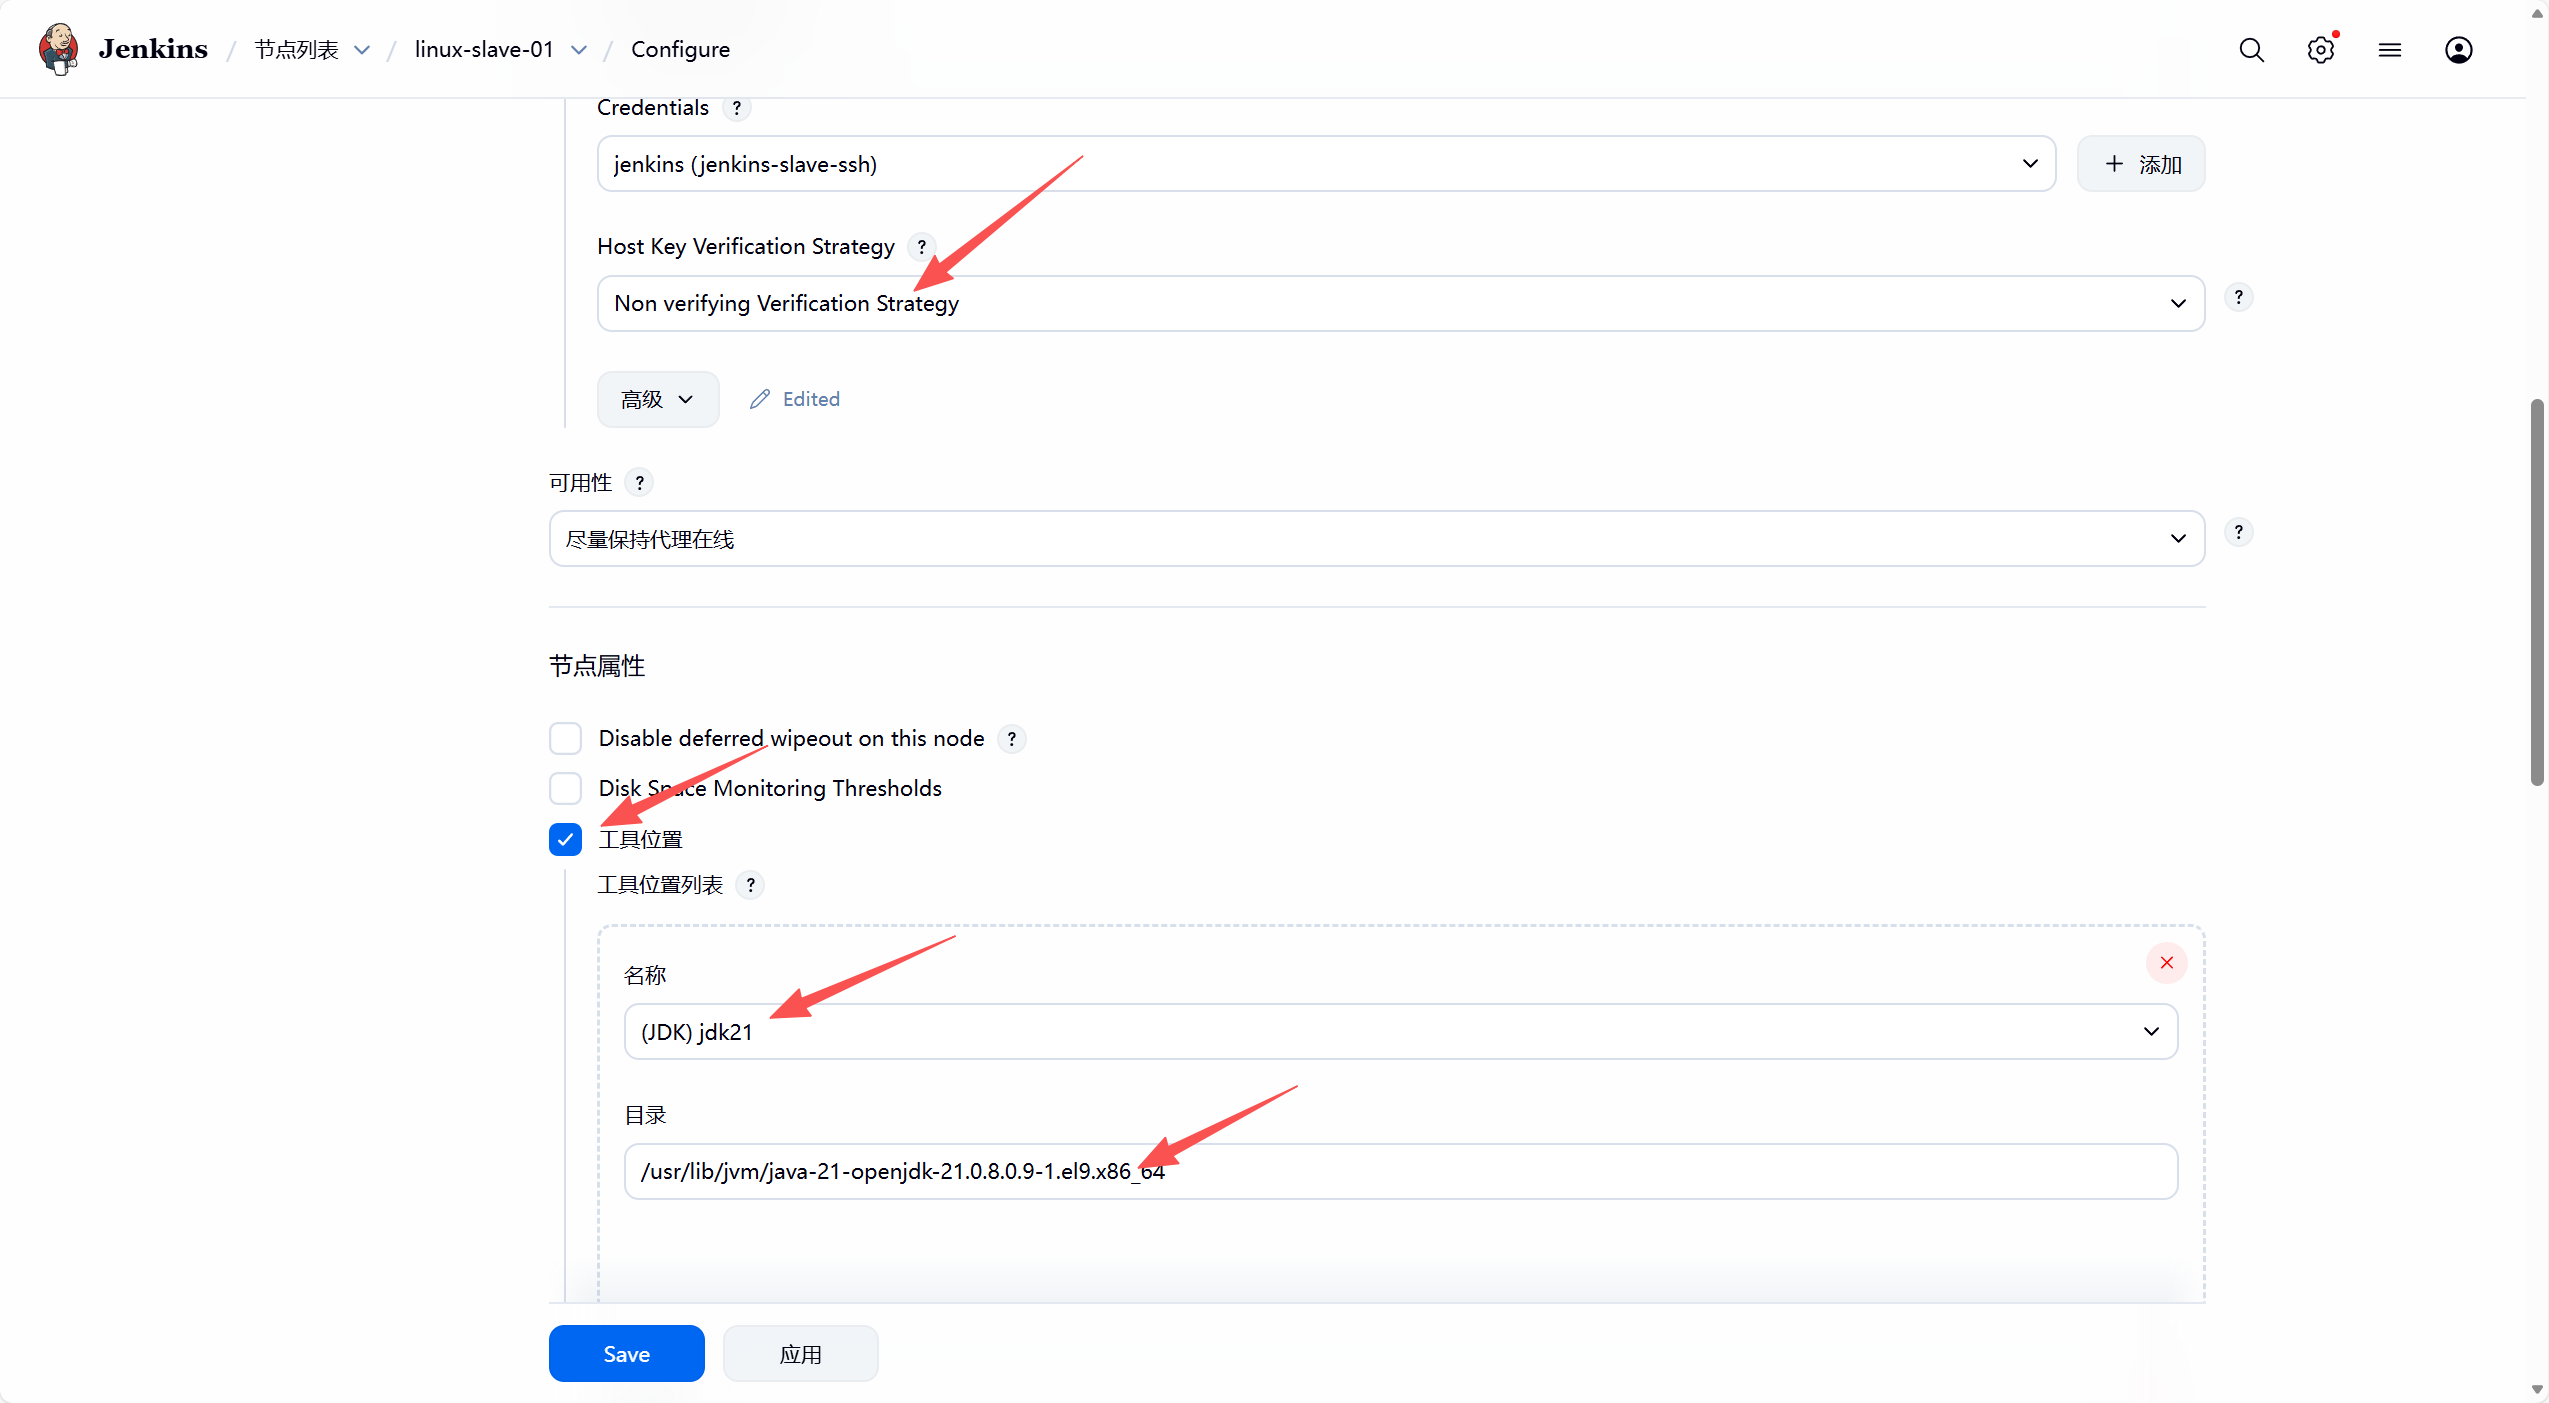
export JAVA_HOME=/usr/lib/jvm/java-21-openjdk-21.0.8.0.9-1.el9.x86_64
export MAVEN_HOME=/usr/share/maven
export PATH=$JAVA_HOME/bin:$MAVEN_HOME/bin:$PATH

# 使配置生效
source ~/.bashrc

# 验证安装
[jenkins@JenkinsSlave ~]$ java --version
openjdk 21.0.8 2025-07-15 LTS
OpenJDK Runtime Environment (Red_Hat-21.0.8.0.9-1) (build 21.0.8+9-LTS)
OpenJDK 64-Bit Server VM (Red_Hat-21.0.8.0.9-1) (build 21.0.8+9-LTS, mixed mode, sharing)
[jenkins@JenkinsSlave ~]$ mvn --version
Apache Maven 3.6.3 (Red Hat 3.6.3-22)
Maven home: /usr/share/maven
Java version: 21.0.8, vendor: Red Hat, Inc., runtime: /usr/lib/jvm/java-21-openjdk-21.0.8.0.9-1.el9.x86_64
Default locale: en_US, platform encoding: UTF-8
OS name: "linux", version: "5.14.0-592.el9.x86_64", arch: "amd64", family: "unix"
3. Master 节点配置
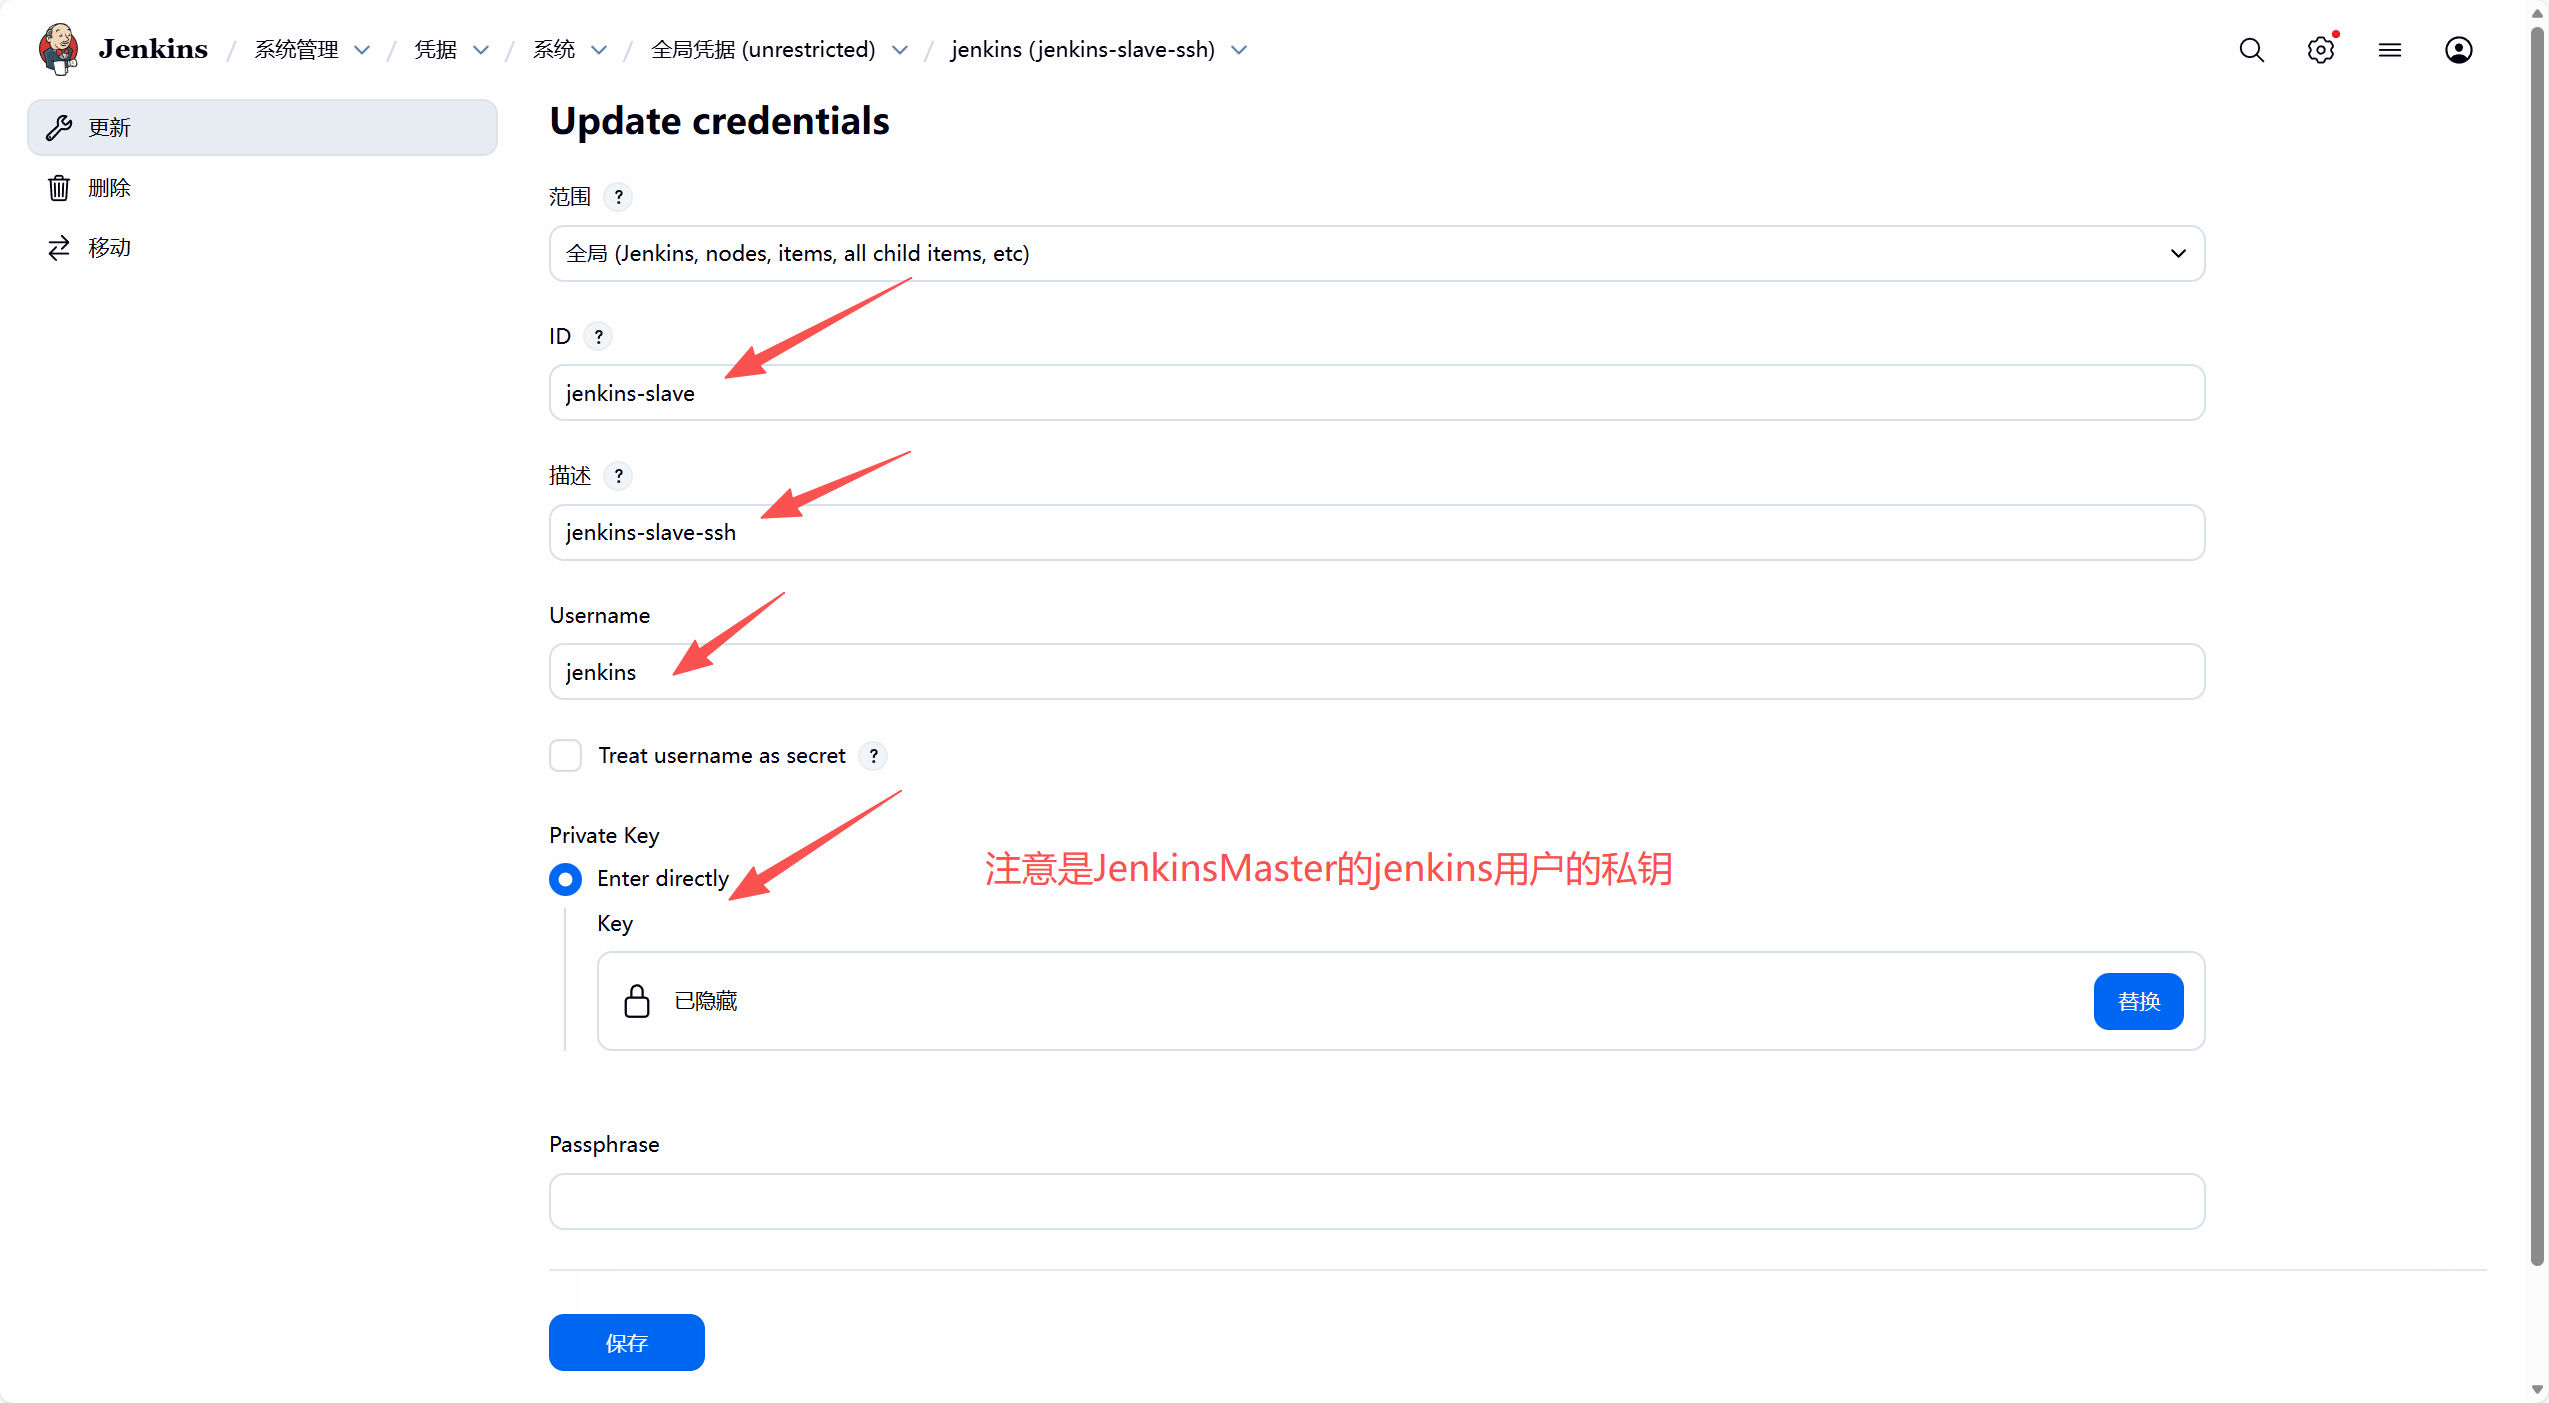
注意:将Master节点的Jenkins用户的公钥传给Slave节点的Jenkins用户!
3.1 添加 SSH 凭证
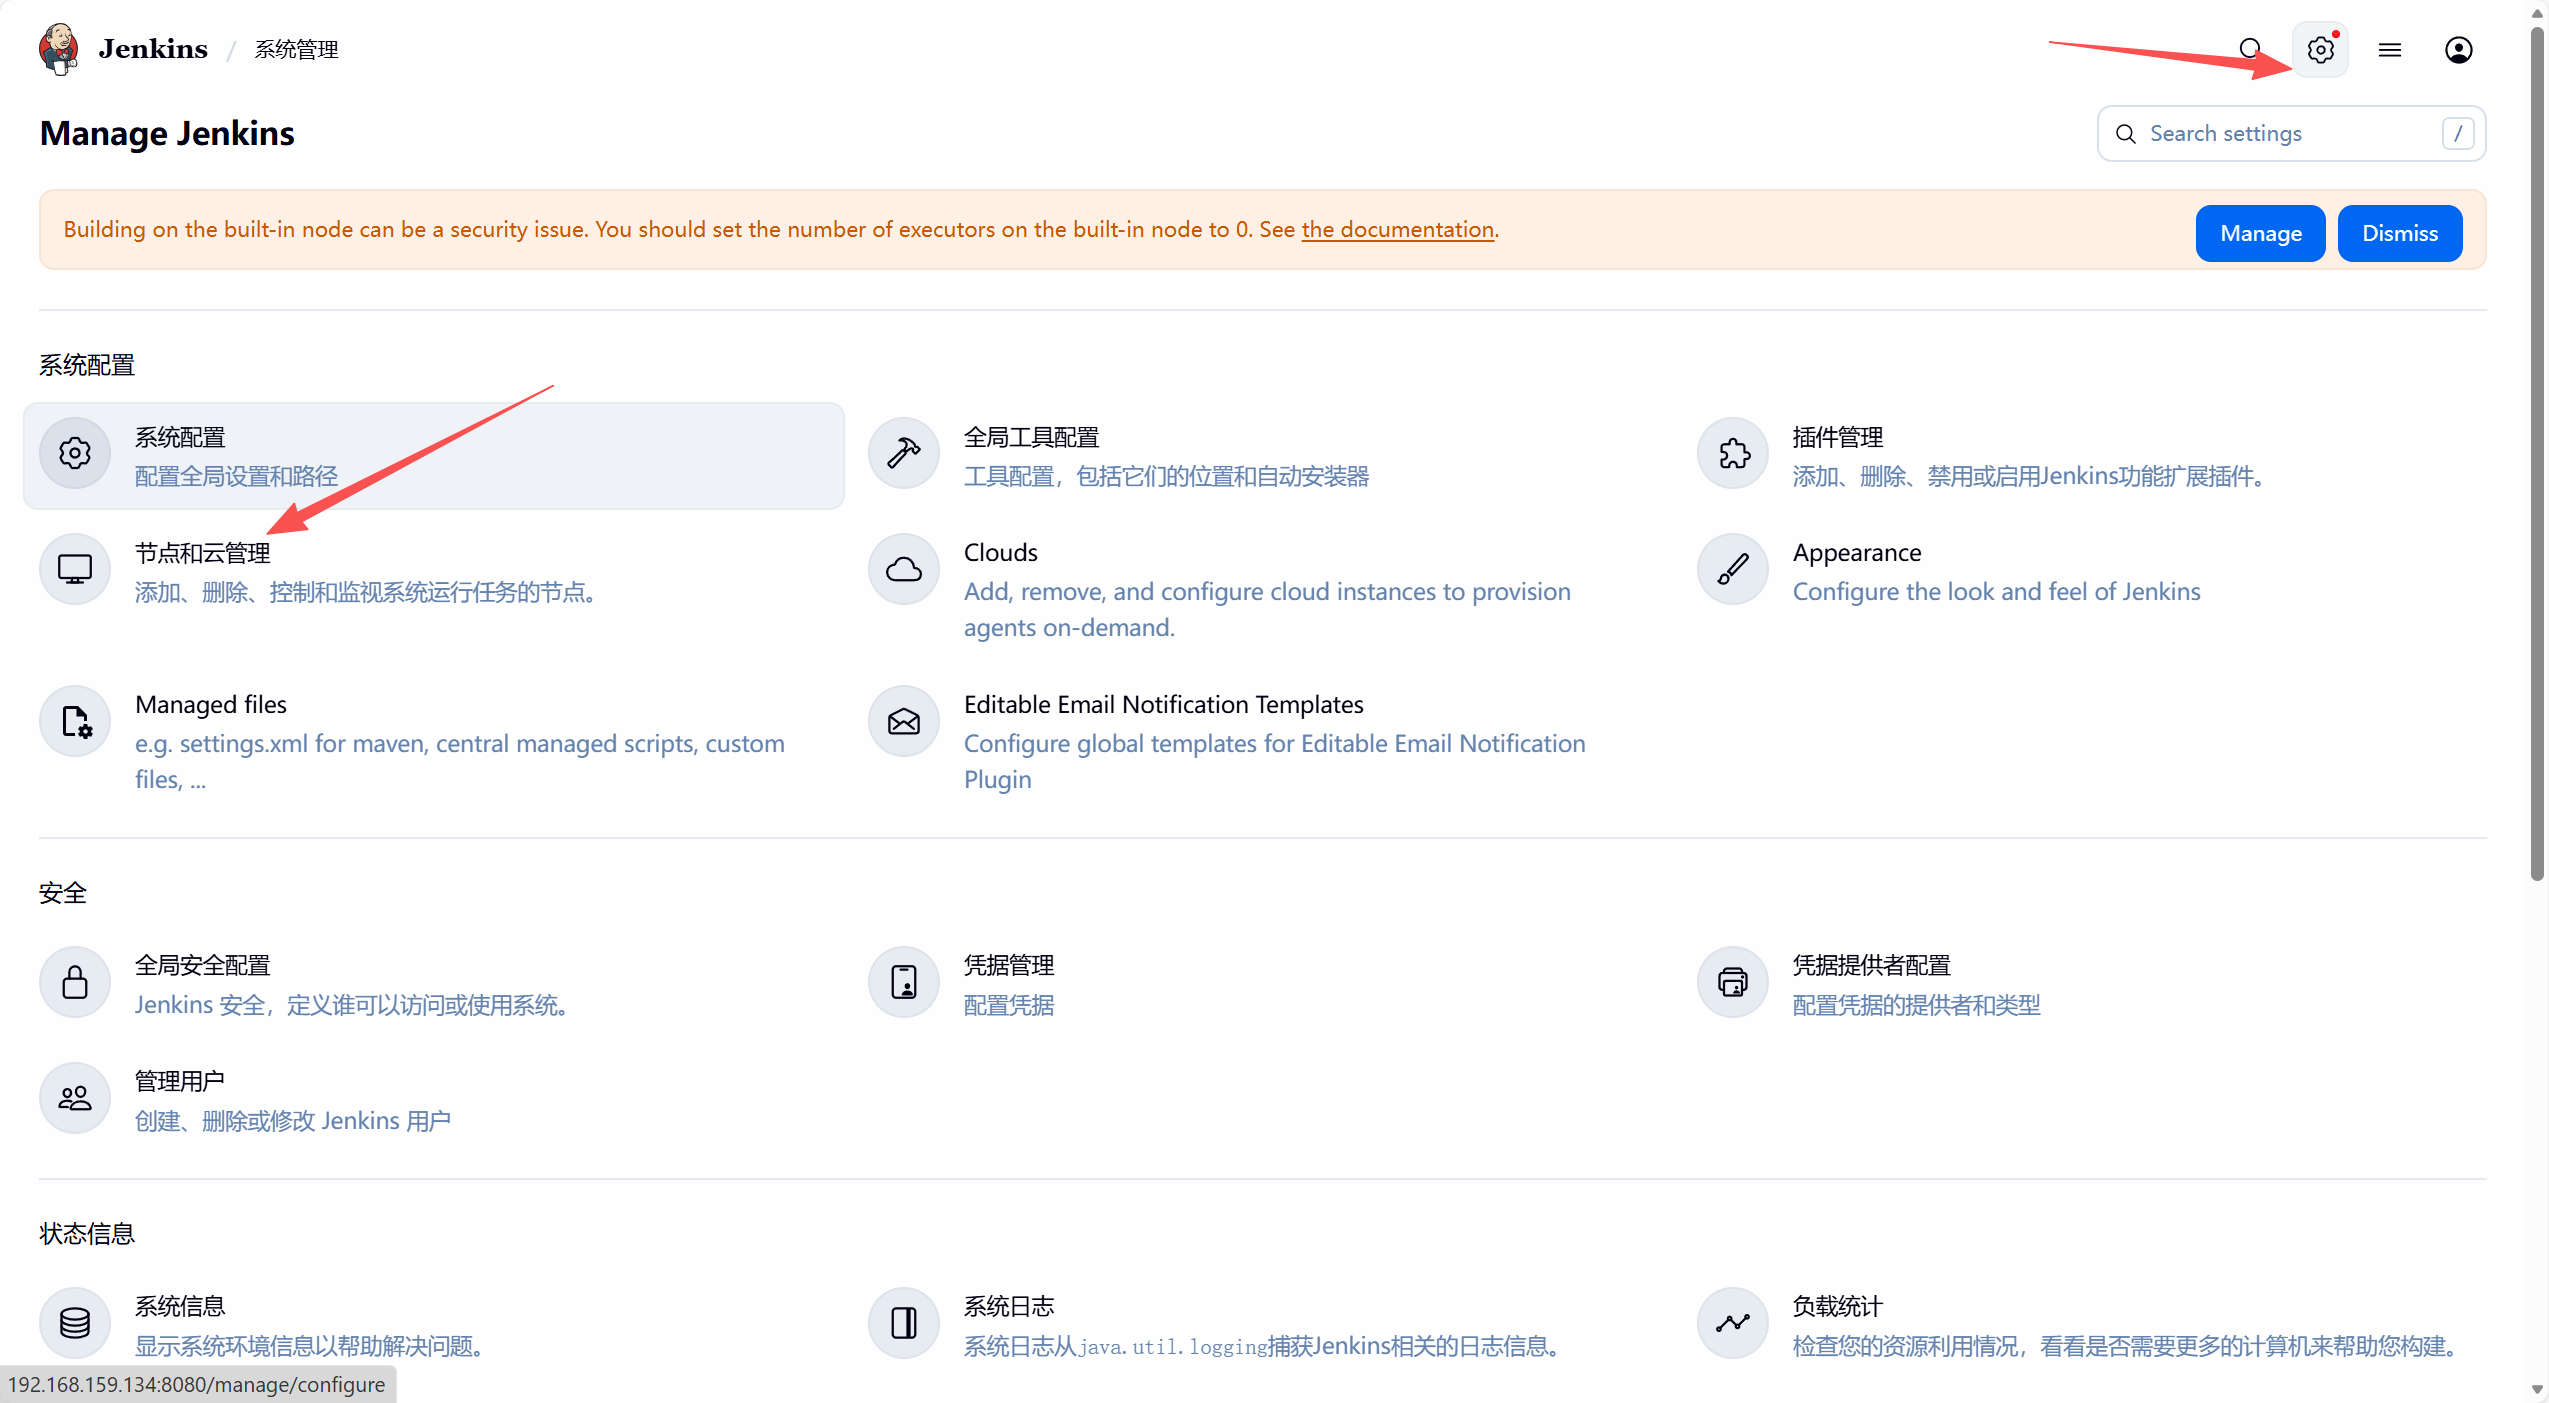
3.2 创建 Slave 节点
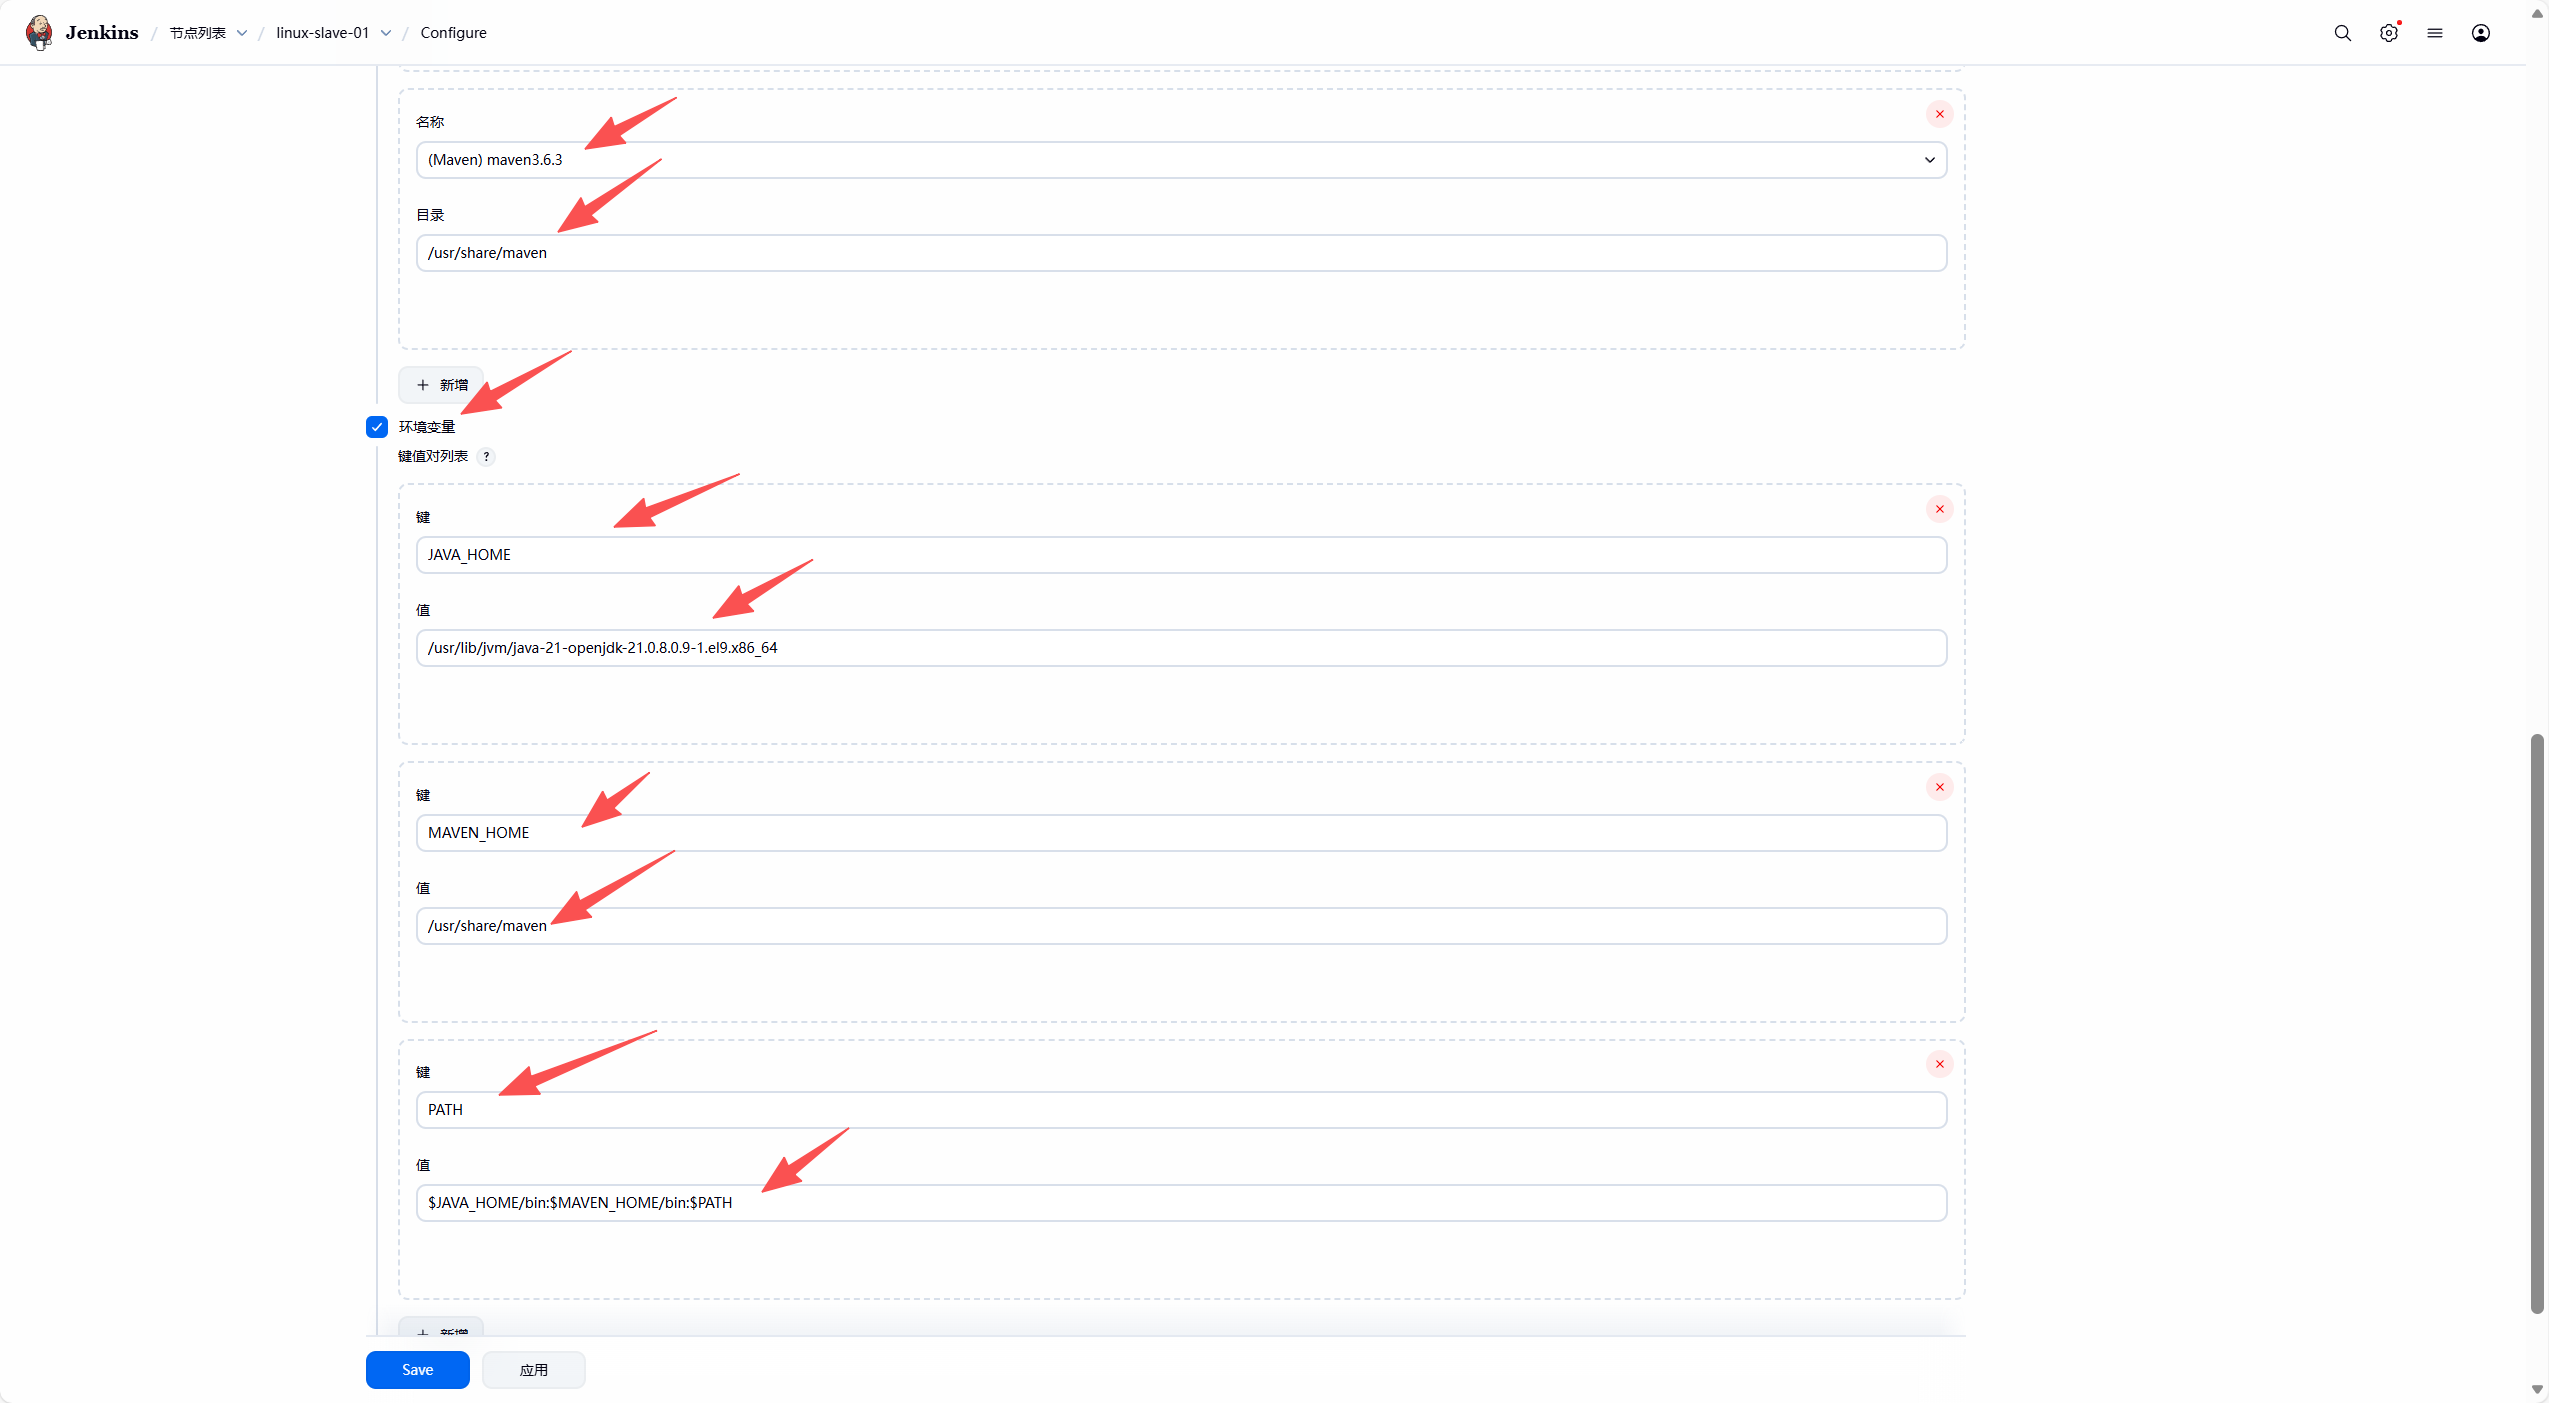
4. 连接验证
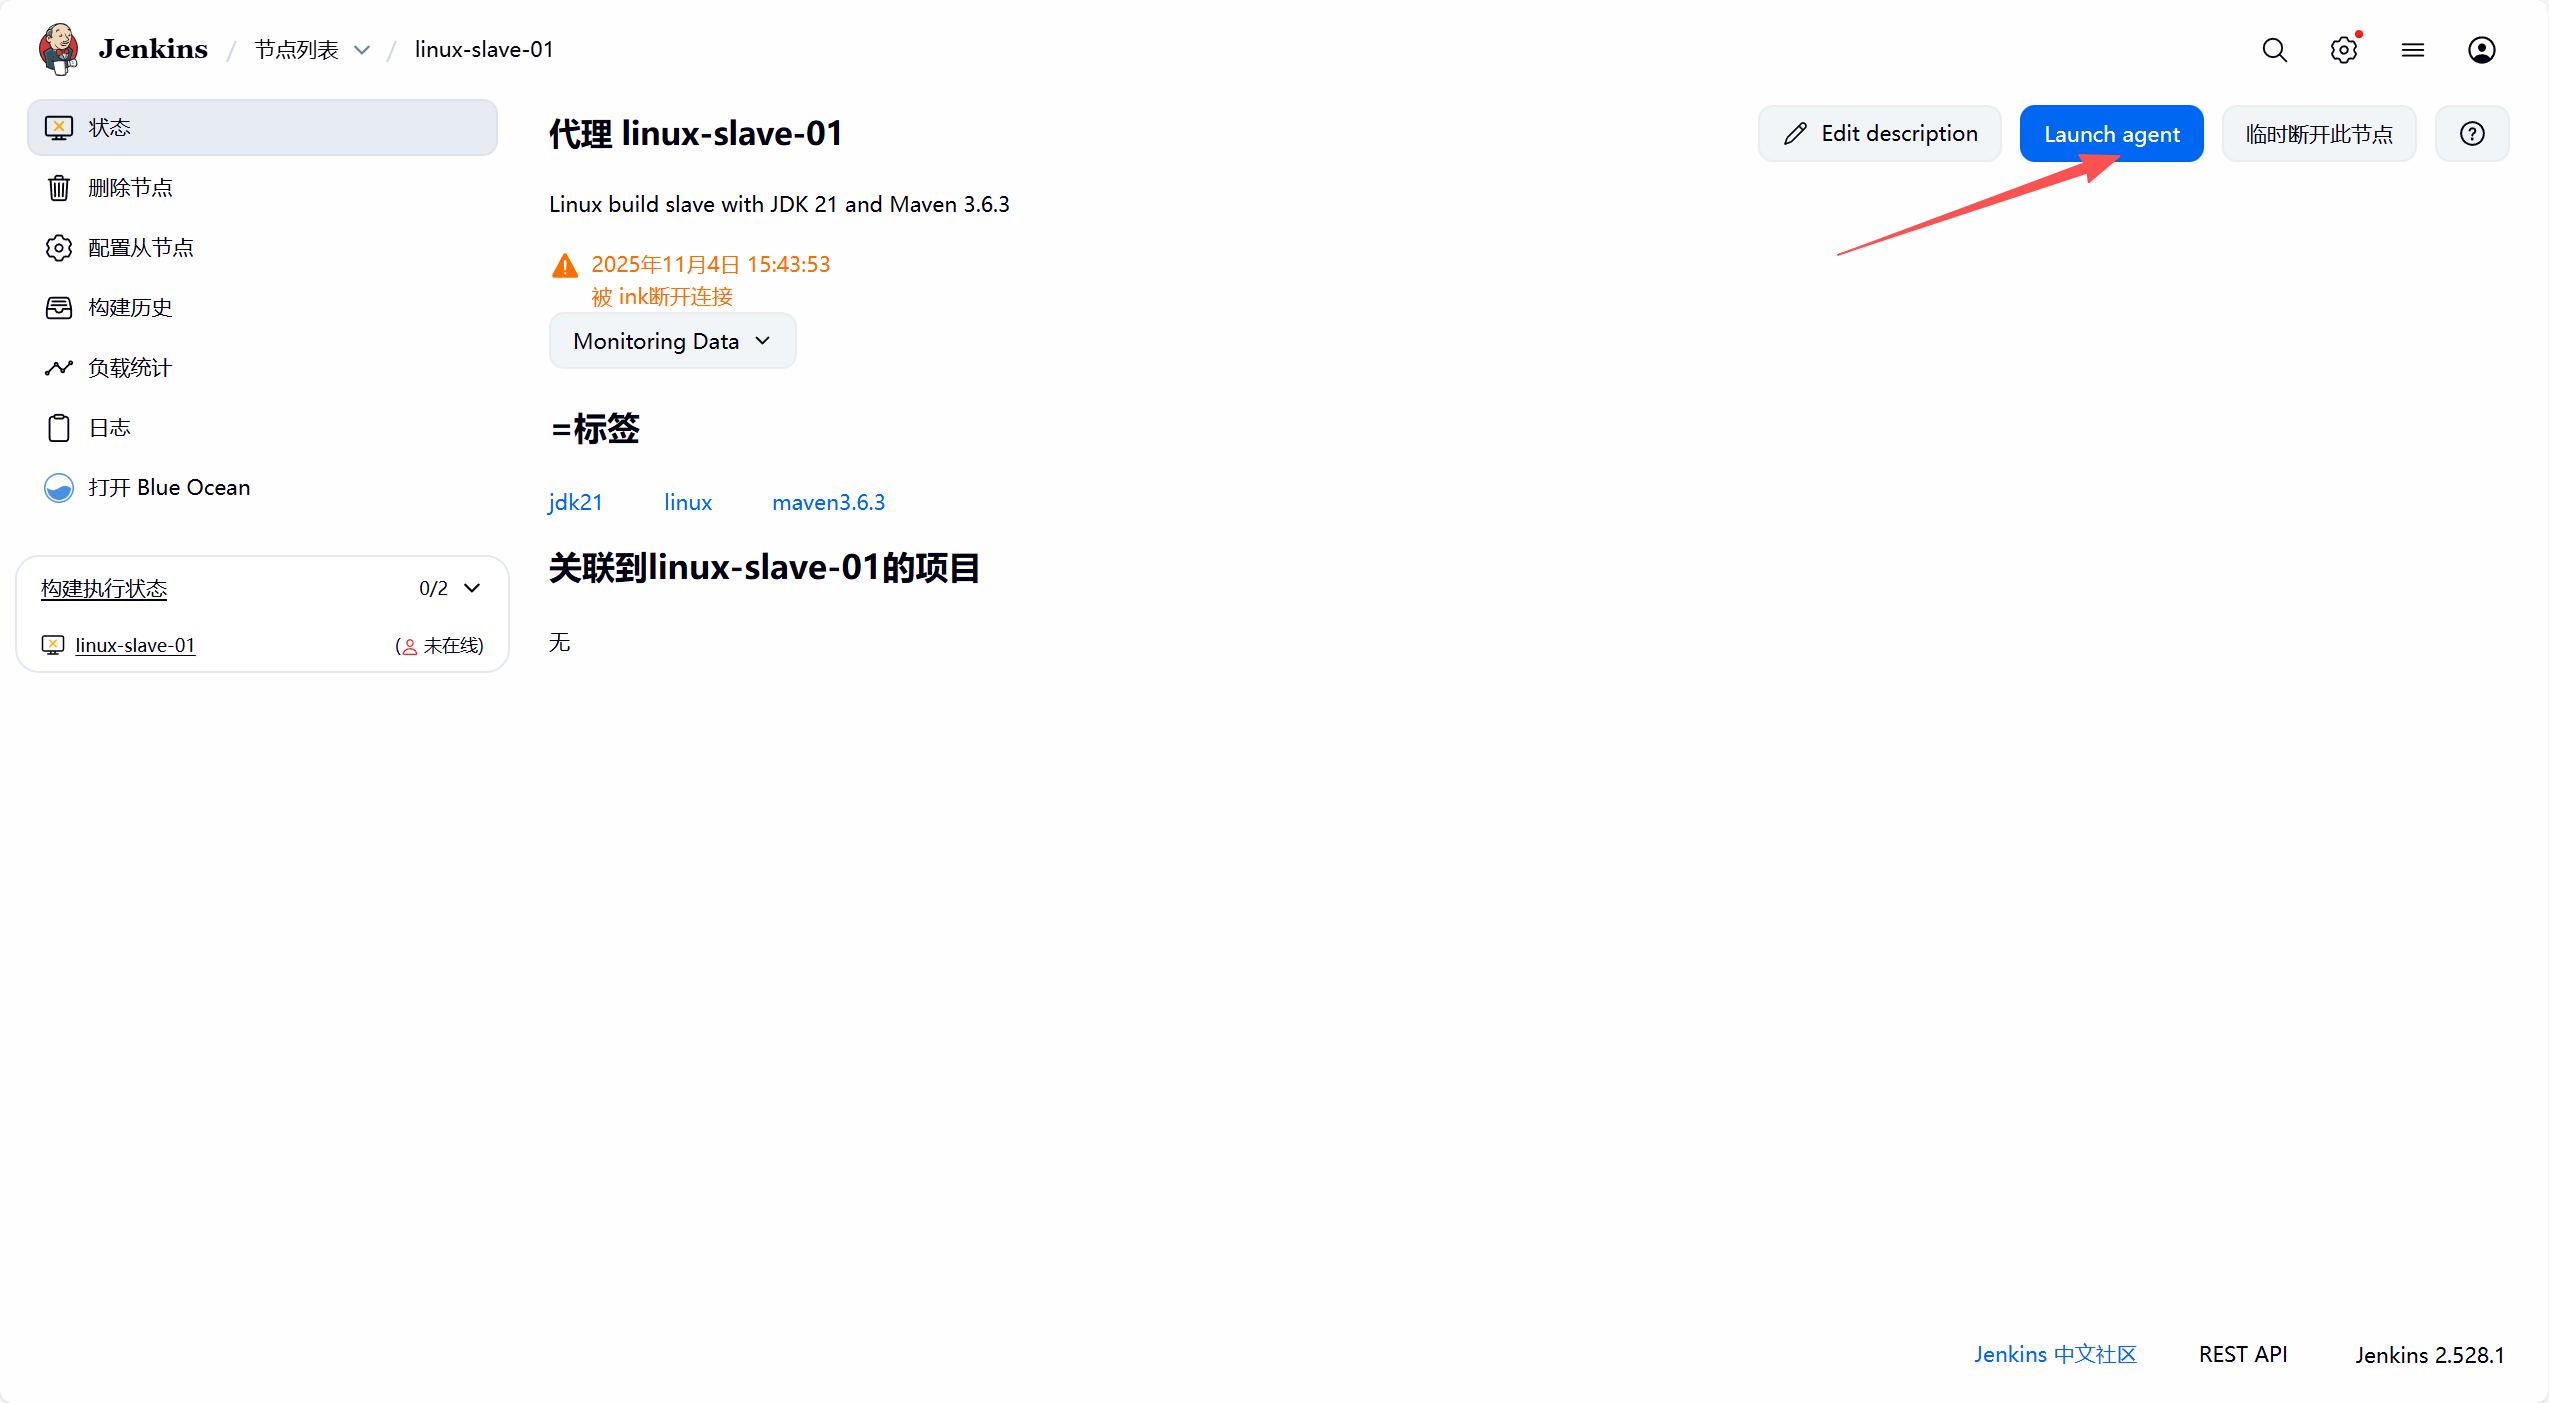
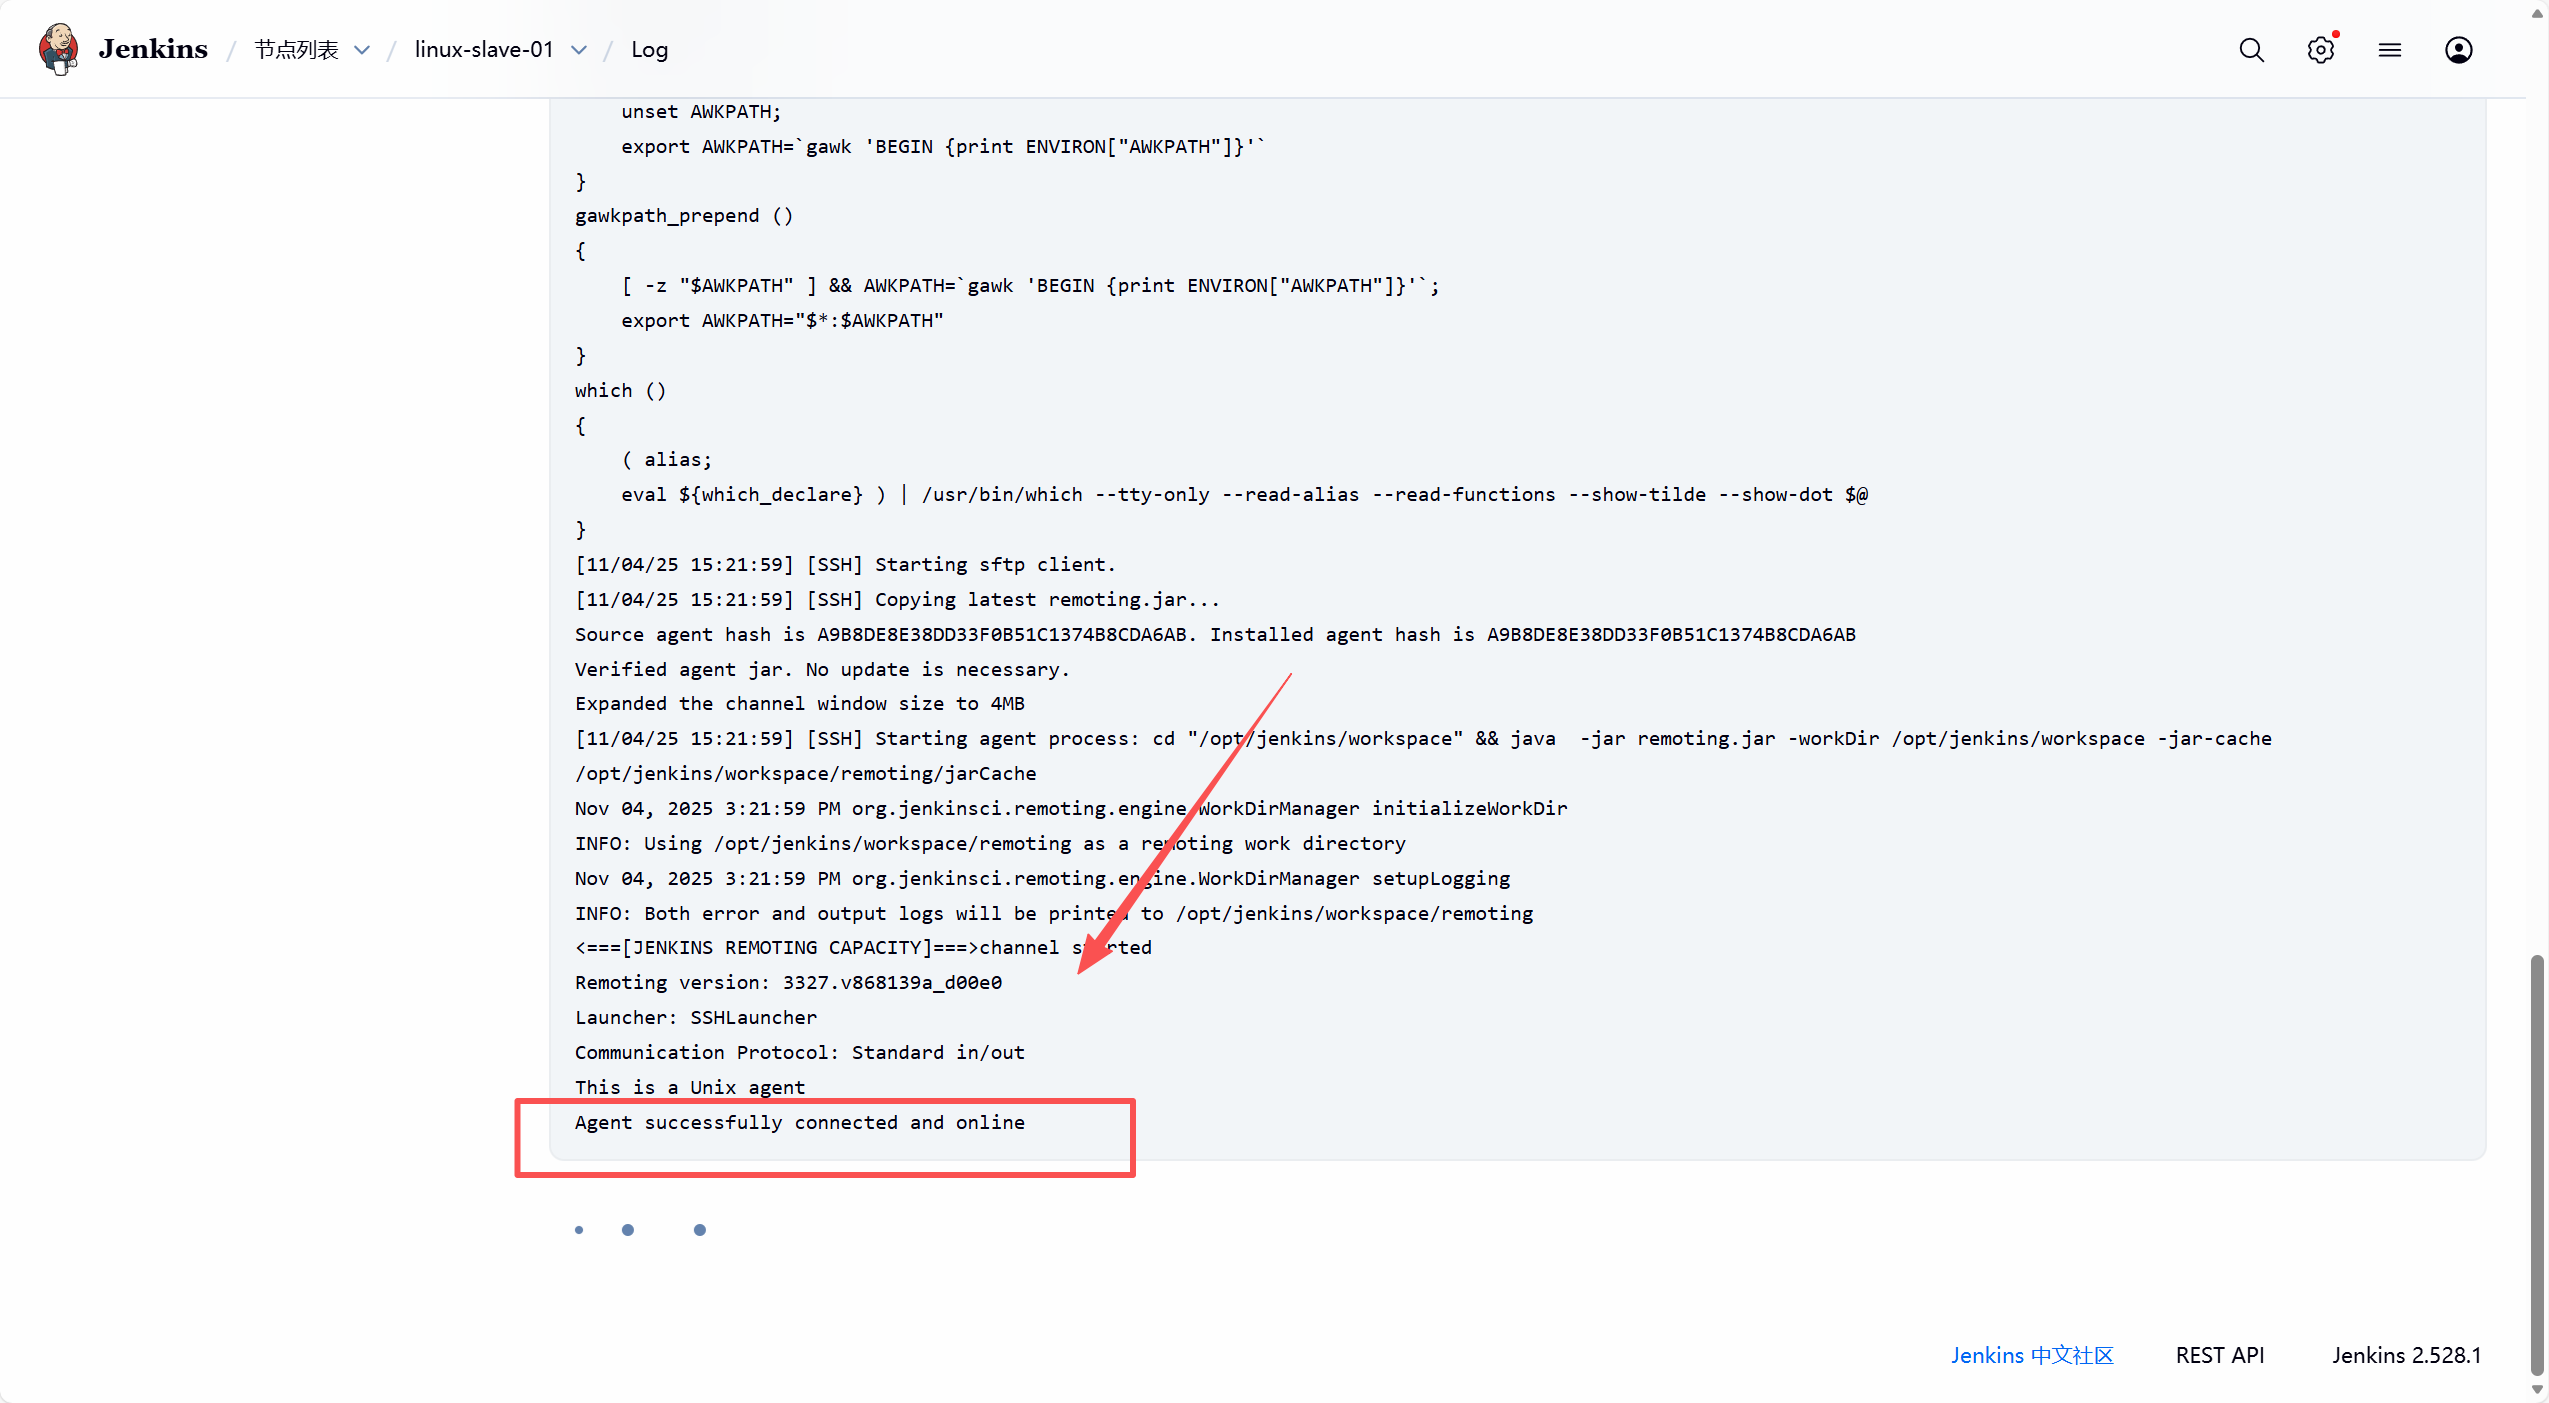
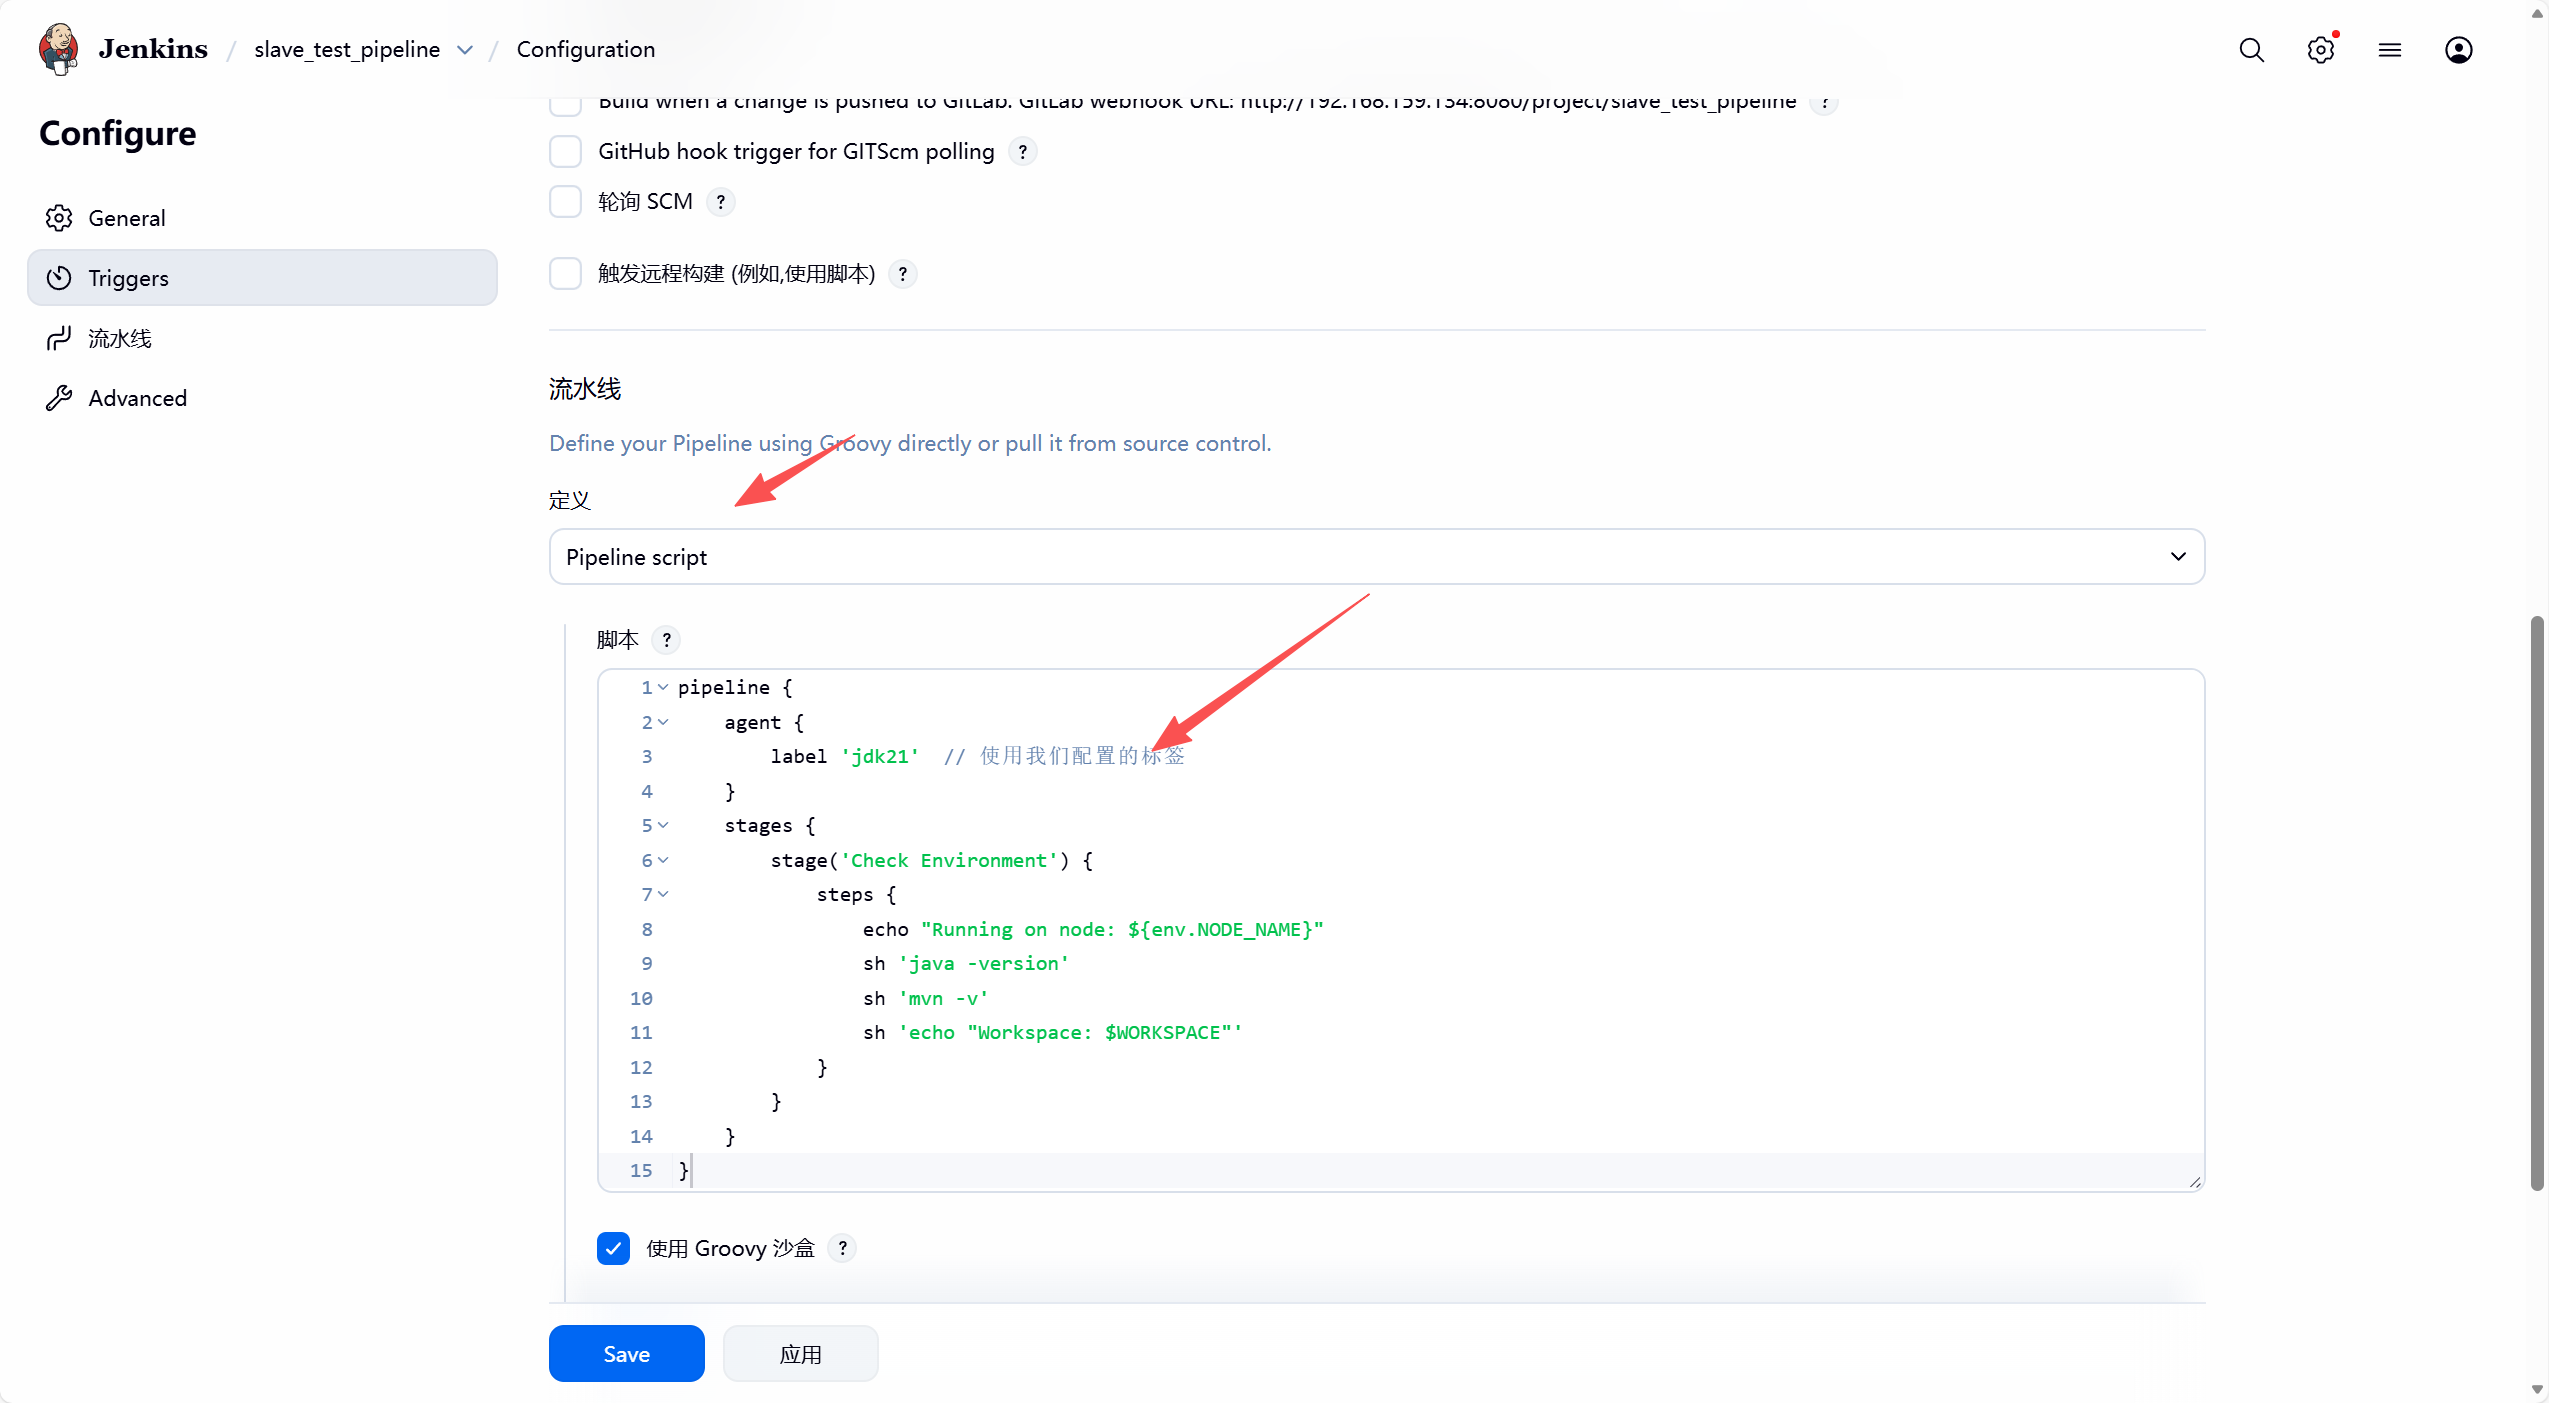
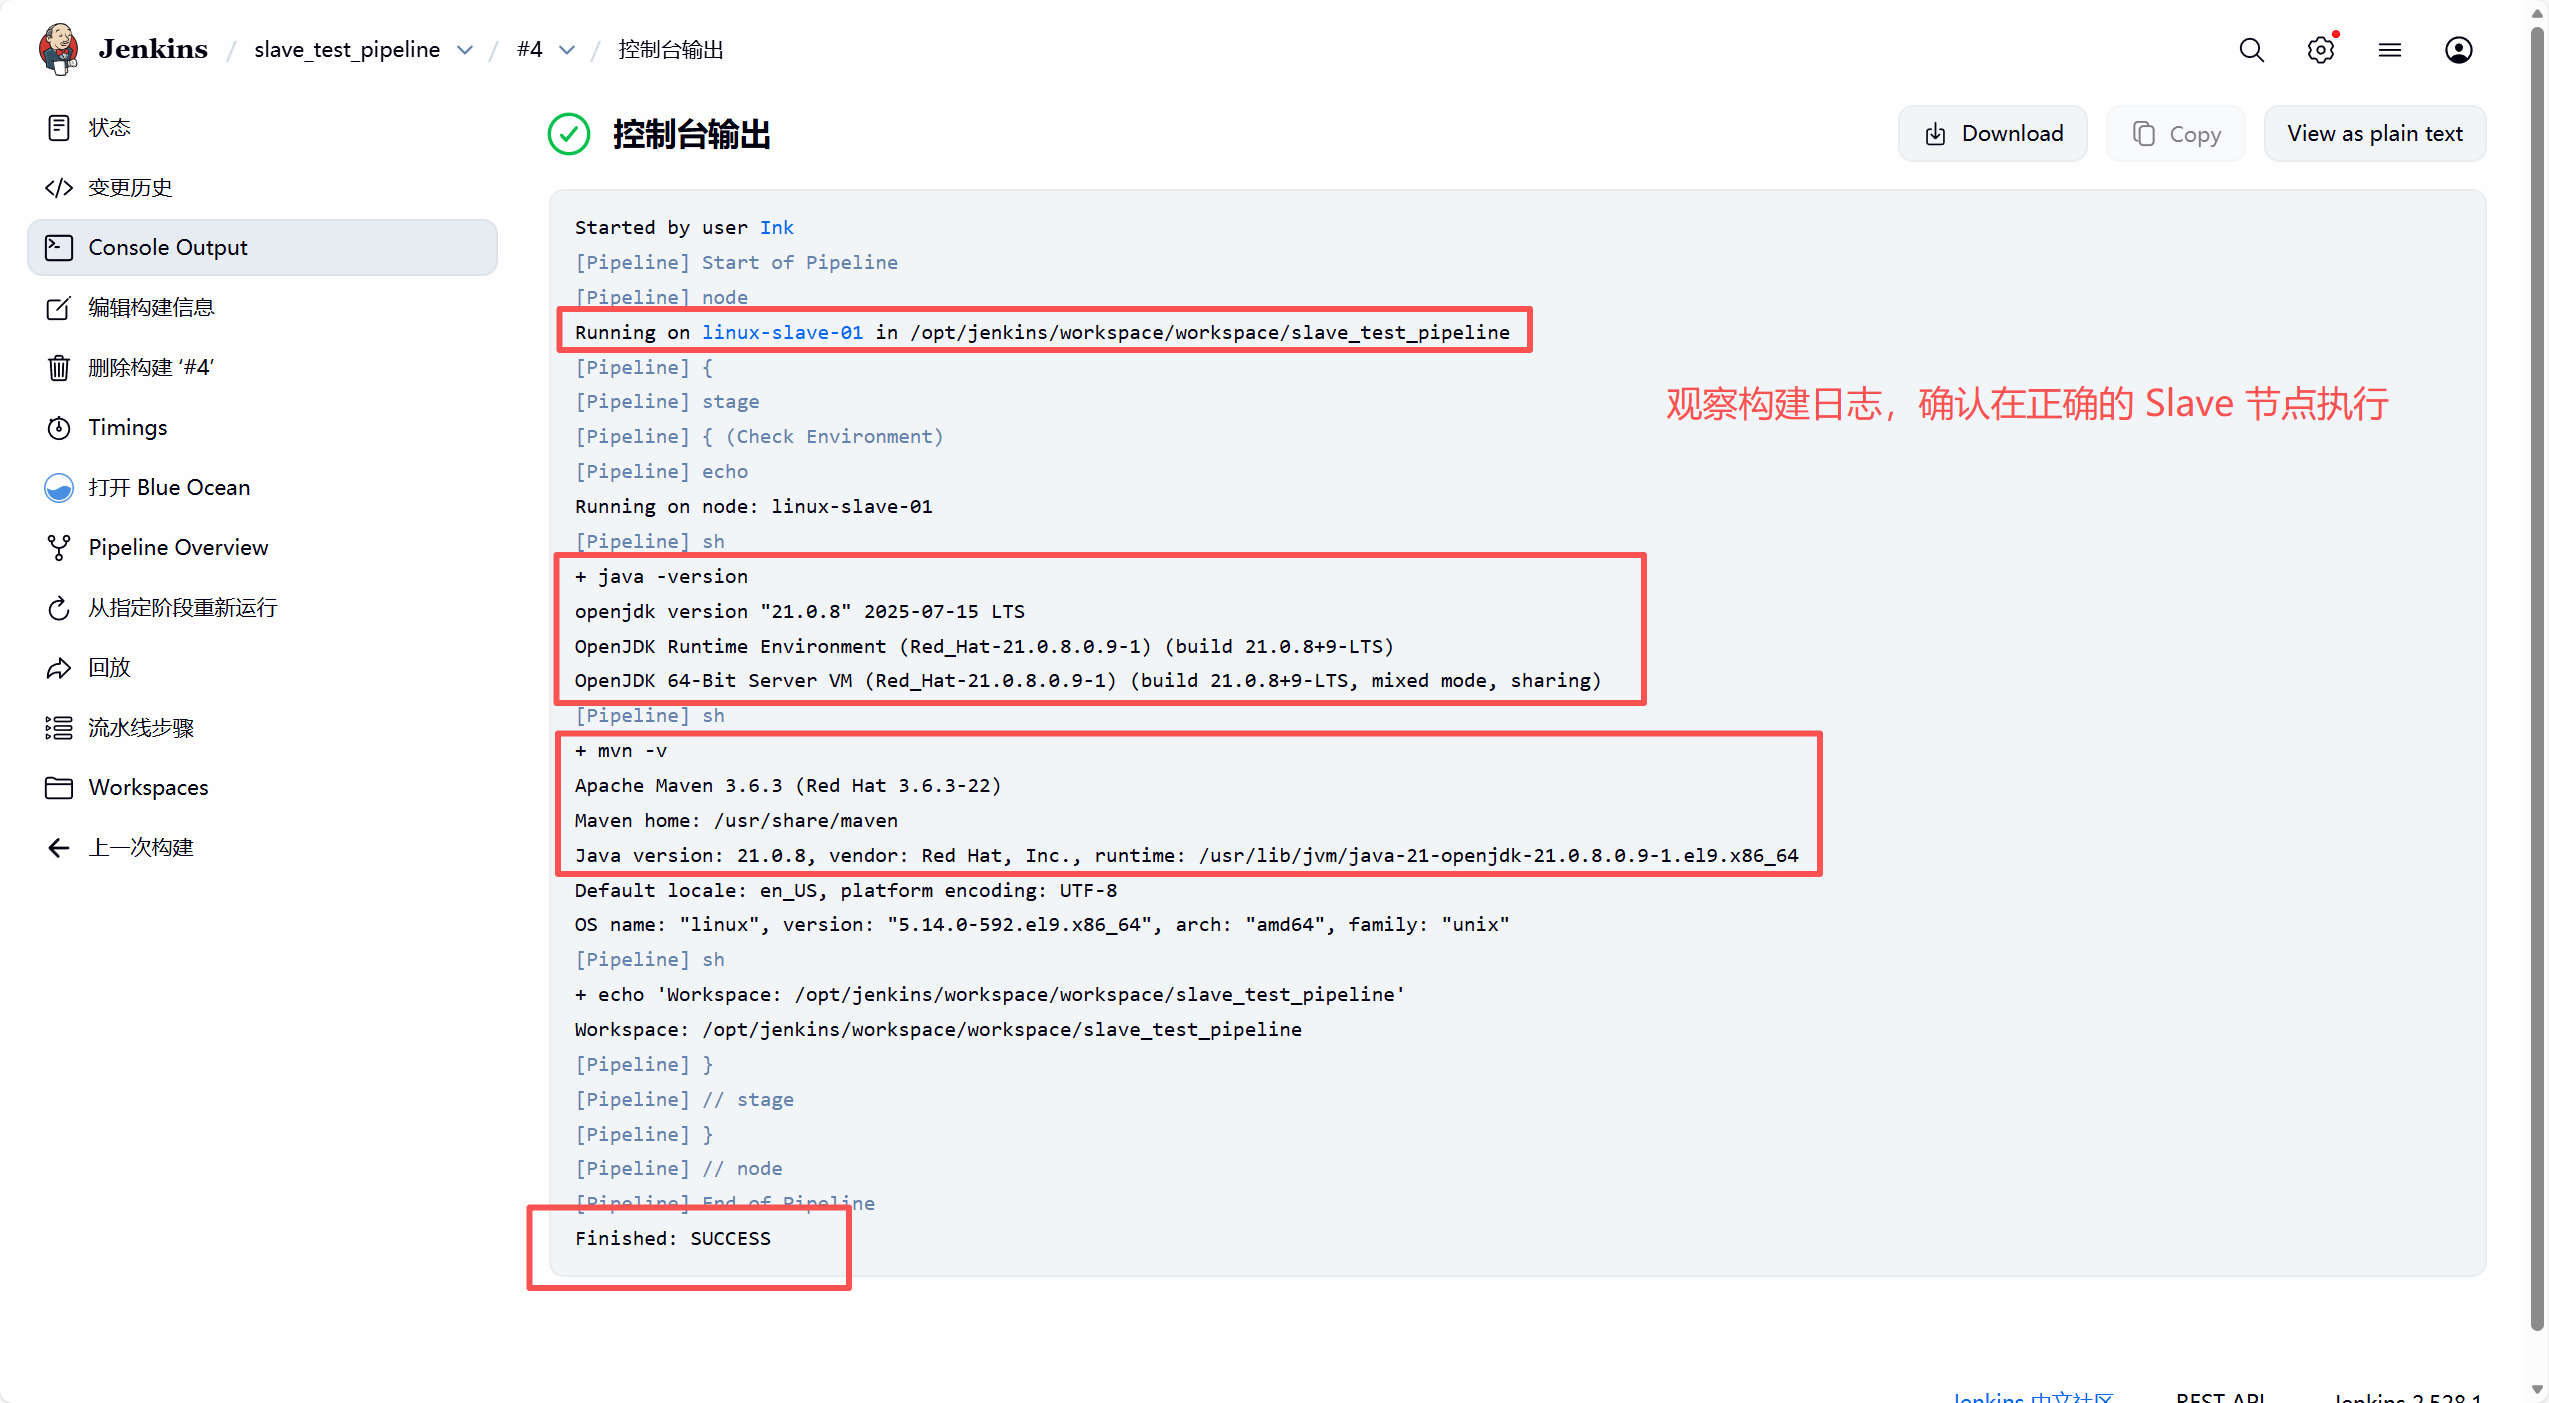
5. 流水线测试
pipeline {
    agent {
        label 'jdk21'  // 使用我们配置的标签
    }
    stages {
        stage('Check Environment') {
            steps {
                echo "Running on node: ${env.NODE_NAME}"
                sh 'java -version'
                sh 'mvn -v'
                sh 'echo "Workspace: $WORKSPACE"'
            }
        }
    }
}
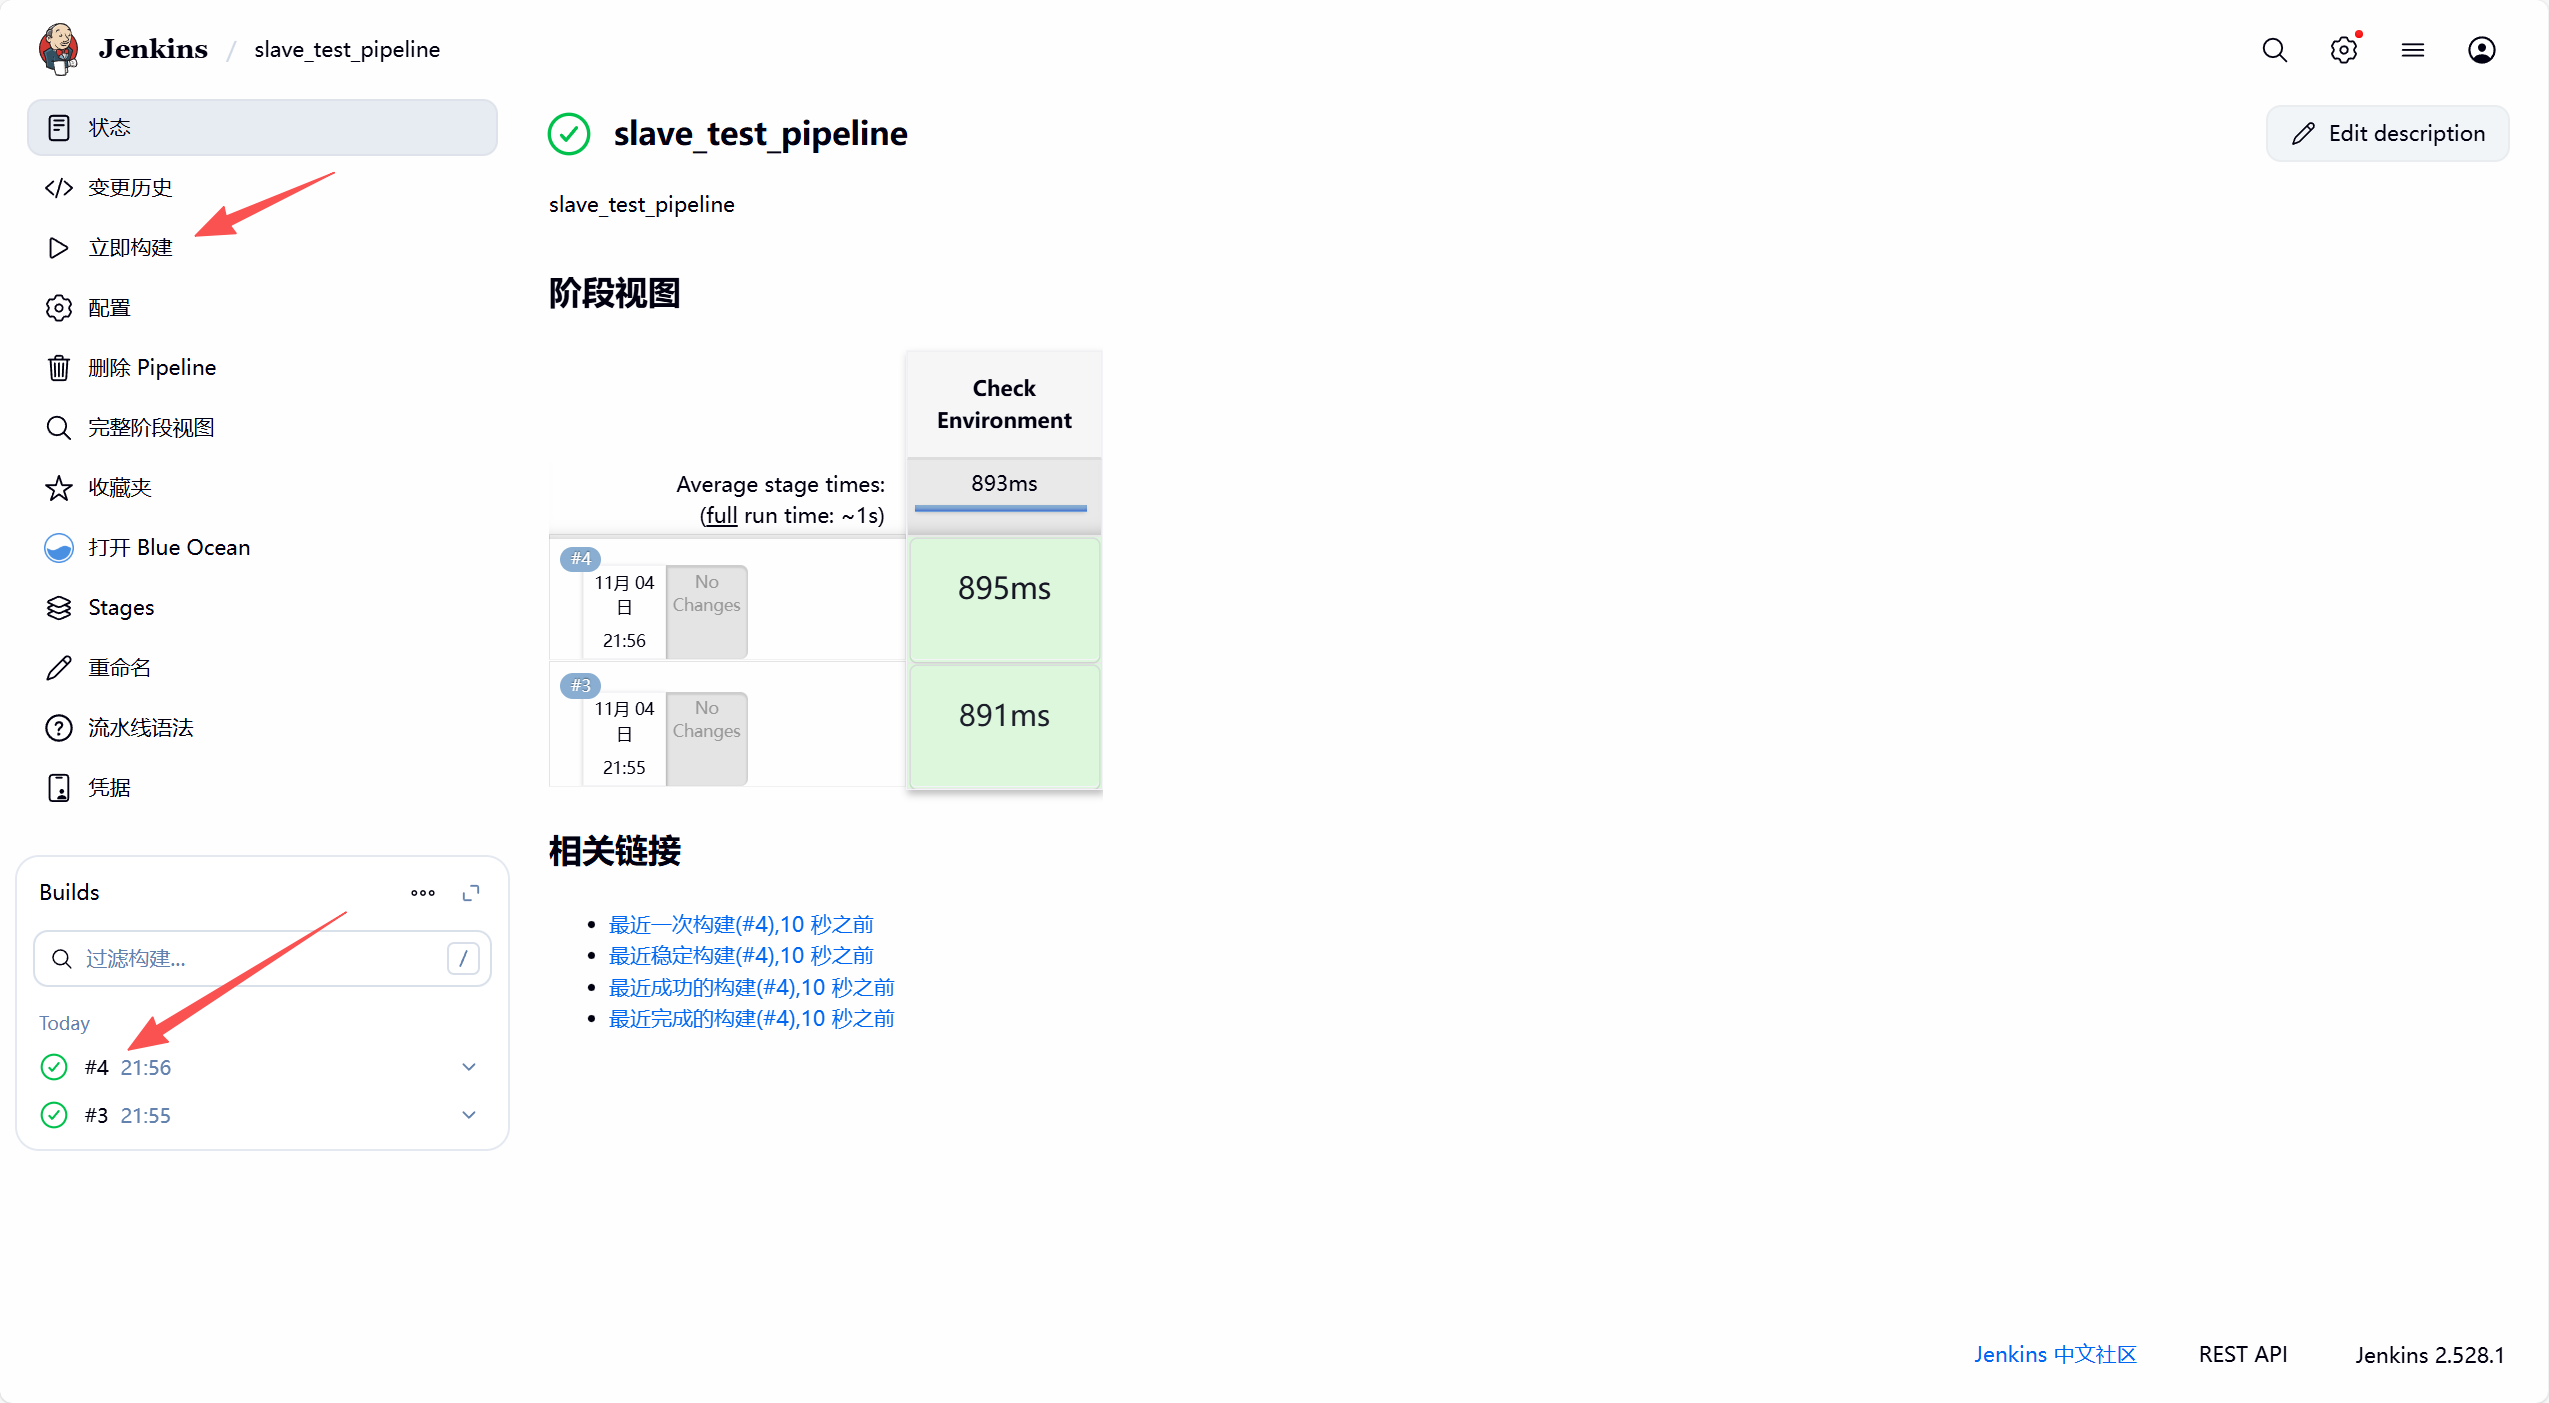
验证构建
检查 /opt/jenkins/workspace目录下是否生成了构建产物
[jenkins@JenkinsSlave workspace]$ pwd
/opt/jenkins/workspace
[jenkins@JenkinsSlave workspace]$ ls
[jenkins@JenkinsSlave workspace]$ ls
caches  workspace
十、Gitlab webhook
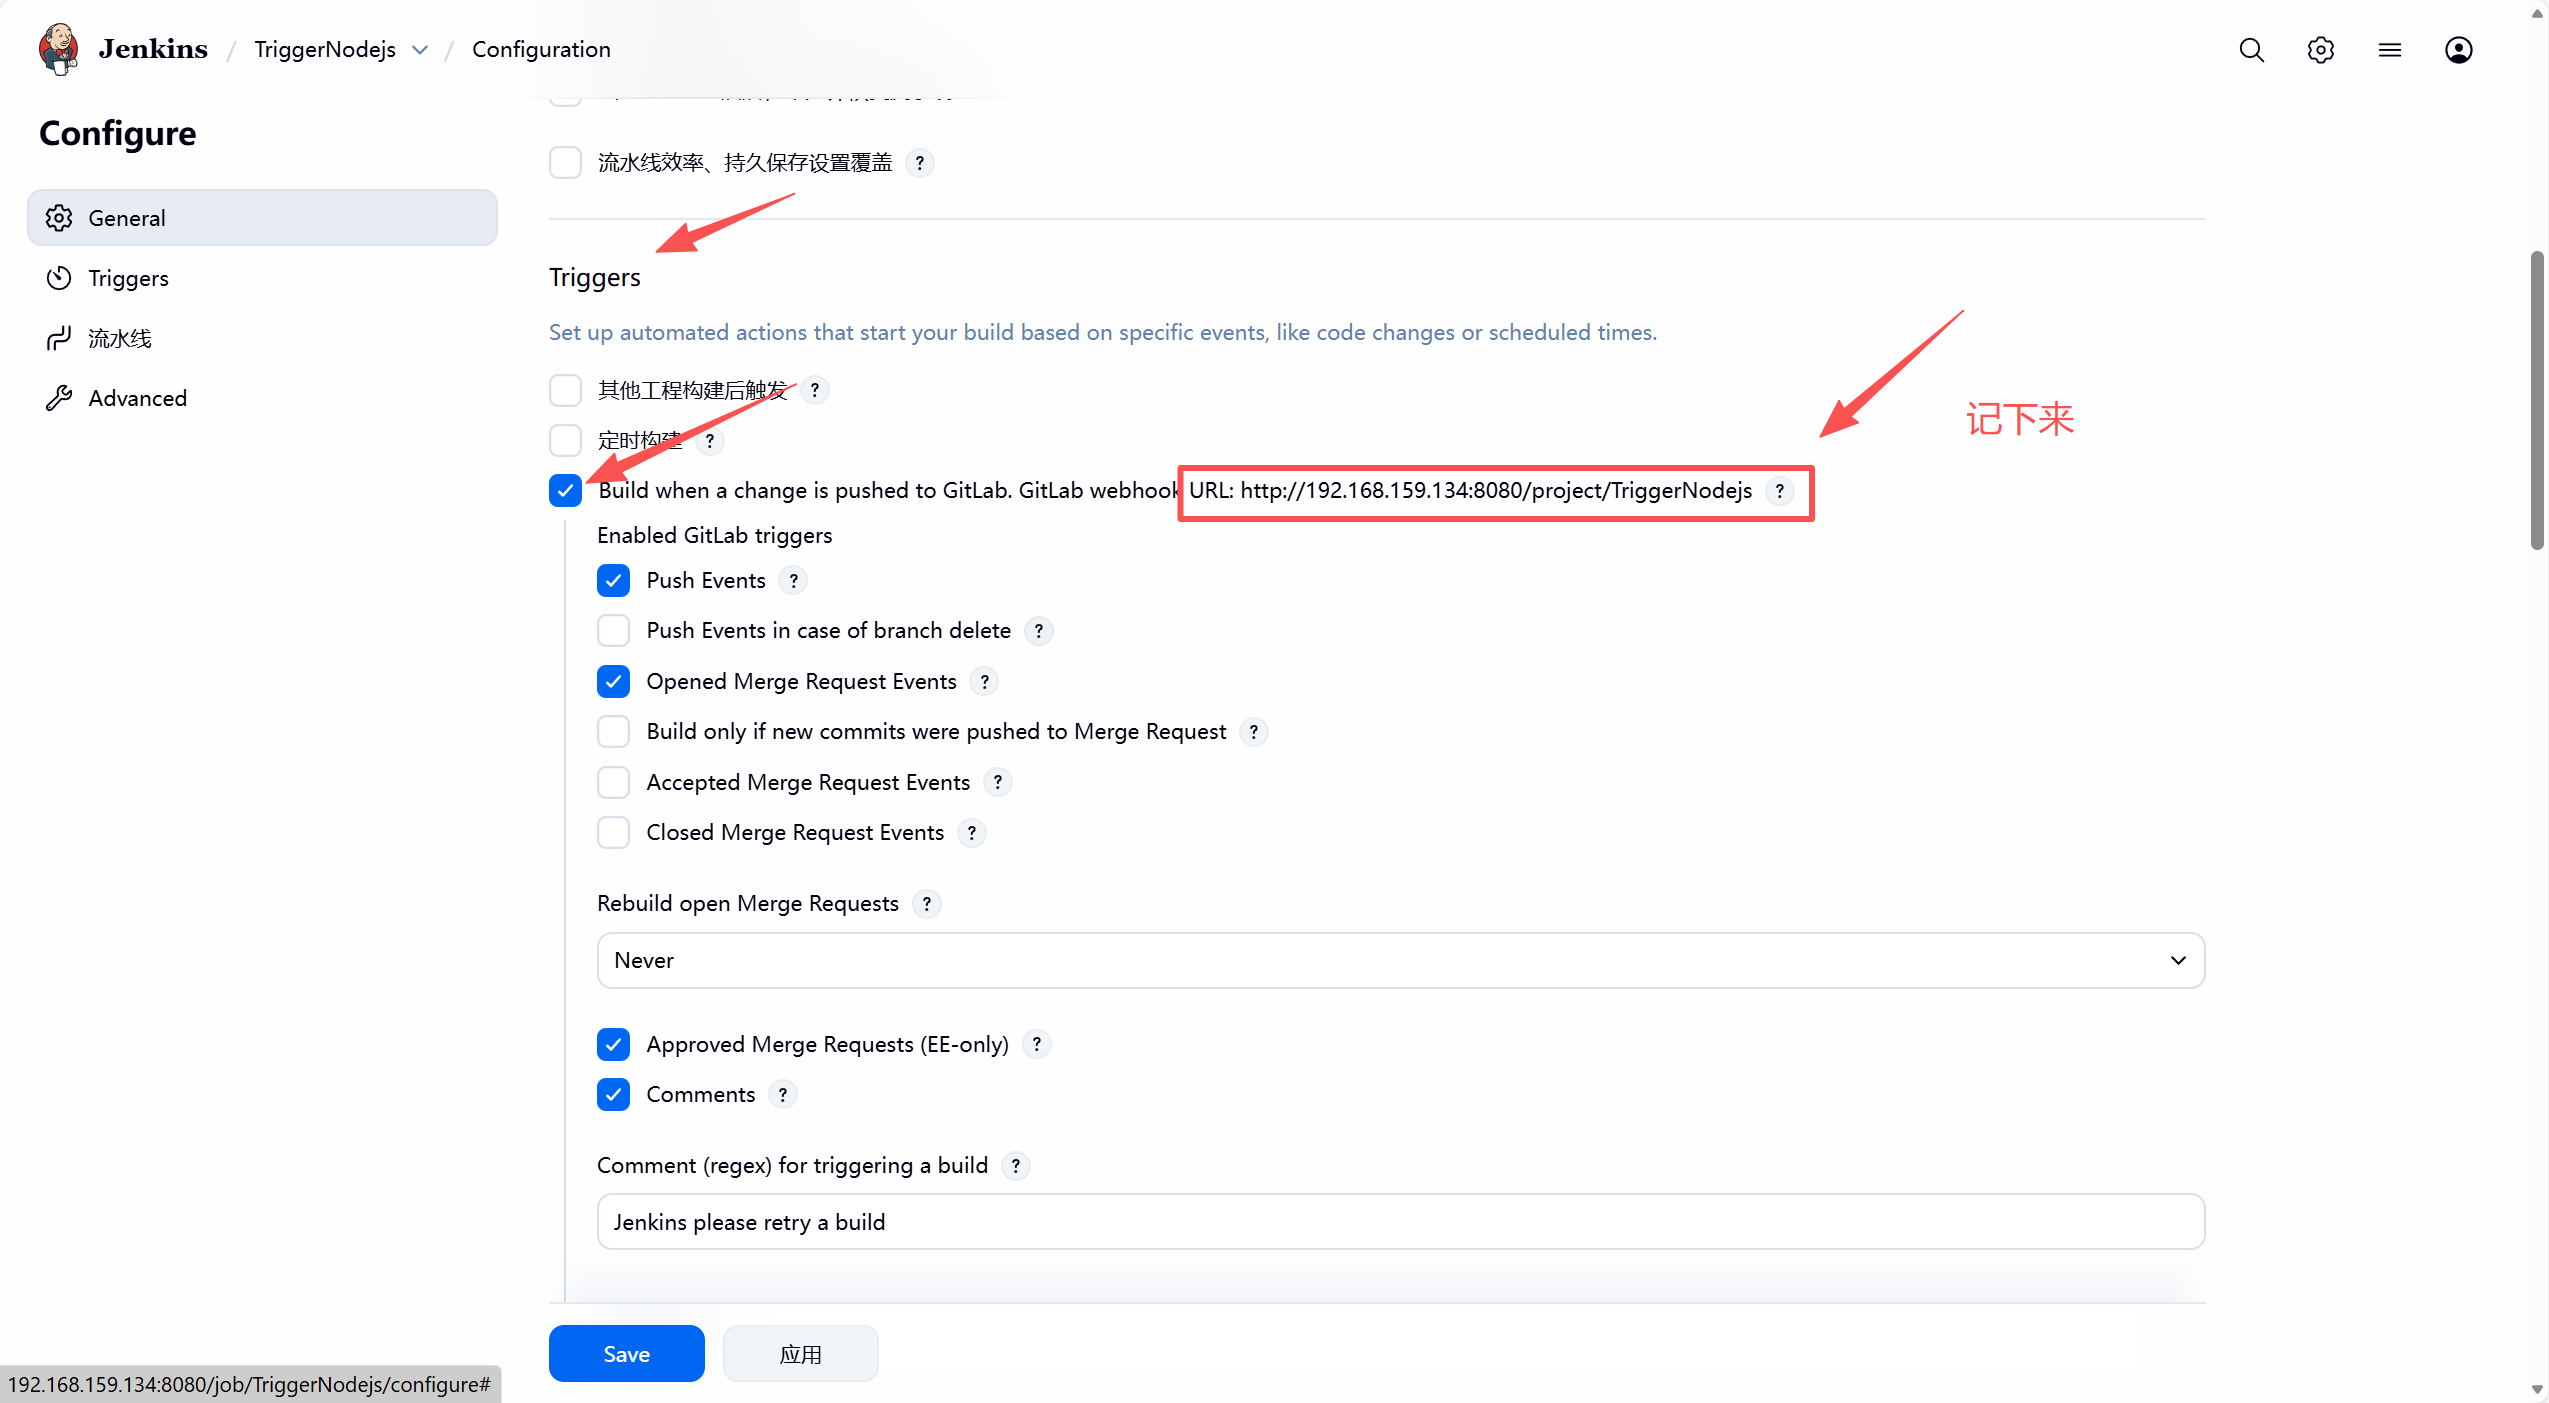
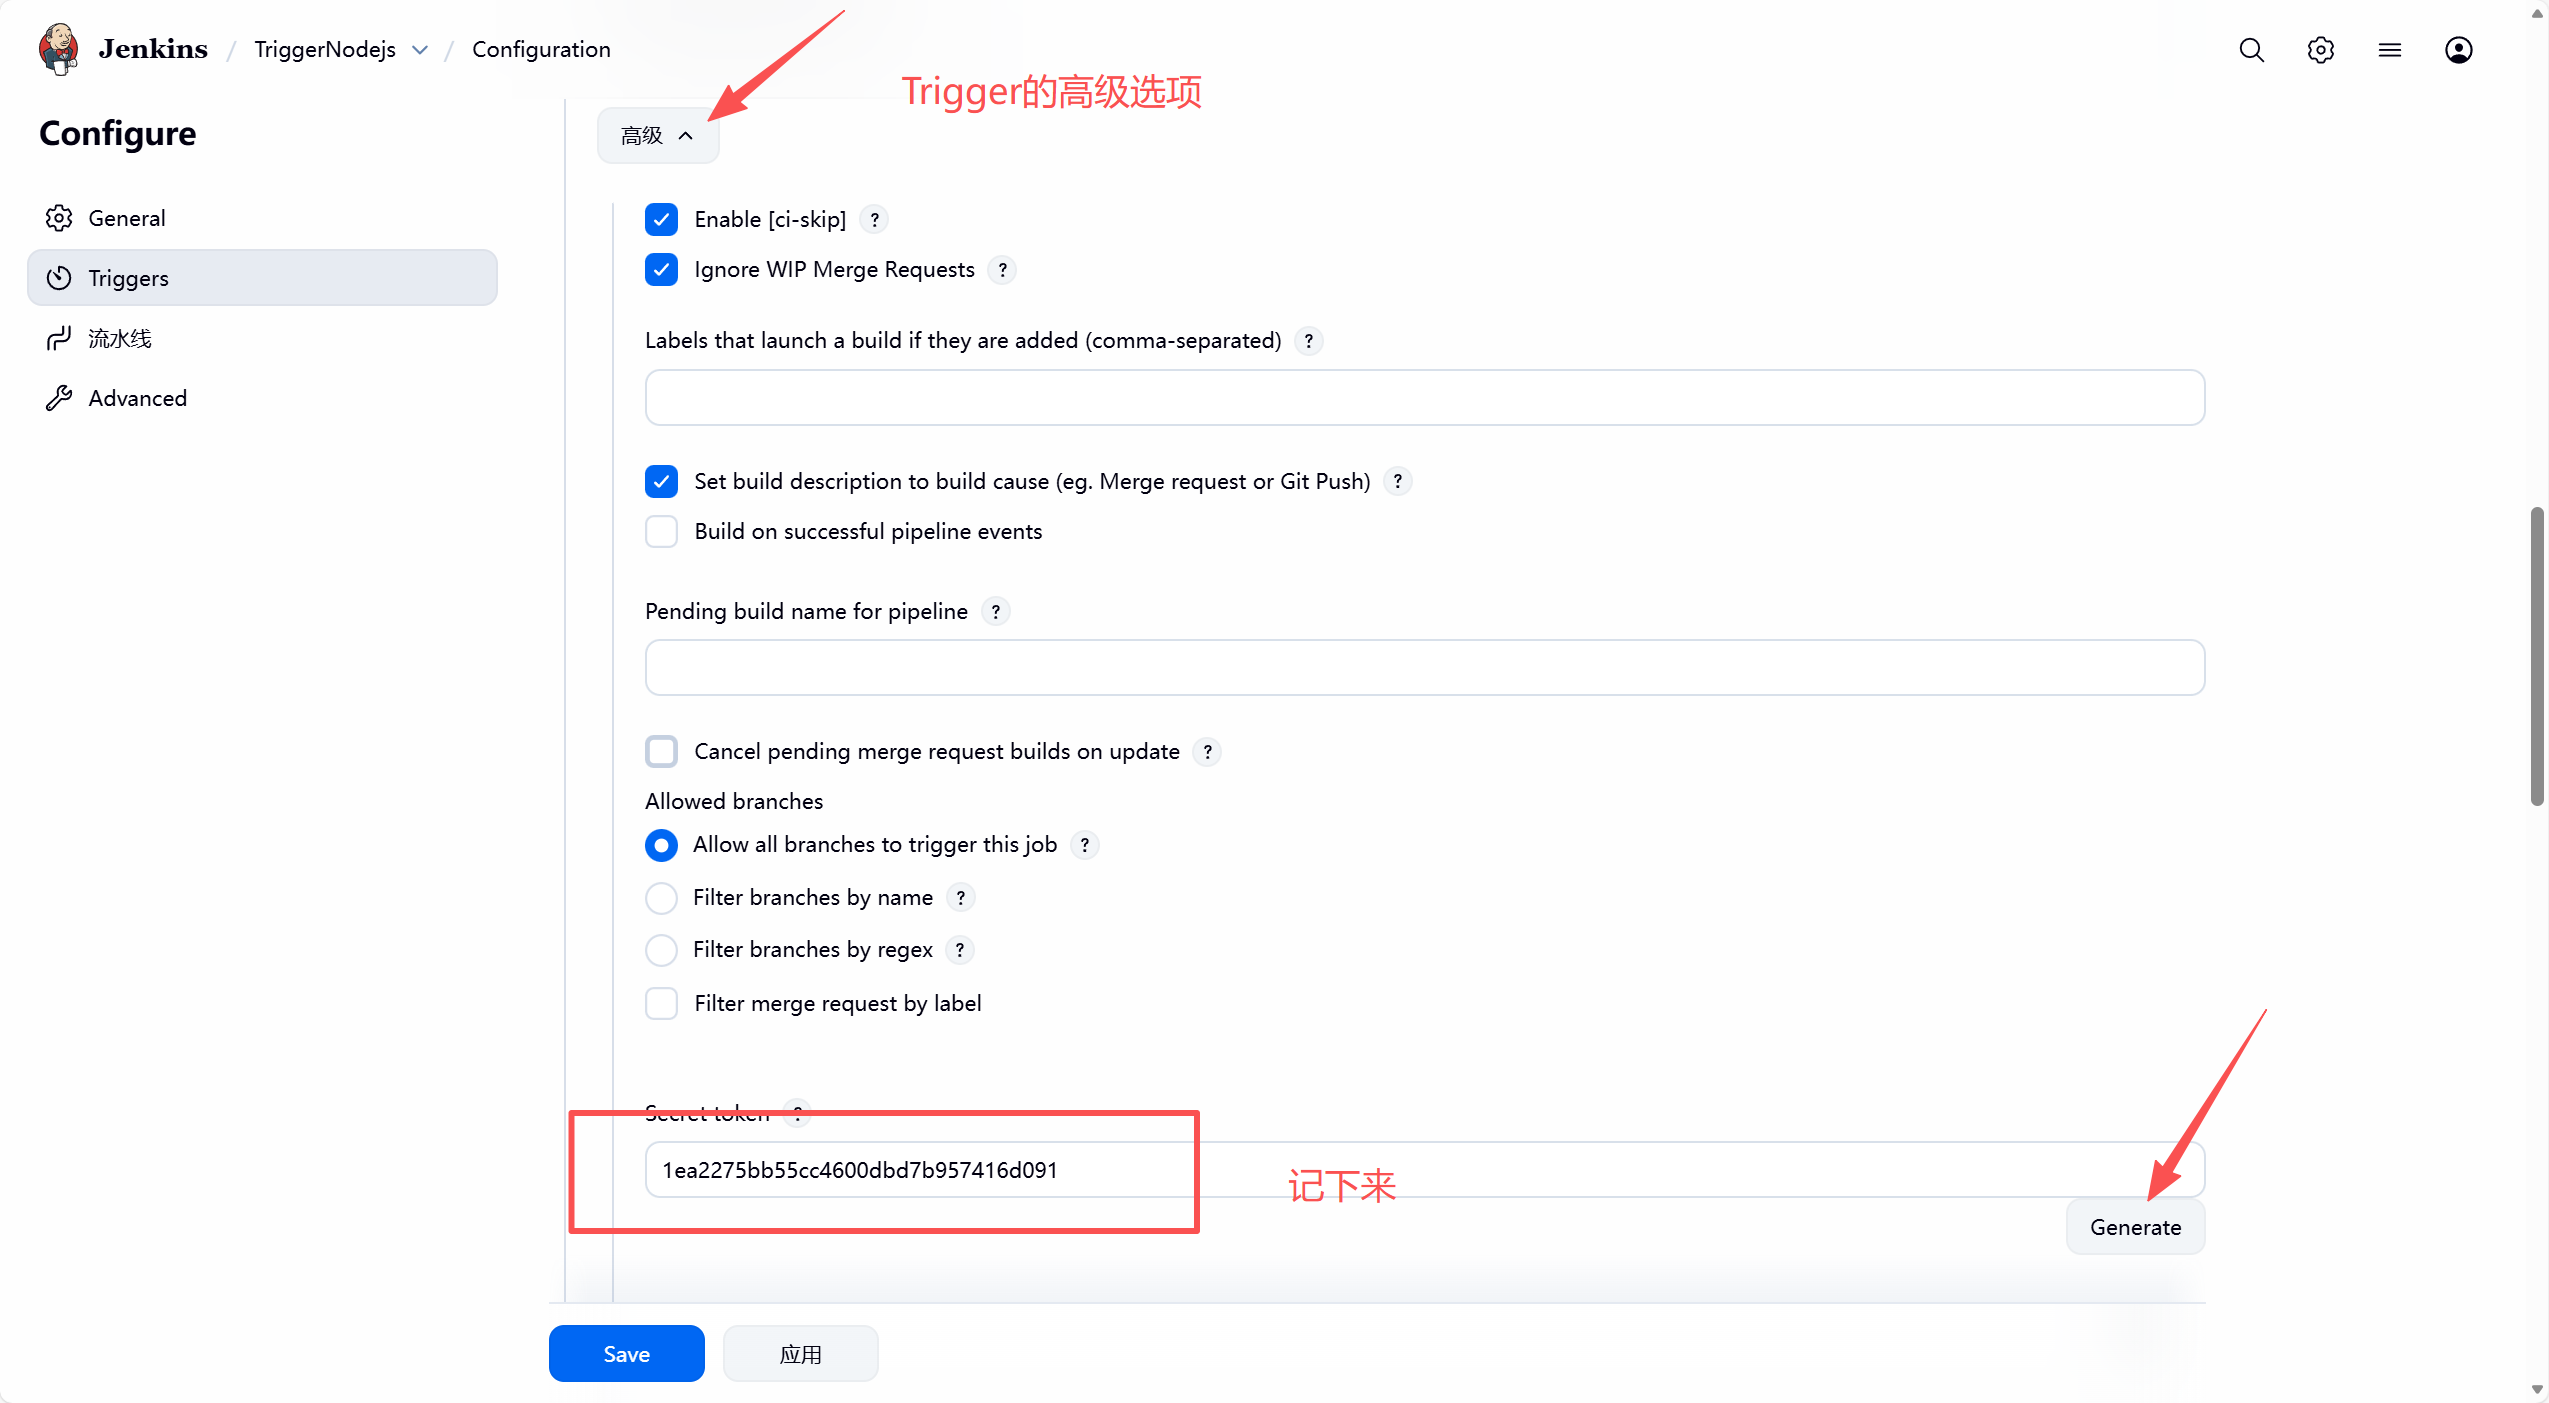
在之前构建成功的项目基础上添加触发器配置(以node.js项目为基础)
1. jenkins服务器配置
2. gitlab服务器配置
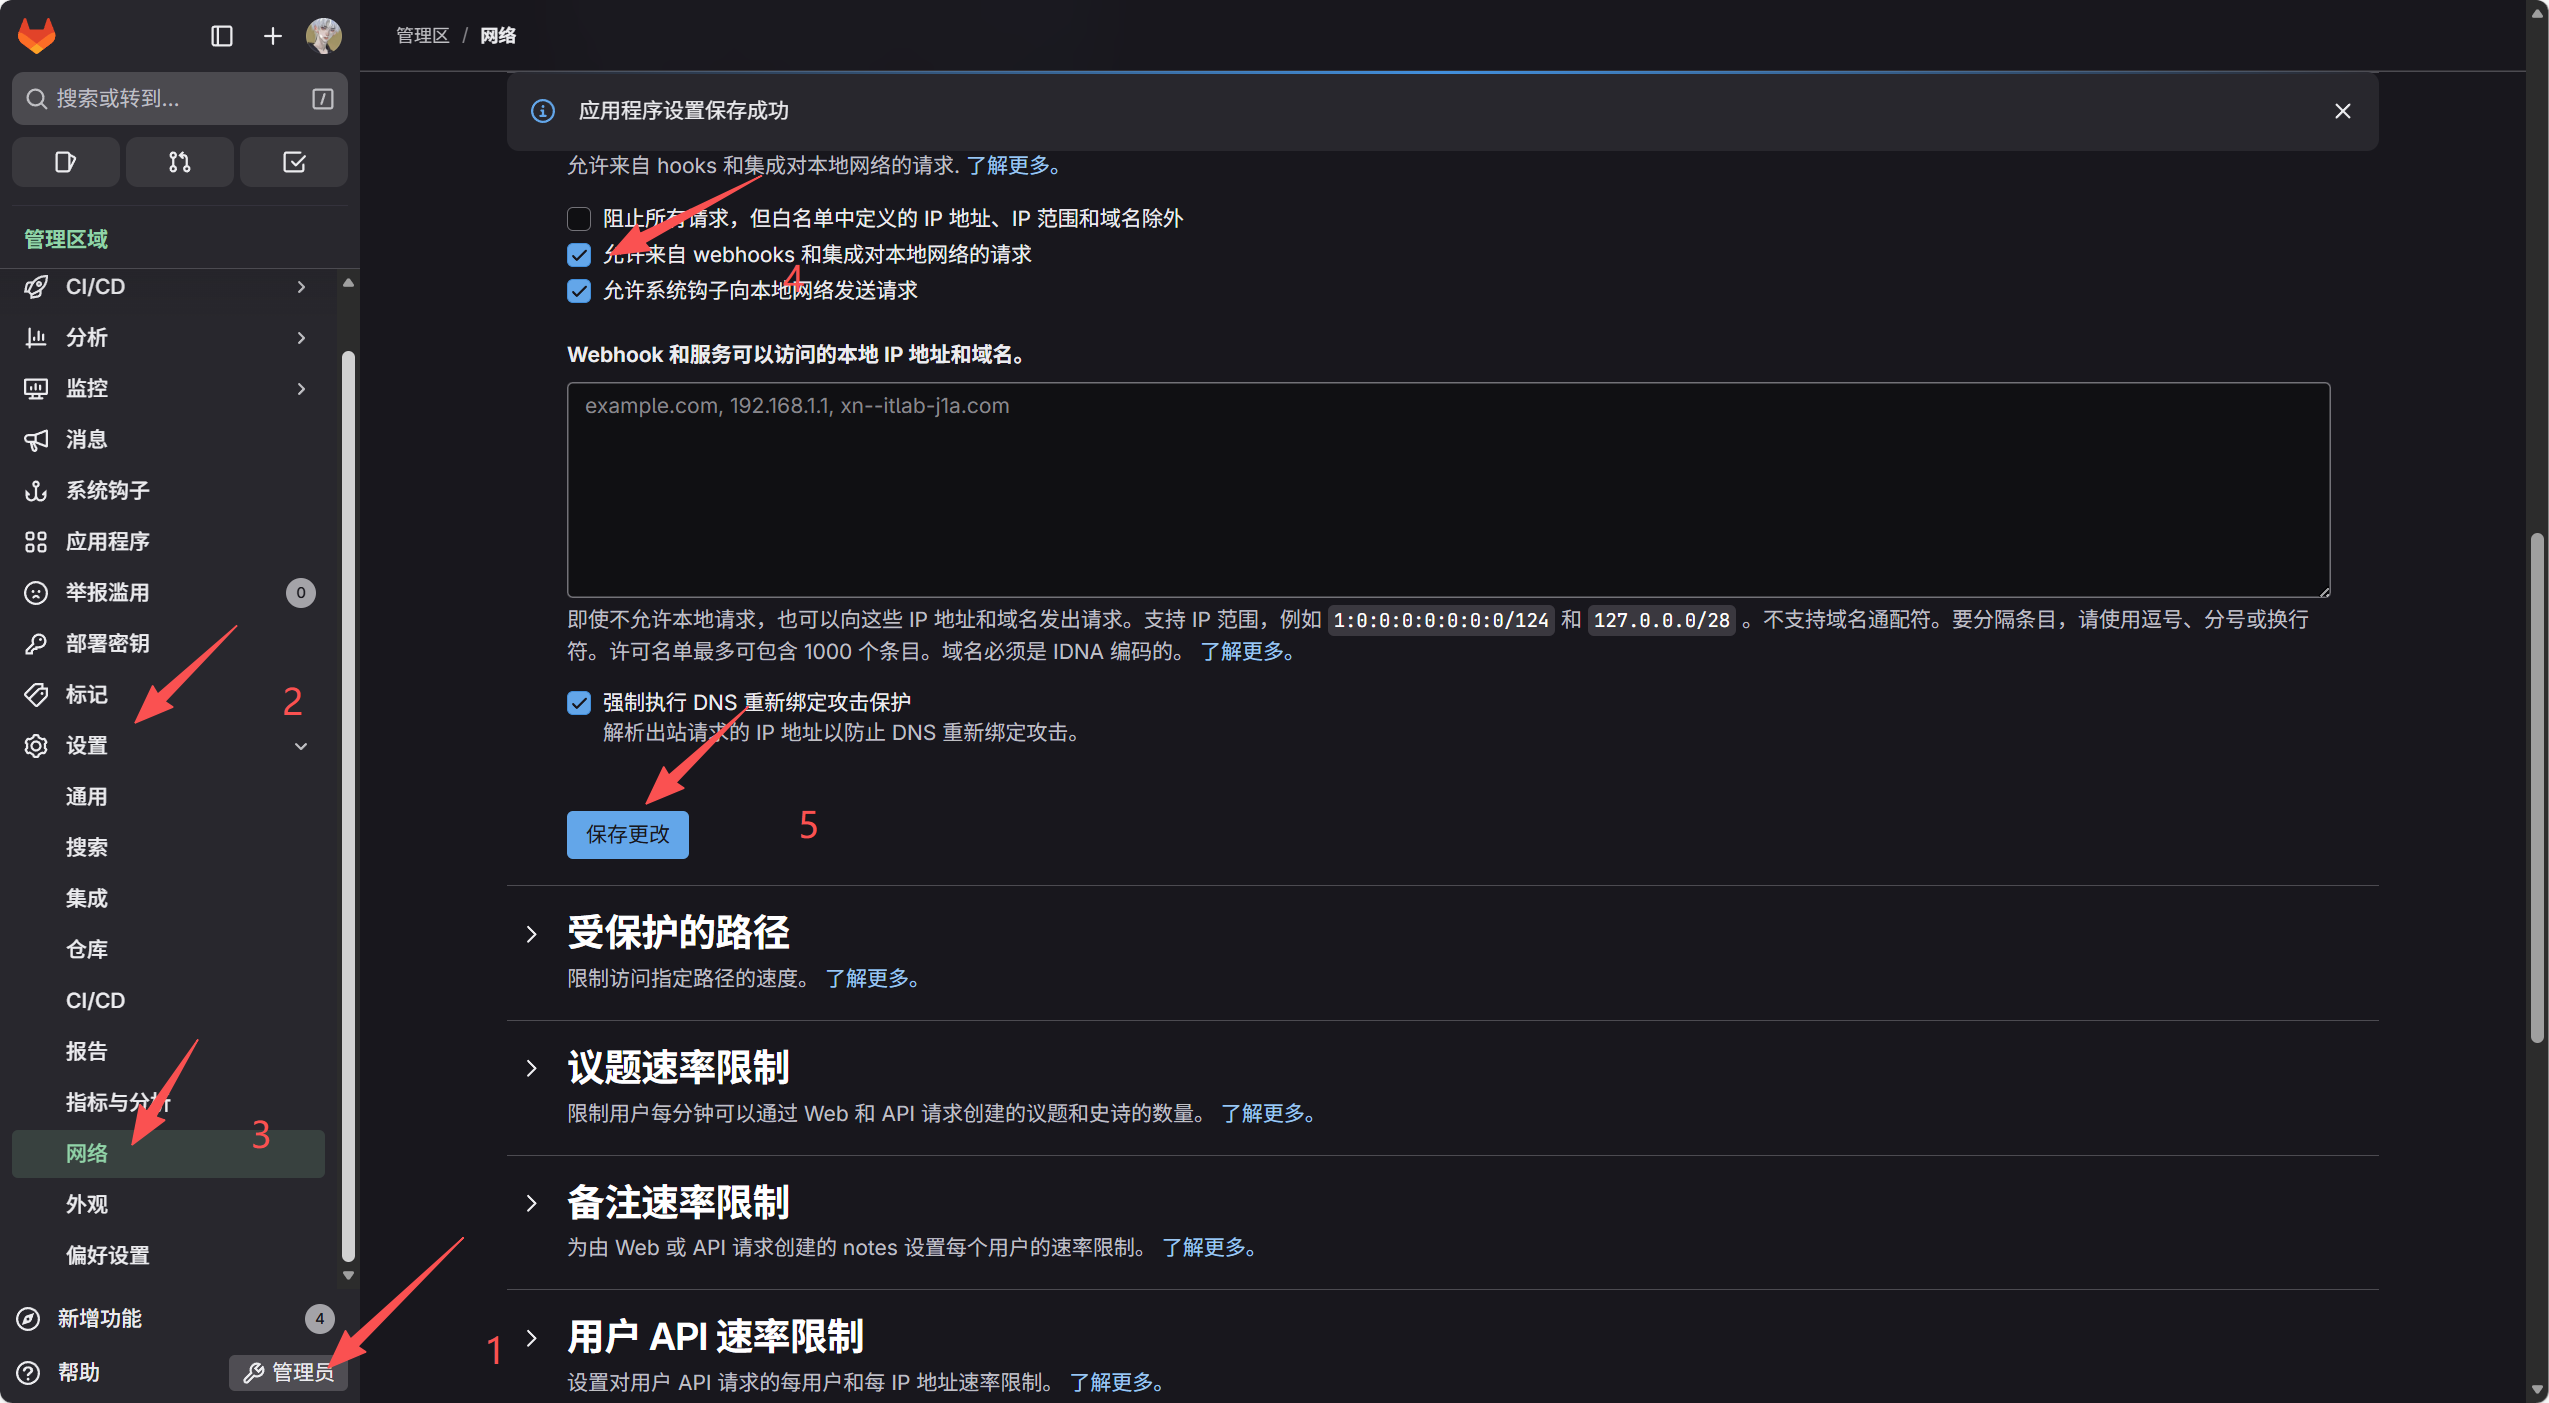
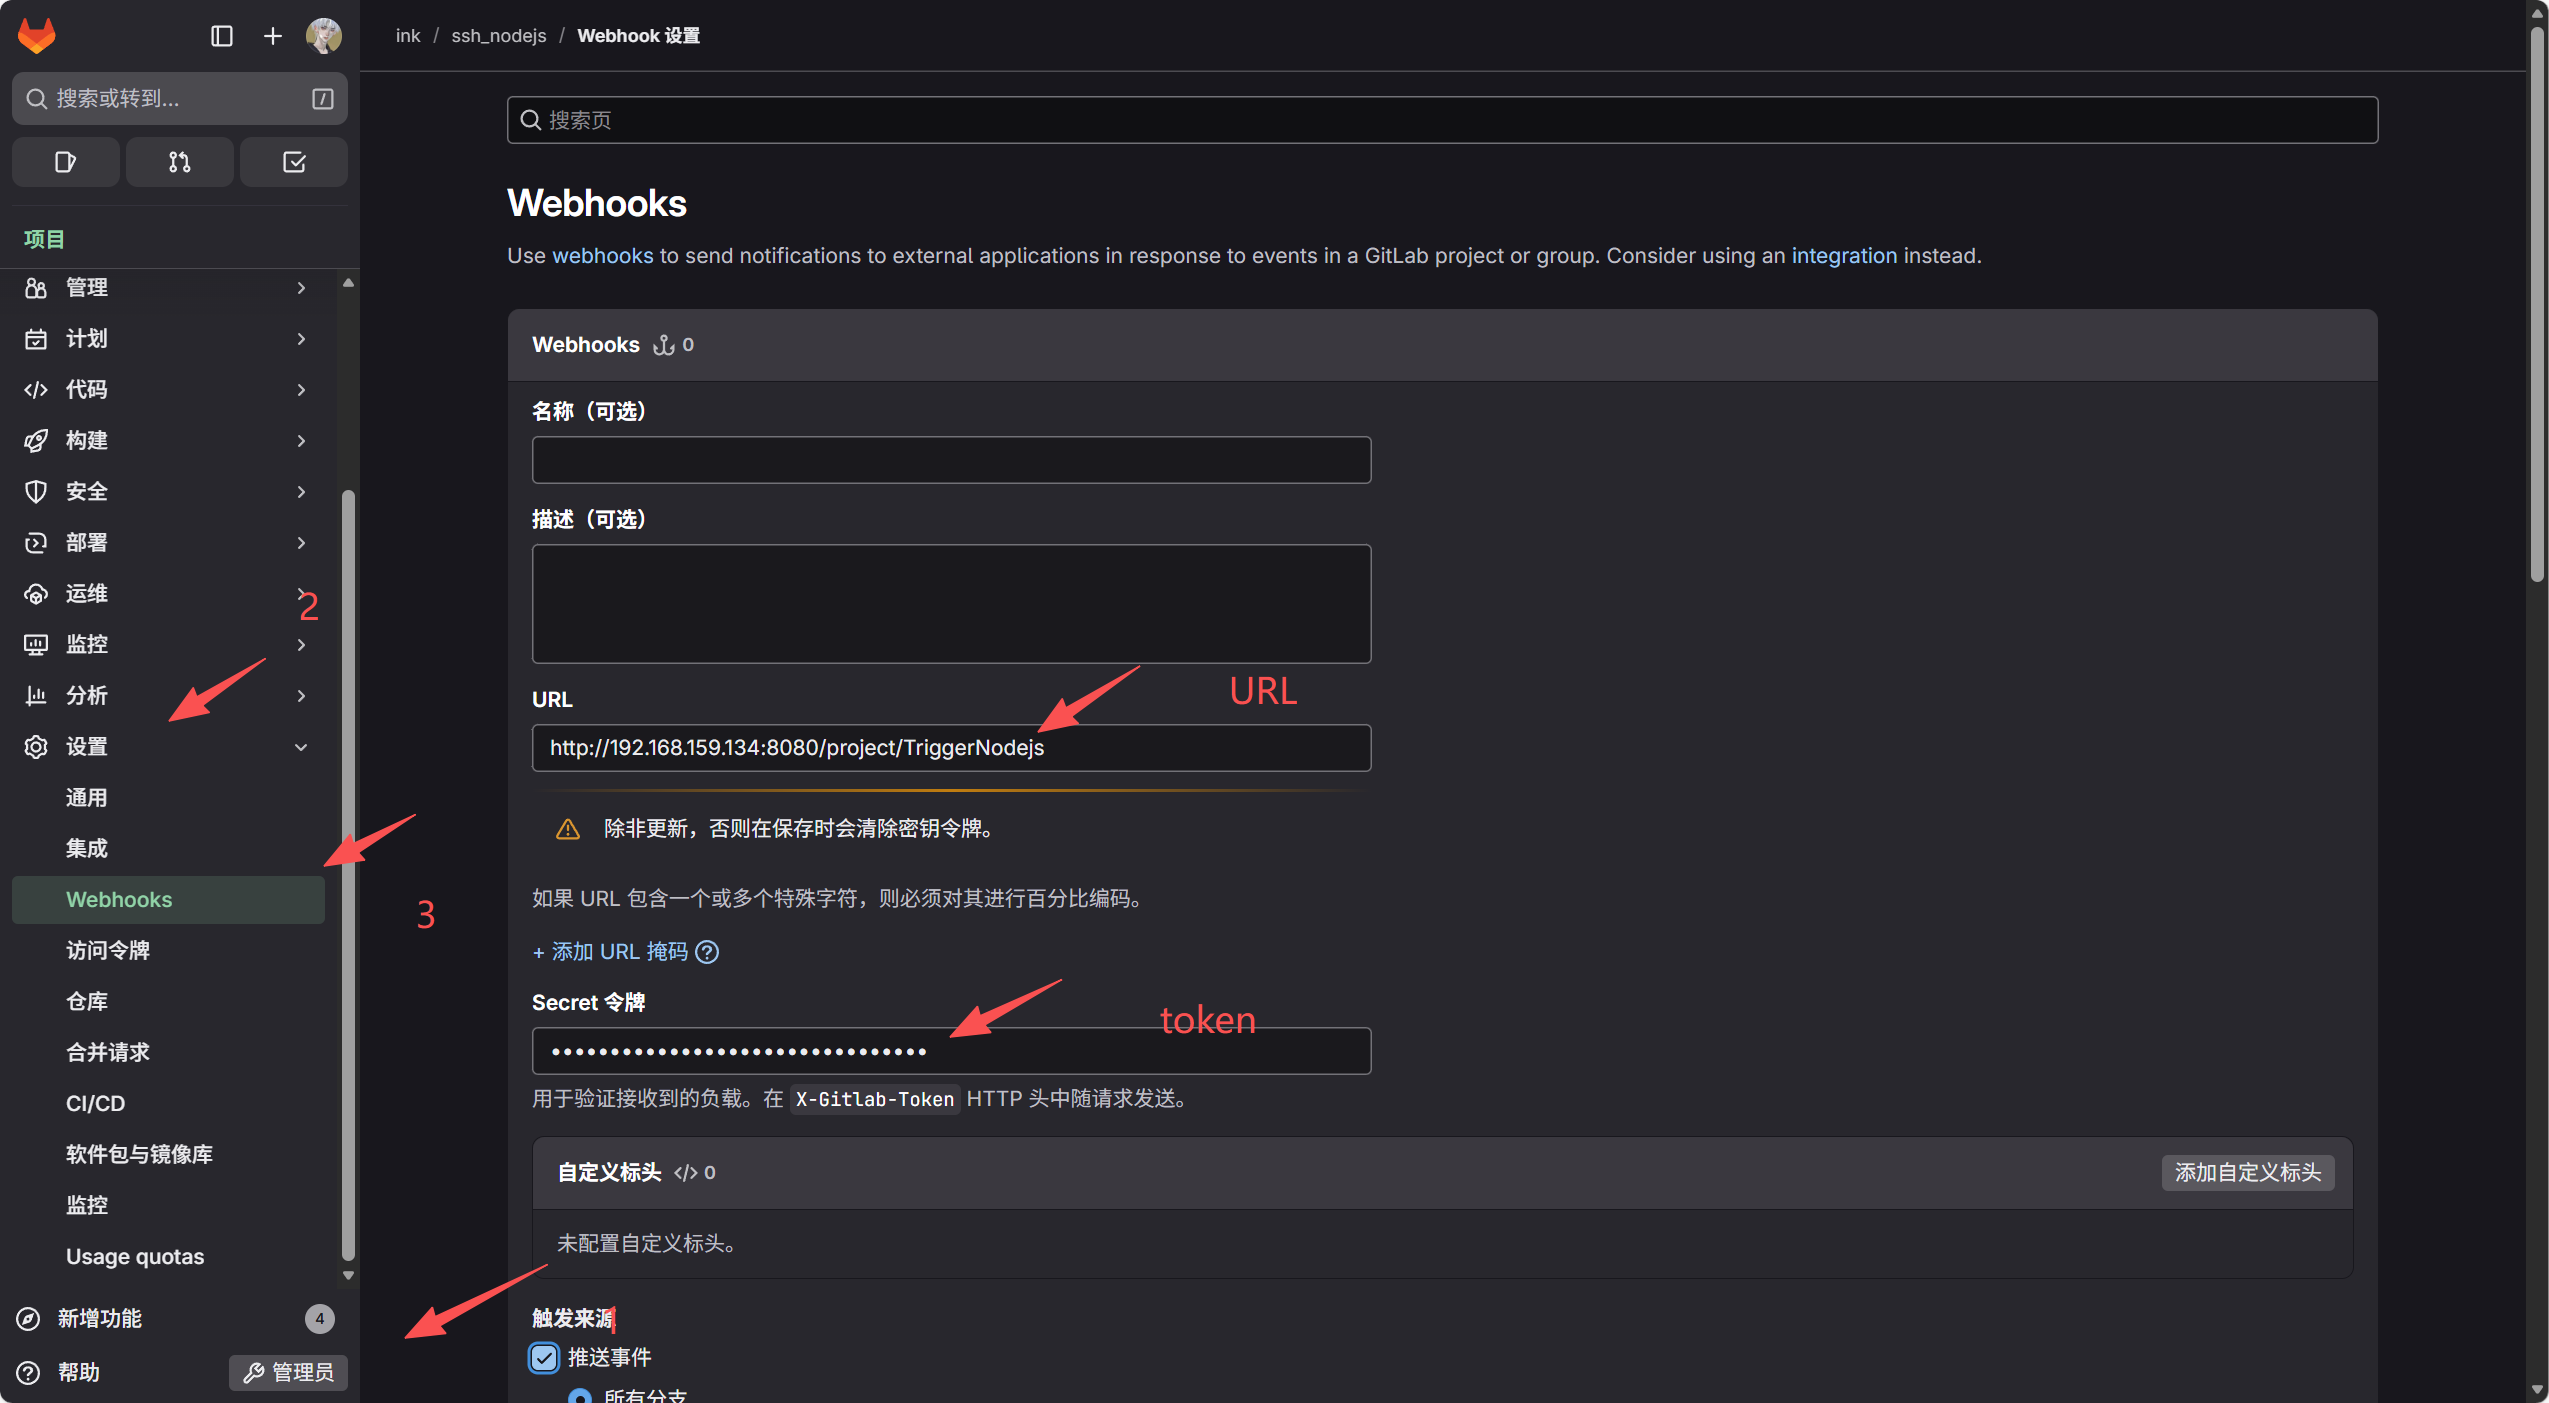
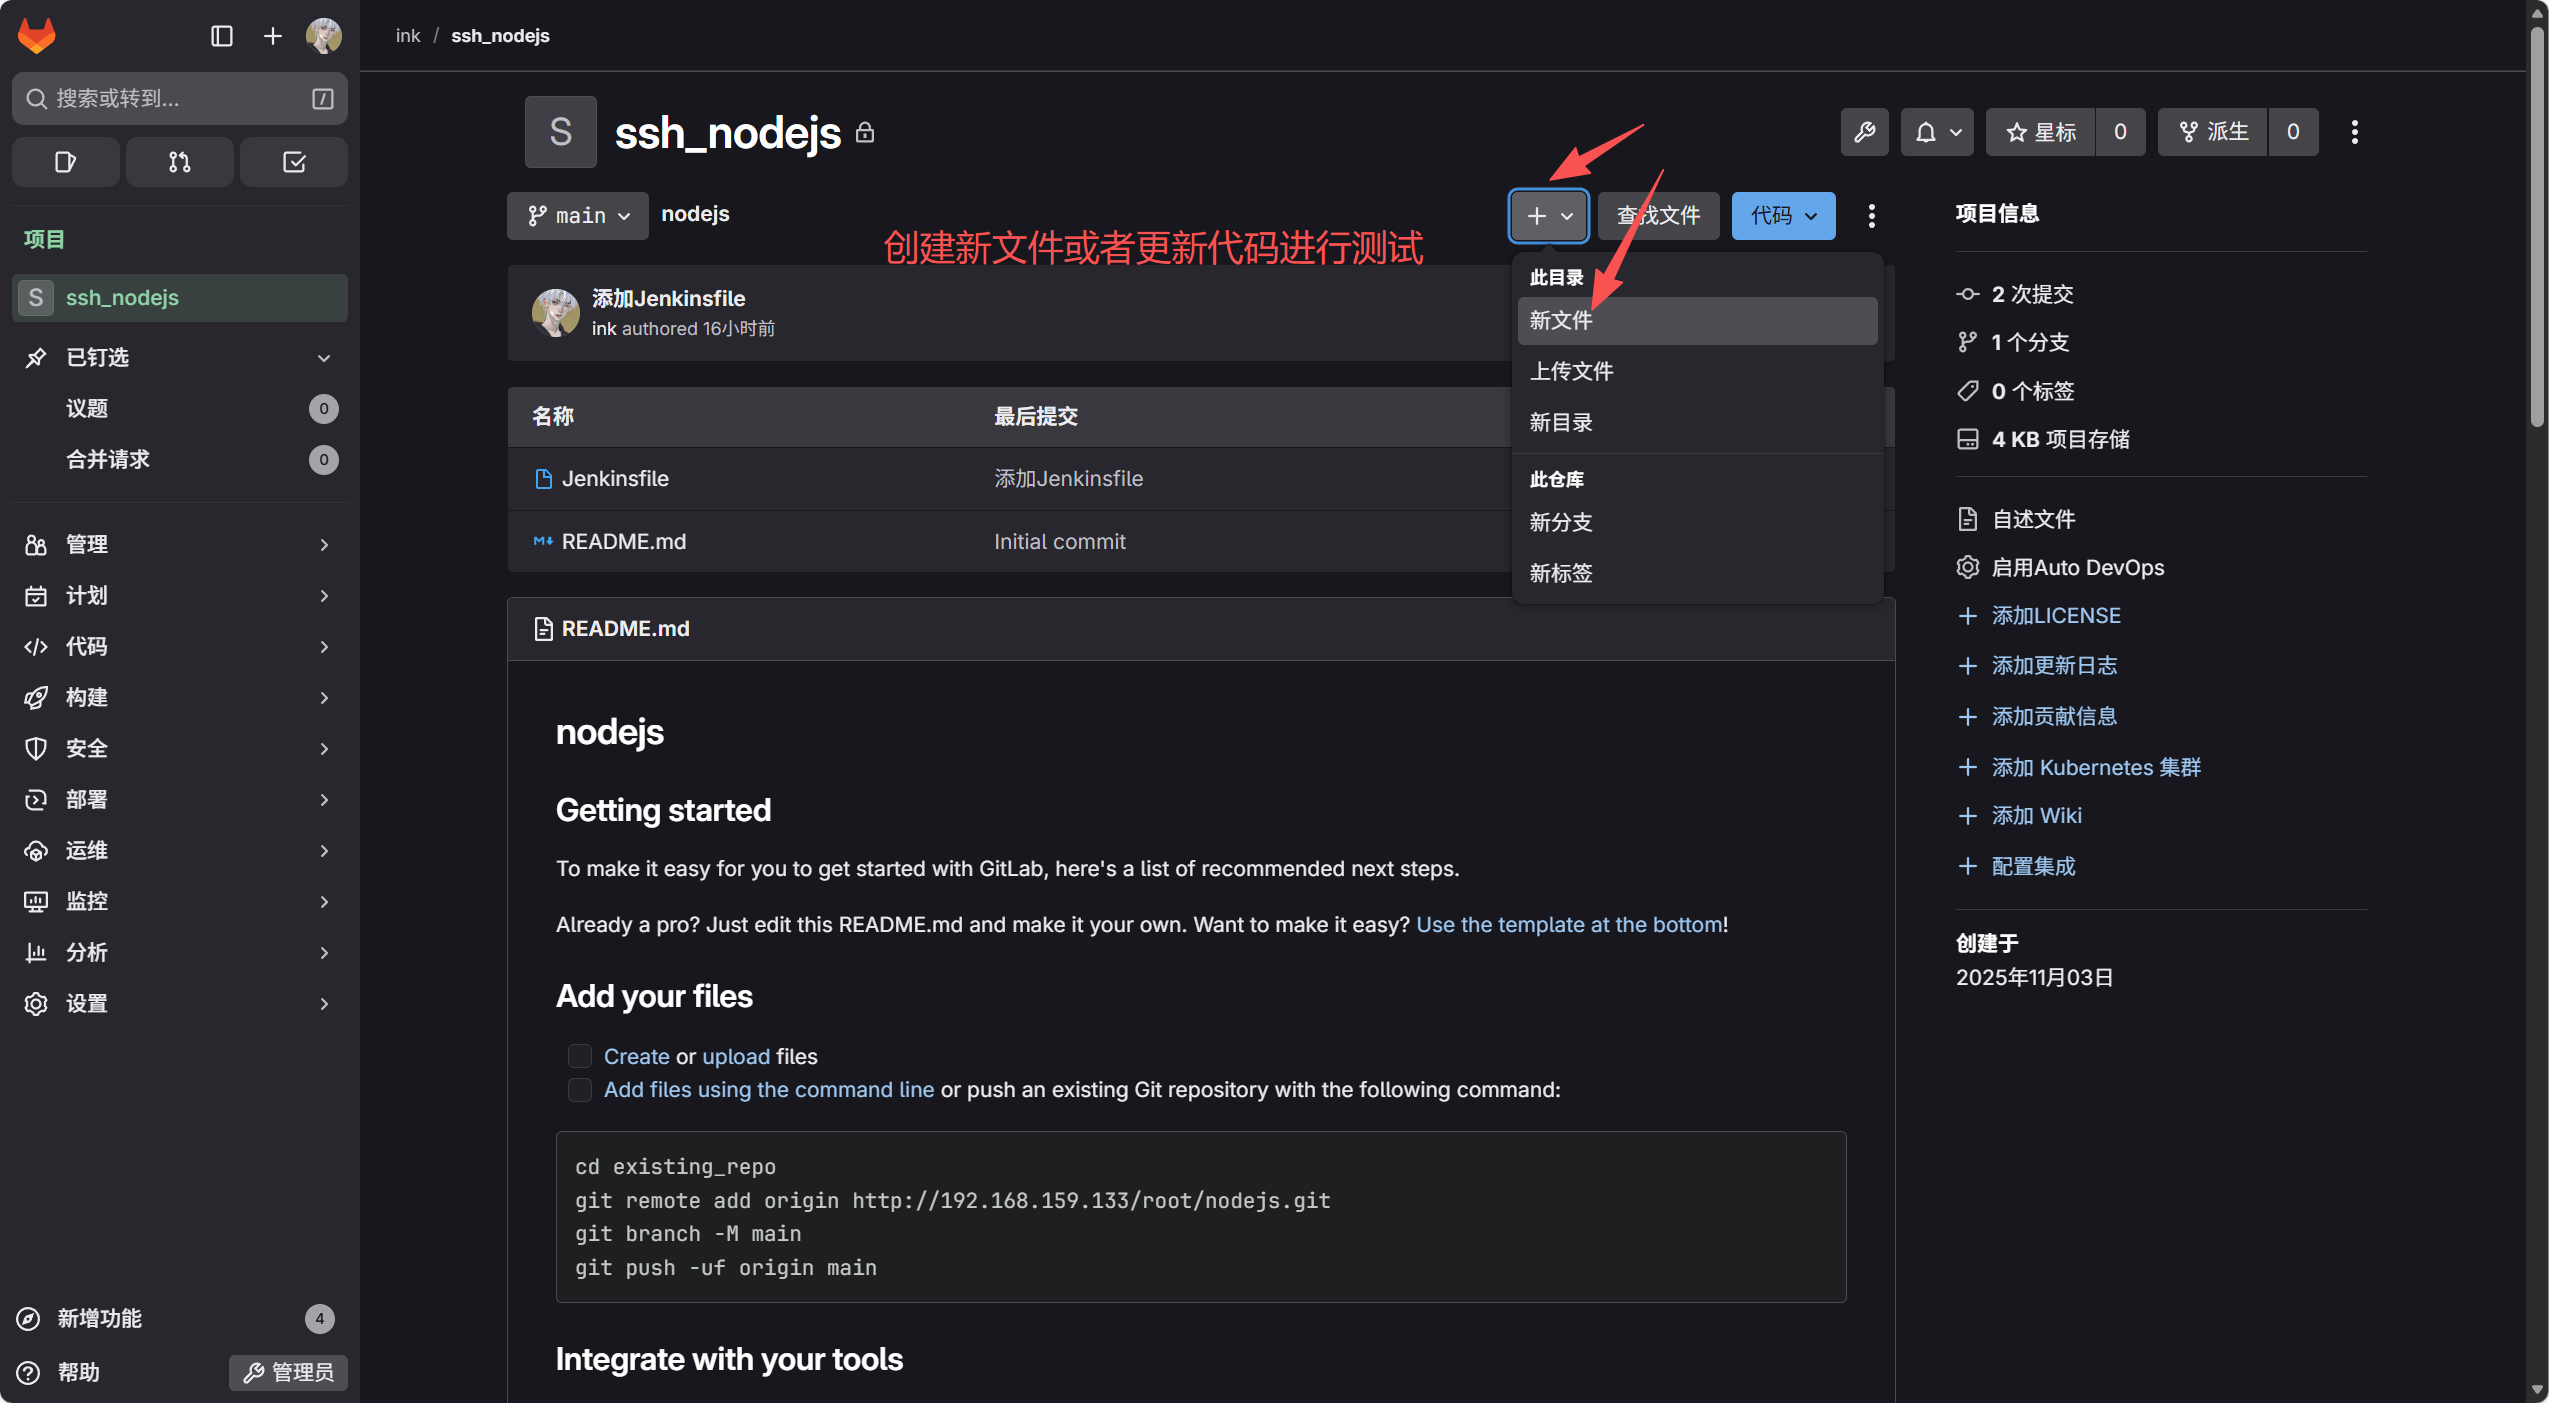
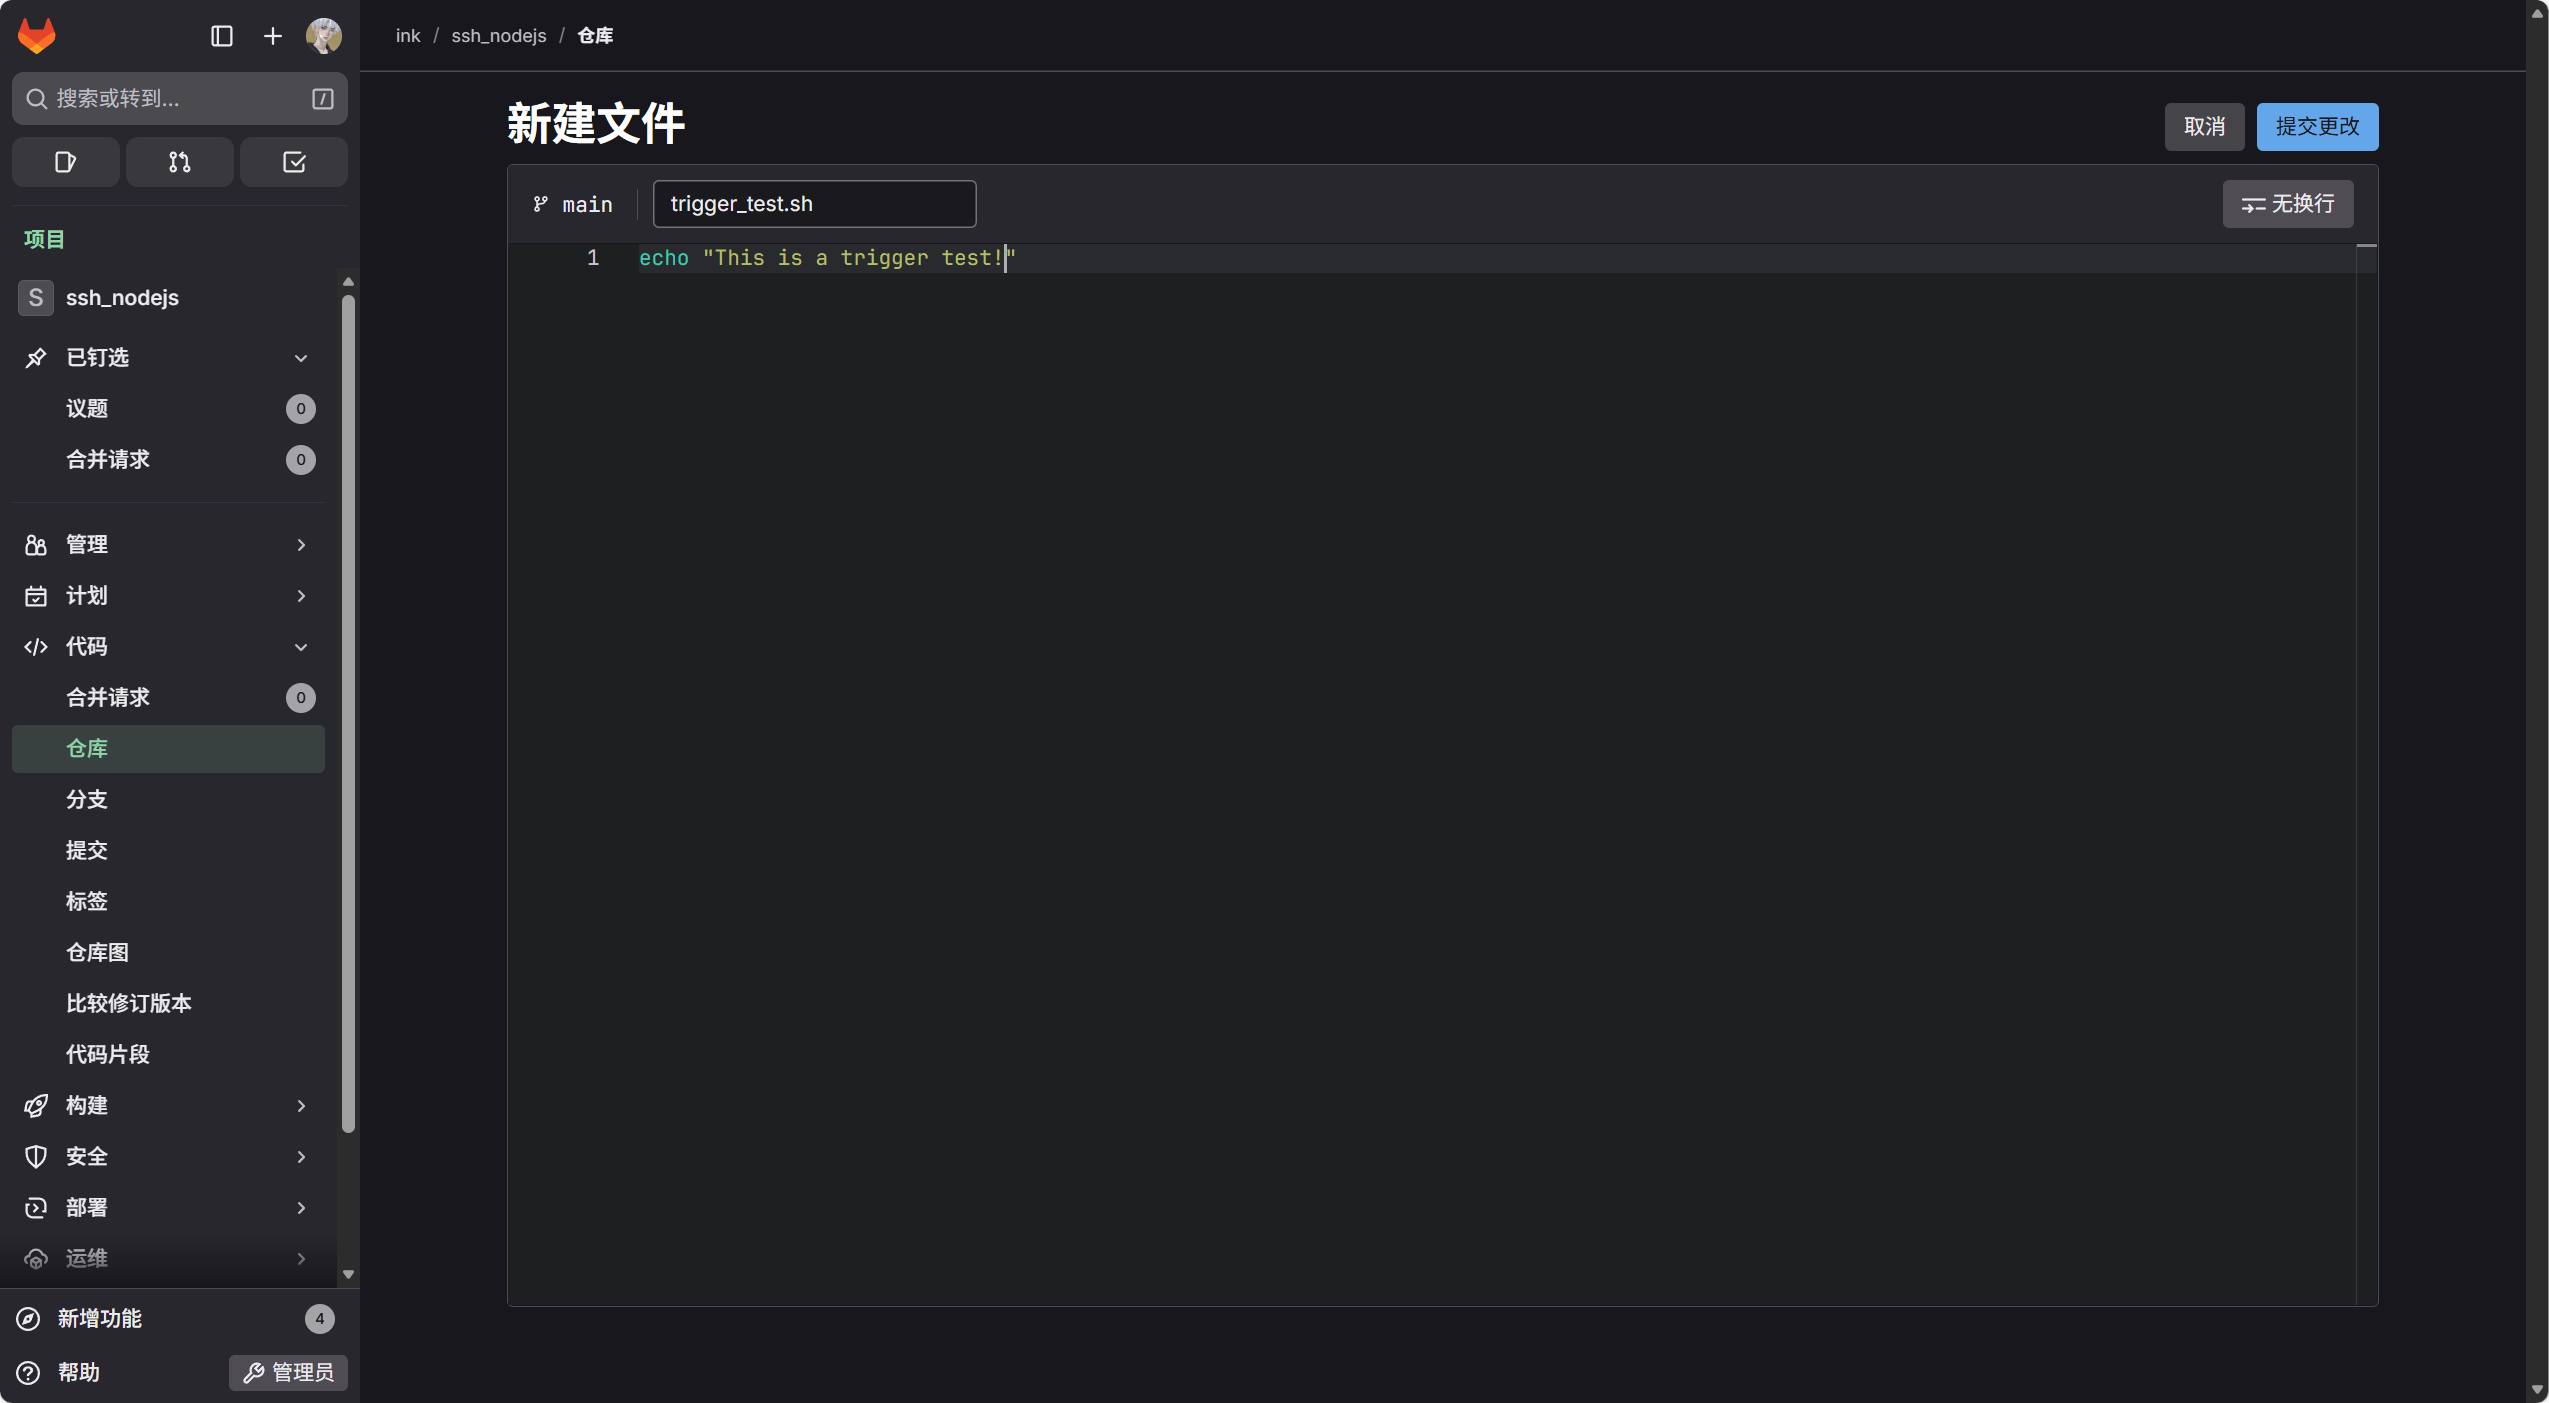
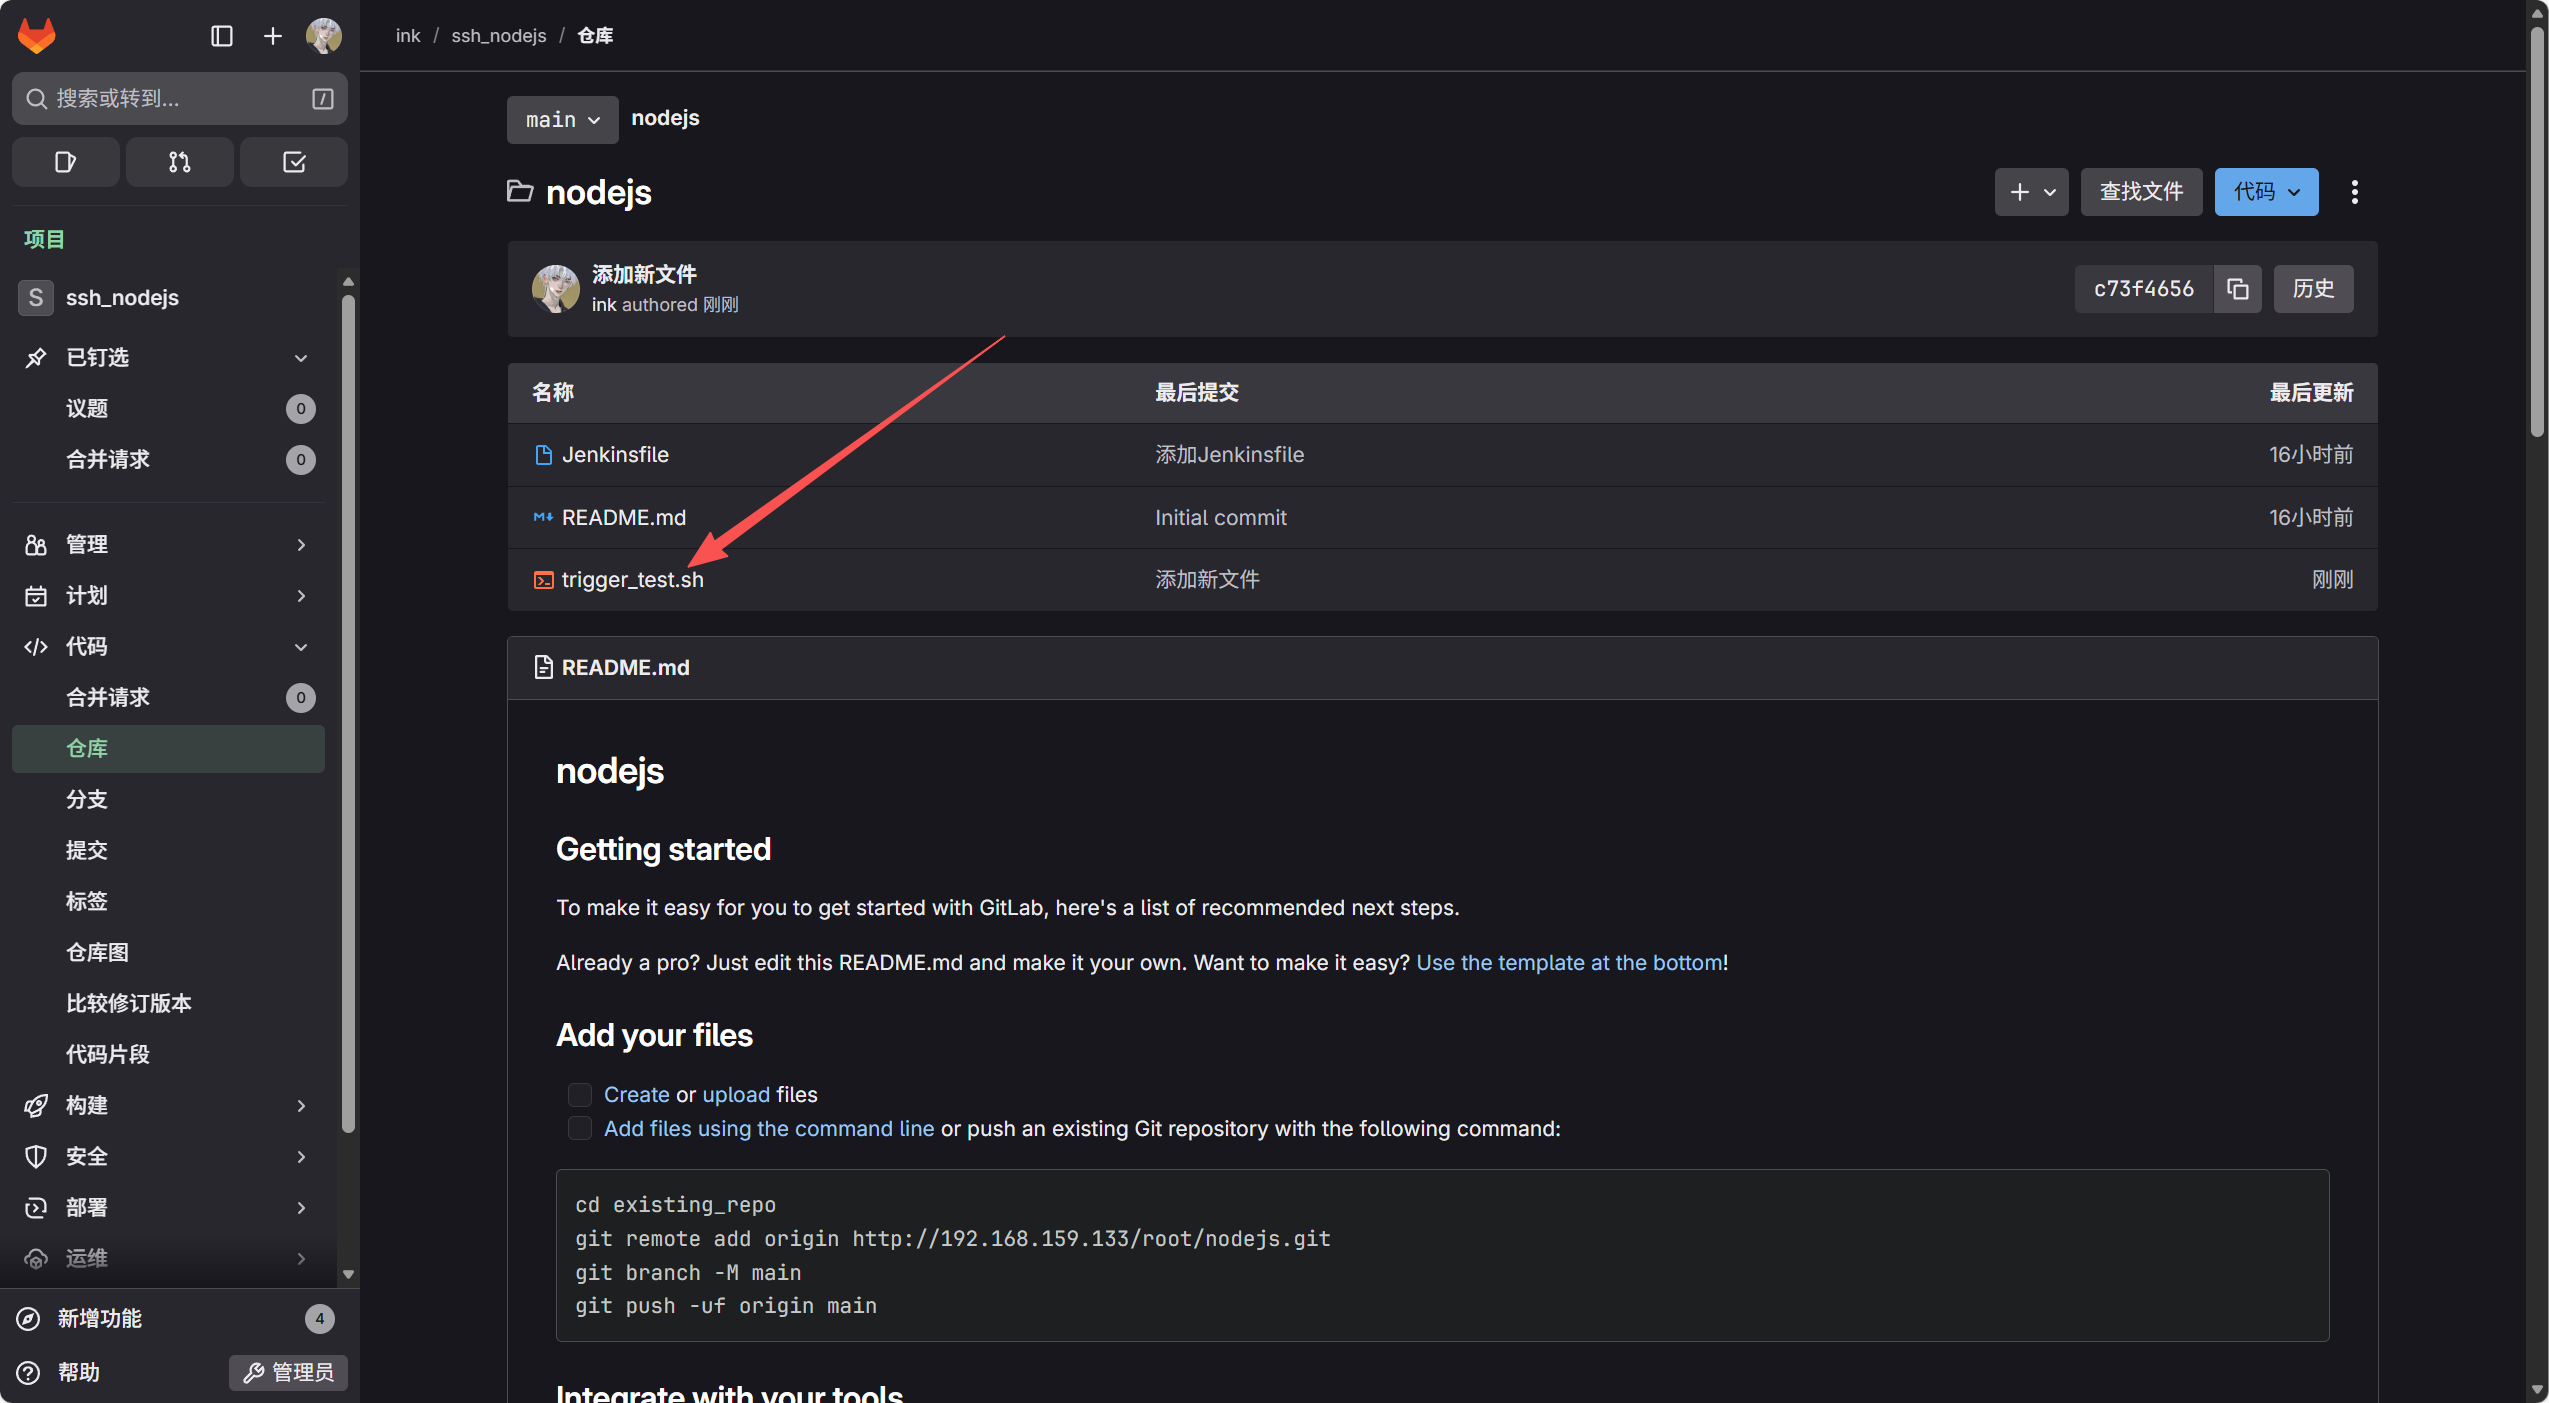
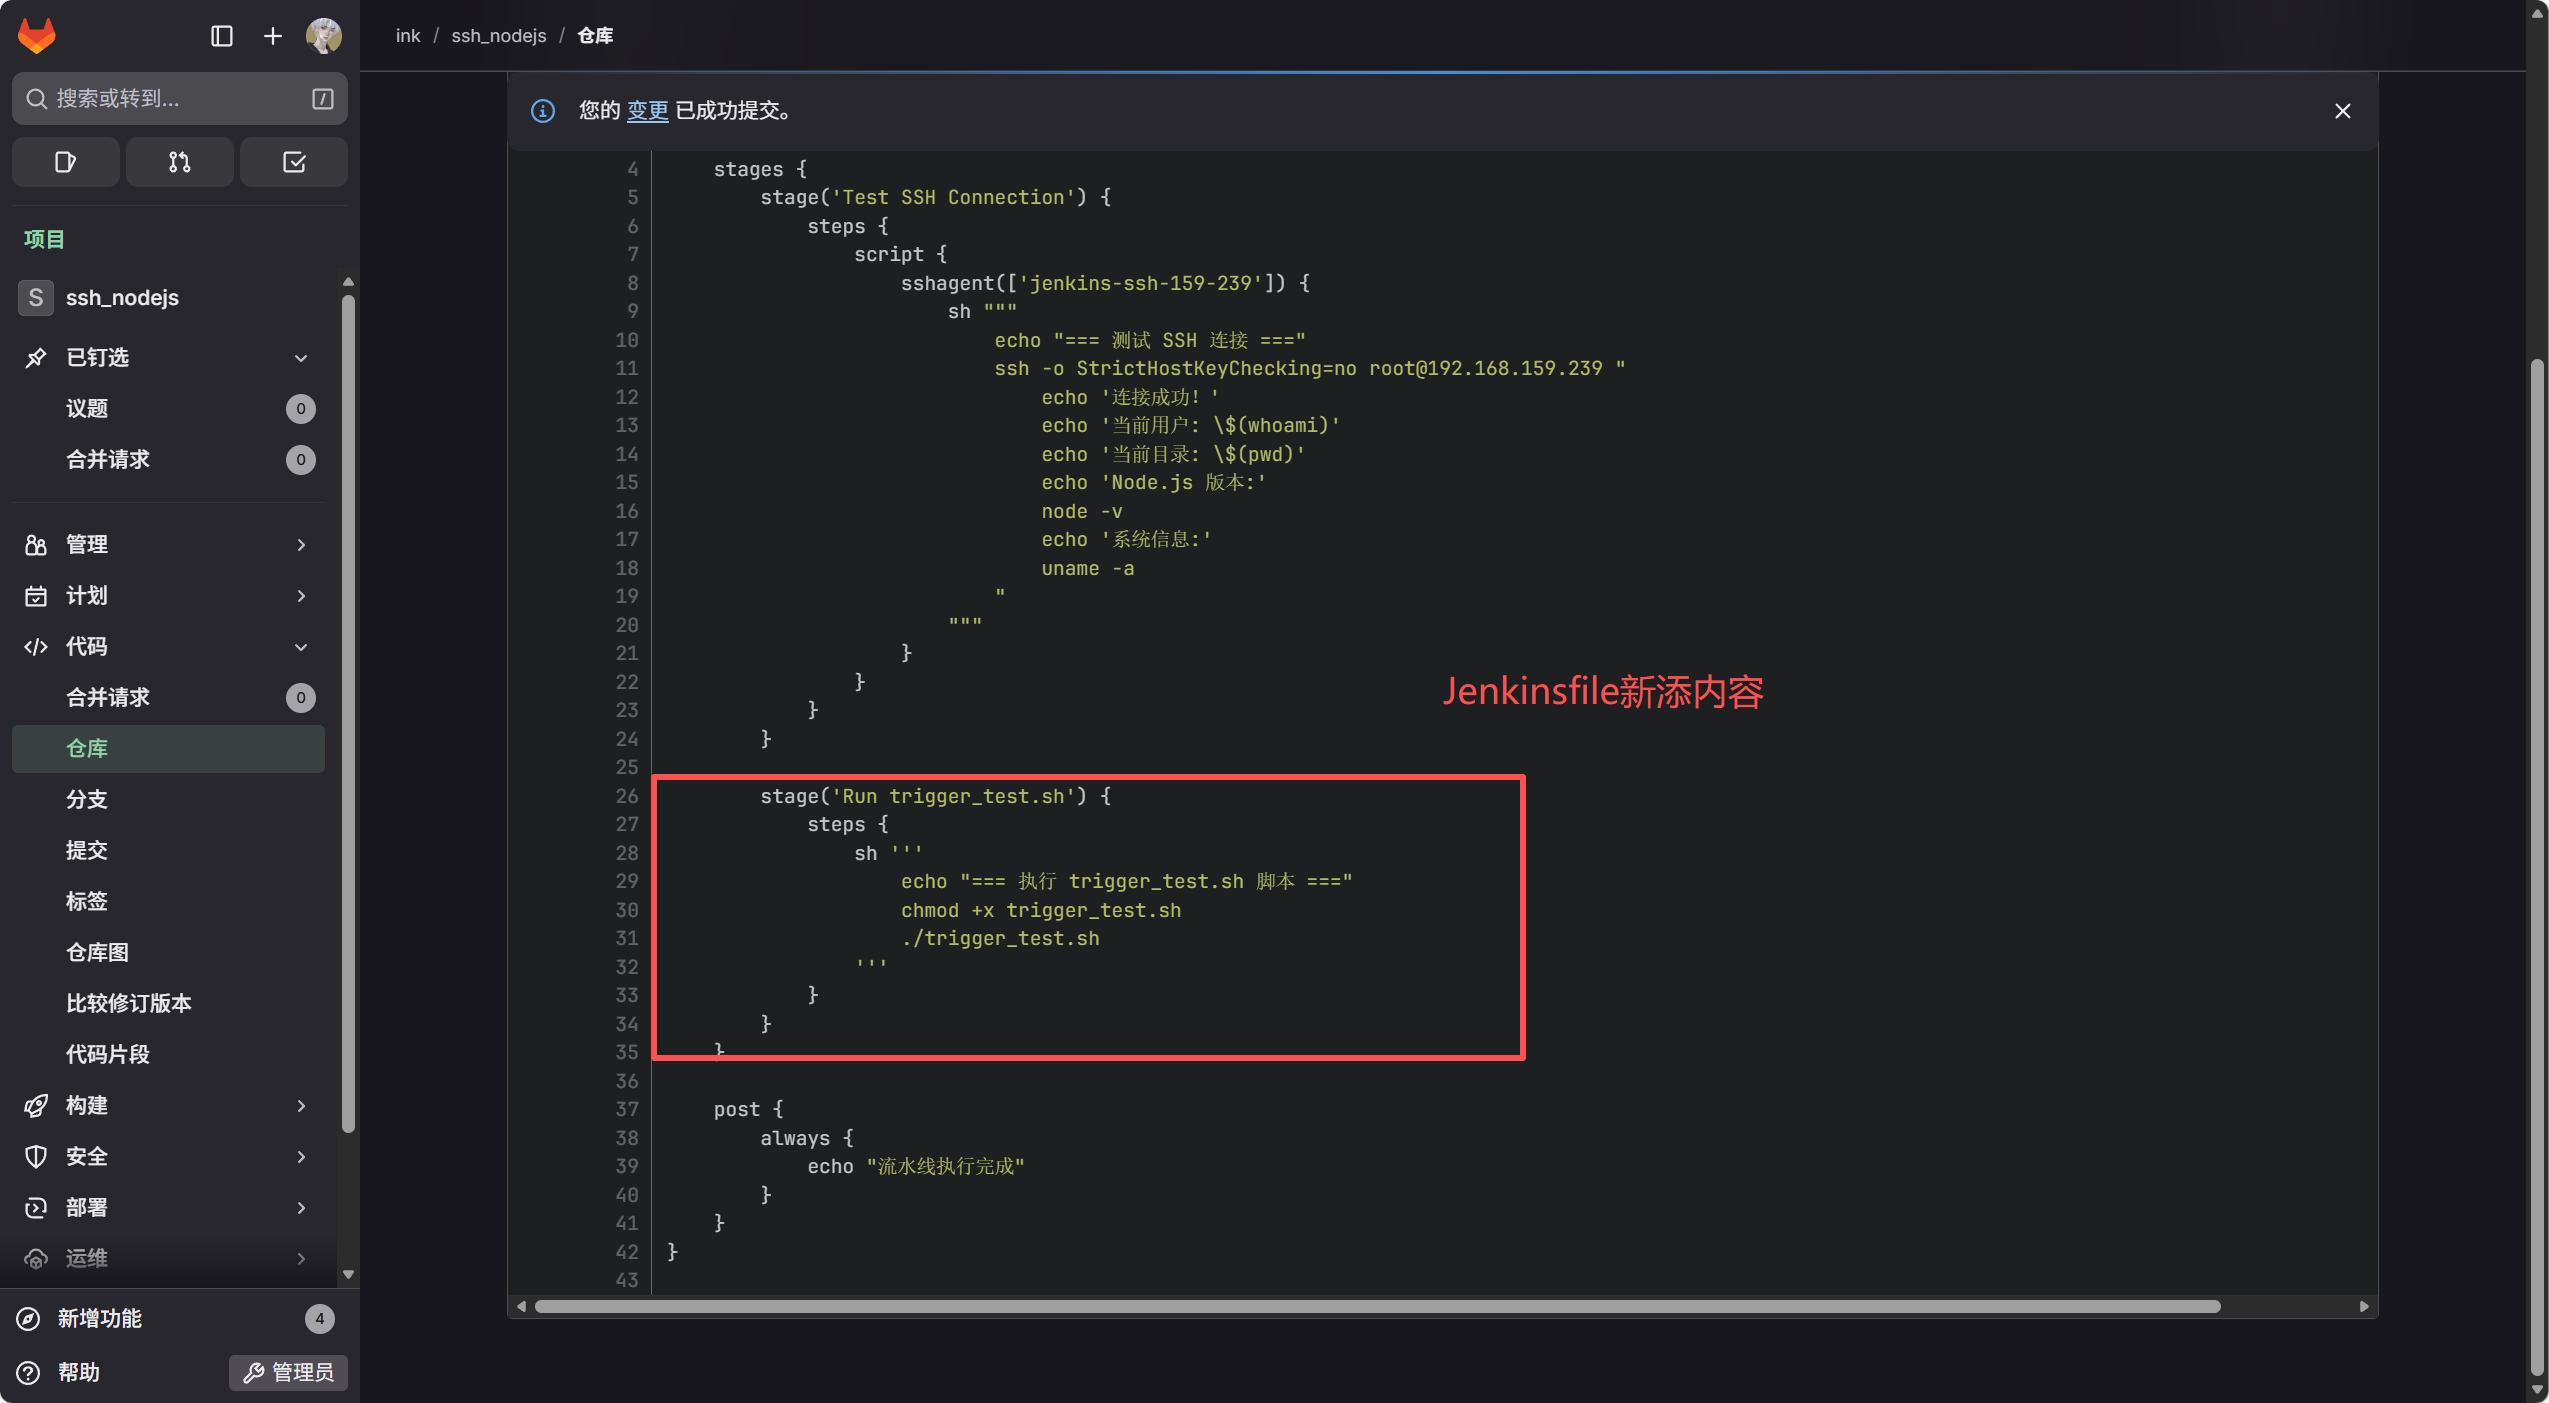
3. 检测与验证
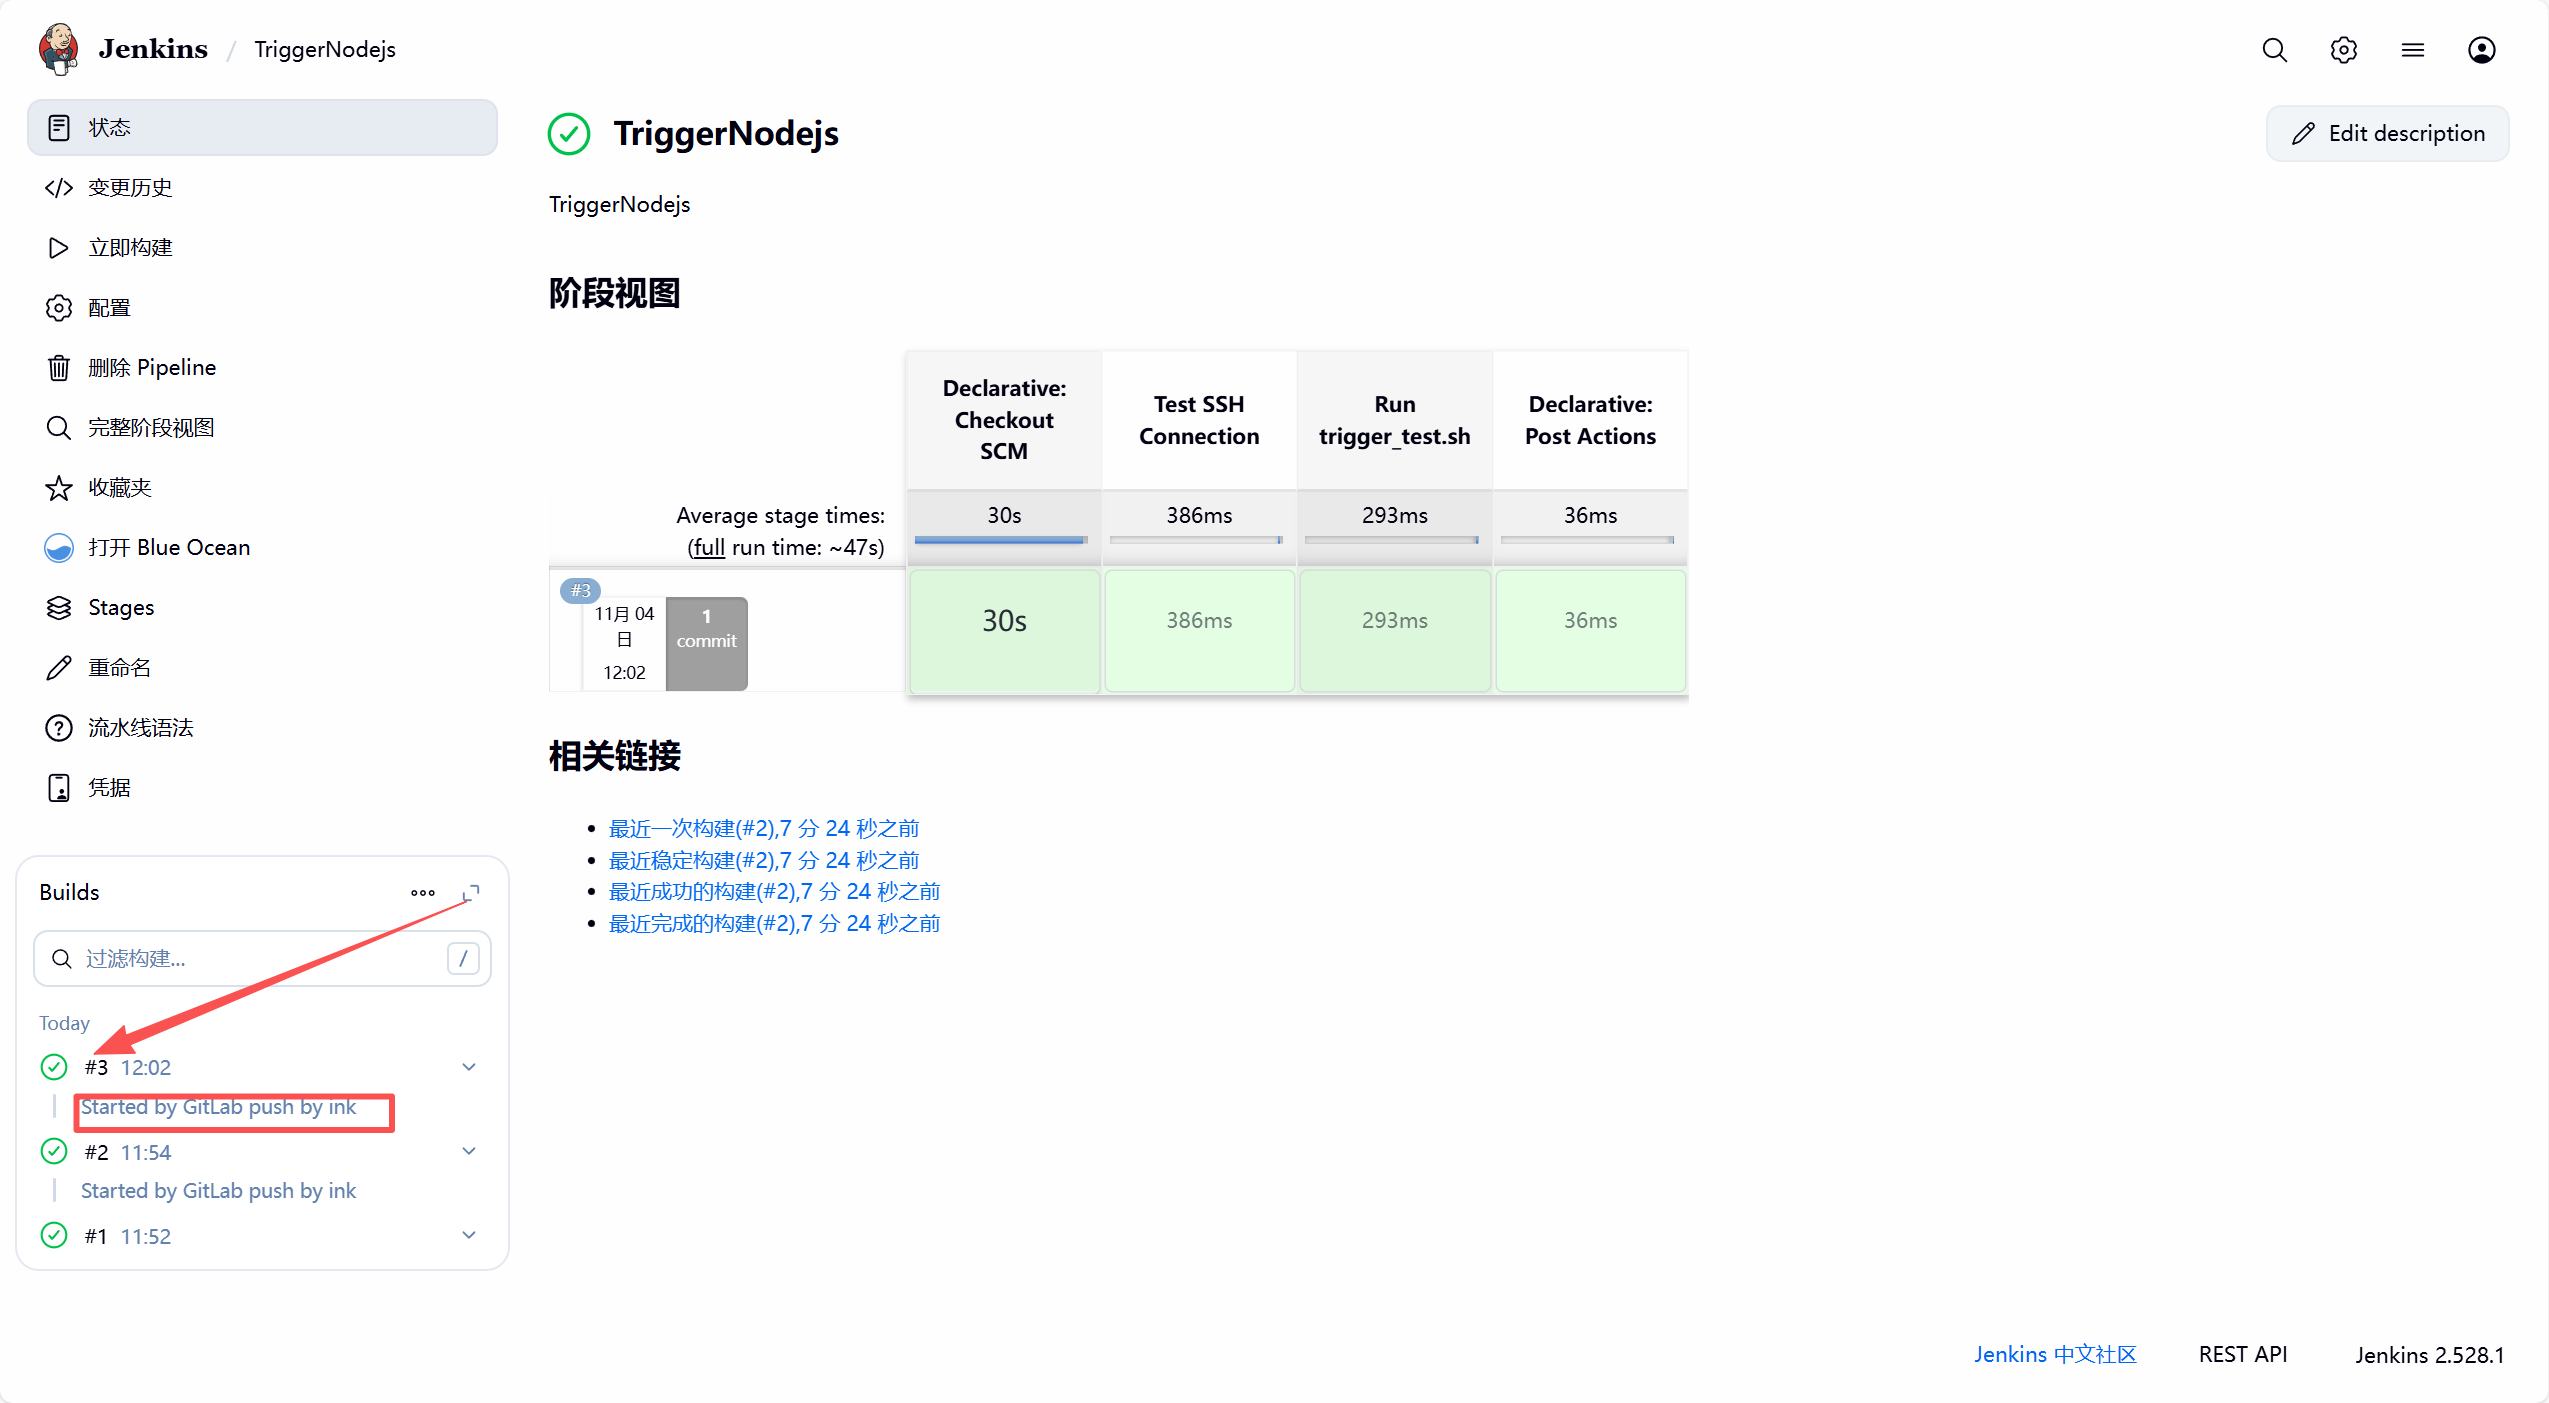
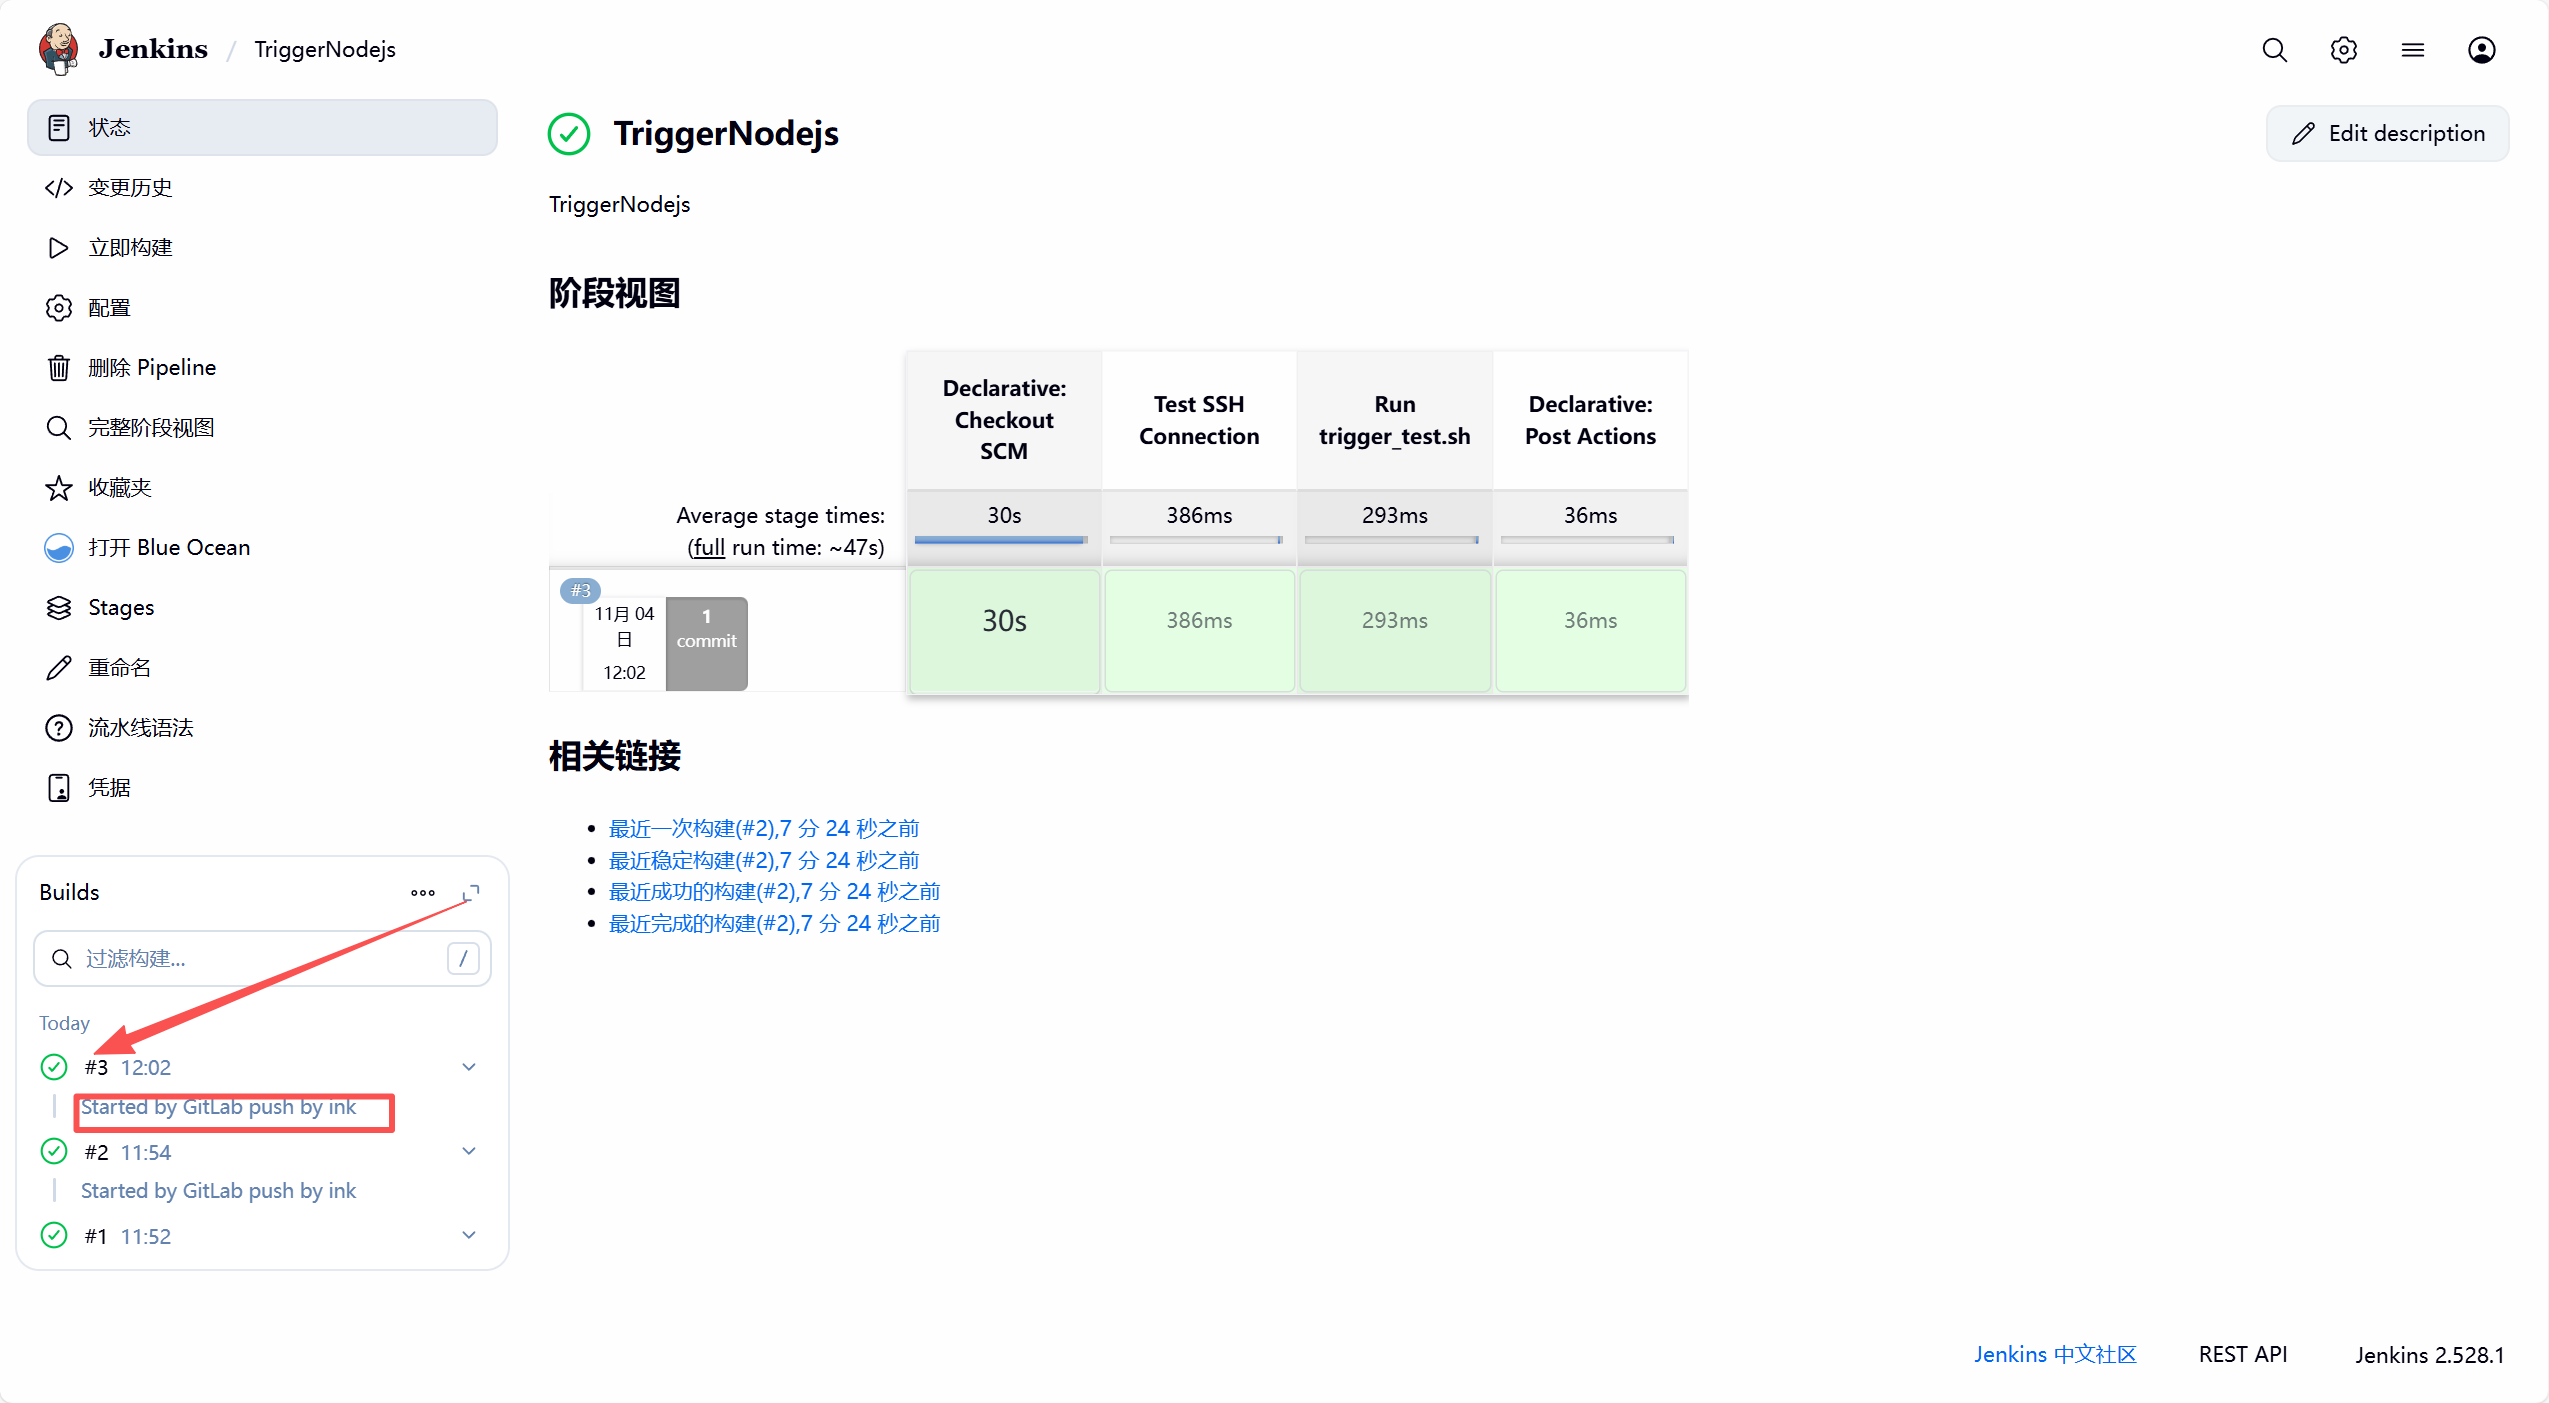
十一、参数化构建
1. Gitlab创建测试项目
1.1 创建新分支
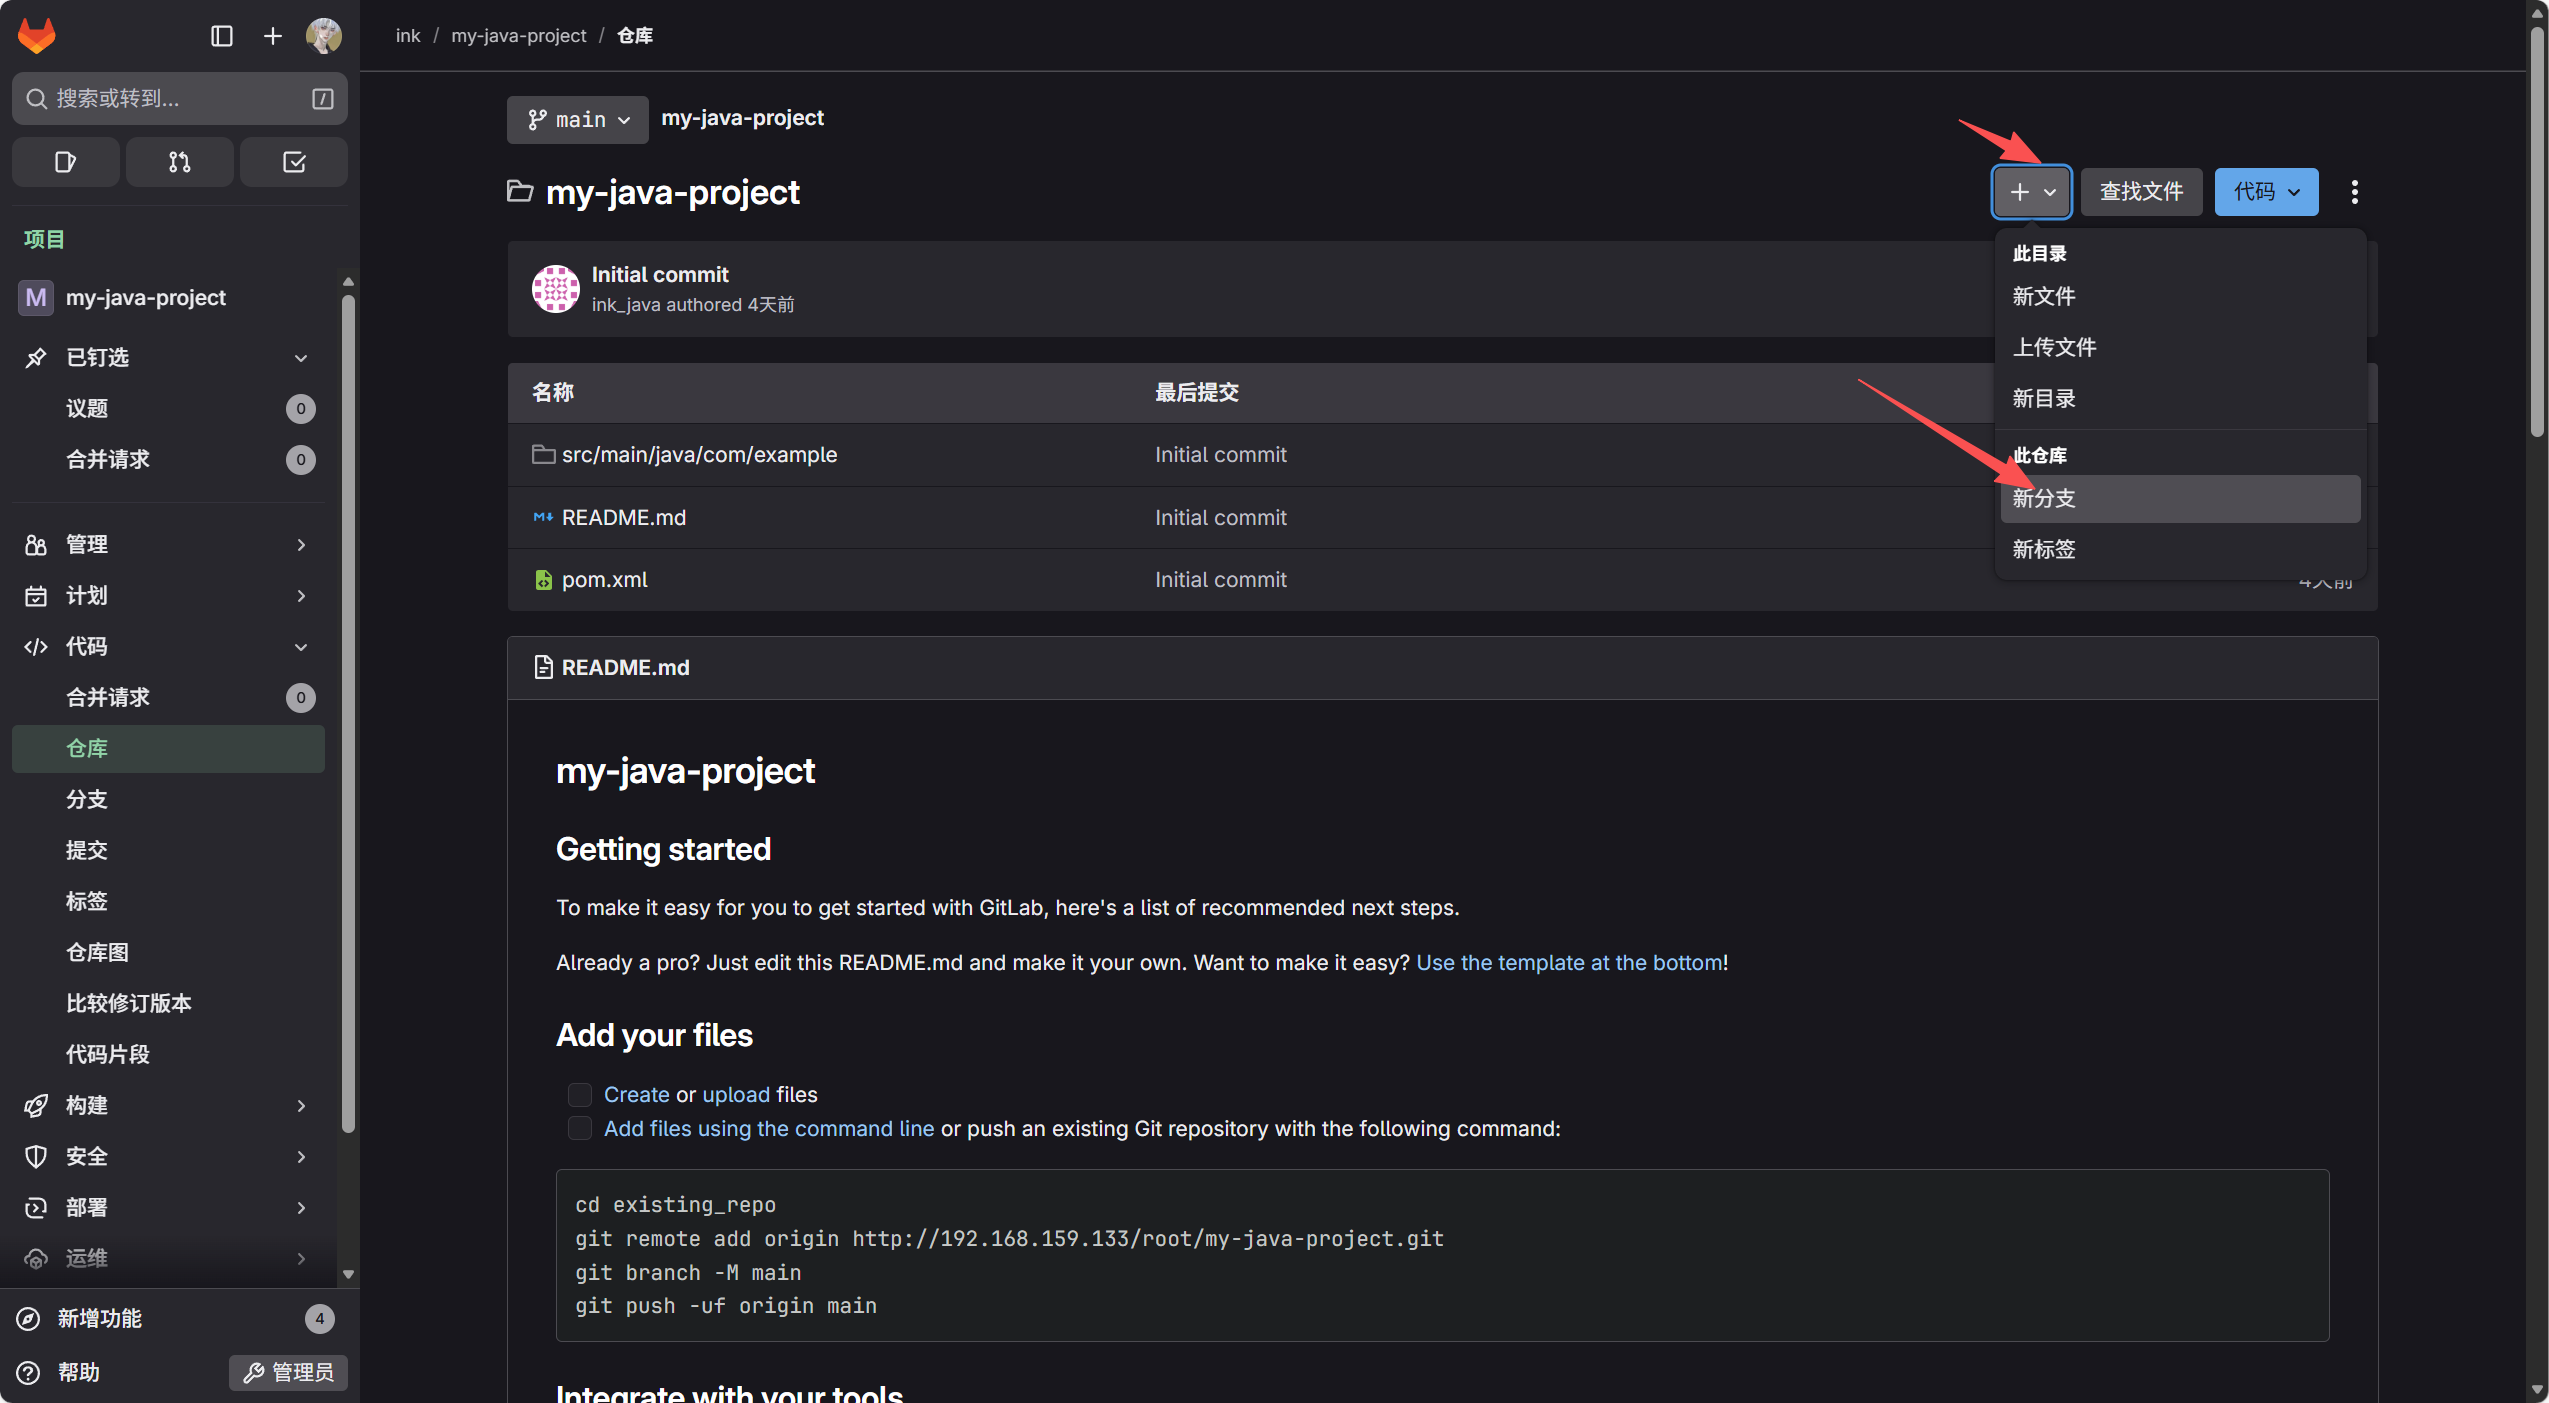
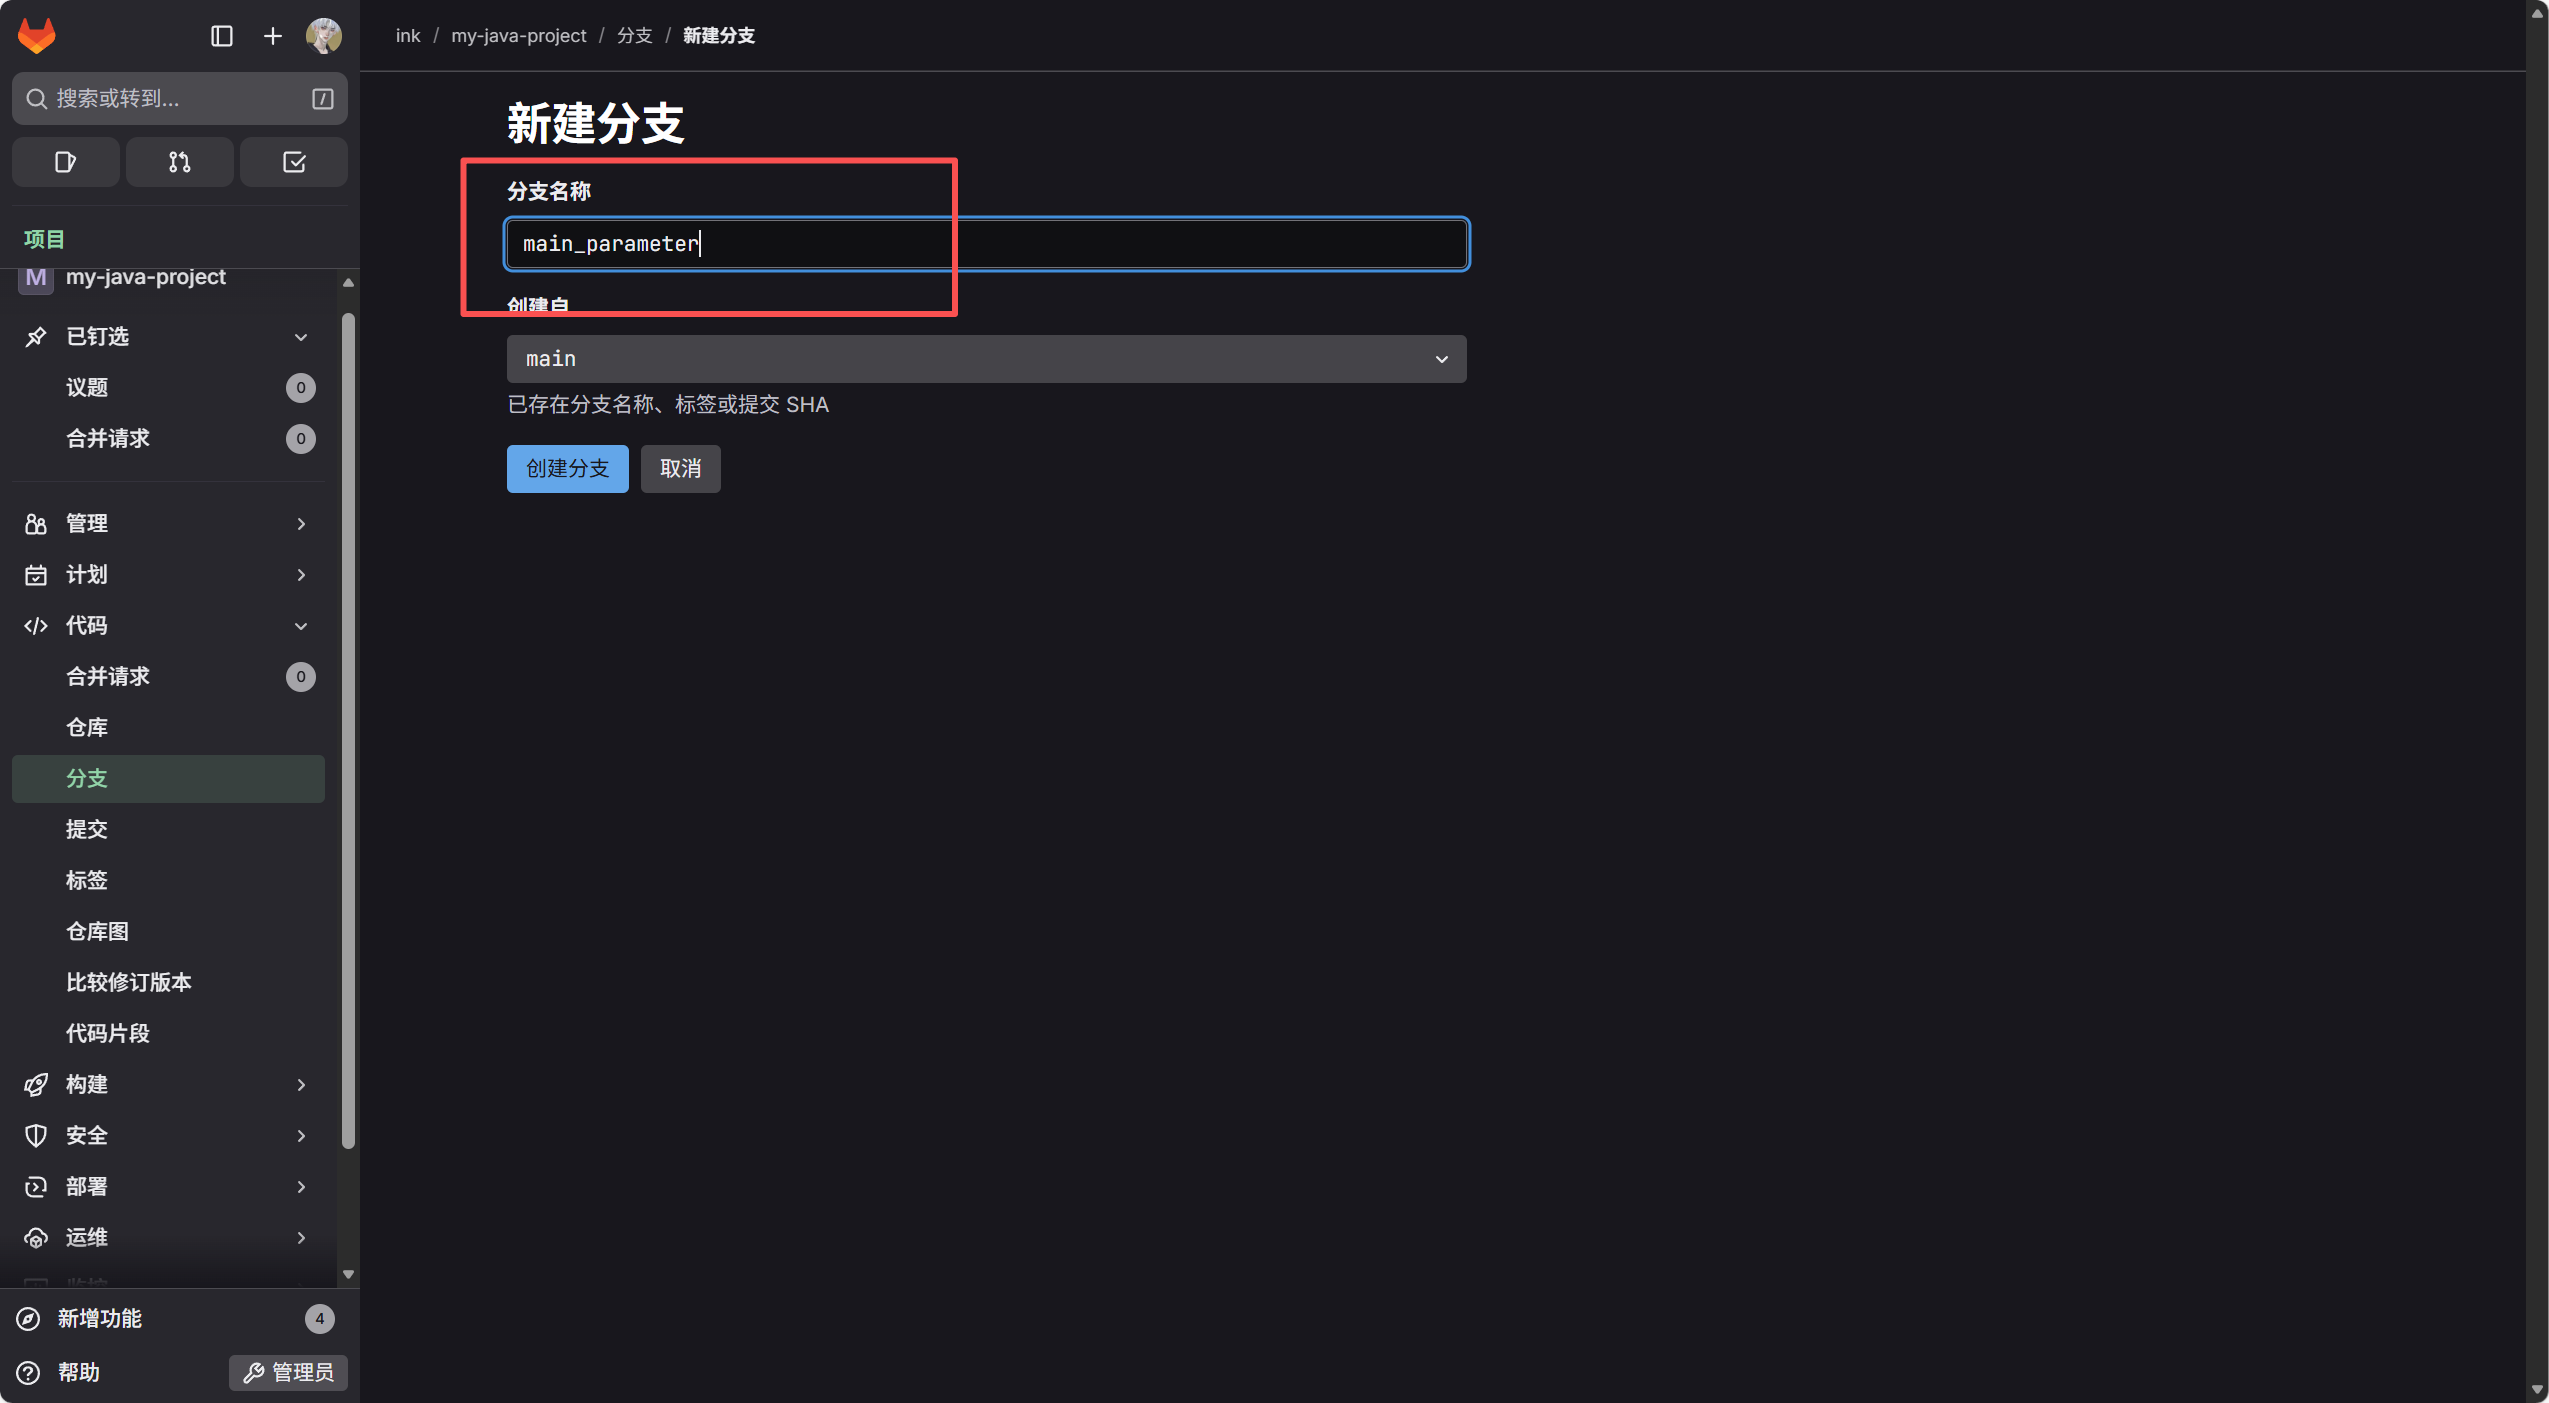
1.2 Jenkinsfile
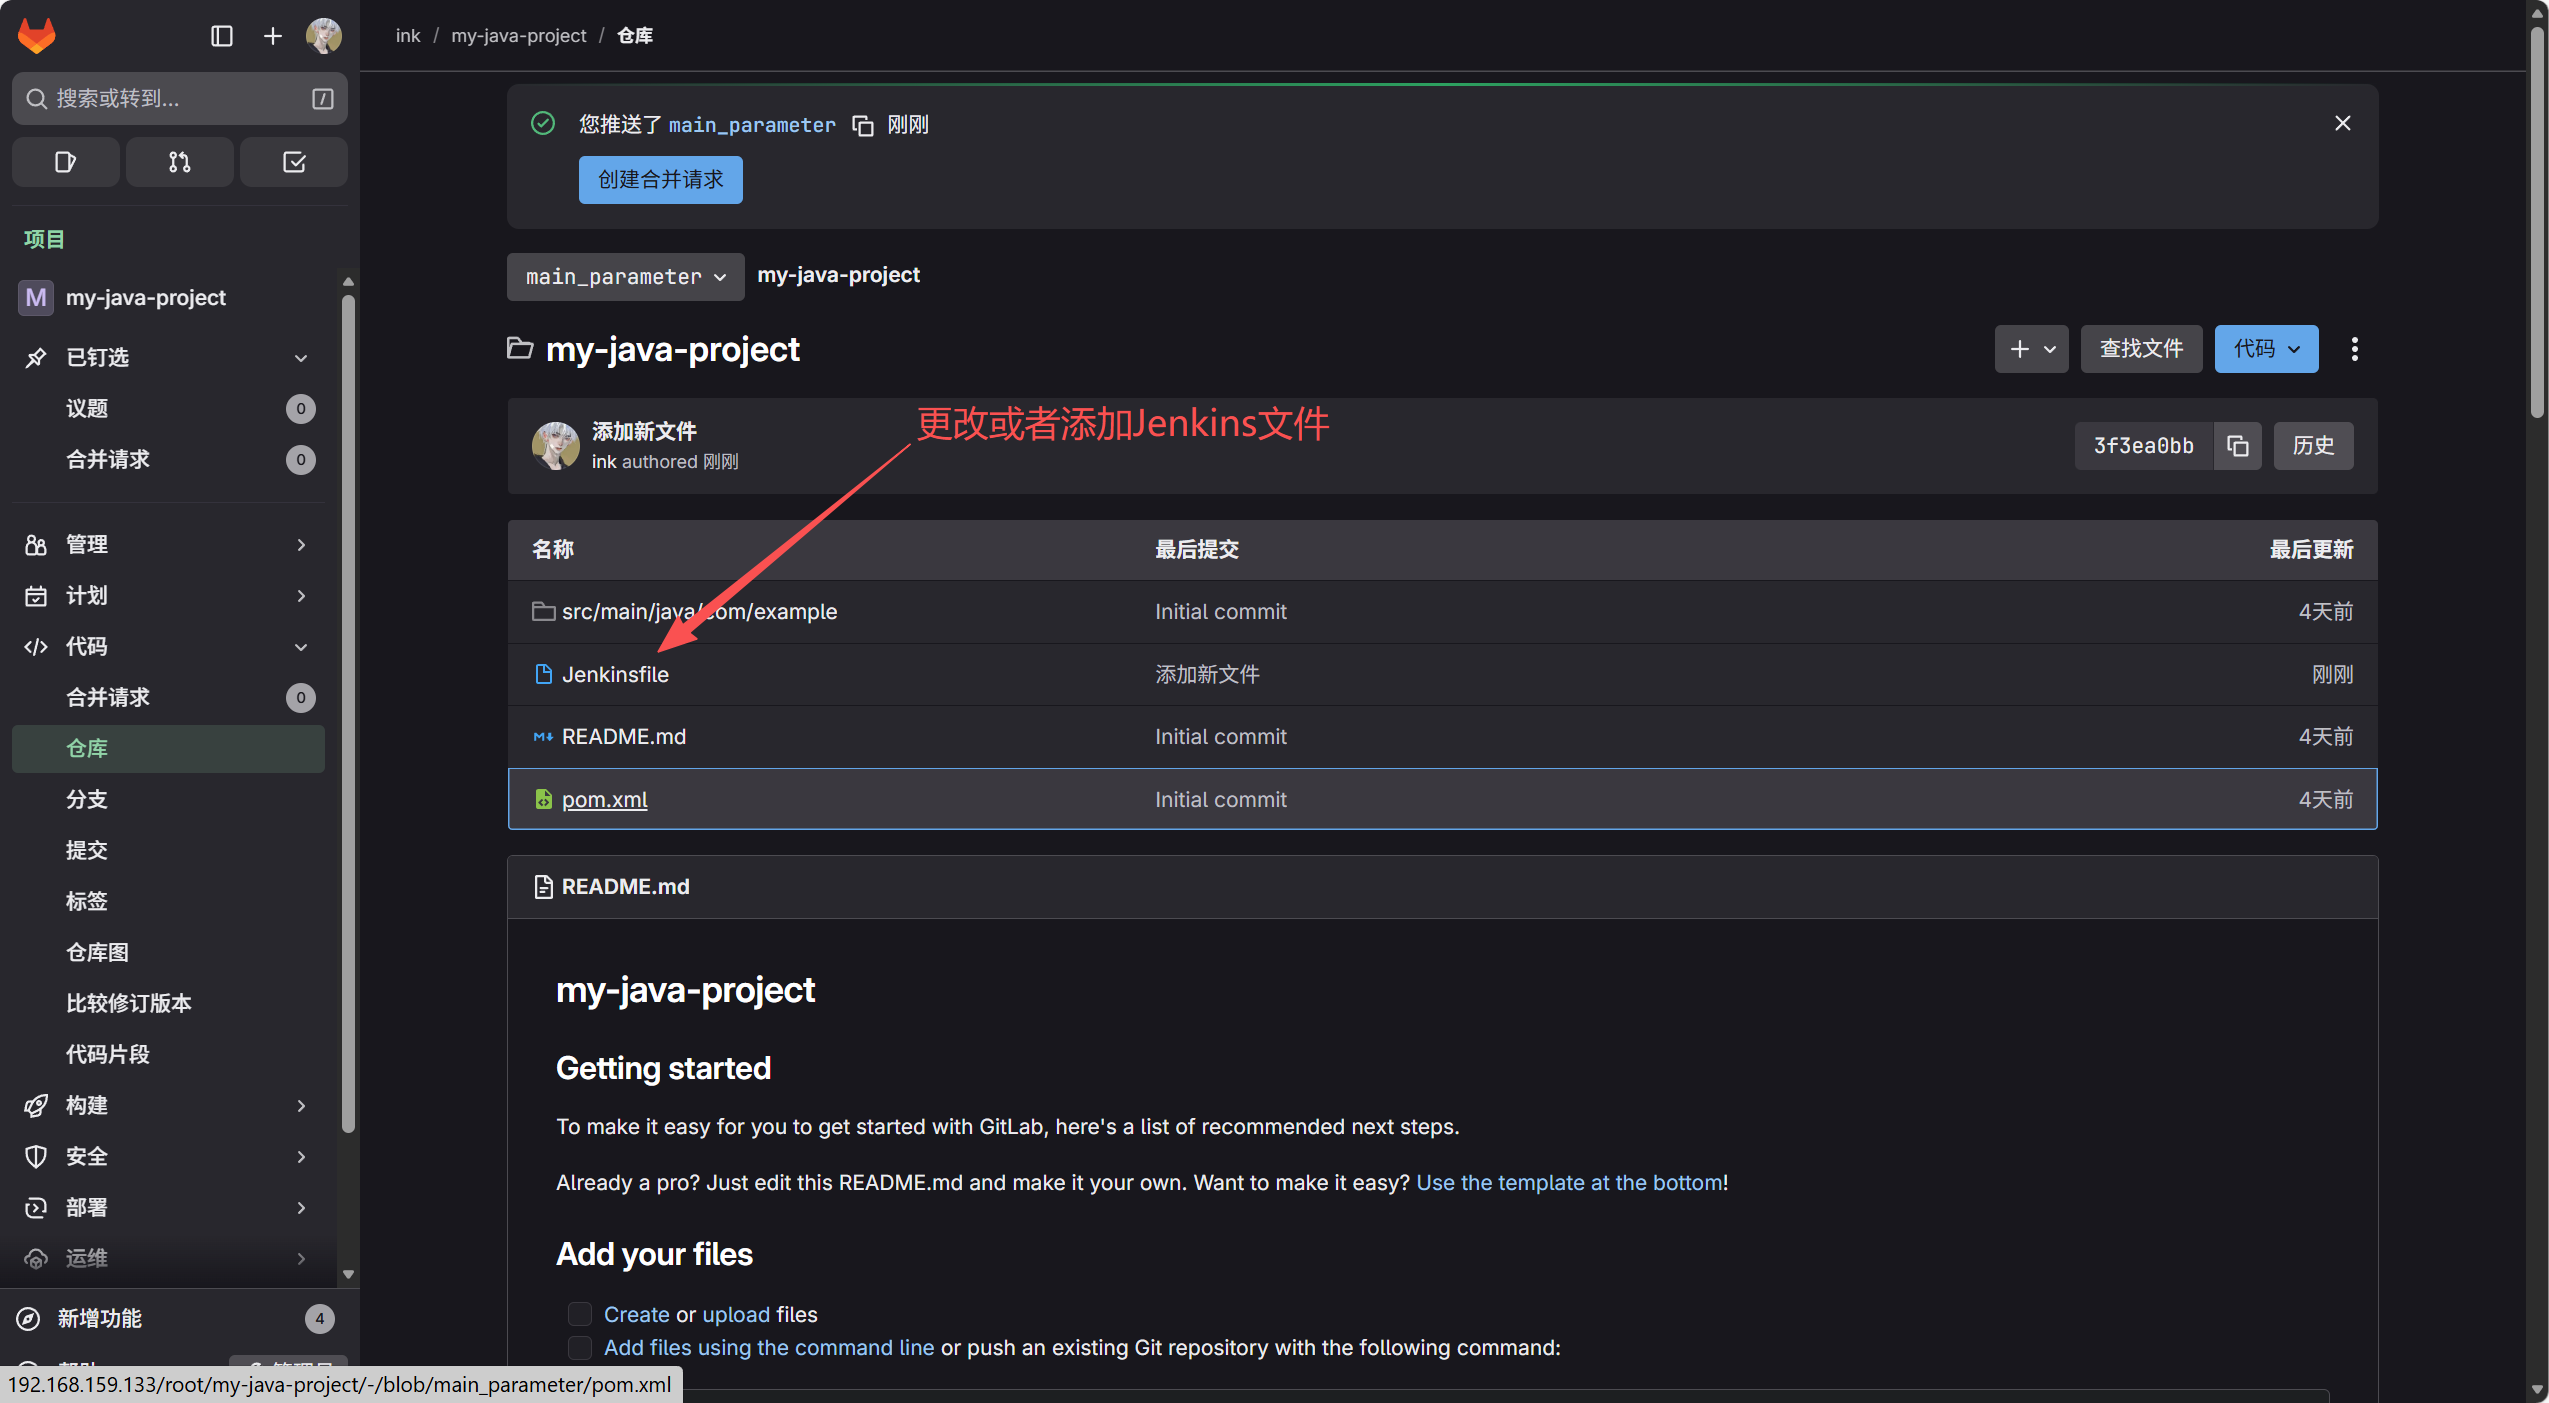
pipeline {
    agent any

    parameters {
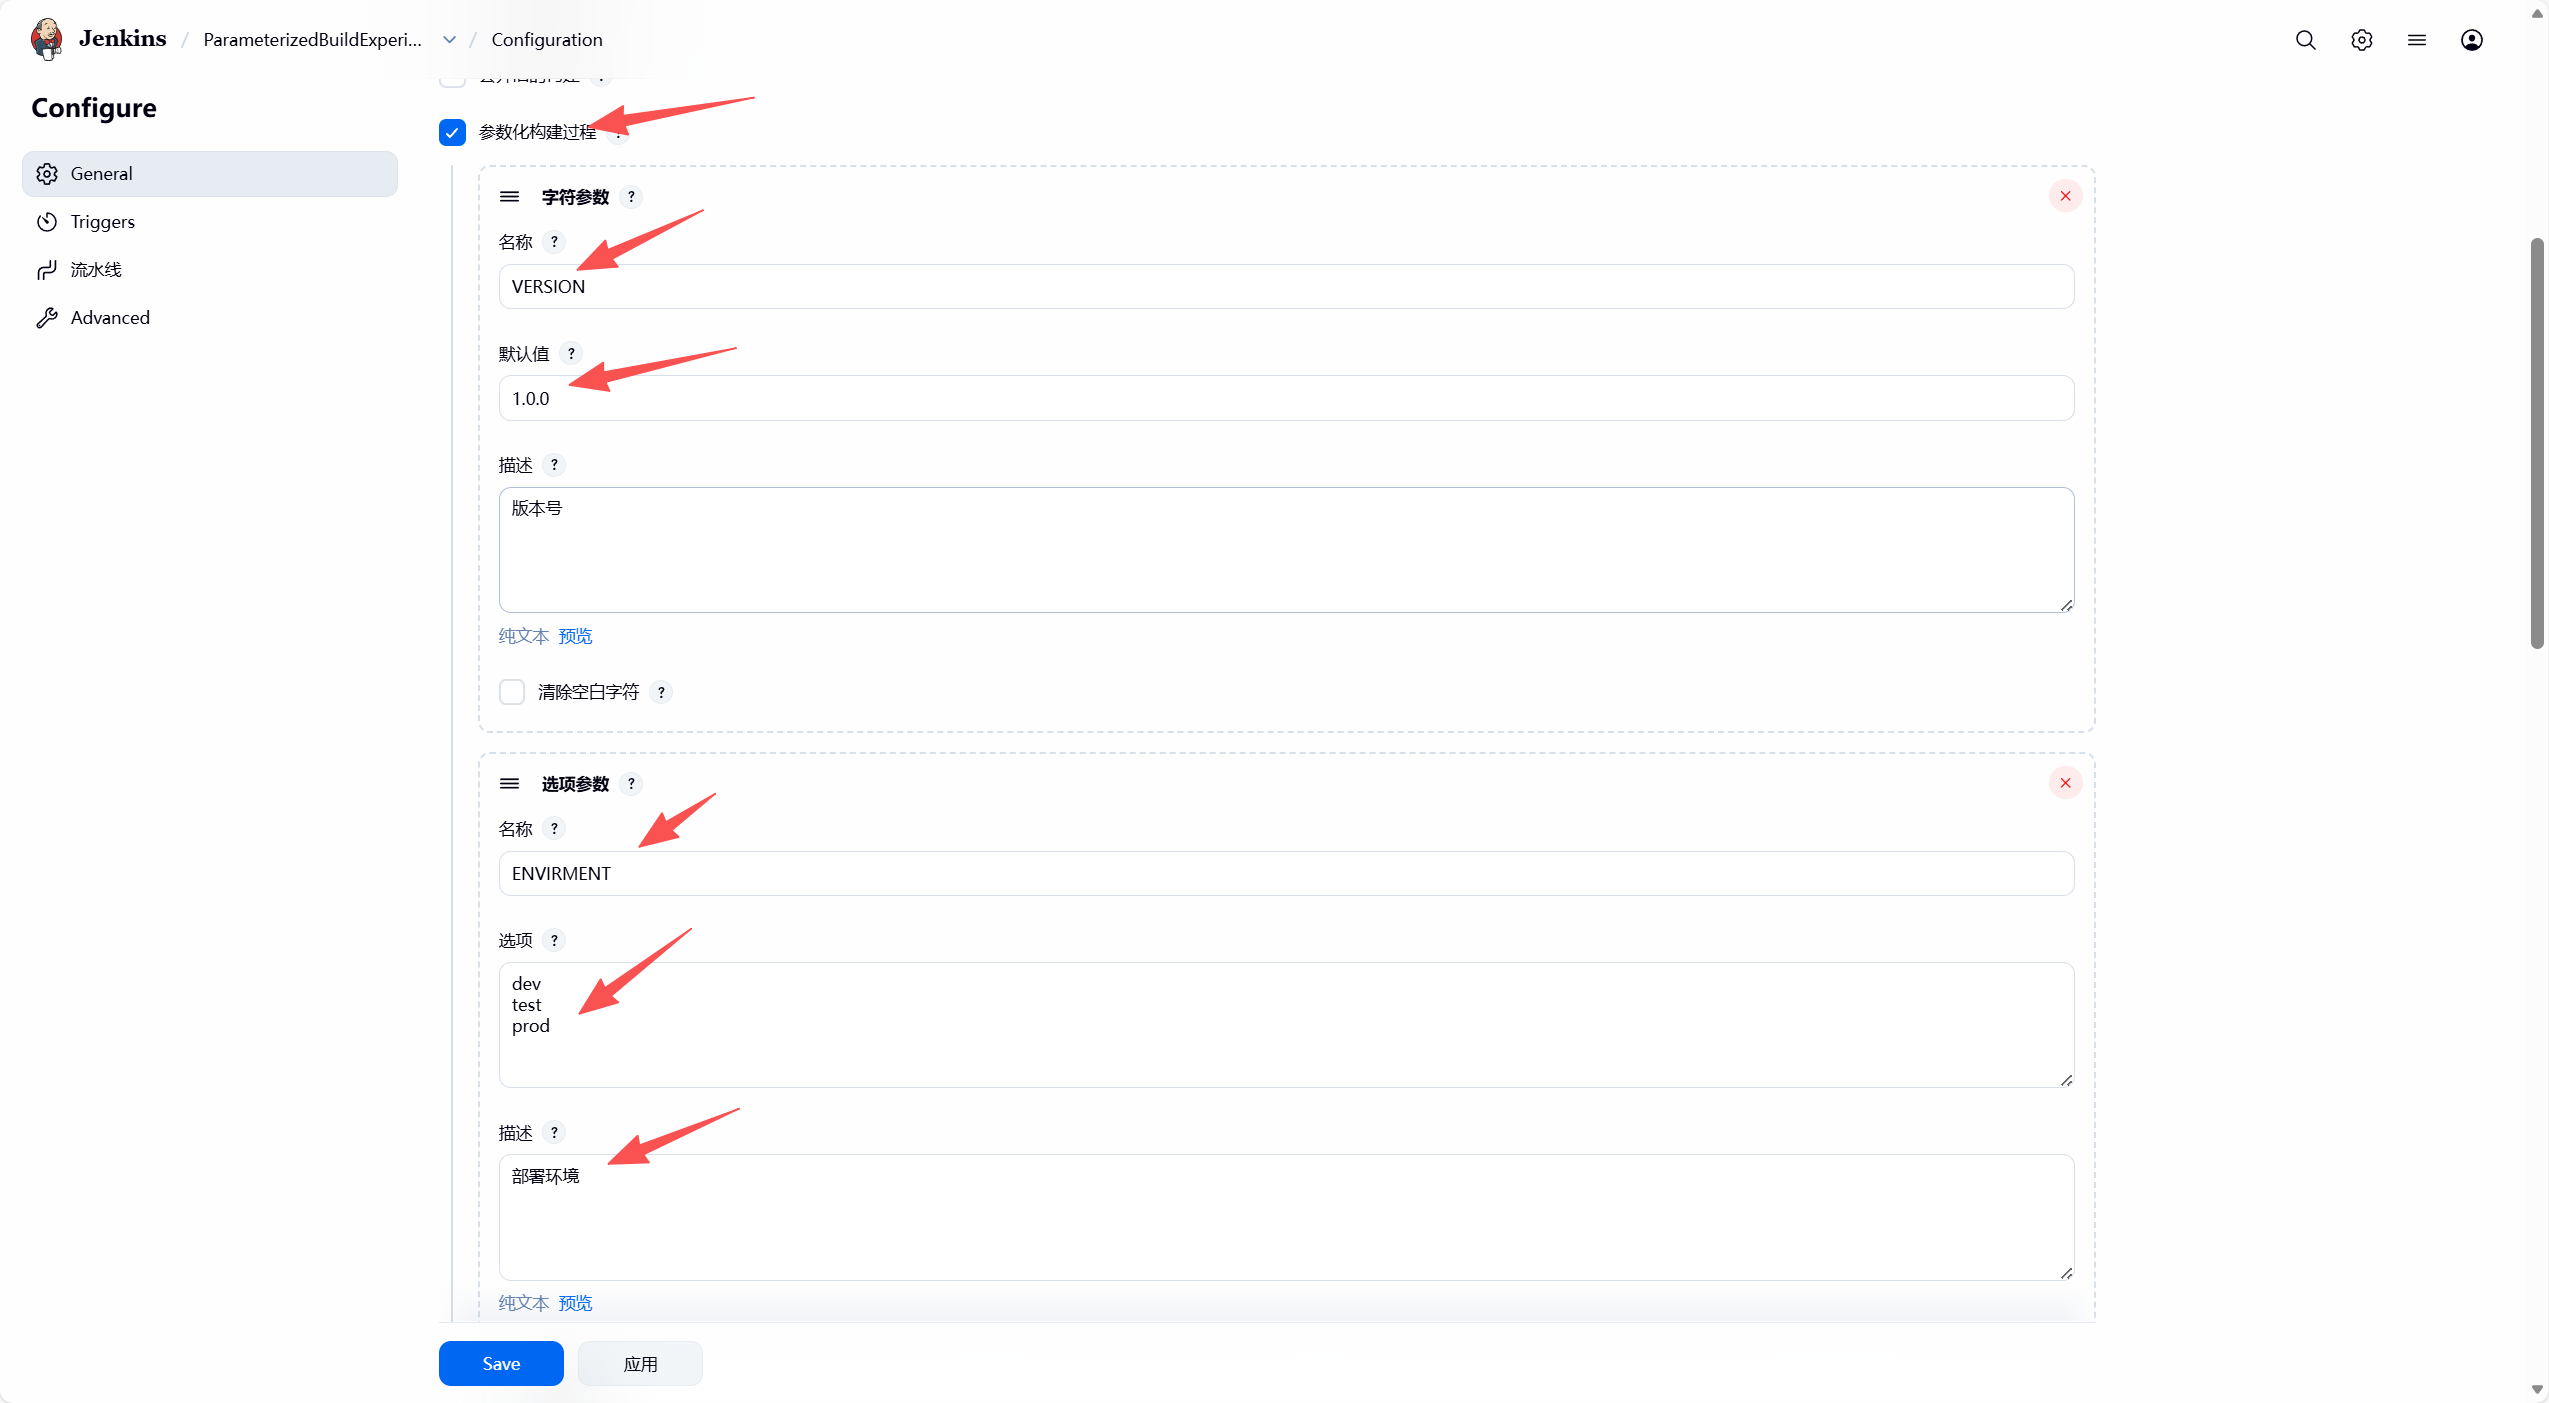
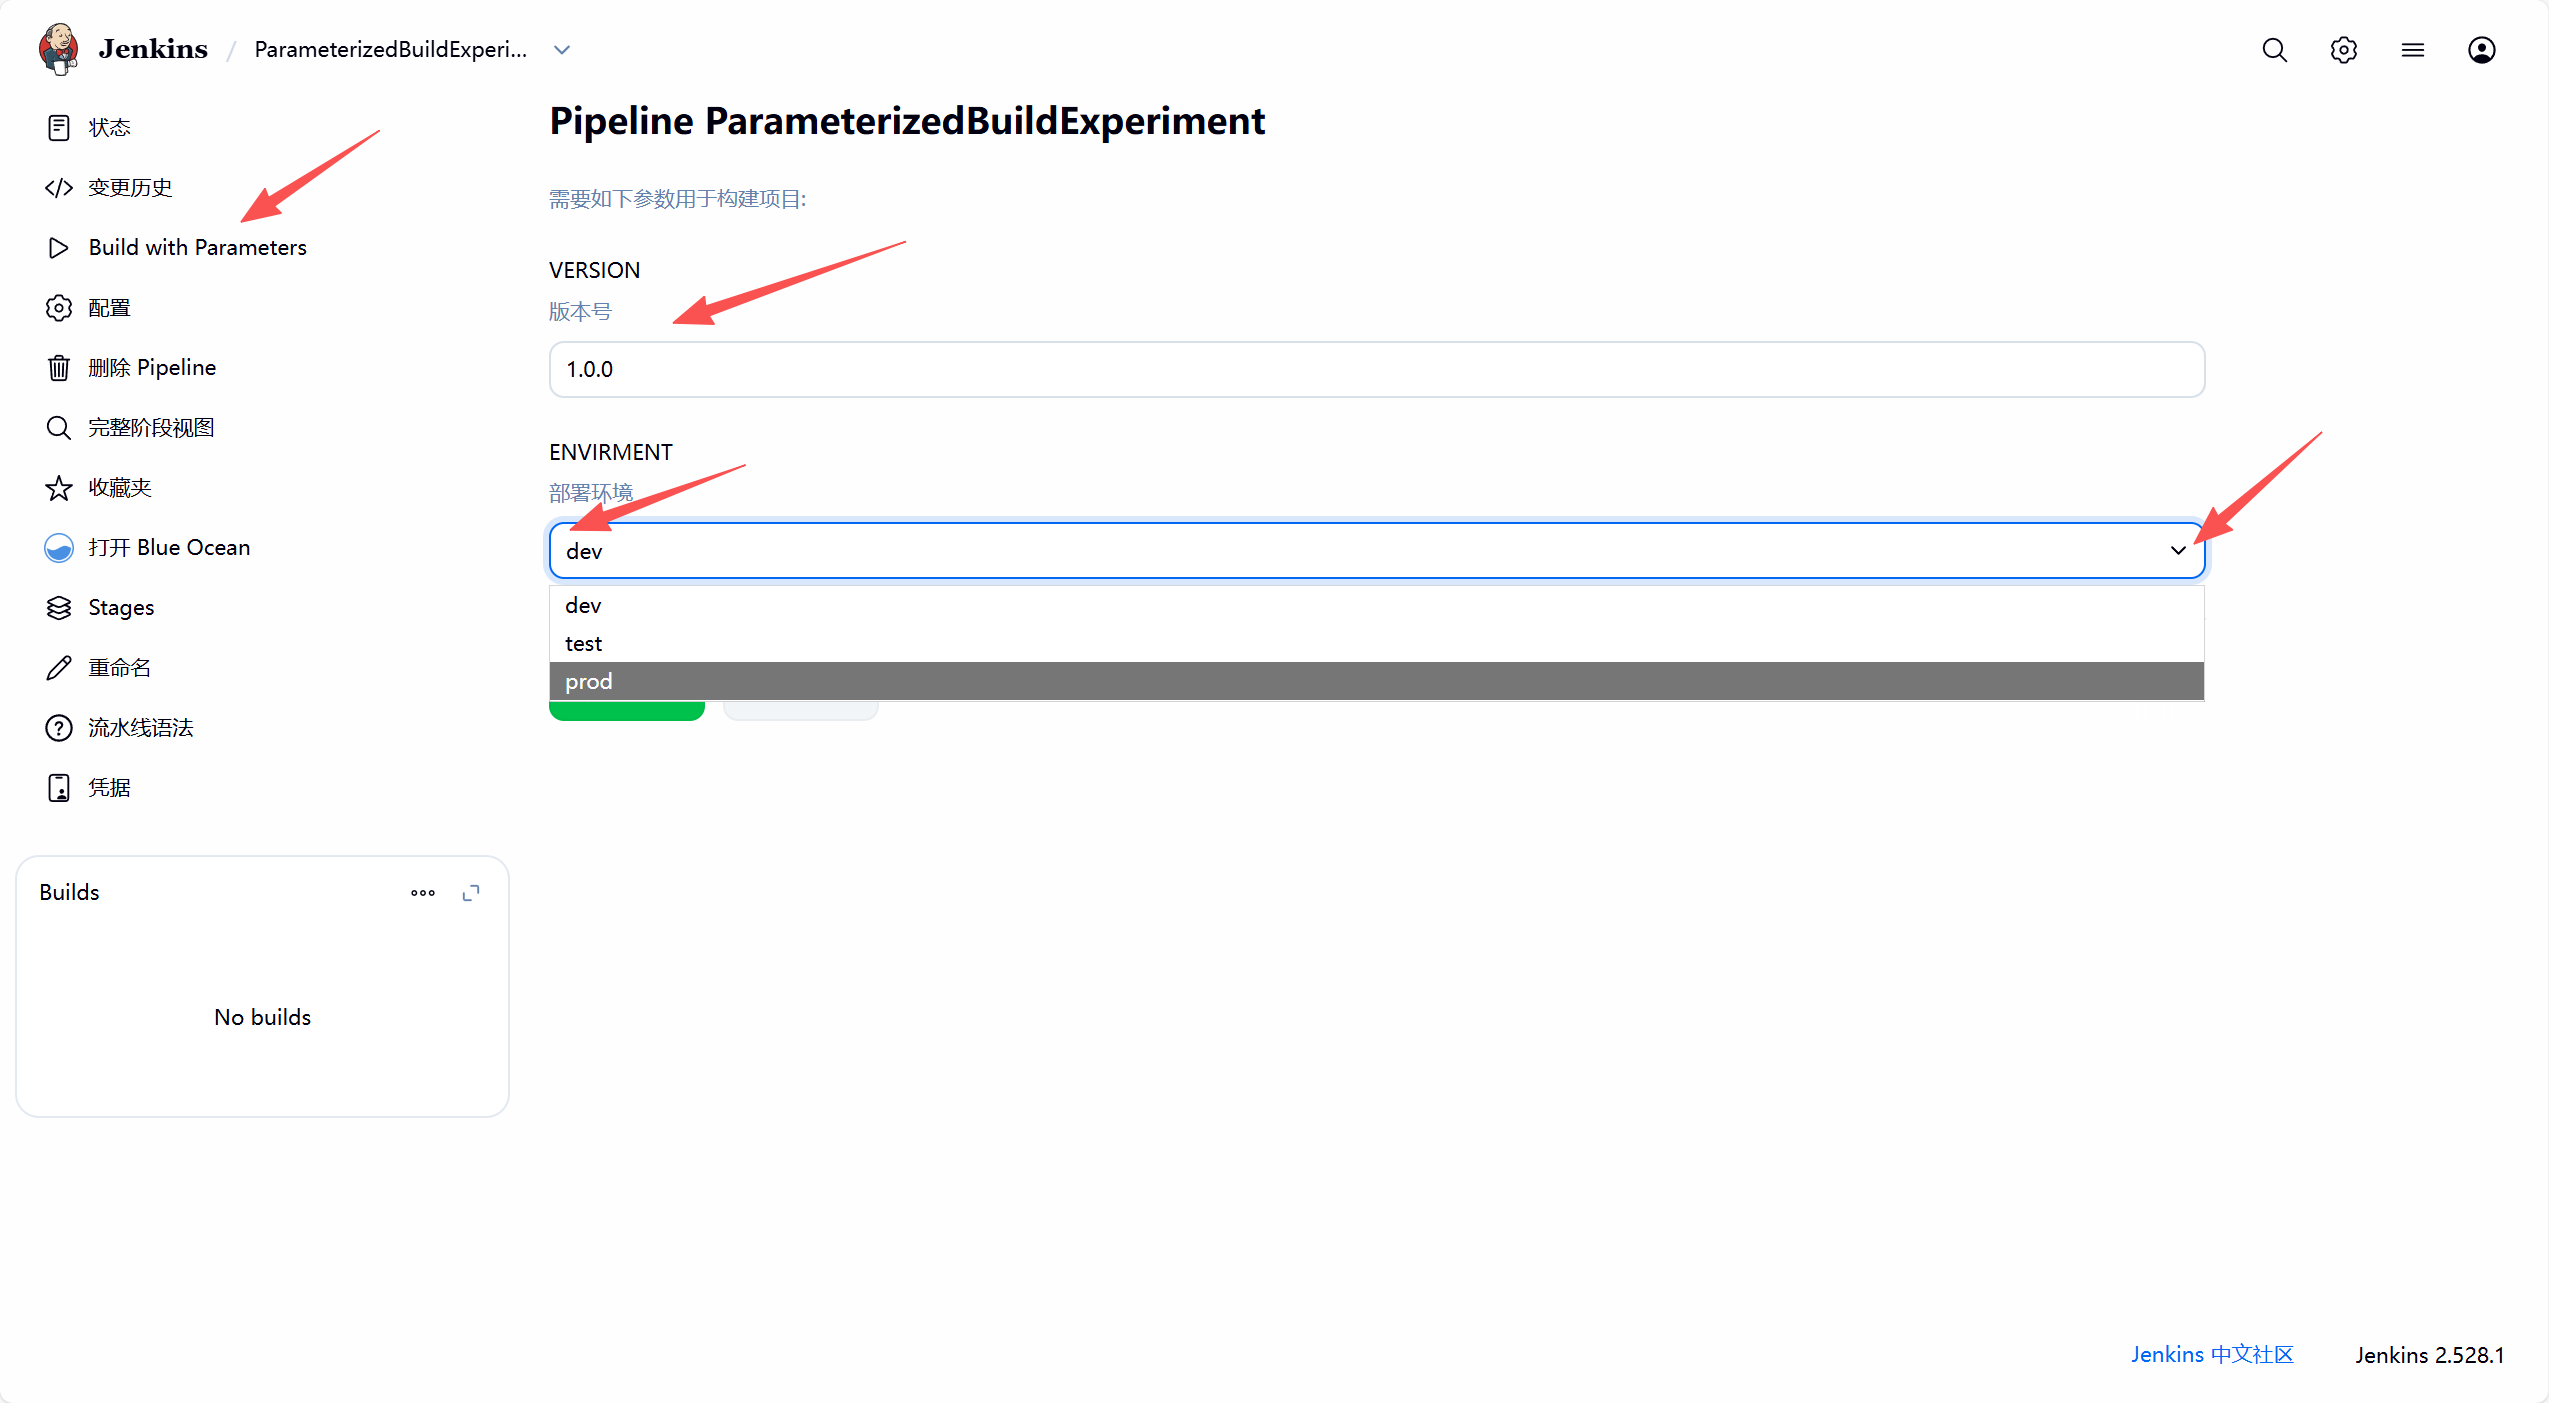
        string(name: 'VERSION', defaultValue: '1.0.0', description: '版本号')
        choice(name: 'ENVIRONMENT', choices: ['dev', 'staging', 'prod'], description: '选择部署环境')
    }

    stages {
        stage('Build') {
            steps {
                script {
                    echo "构建版本:${params.VERSION}"
                    echo "部署环境:${params.ENVIRONMENT}"
                    // 模拟构建操作
                    echo "正在构建项目..."
                    // 假设我们在这里执行构建脚本,例如:
                    // sh "mvn clean install -Dversion=${params.VERSION}"
                }
            }
        }

        stage('Deploy') {
            steps {
                script {
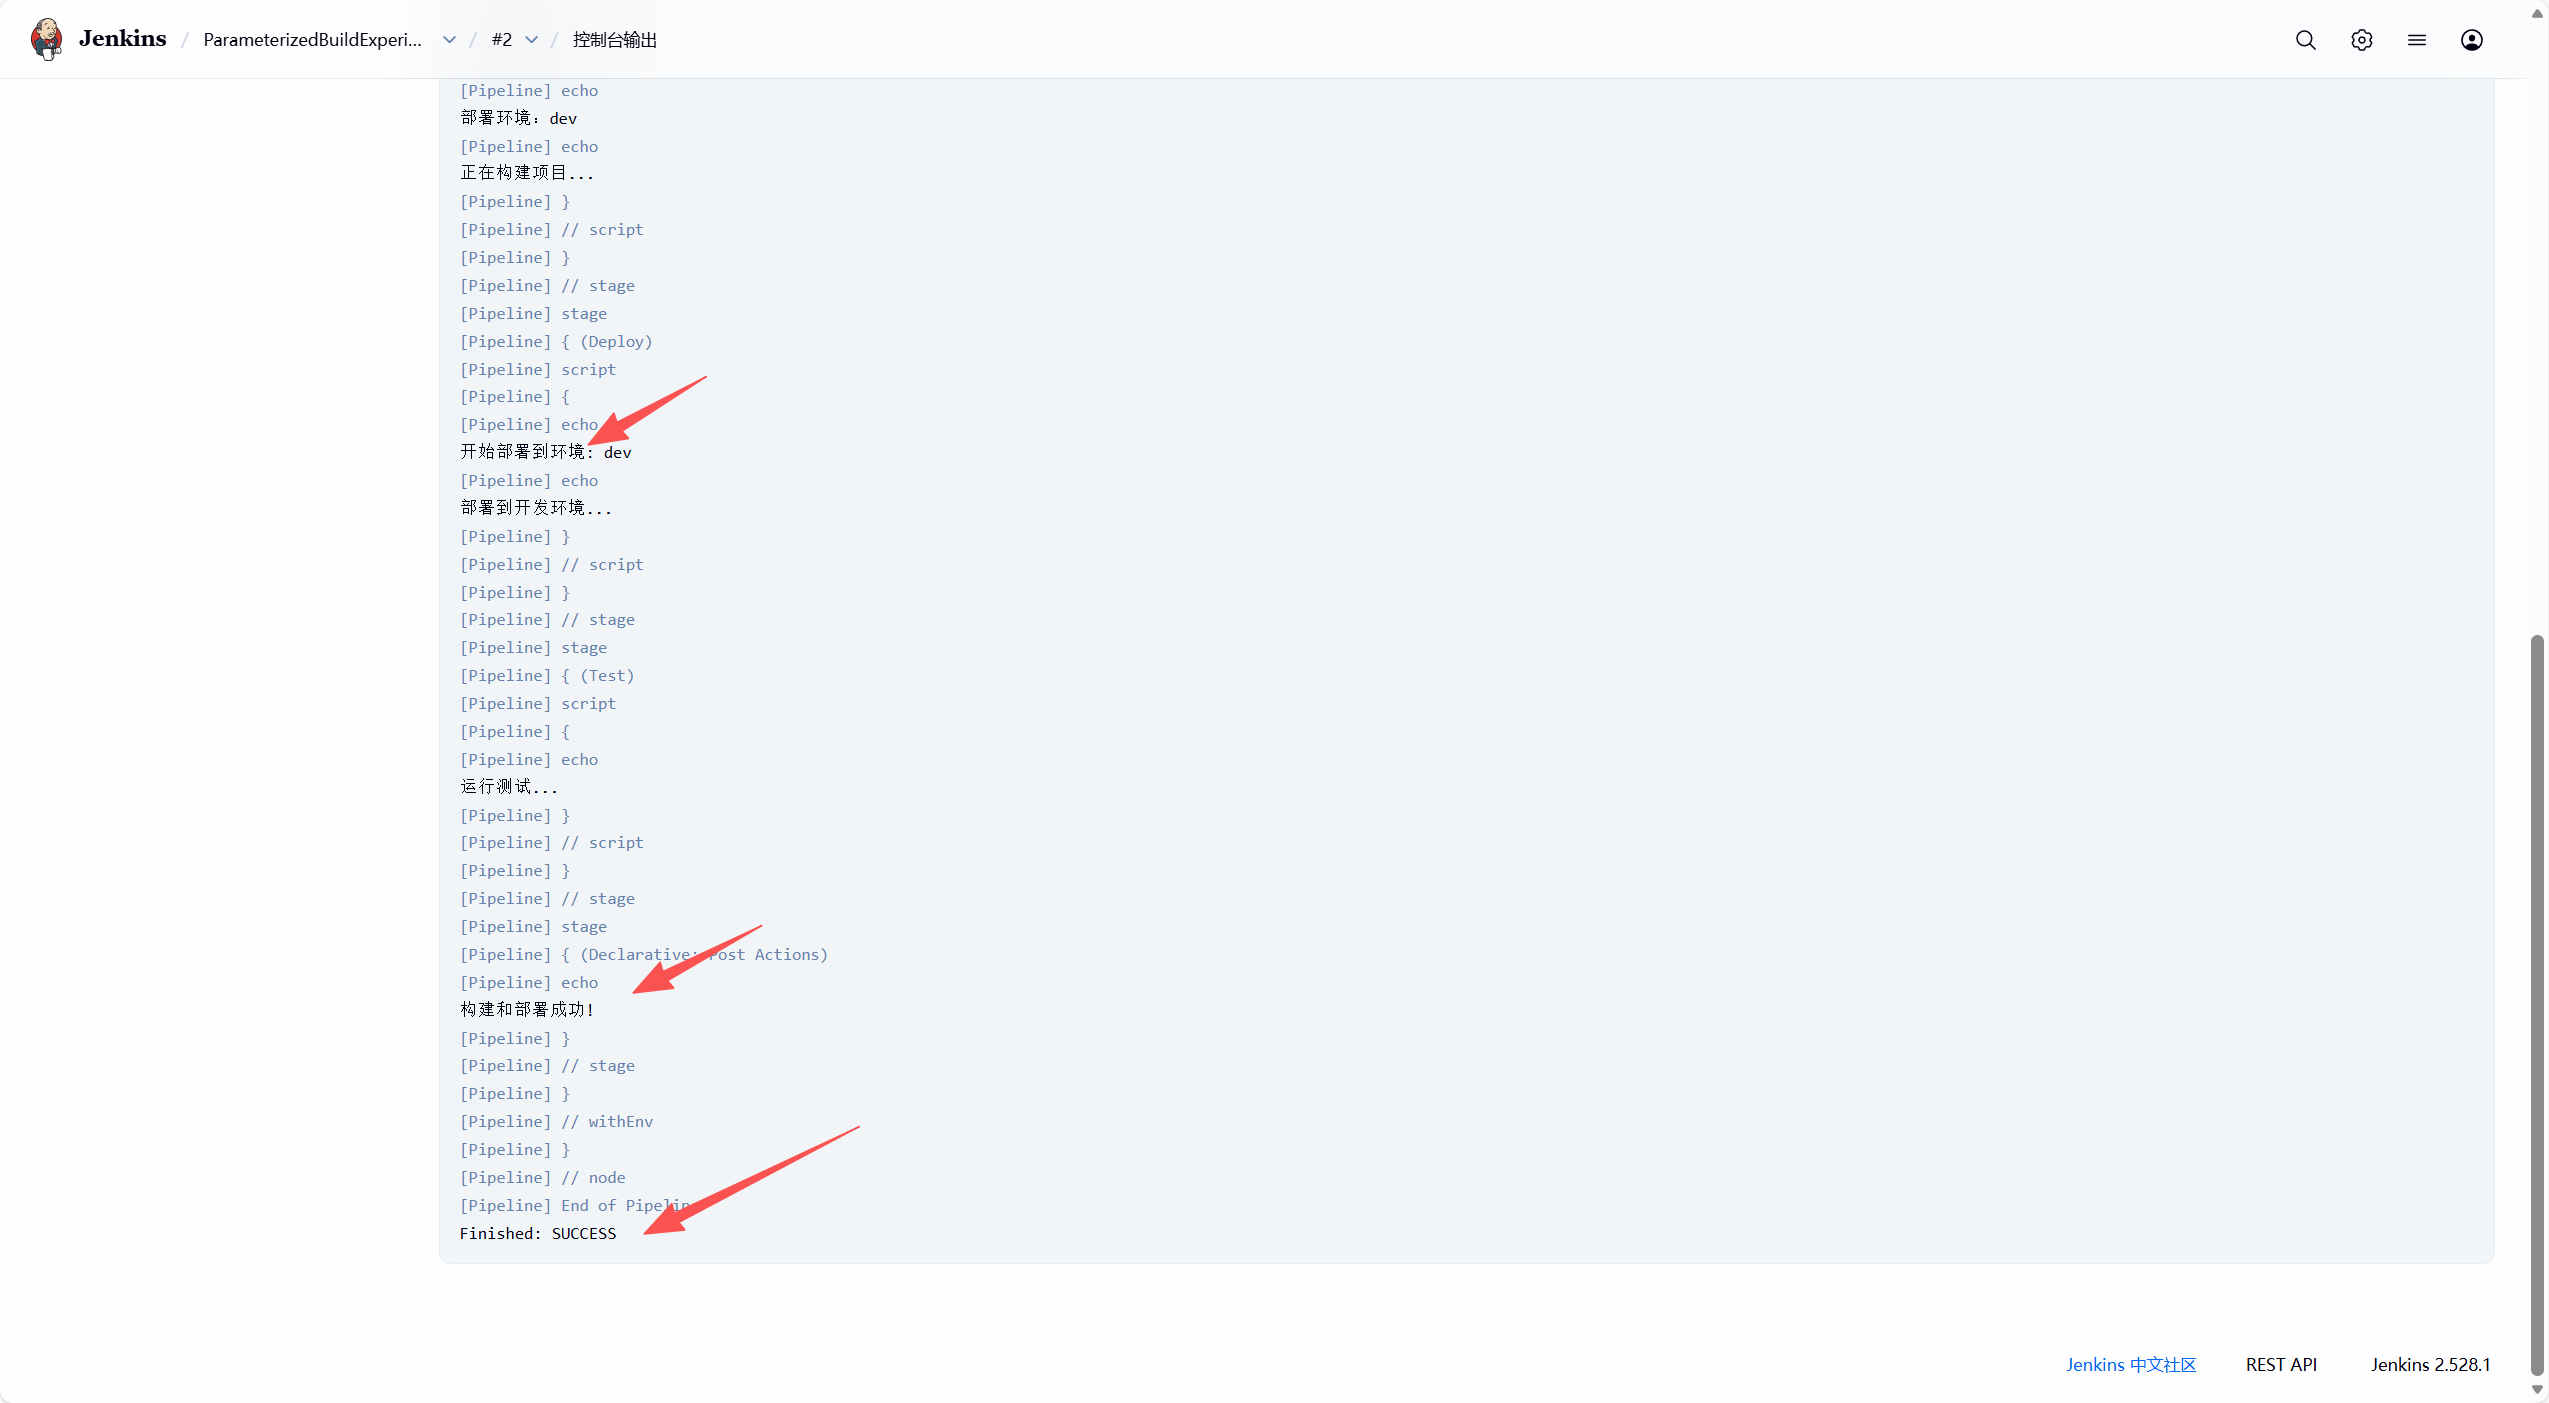
                    echo "开始部署到环境: ${params.ENVIRONMENT}"
                    if (params.ENVIRONMENT == 'dev') {
                        echo "部署到开发环境..."
                    } else if (params.ENVIRONMENT == 'staging') {
                        echo "部署到预生产环境..."
                    } else {
                        echo "部署到生产环境..."
                    }
                    // 在实际情况下,你可以在这里执行部署脚本
                    // 例如:
                    // sh "./deploy.sh ${params.ENVIRONMENT} ${params.VERSION}"
                }
            }
        }

        stage('Test') {
            steps {
                script {
                    echo "运行测试..."
                    // 假设执行测试脚本
                    // sh "mvn test"
                }
            }
        }
    }

    post {
        success {
            echo "构建和部署成功!"
        }
        failure {
            echo "构建或部署失败."
        }
    }
}
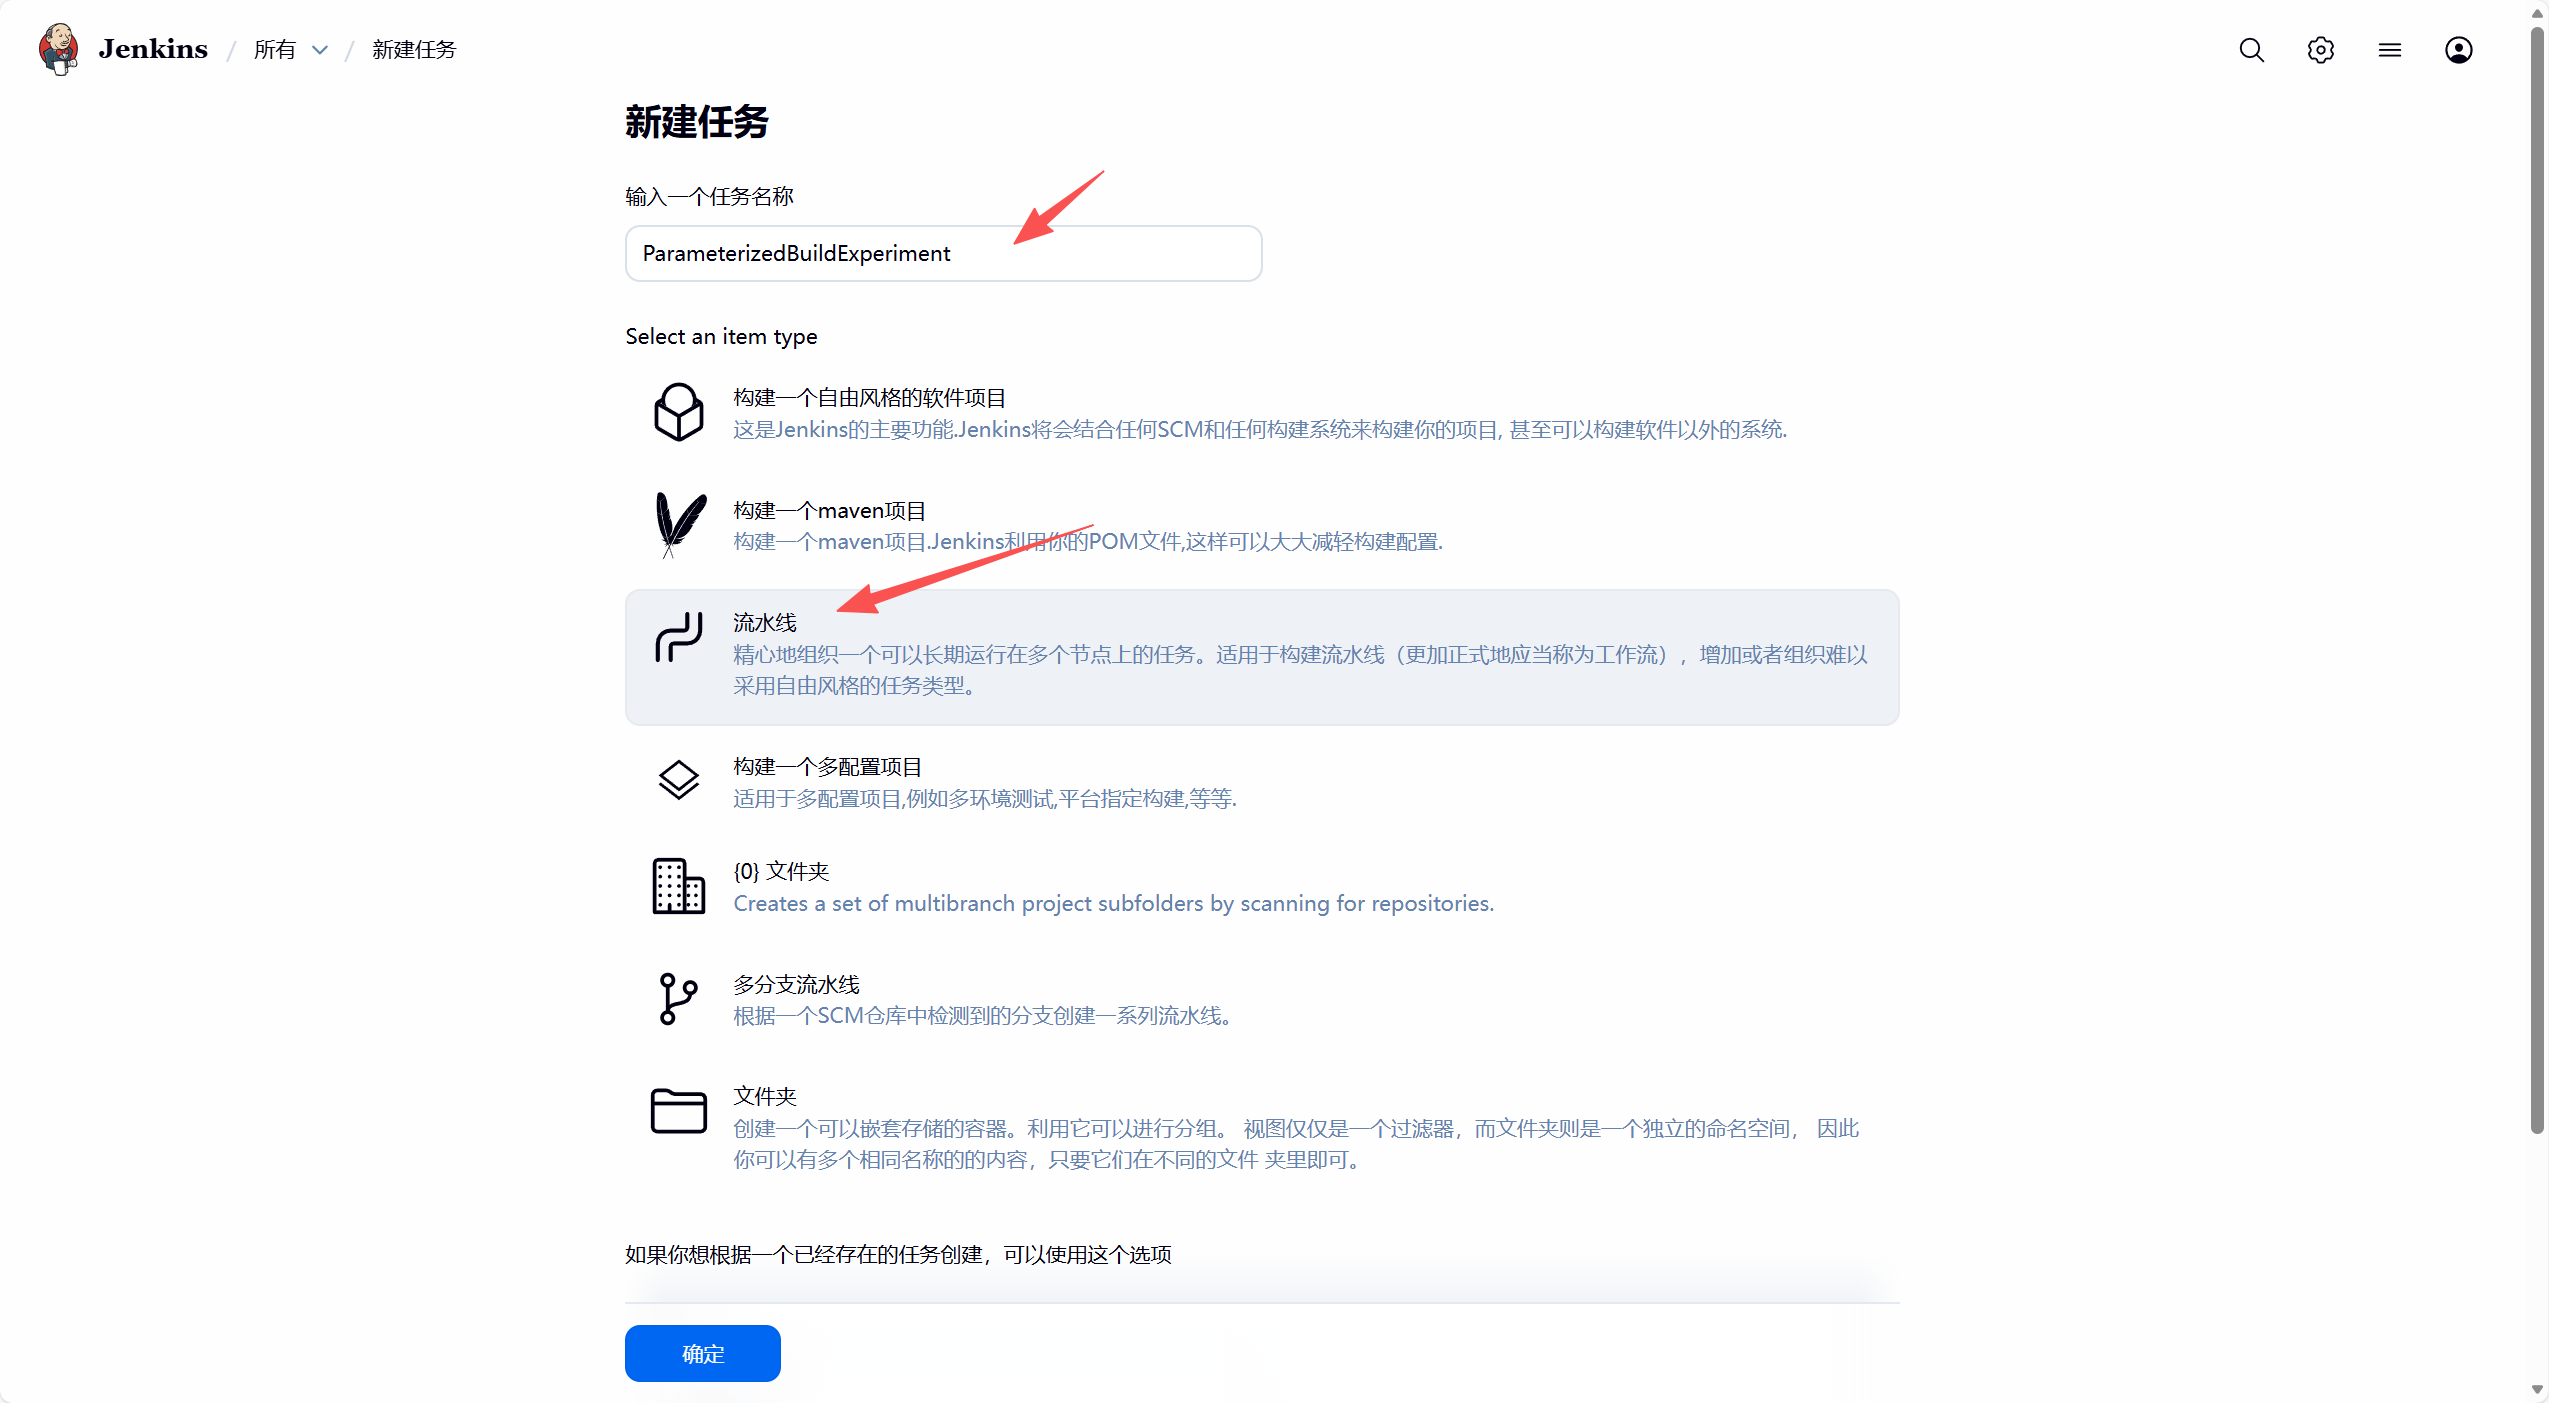
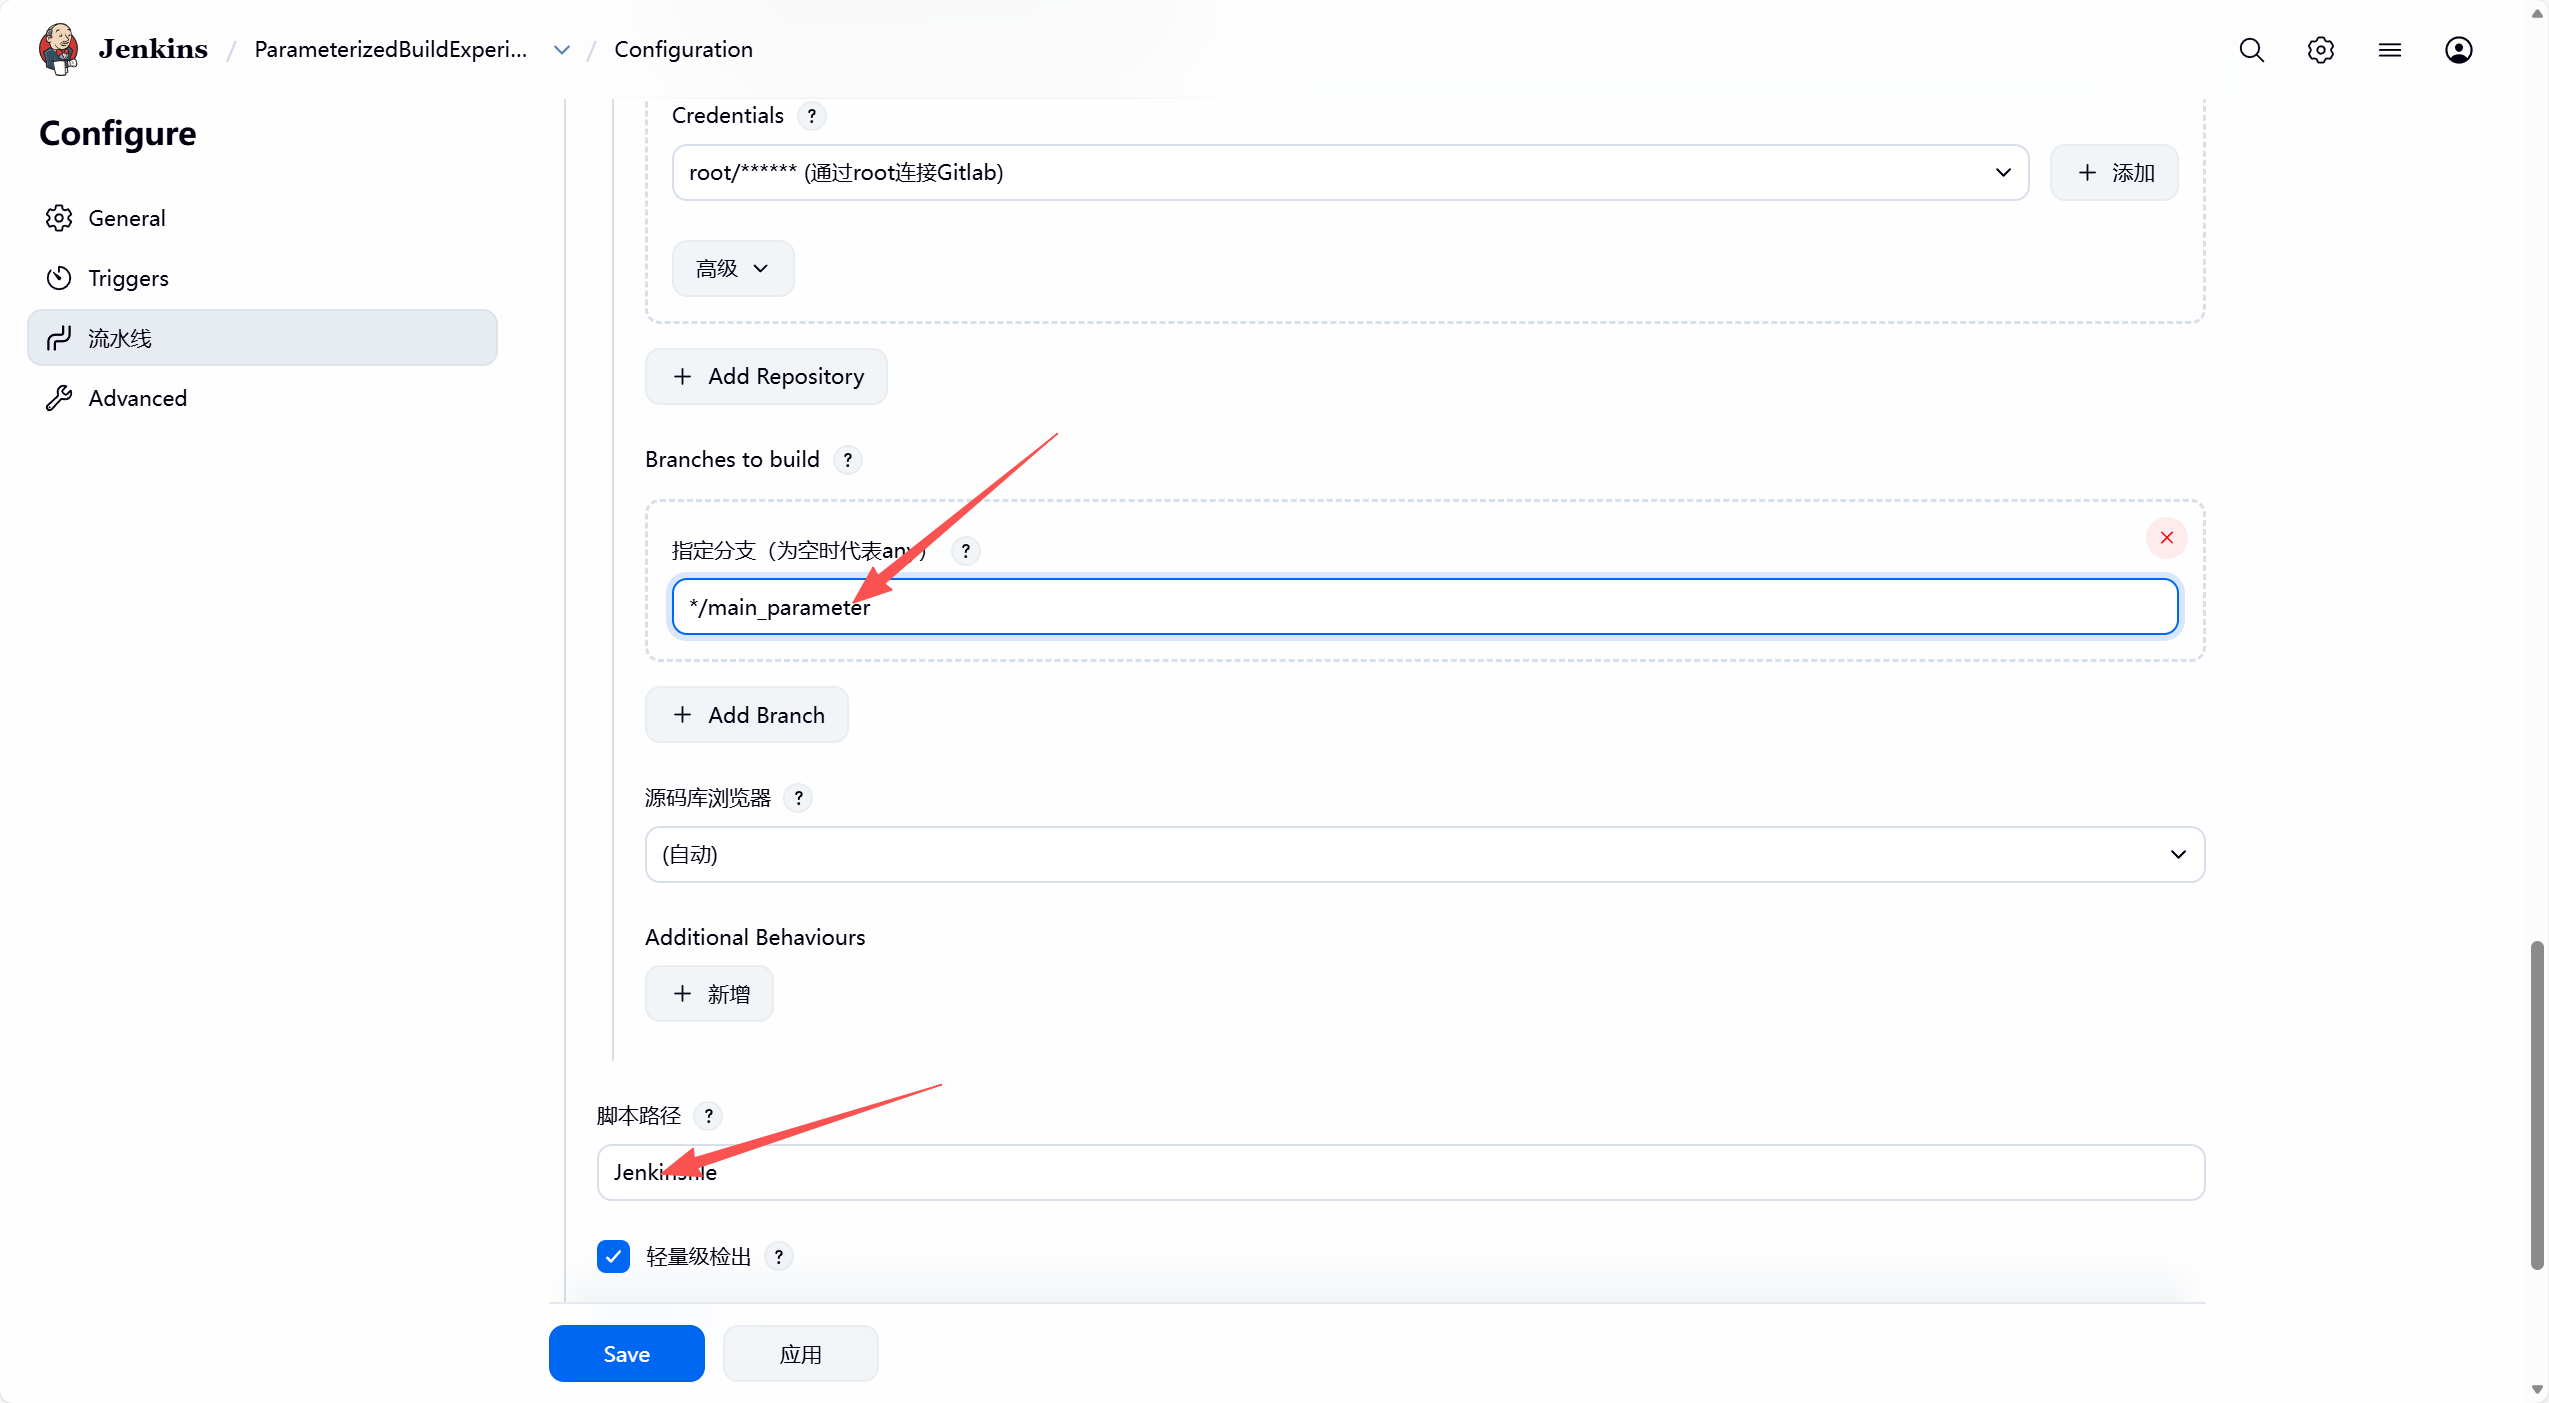
2. 创建参数化构建Job

腾讯云面向开发者汇聚海量精品云计算使用和开发经验,营造开放的云计算技术生态圈。
更多推荐
 28
 0
- 0


 已为社区贡献1条内容

所有评论(0)