02-原生开发记录
1. 团队开发
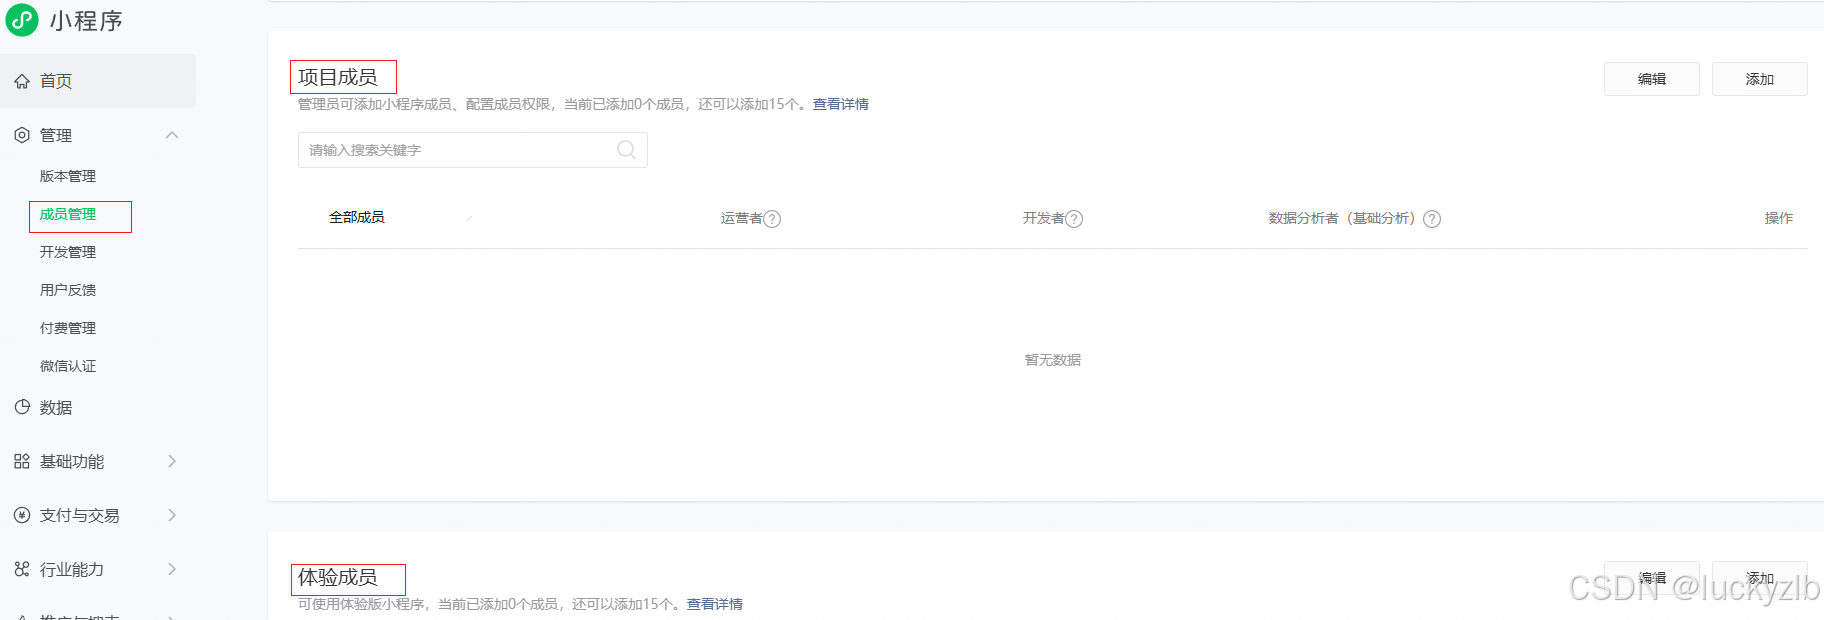
团队开发小程序时一般不再使用个人的 AppID,而使用企业 AppID 时做为开发人员需要先申请权限
1.1 申请权限
申请开发权限:提供给开发者
- 提供个人微信号
- 获取团队小程序的 AppID
- 创建/导入小程序
申请体验权限:提供给测试、产品、客户等
- 后台添加,提供个人微信号
- 扫码申请
1.2 初始开发环境
优化目录结构
- miniprogramRoot: 小程序的根目录
- setting.packNpmManually: 自定义构建 npm
- setting.packNpmRelationList: 构建结果和 package.json
启用 less/sass
- setting.useCompilerPlugins 启用 less/sass
配置 VS Code
- Prettier – Code formatter
- WXML – Language Service
- 微信开发小程序
- …其它
- 将涉及业务的代码独立到单独的目录当中,非业务的文件和目录直接放在根目录中,调整后小程序运行会报错,需要修改
project.config.json中的配置项:
{
  "setting": {
    "packNpmManually": true,
    "packNpmRelationList": [
      {
        "miniprogramNpmDistDir": "业务代码所在目录",
        "packageJsonPath": "package.json的路径"
      }
    ]
  },
  "miniprogramRoot": "业务代码所在目录"
}
实际开发使用
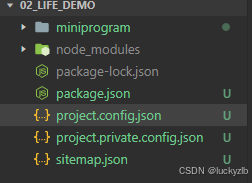
"miniprogramRoot": "/miniprogram",
  "setting": {
    "packNpmRelationList": [
        {
            "miniprogramNpmDistDir": "/miniprogram",
            "packageJsonPath": "/package.json"
        }
    ],
    "packNpmManually": true
  },
之后
npm i @vant/weapp -S --production===》工具===》构建即可
- 启用 less/sass:通过 less/sass 可以更好的管理 css 样式,通过
project.config.json可以启用对 less/sass 的支持。
{
  "setting": {
    "useCompilerPlugins": ["sass"]
  }
}
然后将
.wxss文件后缀改换成.scss即可。
$red:red;
.container {
  color: $red;
 }
- 配置 VS Code:小程序开发者工具的代码编辑器功能相较 VS Code 是有些不足的(其实小程序开发者工具是基于 VS Code 开发的),因此为了提高代码编写的效率,编写小程序代码时使用 VS Code 调试小程序仍然用小程序开发者工具。安装用于小程序开发的一些插件:
- WXML - Language Service 小程序代码语法高亮和提示
{
  "minapp-vscode.wxmlFormatter": "prettier",
  "minapp-vscode.prettier": {
    "useTabs": false,
    "tabWidth": 2,
    "printWidth": 80,
    "singleQuote": false
  },
  "[wxml]": {
    "editor.defaultFormatter": "qiu8310.minapp-vscode"
  },
  "minapp-vscode.formatMaxLineCharacters": 80,
}
- Prettier - Code Formatter 格式化代码
2. 项目开发
每次
npm i 包的时候都要到微信小程序中重新构建npm
2.1 基础封装
2.1.1 通用工具
将所有通用的工具方法封装到 utils/utils.js 中
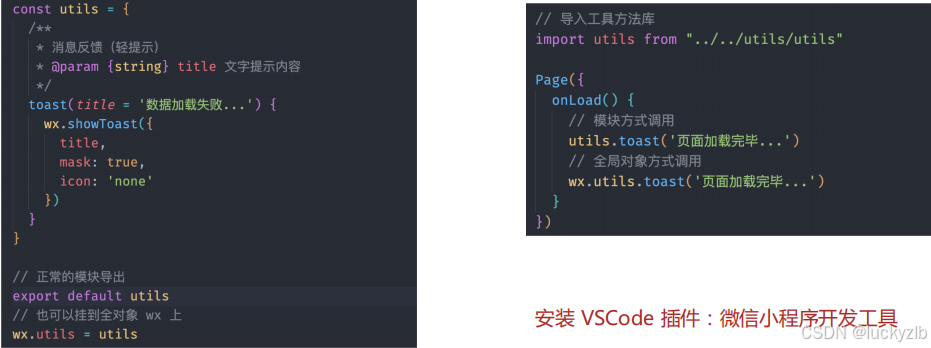
const utils = {
    /**
     * 轻提示
     * @param {string} title 提示内容
     */
    toast(title='数据加载失败'){
        wx.showToast({
          title,
          icon: 'none',
          mask: true,
        })
    }
}
// 模块导出
export default utils
// 挂载到全局对象wx
wx.utils = utils
模块导出使用
import utils from "../../utils/utils"
Page({
     async onLoad(){
        utils.toast('hello world')
        // wx.utils.toast('hello world')
        const res = await wx.http.get('/xx')
        console.log(res);

    }

})
2.1.2 网络请求
基础封装 - 网络请求
小程序 API wx.request 不支持返回 Promise、拦截器等功能,需要开发者进行二次封装,也可以使用第三方的封装好的模块。
npm install wechat-http
注:安装完成后还必须要构建 npm后才可以使用。
接下来介绍 wechat-http 模块的使用,其用法与 axios 类似:
http.baseURL配置接口基础路径http.get以GET方法发起请求http.post以POST方法发起请求http.put以PUT方法发起请求http.delete以DELETE方法发起请求http.intercept配置请求和响应拦截器http本身做为函数调用也能用于发起网络请求
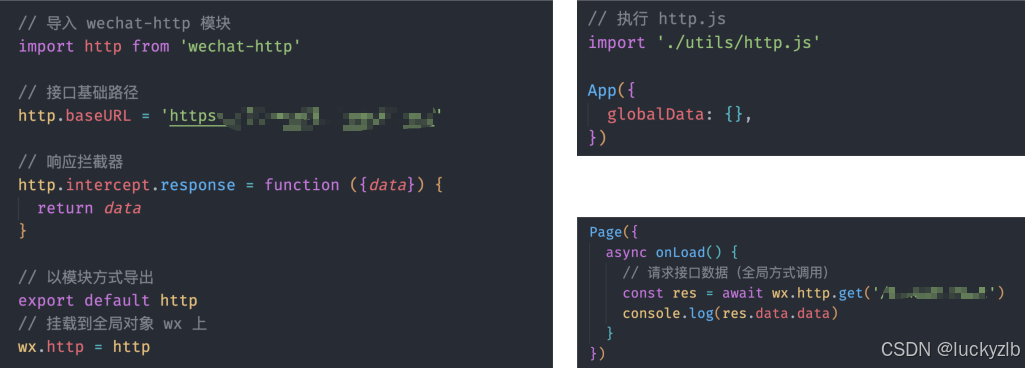
新建 utils/http.js 文件
import http from 'wechat-http'
// 基础路径
http.baseURL = 'https://xxx'
// 响应拦截器
http.intercept.response = function ({data}) {
    return data
  }

// 挂载到全局对象
wx.http = http
挂载全局的话要在app.js导入,之后可以在页面直接使用
app.js
import './utils/utils.js'
import './utils/http.js'
App({
  globalData: {},
})
在页面直接使用
import utils from "../../utils/utils"
Page({
     async onLoad(){
        utils.toast('hello world')
        // wx.utils.toast('hello world')
        const res = await wx.http.get('/xxx')
        console.log(res);

    }

})
2.2 项目逻辑 - 没有token跳转登录页
- 大致思路
设置全局组件authorization包裹需要token页面,设置插槽<slot wx:if="{{isLogin}}">{{需要token页面}}</slot>有token则正常显示包裹中的内容,没有token则进行跳转到登录页面。
token使用应用js进行获取,主要代码实现如下:
- page.js
import './utils/utils.js'
import './utils/http.js'
App({
  globalData: {},
  // 挂载一个全局的token
  onLaunch () {
    const toekn = this.getToken()
    if(toekn){
      this.token = toekn
    }
  },
  getToken(){
    return wx.getStorageSync('token')
  }
})
- 组件authorization的js
const app = getApp()
Component({

  /**
   * 组件的属性列表
   */
  properties: {

  },

  /**
   * 组件的初始数据
   */
  data: {
    isLogin: false
  },
  lifetimes: {
    attached() {

      // 判断是否含有token,没有则进行跳转
      const token = !!app.token
      this.setData({
          isLogin: token
        })
      if (!token) {
         console.log('没有token进行跳转');
        wx.redirectTo ({
          url: '/pages/login/index',
        })
      }
  },
  },
  /**
   * 组件的方法列表
   */
  methods: {

  }
})
2.3 项目逻辑 - 短信验证码(表单验证 + 调用接口)
需要下载包
npm install wechat-validate然后进行验证使用
将插件导入到项目中:
behaviors将插件注入到页面中rules由插件提供的属性,用来定义数据验证的规则(类似于 Element UI)validate由插件提供的方法,根据rules的规则来对数据进行验证
- js书写逻辑代码
import wxValidate from 'wechat-validate'
Page({
  data: {
    countDownVisible: false,
    mobile:'',
    code:''// 实际开发中验证码是需要使用发送到用户手机
  },
  behaviors: [wxValidate],
  rules: {
    mobile: [
      { required: true, message: '请输入手机号' },
      { pattern: /^1[3456789]\d{9}$/, message: '请输入正确的手机号' }
    ]
  },
  getSMSCode(){
    const { valid, message}= this.validate('mobile')
    console.log(valid,message,'<== 验证手机号');
    if(!valid){
      return wx.utils.toast(message)
    }
    // 发送验证码
    wx.http.get('/xxx', { mobile: this.data.mobile })
    .then(res => {
      console.log(res,'<==发送短信验证码');
      if (res.code === 10000) {
        this.setData({
          code:res.data.code
        })
        wx.utils.toast('获取验证码成功')
      }
    }).catch(err => {
      wx.utils.toast(err.message)
    })
    // 用户点击获取验证码
    this.setData({
      countDownVisible: true,
    })
  }
})
- 用户填写的手机号
mobile通过简易双向数据绑定来获取:
<view class="login-form">
  <van-cell-group border="{{false}}">
    <van-field
    placeholder="请输入手机号码"
    type="number"
    use-button-slot
    model:value="{{mobile}}"
    placeholder-style="color: #979797">
      <view class="button-slot" slot="button">
        <text wx:if="{{!countDownVisible}}" bind:tap="getSMSCode">获取验证码</text>
        <van-count-down wx:else use-slot time="{{ 60000 }}" bind:change="countDownChange">
          <text>{{ timeData.seconds }}秒后重新获取</text>
        </van-count-down>
      </view>
    </van-field>
    <van-field model:value="{{code}}" placeholder="请输入6位验证码" placeholder-style="color: #979797" />
  </van-cell-group>
  <view class="login-tips">未注册手机号经验证后将自动注册</view>
</view>
2.4 项目逻辑 - 登录/注册
- 验证所有字段,
this.validate()不传递参数的话均有验证,调用接口- 存储登录状态(token),应用实例和本地均有存储
- 重定向(跳转页面),这里需要注意:
获取页面路径调用页面栈获取最后一个路由当作参数传递之后登录完毕则当作跳转参数
- 登录index.js核心代码
import wxValidate from 'wechat-validate'
const app = getApp()
Page({
  data: {
    countDownVisible: false,
    mobile:'13212345678',
    code:'',
    redirectUrl:''
  },
  onLoad({redirectUrl}){
    console.log(redirectUrl)
    if(redirectUrl){
     this.setData({
        redirectUrl
     })
    }
  },
  behaviors: [wxValidate],
  rules: {
    mobile: [
      { required: true, message: '请输入手机号' },
      { pattern: /^1[3456789]\d{9}$/, message: '请输入正确的手机号' }
    ],
    code:[
      { required: true, message: '请输入验证码' },
      { pattern: /^\d{6}$/, message: '请输入正确的验证码' }
    ]
  },

  countDownChange(ev) {
    this.setData({
      timeData: ev.detail,
      countDownVisible: ev.detail.minutes === 1 || ev.detail.seconds > 0,
    })
  },
  // 登录
  loginHandle(){
    // 验证
    // this.validate()不传递参数的话均有验证
    if(!this.validate()) return wx.utils.toast('请输入正确的手机号或者验证码')
    wx.http.post('/xxx', { mobile: this.data.mobile, code: this.data.code })
    .then(res => {
      console.log(res,'<=== 登录输出');
      if (res.code === 10000) {
        wx.utils.toast('登录成功')
        // 存储本地 + 应用实例
        app.setToken('token',res.data.token)
        app.setToken('refreshToken',res.data.refreshToken)
        wx.redirectTo({
          url: this.data.redirectUrl || '/pages/index/index'
        })
      }
    })
    .catch(err => {
      wx.utils.toast('登录失败稍后重试,失败原因:' + err.message)
    })
  }
})
- 应用实例app.js核心代码
import './utils/utils.js'
import './utils/http.js'
App({
  globalData: {},
  // 挂载一个全局的token
  onLaunch () {
    const toekn = this.getToken()
    if(toekn){
      this.token = toekn
    }
  },
  getToken(){
    return wx.getStorageSync('token')
  },
  setToken(key,token){
    this[key] = token
    wx.setStorageSync(key,token)
  }
})
- 进行跳转需要传递参数,所以需要进行跳转的页面需要把路由当作参数进行传递
lifetimes: {
    attached() {
      // 获取页面路径调用页面栈获取最后一个路由当作参数传递之后登录完毕则当作跳转参数
      const pages = getCurrentPages()
      const { route } = pages[pages.length - 1]

      // 判断是否含有token,没有则进行跳转
      const token = !!app.token
      this.setData({
          isLogin: token
        })
      if (!token) {
         console.log('没有token进行跳转');
        wx.redirectTo ({
          url: '/pages/login/index?redirectUrl=/' + route,
        })
      }
  },
  },
2.5 项目逻辑 - 头像和昵称
- 请求接口需要
携带token所以要优化请求拦截器
import http from 'wechat-http'
// 基础路径
http.baseURL = 'https://xxx'
// 请求拦截器
http.intercept.request = function (options) {
  const defaultHeader = {}
  defaultHeader.Authorization = 'Bearer ' +  getApp().token
  options.header = Object.assign({},defaultHeader, options.header)
  return options
}
// 响应拦截器
http.intercept.response = function ({data}) {
    return data
  }

// 挂载到全局对象
wx.http = http
- 修改头像和昵称主要代码
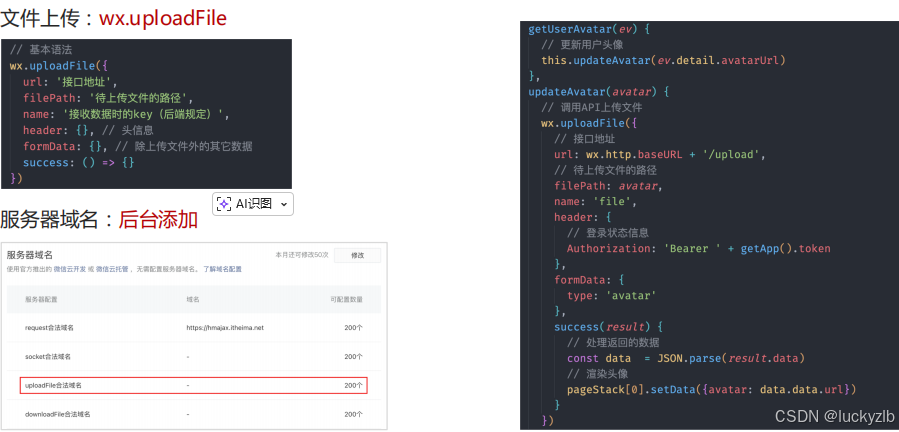
<authorization>
  <view class="profile">
    <van-cell center title="头像">
      <van-icon slot="right-icon" name="arrow" size="16" color="#c3c3c5" />
      <button class="button" size="mini" hover-class="none" open-type="chooseAvatar" bind:chooseavatar="chooseAvatarHandle">
        <image class="avatar" src="{{avatarUrl}}"></image>
      </button>
    </van-cell>
    <van-field  model:value="{{ nickName }}" center label="昵称" bind:blur="nicknameHandle" input-align="right" type="nickname" placeholder="请输入昵称" />
  </view>
</authorization>
// pages/profile/index.ts
// 使用页面栈实例
const pageStack = getCurrentPages()
Page({

  /**
   * 页面的初始数据
   */
  data: {
      avatarUrl:null,
      nickName:null
  },
  onShow(){
      wx.http.get('/userInfo').then(res=>{
        console.log(res,'<==用户信息');
        this.setData({
          avatarUrl:res.data.avatar,
          nickName:res.data.nickName
        })
      })
  },
  /**
   * 修改昵称
   * @param {string} ev
   */
  nicknameHandle(ev){
    console.log(ev.detail.value,'<===修改昵称')
    if(!ev.detail.value){
      wx.utils.toast('昵称不能为空')
      return
    }
    wx.http.put('/userInfo', {
      nickName: ev.detail.value
    }).then(res => {
     console.log(res);
     if(res.code === 10000){
       wx.utils.toast('修改成功')
       pageStack[0].setData({
         ['userInfo.nickName']:ev.detail.value
       })
     }
    })
  },
  /**
   * 修改头像
   * @param {*} ev
   */
  chooseAvatarHandle(ev){
    console.log(ev.detail,'<===修改头像');
    wx.uploadFile({
      url: wx.http.baseURL + '/upload', //仅为示例,非真实的接口地址
      // 待上传文件路径
      filePath: ev.detail.avatarUrl,
      name: 'file',
      header:{
        'Authorization': 'Bearer ' +  getApp().token
      },
      formData: {
        'type': 'avatar'
      },
      success (res){
        const data = JSON.parse(res.data)
        console.log(data,'<=== 上传头像');
        if(data.code === 10000){
          getCurrentPages().pop().setData({
          avatarUrl:data.data.url
        })
         pageStack[0].setData({
         ['userInfo.avatar']:data.data.url
       })
       wx.utils.toast('修改头像成功')
        }

      }
    })
  }
})
2.6 项目逻辑 - 无感token刷新和登录
在工具类
http.js中进行设置,当token过期则使用refreshToken进行请求接口刷新token并重新请求端口,当refreshToken过期则跳转到登录页面
- http.js工具类实现核心代码如下
import http from 'wechat-http'
// 基础路径
http.baseURL = 'https://xxx'
// 请求拦截器
http.intercept.request = function (options) {
  const defaultHeader = {}
  defaultHeader.Authorization = 'Bearer ' +  getApp().token
  options.header = Object.assign({},defaultHeader, options.header)
  return options
}
// 响应拦截器
http.intercept.response = function ({data,config}) {
  // 如果状态码是401 则表明token失效,则使用刷新token即refreshToken重新向后端获取新的token
  if(data.code === 401) {
    // 判断使用的是否是刷新token是的话只能跳转到登录重新登录
    if(config.url.includes('/refreshToken') ) {
      // 保存当前页面 这样的话登录完成之后可以直接跳转
      const route = getCurrentPages().pop().route
      wx.utils.toast('登录失效,请重新登录')
      return wx.redirectTo({
        url: `/pages/login/index?redirectUrl=/${route}`,
      })
    }
    const refreshToken = getApp().refreshToken
    if(refreshToken) {
      http({
        url: '/refreshToken',
        method: 'POST',
        header: {
          Authorization : 'Bearer ' +  refreshToken
        }
      }).then(res => {
        console.log(res,'<== token过期调用刷新token');
        getApp().setToken('token',res.data.token)
        getApp().setToken('token',res.data.token)
        // 无感刷新 重新请求接口方法使用新的token
        console.log(config,'<== 无感刷新config');
        config = Object.assign(config,{
          // 使用新的token进行请求
          header: {
            Authorization : 'Bearer ' +  res.data.token
          }
        })
        //继续原来的请求
        return http(config)
      })
    }
  }
    return data
  }

// 挂载到全局对象
wx.http = http
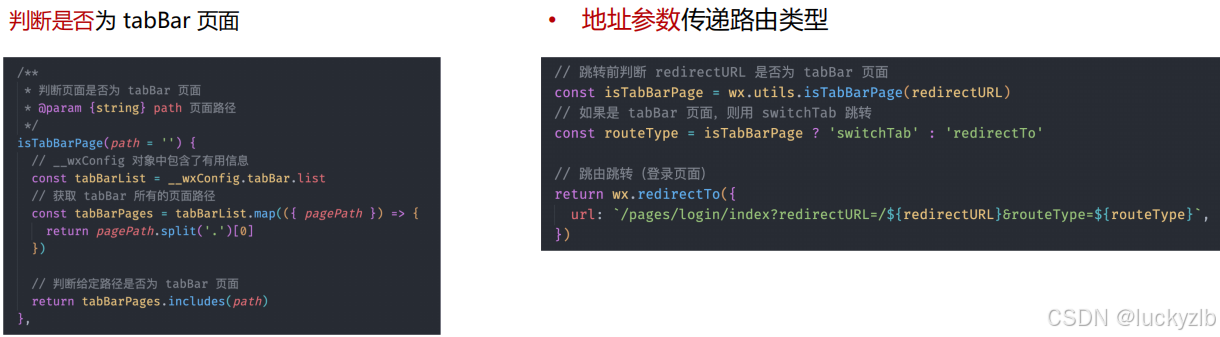
2.6.1 bug - tabBar 的页面只能 wx.switchTab 跳转
- 判断是否是是tabBar页面
- 修改参数传递地址类型
2.7 项目逻辑 - 位置服务
位置服务(LBS)是基于用户的位置来提供服务的技术,通过要配合第三方的服务来实现,如腾讯地图、高德地图、百度地图等,在本项目采用的是腾讯的位置服务。
申请使用腾讯位置服务需要按如下步骤操作:
- 注册账号
- 创建应用
- 生成 key
- 小程序管理后台添加合法域名
步骤参考视频的介绍和官方文档来操作,在此就不缀述了。
在使用位置服务的时候需要提供用户的位置(经纬度),关于用户的位置小程序提供了 API ,在使用获取位置的 API 时需要先在
app.json中进行声明,并在小程序管理后进行申请,相关限制请参考文档说明。
在这里插入代码片{
  "requiredPrivateInfos": [
    "getLocation",
    "chooseLocation"
  ],
  "permission": {
    "scope.userLocation": {
      "desc": "你的位置信息将用于小程序位置接口的效果展示"
   }
}
调用
wx.getLocation()获取用户当前位置,该 API 支持返回 Promise
调用
wx.chooseLocation会打开地图由用户自由选择一个位置后返回该位置的经纬度,该 API 支持返回
- 导入位置服务微信小程序 Javascript SDK,它是官方封装好的一个
.js文件,只需要放到一个位置即可比如:miniprogram\libs\qqmap-wx-jssdk.min.js - 调用 SDK 提供的方法
reverseGeocoder实现逆地址解析的功能,逆地址解析是指根据经纬度来获取具体的地址信息。 - 调用
wx.chooseLocation重新选择位置
import QQMapWX from '../libs/qqmap-wx-jssdk.min.js'
const qqmapsdk = new QQMapWX({
  key: '自己的key'
})
export default qqmapsdk
- 调用 SDK 提供的方法
search实现搜索周边小区的功能
import qqmap from '../../../utils/qqmap'
Page({

  /**
   * 页面的初始数据
   */
  data: {
    houseList:[],
    address:''
  },
  /**
   * 获取房屋列表
   */
   async getLocation(latitude,longitude,name){
    if(!latitude || !longitude){
      const res= await wx.getLocation()
      latitude = res.latitude
      longitude = res.longitude
    }
      console.log(latitude,longitude,'<==== 经纬度');
      wx.showLoading({
        title: '加载中',
      })
      qqmap.reverseGeocoder({
        location: [latitude,longitude].join(','),
        success:(res)=>{
          console.log(res,'<==== 地址');
          if(name){
            this.setData({
              address:name
            })
          }else{
            this.setData({
              address:res.result.address
            })
          }
        },
        fail:(err)=>{
          wx.utils.toast(err.message)
        }
      }),
      qqmap.search({
         keyword: '小区住宅',  //搜索关键词
         location: [latitude,longitude].join(','),
         page_size: 20,
         success:(res)=>{
          console.log(res,"<==== 小区住宅搜索结果");
          this.setData({
            houseList:res.data
          })
         },
         fail:(err)=>{
          this.setData({
            houseList:[]
          })
           wx.utils.toast(err.message)
         },
         complete:()=>{
          wx.hideLoading()
         }
        })
    },
    /**
     * 重新定位
     */
    async refreshChoose(){
      const { latitude ,longitude } = await wx.getLocation()
      const res = await wx.chooseLocation({latitude,longitude})
      console.log(res,'<=== 重新定位');
      await this.getLocation(res.latitude,res.longitude,res.name)
      console.log(res.name,'<==选择地址名称');

    },
  /**
   * 生命周期函数--监听页面加载
   */
  onLoad() {
    this.getLocation(null,null,null)
  }
})
2.8 业务逻辑 - 上传图片并保存
用户身份证照片的上传会用到
wx.chooseMedia这个 API 让用户来打开相册或拍照选择一张照片后再调用wx.uploadFile实现图片的上传,上传图片这部分逻辑与之前上传用户头像是一样的,调用的接口也一样。
wx.chooseMedia的基本用法:
count允许1次选择几张图片mediaType允许选择文件的类型,图片或视频compressed图片或视频是否压缩- 支持返回 Promise
// house_pkg/pages/form/index.js
Page({
  onLoad({point, building, room}) {
    // 获取房屋信息数据
    this.setData({point, building, room})
  },
  async uploadPicture() {
    // 打开相册或拍照
    const media = await wx.chooseMedia({
      count: 1,
      mediaType: ['image'],
      sizeType: ['compressed'],
    })
  }
})
- 在获取到一张图片后调用
wx.uploadFile将图片上传到服务器:
// house_pkg/pages/form/index.js
Page({
	onLoad({point, building, room}) {
    // 获取房屋信息数据
    this.setData({point, building, room})
  },
  // 上传身份证照片
  async uploadPicture(ev) {
    // 区分用户上传的是正面或反面
    const type = ev.mark.type

    try {
      // 打开相册或拍照
      const media = await wx.chooseMedia({
        count: 1,
        mediaType: ['image'],
        sizeType: ['compressed'],
      })

      // 调用 API 上传图片
      wx.uploadFile({
        url: wx.http.baseURL + '/upload',
        filePath: media.tempFiles[0].tempFilePath,
        name: 'file',
        header: {
          Authorization: 'Bearer ' + getApp().token,
        },
        success: (result) => {
          // 处理返回的 json 数据
          const data = JSON.parse(result.data)
          // 判断接口是否调用成功
          if (data.code !== 10000) return wx.utils.toast('上传图片失败!')
          // 渲染数据
          this.setData({[type]: data.data.url})
        },
      })
    } catch (err) {
      // 获取图片失败
      console.log(err)
    }
  },
})
- 上述的代码中通过
ev.mark.type来区分用户上传的是身份证的正确还是反面。

腾讯云面向开发者汇聚海量精品云计算使用和开发经验,营造开放的云计算技术生态圈。
更多推荐
 9
9 0
0- 0


 已为社区贡献2条内容

所有评论(0)