【Java-SpringBoot】-腾讯云COS对象存储-文件上传
本文介绍了如何在SpringBoot项目中集成腾讯云COS对象存储实现文件上传功能。主要内容包括:1) 腾讯云账号注册与实名认证;2) 创建存储桶并配置访问权限;3) 生成API密钥并配置环境变量;4) 在SpringBoot项目中引入COS SDK依赖;5) 实现文件上传工具类,包含配置注入和上传逻辑。文章提供了详细的步骤说明和代码示例,帮助开发者快速实现文件上传功能,同时强调了密钥安全的重要性
【Java-SpringBoot】-腾讯云COS对象存储-文件上传
一、前置准备
1.1 注册腾讯云账号
点击进入:腾讯云官网
腾讯云COS对象存储:快速入门(官方文档)
【注意】 如果图片小看不清,就把图片拖拽到浏览器标签栏,用浏览器打开查看。
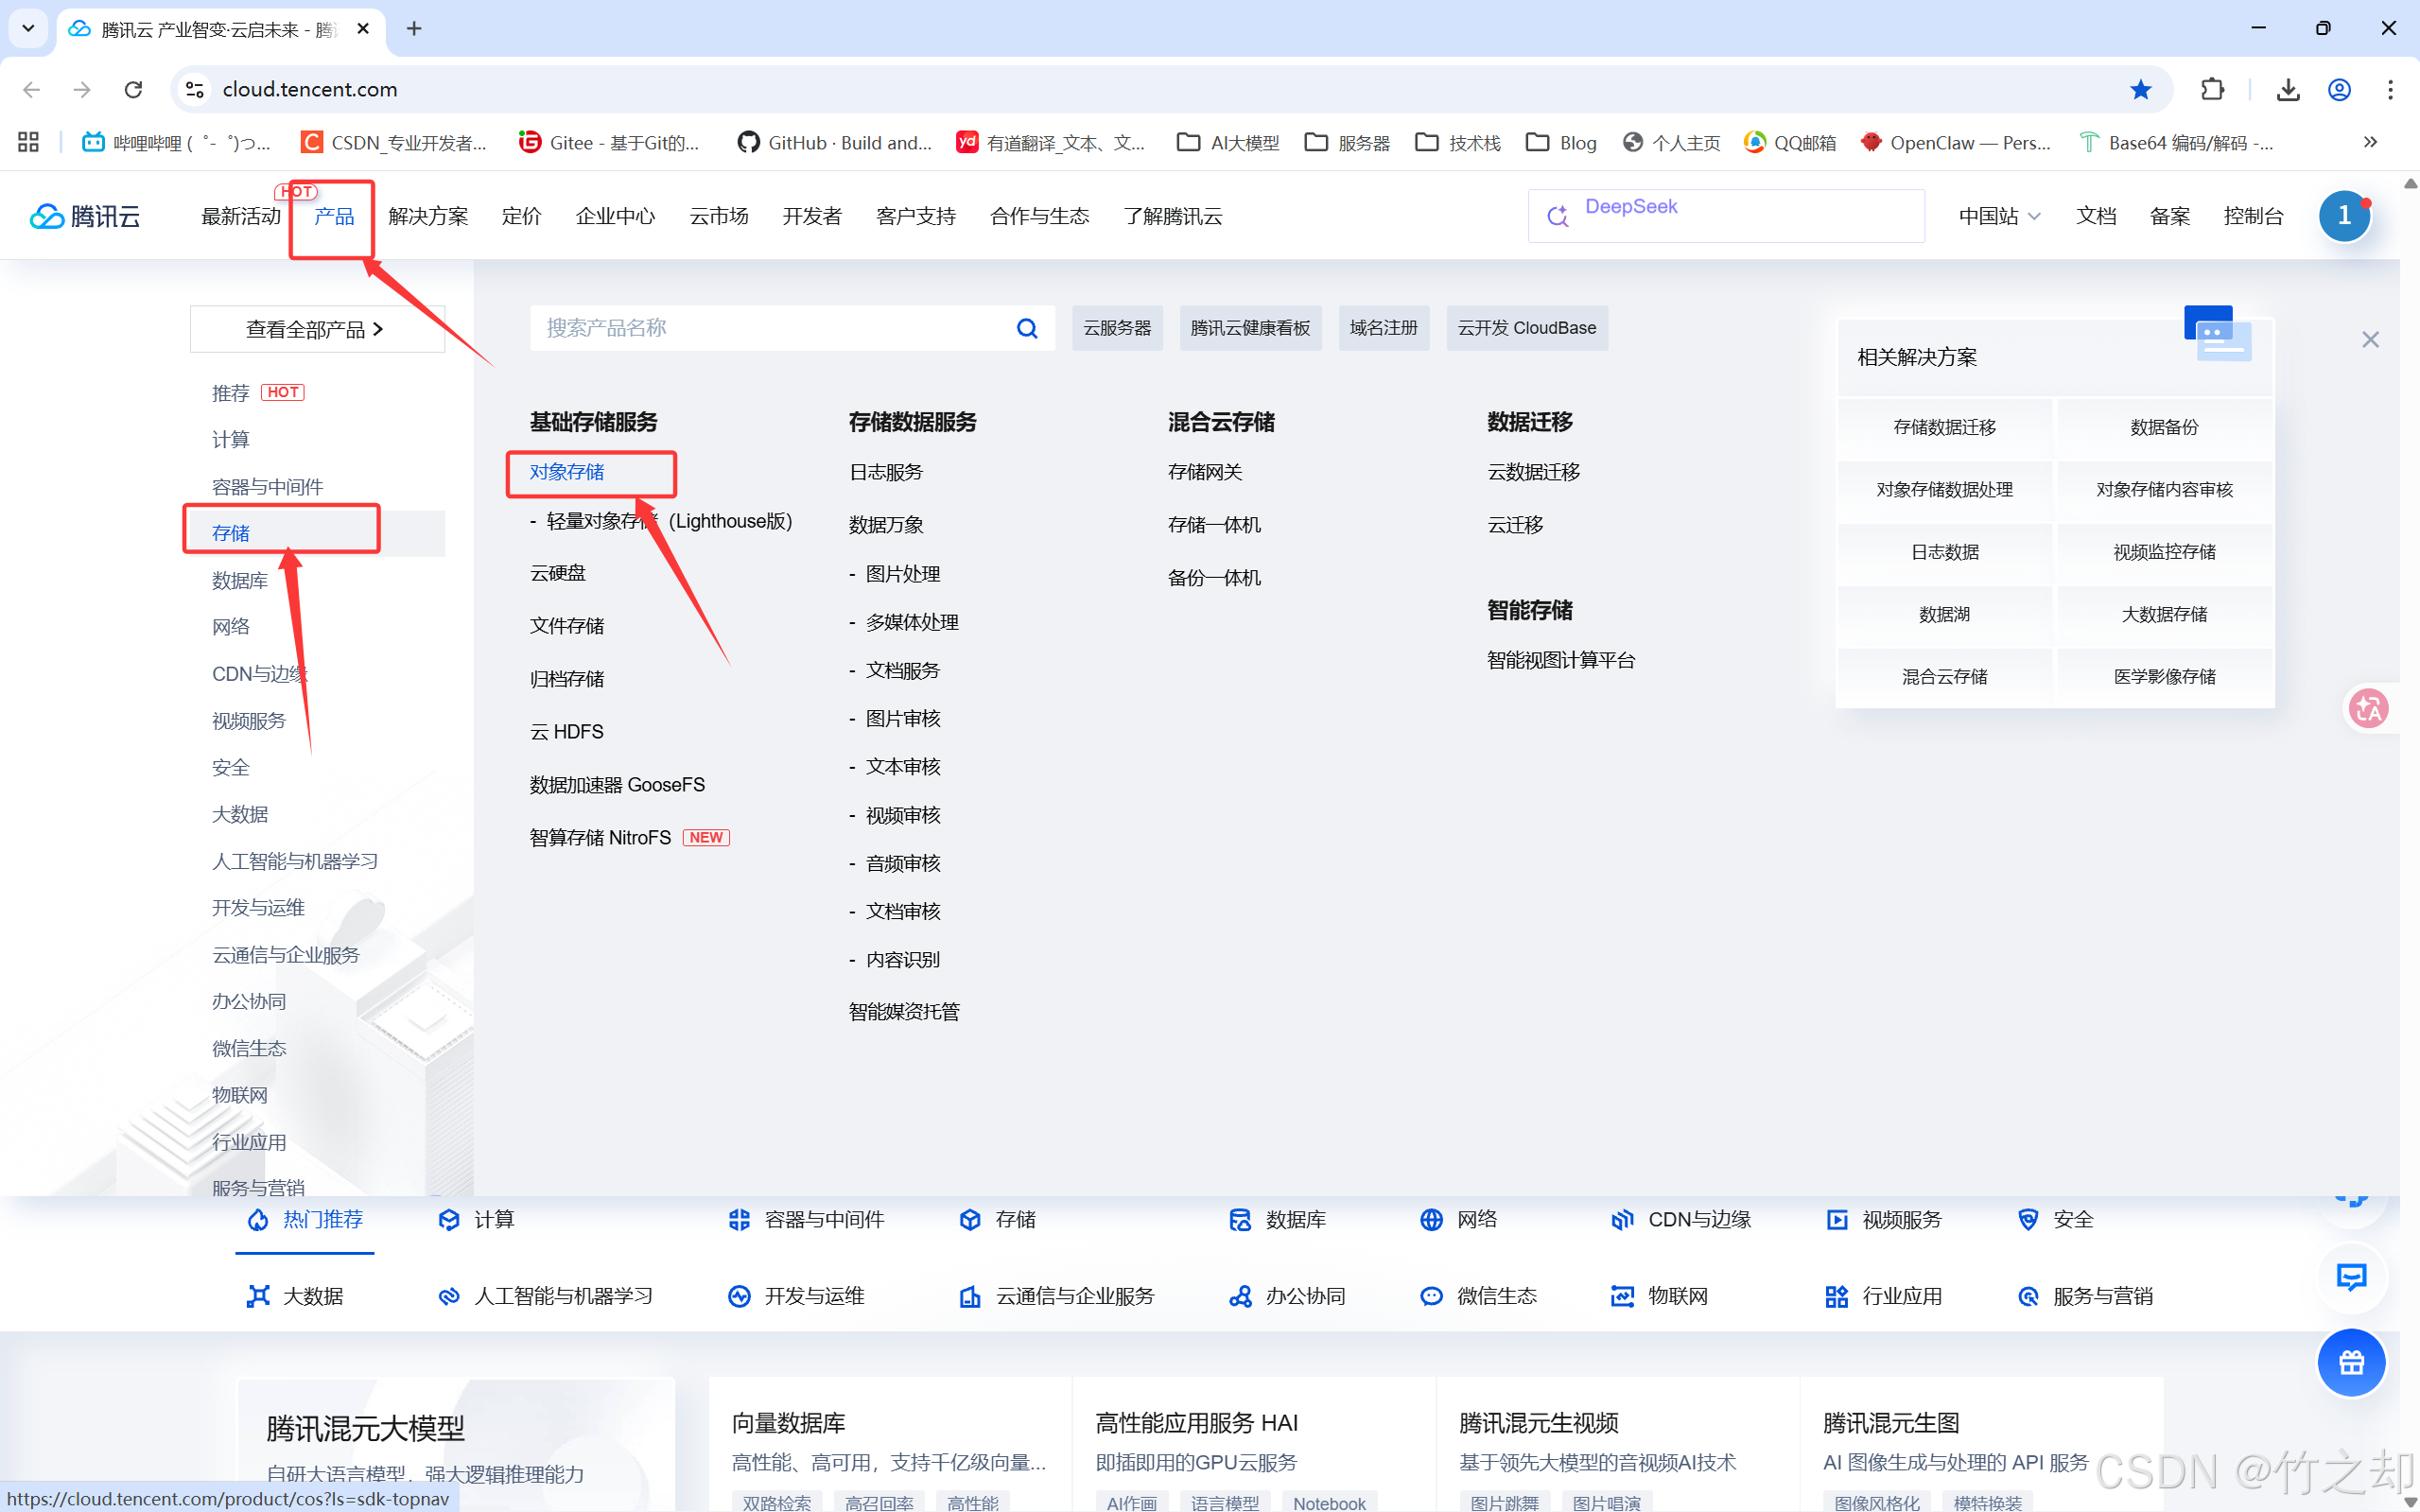
- 请先注册腾讯云平台,登录并实名验证。在腾讯云官网主页找到:产品->存储->对象存储。
3. 点击立即使用,进入COS对象存储控制台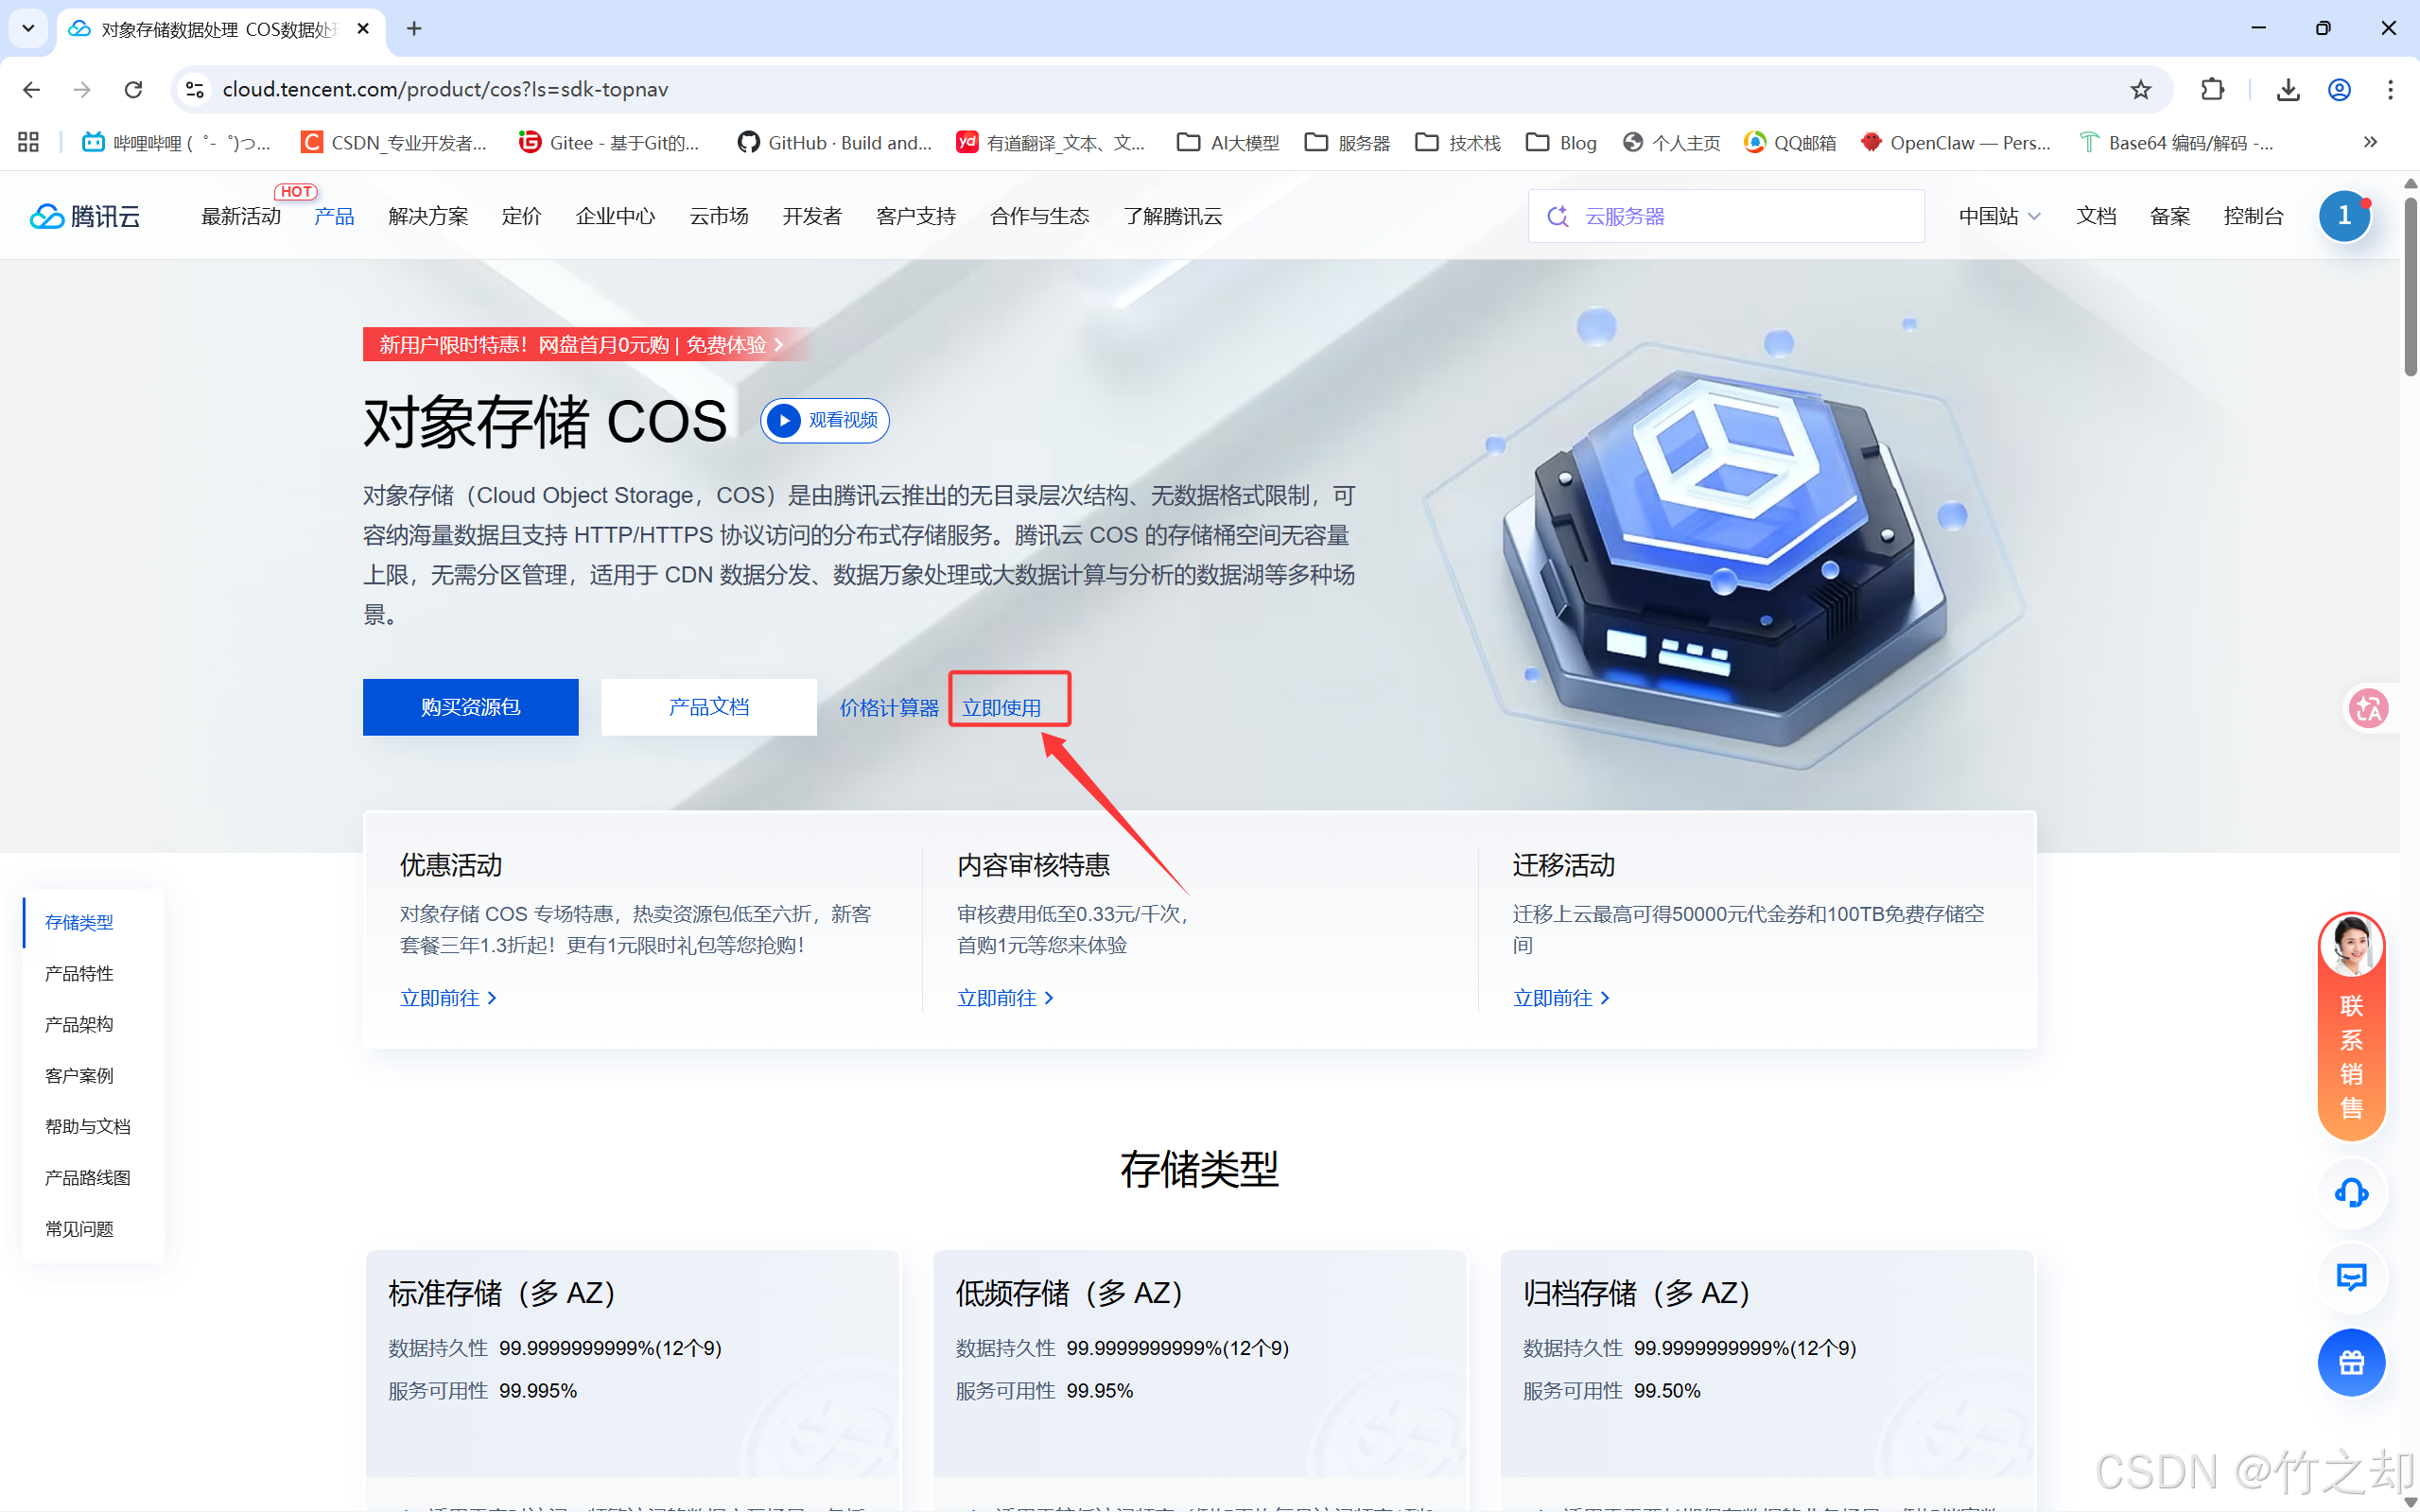
1.2 创建Buket 存储桶
-
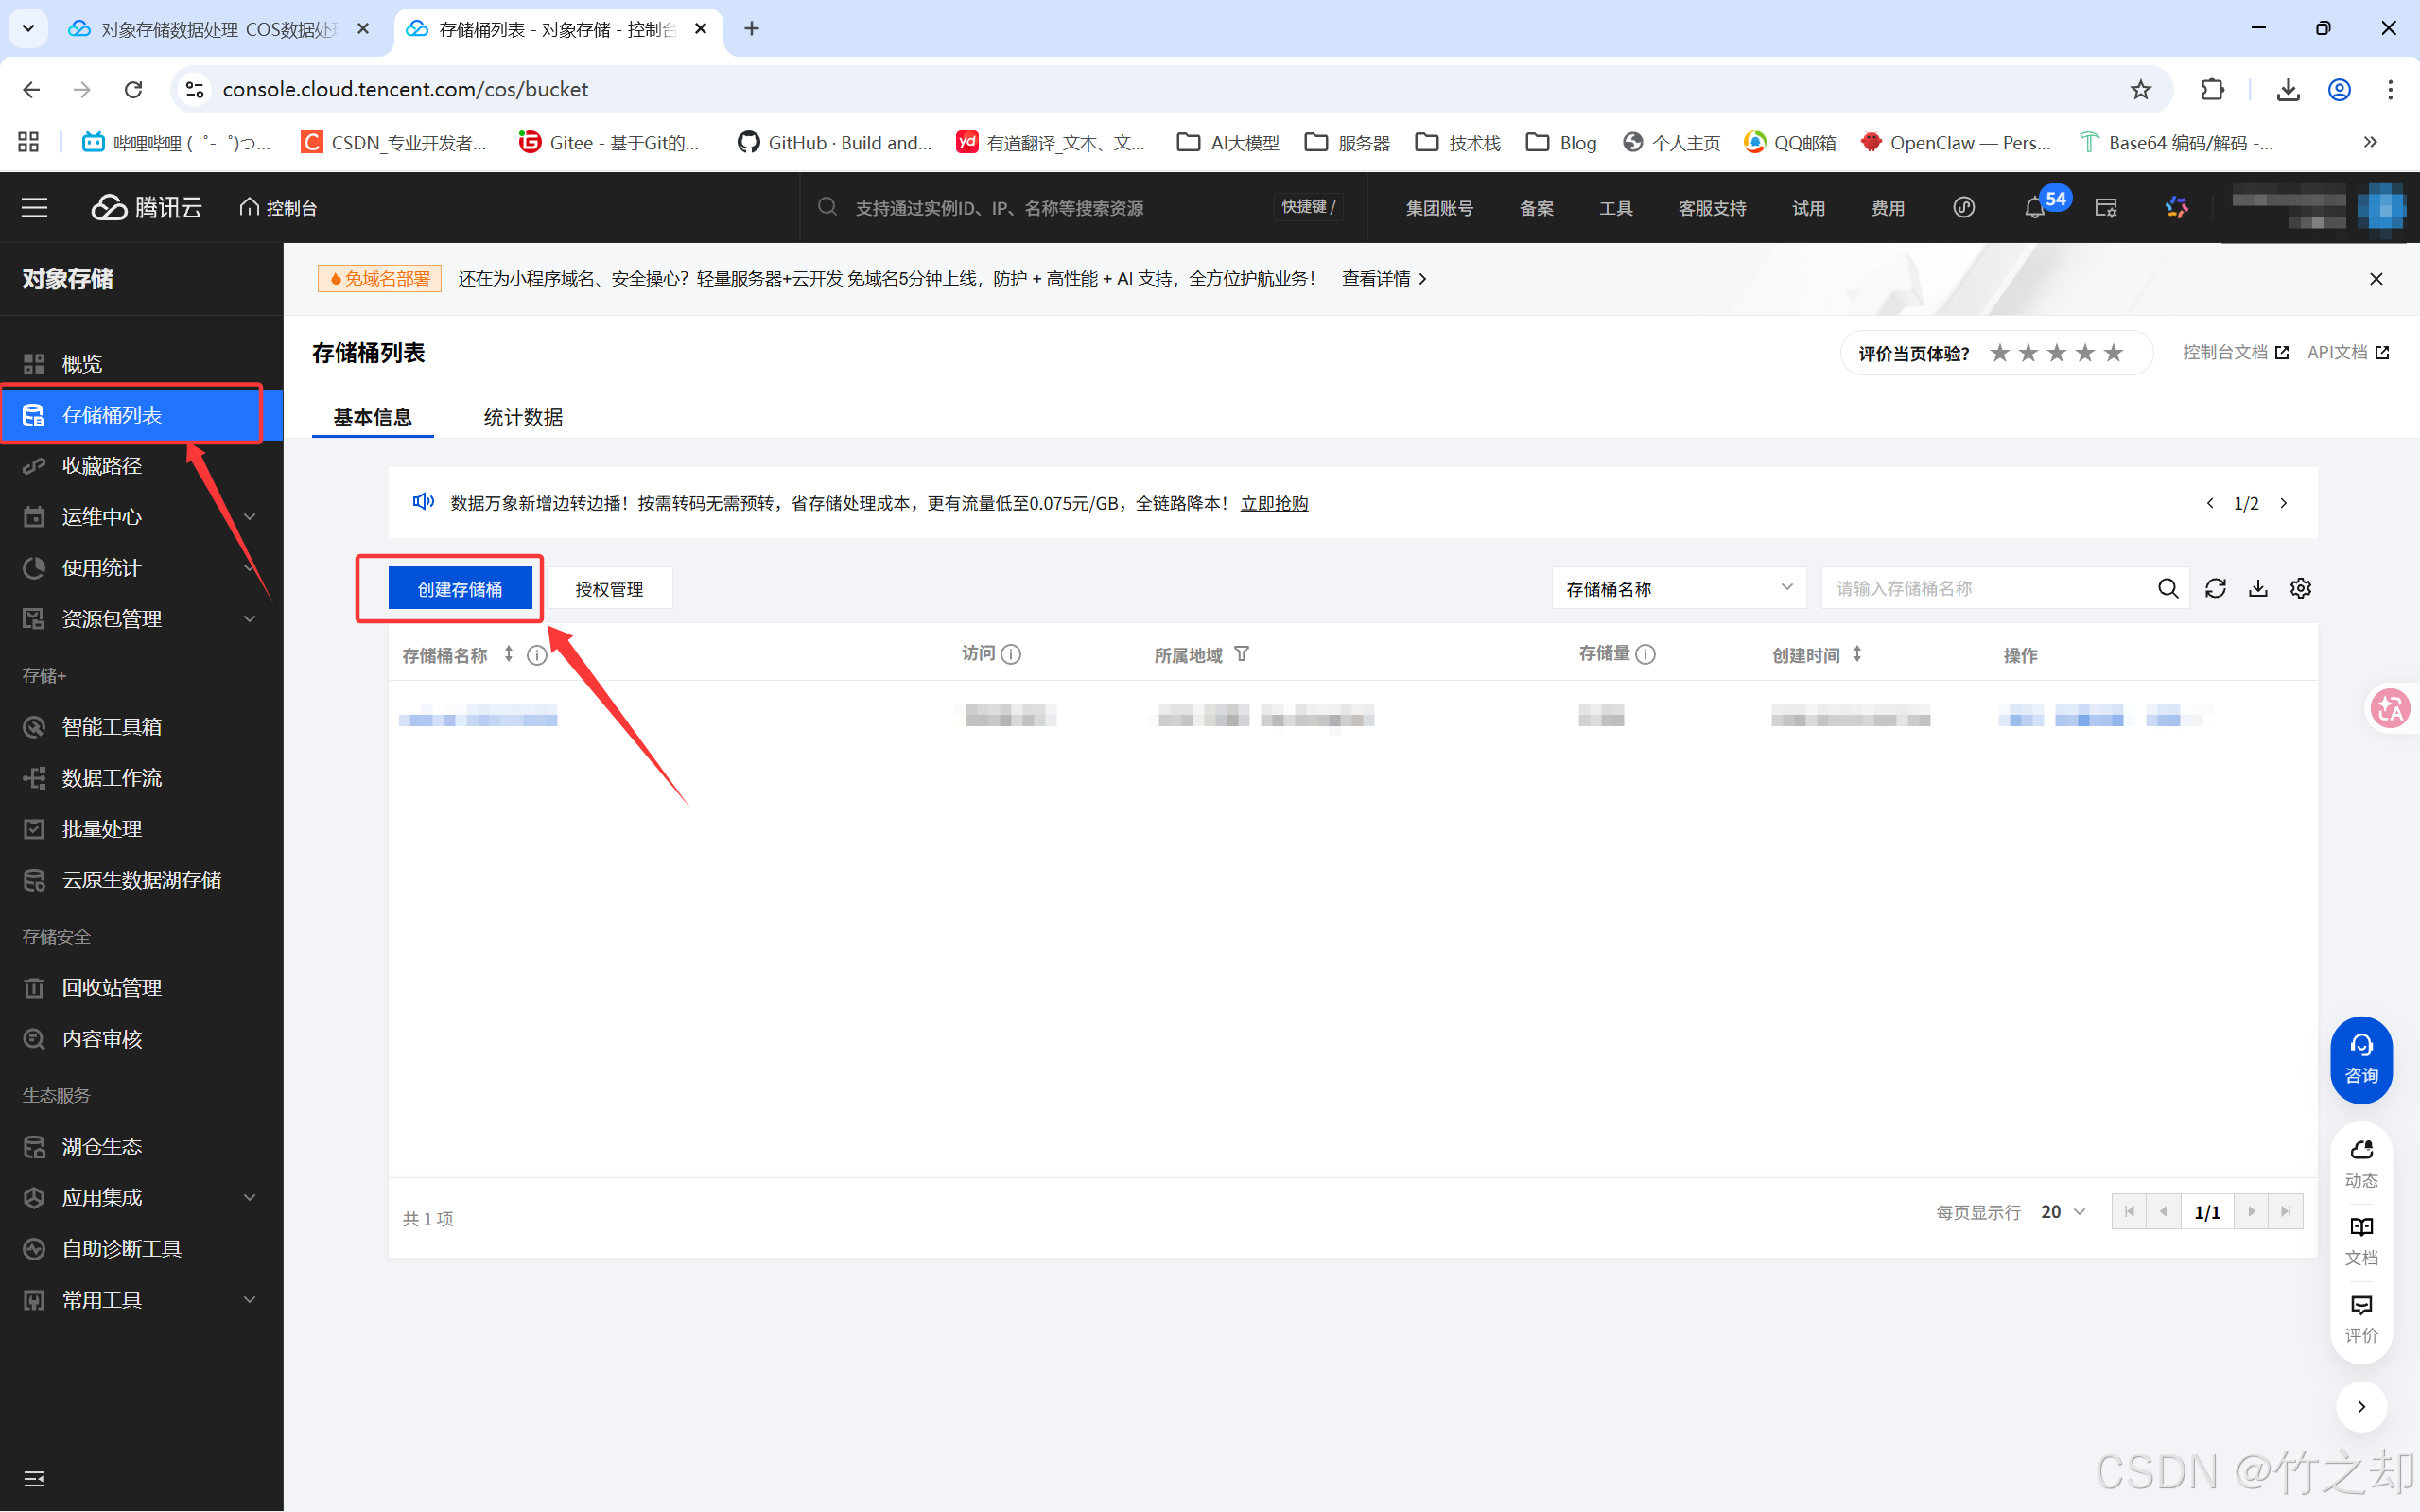
点击存储桶列表–>新建存储桶。
-
基本信息:
所属地域: 地区选择与你云服务器相同的地区(比如:你的云服务器在上海,这里就选择上海),注:云服务器访问跨地区COS对象存储服务器会增加额外费用(ps. 如果你存储文件“小”,费用可忽略不计),建议选择与云服务器相同地区。
名称: 根据你的需求起名。这里为测试样例:demo–1322221003
访问权限: 选择第二个:共有读私有写。如果设置私有读写,别人无法访问。
其余保持默认,并勾选协议。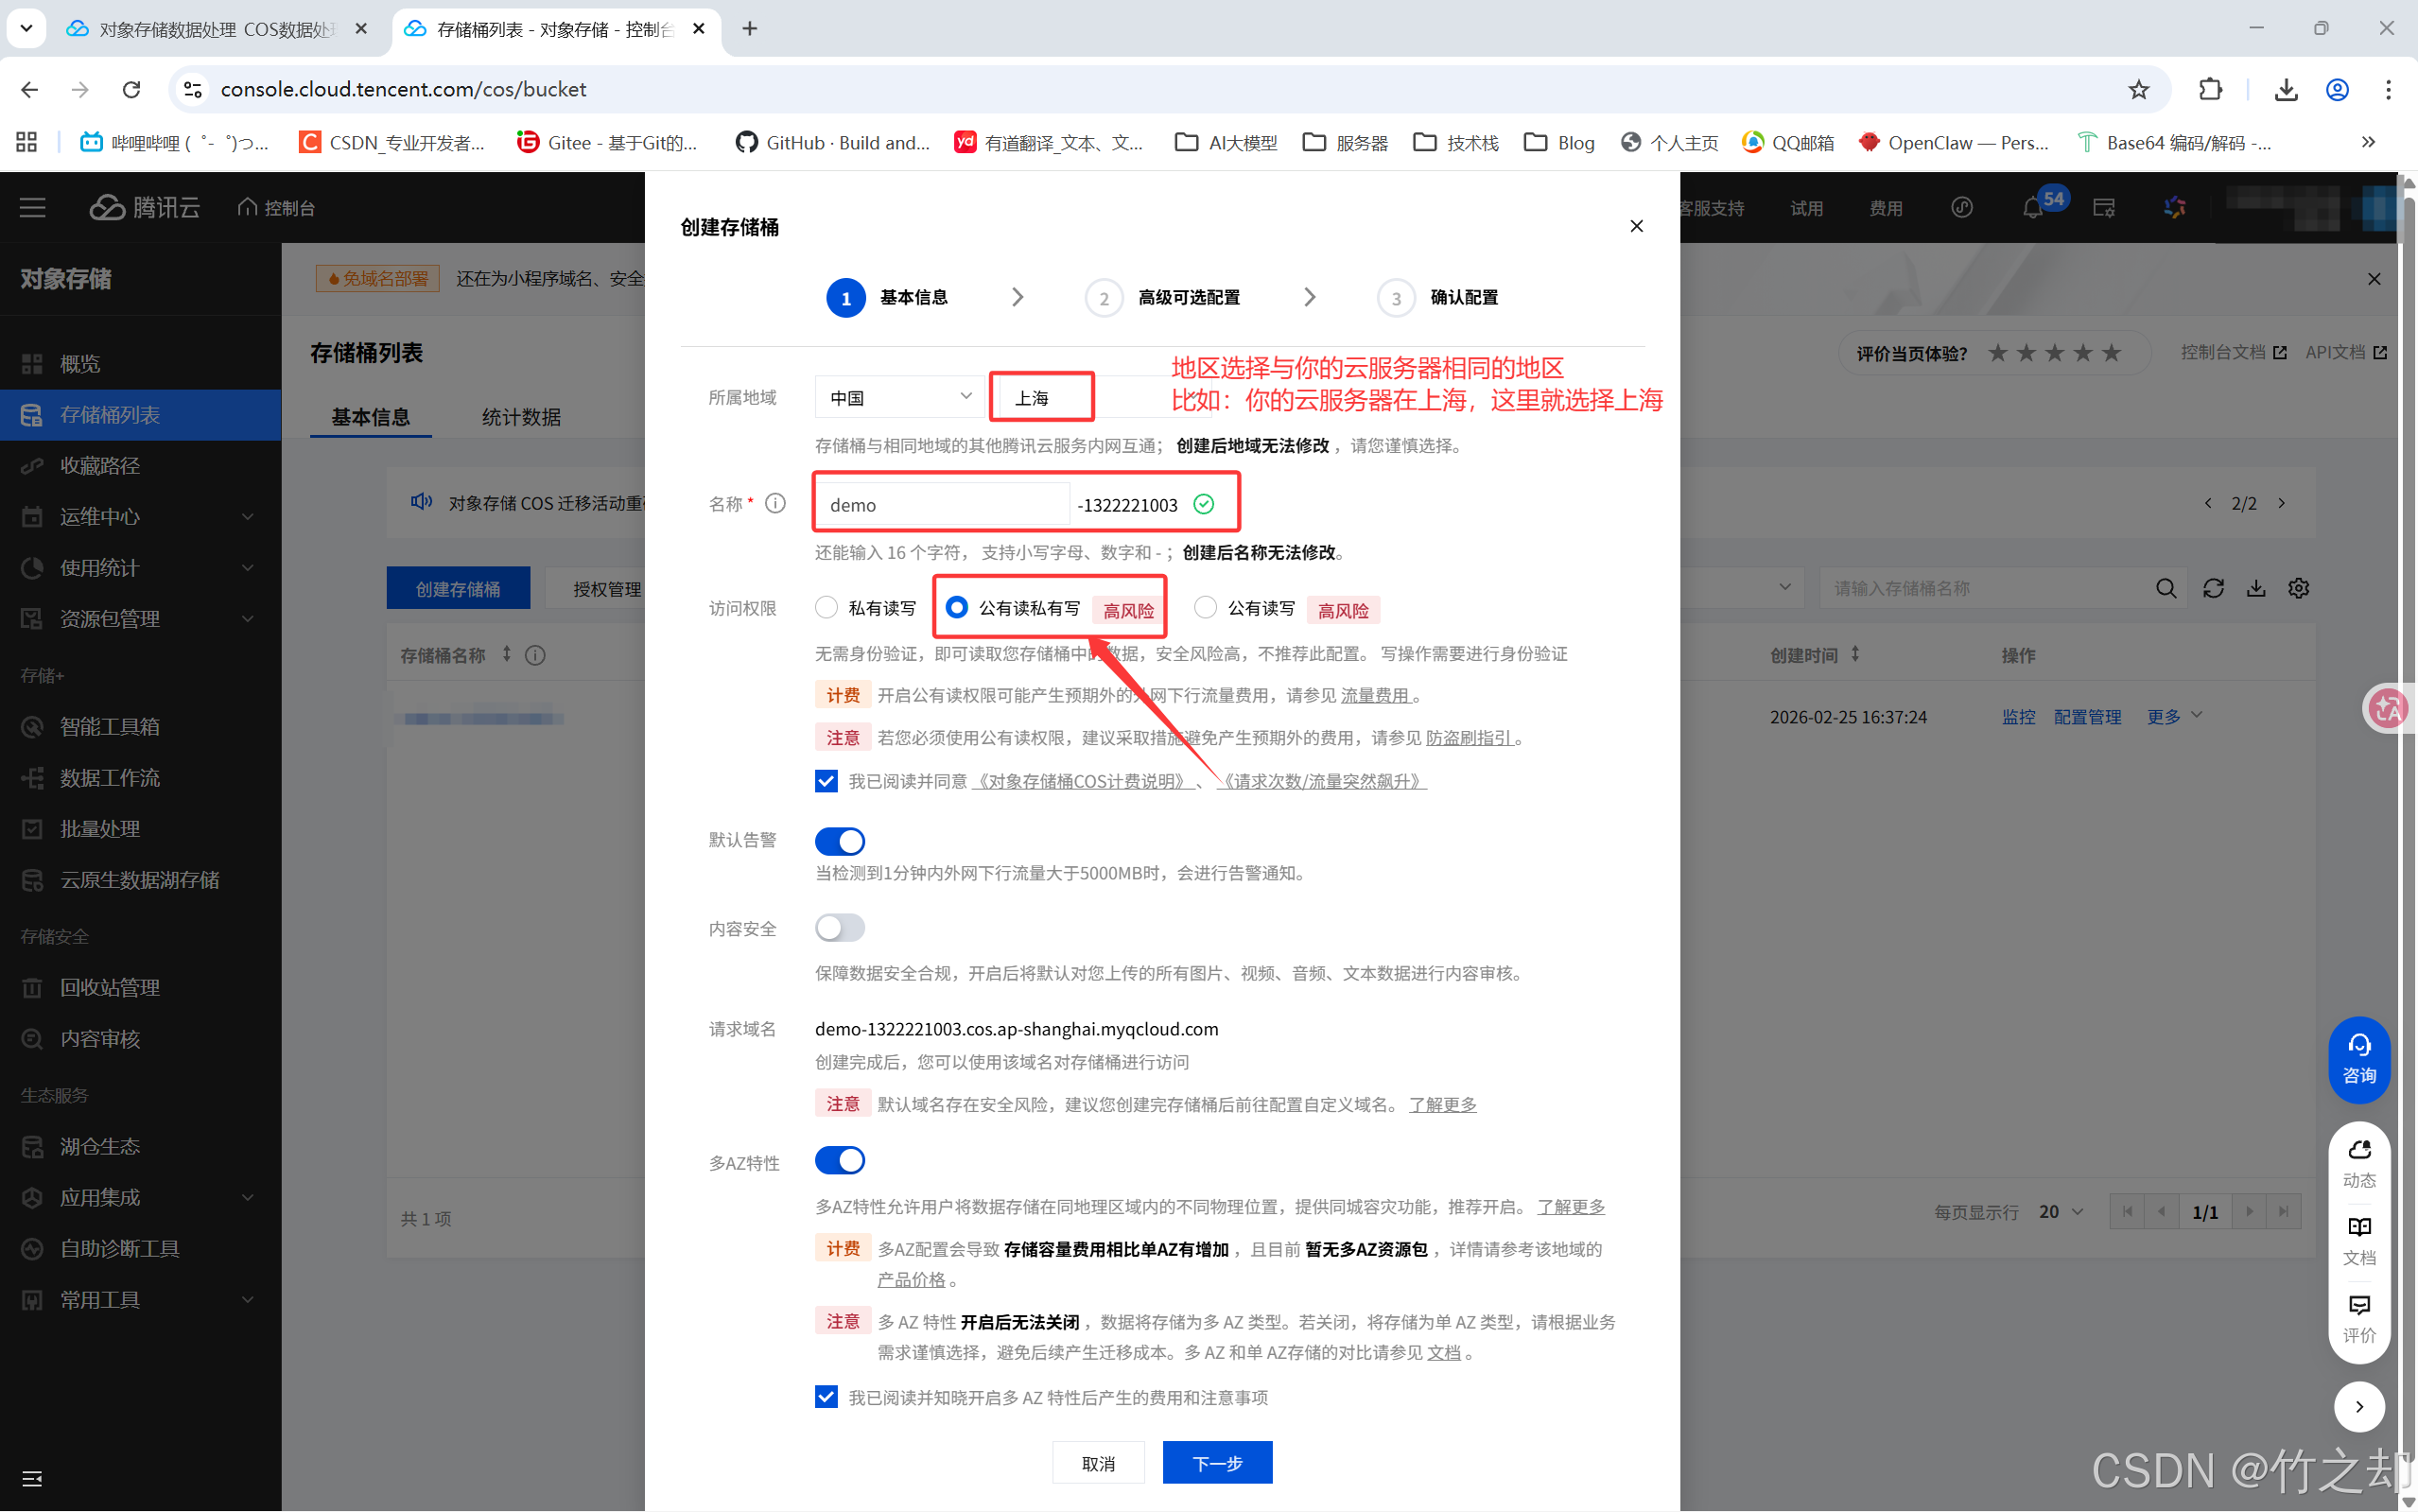
-
高级可选配置和确认配置,保持默认,选择下一步,并创建。
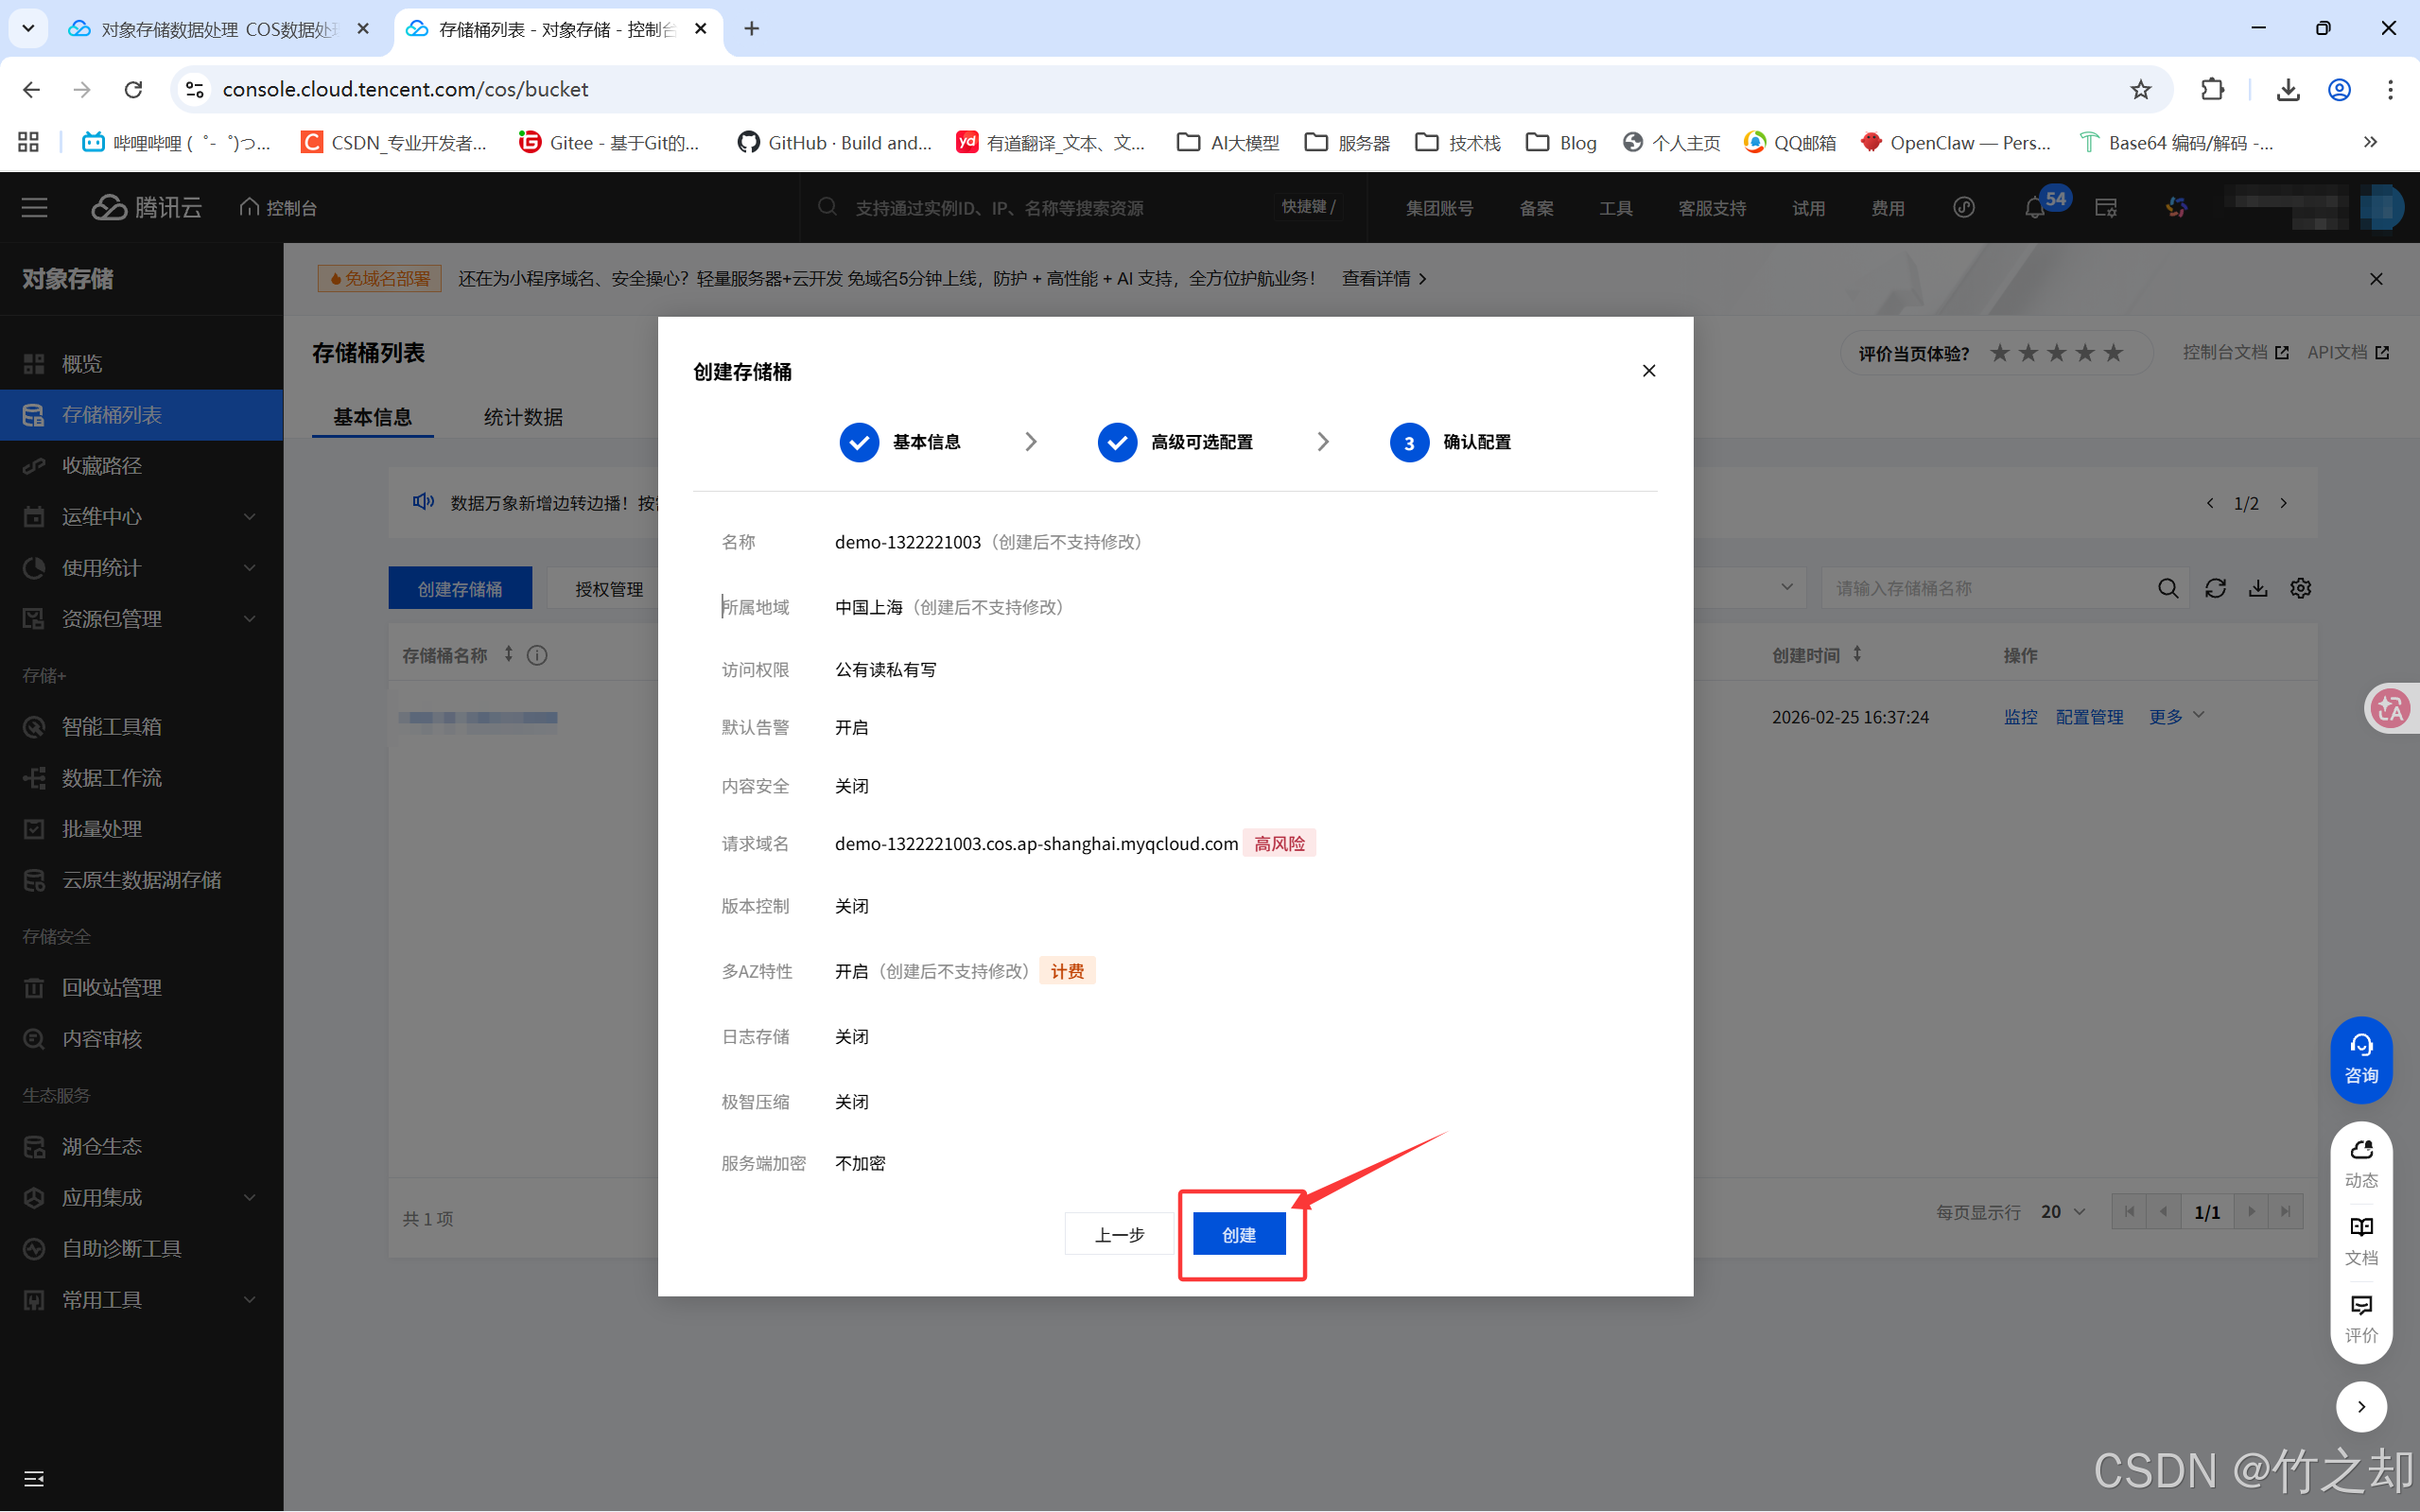
-
在这里你就可以直接上传文件了。
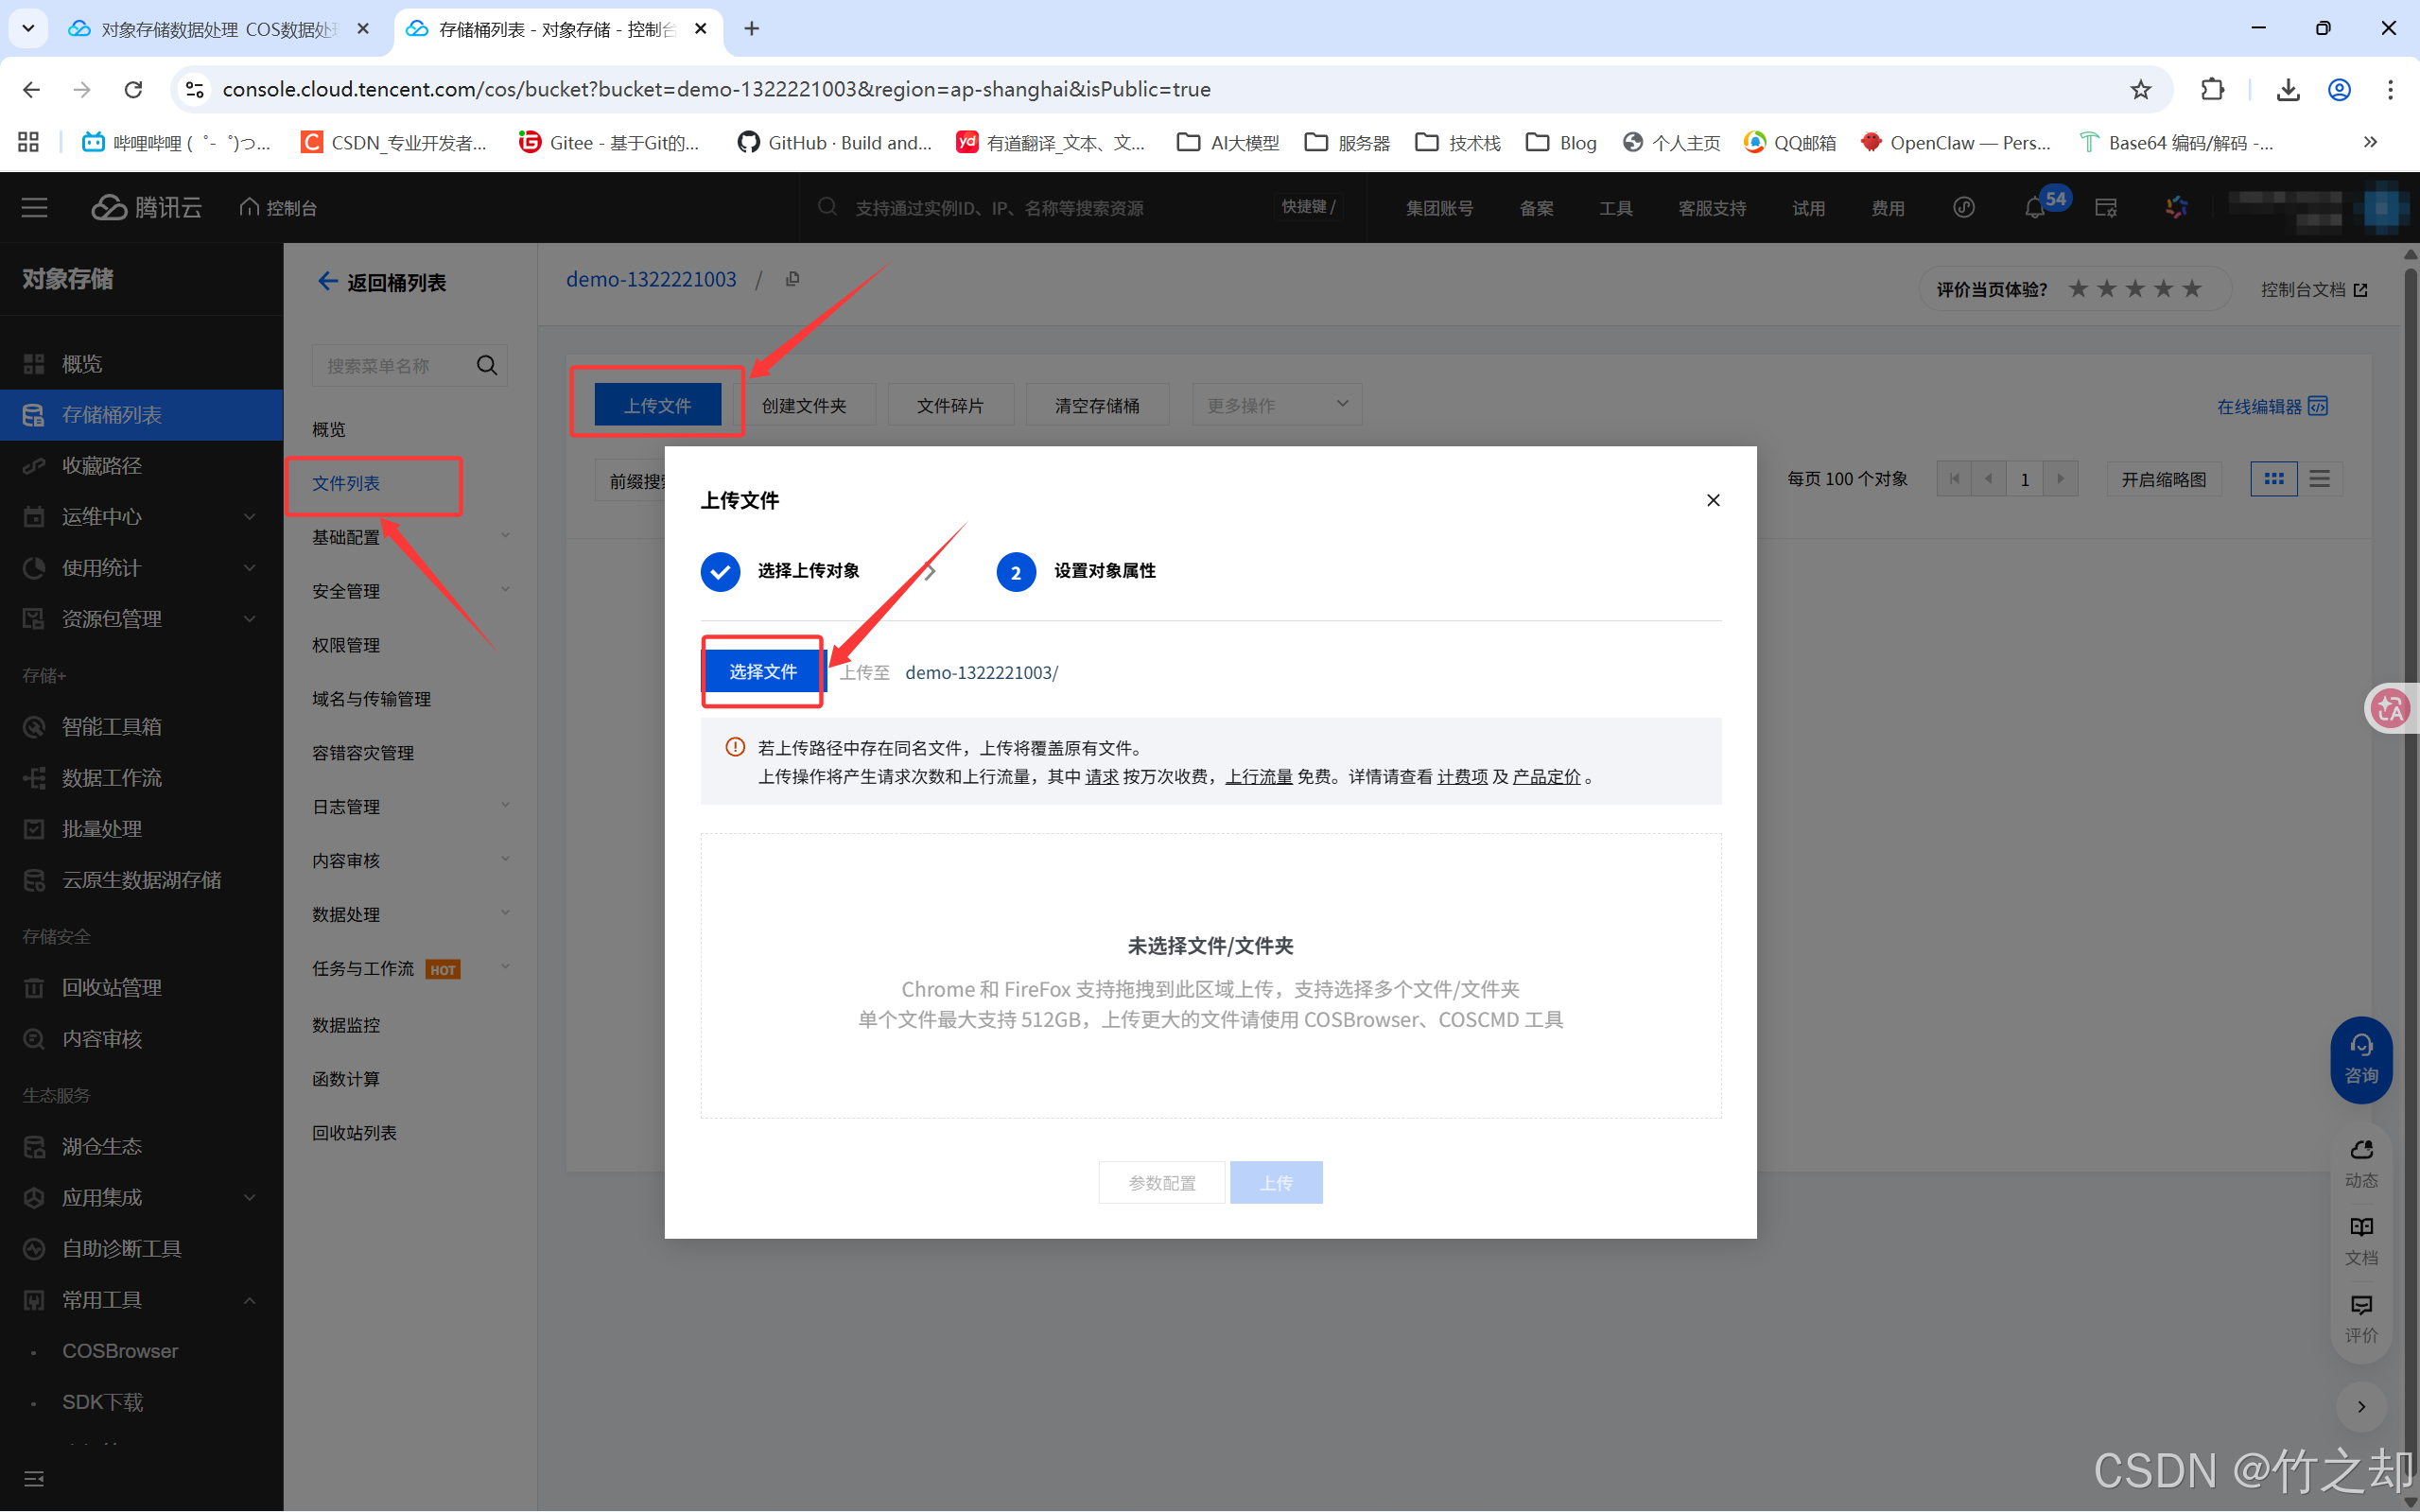
-
最右侧点击表格布局,然后将鼠标悬浮在图片上,选择复制文件链接,这个链接就是你访问COS文件的文件地址。将链接地址粘贴到浏览器地址栏,可自动访问并下载图片。(前提是不能给访问权限设置私有读写)
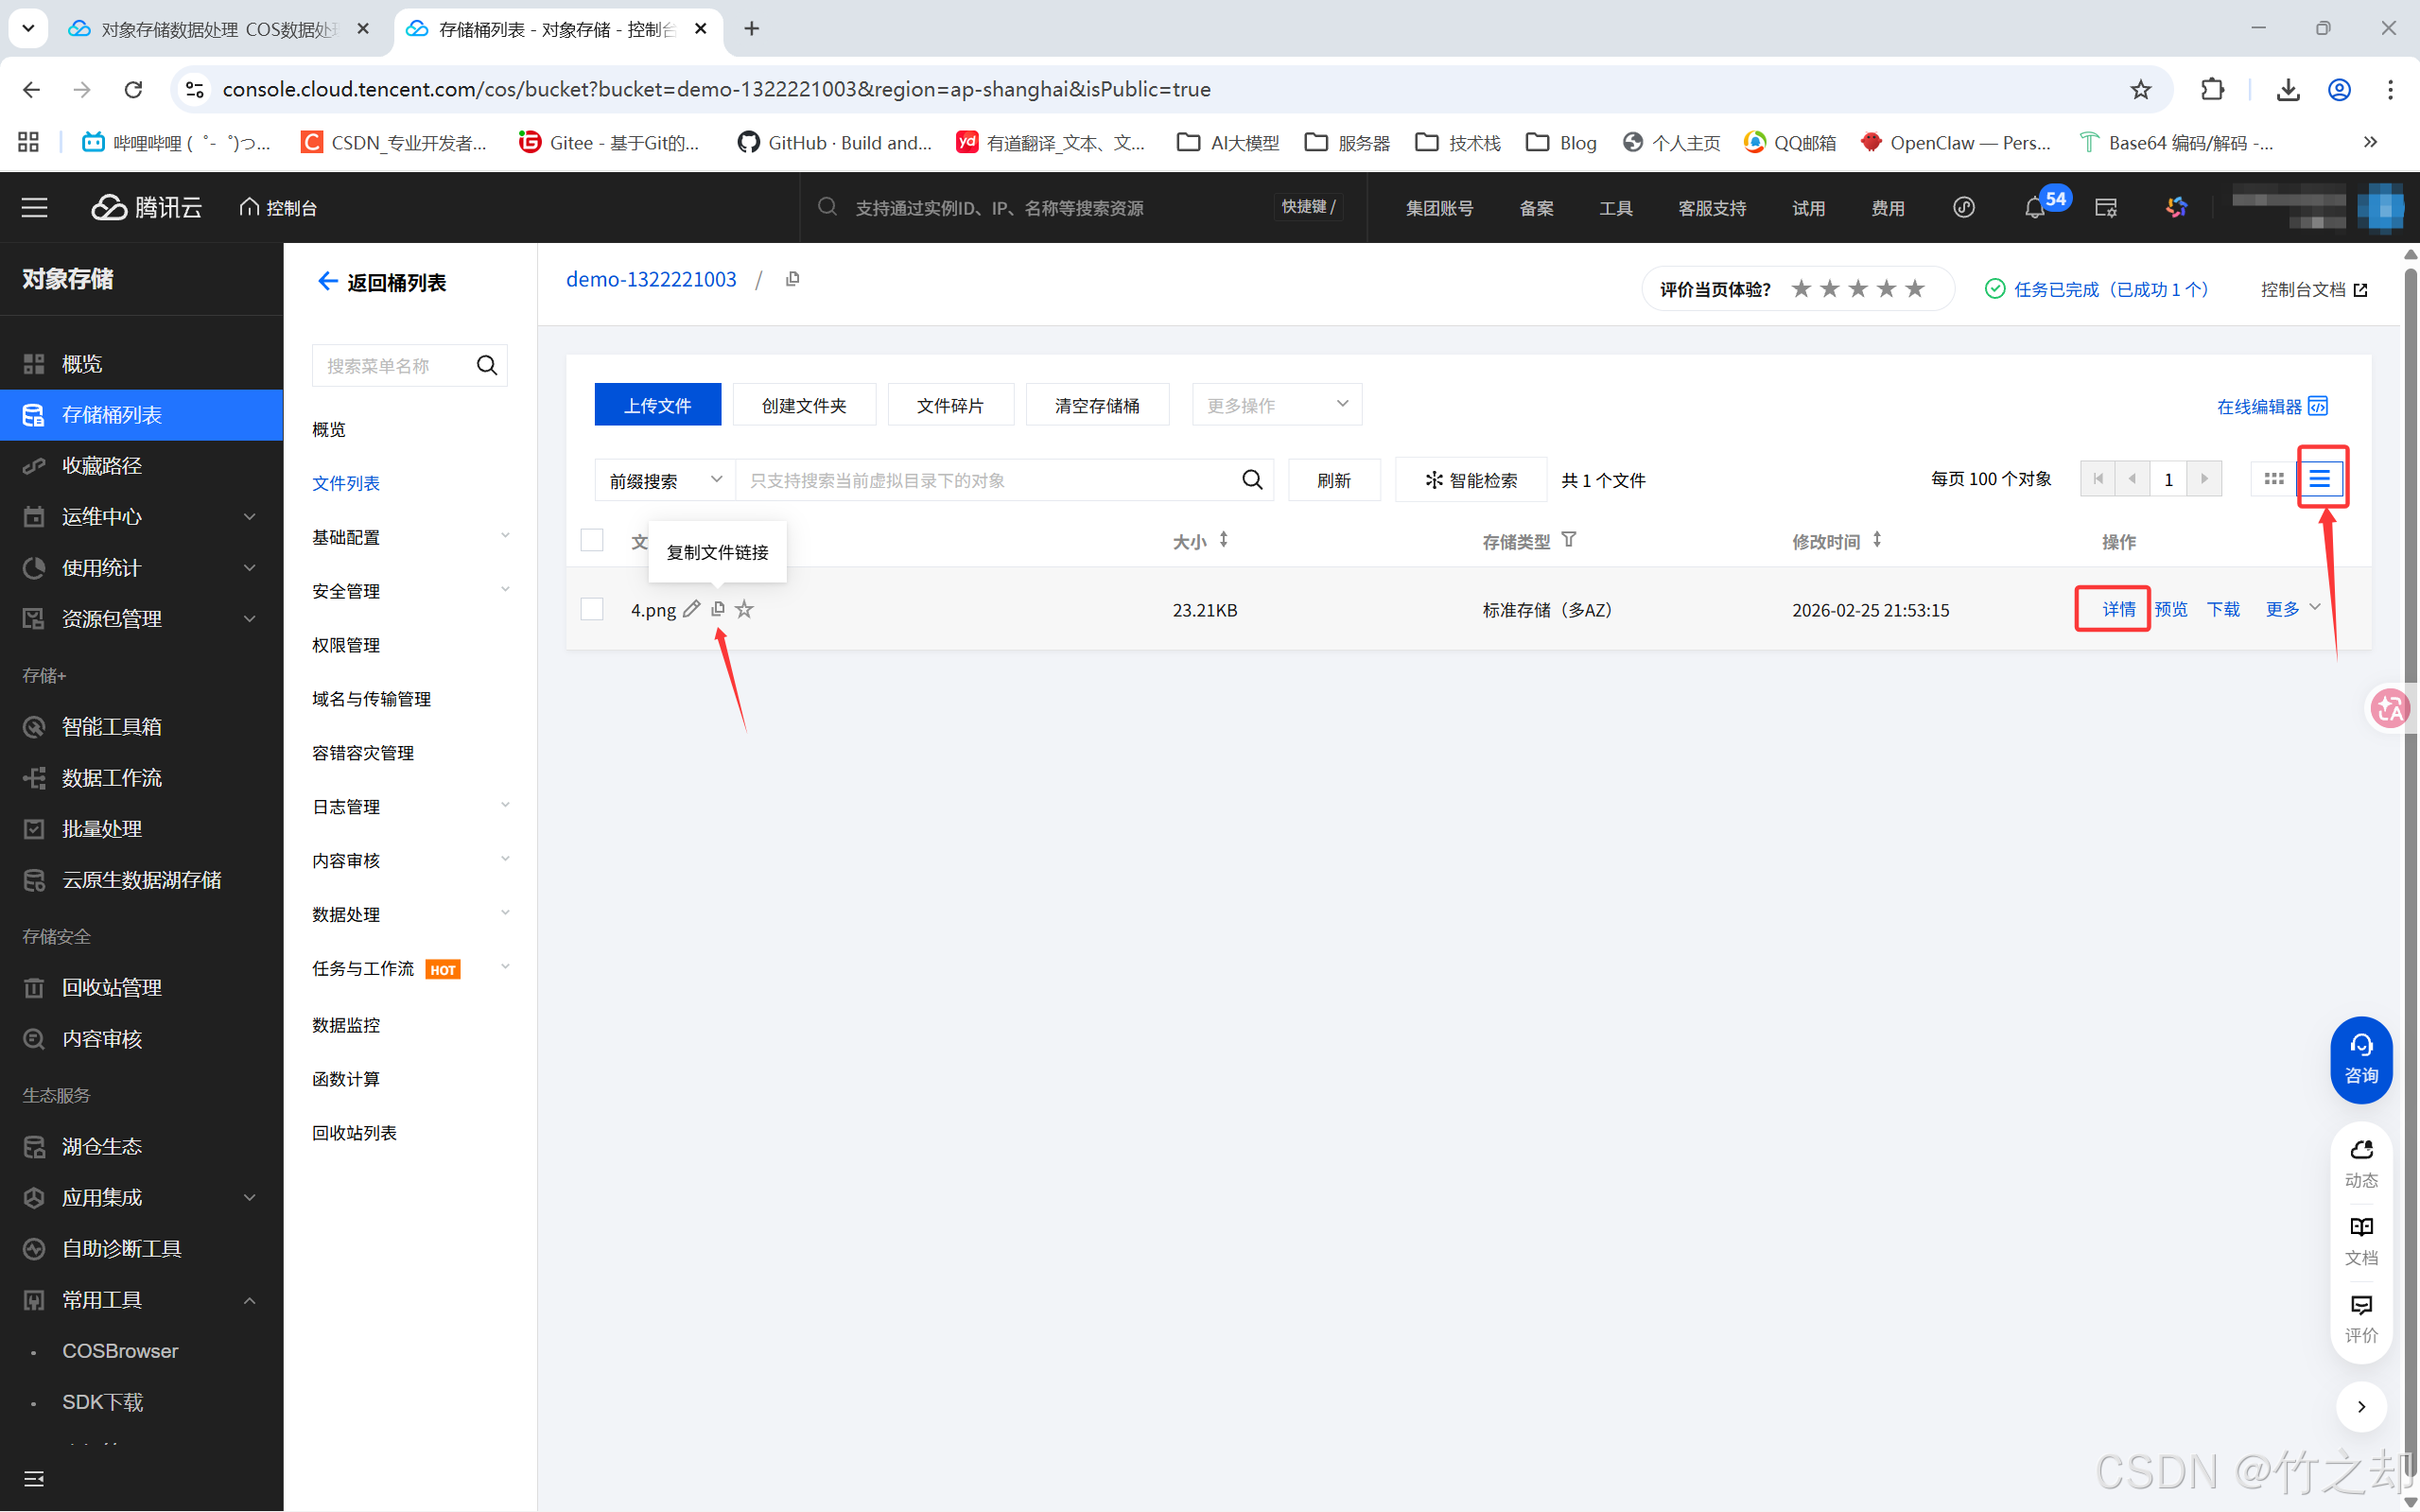
-
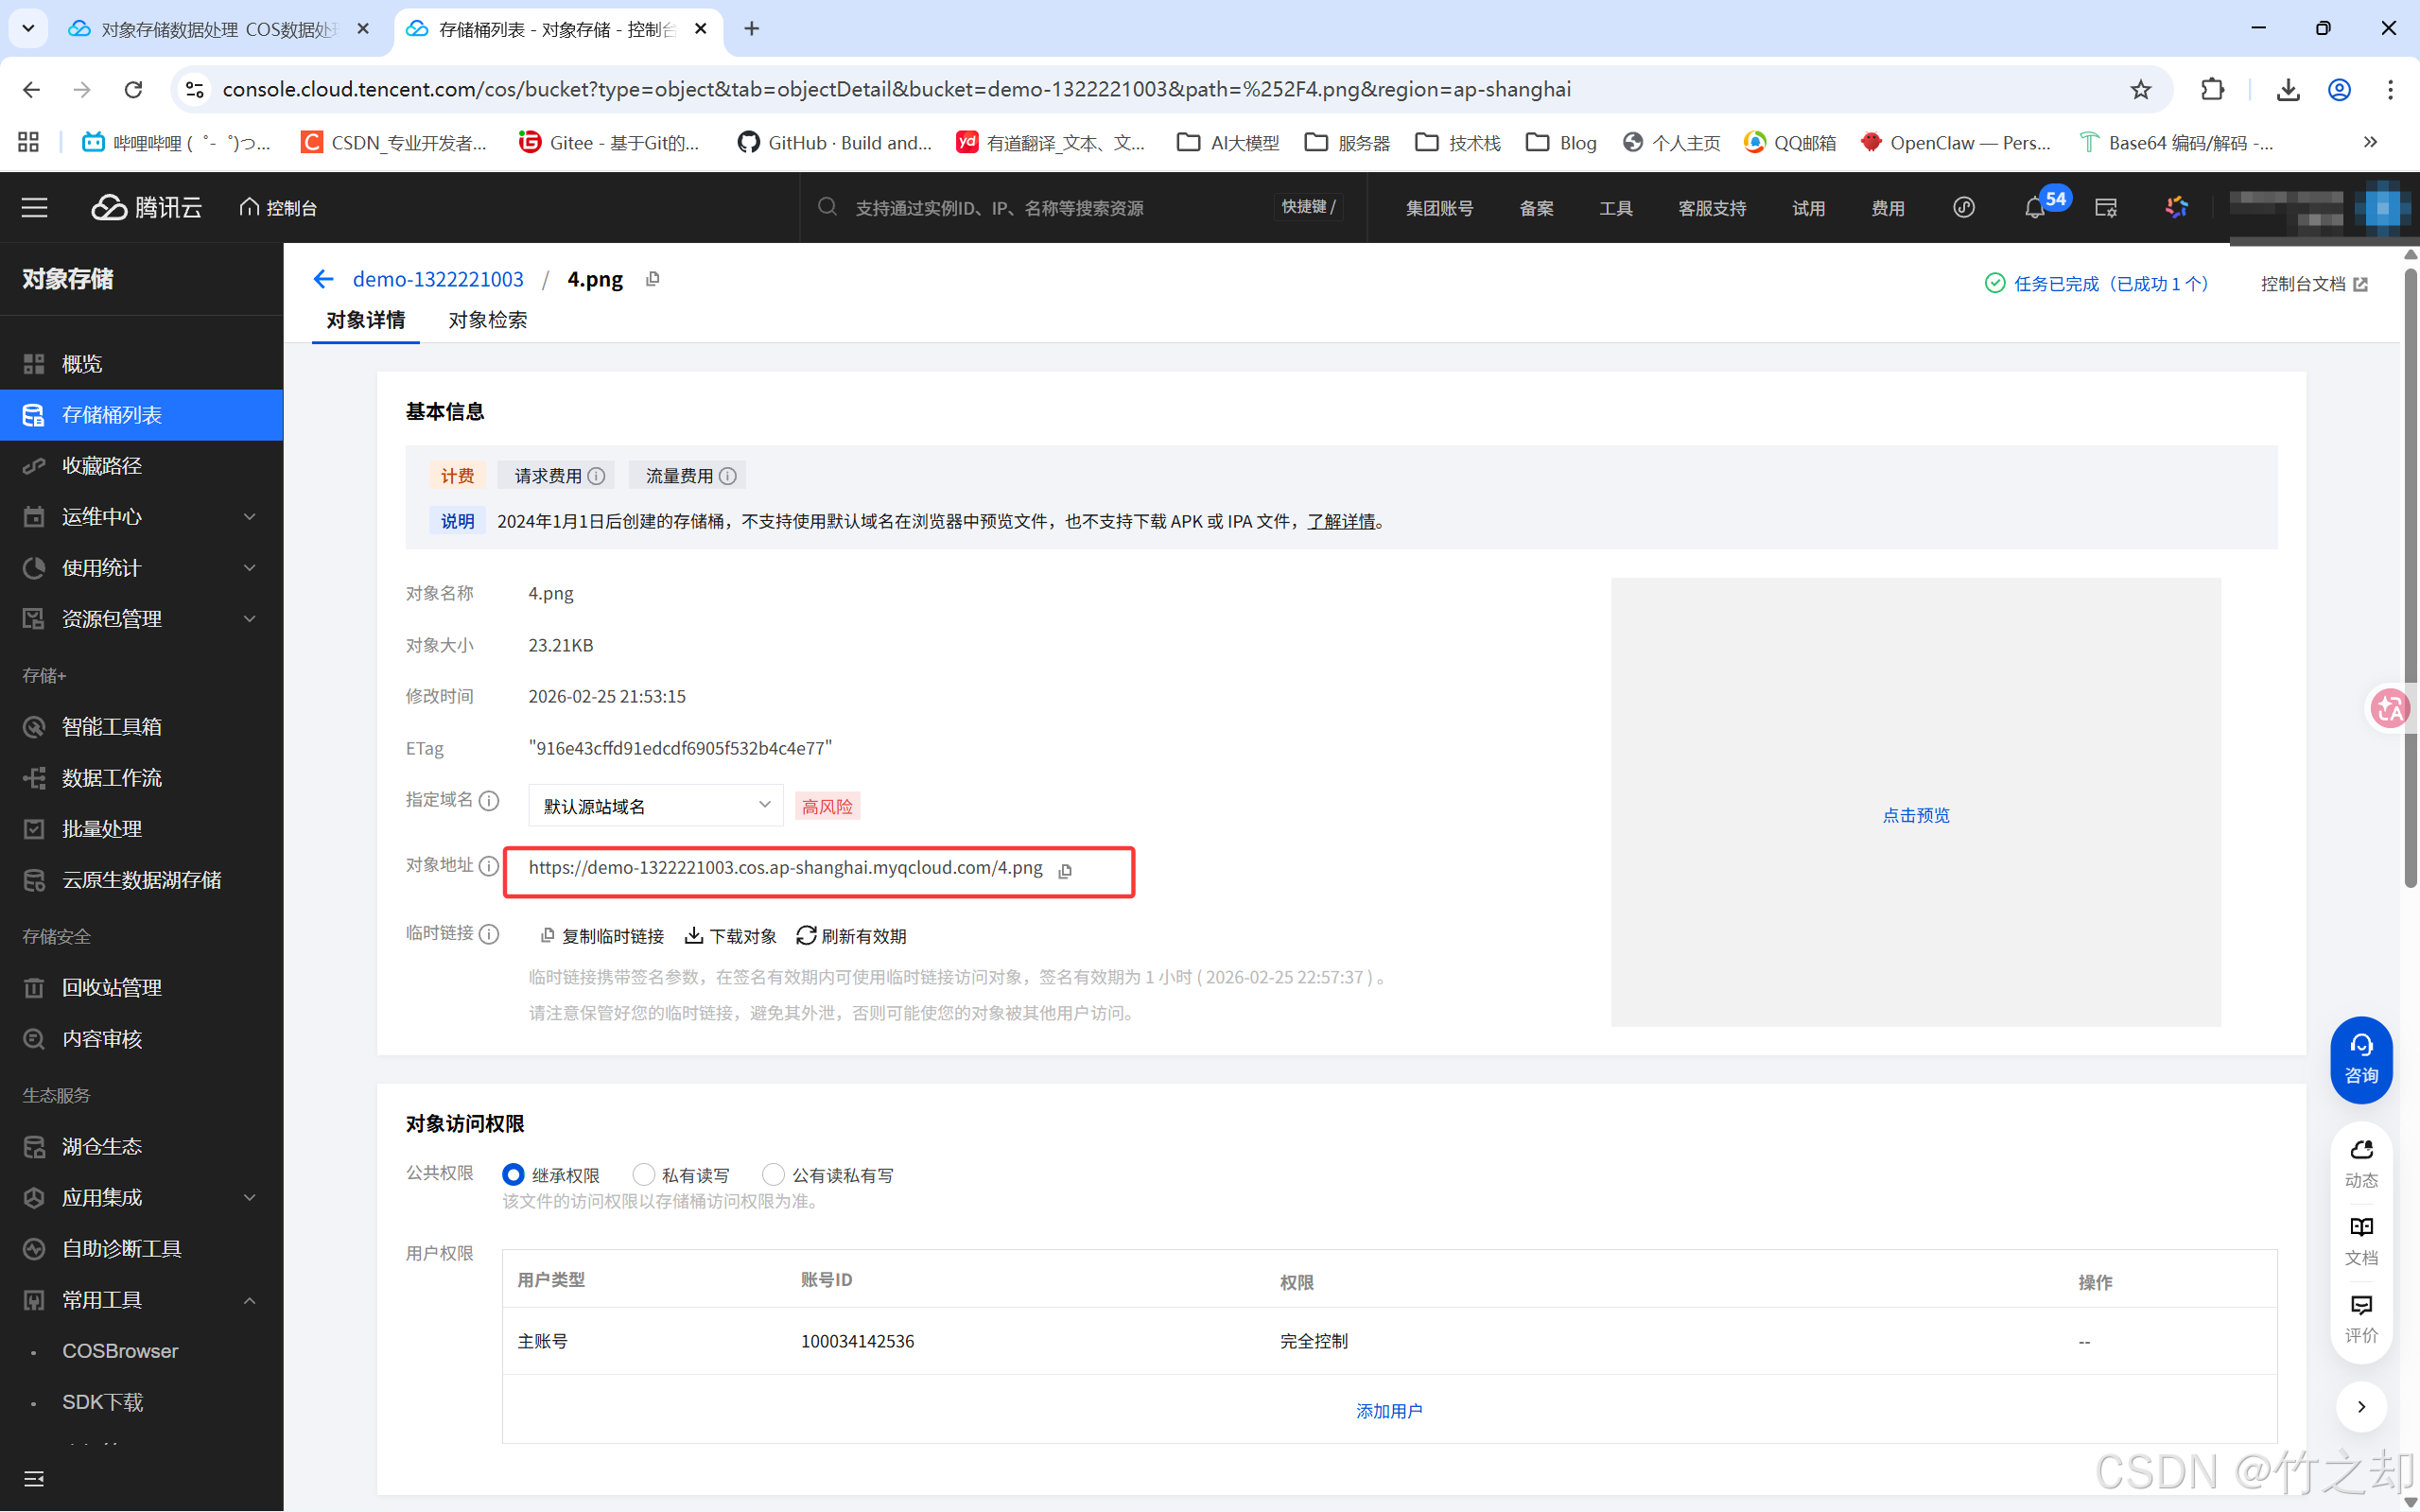
你也可以点击详情,在详情页复制文件路径。
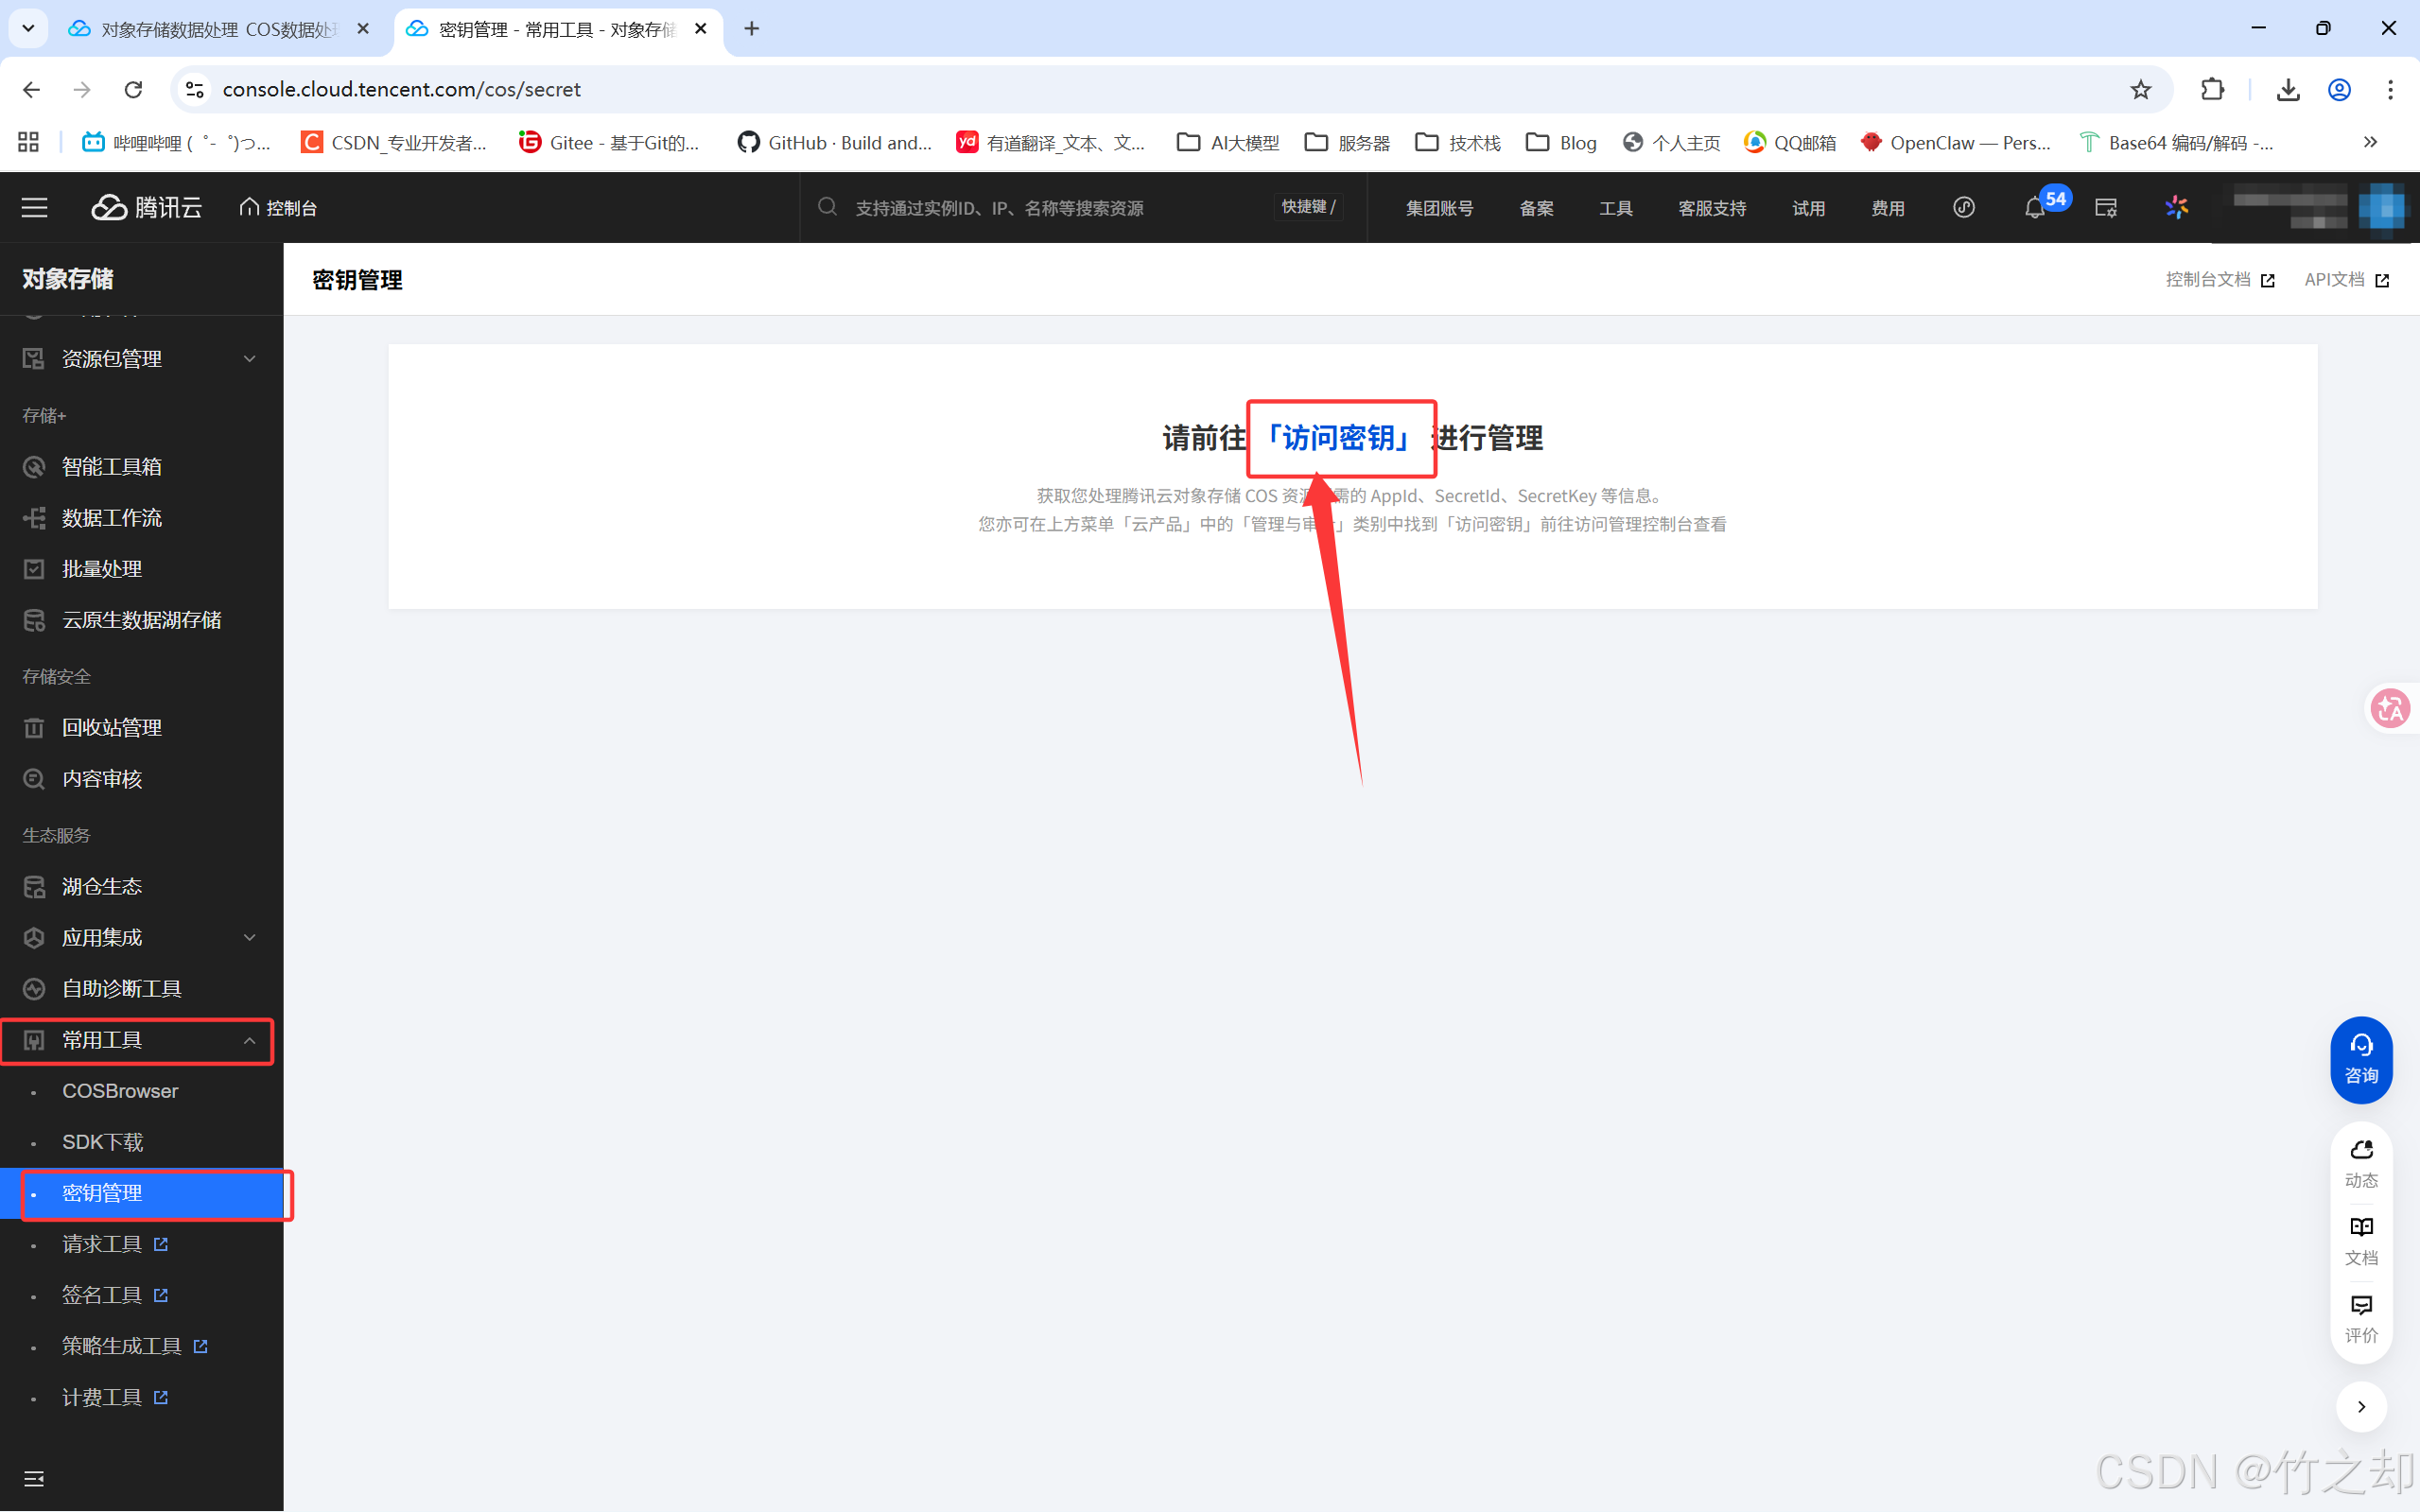
1.3 创建密钥
-
在左侧找到:常用工具–> 密钥管理, 点击访问密钥
-
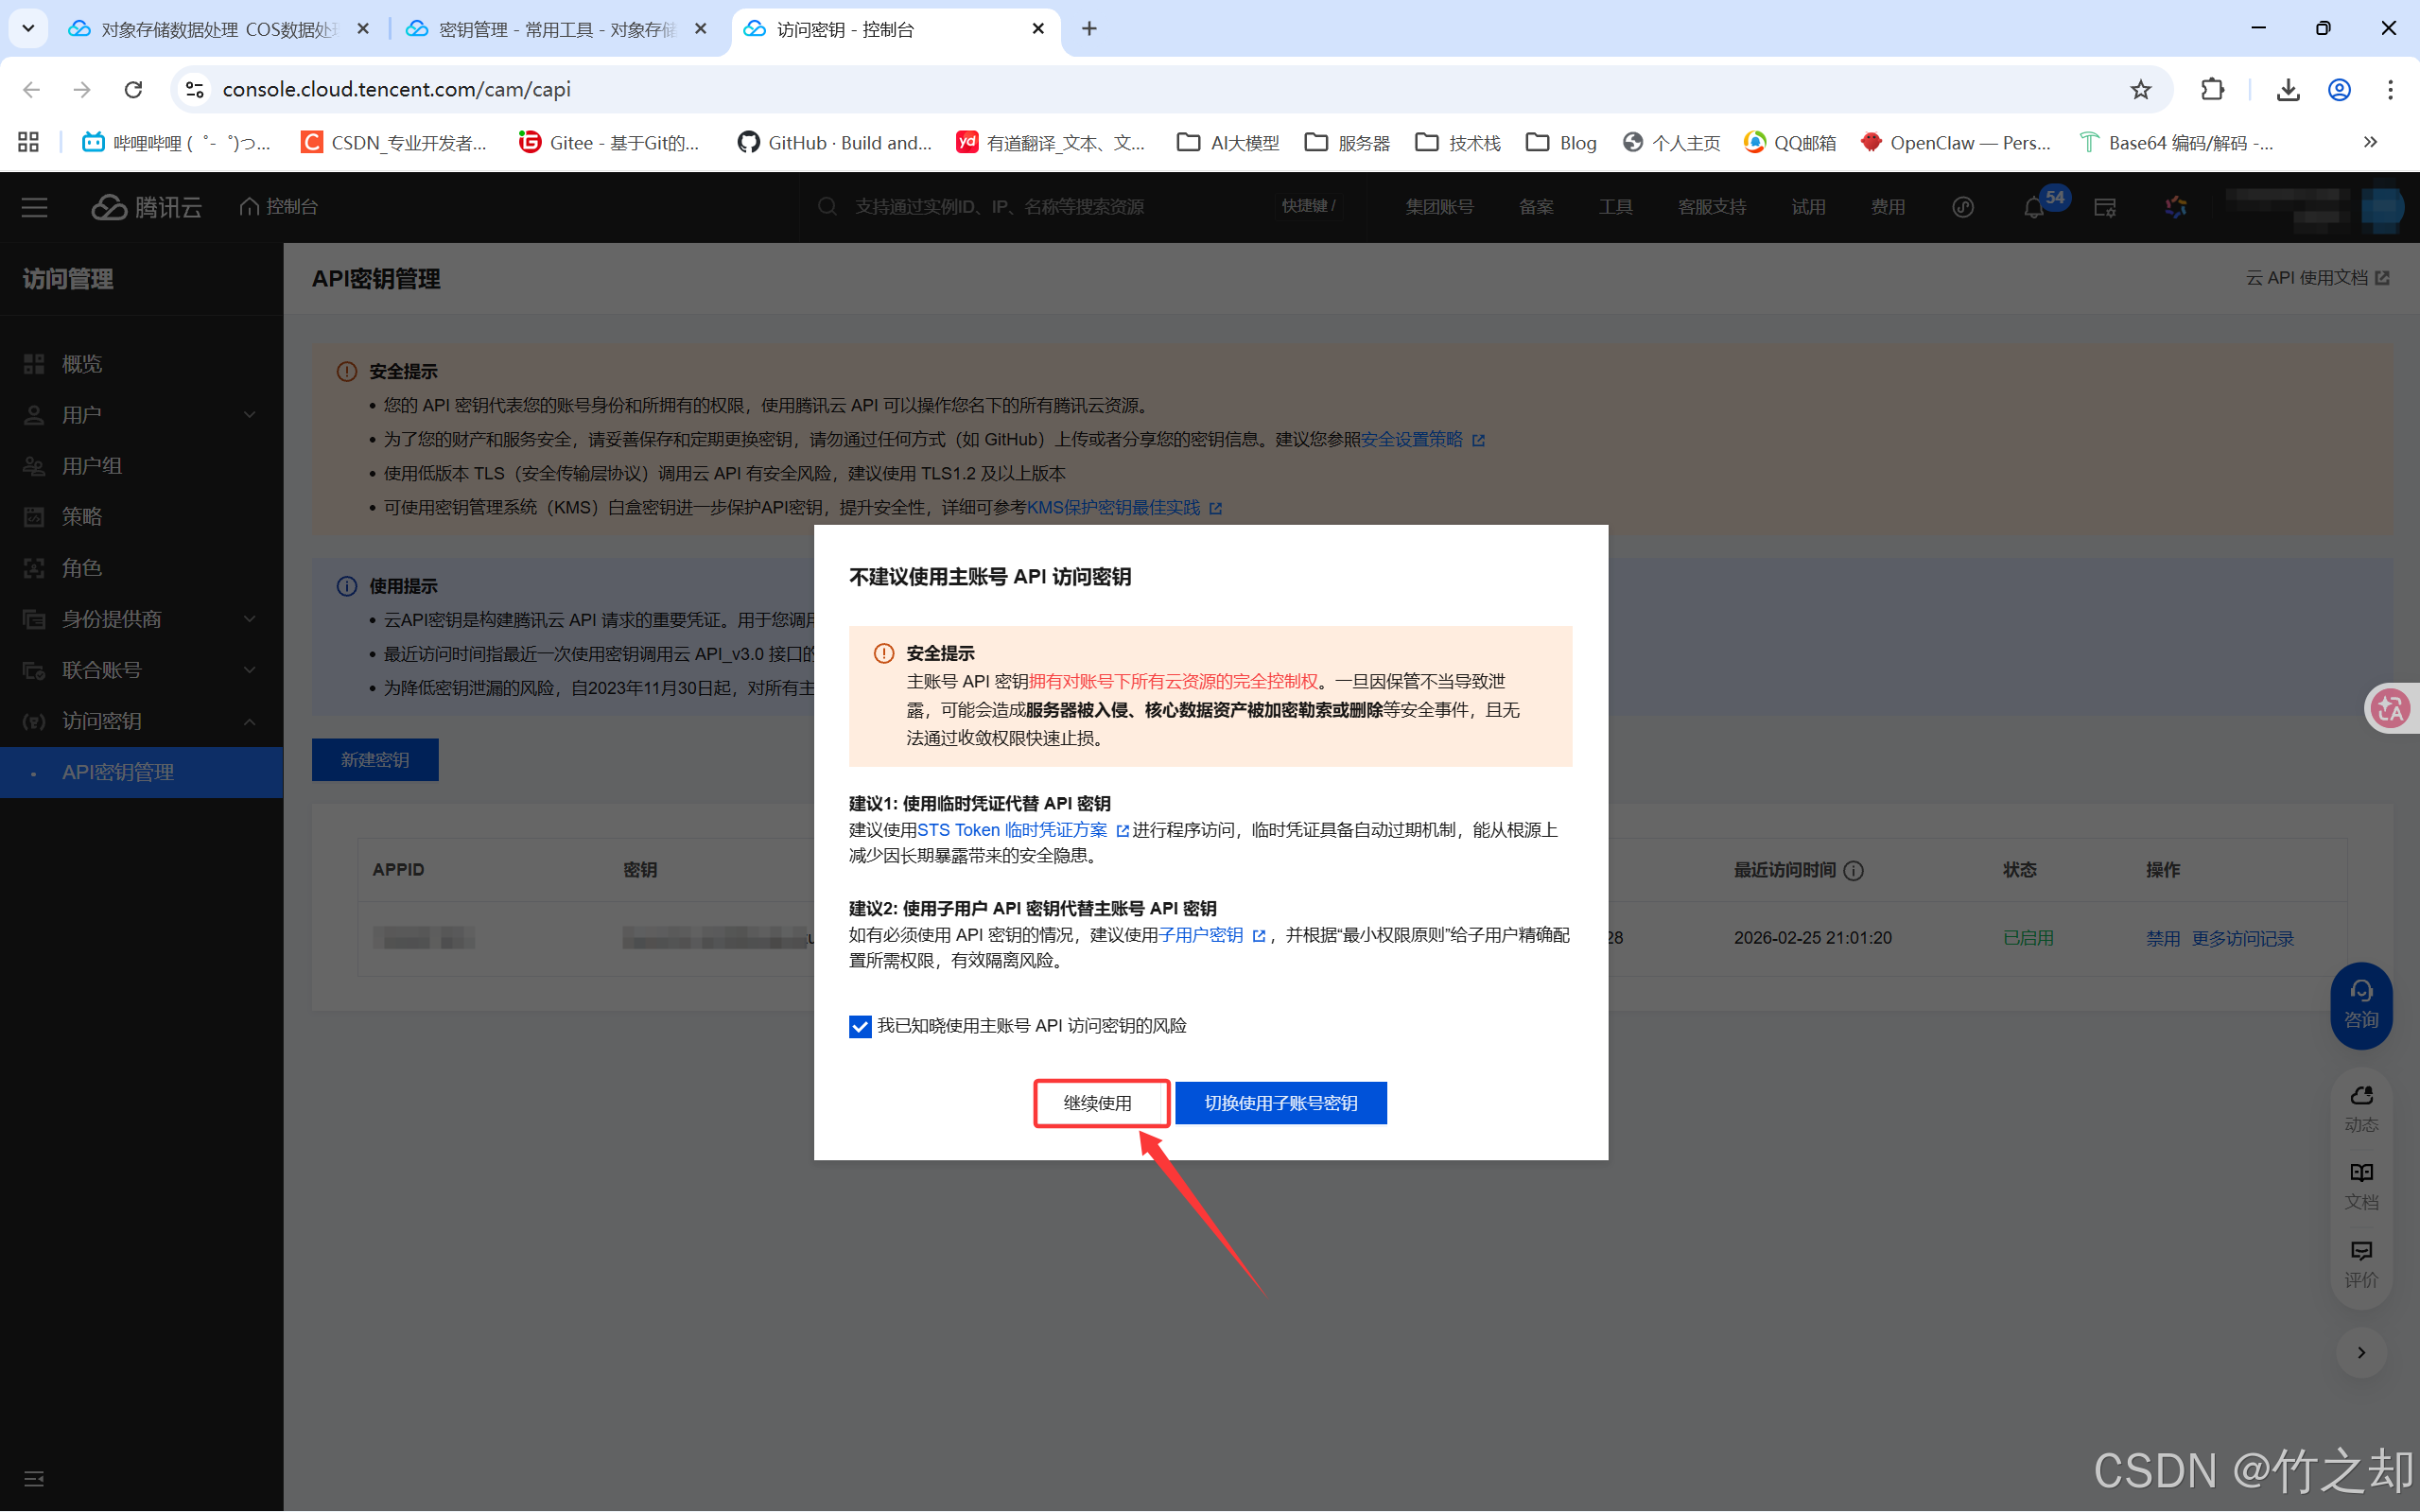
注意保护自己的账号信息安全,本篇博客写完,我会把刚刚创建的存储桶和即将创建的密钥删除!!!注意保护个人隐私安全!注意保护个人隐私安全!!注意保护个人隐私安全!!!
-
点击新建密钥

-
扫码进行身份验证,请保存好自己的私人密钥。

二、Spring Boot 中将文件上传至腾讯云COS对象存储
如果你想快速开始,请跳转到本文的第三章。(第二章,第三章均以图片上传为例)
源码 见文章置顶。
2.1 配置密钥的环境变量
Win+S打开搜索,搜索:环境变量,打开系统环境变量。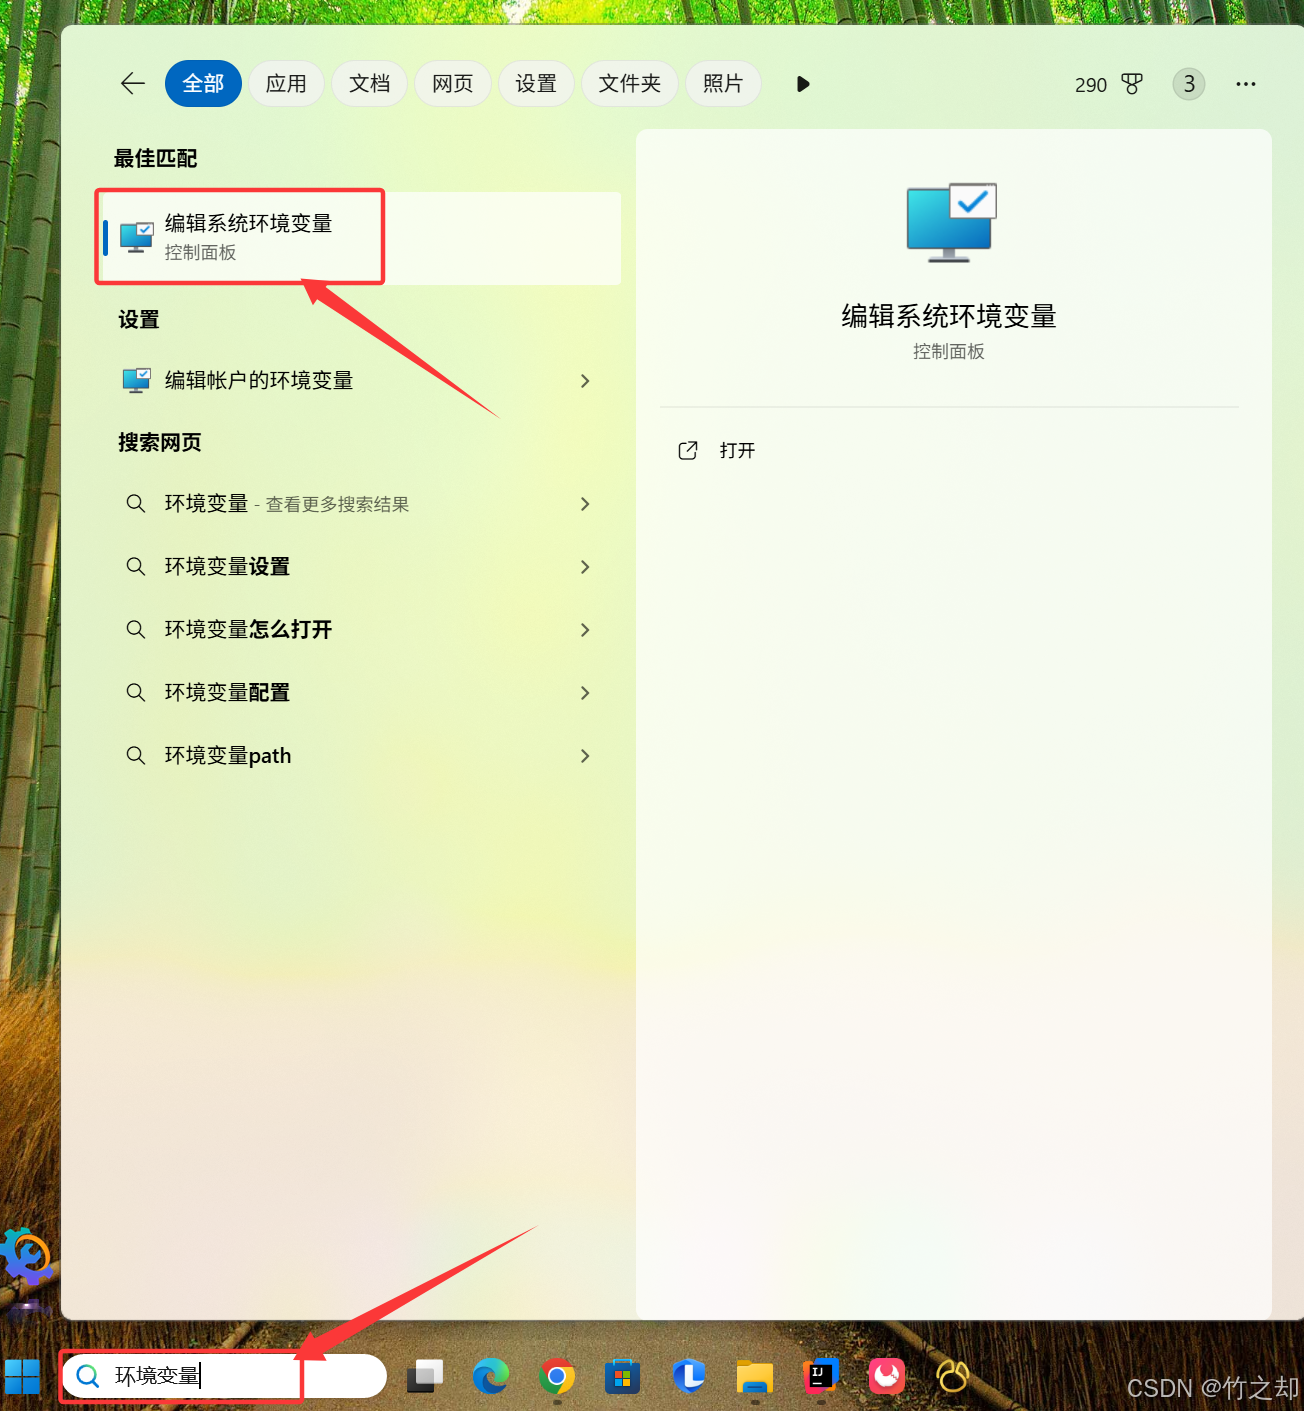
- 新建两个系统变量,值就是刚刚创建的SecretId和SecretKey。
新建完成后将IDEA关闭,重新打开。否则配置的环境变量IDEA检测不到。COS_SECRET_ID 值为 你刚刚创建的SecretId COS_SECRET_KEY 值为 你刚刚创建的密钥SecretKey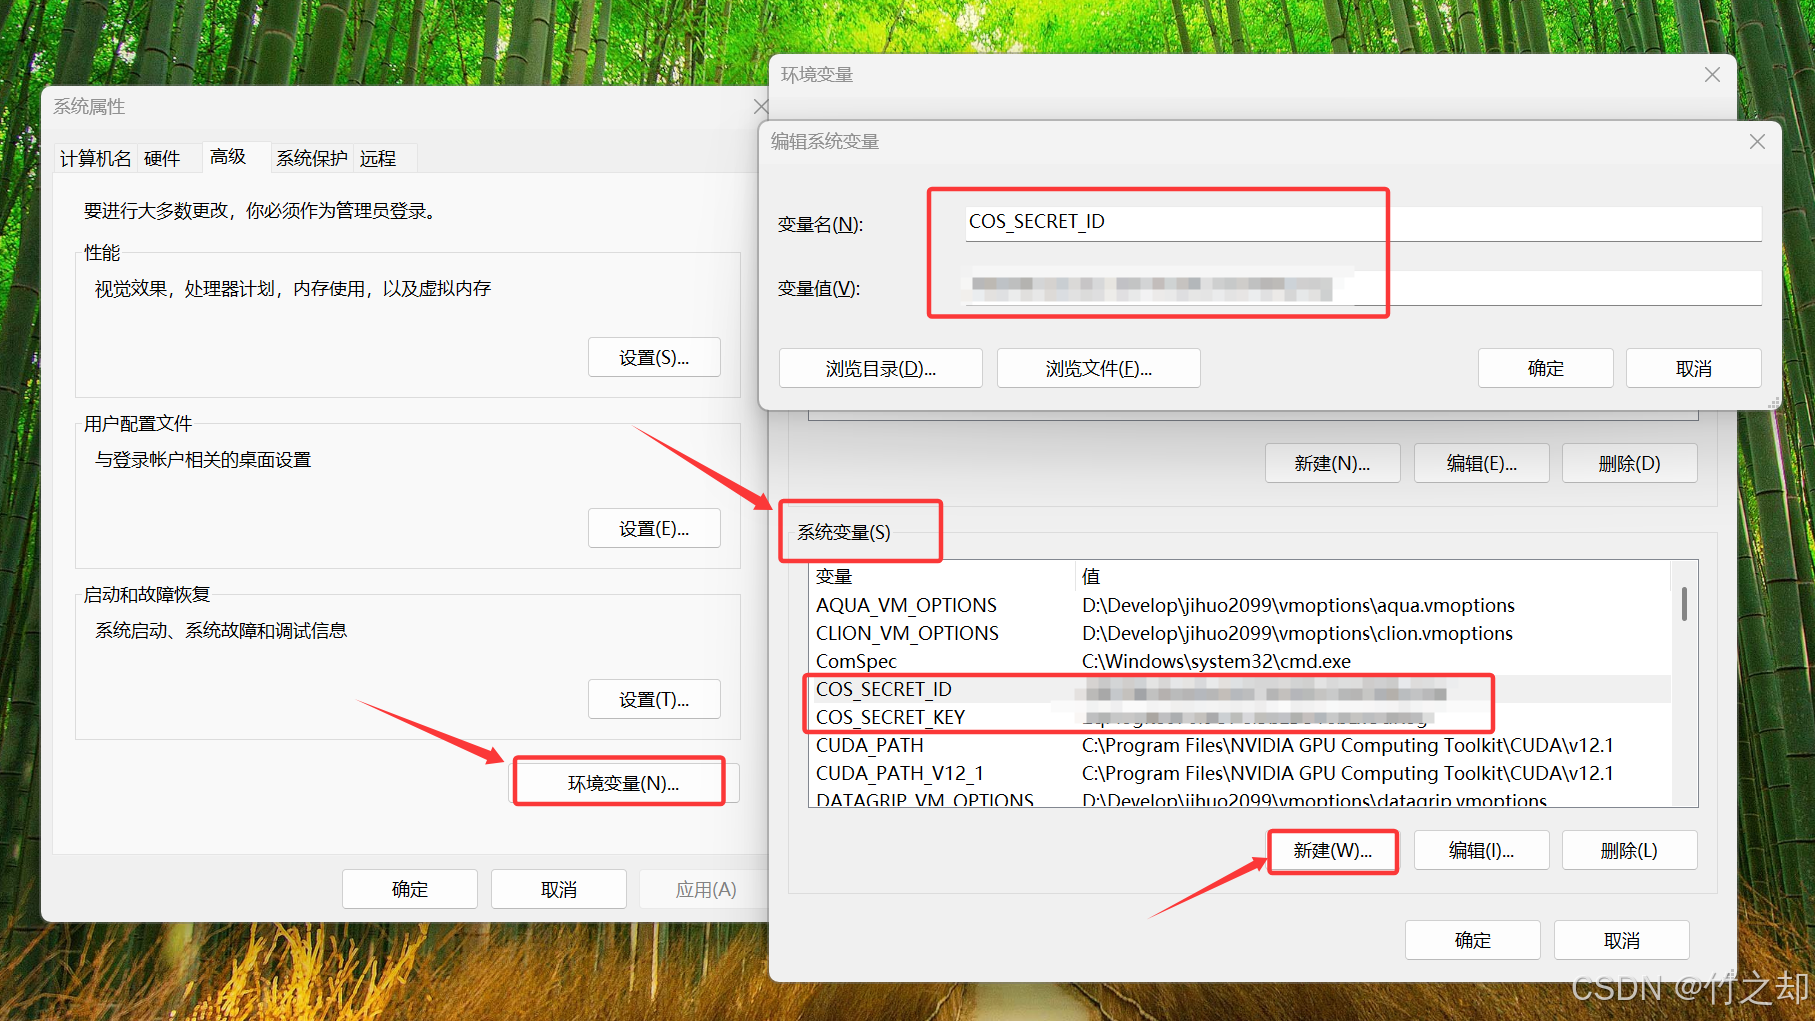
2.2 导入Maven坐标(依赖)
前置:样例版本-SpringBoot 4.0.3, jdk-21。 如果你无法导入maven 依赖,请在创建项目时,选择jdk版本为17,SpringBoot 的版本为 3.x.x。
-
打开IDEA, 打开你创建的项目,打开pom.xml 文件,将maven坐标导入,刷新maven 依赖。
查看最新 Maven 版本: https://mvnrepository.com/artifact/com.qcloud/cos_api/versions<!-- 腾讯云COS对象存储 --> <dependency> <groupId>com.qcloud</groupId> <artifactId>cos_api</artifactId> <version>5.6.261</version> <scope>compile</scope> </dependency> -
打开application.yaml 文件,配置COS对象存储
# 配置腾讯云COS对象存储
tencent:
  cos:
    secretId: ${COS_SECRET_ID}    # 读取本地环境变量
    secretKey: ${COS_SECRET_KEY}  # 读取本地环境变量
    bucketName: demo-1322221003 # 存储桶名称--填写你自己的
    bucketRegion: ap-shanghai     # 存储桶区域--填写你自己的
2.3 创建Java类
-
创建 TencentCOSProperties.java 类,添加@ConfigurationProperties注解,自动将application.yaml文件中的配置注入到类中。
package com.izhu.utils; import lombok.Data; import org.springframework.boot.context.properties.ConfigurationProperties; import org.springframework.stereotype.Component; @Data @Component @ConfigurationProperties(prefix = "tencent.cos") public class TencentCOSProperties { private String secretId; // 密钥ID private String secretKey; // 密钥 private String bucketName; // 存储桶的名字 private String bucketRegion; // 存储桶的地域 } -
创建 TencentCOSOperator.java 类,用于文件上传并返回上传的文件url 地址。
package com.izhu.utils; import org.springframework.beans.factory.annotation.Autowired; import org.springframework.stereotype.Component; import org.springframework.web.multipart.MultipartFile; import com.qcloud.cos.COSClient; import com.qcloud.cos.ClientConfig; import com.qcloud.cos.auth.BasicCOSCredentials; import com.qcloud.cos.auth.COSCredentials; import com.qcloud.cos.http.HttpProtocol; import com.qcloud.cos.model.ObjectMetadata; import com.qcloud.cos.region.Region; import java.io.InputStream; import java.time.LocalDate; import java.time.format.DateTimeFormatter; import java.util.UUID; // 交给 IOC 容器管理 @Component public class TencentCOSOperator { @Autowired private TencentCOSProperties tencentCOSProperties; /** * 上传图片文件,并返回文件的网络访问路径: url */ public String uploadFile(MultipartFile file) { String secretId = tencentCOSProperties.getSecretId(); String secretKey = tencentCOSProperties.getSecretKey(); String bucketName = tencentCOSProperties.getBucketName(); String bucketRegion = tencentCOSProperties.getBucketRegion(); // 1. 生成COSClient实例 COSCredentials cred = new BasicCOSCredentials(secretId, secretKey); ClientConfig clientConfig = new ClientConfig(new Region(bucketRegion)); clientConfig.setHttpProtocol(HttpProtocol.https); COSClient cosClient = new COSClient(cred, clientConfig); try { InputStream inputStream = file.getInputStream(); // 2. 生成一个新的不重复的文件名 String originalFilename = file.getOriginalFilename(); String fileType = originalFilename.substring(originalFilename.lastIndexOf(".")); //获取当前系统日期的字符串,格式为 yyyy/MM String dir = LocalDate.now().format(DateTimeFormatter.ofPattern("yyyy/MM")); String newFileName = UUID.randomUUID() + originalFilename.substring(originalFilename.lastIndexOf(".")); String objectName = dir + "/" + newFileName; // 3. 上传文件 ObjectMetadata objectMetadata = new ObjectMetadata(); objectMetadata.setContentLength(inputStream.available()); objectMetadata.setCacheControl("no-cache"); objectMetadata.setContentType(fileType); cosClient.putObject(bucketName, objectName, inputStream, objectMetadata); // 4. 创建文件的网络访问路径, 并返回 String url = "https://" + bucketName + ".cos." + bucketRegion + ".myqcloud.com/" + objectName; //关闭 cosClient,并释放 HTTP 连接的后台管理线程 cosClient.shutdown(); return url; } catch (Exception e) { e.printStackTrace(); // 发生IO异常、COS连接异常等,返回空 return null; } } } -
创建 UploadFileController 控制器
package com.izhu.controller; import com.izhu.pojo.Result; import com.izhu.utils.TencentCOSOperator; import org.springframework.beans.factory.annotation.Autowired; import org.springframework.web.bind.annotation.PostMapping; import org.springframework.web.bind.annotation.RestController; import org.springframework.web.multipart.MultipartFile; @RestController public class UploadFileController { @Autowired private TencentCOSOperator tencentCOSOperator; /** * 文件上传 */ @PostMapping("/upload") public String upload(MultipartFile file) { System.out.println("文件上传:"+ file); if (!file.isEmpty()) { // 上传文件 String url = tencentCOSOperator.uploadFile(file); System.out.println("文件上传成功:"+url); return url; } return "文件上传失败!"; } } -
上传文件的html 页面
<!DOCTYPE html> <html lang="en"> <head> <meta charset="UTF-8"> <title>上传文件</title> </head> <body> <form action="/upload" method="post" enctype="multipart/form-data"> 图片: <input type="file" name="file"><br> <input type="submit" value="提交"> </form> </body> </html> -
启动项目
访问页面:localhost:8080/upload.html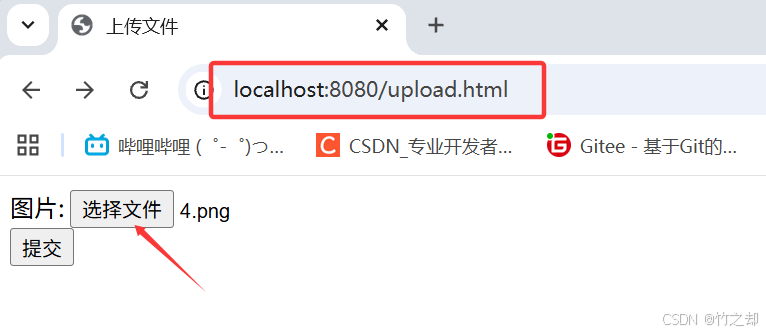
-
返回结果为:图片的url 链接。

三、腾讯云COS对象存储【快速开始】
前置: 样例版本-SpringBoot 4.0.3, jdk-21。如果你无法导入maven 依赖,请在创建项目时,选择jdk版本为17,SpringBoot 的版本为 3.x.x。
导航: 创建一个 SpringBoot 项目,导入 maven 依赖,创建两个Java类和一个 html 页面,启动项目并测试。
推荐: 推荐阅读 腾讯云COS对象存储(官方文档),根据官方文档的使用方式来总不会错。腾讯云COS对象存储:快速入门(官方文档)
3.1 导入 Maven 坐标
- 导入腾讯云COS对象存储,maven依赖。
查看最新 Maven 版本: https://mvnrepository.com/artifact/com.qcloud/cos_api/versions<!-- Source: https://mvnrepository.com/artifact/com.qcloud/cos_api --> <dependency> <groupId>com.qcloud</groupId> <artifactId>cos_api</artifactId> <version>5.6.261</version> <scope>compile</scope> </dependency>
3.2 创建Java类(以上传图片为例)
- 创建上传文件的工具类:src/main/java/com/izhu/utils/TencentCOSOperator.java
并将以下四个变量修改为你自己的值(secretId,secretKey,bucketName,bucketRegion)。
注意: 直接将密钥配置在类中不安全,也不推荐。这里只是带你快速开始,实际开发中应配置在环境变量中或外置配置文件中。注意保护个人隐私安全!!!package com.izhu.utils; import org.springframework.stereotype.Component; import org.springframework.web.multipart.MultipartFile; import com.qcloud.cos.COSClient; import com.qcloud.cos.ClientConfig; import com.qcloud.cos.auth.BasicCOSCredentials; import com.qcloud.cos.auth.COSCredentials; import com.qcloud.cos.http.HttpProtocol; import com.qcloud.cos.model.ObjectMetadata; import com.qcloud.cos.region.Region; import java.io.InputStream; import java.time.LocalDate; import java.time.format.DateTimeFormatter; import java.util.UUID; // 交给 IOC 容器管理 @Component public class TencentCOSOperator { /** * 上传图片文件,并返回文件的网络访问路径: url */ public String uploadFile(MultipartFile file) { String secretId = "xxxxxxxxxxxxxxxxxxx"; // 修改为你自己的 SecretId String secretKey = "xxxxxxxxxxxxxxxxxxx"; // 修改为你自己的 SecretKey String bucketName = "xxxxxxxxxxxxxxxxxxx"; // 修改为你自己的 存储桶名称 String bucketRegion = "xxxxxxxxxxxxxxxxxxx"; // 修改为你自己的 存储桶区域 // 1. 生成COSClient实例 COSCredentials cred = new BasicCOSCredentials(secretId, secretKey); ClientConfig clientConfig = new ClientConfig(new Region(bucketRegion)); clientConfig.setHttpProtocol(HttpProtocol.https); COSClient cosClient = new COSClient(cred, clientConfig); try { InputStream inputStream = file.getInputStream(); // 2. 生成一个新的不重复的文件名 String originalFilename = file.getOriginalFilename(); String fileType = originalFilename.substring(originalFilename.lastIndexOf(".")); //获取当前系统日期的字符串,格式为 yyyy/MM String dir = LocalDate.now().format(DateTimeFormatter.ofPattern("yyyy/MM")); String newFileName = UUID.randomUUID() + originalFilename.substring(originalFilename.lastIndexOf(".")); String objectName = dir + "/" + newFileName; // 3. 上传文件 ObjectMetadata objectMetadata = new ObjectMetadata(); objectMetadata.setContentLength(inputStream.available()); objectMetadata.setCacheControl("no-cache"); objectMetadata.setContentType(fileType); cosClient.putObject(bucketName, objectName, inputStream, objectMetadata); // 4. 创建文件的网络访问路径, 并返回 String url = "https://"+bucketName+".cos."+bucketRegion+".myqcloud.com/" + objectName; //关闭 cosClient,并释放 HTTP 连接的后台管理线程 cosClient.shutdown(); return url; } catch (Exception e) { e.printStackTrace(); // 发生IO异常、COS连接异常等,返回空 return null; } } } - 创建接收文件上传请求控制器类:src/main/java/com/izhu/controller/UploadFileController.java
package com.izhu.controller; import com.izhu.utils.TencentCOSOperator; import org.springframework.beans.factory.annotation.Autowired; import org.springframework.web.bind.annotation.PostMapping; import org.springframework.web.bind.annotation.RestController; import org.springframework.web.multipart.MultipartFile; @RestController public class UploadFileController { @Autowired private TencentCOSOperator tencentCOSOperator; /** * 上传文件 */ @PostMapping("/upload") public String uploadFile(MultipartFile file) { String url = tencentCOSOperator.uploadFile(file); System.out.println("文件路径:"+url); return url; } } - 创建上传文件的前端页面:src/main/resources/static/upload.html
<!DOCTYPE html>
<html lang="en">
<head>
    <meta charset="UTF-8">
    <title>上传文件</title>
</head>
<body>
    <form action="/upload" method="post" enctype="multipart/form-data">
        图片: <input type="file" name="file"><br>
        <input type="submit" value="提交">
    </form>

</body>
</html>
3.3 启动项目并测试
-
启动项目
访问页面:localhost:8080/upload.html -
返回结果为:图片的url 链接。
我也是第一次使用对象存储服务,如果有写的不对的,还请大佬指出,感谢。emmm~
源码见文章置顶。
END

腾讯云面向开发者汇聚海量精品云计算使用和开发经验,营造开放的云计算技术生态圈。
更多推荐
 13
13 0
0- 0


 已为社区贡献14条内容

所有评论(0)