学习的spring boot 2.0的记录(十一):SpringBoot关于Shiro的配置(简单的登录demo)
前言:
学习的地址:https://www.majiaxueyuan.com/front/showcoulist 、https://www.bilibili.com/video/av44084437
SpringBoot的pom依赖(以2.0版本为例的)
本集记录的是shiro的权限框架(先写一个简单的demo,后面记录一个比较偏向实战的demo)
使用了springboot + freemark + shiro 这样的框架
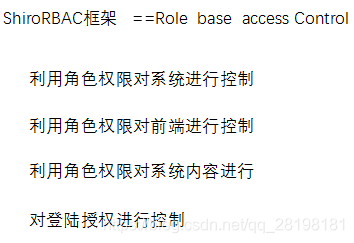
作用如下:
piao的图:
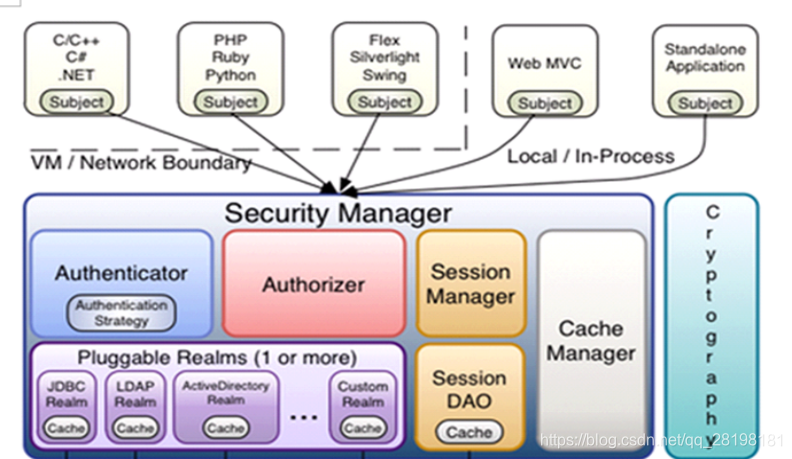
都是基于在Security manager上进行的操作
整个demo的层次:
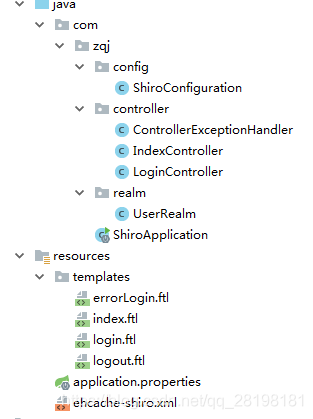
目录
目录
2.编写配置application.properites文件
异常:Uncaught SyntaxError: Unexpected token <
1.添加pom文件
<parent>
        <groupId>org.springframework.boot</groupId>
        <artifactId>spring-boot-starter-parent</artifactId>
        <version>2.0.0.RELEASE</version>
    </parent>

    <dependencies>

        <dependency>
            <groupId>org.springframework.boot</groupId>
            <artifactId>spring-boot-starter</artifactId>
        </dependency>

        <dependency>
            <groupId>org.springframework.boot</groupId>
            <artifactId>spring-boot-starter-web</artifactId>
        </dependency>
        <!-- 引入freeMarker的依赖包. -->
        <dependency>
            <groupId>org.springframework.boot</groupId>
            <artifactId>spring-boot-starter-freemarker</artifactId>
        </dependency>


        <!-- shiro -->
        <dependency>
            <groupId>org.apache.shiro</groupId>
            <artifactId>shiro-core</artifactId>
            <version>1.3.2</version>
        </dependency>
        <dependency>
            <groupId>org.apache.shiro</groupId>
            <artifactId>shiro-web</artifactId>
            <version>1.3.2</version>
        </dependency>
        <dependency>
            <groupId>org.apache.shiro</groupId>
            <artifactId>shiro-ehcache</artifactId>
            <version>1.3.2</version>
        </dependency>
        <dependency>
            <groupId>org.apache.shiro</groupId>
            <artifactId>shiro-spring</artifactId>
            <version>1.3.2</version>
        </dependency>
2.编写配置application.properites文件
这里是用于把freemark的一些配置以及常用的配置加载进去
server.port=8080
server.tomcat.uri-encoding=UTF-8
spring.freemarker.allow-request-override=false
spring.freemarker.cache=true
spring.freemarker.charset=UTF-8
spring.freemarker.check-template-location=true
spring.freemarker.content-type=text/html
spring.freemarker.expose-request-attributes=false
spring.freemarker.expose-session-attributes=false
spring.freemarker.expose-spring-macro-helpers=false
spring.freemarker.suffix=.ftl
spring.freemarker.template-loader-path=classpath:/templates/
3.写一个简单的登录demo
1.配置shiro类
import org.apache.shiro.cache.ehcache.EhCacheManager;
import org.apache.shiro.session.mgt.eis.JavaUuidSessionIdGenerator;
import org.apache.shiro.session.mgt.eis.MemorySessionDAO;
import org.apache.shiro.spring.LifecycleBeanPostProcessor;
import org.apache.shiro.spring.security.interceptor.AuthorizationAttributeSourceAdvisor;
import org.apache.shiro.spring.web.ShiroFilterFactoryBean;
import org.apache.shiro.web.mgt.DefaultWebSecurityManager;
import org.apache.shiro.web.servlet.SimpleCookie;
import org.apache.shiro.mgt.SecurityManager;
import org.apache.shiro.web.session.mgt.DefaultWebSessionManager;
import org.springframework.aop.framework.autoproxy.DefaultAdvisorAutoProxyCreator;
import org.springframework.context.annotation.Bean;
import org.springframework.context.annotation.Configuration;


@Configuration
public class ShiroConfiguration {
    // ShiroFilterFactoryBean 处理拦截问题,核心配置
    @Bean
    public ShiroFilterFactoryBean shirFilter(SecurityManager securityManager) {
        ShiroFilterFactoryBean shiroFilterFactoryBean = new ShiroFilterFactoryBean();
        // 必须设置 SecurityManager
        shiroFilterFactoryBean.setSecurityManager(securityManager);
        // 拦截器.
        Map<String, String> filterChainDefinitionMap = new LinkedHashMap<String, String>();
        // 放开请求
        filterChainDefinitionMap.put("/login", "anon");
        filterChainDefinitionMap.put("/userLogin", "anon");
        filterChainDefinitionMap.put("/toErrorLogin", "anon");
        // 其他的请请求拦截
        filterChainDefinitionMap.put("/**", "authc");
        // 如果不设置默认会自动寻找Web工程根目录下的"/login.jsp"页面
        shiroFilterFactoryBean.setLoginUrl("/login");
        // 未授权界面
        shiroFilterFactoryBean.setUnauthorizedUrl("/login");
        shiroFilterFactoryBean.setFilterChainDefinitionMap(filterChainDefinitionMap);
        return shiroFilterFactoryBean;
    }

     // 这是去加载缓存的配置文件
    @Bean
    public EhCacheManager getEhCacheManager() {
        EhCacheManager em = new EhCacheManager();
        em.setCacheManagerConfigFile("classpath:ehcache-shiro.xml");
        return em;
    }

    @Bean
    public DefaultAdvisorAutoProxyCreator getDefaultAdvisorAutoProxyCreator() {
        DefaultAdvisorAutoProxyCreator daap = new DefaultAdvisorAutoProxyCreator();
        daap.setProxyTargetClass(true);
        return daap;
    }

    // 配置org.apache.shiro.web.session.mgt.DefaultWebSessionManager session的配置
    @Bean
    public DefaultWebSessionManager getDefaultWebSessionManager() {
        DefaultWebSessionManager defaultWebSessionManager = new DefaultWebSessionManager();
        defaultWebSessionManager.setSessionDAO(getMemorySessionDAO());
        //设置到最长的有效时间为1小时
        defaultWebSessionManager.setGlobalSessionTimeout(1 * 60 * 60 * 1000);
        defaultWebSessionManager.setSessionValidationSchedulerEnabled(true);
        defaultWebSessionManager.setSessionIdCookieEnabled(true);
        defaultWebSessionManager.setSessionIdCookie(getSimpleCookie());
        return defaultWebSessionManager;
    }

    // 配置org.apache.shiro.session.mgt.eis.MemorySessionDAO 配置唯一的UUID
    @Bean
    public MemorySessionDAO getMemorySessionDAO() {
        MemorySessionDAO memorySessionDAO = new MemorySessionDAO();
        memorySessionDAO.setSessionIdGenerator(javaUuidSessionIdGenerator());
        return memorySessionDAO;
    }

    @Bean
    public JavaUuidSessionIdGenerator javaUuidSessionIdGenerator() {
        return new JavaUuidSessionIdGenerator();
    }

    // session自定义cookie名
    @Bean
    public SimpleCookie getSimpleCookie() {
        SimpleCookie simpleCookie = new SimpleCookie();
        simpleCookie.setName("security.session.id");
        simpleCookie.setPath("/");
        return simpleCookie;
    }

    @Bean
    public LifecycleBeanPostProcessor getLifecycleBeanPostProcessor() {
        return new LifecycleBeanPostProcessor();
    }

    @Bean(name = "securityManager")
    public DefaultWebSecurityManager getDefaultWebSecurityManager(UserRealm userRealm) {
        DefaultWebSecurityManager dwsm = new DefaultWebSecurityManager();
        dwsm.setRealm(userRealm);
        // <!-- 用户授权/认证信息Cache, 采用EhCache 缓存 -->
        dwsm.setCacheManager(getEhCacheManager());
        dwsm.setSessionManager(getDefaultWebSessionManager());
        return dwsm;
    }

    @Bean
    public UserRealm userRealm(EhCacheManager cacheManager) {
        UserRealm userRealm = new UserRealm();
        userRealm.setCacheManager(cacheManager);
        return userRealm;
    }

    // 开启shrio注解支持  可以不用 @Component
    @Bean
    public AuthorizationAttributeSourceAdvisor getAuthorizationAttributeSourceAdvisor(UserRealm userRealm) { // 使用的UserRealm
        AuthorizationAttributeSourceAdvisor aasa = new AuthorizationAttributeSourceAdvisor();
        aasa.setSecurityManager(getDefaultWebSecurityManager(userRealm));
        return aasa;
    }
}
这个类具体就是在处理请求的 除了修改访问的路径,其他几乎都可以不动
2020年3月16日更:
注意:前台使用到的js资源也需要放置到过滤条件里面 否则会报错
Uncaught SyntaxError: Unexpected token <
必须这样:
  /*静态资源也需要通过 否则会有问题*/
        filterChainDefinitionMap.put("/js/**", "anon");
        filterChainDefinitionMap.put("/css/**", "anon");
        filterChainDefinitionMap.put("/images/**", "anon");
2.然后将需要的缓存配置文件放进去
<ehcache updateCheck="false" name="cacheManagerConfigFile">
	<defaultCache maxElementsInMemory="10000" eternal="false"
		timeToIdleSeconds="120" timeToLiveSeconds="120" overflowToDisk="false"
		diskPersistent="false" diskExpiryThreadIntervalSeconds="120"
		memoryStoreEvictionPolicy="LRU" />
	<!-- 登录记录缓存 锁定1分钟 -->
	<!-- <cache name="lgoinRetryCache" maxEntriesLocalHeap="2000" eternal="false"
		timeToIdleSeconds="60" timeToLiveSeconds="0" overflowToDisk="false" statistics="true">
		</cache> -->
	<cache name="shiro-activeSessionCache" eternal="false"
		maxElementsInMemory="10000" overflowToDisk="false" timeToIdleSeconds="0"
		timeToLiveSeconds="0" statistics="true" />
</ehcache>
将其放到resources根目录下
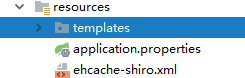
3.需要配置一个UserRealm类 来处理用户的授权和认证(暂时用不到授权,只记录了认证,并且在shiroconfiguration中也需要使用这个类)
package realm;

import org.apache.shiro.authc.AuthenticationException;
import org.apache.shiro.authc.AuthenticationInfo;
import org.apache.shiro.authc.AuthenticationToken;
import org.apache.shiro.authc.SimpleAuthenticationInfo;
import org.apache.shiro.authz.AuthorizationInfo;
import org.apache.shiro.realm.AuthorizingRealm;
import org.apache.shiro.session.Session;
import org.apache.shiro.session.mgt.eis.SessionDAO;
import org.apache.shiro.subject.PrincipalCollection;
import org.apache.shiro.subject.support.DefaultSubjectContext;
import org.springframework.beans.factory.annotation.Autowired;

import java.util.Collection;

/**
 * @author : HYXT_ZouQiJun
 * @createTime : 2019/7/31 17:03
 * @descrption :
 */
public class UserRealm extends AuthorizingRealm {

    @Autowired
    private SessionDAO sessionDAO;

    /**
     * 授权
     *
     * @param principalCollection
     * @return
     */
    @Override
    protected AuthorizationInfo doGetAuthorizationInfo(PrincipalCollection principalCollection) {

        return null;
    }


    /**
     * 认证
     *
     * @param authenticationToken
     * @return
     * @throws AuthenticationException
     */
    @Override
    protected AuthenticationInfo doGetAuthenticationInfo(AuthenticationToken authenticationToken) throws AuthenticationException {

        String username = (String) authenticationToken.getPrincipal(); //传递过来的username 就是登陆的用户名称

        String dbpassWord = "123"; //这里模拟的是数据库的用户密码
        System.out.println("开始进入到Realm:" + username);

        //这里是处理某处登陆后,当前登录失效的方法,就像异地登录那样
        Collection<Session> sessions = sessionDAO.getActiveSessions();
        for (Session session : sessions) {
            String loginedUserName = String.valueOf(session.getAttribute(DefaultSubjectContext.PRINCIPALS_SESSION_KEY));
            if (username.equals(loginedUserName)) {
                //说明已经是登陆成功的了。需要挤掉
                session.setTimeout(0L);
                break;
            }
        }

        SimpleAuthenticationInfo simpleAuthorizationInfo = null;

        //这里是将username 和 数据库得到的密码放进去 最后一个参数可以写死
        //实战是在数据库查到数据后将这个数据放进去
        //后期还可以加盐
        simpleAuthorizationInfo = new SimpleAuthenticationInfo(username, dbpassWord, "realName");
        return simpleAuthorizationInfo;
    }
}
4.写controller去处理请求数据
@Controller
public class LoginController {


    @RequestMapping("login")
    public String getLogin() {
        return "login";
    }

    @RequestMapping("userLogin")
    public String userLogin(@RequestParam("username") String userName, @RequestParam("password") String password, Map<String, String> maps) {

        if (StringUtils.isBlank(userName) || StringUtils.isBlank(password)) {
            System.out.println("帐号为空或者密码为空");
            return "redirect:/toErrorLogin";
        }
        //这里是将得到的用户和密码放到token中
        Subject subject = SecurityUtils.getSubject();
        UsernamePasswordToken usernamePasswordToken = new UsernamePasswordToken(userName, password);
        //login方法到UserRealm的认证方法去
        subject.login(usernamePasswordToken);
            //如果是正常的,就会返回到一个主页
        return "redirect:/index/getIndex";
    }


    @RequestMapping("toErrorLogin")
    public String toErrorLogin(Map<String, String> maps) {
        System.out.println("我怀疑是这里");
        maps.put("code", "101");
        maps.put("msg", "用户和密码有问题");
        return "errorLogin";
    }

    @RequestMapping("logout")
    public String logout(Map<String, String> maps) {
        Subject subject = SecurityUtils.getSubject();
        subject.logout();
        maps.put("msg", "退出成功");
        return "logout";
    }
}
indexController:
@Controller
@RequestMapping("/index")
public class IndexController {

    @RequestMapping("getIndex")
    public String getIndex(Map<String, String> map) {
        Subject subject = SecurityUtils.getSubject();
        String username = (String) subject.getPrincipal();
        map.put("name", username);
        return "index";
    }

    @RequestMapping("/toLogout")
    public String togetLogout(){
        return "redirect:/logout";
    }


}
5.可以写一个全局拦截异常类去处理异常 将其返回到重新登录的页面:
@ControllerAdvice
public class ControllerExceptionHandler {

    @ExceptionHandler(AuthenticationException.class)
    public String ExceptionHandler() {
        System.out.println("抓取到异常了...");
        return "redirect:/toErrorLogin";
    }
}
6.把前端页面放到resources的templates中
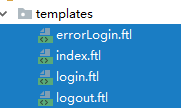
index.ftl:
<!DOCTYPE html>
<html xmlns="http://www.w3.org/1999/html">
<head lang="en">
    <meta charset="UTF-8"/>
    <title></title>
</head>
<body>
你好啊:${name}
</br>

退出:
<form action="toLogout" method="post">
    <input type="submit" name="logout" value="退出"/><br/>
</form>

</body>
</html>
login.ftl
<!DOCTYPE html>
<html>
<head lang="en">
    <meta charset="UTF-8"/>
    <title></title>
</head>
<body>
骚年 登录 SAO么

<form action="userLogin" method="post">
    <input type="text" name="username"/><br/>
    <input type="password" name="password"/><br/>
    <input type="submit" name="submit"/><br/>
</form>
</body>
</html>
errorLogin.ftl:
<!DOCTYPE html>
<html>
<head lang="en">
    <meta charset="UTF-8"/>
    <title></title>
</head>
<body>
骚年 登录 SAO么????
${code}
${msg}
<form action="userLogin" method="post">
    <input type="text" name="username"/><br/>
    <input type="password" name="password"/><br/>
    <input type="submit" name="submit"/><br/>
</form>
</body>
</html>
还有一个登出的页面 logout.ftl
<!DOCTYPE html>
<html>
<head lang="en">
    <meta charset="UTF-8"/>
    <title></title>
</head>
<body>
${msg}
<form action="login" method="post">
    <input type="submit" name="登录页面" value="跳转到登录页面......"/><br/>
</form>
</body>
</html>
当前的demo整个流程就是:
controller获得的请求之前基于aop会判断是否能够直接进入index页面
如果没有登陆的话全部会跳转到login或者errorlogin页面
输入的用户名密码会进入realm里面进行一个判断,如果是正确的会按正常流程处理。如果有误会抛出异常
AuthenticationException所以这个时候使用拦截器去抓取然后在做其他处理
可以看看如下的demo流程:
1.在没有登录的情况下访问主页
http://localhost:9090/index会自动跳转到登录页面
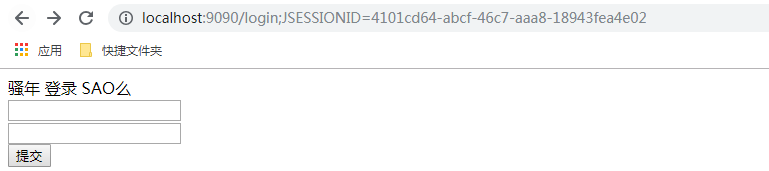
我们随便来个帐号密码 uname:姬子阿姨 pwd:111
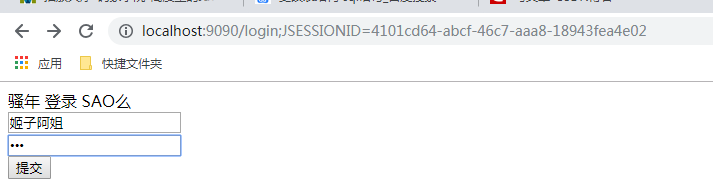
因为后台写死的密码是123
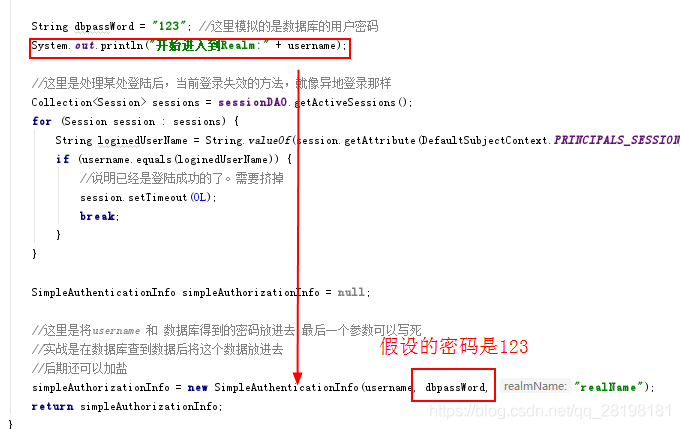
所以111是不对的
因此会在拦截器中获取到异常:
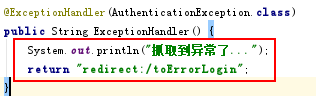
然后重新跳转到toErrorLogin的方法中去
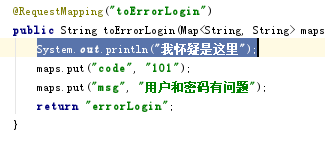
后台日志打印如下:
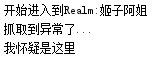
再测试一个正确的 密码是123
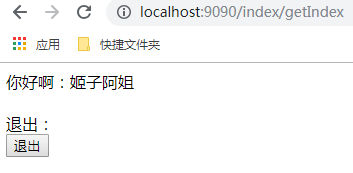
这就是正确的了
点击退出就是执行退出操作。
会将当前的用户登出 让其无法直接进入index
4.退出
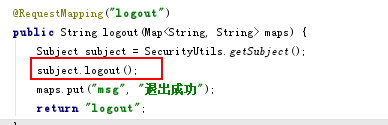
其实很简单,在退出的controller中 将subject logout就行:格式如下:
User user = (User) o;
            log.info("user:" + user.getUserName());
            if ("websiteAdmin".equals(user.getUserName())) {
                httpServletRequest.getSession().removeAttribute("admin");
                /*shiro 进行用户登出,避免出现超权限的情况*/
                Subject subject = SecurityUtils.getSubject();
                subject.logout();
                log.info("当前用户已退出了");
                log.info(httpServletRequest.getRemoteHost() + "退出了");

            }
简单的demo如上。

腾讯云面向开发者汇聚海量精品云计算使用和开发经验,营造开放的云计算技术生态圈。
更多推荐
 1
1 0
0- 0


 已为社区贡献3条内容

所有评论(0)