C#自定义控件结合OpencvSharp实现斑点检测
C# 自定义控件 opencvsharp 斑点检测blob
最近在做一个图像处理相关的项目,需要实时检测图片中的斑点,同时要求能够方便地在WinForms界面中展示和操作。经过一番调研和实践,决定采用C#自定义控件结合OpencvSharp来实现。这组合不仅充分发挥了C#在Windows应用开发中的优势,还借助OpencvSharp强大的图像处理功能,完美地完成了斑点检测任务。
一、项目背景
在医疗影像分析、工业检测等领域,斑点检测是一个常见的需求。传统的做法通常是通过Python结合OpenCV来实现,但这次项目需要一个Windows桌面应用程序,因此选择C#作为开发语言。
二、OpencvSharp简介
OpencvSharp是OpenCV在.NET平台上的封装,它允许开发者在C#中使用OpenCV的图像处理功能。相比直接使用OpenCV的C++接口,OpencvSharp更加简洁易用,同时保留了OpenCV的核心功能。
using OpencvSharp;

// 创建一个窗口用于显示图像
var window = new Window("Image Window");
window.Show();

// 读取图像
Mat image = Cv2.ImRead("input.jpg");

// 转换为灰度图像
Mat grayImage = new Mat();
Cv2.CvtColor(image, grayImage, ColorConversion.BgrToGray);

// 显示图像
Cv2.ImShow("Gray Image", grayImage);
Cv2.WaitKey(0);
三、自定义控件实现
为了更好地展示和操作图像,我决定创建一个自定义的Windows Forms控件。这个控件需要支持图像的显示、缩放和拖动功能。
public class ImageViewer : UserControl
{
    private Mat currentImage;
    private Rectangle imageRectangle = Rectangle.Empty;
    private Point mouseDownPoint = Point.Empty;

    public ImageViewer()
    {
        InitializeComponent();
        this.SetStyle(ControlStyles.ResizeRedraw, true);
        this.SetStyle(ControlStyles.UserPaint, true);
        this.SetStyle(ControlStyles.AllPaintingInWmPaint, true);
    }

    public void DisplayImage(Mat image)
    {
        currentImage = image;
        this.Invalidate();
    }

    protected override void OnPaint(PaintEventArgs e)
    {
        base.OnPaint(e);

        if (currentImage == null) return;

        if (imageRectangle == Rectangle.Empty)
        {
            // 计算图像显示区域
            float aspectRatio = (float)currentImage.Width / currentImage.Height;
            int width = this.Width;
            int height = (int)(width / aspectRatio);

            if (height > this.Height)
            {
                height = this.Height;
                width = (int)(height * aspectRatio);
            }

            imageRectangle = new Rectangle(
                (this.Width - width) / 2,
                (this.Height - height) / 2,
                width,
                height
            );
        }

        // 将OpenCV的Mat转换为Bitmap
        var bitmap = currentImage.ToBitmap();
        e.Graphics.DrawImage(bitmap, imageRectangle);
    }

    // 其他事件处理代码...
}
四、斑点检测实现
斑点检测的核心算法采用Blob检测。Blob(Binary Large Object)检测是一种基于图像区域分析的检测方法,特别适合检测图像中的斑点、细胞等目标。
public class SpotDetector
{
private double threshold;
private double minArea;
private double maxArea;
public SpotDetector(double threshold, double minArea, double maxArea)
{
this.threshold = threshold;
this.minArea = minArea;
this.maxArea = maxArea;
}
public List<Rect> Detect(Mat image)
{
var spots = new List<Rect>();
// 转换为二值图像
Mat binaryImage = new Mat();
Cv2.Threshold(image, binaryImage, threshold, 255, ThresholdType_BINARY);
// 查找轮廓
Mat hierarchy = new Mat();
var contours = Cv2.FindContours(binaryImage, RetrievalMode.List, ChainApproxMethod.Simple);
foreach (var contour in contours)
{
var area = Cv2.ContourArea(contour);
if (area < minArea || area > maxArea) continue;
var rect = Cv2.BoundingRect(contour);
spots.Add(rect);
}
return spots;
}
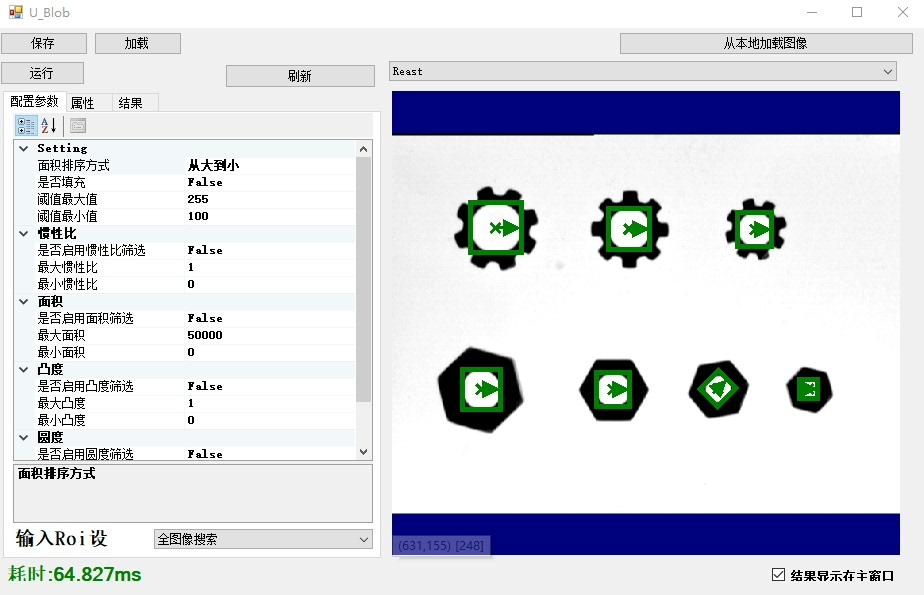
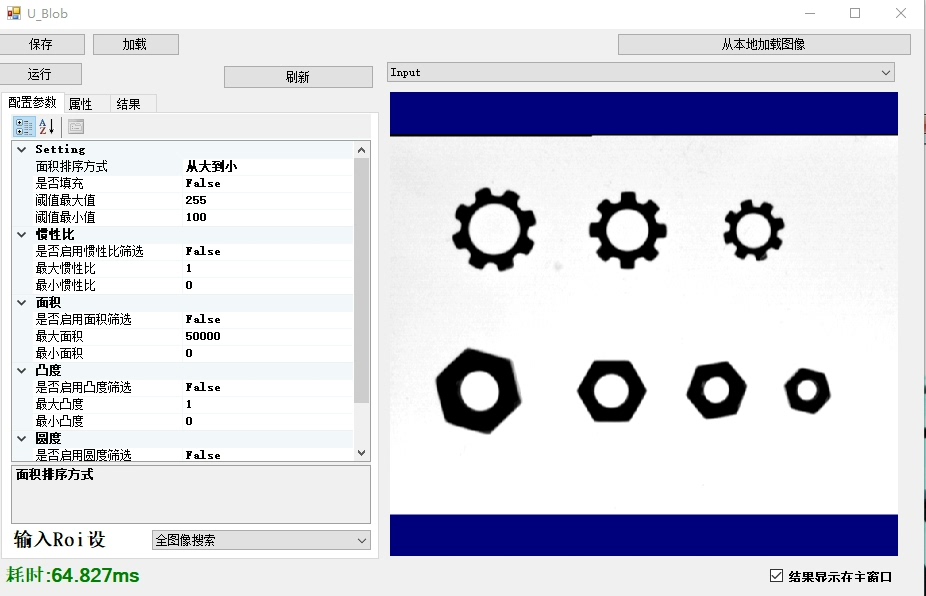
}五、效果展示
将自定义控件和斑点检测算法整合到Windows Forms应用中,可以实时显示原始图像和检测结果。用户可以通过调整阈值、最小面积和最大面积等参数,实现对斑点检测的精细控制。
private void buttonDetect_Click(object sender, EventArgs e)
{
    Mat image = Cv2.ImRead("input.jpg");
    Mat grayImage = new Mat();
    Cv2.CvtColor(image, grayImage, ColorConversion.BgrToGray);

    var detector = new SpotDetector(
        threshold: trackBarThreshold.Value,
        minArea: numericUpDownMinArea.Value,
        maxArea: numericUpDownMaxArea.Value
    );

    var spots = detector.Detect(grayImage);

    // 在原始图像上绘制检测结果
    foreach (var spot in spots)
    {
        Cv2.Rectangle(image, spot, Scalar.Red, 2);
    }

    imageViewer.DisplayImage(image);
}
六、总结
通过C#自定义控件和OpencvSharp的结合,我们成功地实现了一个功能强大且易于操作的斑点检测应用。自定义控件提供了良好的用户界面支持,而OpencvSharp则为图像处理提供了丰富的功能。这种组合不仅充分发挥了C#在Windows应用开发中的优势,还借助了OpenCV强大的图像处理能力,是一种非常值得推荐的开发方案。
C# 自定义控件 opencvsharp 斑点检测blob

腾讯云面向开发者汇聚海量精品云计算使用和开发经验,营造开放的云计算技术生态圈。
更多推荐
 4
4 0
0- 0


 已为社区贡献8条内容

所有评论(0)