端侧AI 模型部署(Windows/TFLite/Android Studio )实战一
一、准备清单
- Android Studio(新版即可)
- 安卓手机(Android 8.0+,开启 USB 调试)
- Python(本地配合python环境)
- 不用云端、不用充值 token,纯本地端侧运行
二、第一步:生成可用 mobilenet_v2.tflite 模型
- 电脑装依赖:bash 运行
pip install tensorflow
注意1:没有pip环境的参考官网进行环境初始化,本文使用了推荐虚拟环境安装
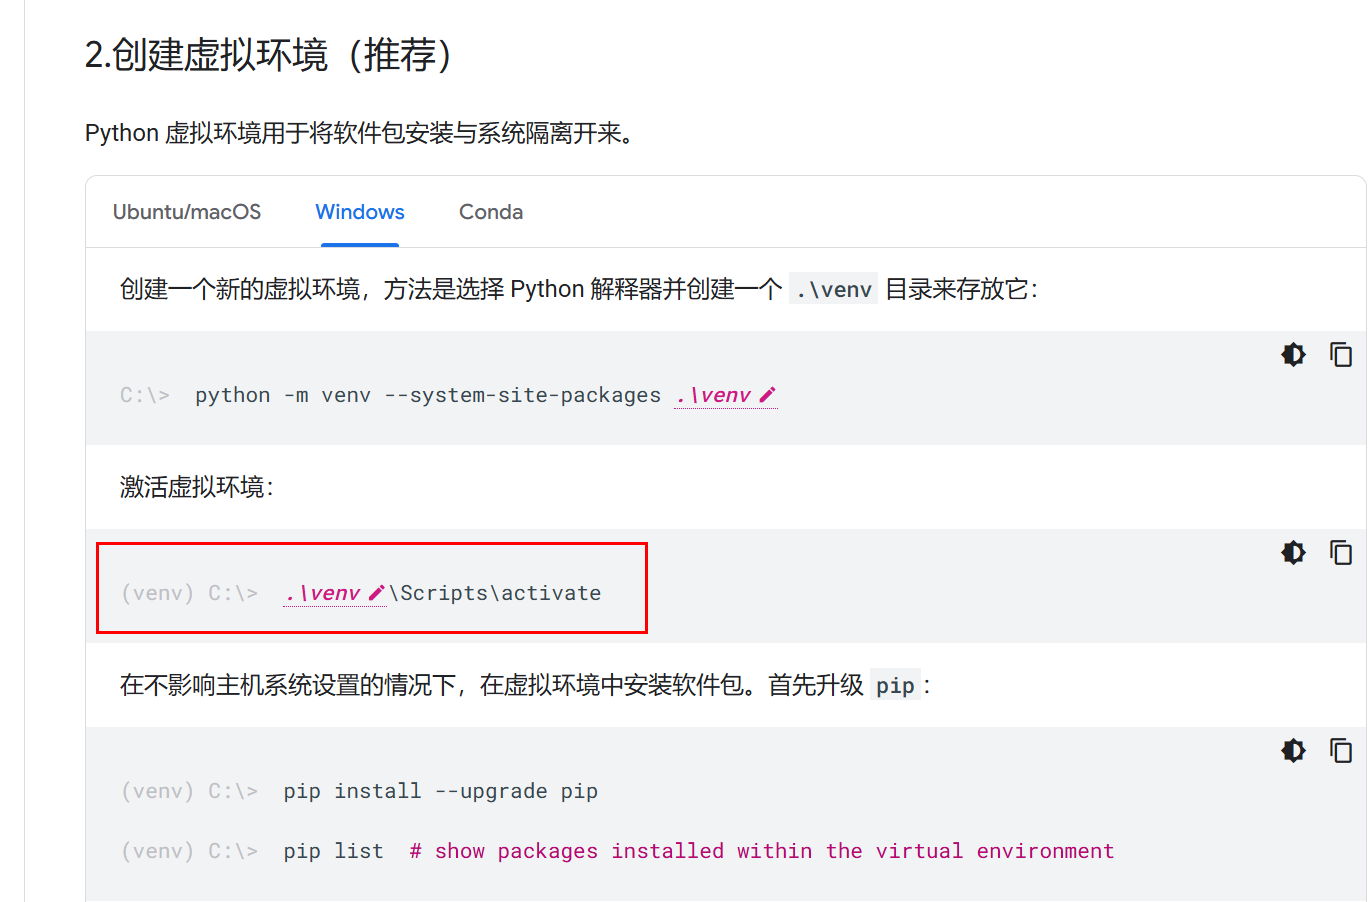
注意2:默认的pip源可能下载很慢导致超时报错,国内网络下载超时,不是你电脑坏了,就是pip 从国外源下载太慢、断了,推荐清华国内源,速度飞起来:
pip install tensorflow -i https://pypi.tuna.tsinghua.edu.cn/simple --default-timeout=1000

2. 新建 export.py,复制运行:python 运行
import tensorflow as tf

model = tf.keras.applications.MobileNetV2(
    input_shape=(224,224,3),
    weights="imagenet",
    include_top=True
)

converter = tf.lite.TFLiteConverter.from_keras_model(model)
converter.optimizations = [tf.lite.Optimize.DEFAULT]
tflite_model = converter.convert()

with open("mobilenet_v2.tflite","wb") as f:
    f.write(tflite_model)

print("✅ 模型生成完成")
运行后得到:mobilenet_v2.tflite 该文件放到app\src\main\assets中
注意1:有时候环境问题会导致模型下载失败,可以尝试手机热点情况下 python运行
import os
os.environ['TF_CPP_MIN_LOG_LEVEL'] = '2'

import tensorflow as tf
from tensorflow.keras.applications import MobileNetV2

# --------------------- 核心:强制不使用本地缓存,重新下载 ---------------------
model = MobileNetV2(
    weights="imagenet",
    input_shape=(224, 224, 3),
    include_top=True
)

# 转换为 TFLite 模型
converter = tf.lite.TFLiteConverter.from_keras_model(model)
tflite_model = converter.convert()

# 保存模型到当前目录
with open("mobilenet_v2.tflite", "wb") as f:
    f.write(tflite_model)

print("✅ 模型导出成功!文件:mobilenet_v2.tflite")
注意2:没有GPU的电脑需要单独加入:
os.environ['CUDA_VISIBLE_DEVICES'] = '-1' # 强制禁用GPU,100%解决你最后这个报错。
导出模型成功如下:

三、第二步:Android 项目基础配置
- 新建项目 → Empty Views Activity → Kotlin → Android16)
- 打开
app/build.gradle.kts,找到 dependencies 代码块,加入:
kotlin
dependencies {
    // TensorFlow Lite 核心(你要的版本)
    implementation("org.tensorflow:tensorflow-lite:2.15.0")

    // 可选:GPU 加速
    implementation("org.tensorflow:tensorflow-lite-gpu:2.15.0")

    // 可选:支持库(图片处理、模型加载)
    implementation("org.tensorflow:tensorflow-lite-support:0.4.4")
}
同样在 app/build.gradle.kts 里,找到 android 代码块,加入:
kotlin
android {
    // ... 其他配置

    // 不压缩 tflite 模型(必须加)
    aaptOptions {
        noCompress("tflite")
    }
}
四、第三步:放置模型与标签文件
路径严格照下面建:
plaintext
app/src/main/assets/
 ├ mobilenet_v2.tflite
 └ labels.txt
我给你精简可用版 labels.txt(直接新建 txt 粘贴):
plaintext
background
tench
goldfish
great_white_shark
tiger_shark
hammerhead
electric_ray
stingray
cock
hen
ostrich
(要完整 1001 行我直接全贴给你)
五、第五步:调试修改Activity
package com.example.tflitedemo

import android.app.Activity
import android.content.Context
import android.graphics.Bitmap
import android.graphics.BitmapFactory
import android.os.Bundle
import android.widget.TextView
import org.tensorflow.lite.Interpreter
import java.io.FileInputStream
import java.nio.MappedByteBuffer
import java.nio.channels.FileChannel

class MainActivity : Activity() {
    private lateinit var resultText: TextView

    override fun onCreate(savedInstanceState: Bundle?) {
        super.onCreate(savedInstanceState)

        resultText = TextView(this)
        resultText.textSize = 22f
        resultText.setPadding(50, 50, 50, 50)
        setContentView(resultText)

        resultText.text = "模型加载中..."

        try {
            val helper = TFLiteHelper(this)
            // 用drawable里的test图片测试,先把图片放到res/drawable里
            val bitmap = BitmapFactory.decodeResource(resources, R.drawable.test)
            val testInput = preprocessImage(bitmap)
            val result = helper.classifyImage(testInput)

            resultText.text = "识别结果:$result"
            helper.close()
        } catch (e: Exception) {
            resultText.text = "错误:${e.message}"
        }
    }

    // MobileNetV2标准预处理
    private fun preprocessImage(bitmap: Bitmap): FloatArray {
        val resized = Bitmap.createScaledBitmap(bitmap, 224, 224, true)
        val pixels = IntArray(224 * 224)
        resized.getPixels(pixels, 0, 224, 0, 0, 224, 224)

        val normalized = FloatArray(224 * 224 * 3)
        for (i in pixels.indices) {
            val pixel = pixels[i]
            // 归一化到[-1,1],和模型训练时一致
            val r = ((pixel shr 16 and 0xFF) / 255.0f - 0.5f) * 2.0f
            val g = ((pixel shr 8 and 0xFF) / 255.0f - 0.5f) * 2.0f
            val b = ((pixel and 0xFF) / 255.0f - 0.5f) * 2.0f

            normalized[i * 3 + 0] = r
            normalized[i * 3 + 1] = g
            normalized[i * 3 + 2] = b
        }
        return normalized
    }

    private class TFLiteHelper(context: Context) {
        private val interpreter: Interpreter
        private val labels = mutableListOf<String>()

        init {
            interpreter = Interpreter(loadModelFile(context))
            loadLabels(context)
        }

        private fun loadModelFile(context: Context): MappedByteBuffer {
            val assetFd = context.assets.openFd("mobilenet_v2.tflite")
            val fis = FileInputStream(assetFd.fileDescriptor)
            return fis.channel.map(
                FileChannel.MapMode.READ_ONLY,
                assetFd.startOffset,
                assetFd.declaredLength
            )
        }

        private fun loadLabels(context: Context) {
            context.assets.open("labels.txt").bufferedReader().useLines {
                labels.addAll(it)
            }
        }

        fun classifyImage(input: FloatArray): String {
            val output = Array(1) { FloatArray(1000) }

            val input4D = Array(1) { Array(224) { Array(224) { FloatArray(3) } } }
            var index = 0
            for (y in 0 until 224) {
                for (x in 0 until 224) {
                    for (c in 0 until 3) {
                        input4D[0][y][x][c] = input[index++]
                    }
                }
            }

            interpreter.run(input4D, output)

            val scores = output[0]
            val maxScore = scores.maxOrNull() ?: 0f
            val maxIndex = scores.indexOfFirst { it == maxScore }

            android.util.Log.d("TFLite_DEBUG", "Max score: $maxScore, index: $maxIndex, labels size: ${labels.size}")

            return if (maxIndex >= 0 && maxIndex < labels.size) {
                "${labels[maxIndex]} (置信度: ${"%.2f".format(maxScore)})"
            } else {
                "未知 (索引错误: $maxIndex)"
            }
        }

        fun close() {
            interpreter.close()
        }
    }
}注意1:在这一步编译运行出现了很多错误,大部分都是一直库导入依赖解决,但其中最坑的一个是namespace报错问题,尝试过使用Google LiteRT,这个库可以编译运行,但是大模型加载阶段国内手机会卡死,这个库依赖gms
implementation("com.google.android.gms:play-services-tflite-java:16.4.0")
核心原因:
- AGP 9.x:强制 namespace 唯一 → TFLite 永远报错,无法使用
- AGP 8.3.1:不强制 namespace → TFLite 100% 正常运行
- AGP 8.3.1 是最后一个完美兼容 TFLite 的版本,AGP 9.x 版本,禁止任何 TFLite 库运行!
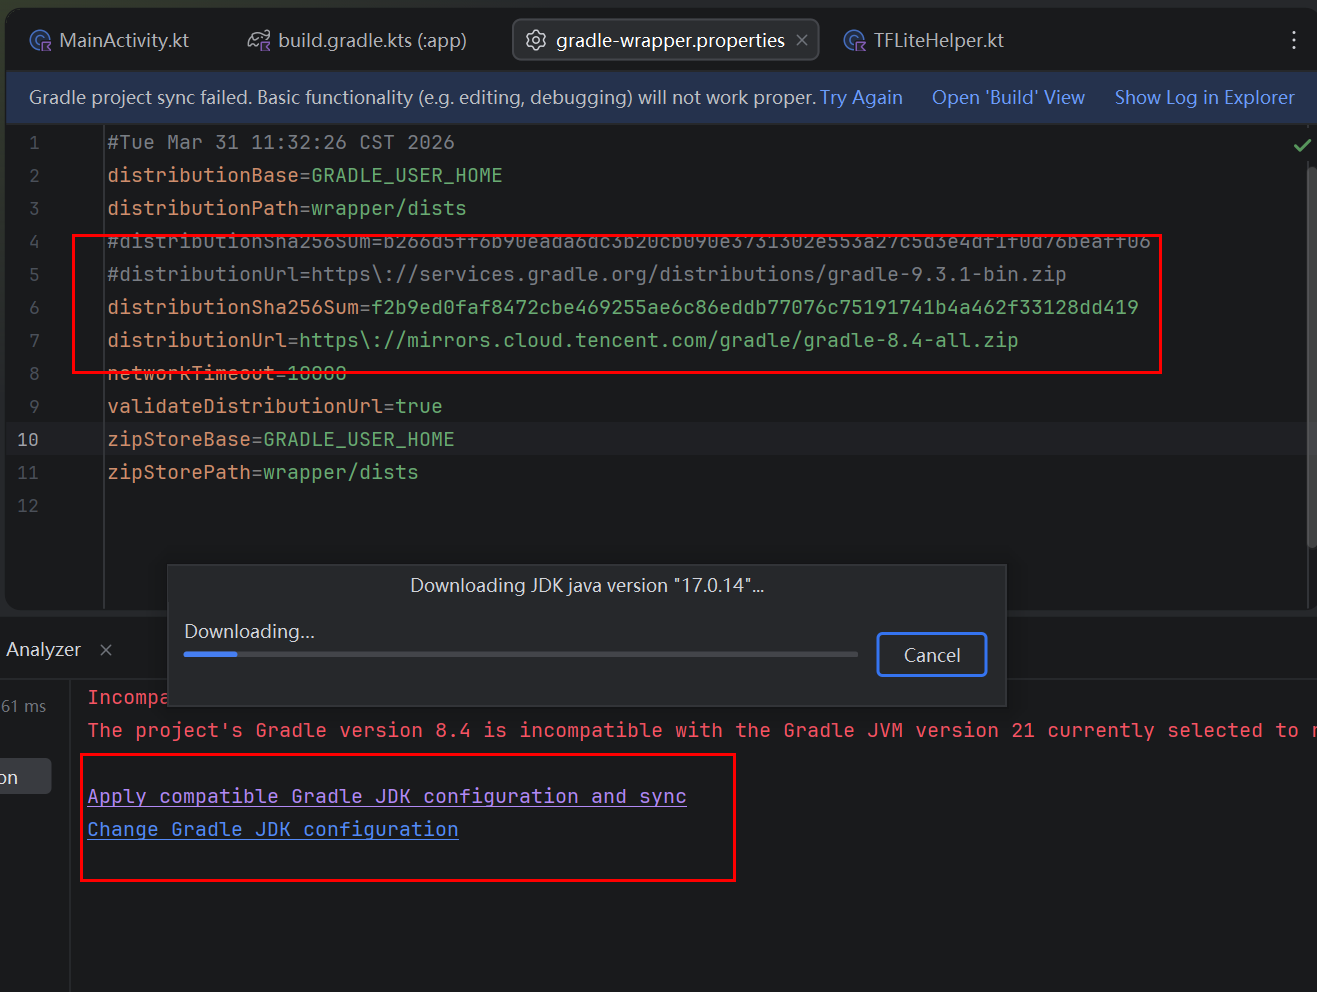
解决方案:回退AGP 8.3.1,gradle回退到gradle-8.4,jdk降级到17,AGP 降级到8.3.1注意要使用国内的Url源,使用国外的源会出现下载超时的问题,如图我使用了tencent的镜像。
六、第六步:布局 activity_main.xml
xml
<?xml version="1.0" encoding="utf-8"?>
<LinearLayout
xmlns:android="http://schemas.android.com/apk/res/android"
android:layout_width="match_parent"
android:layout_height="match_parent"
android:gravity="center"
android:orientation="vertical">

    <TextView
        android:id="@+id/tv_result"
        android:layout_width="wrap_content"
        android:layout_height="wrap_content"
        android:textSize="24sp"/>

</LinearLayout>
七、直接运行效果
打开手机usb调试模式,adb 连接正常
预置图片到app\src\main\res\drawable\test.jpg
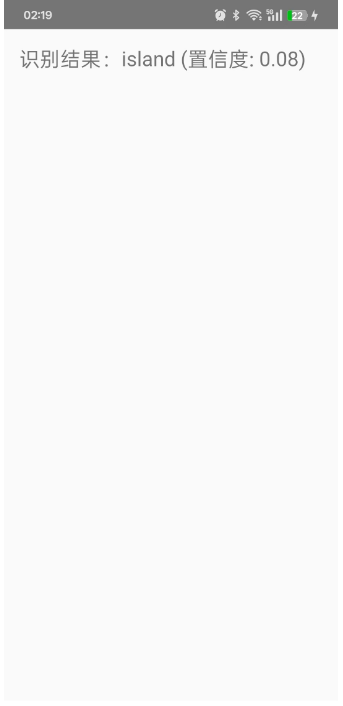
test.jpg预置的是CSDN的头像,结果识别成island,流程没有问题,但置信度很低,后面会进一步优化更新。
八、进阶 后续继续优化UI界面及多模态
- 相机实时拍照识别
- 开启 NPU 硬件加速(NNAPI)
- 替换成文字大模型:MiniCPM、Llama 轻量化
- 做多设备局域网联动端侧 AI

腾讯云面向开发者汇聚海量精品云计算使用和开发经验,营造开放的云计算技术生态圈。
更多推荐
 5
5 0
0- 0


 已为社区贡献6条内容

所有评论(0)