AI对话App-开发-项目创建和运行
·
IDE 的使用看自己爱好,可以使用 AS(Android Studio),可以 vscode,也可以命令行。开发的时候需要使用手机系统模拟器,IDE可以自动配置比较方便,命令行则需要自己另外启动模拟器,所以不推荐小白使用命令行。
项目创建
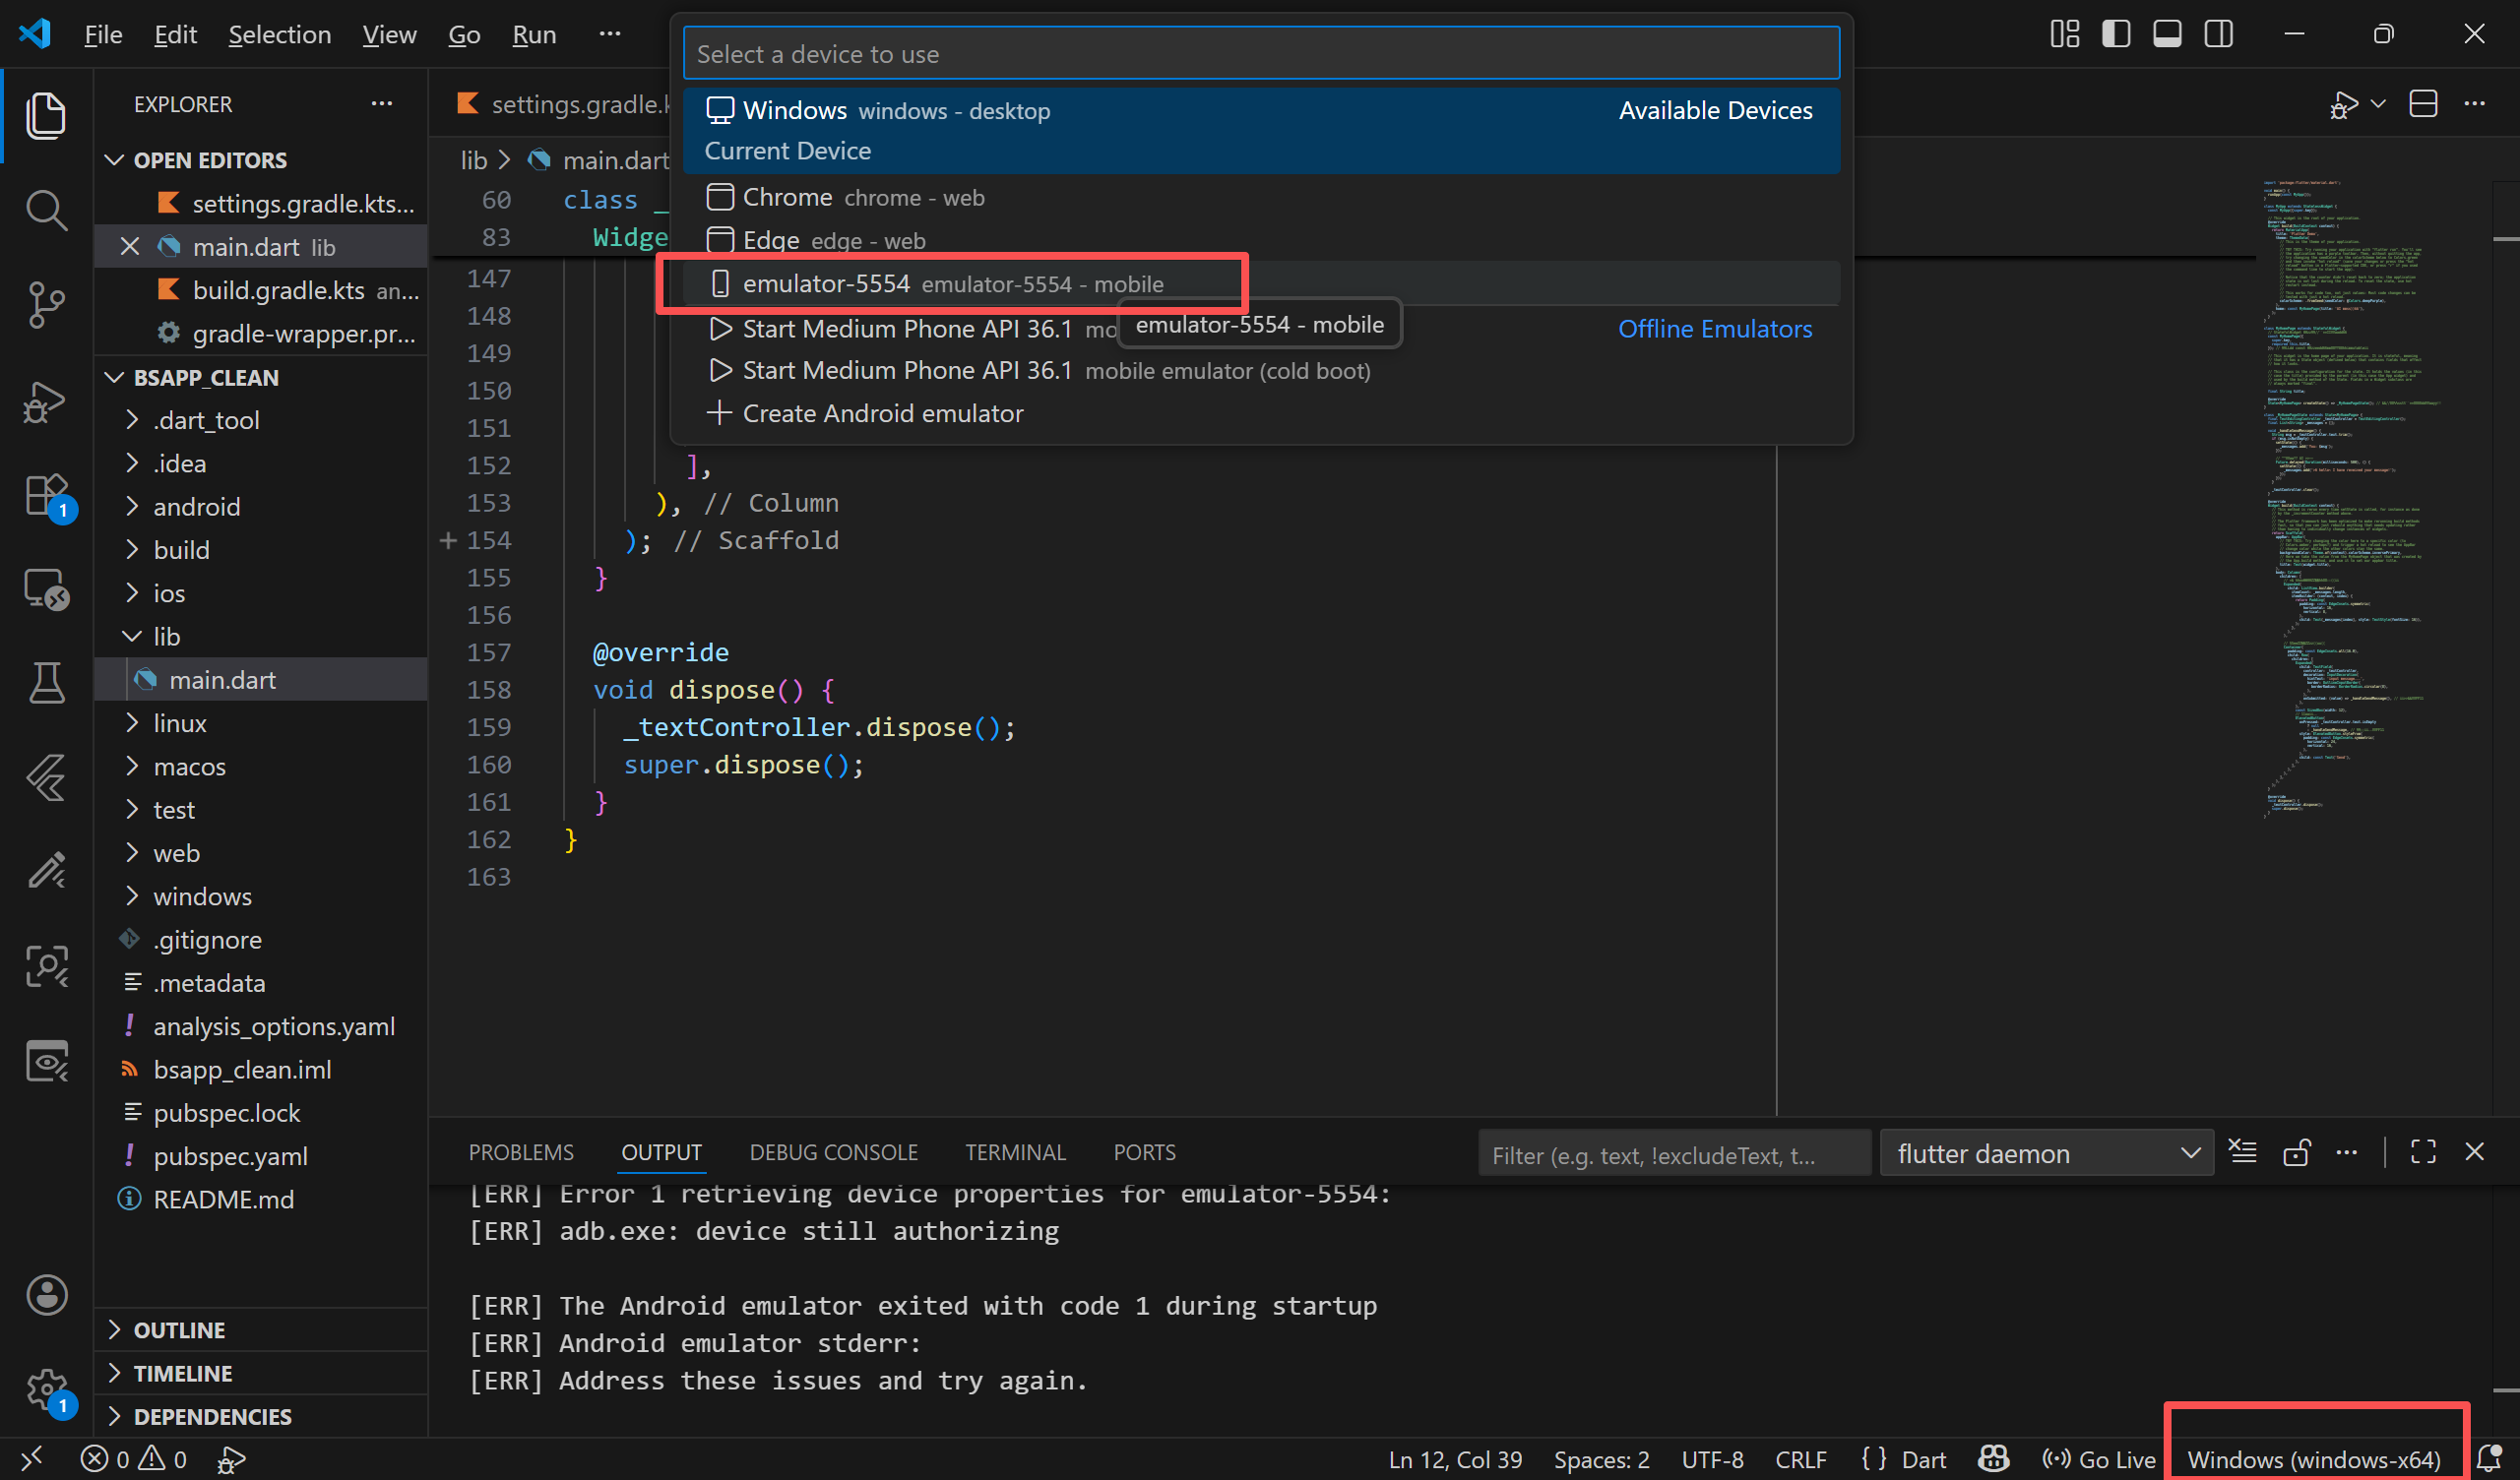
我这里使用 vscode,下载个 flutter 插件即可。教程很多:用vscode创建第一个flutter项目_vscode新建flutter项目-CSDN博客 https://blog.csdn.net/2501_91395113/article/details/146598265 补充:他这里可能用 mac 的原因,手动启用模拟器。实际 vscode 可以直接启用:
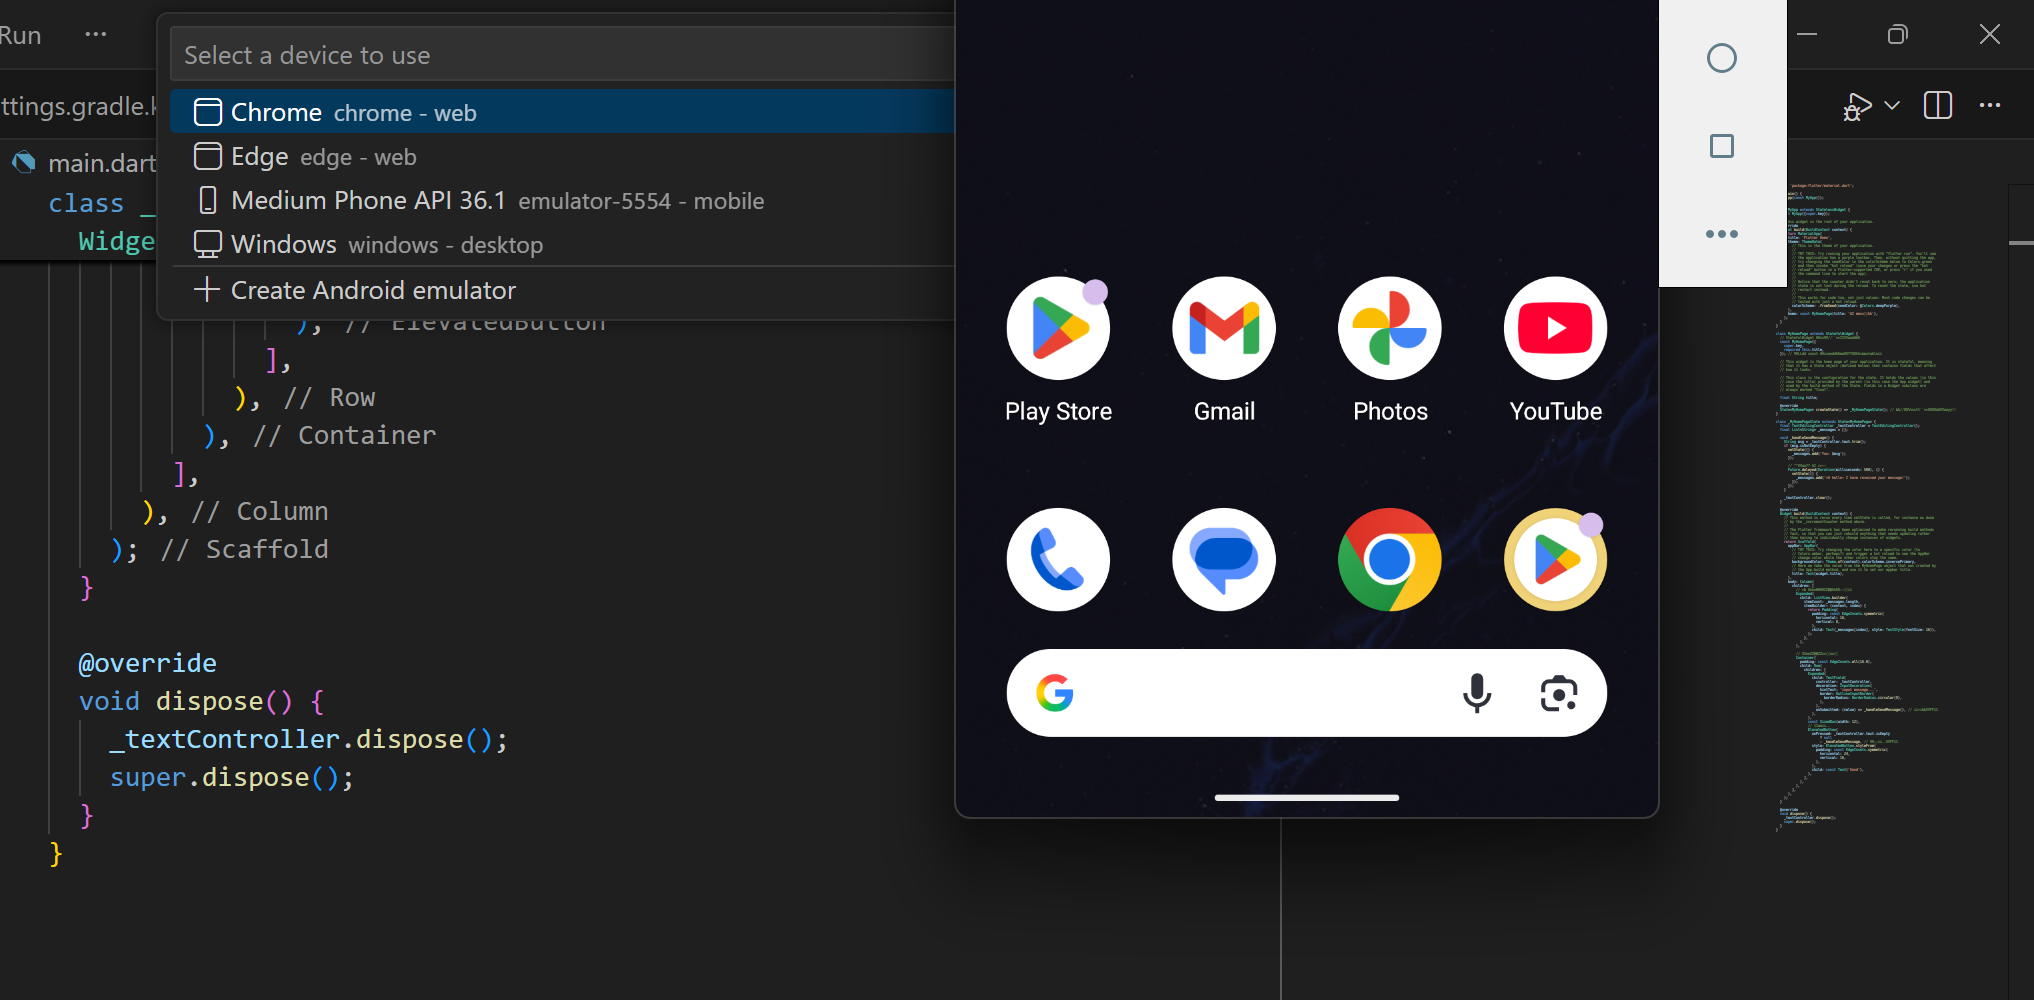
启用之后我这里不知道为啥藏了半截,不过稍微调整下大小就自适应了:
代码运行
项目创建后会有一个默认初始代码,一个自增的计数器,可以根据该初始代码熟悉 Flutter 框架和 Dart 的语法,新手这一步不建议跳过或者着急,炉石老阴阳人鲍勃说得好,时间和钱一样,花钱要慎重,但...你也得花啊!
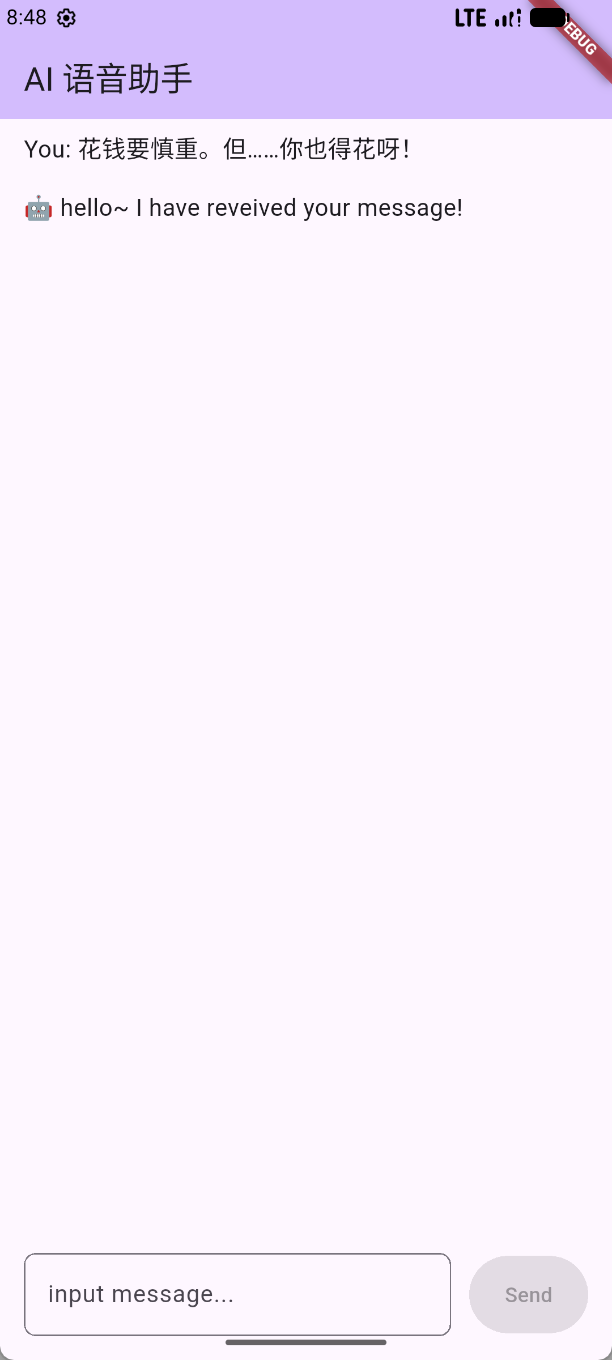
测试和熟悉 flutter 的运行环境,首先模仿常见的 ai 对话界面,一个输入框,一个发送按钮,一个对话文本显示的部分,将界面整出来之后,功能测试:
代码:
import 'package:flutter/material.dart';

void main() {
  runApp(const MyApp());
}

class MyApp extends StatelessWidget {
  const MyApp({super.key});

  // This widget is the root of your application.
  @override
  Widget build(BuildContext context) {
    return MaterialApp(
      title: 'Flutter Demo',
      theme: ThemeData(
        // This is the theme of your application.
        //
        // TRY THIS: Try running your application with "flutter run". You'll see
        // the application has a purple toolbar. Then, without quitting the app,
        // try changing the seedColor in the colorScheme below to Colors.green
        // and then invoke "hot reload" (save your changes or press the "hot
        // reload" button in a Flutter-supported IDE, or press "r" if you used
        // the command line to start the app).
        //
        // Notice that the counter didn't reset back to zero; the application
        // state is not lost during the reload. To reset the state, use hot
        // restart instead.
        //
        // This works for code too, not just values: Most code changes can be
        // tested with just a hot reload.
        colorScheme: .fromSeed(seedColor: Colors.deepPurple),
      ),
      home: const MyHomePage(title: 'AI 语音助手'),
    );
  }
}

class MyHomePage extends StatefulWidget {
  // StatefulWidget 表示这是一个有状态组件
  const MyHomePage({
    super.key,
    required this.title,
  }); // 这里的 const 表示该组件不可改变(immutable)

  // This widget is the home page of your application. It is stateful, meaning
  // that it has a State object (defined below) that contains fields that affect
  // how it looks.

  // This class is the configuration for the state. It holds the values (in this
  // case the title) provided by the parent (in this case the App widget) and
  // used by the build method of the State. Fields in a Widget subclass are
  // always marked "final".

  final String title;

  @override
  State<MyHomePage> createState() => _MyHomePageState(); // 但是可以关联一个可变的状态对象
}

class _MyHomePageState extends State<MyHomePage> {
  final TextEditingController _textController = TextEditingController();
  final List<String> _messages = [];

  void _handleSendMessage() {
    String msg = _textController.text.trim();
    if (msg.isNotEmpty) {
      setState(() {
        _messages.add('You: $msg');
      });

      // 暂时模拟 AI 回复
      Future.delayed(Duration(milliseconds: 500), () {
        setState(() {
          _messages.add('🤖 hello~ I have reveived your message!');
        });
      });
    }

    _textController.clear();
  }

  @override
  Widget build(BuildContext context) {
    // This method is rerun every time setState is called, for instance as done
    // by the _incrementCounter method above.
    //
    // The Flutter framework has been optimized to make rerunning build methods
    // fast, so that you can just rebuild anything that needs updating rather
    // than having to individually change instances of widgets.
    return Scaffold(
      appBar: AppBar(
        // TRY THIS: Try changing the color here to a specific color (to
        // Colors.amber, perhaps?) and trigger a hot reload to see the AppBar
        // change color while the other colors stay the same.
        backgroundColor: Theme.of(context).colorScheme.inversePrimary,
        // Here we take the value from the MyHomePage object that was created by
        // the App.build method, and use it to set our appbar title.
        title: Text(widget.title),
      ),
      body: Column(
        children: [
          // 👆 消息列表区域(可滚动)
          Expanded(
            child: ListView.builder(
              itemCount: _messages.length,
              itemBuilder: (context, index) {
                return Padding(
                  padding: const EdgeInsets.symmetric(
                    horizontal: 16,
                    vertical: 8,
                  ),
                  child: Text(_messages[index], style: TextStyle(fontSize: 16)),
                );
              },
            ),
          ),

          // 输入区域固定在底部
          Container(
            padding: const EdgeInsets.all(16.0),
            child: Row(
              children: [
                Expanded(
                  child: TextField(
                    controller: _textController,
                    decoration: InputDecoration(
                      hintText: 'input message...',
                      border: OutlineInputBorder(
                        borderRadius: BorderRadius.circular(8),
                      ),
                    ),
                    onSubmitted: (value) => _handleSendMessage(), // 按回车时触发
                  ),
                ),
                const SizedBox(width: 12),
                // 发送按钮
                ElevatedButton(
                  onPressed: _textController.text.isEmpty
                      ? null
                      : _handleSendMessage, // 点击按钮时触发
                  style: ElevatedButton.styleFrom(
                    padding: const EdgeInsets.symmetric(
                      horizontal: 24,
                      vertical: 16,
                    ),
                  ),
                  child: const Text('Send'),
                ),
              ],
            ),
          ),
        ],
      ),
    );
  }

  @override
  void dispose() {
    _textController.dispose();
    super.dispose();
  }
}
代码应该是在资源绑定那个地方,也不知道上传的对不对。

腾讯云面向开发者汇聚海量精品云计算使用和开发经验,营造开放的云计算技术生态圈。
更多推荐
 8
8 0
0- 0


 已为社区贡献3条内容

所有评论(0)