Flutter for OpenHarmony 万能游戏库App实战 - 宝可梦属性分类实现
本文介绍了宝可梦属性分类系统的实现方案。系统采用两层架构:第一层展示18种属性网格列表,每种属性配有对应颜色;第二层显示选定属性下的50只宝可梦。关键实现包括:通过API获取数据、属性颜色映射、网格布局展示、ID提取以及页面导航。系统通过限制显示数量优化性能,同时保持直观的视觉设计,让用户能够快速识别和浏览不同属性的宝可梦。
宝可梦有18种不同的属性,每种属性都有独特的特性和对应的宝可梦。通过属性分类功能,用户可以快速浏览某个属性的所有宝可梦。这篇文章我们来实现一个两层的属性分类系统:第一层是属性列表,第二层是某个属性下的所有宝可梦。这涉及到多页面导航、颜色映射、网格布局等技巧。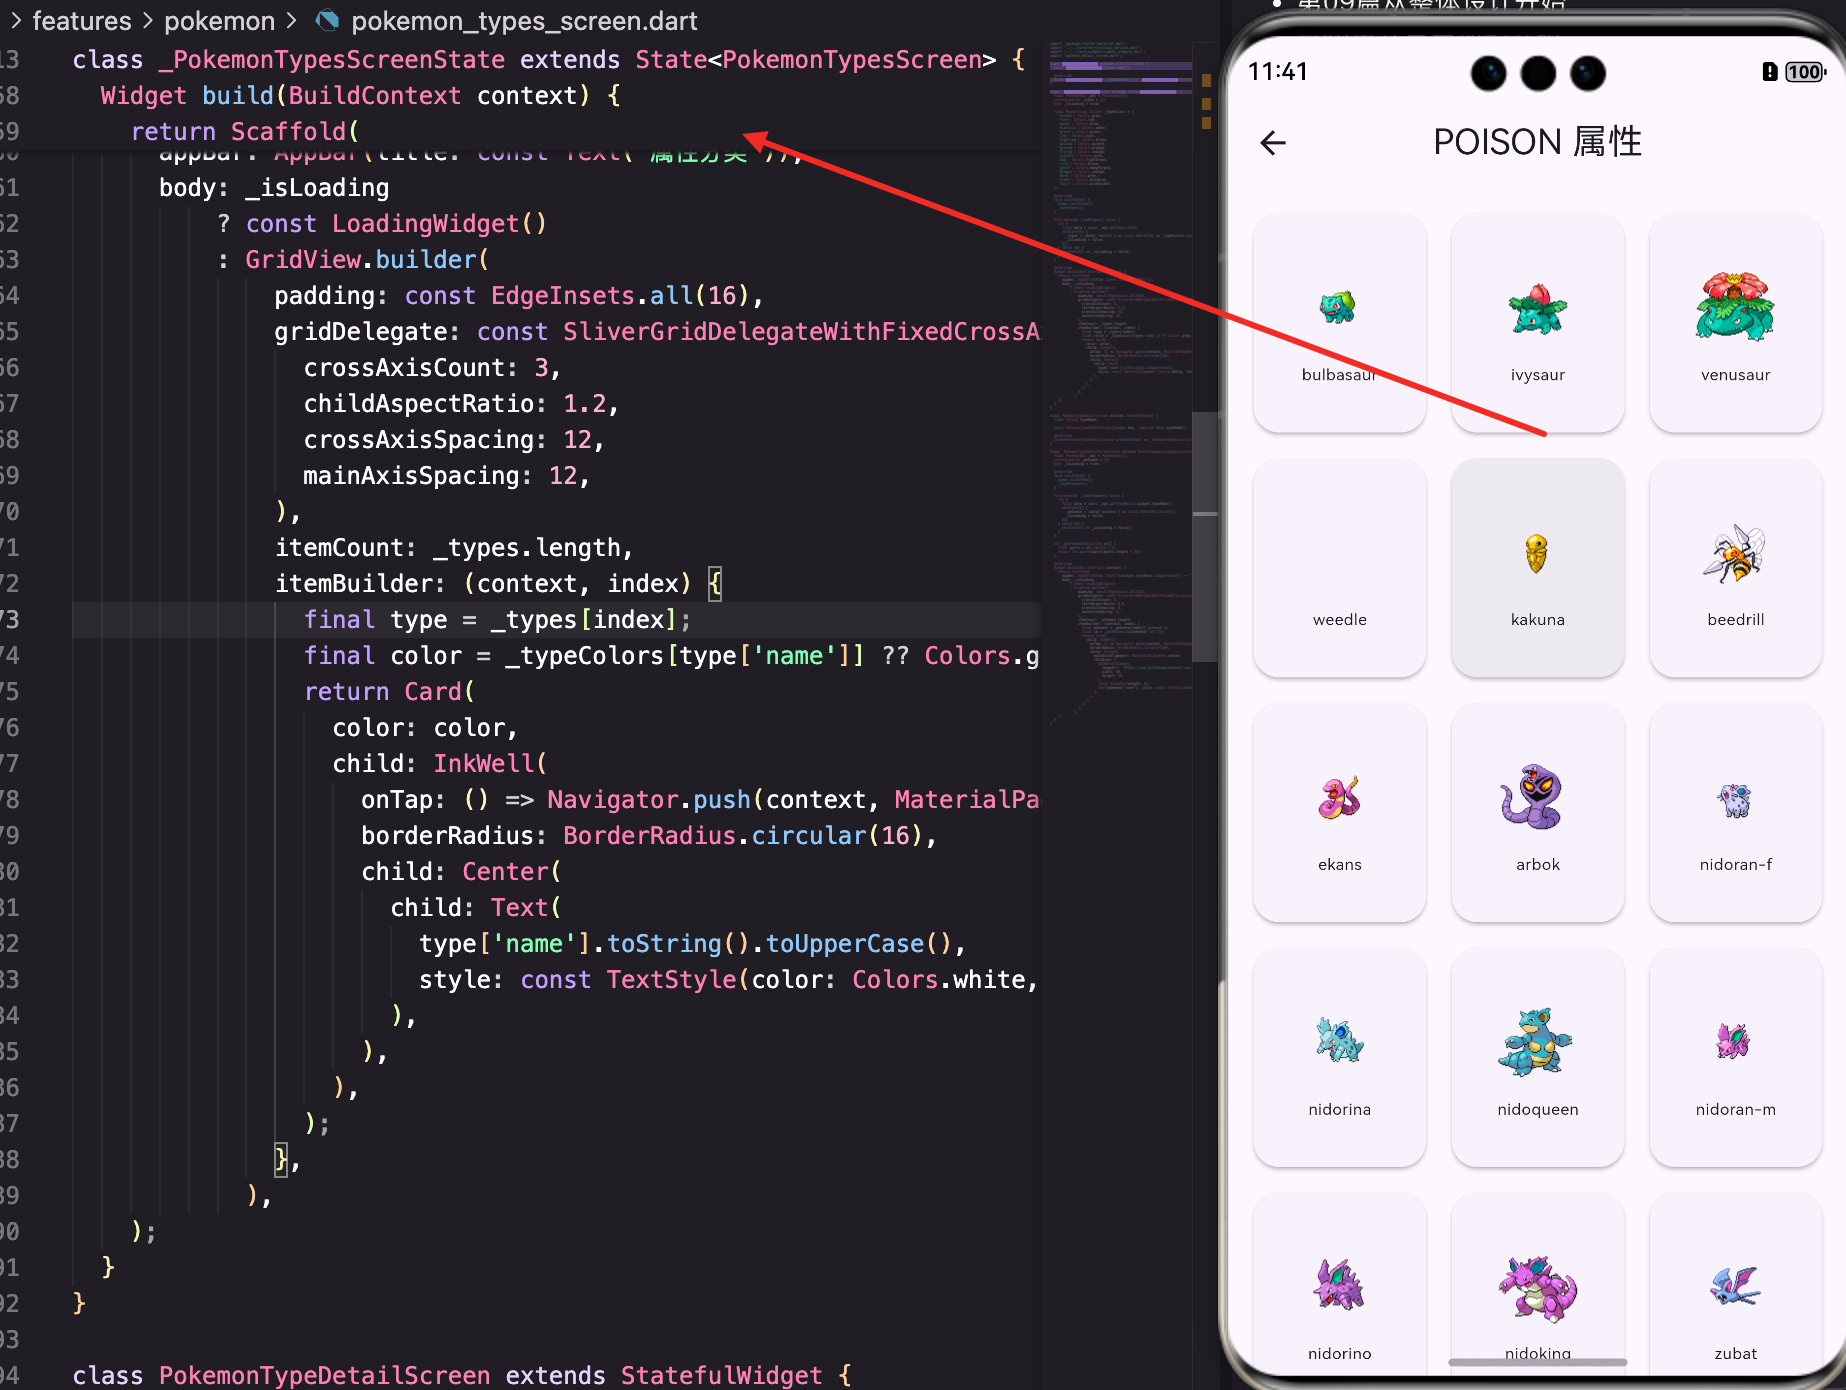
属性分类的整体设计
首先看看属性分类功能的架构。我们用两个页面来实现:PokemonTypesScreen展示所有属性,PokemonTypeDetailScreen展示某个属性的宝可梦:
class PokemonTypesScreen extends StatefulWidget {
const PokemonTypesScreen({super.key});
State<PokemonTypesScreen> createState() => _PokemonTypesScreenState();
}
class _PokemonTypesScreenState extends State<PokemonTypesScreen> {
final PokemonApi _api = PokemonApi();
List<dynamic> _types = [];
bool _isLoading = true;
final Map<String, Color> _typeColors = {
'normal': Colors.grey,
'fire': Colors.red,
'water': Colors.blue,
'electric': Colors.amber,
'grass': Colors.green,
'ice': Colors.cyan,
'fighting': Colors.brown,
'poison': Colors.purple,
'ground': Colors.orange,
'flying': Colors.indigo,
'psychic': Colors.pink,
'bug': Colors.lightGreen,
'rock': Colors.brown,
'ghost': Colors.deepPurple,
'dragon': Colors.indigo,
'dark': Colors.grey,
'steel': Colors.blueGrey,
'fairy': Colors.pinkAccent,
};
这里定义了一个类型颜色映射表。每种属性都有对应的颜色,这样用户能直观地识别属性。比如火系用红色、水系用蓝色,这些都是符合直觉的。
加载属性列表
initState中加载所有属性:
void initState() {
super.initState();
_loadTypes();
}
Future<void> _loadTypes() async {
try {
final data = await _api.getTypeList();
setState(() {
_types = (data['results'] as List).where((t) => _typeColors.containsKey(t['name'])).toList();
_isLoading = false;
});
} catch (e) {
setState(() => _isLoading = false);
}
}
调用getTypeList()获取所有属性。然后用where()过滤,只保留_typeColors中定义的属性。这样能确保每个属性都有对应的颜色。
这个过滤很重要,因为PokeAPI可能返回一些特殊的属性(比如"unknown"),我们不需要显示这些。
属性列表的UI
属性列表用网格布局展示,每个属性是一个彩色卡片:
Widget build(BuildContext context) {
return Scaffold(
appBar: AppBar(title: const Text('属性分类')),
body: _isLoading
? const LoadingWidget()
: GridView.builder(
padding: const EdgeInsets.all(16),
gridDelegate: const SliverGridDelegateWithFixedCrossAxisCount(
crossAxisCount: 3,
childAspectRatio: 1.2,
crossAxisSpacing: 12,
mainAxisSpacing: 12,
),
用GridView.builder实现网格布局。crossAxisCount: 3表示每行3列,这样能在一屏内显示所有18种属性。
childAspectRatio: 1.2让卡片稍微宽一点,这样属性名称能更清楚地显示。
属性卡片的构建:
              itemBuilder: (context, index) {
                final type = _types[index];
                final color = _typeColors[type['name']] ?? Colors.grey;
                return Card(
                  color: color,
                  child: InkWell(
                    onTap: () => Navigator.push(context, MaterialPageRoute(builder: (_) => PokemonTypeDetailScreen(typeName: type['name']))),
                    borderRadius: BorderRadius.circular(16),
                    child: Center(
                      child: Text(
                        type['name'].toString().toUpperCase(),
                        style: const TextStyle(color: Colors.white, fontWeight: FontWeight.bold),
                      ),
                    ),
                  ),
                );
              },
每个卡片的背景色就是该属性的颜色。这样用户能一眼看出属性的特性。
卡片中间显示属性名称,用大写和白色文字,这样在彩色背景上对比度很高。
点击卡片时跳转到PokemonTypeDetailScreen,传入属性名称。
属性详情页面
PokemonTypeDetailScreen展示某个属性的所有宝可梦:
class PokemonTypeDetailScreen extends StatefulWidget {
final String typeName;
const PokemonTypeDetailScreen({super.key, required this.typeName});
State<PokemonTypeDetailScreen> createState() => _PokemonTypeDetailScreenState();
}
class _PokemonTypeDetailScreenState extends State<PokemonTypeDetailScreen> {
final PokemonApi _api = PokemonApi();
List<dynamic> _pokemon = [];
bool _isLoading = true;
void initState() {
super.initState();
_loadPokemon();
}
Future<void> _loadPokemon() async {
try {
final data = await _api.getTypeDetail(widget.typeName);
setState(() {
_pokemon = (data['pokemon'] as List).take(50).toList();
_isLoading = false;
});
} catch (e) {
setState(() => _isLoading = false);
}
}
调用getTypeDetail()获取该属性的所有宝可梦。然后用take(50)只取前50个,避免数据过多。
有些属性的宝可梦数量很多(比如普通属性有100多只),一次性加载所有数据会很慢。所以限制在50个是一个合理的折中。
从URL提取宝可梦ID
PokeAPI返回的是宝可梦的URL,我们需要从中提取ID:
  int _getPokemonId(String url) {
    final parts = url.split('/');
    return int.parse(parts[parts.length - 2]);
  }
URL格式是
https://pokeapi.co/api/v2/pokemon/1/,倒数第二个元素就是ID。这个方法在多个地方都用到了。
属性宝可梦列表的展示
属性详情页面用网格布局展示该属性的宝可梦:
Widget build(BuildContext context) {
return Scaffold(
appBar: AppBar(title: Text('${widget.typeName.toUpperCase()} 属性')),
body: _isLoading
? const LoadingWidget()
: GridView.builder(
padding: const EdgeInsets.all(12),
gridDelegate: const SliverGridDelegateWithFixedCrossAxisCount(
crossAxisCount: 3,
childAspectRatio: 0.8,
crossAxisSpacing: 8,
mainAxisSpacing: 8,
),
AppBar的标题显示属性名称,比如"FIRE 属性"。
网格布局用3列展示宝可梦。childAspectRatio: 0.8让卡片稍微高一点,这样能更好地显示宝可梦的图片和名称。
宝可梦卡片的构建:
              itemBuilder: (context, index) {
                final pokemon = _pokemon[index]['pokemon'];
                final id = _getPokemonId(pokemon['url']);
                return Card(
                  child: InkWell(
                    onTap: () => Navigator.push(context, MaterialPageRoute(builder: (_) => PokemonDetailScreen(pokemonId: id))),
                    borderRadius: BorderRadius.circular(16),
                    child: Column(
                      mainAxisAlignment: MainAxisAlignment.center,
                      children: [
                        AppNetworkImage(
                          imageUrl: 'https://raw.githubusercontent.com/PokeAPI/sprites/master/sprites/pokemon/$id.png',
                          width: 60,
                          height: 60,
                        ),
                        const SizedBox(height: 4),
                        Text(pokemon['name'], style: const TextStyle(fontSize: 10), maxLines: 1, overflow: TextOverflow.ellipsis),
                      ],
                    ),
                  ),
                );
              },
每个卡片显示宝可梦的图片和名称。图片用AppNetworkImage加载,这样能处理加载中和加载失败的情况。
名称限制为单行,超出部分用省略号。这样即使名称很长也不会破坏布局。
点击卡片时跳转到PokemonDetailScreen查看详情。
颜色映射的重要性
颜色映射表是这个功能的核心。它不仅用于属性列表的卡片背景,还能用于其他地方:
final Map<String, Color> _typeColors = {
  'normal': Colors.grey,
  'fire': Colors.red,
  'water': Colors.blue,
  'electric': Colors.amber,
  'grass': Colors.green,
  'ice': Colors.cyan,
  'fighting': Colors.brown,
  'poison': Colors.purple,
  'ground': Colors.orange,
  'flying': Colors.indigo,
  'psychic': Colors.pink,
  'bug': Colors.lightGreen,
  'rock': Colors.brown,
  'ghost': Colors.deepPurple,
  'dragon': Colors.indigo,
  'dark': Colors.grey,
  'steel': Colors.blueGrey,
  'fairy': Colors.pinkAccent,
};
这个映射表应该集中管理,最好放在一个单独的文件中,这样其他页面也能使用。比如宝可梦详情页面也需要根据属性显示颜色。
颜色的选择很重要。火系用红色、水系用蓝色等,这些都是符合用户直觉的。
多层导航的设计
这个功能涉及到多层导航:
- 属性列表页面 - 显示所有属性
- 属性详情页面 - 显示某个属性的宝可梦
- 宝可梦详情页面 - 显示某个宝可梦的详细信息
用户可以从属性列表进入属性详情,再进入宝可梦详情。每一层都有返回按钮,用户能轻松返回上一层。
性能优化
虽然代码看起来简单,但有几个性能优化点:
1. 数据过滤
_types = (data['results'] as List).where((t) => _typeColors.containsKey(t['name'])).toList();
只保留有颜色映射的属性,避免显示不必要的属性。
2. 数据限制
_pokemon = (data['pokemon'] as List).take(50).toList();
只取前50个宝可梦,避免一次性加载过多数据。
3. 网格布局
GridView.builder是懒加载的,只有即将显示的卡片才会被构建。这样能节省内存。
用户体验的考虑
1. 直观的颜色
每种属性都有对应的颜色,用户能快速识别。
2. 清晰的导航
多层导航很清晰,用户能轻松返回。
3. 合理的数据量
属性列表显示18种属性,属性详情显示50个宝可梦,这些都是合理的数据量。
4. 快速的加载
由于数据量不大,加载速度很快,用户体验很流畅。
总结
这篇文章我们实现了一个完整的属性分类系统。涉及到的知识点包括:
- 颜色映射 - 如何管理和使用颜色映射表
- 多层导航 - 如何实现多层页面导航
- 网格布局 - 用GridView实现高效的网格显示
- 数据处理 - 从API数据中提取需要的信息
- 性能优化 - 数据过滤、限制、懒加载等
- 用户体验 - 直观的设计和清晰的导航
属性分类功能让用户能按属性浏览宝可梦,这是一个很好的补充功能。结合搜索和列表功能,用户能用多种方式找到想要的宝可梦。
欢迎加入开源鸿蒙跨平台社区:https://openharmonycrossplatform.csdn.net

腾讯云面向开发者汇聚海量精品云计算使用和开发经验,营造开放的云计算技术生态圈。
更多推荐
 13
13 0
0- 0


 已为社区贡献19条内容

所有评论(0)