OpenCV图像处理——阈值操作函数 threshold
目录
1. 有关阈值运算
(1) 它是最简单的分割方法。
(2) 应用示例:从图像中分离出对应于待分析物体的区域。这种分离是基于物体像素与背景像素之间强度差实现的。
(3) 为了将我们感兴趣的像素与其余像素(最终将被舍弃)区分开来,我们对每一个像素的强度值与某一阈值(根据待解决的问题确定)进行了比较。
(4) 一旦我们正确地分离出了重要像素,便可以为其设定一个特定数值以作标识(即,我们可以将其赋值为黑色、白色,或任何符合你需求的数值)。

2. 阈值类型
(1) OpenCV 提供了 cv::threshold 函数用于执行阈值化操作。
(2) 利用该函数,我们可以实现多种类型的阈值化操作。我们将在接下来的小节中对它们进行详细解释。
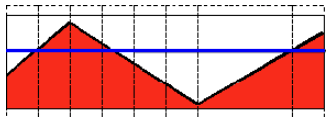
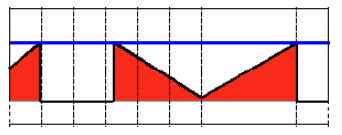
(3) 为了说明这些阈值化过程的运作原理,让我们假设有一幅源图像,其像素具有强度值 src(x,y)。下图描述了这个原理。水平蓝线表示阈值 thresh(固定)。
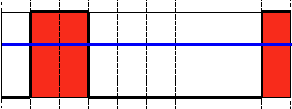
2.1 阈值二值化
这种阈值运算可表示为
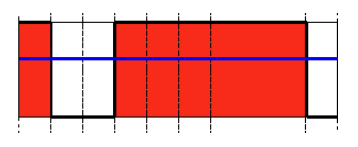
2.2 阈值二值化(反转)
这种阈值运算可表示为
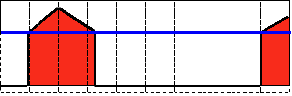
2.3 大于阈值截断为阈值
这种阈值运算可表示为

2.4 低于阈值取 0
这种阈值运算可表示为
2.5 低于阈值取0 之反转
这种阈值运算可表示为
3. 示例
int threshold_value = 0;
int threshold_type = 3;
int const max_value = 255;
int const max_type = 4;
int const max_binary_value = 255;
Mat src, src_gray, dst;
const char* window_name = "Threshold Demo";
const char* trackbar_type = "Type: \n 0: Binary \n 1: Binary Inverted \n 2: Truncate \n 3: To Zero \n 4: To Zero Inverted";
const char* trackbar_value = "Value";
void Test_threshold(int,void*)
{
/* 0: Binary
1: Binary Inverted
2: Threshold Truncated
3: Threshold to Zero
4: Threshold to Zero Inverted
*/
threshold(src_gray, dst, threshold_value, max_binary_value, threshold_type);
imshow(window_name, dst);
}
int _tmain(int argc, _TCHAR* argv[])
{
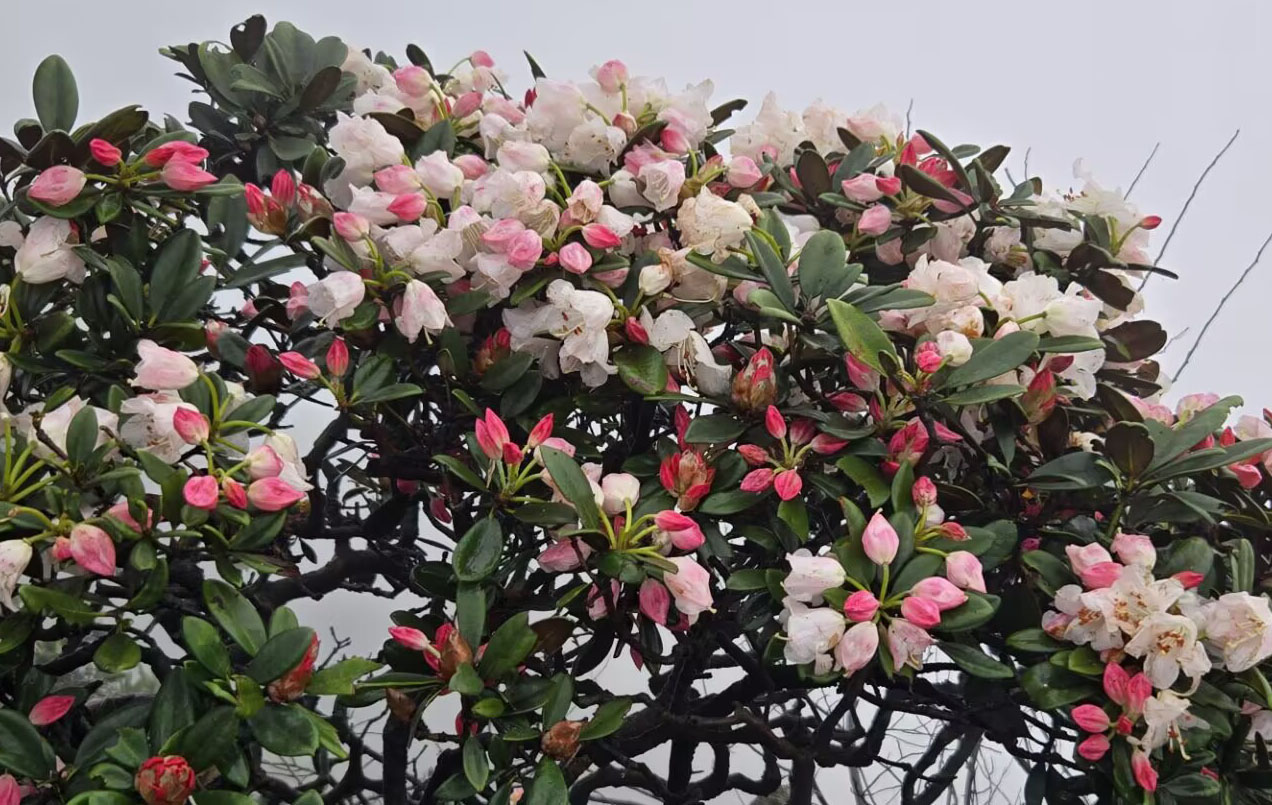
string filename = "D:\\TestVideo\\Flower6-2.jpg";
src = imread(samples::findFile(filename), IMREAD_COLOR); // Load an image
cvtColor(src, src_gray, COLOR_BGR2GRAY); // 转换为灰度图像
namedWindow(window_name, WINDOW_AUTOSIZE); // 创建一个窗口来显示结果
createTrackbar(trackbar_type,
window_name, &threshold_type,
max_type, Test_threshold); // 创建一个跟踪条来显示阈值类型
createTrackbar(trackbar_value,
window_name, &threshold_value,
max_value, Test_threshold); // 创建一个跟踪条来显示阈值类型对应的值
Test_threshold(0, 0); // 调用函数初始化
waitKey();
system("pause");
return 0;
}
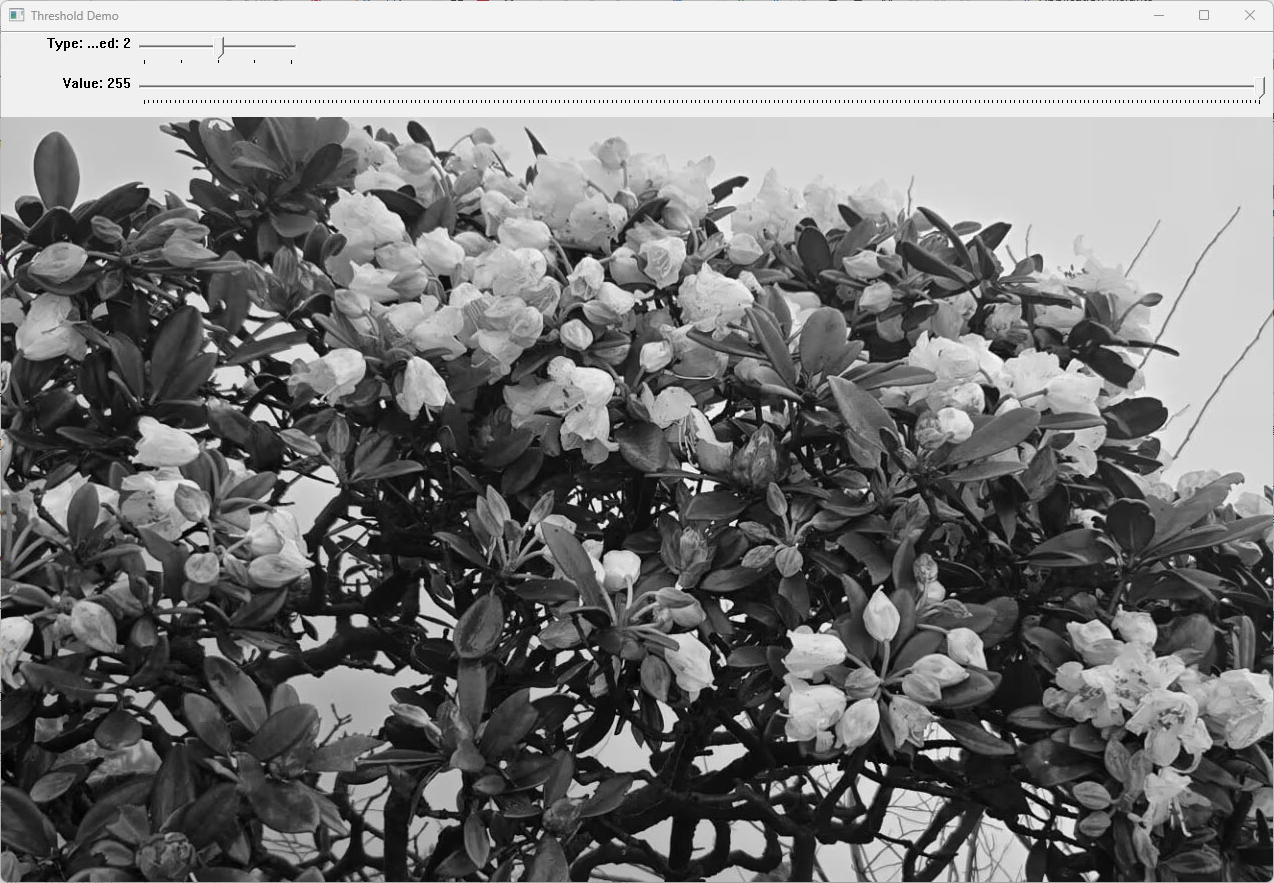
运行结果如下,拖动跟踪条可以看到相应阈值处理效果:
原图:
阈值处理后:

腾讯云面向开发者汇聚海量精品云计算使用和开发经验,营造开放的云计算技术生态圈。
更多推荐
 6
6 0
0- 0


 已为社区贡献10条内容

所有评论(0)