Ansible Playbook重构:简化与模块化拆分演示
·
Ansible Playbook重构:简化与模块化拆分演示
1. 题目要求
您从一些Web服务器的前任管理员那里继承了playbook。该playbook用于在servera.lab.example.com、serverb.lab.example.com、serverc.lab.example.com和serverd.lab.example.com上配置Web服务。该playbook还在四个受管主机上配置防火墙,以便允许Web流量。

对playbook.yml playbook文件进行以下更改,以简化管理。

1. 使用通配符主机模式,简化/home/student/projects-review/playbook.yml playbook中的play所使用的受管主机列表。

您有第二个playbook /home/student/projects-review/host-test.yml,其中包含一个play,您可用其测试主机模式,然后再将其用于playbook.yml playbook中的play。

	1. 重组playbook.yml playbook,以便其中的前三个任务保存在tasks/web_tasks.yml地址处的外部任务文件中。使用import_tasks功能将此任务文件合并到play中。
	2. 重组playbook.yml playbook,以便其中的第四、第五和第六个任务保存在tasks/firewall_tasks.yml位置处的外部任务文件中。使用import_tasks功能将此任务文件合并到play中。
	3. tasks/web_tasks.yml文件和tasks/firewall_tasks.yml文件均包含安装软件包和启用服务的任务。这些文件可以合并到一个任务文件中,您可以使用变量来控制这些任务要安装和启用哪些软件包和服务。

将安装软件包和启用服务的任务移动到名为tasks/install_and_enable.yml的新文件中,并更新它们以使用变量。将原始任务换成import_tasks语句,在新变量中传入适当值。

2.确认您对playbook.yml内的play所做的更改正确无误,然后运行playbook。
2. 解决过程
1. 原始playbook.yml:
cat playbook.yml
---
#目标主机名单
- name: Install and configure web service
  hosts:
    - servera.lab.example.com
    - serverb.lab.example.com
    - serverc.lab.example.com
    - serverd.lab.example.com
#使用dnf模块安装httpd程序,并将其更新到最新版本。
  tasks:
    - name: Install httpd
      ansible.builtin.dnf:
        name: httpd
        state: latest
#使用service模块将httpd服务的状态设置为启用,并启动它。
    - name: Enable and start httpd
      ansible.builtin.service:
        name: httpd
        enabled: true
        state: started
#使用copy模块将管理节点files/tune.conf文件复制到受管主机的/etc/httpd/conf.d/tune.conf,并且修改文件的所有者为root组的root,将其权限修改为0644
    - name: Tuning configuration installed
      ansible.builtin.copy:
        src: files/tune.conf
        dest: /etc/httpd/conf.d/tune.conf
        owner: root
        group: root
        mode: 0644
#通知处理程序
      notify:
        - restart httpd
#使用dnf模块安装firewalld应用并将其更新到最新版本
    - name: Install firewalld
      ansible.builtin.dnf:
        name: firewalld
        state: latest
#使用service模块将firewalld状态设置为启用并启动它
    - name: Enable and start the firewall
      ansible.builtin.service:
        name: firewalld
        enabled: true
        state: started
#使用firewalld模块,将http服务添加到防火墙,并立即且永久的启用它
    - name: Open the port for http
      ansible.posix.firewalld:
        service: http
        immediate: true
        permanent: true
        state: enabled
#处理程序 用来将httpd服务重启
  handlers:
    - name: restart httpd
      ansible.builtin.service:
        name: httpd
        state: restarted
2. 通过通配符匹配多个主机名
vim playbook.yml

- name: Install and configure web service
  hosts:
    - servera.lab.example.com
    - serverb.lab.example.com
    - serverc.lab.example.com
    - serverd.lab.example.com
  #将原本playbook.yml的换成下一句,通过通配符匹配。
  hosts: server*.lab.example.com
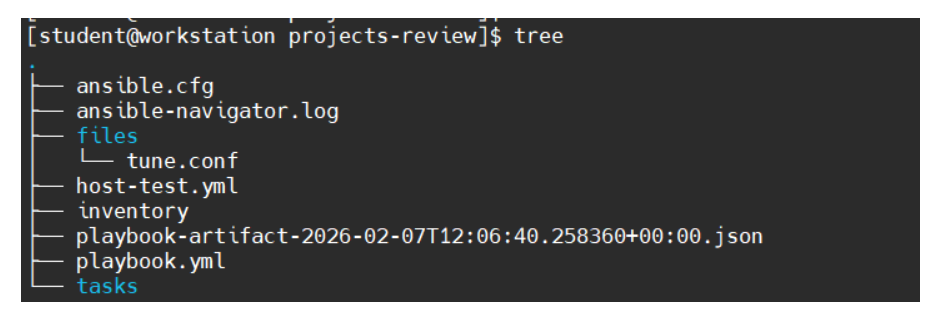
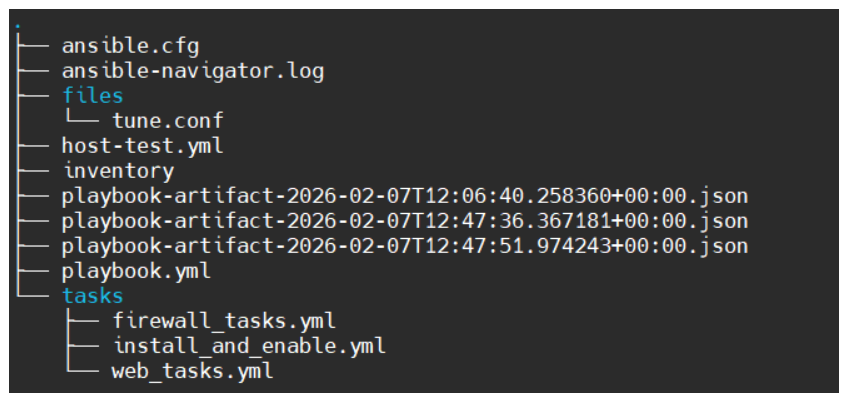
3. mkdir tasks 创建tasks文件夹(文件夹结构如图)
4. 创建web_tasks.yml,将web相关功能拆分
cat > tasks/web_tasks.yml << "EOF"
---
#使用dnf安装最新版本的httpd
- name: Install httpd
  ansible.builtin.dnf:
    name: httpd
    state: latest
#应用并启用httpd服务
- name: Enable and start httpd
  ansible.builtin.service:
    name: httpd
    enabled: true
    state: started
#将控制节点的files/tune.conf发送到受管主机的/etc/httpd/conf.d/tune.conf,并且修改所有者为root组root用户权限为0644
- name: Tuning configuration installed
  ansible.builtin.copy:
    src: files/tune.conf
    dest: /etc/httpd/conf.d/tune.conf
    owner: root
    group: root
    mode: 0644
  notify:
    - restart httpd
EOF
更新playbook.yml
cat > playbook.yml << "EOF"
---
- name: Install and configure web service
  hosts: server*.lab.example.com

  tasks:
    - name: Import the web_tasks.yml task file
      import_tasks: tasks/web_tasks.yml #修改了这一段,使其能导入web_task.yml的任务

    - name: Install firewalld
      ansible.builtin.dnf:
        name: firewalld
        state: latest

    - name: Enable and start the firewall
      ansible.builtin.service:
        name: firewalld
        enabled: true
        state: started

    - name: Open the port for http
      ansible.posix.firewalld:
        service: http
        immediate: true
        permanent: true
        state: enabled

  handlers:
    - name: restart httpd
      ansible.builtin.service:
        name: httpd
        state: restarted
EOF
5. 创建firewall_tasks.yml,将防火墙相关任务拆分
cat > tasks/firewall_tasks.yml << "EOF"
---
#使用dnf模块安装firewalld应用并将其更新到最新版本
- name: Install firewalld
  ansible.builtin.dnf:
  name: firewalld
  state: latest
#使用service模块将firewalld状态设置为启用并启动它
- name: Enable and start the firewall
  ansible.builtin.service:
  name: firewalld
  enabled: true
  state: started
#使用firewalld模块,将http服务添加到防火墙,并立即且永久的启用它
- name: Open the port for http
  ansible.posix.firewalld:
  service: http
  immediate: true
  permanent: true
  state: enabled
EOF
再修改playbook.yml
cat > playbook.yml << "EOF"
---
- name: Install and configure web service
  hosts: server*.lab.example.com

  tasks:
    - name: Import the web_tasks.yml task file
      import_tasks: tasks/web_tasks.yml

    - name: Import the firewall_tasks.yml task file
      import_tasks: tasks/firewall_tasks.yml		#修改了这里,导入拆分的firewall_tasks.yml文件

  handlers:
    - name: restart httpd
      ansible.builtin.service:
        name: httpd
        state: restarted
EOF
6. 创建install_and_enable.yml,将web_tasks.yml和firewall_tasks.yml合并
cat > tasks/install_and_enable.yml << "EOF"
---
#将原本要安装和启用的服务名称提取为变量
- name: Install {{ package }}
  ansible.builtin.dnf:
    name: "{{ package }}"
    state: latest

- name: Enable and start {{ service }}
  ansible.builtin.service:
    name: "{{ service }}"
    enabled: true
    state: started
EOF
修改web_tasks.yml,以调用install_and_enable.yml
cat > tasks/web_tasks.yml << "EOF"
---
#调用install_and_enable.yml,但是将package变量和service变量覆盖为httpd
- name: Install and start httpd
  import_tasks: install_and_enable.yml
  vars:
    package: httpd
    service: httpd

- name: Tuning configuration installed
  ansible.builtin.copy:
    src: files/tune.conf
    dest: /etc/httpd/conf.d/tune.conf
    owner: root
    group: root
    mode: 0644
  notify:
    - restart httpd
EOF
同上,修改firewall_tasks.yml,以调用install_and_enable.yml
cat > tasks/firewall_tasks.yml << "EOF"
---
#调用install_and_enable.yml,但是将package变量和service变量覆盖为firewalld
- name: Install and start firewalld
  import_tasks: install_and_enable.yml
  vars:
    package: firewalld
    service: firewalld

- name: Tuning configuration installed
  ansible.builtin.copy:
    src: files/tune.conf
    dest: /etc/httpd/conf.d/tune.conf
    owner: root
    group: root
    mode: 0644
  notify:
    - restart httpd
EOF
3. 结果

腾讯云面向开发者汇聚海量精品云计算使用和开发经验,营造开放的云计算技术生态圈。
更多推荐
 22
22 0
0- 0


 已为社区贡献5条内容

所有评论(0)