基于Python进行人脸识别控制小灯闪烁(仅检验到人脸则闪烁)
·
这里我没有给 ESP8266 刷入 MicroPython 固件,而是用的Python和Mixly(在Mixly上写的代码,这个是一个可以图形化的软件,也可以进行部分代码编写,当然复杂程序还是用Arduino IDE,这边两者都可实现,以下仅展示用Mixly2.0进行的操作),且是HTTP服务器版本,非MQTT版本。
可以先安装python所需库:
pip install opencv-python
pip install requests
可以先写个测试demo测试连接
这个是Mixly的代码:
#include <ESP8266WiFi.h>
#include <ESP8266WebServer.h>

// WiFi配置
const char* ssid = "410";
const char* password = "223166E0";

// 创建Web服务器,端口默认是80
ESP8266WebServer server(80);

void handleRoot() {
  server.send(200, "text/plain", "Hello from ESP8266!");
}

void setup() {
  Serial.begin(115200);
  delay(10);

  // 连接WiFi
  WiFi.begin(ssid, password);
  Serial.print("Connecting to WiFi");
  while (WiFi.status() != WL_CONNECTED) {
    delay(500);
    Serial.print(".");
  }
  Serial.println();
  Serial.println("WiFi connected");
  Serial.print("IP address: ");
  Serial.println(WiFi.localIP());

  // 设置Web服务器路由
  server.on("/", handleRoot);

  // 启动Web服务器
  server.begin();
  Serial.println("HTTP server started");
}

void loop() {
  server.handleClient();  // 处理客户端请求
}
上传了代码后,按下esp8266板子上的小按钮后可以看到打印出的ip是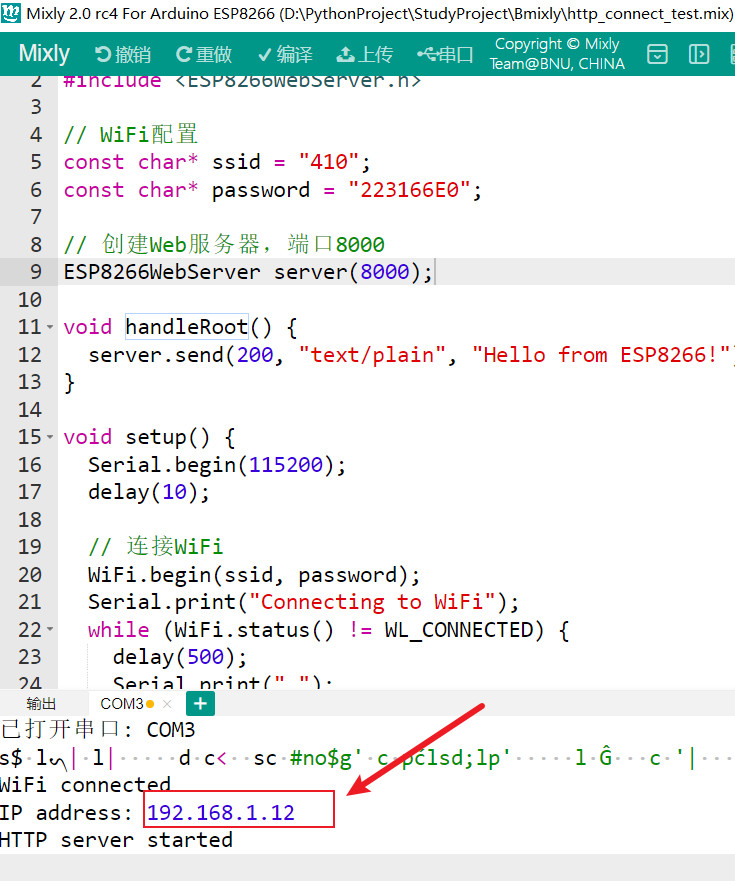
将这个ip放到下边的python代码下:
import requests

# ESP8266的IP地址
ESP8266_IP = "192.168.1.12"    # 如果上边ESP8266WebServer server(8000)这里写的是8000,则地址是192.168.1.12:8000;
TEST_URL = f"http://{ESP8266_IP}/text/plain"

def test_esp8266_connection():
    """测试ESP8266连接"""
    print("测试ESP8266连接...")
    try:
        response = requests.get(f"http://{ESP8266_IP}/", timeout=3)
        if response.status_code == 200:
            print(f"✓ ESP8266连接成功 (IP: {ESP8266_IP})")
            return True
    except:
        print(f"✗ 无法连接到ESP8266 (IP: {ESP8266_IP})")
        print("请确保:")
        print("1. ESP8266已连接到同一WiFi网络")
        print("2. IP地址正确")
        print("3. ESP8266已上传Web服务器程序")
        return False

if __name__ == "__main__":
    # 测试连接
    if test_esp8266_connection():
        print("连接测试成功")
    else:
        print("连接测试失败,请检查配置")
执行python代码,测验成功后,我们将代码继续完善
Mixly:
#include <ESP8266WiFi.h>
#include <ESP8266WebServer.h>

// WiFi配置
const char* ssid = "410";
const char* password = "223166E0";

// 创建Web服务器对象
ESP8266WebServer server(80);

// LED引脚
const int ledPin = LED_BUILTIN;
bool ledState = false;

void setup() {
  Serial.begin(115200);
  pinMode(ledPin, OUTPUT);
  digitalWrite(ledPin, HIGH);  // 初始关闭

  // 连接WiFi
  WiFi.begin(ssid, password);
  Serial.print("connecting WiFi");

  while (WiFi.status() != WL_CONNECTED) {
    delay(500);
    Serial.print("***");
  }

  Serial.println("\nWiFi connect success!");
  Serial.print("IP address: ");
  Serial.println(WiFi.localIP());

  // 设置HTTP路由 - 添加根路径
  server.on("/", HTTP_GET, []() {
    server.send(200, "text/html",
      "<h1>ESP8266 Web Server</h1>"
      "<p><a href='/led/on'>Turn LED ON</a></p>"
      "<p><a href='/led/off'>Turn LED OFF</a></p>"
      "<p><a href='/status'>Check Status</a></p>"
    );
  });

  server.on("/led/on", HTTP_GET, []() {
    digitalWrite(ledPin, HIGH);  // 打开LED
    ledState = true;
    server.send(200, "text/plain", "LED ON");
    Serial.println("LED is open ");
  });

  server.on("/led/off", HTTP_GET, []() {
    digitalWrite(ledPin, LOW);  // 关闭LED
    ledState = false;
    server.send(200, "text/plain", "LED OFF");
    Serial.println("LED is close");
  });

  server.on("/status", HTTP_GET, []() {
    String state = ledState ? "ON" : "OFF";
    server.send(200, "text/plain", "LED status : " + state);
  });

  // 启动服务器
  server.begin();
  Serial.println("HTTP server begin");
  Serial.println("Open browser and visit: http://" + WiFi.localIP().toString());
}

void loop() {
  server.handleClient();
}
可以上传代码后,在网页上先进行测验,比如将小灯的光设置成高亮状态:
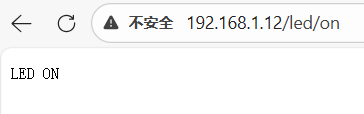
可以看到Mixly这里也有打印: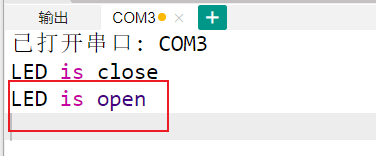
这边没问题后,我们可以将用python做一别别的事了,用了opencv模块,这里我用人脸识别进行举例,如果摄像机识别到人脸,则访问刚刚的http://192.168.1.12/led/on进行小灯调控,否则执行http://192.168.1.12/led/off:
import cv2
import requests
import time
import threading
import numpy as np

# ESP8266的IP地址
ESP8266_IP = "192.168.1.12"
LED_ON_URL = f"http://{ESP8266_IP}/led/on"
LED_OFF_URL = f"http://{ESP8266_IP}/led/off"

class FaceDetectorHTTP:
    def __init__(self):
        self.face_detected = False
        self.last_detection_time = 0
        self.detection_cooldown = 2

        # 加载人脸检测器
        cascade_path = cv2.data.haarcascades + 'haarcascade_frontalface_default.xml'
        try:
            self.face_cascade = cv2.CascadeClassifier(cascade_path)
            if self.face_cascade.empty():
                raise ValueError("无法加载人脸检测器")
        except:
            print("无法加载默认人脸检测器,尝试其他方法...")
            # 尝试其他路径
            import os

    def send_http_command(self, state):
        """发送HTTP命令到ESP8266"""
        def send_request():
            try:
                url = LED_ON_URL if state == "on" else LED_OFF_URL
                response = requests.get(url, timeout=2)
                if response.status_code == 200:
                    print(f"HTTP命令发送成功: LED {state}")
                else:
                    print(f"HTTP请求失败: {response.status_code}")
            except requests.exceptions.RequestException as e:
                print(f"无法连接到ESP8266: {e}")

        # 在新线程中发送请求,避免阻塞主线程
        thread = threading.Thread(target=send_request)
        thread.daemon = True
        thread.start()

    def run(self):
        # 尝试打开摄像头
        cap = cv2.VideoCapture(0)
        # 设置摄像头分辨率
        cap.set(cv2.CAP_PROP_FRAME_WIDTH, 640)
        cap.set(cv2.CAP_PROP_FRAME_HEIGHT, 480)

        if not cap.isOpened():
            print("无法打开摄像头,尝试其他索引...")
            for i in range(1, 5):
                cap = cv2.VideoCapture(i)
                if cap.isOpened():
                    print(f"使用摄像头索引 {i}")
                    break
            else:
                print("错误:没有可用的摄像头")
                return

        print("=" * 50)
        print("人脸识别HTTP版本")
        print(f"ESP8266 IP: {ESP8266_IP}")
        print("按 'q' 键退出程序")
        print("=" * 50)

        frame_count = 0
        detection_count = 0

        while True:
            ret, frame = cap.read()
            if not ret:
                print("无法读取视频帧")
                time.sleep(0.5)
                continue

            frame_count += 1
            # 每2帧处理一次,提高性能
            if frame_count % 2 != 0:
                continue

            # 转换为灰度图
            gray = cv2.cvtColor(frame, cv2.COLOR_BGR2GRAY)

            # 均衡化,提高检测效果
            gray_eq = cv2.equalizeHist(gray)

            # 检测人脸
            faces = self.face_cascade.detectMultiScale(
                gray_eq,
                scaleFactor=1.05,  # 稍微降低以提高准确性
                minNeighbors=5,    # 增加以减少误报
                minSize=(50, 50),  # 增加最小尺寸
                maxSize=(300, 300) # 增加最大尺寸
            )
            print(f'faces: {faces}')

            current_time = time.time()

            # 如果检测到人脸
            if len(faces) > 0:
                valid_faces = []
                for (x, y, w, h) in faces:
                    # 提取人脸区域
                    face_region = gray[y:y+h, x:x+w]
                    # 计算平均亮度
                    brightness = np.mean(face_region)

                    # 设置亮度阈值,例如:30 < brightness < 220
                    if 30 < brightness < 220:
                        valid_faces.append((x, y, w, h))

                # 如果经过亮度过滤后还有有效人脸,才进行处理
                if len(valid_faces) > 0:
                    # 绘制有效人脸框
                    for (x, y, w, h) in valid_faces:
                        cv2.rectangle(frame, (x, y), (x+w, y+h), (0, 255, 0), 2)
                        cv2.putText(frame, 'Face', (x, y-10),
                                cv2.FONT_HERSHEY_SIMPLEX, 0.5, (0, 255, 0), 2)

                    # 在左上角显示状态
                    cv2.putText(frame, f'Faces: {len(valid_faces)}', (10, 30),
                            cv2.FONT_HERSHEY_SIMPLEX, 0.7, (0, 255, 0), 2)

                    if not self.face_detected and (current_time - self.last_detection_time > self.detection_cooldown):
                        print(f"[{time.strftime('%H:%M:%S')}] 检测到 {len(valid_faces)} 个人脸")
                        self.send_http_command("on")
                        self.face_detected = True
                        self.last_detection_time = current_time
                else:
                    # 如果没有有效人脸,则按无人脸处理
                    if self.face_detected and (current_time - self.last_detection_time > self.detection_cooldown):
                        print(f"[{time.strftime('%H:%M:%S')}] 人脸消失")
                        self.send_http_command("off")
                        self.face_detected = False

            # 如果人脸消失
            else:
                if self.face_detected and (current_time - self.last_detection_time > self.detection_cooldown):
                    print(f"[{time.strftime('%H:%M:%S')}] 人脸消失")
                    self.send_http_command("off")
                    self.face_detected = False

            # 显示帧率
            fps = cap.get(cv2.CAP_PROP_FPS)
            if fps > 0:
                cv2.putText(frame, f'FPS: {fps:.1f}', (10, 60),
                           cv2.FONT_HERSHEY_SIMPLEX, 0.6, (255, 255, 255), 2)

            # 显示窗口
            cv2.imshow('Face Detection - Press Q to quit', frame)

            # 按'q'退出
            if cv2.waitKey(1) & 0xFF == ord('q'):
                break

        # 清理资源
        cap.release()
        cv2.destroyAllWindows()
        self.send_http_command("off")
        print("程序已退出")

def test_esp8266_connection():
    """测试ESP8266连接"""
    print("测试ESP8266连接...")
    try:
        response = requests.get(f"http://{ESP8266_IP}/", timeout=3)
        if response.status_code == 200:
            print(f"✓ ESP8266连接成功 (IP: {ESP8266_IP})")
            return True
    except:
        print(f"✗ 无法连接到ESP8266 (IP: {ESP8266_IP})")
        print("请确保:")
        print("1. ESP8266已连接到同一WiFi网络")
        print("2. IP地址正确")
        print("3. ESP8266已上传Web服务器程序")
        return False

if __name__ == "__main__":
    print("人脸识别系统初始化...")

    # 测试连接
    if test_esp8266_connection():
        detector = FaceDetectorHTTP()
        detector.run()
    else:
        print("连接测试失败,请检查配置")
其中一些参数可以自己根据需求进行调整,以上是所有内容,感谢观看。
如果需要指定人脸识别才亮灯,可以查看此篇:https://blog.csdn.net/m0_50481455/article/details/157441451?spm=1001.2014.3001.5502点击直接跳转

腾讯云面向开发者汇聚海量精品云计算使用和开发经验,营造开放的云计算技术生态圈。
更多推荐
 15
15 0
0- 0


 已为社区贡献3条内容

所有评论(0)